Table of Contents
Advertisement
Available languages
Available languages
Advertisement
Chapters
Table of Contents

Related Manuals for Viscount Cantorum Dou


Summary of Contents for Viscount Cantorum Dou
- Page 1 Manuale Utente - User Guide - Mode d’Emploi Ver. - 1.0...
-
Page 3: Table Of Contents
Manuale Utente INDICE 1. Note importanti ............................2 1.1 Cura del prodotto ................................2 1.2 Note riguardanti il manuale ............................2 2. Descrizione generale dello strumento..................... 4 3. Accensione e videata principale ......................8 3.1 Il Main Menu ................................. 9 4. -
Page 4: Note Importanti
Manuale Utente 1. NOTE IMPORTANTI 1.1 CURA DEL PRODOTTO • Non applicate eccessiva forza alle strutture ed ai comandi dell’organo (manopole, registri, pulsanti, ecc…). • Non collocare, quando possibile, lo strumento in prossimità di unità che producano forti interferenze come apparecchi radio – TV, monitor, ecc... •... - Page 5 Manuale Utente • Leggete attentamente tutte le informazioni descritte. Eviterete inutili perdite di tempo ed otterrete le migliori prestazioni dallo strumento. • Le sigle od i numeri riportati tra parentesi quadre ([ ]) stanno ad indicare i nomi dei pulsanti, sliders, potenziometri e connettori presenti sullo strumento.
-
Page 6: Descrizione Generale Dello Strumento
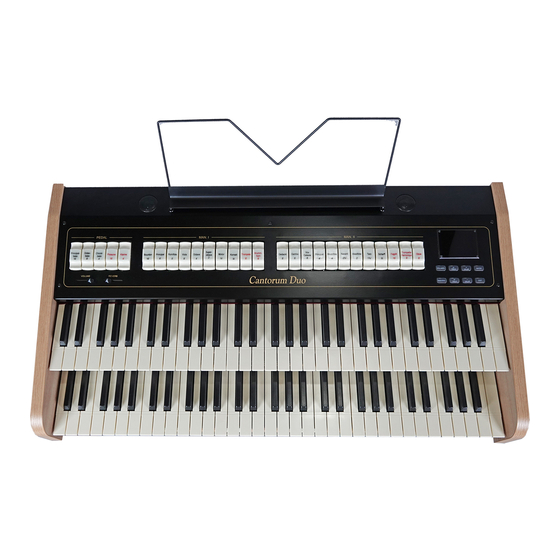
Manuale Utente 2. DESCRIZIONE GENERALE DELLO STRUMENTO 1. Registri [PEDAL]: qui sono raccolti i registri per la sezione Pedal. E’ possibile suonare questi registri tramite una pedaliera MIDI collegata al connettore [MIDI IN] presente nel pannello posteriore (vedi punto 19) oppure con il primo manuale attivando la funzione Automatic Pedal (vedi punto 13). In caso di pedaliera MIDI, questa deve trasmettere le note sul canale di ricezione impostato per la sezione Pedal (vedi par. - Page 7 Manuale Utente 7. Pistoncini ORCHESTRA: qui si trovano i registri orchestrali dell’organo. [ORCH P]: registro orchestrale della sezione Pedal. [ORCH I]: registro orchestrale della sezione Manual I. [ORCH II]: registro orchestrale della sezione Manual II. E’ possibile selezionare per qualsiasi registro il timbro che questo attiverà. Per maggiori informazioni consultare il par.
- Page 8 Manuale Utente 10. Pistoncini degli Stili: qui sono raccolti i pistoncini per la selezione dello Stile d’organo (vedi cap. 6): [BAR]: barocco [BRK]: barocco nord europeo [ROM]: romantico [SYM]: sinfonico Dopo la selezione, se il display sta visualizzando la videata principale (vedi cap. 3), il nome dello Stile viene indicato per qualche secondo con un pop-up informativo.
- Page 9 Manuale Utente 15. Uscite audio [OUT 1] e [OUT 2]: uscite Jack di linea in cui è presente il segnale stereo dell’organo in base alle impostazioni effettuate nella videata descritta al par. 5.3. Queste uscite inoltre dispongono del controllo dedicato di livello ed equalizzazione (vedi par. 4 e 5.2). In caso di impianto stereofonico collegare l’uscita [L/MONO] al canale sinistro e l’uscita [RIGHT] al canale destro.
-
Page 10: Accensione E Videata Principale
Manuale Utente 3. ACCENSIONE E VIDEATA PRINCIPALE Dopo aver acceso lo strumento il display visualizza la videata di presentazione, quindi quella in cui si viene informati sulla versione (Release) del sistema operativo attualmente installata nello strumento, dopo qualche istante viene visualizzata la videata principale, Nella parte superiore di questa videata sono presenti i parametri: o TRANSPOSER: regolazione del traspositore. -
Page 11: Il Main Menu
Se subito dopo l’accensione viene visualizzato il messaggio di errore “RELESE CHECKSUM ERROR”, contattare il servizio di assistenza tecnica all’indirizzo e-mail service@viscount.it indicando il tipo di errore riportato nella riga inferiore (SYSTEM o MODEL) ed i numeri a fianco dei campi “M:”, “V:”, “S:” e “Release” così da ottenere il file e le informazioni necessarie per ripristinare lo strumento. -
Page 12: Regolazione Dei Volumi (Funzione Volumes)
Manuale Utente o FILE: memorizzazione e caricamento su penna USB dei file contenenti le impostazioni, gli Stili e le combinazioni dell’organo. Queste funzioni sono descritte nel cap. 7. o DEMO: riproduzione dei brani dimostrativo presenti nello strumento. Questa funzione è descritta nel par 10.1. -
Page 13: Impostazioni Generali Dello Strumento (Menu Settings)
Manuale Utente 5. IMPOSTAZIONI GENERALI DELLO STRUMENTO (menu SETTINGS) Per accedere al menu SETTINGS, che raccoglie tutte le funzioni atte alla totale configurazione dello strumento, selezionare la voce SETTINGS nel MAIN MENU, viene visualizzata la prima videata: utilizzare i pulsanti [FIELD ] e [FIELD ] per muovere il cursore e scorrere tutte le videate del menu: ... -
Page 14: Selezione Del Tipo Di Riverbero (Parametro Reverb)
Manuale Utente o MIDI: accesso alle funzioni di impostazione dell’interfaccia MIDI. Queste funzioni sono descritte nel par. 5.4. o VEL. SENS. (Velocity Sensitivity): regolazione della dinamica dei manuali e della pedaliera per l’utilizzo con le voci Orchestra e le note trasmesse via MIDI. Questa funzione è descritta nel par. 5.5. o COMBINATIONS: accesso alle funzioni di personalizzazione del contenuto delle combinazioni. -
Page 15: Regolazione Degli Equalizzatori (Funzioni Equalizers)
Manuale Utente 5.2 REGOLAZIONE DEGLI EQUALIZZATORI (funzioni EQUALIZERS) Il Cantorum Duo è dotato di tre equalizzatori grafici, uno per il suono emesso dagli altoparlanti interni ed altri due per il segnale presente sulle due coppie di uscite audio [OUT 1] e [OUT 2] del pannello posteriore. -
Page 16: Canalizzazione Dei Segnali Sulle Uscite Audio (Funzione External Outputs)
Manuale Utente Premere [EXIT] per uscire dalla videata e memorizzare le impostazioni correnti. N.B. Gli equalizzatori dell’organo hanno effetto anche sui segnali in ingresso alla presa [INPUT] presente nel pannello posteriore. 5.3 CANALIZZAZIONE DEI SEGNALI SULLE USCITE AUDIO (funzione EXTERNAL OUTPUTS) Un’altra interessante impostazione offerta dal Cantorum Duo è... - Page 17 Manuale Utente in cui sono presenti le seguenti voci a display: o CHANNELS: accesso alla videata di impostazione dei canali MIDI di ricezione e trasmissione. o FILTERS: accesso alla videata di impostazione dei filtri MIDI di ricezione e trasmissione. o NOTES TO COUPL. (Note to Couplers): questa funzione permette di scegliere se trasmettere via MIDI solo le note fisicamente suonate sui manuali (a funzione disattivata), oppure anche quelle generate dai vari controlli di unione (a funzione attivata).
- Page 18 [MIDI OUT] viene trasmesso il contenuto (registri, unioni e tremoli) di tale combinazione. Questa è l’unica modalità da utilizzarsi qualora il Cantorum Duo sia collegato all’interfaccia digitale per organi a canne VPI (Viscount Pipe Interface), al fine di garantire la perfetta compatibilità tra i due strumenti.
-
Page 19: Regolazione Della Dinamica Dei Manuali (Funzione Velocity Sens.)
Manuale Utente La colonna a sinistra riporta i messaggi MIDI che è possibile filtrare: - CONTROL: Control Change - PROGRAM: Program Change - SYSEX: System Exclusive - REAL TIME: Real Time Nelle colonne TX e RX è invece possibile impostare lo stato dei filtri rispettivamente in trasmissione e ricezione. -
Page 20: Configurazione Dei Pedali E Della Pedaliera Midi (Funzione Pedals)
Manuale Utente STYLE: lo Stile d’organo selezionato al momento della memorizzazione (per la selezione dello Stile consultare il punto 10 del cap.2) così che possa essere richiamato con le combinazioni generali ed il Tutti. TREM: i valori di Depth e Speed dei tremoli presenti al momento della memorizzazione (per la regolazione vedi par. -
Page 21: Salvataggio Nelle Combinazioni Dei Messaggi Midi Di Cambio Programma (Funzione Combination Prg)
Manuale Utente Posizionare il pedale alla posizione minima (pedale completamente alzato) o massima (pedale completamente abbassato) e premere [ENTER]: il valore acquisito viene memorizzato nella corrispondente casella MIN o MAX. Eseguire la stessa procedura per la posizione ancora non registrata e per l’eventuale altro pedale collegato. Premere [EXIT] per uscire dalla videata e memorizzare le impostazioni correnti. -
Page 22: Blocco Di Sicurezza Alle Modifiche (Funzione Security)
Manuale Utente 5.9 BLOCCO DI SICUREZZA ALLE MODIFICHE (funzione SECURITY) Qualora si reputi necessario inibire la modifica della configurazione dell’organo, è presente la funzione SECURITY. Attivando questa funzione, infatti, non sarà possibile modificare le combinazioni, il Tutti e i passi del Crescendo, lo stato di Local Off dei registri e le uniche regolazioni possibili saranno quella relative ai volumi divisionali, ai parametri di intonazione presenti nella videata principale e alla scelta dell’Organ Style. -
Page 23: Configurazione Del Controllo Di Volume E Regolazione Del Contrasto Del Display (Funzione Controls)
Manuale Utente E’ inoltre possibile modificare la password quando è già attiva un’opzione di blocco. Per fare ciò selezionare il campo SET PASSWORD, il sistema dapprima chiede di inserire il codice esistente: dopodichè il nuovo codice: a conferma dell’avvenuta modifica viene visualizzata la videata: Come informa il display, premere [EXIT] per tornare alla videata principale della funzione SECURITY. -
Page 24: Ripristino Delle Impostazioni Di Fabbrica (Funzione Factory Settings)
Manuale Utente 5.11 RIPRISTINO DELLE IMPOSTAZIONI DI FABBRICA (funzione FACTORY SETTINGS) L’organo prevede diverse tipologie di ripristino delle impostazioni di fabbrica (Factory Settings) offrendo così la possibilità di scegliere ciò che si desidera inizializzare. Per richiamare la procedura, selezionare la voce FACTORY SETT. nel menu SETTINGS: o ALL: tutto lo strumento, ovvero le impostazioni e le funzioni presenti nel menu SETTING, i 4 Stili d’organo (ovvero le impostazioni presenti nel menu STYLE per tutti e quattro gli Stili), tutte le combinazioni generali, il Crescendo, il Tutti, lo stato di Local Off dei registri. -
Page 25: Aggiornamento Del Sistema Operativo (Funzione Op.sys. Upgrade)
Manuale Utente 5.12 AGGIORNAMENTO DEL SISTEMA OPERATIVO (funzione OP.SYS. UPGRADE) Ogni qualvolta verrà rilasciato un file di aggiornamento del sistema operativo degli organi della serie Cantorum Duo, questo sarà reso disponibile sul sito web www.viscountinstruments.com. Dopo aver scaricato il file, copiarlo nella cartella principale (root) di una penna USB, inserire la penna nel connettore [USB] presente nel pannello posteriore (vedi il punto 18 del cap. - Page 26 (SYSTEM o MODEL) ed i numeri a fianco dei campi “M:”, “V:”, “S:” e “Release” così da ottenere il file e le informazioni necessarie per ripristinare lo strumento.
-
Page 27: Programmazione Degli Stili D'organo (Menu Style)
Manuale Utente 6. PROGRAMMAZIONE DEGLI STILI D’ORGANO (menu STYLE) Lo Style identifica la configurazione fonica dell’organo e pertanto la voce attivata per ogni singolo registro. La presenza di più Stili d’organo offre al musicista la possibilità di utilizzare diverse configurazioni sonore come se si potesse disporre di più... -
Page 28: Regolazione Dei Tremoli (Funzione Tremulants)
Manuale Utente 6.1 REGOLAZIONE DEI TREMOLI (funzione TREMULANTS) Nell’organo a canne è di fondamentale importanza che la pressione dell’aria sia costante per ottenere un suono regolare e “sostenuto”, tuttavia alcuni dispositivi meccanici vennero introdotti per generare variazioni periodiche più o meno marcate nel flusso dell’aria. Queste variazioni permettevano di aggiungere un effetto “tremolante”... -
Page 29: Selezione Delle Voci Orchestrali (Funzione Orchestra)
Manuale Utente Durante la regolazione è anche possibile accendere altri registri al fine di valutare complessivamente le modifiche. Premere [EXIT] per uscire dalla funzione, le modifiche verranno automaticamente memorizzate nello Stile corrente. 6.3 SELEZIONE DELLE VOCI ORCHESTRALI (funzione ORCHESTRA) Come descritto nel cap. 2, nel set di voci del Cantorum Duo sono presenti anche una serie di timbri orchestrali. -
Page 30: Salvataggio Su File Della Configurazione Dell'organo (Menu File)
Manuale Utente 7. SALVATAGGIO SU FILE DELLA CONFIGURAZIONE DELL’ORGANO (menu FILE) Il Cantorum Duo permette di salvare su penna USB la completa configurazione dello strumento o parti di essa, così da poter essere ricaricate quando desiderato. L’utilità principale di questa funzione è quelle di disporre di un numero praticamente illimitato di configurazioni dello strumento, così... -
Page 31: Caricamento Delle Combinazioni E/Oimpostazioni Dell'organo (Funzione File Load)
Manuale Utente N.B. Una volta inserita la penna USB attendere qualche secondo prima di visualizzare il menu FILE. Accedendo a queste funzioni senza la penna inserita viene visualizzato il messaggio di errore “USB PEN NOT PRESENT”. Se la penna è invece presente ciò sta a significare che non viene riconosciuta dal sistema. -
Page 32: Salvataggio Su File Delle Combinazioni E/O Impostazioni Dell'organo (Funzione File Save)
Manuale Utente FILES”. Una volta selezionato il file desiderato premere [ENTER, il sistema richiede una conferma a procedere: A caricamento avvenuto viene visualizzato il messaggio informativo “FILE SUCCESFULLY LOADED”. N.B. In caso di caricamento del singolo Stile, questo può essere posizionato solo in sostituzione di uno Stile dello stesso tipo (Baroque al posto di Baroque, Romantic al posto di Romantic). - Page 33 Manuale Utente Una volta selezionato il tipo di salvataggio viene visualizzata la videata di composizione del nome del file: Per selezionare le lettere del nome utilizzare i tasti [VALUE +] e [VALUE -] mentre per muovere il cursore utilizzare [FIELD ] e [FIELD ].
-
Page 34: Registrazione E Riproduzione Di Brani Musicali (Sequencer)
Manuale Utente 8. REGISTRAZIONE E RIPRODUZIONE DI BRANI MUSICALI (SEQUENCER) L’organo è equipaggiato con un sequencer (registratore digitale) interno in grado di acquisire le esecuzioni, i comandi ed i controlli effettuati sullo strumento, così come i dati MIDI ricevuti dalla porta [MIDI IN]. Le registrazioni vengono salvate nella penna USB come file MIDI (Standard MIDI File formato 1 a 125 beats per minute, 384 ticks per quarter note) e riascoltate in qualsiasi momento. - Page 35 Manuale Utente Selezionare ora il file MIDI che si desidera riprodurre: La nuova videata informa circa tutti i comandi necessari per l’utilizzo del sequencer: [ENTER]: avvia la riproduzione del brano. [EXIT]: abbandono del sequencer. [FIELD ]: avanzamento veloce (Fast Forward). ...
-
Page 36: Registrazione Di Un Brano (Modalità Record)
Manuale Utente Non modificare i canali delle tracce. Se ciò deve essere fatto (per cambiare sezione di esecuzione per esempio) occorre rispettare la canalizzazione interna del sequencer dell’organo. Le sezioni infatti sono così canalizzate: Pedal: 1 Manual I: 2 ... - Page 37 Manuale Utente Come per la modalità Play, anche in Record la videata informa circa le funzioni dei pulsanti: [ENTER]: avvia la registrazione. [EXIT]: abbandono del sequencer. Una volta avviata la registrazione le funzioni cambiano in: [ENTER]: pausa / riavvio della registrazione. [EXIT]: arresto della registrazione.
-
Page 38: Sovraincisione Di Un Brano (Modalità Overdub)
Manuale Utente e di premere [ENTER] per confermare l’abbandono e l’eliminazione dei dati acquisiti o [EXIT] per tornare alla videata di salvataggio. N.B. Selezionando la funzione SAVE senza la penna inserita viene visualizzato il messaggio di errore “USB PEN NOT PRESENT”. Se la penna è invece presente ciò sta a significare che non viene riconosciuta dal sistema. - Page 39 Manuale Utente Ora il sequencer è pronto per registrare: Come informa il display i pulsanti assumono le seguenti funzioni: [ENTER]: avvia la registrazione. [EXIT]: abbandono del sequencer. [VALUE -]: riduzione della velocità di riproduzione / registrazione (visualizzata in alto a sinistra come percentuale del valore originale, 100% nella videata sopra illustrata).
- Page 40 Manuale Utente Selezionando ACCEPT o TRIM AND ACCEPT viene visualizzata la videata di salvataggio della sequenza a cui è possibile assegnare anche un diverso nome. Selezionando PLAY o PLAY FROM OVD il sequencer torna nella modalità di esecuzione del brano, terminato il quale premendo [EXIT] viene visualizzata la videata di cui sopra per rendere definitiva o meno la sovraincisione.
-
Page 41: Local Off Dei Registri
Manuale Utente 9. LOCAL OFF DEI REGISTRI Impostare un registro in Local Off significa fare in modo che questo non suoni tramite la generazione interna dell’organo ma che ne venga comunque trasmesso il relativo messaggio MIDI (codice di Sistema Esclusivo) così da poter essere acceso e suonato su uno strumento collegato. Per impostare il Local Off delle voci è... - Page 42 Manuale Utente Potremmo definire esso come il rapporto che esprime l’esubero di una catena di 12 quinte pure rispetto ad una catena di 7 ottave, entrambe principianti da un unico suono. Il disegno soprastante pur non essendo in scala (l’eccedenza a livello grafico sarebbe praticamente impercettibile) può...
-
Page 43: I Temperamenti Nel Cantorum Duo
Manuale Utente pura. Le quinte sottese sono dette quinte mesotoniche; esse sono piuttosto calanti ma ancora accettabili. Va osservato che se un temperamento recupera un solo comma sintonico per “chiudersi” bene è necessario compensare ancora la differenza tra comma pitagorico e comma sintonico. Tale rapporto è detto skisma. - Page 44 Manuale Utente PYTHAGOREAN Si basa su undici quinte pure (pitagoriche appunto) ed un lupo su G#. E’ utilizzabile solo per eseguire musica monodica o, comunque, che escluda intervalli armonici di terza. Ha funzione soprattutto didattico-informativa. MEANTONE 3#, MEANTONE 3b E’ il prototipo di tutti i temperamenti basati su quinte ridotte di 1/4 di comma sintonico. Esso da adito ad otto terze maggiori pure: Eb, Bb, F, C, G, D, A, E;...
- Page 45 Manuale Utente VALLOTTI Si basa su sei quinte ridotte di 1/6 di comma pitagorico. Va da sé che le altre sono pure. Equivalenti le coppie di terze maggiori su Eb e B, Bb ed E, F ed A; equivalenti tra loro le terze maggiori su C, G e D. Sono invece pitagoriche quelle su F#, C# e G#.
- Page 46 Manuale Utente KIRNBERGER III (KIRNBERGER3 a display) Si basa su quattro quinte ridotte di 1/4 di comma sintonico ed una ridotta del rimanente skisma. L’unica terza maggiore pura è su C; via via meno pure sono G, D, A; speculari a queste tre F, Bb ed Eb. Equivalenti tra loro E, B ed F#;...
- Page 47 Manuale Utente SILBERMANN Si basa su quinte ridotte di 1/6 di comma sintonico. Il lupo si colloca su G#. Le terze che nel mesotonico classico sono pure qui sono più larghe di 1/3 di comma sintonico. Per contro il lupo è meno pronunciato ed al limite tra accettabile ed inaccettabile.
- Page 48 Manuale Utente SAUVEUR 1, SAUVEUR 2 Il temperamento di Sauveur 1 si basa su undici quinte ridotte di 1/5 di comma sintonico. Il lupo si trova su G#. Nel temperamento Sauveur 2 la quinta su F# è pura. Le otto terze maggiori pure del mesotonico sono qui leggermente più...
-
Page 49: Contenuto Dei File .Set, .Cmb, .Sts, .Sta E .All
Manuale Utente 10.4 CONTENUTO DEI FILE .SET, .CMB, .STS, .STA e .ALL FILE .SET PARAMETER POSITION NOTE SELECTED STYLE system data Local Off of each stop PEDAL VOLUMES function MAN. I VOLUMES function MAN. II VOLUMES function OUT 1 VOLUMES function OUT 2 VOLUMES function INPUT... -
Page 50: Cosa E' Il Midi
Manuale Utente FILE .ALL CONTENT NOTE the same of 1 .sta files the same of 1 .cmb file the same of 1 .set file Local Off of each stop 10.5 COSA E’ IL MIDI L’interfaccia MIDI (Musical Instrument Digital Interface, Interfaccia Digitale per Strumenti Musicali) permette a strumenti di marca e genere diverso di comunicare tra loro tramite questo ben specifico protocollo di codici. - Page 51 Manuale Utente NOTA Il messaggio di Note On con Velocity=0 viene equiparato ad un messaggio di Note Off. PROGRAM CHANGE Questo messaggio viene usato per la selezione dei programmi o dei suoni sullo strumento ricevente. Esiste inoltre uno specifico standard chiamato General MIDI che descrive quale suono richiamare per ogni Program Change che viene ricevuto.
-
Page 52: Detailed Midi Implementation
Manuale Utente 10.6 DETAILED MIDI IMPLEMENTATION CHANNEL MESSAGES Volume (CC 7) • Message which controls the sections volume. Using default settings, channel messages are sent and received on the following MIDI channels: Data format: BnH 07H vvH Ch.1: Manual II notes or controls n=channel number :0H–EH (1–15) Ch.2: Manual I notes or controls... - Page 53 6FH (111): Crescendo -- (OFF) Register on/off • 70H–7FH (112-127): Crescendo steps 1-16 Data format: F0H 31H snH xxH yyH F7H F0H : Exclusive status STANDARD SYSTEM EXCLUSIVE 31H : Viscount ID MESSAGES sH : switch 0H=voice off 4H=voice on Device Inquiry •...
- Page 54 Manuale Utente 31H : Viscount ID 31H : Viscount ID 2nH : channel number (s=0H–EH) 2FH : system control 5CH : 1st tremulant depth 67H : fine tuning vvH : depth value (04H–20H) 0nH 0nH 0nH: nibblezed data of tuning value...
- Page 55 Smaltimento dei rifiuti elettrici ed elettronici (applicabile nell’Unione Europea e negli altri paesi europei con servizio di raccolta differenziata) Ai sensi dell’art. 13 del Decreto legislativo 25 luglio 2005, n. 151 “Attuazione delle Direttive 2002/95/CE, 2002/96/CE e 2003/108/CE” II simbolo presente sul prodotto o sulla sua confezione indica che il prodotto non verrà trattato come rifiuto domestico.
- Page 57 User Manual INDEX 1. Important notes ............................2 1.1 Looking after the product ............................2 1.2 Notes about the manual .............................. 2 2. General description of the instrument ....................4 3. Switching on and main video page ......................8 3.1 The Main Menu ................................9 4.
- Page 58 User Manual 1. IMPORTANT NOTES 1.1 LOOKING AFTER THE PRODUCT • Do not apply excessive force to the organ’s structures or the controls (knobs, stops, push-buttons, etc.). • When possible, do not place the instrument close to units which generate strong interference, such as radios, TVs, computer videos, etc.
- Page 59 User Manual • Read all the information carefully in order to obtain the best performances from your product and waste no time. • The codes or numbers in square brackets ([ ]) indicate the names of the buttons, sliders, trimmers and connectors on the instrument.
- Page 60 User Manual 2. GENERAL DESCRIPTION OF THE INSTRUMENT 1. [MAN. I] stops: registers for the Bass section are collected here. It is possible to play these registers through a MIDI pedalboard connected to the [MIDI IN] connector on the rear panel (see point 19) or with the first manual by activating the Automatic Pedal function (see point 13).
- Page 61 User Manual 7. ORCHESTRA pistons: pistons for activation and deactivation of orchestral voices. [ORCH P]: orchestral voice of Pedal. [ORCH I]: orchestral voice of Manual I. [ORCH II]: orchestral voice of Manual II. It is possible to select the voice activated by each piston. For further information read par. 6.3. 8.
- Page 62 User Manual 11. General combinations. [1] / [6]: pistons to recall the combinations saved in the selected memory bank (see [PREV] / [NEXT] point). These combinations can be modified. To do so, follow the procedure described at point 9. [HR]: restores the voice setup prepared in manual mode before a memory was recalled. [PREV.] / [NEXT]: general combinations sequencers.
- Page 63 User Manual The currently selected level is displayed on the main video page inside the "CRESCEN.” box. The Crescendo controls all the registers, and modifies the stops configuration. Each level of the crescendo can be programmed. To save the Crescendo configuration, see point 9. N.B.
- Page 64 User Manual 3. SWITCHING ON AND MAIN VIDEO PAGE After switching on the instrument, the display shows the introduction page, then, the current version (Release) of the operating system, the main video page appears in a few seconds, On the top of this video page are the following parameters: o TRANSPOSER: set the transposer.
- Page 65 If after the power on the system displays the error message “RELESE CHECKSUM ERROR”, contact the technical support at service@viscount.it reporting the error type as it appears on the second line (SYSTEM or MODEL) and the numbers in the “M:”, “V:”, “S:”...
- Page 66 User Manual 4. VOLUME SETTINGS (VOLUMES function) The Cantorum Duo organ allows the regulation of different volume controls, so as to guarantee a perfect sound balance between the various sections and between the internal and external amplification. To visualize the volume screen, press the [VOLUMES] button: o PED (Pedal): pedal board divisional volume.
- Page 67 User Manual 5. INSTRUMENT GENERAL SETTINGS (SETTINGS menu) To access the SETTINGS menu, containing all the configuration options, select the SETTINGS field from the MAIN MENU; the following page will appear: Use the [FIELD ] and [FIELD ] buttons to move the cursor and scroll through all the fields: ...
- Page 68 User Manual o VEL. SENS. (Velocity Sensitivity): calibrate the velocity of the manuals and pedalboard when using Orchestra stops or transmitting MIDI note messages. This function is described in par. 5.5. o COMBINATIONS: customize combinations in a dedicated video page. These functions are described in par.
- Page 69 User Manual 5.2 ADJUST EQUALIZERS (EQUALIZERS functions) The Cantorum Duo is equipped with three graphic equalizers, one for the sound reproduced by the internal speakers and the other two for the signal present on the two pairs of audio outputs [OUT 1] and [OUT 2] on the rear panel.
- Page 70 User Manual In all the equalizers, press [EXIT] to exit the video page and save the new settings. N.B. The equalizers also affect the signal from the [INPUT] port located on the rear panel. 5.3 CHANNELING SIGNALS ON THE AUDIO OUTPUTS (EXTERNAL OUTPUTS function) Cantorum Duo has one more interesting function: it allows the user to select the sound source transmitted through the rear panel outputs.
- Page 71 User Manual containing the following fields: o CHANNELS: set up the receiving and transmitting MIDI channels. o FILTERS: set up the MIDI filters for data reception and transmission. o NOTES TO COUPL. (Note to Couplers): this control allows to select the notes to send through MIDI.
- Page 72 MIDI sequencer, Cantorum Duo will transmit the content of the combination (stops, couplers, tremulant) to the [MIDI OUT] port. Always use this mode when Cantorum Duo is connected to a digital pipe interface VPI (Viscount Pipe Interface), to ensure a complete compatibility between the two devices. Cantorum Duo MIDI...
- Page 73 User Manual For each section, set a fixed value (FIXED from 1 to 127) or three dynamic curves: SOFT, NORMAL or HARD. Press [EXIT] to leave and save the settings. 5.5 REGULATING THE NOTES VELOCITY (VELOCITY SENS. function) This function sets the velocity of the notes played with Orchestra stops and transmitted through [MIDI OUT] port, for each section.
- Page 74 User Manual 5.7 CONFIGURATION OF THE PEDALS AND THE MIDI PEDALBOARD (PEDALS FUNCTION) In the PEDALS screen several functions are collected for the configuration of the pedals and MIDI pedalboard eventually connected. You can select the operation of the pedal connected to the [CRESC.] connector on the rear panel, calibrate this pedal and the one connected to the [EXPR.] connector, if the operating range is not complete.
- Page 75 User Manual 5.8 SAVING THE PROGRAM CHANGE MIDI MESSAGES IN THE COMBINATIONS (COMBINATION PRG function) Program Change MIDI messages can recall, in a connected unit, a particular sound or program (patch). Thanks to this function you may select a desired voice from external module (such as an expander) connected to the [MIDI OUT] port.
- Page 76 User Manual To activate one or more lock options select the LOCKED field, then press [EXIT] to enter the unlock code (password): Press [VALUE +] and [VALUE -] to select the characters. Use the [FIELD ] and [FIELD ] buttons to move the cursor. Press [ENTER] to save the code, and ...
- Page 77 User Manual the following page confirms that the password has been successfully modified: As written on the display, press [EXIT] to return to the SECURITY main page. 5.10 CONFIGURING THE VOLUME CONTROL AND ADJUSTING THE DISPLAY CONTRAST (CONTROLS function) With this function it is possible to select the operation mode of the [VOLUME] slider and adjust the display contrast.
- Page 78 User Manual o COMBINATIONS: all general combinations, Crescendo and Tutti. o STYLE - ALL: the four organ Styles (i.e. the settings of the STYLE menu for all four organ Styles). o STYLE – CURR.: the currently selected organ Style (i.e. the settings of the STYLE menu for the currently selected Style).
- Page 79 if the system displays the error message “RELESE CHECKSUM ERROR” after restarting the system, write an email to the technical assistance service (service@viscount.it) reporting the error type as it appears on the second line (SYSTEM or MODEL) and the numbers in the “M:”, “V:”, “S:”...
- Page 80 User Manual VERIFYING THE OPERATING SYSTEM VERSION (SYS. INFO function) Use this function to verify the release of the operating system currently running on your instrument, then look for available updates on the website www.viscountinstruments.com. To do so, select the SYSTEM field on the display under the SETTINGS menu: now select the SYS.INFO field: The RELEASE field indicates the currently installed version, and the organ model is displayed below.
- Page 81 User Manual 6. PROGRAMMING ORGAN STYLES (STYLE menu) The Style indentifies the sound configuration of the organ, i.e. the actual voice activated by each stop. The many organ styles allow the musician to use several sound configurations, as if several different instruments were present at the same time in the same place.
- Page 82 User Manual The speed and depth of the modulation can be adjusted for each Style. To access the setting page, select the TREMULANTS field under the STYLES menu: That show the current SPD (speed) or DPT (depth) and values of the manuals’ tremulant. Press [EXIT] to go back to the STYLES menu and save the new settings.
- Page 83 User Manual 6.3 SELECTING THE ORCHESTRAL VOICES (ORCHESTRA function) As described in chap. 2, in the set of voices of the Cantorum Duo are also present a series of orchestral timbres. To select an orchestra voice, access the STYLES menu and then select the ORCHESTRA field. The display shows: For each division, in the VOICE column you can select the orchestral voice while in the SUS.
- Page 84 User Manual 7. SAVING THE ORGAN CONFIGURATION TO FILES (FILE function) The Cantorum Duo can save the complete organ configuration (or parts of it) to a USB drive. The configuration can then be recalled at any time. The main purpose of this function is to offer an almost unlimited number of configurations;...
- Page 85 User Manual N.B. Once the USB pen is inserted please wait some seconds before displaying the FILE menu. The system displays the error message “USB PEN NOT PRESENT” when accessing the FILE functions without a USB drive connected to the instrument, or when the pen drive has not been recognized.
- Page 86 User Manual Once the file has been selected, press [ENTER], then confirm to proceed: When the file has been loaded, the message “FILE SUCCESFULLY LOADED” will appear. N.B. When a single Style is loaded, it can only replace a Style of the same type (a Baroque Style replaces Baroque, Romantic replaces Romantic etc.).
- Page 87 User Manual Once the save option has been selected, the following page appears: where it is possible to give a name to the saved file. To select the characters, use the buttons [VALUE +] and [VALUE -], to move the cursor use the buttons [FIELD ] and [FIELD ].
- Page 88 User Manual 8. PLAYING AND RECORDING OF MUSICAL SEQUENCES (SEQUENCER) The organ is equipped with an internal sequencer (digital recorder). The sequencer can record songs played on the instrument, controls used and MIDI data received through the [MIDI IN] port. Recordings can then be saved on the USB stick as MIDI files (Standard MIDI file, format 1 to 125 beats per minute, 384 ticks per quarter note) and played back at any time.
- Page 89 User Manual Now select the MIDI file you wish to play back: The new screen provides information about all the controls necessary for use of the sequencer: [ENTER]: starts playback of the songs. [EXIT]: quits the sequencer function. [FIELD ]: fast forward. ...
- Page 90 User Manual USING RECORDED AND/OR MODIFIED SONGS WITH DEDICATED SOFTWARE MIDI files recorded by the internal sequencer can be modified with the most common MIDI editing softwares. This might prove useful to correct errors of the recording or to generally improve the track. However, we strongly advice inexperienced users not to do so.
- Page 91 User Manual Once recording has started, the functions change to: [ENTER]: pause /restart recording. [EXIT]: stop recording. Press [EXIT] to end the session. The display will show the screen allowing the recording just made to be saved: The functions displayed allow: o SAVE: saving of the recording as a MIDI file.
- Page 92 User Manual and that [ENTER] must be pressed to confirm that you wish to quit and delete the data acquired, or [EXIT] to return to the save screen. N.B. The system displays the error message “USB PEN NOT PRESENT” when trying to save a MIDI sequence without a USB drive connected to the instrument, or when the pen drive has not been recognized.
- Page 93 User Manual The screen carries information about the functions of the buttons: [ENTER]: start recording. [EXIT]: leave the sequencer. [VALUE -]: decrease play /recording speed. It can be seen on top left as percentage (100% in the picture above). [VALUE +]: increase play / recording speed. It can be seen on top left as percentage (100% in the picture above).
- Page 94 User Manual ACCEPT TRIM AND ACCEPT 05:20 05:20 ORIGINAL ORIGINAL 03:10 03:10 OVERDUB OVERDUB 05:20 03:10 05:20 05:20 ORIGINAL ORIGINAL 06:00 06:00 OVERDUB OVERDUB 06:00 06:00 Press [EXIT] to quit the screen. The display will show: Warning you that the overdubbing will be lost. Press [ENTER] to continue – and therefore discard the recording –...
- Page 95 User Manual 9. STOP LOCAL OFF Setting a stop in Local Off mode means that it will not be played by the organ’s internal sound generation system, but the relative MIDI (System Exclusive code) message will be transmitted, so that it can be turned on and played on a connected instrument.
- Page 96 User Manual The picture is not in scale (otherwise the comma would be almost invisible) but it gives a graphical understanding of the problem. Now, dividing the Pythagorean comma in 12 equal parts, and subtracting this value to each pure fifth, the result is a twelve-fifth chain, ending with the same value as seven octaves.
- Page 97 User Manual 10.3 TEMPERAMENTS OF THE CANTORUM DUO In addition to equal temperament, with the Cantorum Duo you can play other temperaments described below. KIRNBERGER II (KIRNBERGER2 on display) Based on two fifths, reduced by half syntonic comma, and one fifth reduced by a skisma. There are three pure majors: C, G, D.
- Page 98 User Manual MEANTONE 3# - MEANTONE 3b This tuning is the prototype of all temperaments based on fifths reduced by ¼ of syntonic comma. This generates eight pure major thirds: Eb, Bb, F, C, G, D, A, E. However, the other thirds are unsuable (B, F#, G#).
- Page 99 User Manual CHAUMONT A meantone temperament; the wolf fifth has been improved by enlarging the fifths on Eb and Bb. There are six pure major thirds: F, C, G, D, A, E. The third major on B, although not very pleasant, can still be used.
- Page 100 User Manual WERCKMEISTER IV (WERCKMEIST.4 on display) Based on five fiths, each reduced of 1/3 of Pythagorean comma, and two more thirds increased of the same amount. Very pleasant with mostly unaltered tonalities, it becomes “harder” as the alterations increase. WERCKMEISTER V (WERCKMEIST.5 on display) Based on five fiths reduced by 1/5 of Pythagorean comma, and one fifth increased of the same amount.
- Page 101 User Manual MEANTONE PURE MINOR 3rd (MEANTONE 3M on display) This temperament is built with fifths narrowed by 1/3 of syntonic comma. The wolf fifth on G# is very large and completely unusable. The nine minor thirds based on C, G, D, A, E, B, F#, C#, G# are pure. The eight major thirds based on Eb, Bb, F, C, G, D, A, E, are narrower, with respect to the pure, by 1/3 of syntonic comma.
- Page 102 User Manual BARCA The Barca temperament is based on six fifths (from C) reduced by 1/6 of syntonic comma each, and one fifth (on Eb) reduced of the remaining skisma. Therefore there are no Pythagorean thirds, and tonalities with many alterations still sound well. 10.4 CONTENT DEI FILE .SET, .CMB, .STS, .STA e .ALL FILE .SET PARAMETER...
- Page 103 User Manual PARAMETER POSITION NOTE CRESC/EXPR SETTINGS menu, PEDALS function EXPR CH->CRESC SETTINGS menu, PEDALS function MIDI PEDALBOARD SETTINGS menu, PEDALS function LCD CONTRAST SETTINGS menu, CONTROLS function VOL. KNOB SETTINGS menu, CONTROLS function FILE .CMB COMBINATIONS CONTENT NOTE all stops, all couplers, all tremulants, tremulants depth and * recalled if enabled in Tutti speed*, ENC*, AP*, MIDI Program Change and Bank...
- Page 104 User Manual connector. this is thanks to the MIDI channels. There are 16 MIDI channels, and in a similar way as for radio communications in which two stations can only communicate if they are tuned to the same frequency (or channel), two MIDI instruments connected together are only able to communicate if the transmitter instrument channel is the same as the receiver instrument channel.
- Page 105 User Manual REAL TIME These messages are used for the real-time control of specific modules or functions of a connected instrument. These messages include the Start, Stop, Pause/Continue and Clock commands. START: the sequencer has started to record or play back a MIDI sequence STOP: the sequencer has been stopped PAUSE / CONTINUE: the sequencer has been set in stop status CLOCK: the sequencer speed...
- Page 106 (received as 00H-39H) 06H: general information :7FH (127) on 02H: device ID reply (received as 40H-7FH) 31H: Viscount ID 00H 1CH: device family code All Sounds Off (CC 120) • 20H 00H: device family member code Terminates all voices currently on for the specific...
- Page 107 Register on/off • 14H=Vallotti Data format: F0H 31H snH xxH yyH F7H 15H=Chaumont 16H=Kellner 1975 F0H : Exclusive status 17H=Kirnberger III 31H : Viscount ID 18H=Werckmeister IV sH : switch 19H=Werckmeister V 0H=voice off 1AH=Silbermann 4H=voice on 1BH=Meantone 3b nH : channel number (0H – EH) 1CH=Meantone 3M xxH : voice id –...
- Page 108 User Manual Couplers on/off • Data format: F0H 31H 2FH 70H vvH F7H F0H : Exclusive status 31H : Viscount ID 2FH : system control 70H : coupler vvH : type and switch 00H=II/P on 10H=II/P off 01H=I/P on 11H=I/P off...
- Page 109 Disposal of old Electrical & Electronic Equipment (Applìcable throughout the European Union and other European countries with separate collection programs) Dir. 2002/95/CE, 2002/96/CE e 2003/108/CE This syrnbol, found on your product or on its packaging, indicates that this product should not be treated as household waste when you wish to dispose of it.
- Page 110 AVIS IMPORTANT! WARNING RISK OF ELECTRIC SHOCK DO NOT OPEN AVIS RISQUE DE CHOC ÉLECTRIQUE NE PAS OUVRIR Ce simbole sert pour avertir l’utilisateur Ce simbole sert pour avertir l’utilisateur qu’à l’interieur de ce produit sont qu’à l’interieur de la documentation de présents éléments non isolés soumis à...
- Page 111 Mode d’Emploi TABLES DES MATIERES 1. Notes importantes ............................ 2 1.1 Conseils d’utilisation ..............................2 1.2 Notes sur le mode d’emploi ............................2 2. Description generales de l'instrument ....................4 3. Allumage et ecran principal ........................8 3.1 Le menu principal -Main Menu- ..........................9 4.
-
Page 112: Notes Importantes
Mode d’Emploi 1. NOTES IMPORTANTES 1.1 CONSEILS D’UTILISATION • Ne pas exercer de pressions trop fortes sur les structures de l’orgue et les organes de contrôle (boutons, registres, tirants, etc…). • Si possible, ne pas placer l’instrument à proximité d’appareils générateurs d’interférences tels que radios, TV, ordinateurs ou systèmes vidéo. - Page 113 Mode d’Emploi • Toutes les marques référencées dans ce mode d’emploi sont la propriété exclusive des fabricants respectifs. • Lire attentivement l’ensemble des informations. Cela vous évitera toute perte de temps et vous permettra d’obtenir la meilleure utilisation des capacités de votre instrument. •...
-
Page 114: Description Generales De L'instrument
Mode d’Emploi 2. DESCRIPTION GENERALES DE L'INSTRUMENT 1. Registres [PEDAL]: les registres de la section Bass sont rassemblés ici. Il est possible de jouer ces registres par un pédalier MIDI connecté au connecteur [MIDI IN] sur le panneau arrière (voir point 13) ou avec le premier manuel en activant la fonction Automatic Pedal (voir point 19). - Page 115 Mode d’Emploi 7. Commutateurs ORCHESTRA: rassemble les registres orchestraux de l’orgue. [ORCH P]: registre orchestraux du section Pedal. [ORCH I]: registre orchestraux du section Manual I. [ORCH II]: registre orchestraux du section Manual II. Il est possible de sélectionner, pour tout registre, le timbre que ce dernier activera. Pour en savoir plus, consulter le paragr.
- Page 116 Mode d’Emploi 10. Commutateurs du Style. Voici les commutateurs pour la sélection du style d'organe (voir chap. 6). [BAR]: baroque [BRK]: baroque nord européen [ROM]: romantique [SYM]: symphonique Après la sélection, si l'écran affiche l'écran principal (voir chap. 3), le nom du style apparaît pour quelques secondes avec un pop-up d'information 11.
- Page 117 Mode d’Emploi commande de niveau et d’égalisation spécifique (voir chapt 4 et 5.2). Dans le cas d'un système stéréo, connectez la sortie [L/Mono] au canal gauche et la sortie [RIGHT] au canal droit. Si vous utilisez un système monophonique, connectez uniquement le connecteur [L/Mono]. 16.
-
Page 118: Allumage Et Ecran Principal
Mode d’Emploi 3. ALLUMAGE ET ECRAN PRINCIPAL Après avoir allumé l'instrument, l'écran affiche la présentation, en suite, celle dans laquelle vous êtes informé sur la version (Release) du système opératif actuellement installé dans l'instrument, après un moment vous voyez l'écran principal, Dans la partie supérieure de cette écran sont indiqués les paramètres: o TRANSPOSER: ajustement du transposer. -
Page 119: Le Menu Principal -Main Menu
5.12. Si, immédiatement après l’allumage on ira voir le message "RELEASE CHECKSUM ERROR", contacter le support technique au service@viscount.it e-mail indiquant le type d'erreur mentionné dans la ligne du bas (SYSTEM ou MODEL) et les chiffres à gauche des champs "M:", "V:", "S:"... -
Page 120: Reglage Des Volumes (Fonction Volumes)
Mode d’Emploi 4. REGLAGE DES VOLUMES (fonction VOLUMES) L'orgue Cantorum Duo permet la régulation de différents contrôles de volume, afin de garantir un équilibre sonore parfait entre les différentes sections et entre l'amplification interne et externe. Pour afficher la page-écran relative à ces réglages, appuyer sur la touche [VOLUMES]: o PEDAL: volume de division du Pedal. -
Page 121: Reglages Générals De L' Instrument (Menu Settings)
Mode d’Emploi 5. REGLAGES GÉNÉRALS DE L’ INSTRUMENT (Menu SETTINGS) Pour accéder au menu SETTINGS, qui contient toutes les fonctions nécessaires pour la configuration totale de l'instrument, sélectionnez SETTINGS dans le menu principal, le premier écran est affiché: utiliser les touches [FIELD ] et [FIELD ] pour déplacer le curseur et faire défiler tous les écrans du ... -
Page 122: Selection Du Type De Reverberation (Paramètre Reverb)
Mode d’Emploi o MIDI: accès aux fonctions de réglage de l'interface MIDI. Ces fonctions sont décrites dans le paragraphe. 5.4. o VEL. SENS. (Velocity Sense): l'ajustement de la dynamique des manuels et de la pédalier pour l’utilisation avec les voix Orchestra et les notes transmises par MIDI. Cette fonction est décrite au par. 5.5. -
Page 123: Reglage De L'egaliseurs (Fonction Equalizer)
Mode d’Emploi 5.2 REGLAGE DE L’EGALISEURS (Fonction EQUALIZER) Le Cantorum Duo est équipé de trois égaliseurs graphiques, un pour le son reproduit par les haut- parleurs internes et deux autres pour le signal présent sur les deux paires de sorties audio [OUT 1] et [OUT 2] du panneau arrière. -
Page 124: Canalisation Des Signals Sur Les Sorties Audio (Fonction External Outputs)
Mode d’Emploi Appuyer ensuite sur [EXIT] pour revenir au menu SETTINGS et mémoriser les nouveaux réglages. N.B. Les égaliseurs de l’orgue ont également effet sur les signaux en entrée de la prise [INPUT] présents dans le panneau arrière. 5.3 CANALISATION DES SIGNALS SUR LES SORTIES AUDIO (Fonction EXTERNAL OUTPUTS) Une autre intéressante préparation offerte par Cantorum Duo est la possibilité... - Page 125 Mode d’Emploi dans lequel on a les suivants jeux à l’écran: o CHANNELS: access à l’écran de réglage des filtres MIDI de réception et transmission o FILTERS: access à l’écran de réglage des filtres MIDI de réception et transmission o NOTES TO COUPL. (Note to Couplers): permet de choisir d’envoyer les notes que seront envoyées par MIDI.
- Page 126 MIDI, sur la porte [MIDI OUT] est transmis le contenu ( registres, les unions et les tremolos) de cette combinaison. Celle-ci est le seul mode à utiliser si le Cantorum Duo est connecté à l’interface digitale pour les orgues à tuyaux VPI (Viscount Pipe Interface), afin d'assurer la parfaite compatibilité entre les deux instruments. Cantorum Duo...
-
Page 127: Reglage De La Dynamique Midi (Fonction Velocity Sense)
Mode d’Emploi La colonne de gauche indique les messages MIDI qui peuvent être filtrés : - CONTROL: Control Change - PROGRAM: Program Change - SYSEX: System Exclusive - REAL TIME: Real Time Les colonnes TX et RX permettent de régler l’état des filtres, respectivement à transmission et à la réception. -
Page 128: Configuration Des Pédales Et Du Pédalier Midi (Fonction Pedals)
Mode d’Emploi NONE: rien entre Styles d’orgue, les paramètres de tremolos, des jeux d'orchestre. STYLE: le style d’orgue choisi au moment de la mémorisation (pour la sélection du style voir l'article 10 du cap.2) afin qu’il puisse être rappelé avec le combinaisons générals et Tutti. TREM: la mémorisation des valeurs de Depth et de Speed des Trémolos (pour les réglages, voir par. -
Page 129: Sauvetage Dans Les Combinaison De Messages Midi De Changement De Programme (Fonction Combin. Prg)
Mode d’Emploi Réglez la pédale sur la position minimum (pédale complètement relevée) ou maximum (pédale complètement abaissée) et appuyez sur [ENTER]: la valeur acquise est enregistrée dans la case MIN ou MAX correspondante. Effectuez la même procédure pour la position non enregistrée et toute autre pédale connectée. -
Page 130: Bloc De Sécurité Aux Changements (Fonction Security)
Mode d’Emploi 5.9 BLOC DE SÉCURITÉ AUX CHANGEMENTS (fonction SECURITY) Si cela est considéré nécessaire pour empêcher le changement de configuration de l’orgue, il y a la fonction SECURITY. Lorsqu'elle est active, les combinaisons, Tutti, Crescendo et Local Off ne peuvent pas être modifiés. -
Page 131: Configuration Du Slider De Volume Et Reglage Du Contraste De L'ecran (Fonction Controls)
Mode d’Emploi en suite le nouveau code: pour confirmer le changement apparaît sur l'écran: Selon les informations de l'écran, appuyez sur [EXIT] pour revenir à l'écran principal de la fonction de sécurité. 5.10 CONFIGURATION DU SLIDER DE VOLUME ET REGLAGE DU CONTRASTE DE L’ECRAN (fonction CONTROLS) Par ce fonction, c’... -
Page 132: Restauration Des Reglages D'usine (Fonction Factory Settings)
Mode d’Emploi 5.11 RESTAURATION DES REGLAGES D’USINE (fonction FACTORY SETTINGS) L’orgue prévoit diverses typologies de restauration des réglages d’usine (Factory Settings) offrant ainsi à l’utilisateur la possibilité de choisir ce qu’il souhaite initialiser. Pour effectuer la procédure, sélectionner le champ FACTORY SETT. dans le menu SETTINGS: o STYLE - ALL: les quatre styles d’orgue (donc les paramètres présentes dans le menu STYLE à... - Page 133 si au début vous voyez le message d'erreur "RELEASE CHECKSUM ERROR", contacter le support technique au service@viscount.it e-mail indiquant le type d'erreur mentionné dans la ligne du bas (SYSTEM ou MODEL) et les chiffres à gauche des champs “M:", "V:", "S:"...
- Page 134 Mode d’Emploi VERIFICATION DE LA VERSION DU SYSTÈME D'EXPLOITATION INSTALLÉ (fonction SYS. INFO) Pour savoir quelle version du système d'exploitation est actuellement installé dans l'appareil et donc de déterminer si sur le site www.viscountinstruments.com on en a une plus ajournée, sélectionner le champ SYSTEM dans le menu SETTINGS: Maintenant, sélectionnez sur écran SYS.INFO: Le champ RELEASE indique la version actuellement installée, au dessous de laquelle on montre la...
-
Page 135: Programmation Des Styles D'orgue (Menu Style)
Mode d’Emploi 6. PROGRAMMATION DES STYLES D’ORGUE (menu STYLE) Le style identifie la configuration audio de l'orgue et donc le jeux activée pour chaque registre individuel. La présence de plusieurs styles d’orgue offre au musicien la possibilité d’utiliser différentes configurations sonores comme s’il pouvait avoir plusieurs instruments à... -
Page 136: Reglage Des Tremolos (Fonction Tremulants)
Mode d’Emploi 6.1 REGLAGE DES TREMOLOS (fonction TREMULANTS) Dans l’orgue à tuyaux il est extrêmement important que la pression de l’air soit constante afin d’obtenir un son régulier et « soutenu » ; des dispositifs mécaniques ont été cependant introduits pour générer des variations périodiques plus ou moins marquées de la pression de l’air. -
Page 137: Selection Des Voix Orchestrales (Fonction Orchestra)
Mode d’Emploi Il est aussi possible d’allumer d’autres registres afin d’évaluer les modifications dans leur ensemble. Pour quitter la fonction, appuyer sur [EXIT], les modifications seront automatiquement mémorisées dans l’Organ Style actuellement utilisé. 6.3 SELECTION DES VOIX ORCHESTRALES (fonction ORCHESTRA) Comme décrit au chap. -
Page 138: Sauvegarde Sur Le Fichier De La Configuration De L'orgue (Menu File)
Mode d’Emploi 7. SAUVEGARDE SUR LE FICHIER DE LA CONFIGURATION DE L’ORGUE (menu FILE) Le Cantorum Duo vous permet de garder sur un stylo USB la configuration complète de l'instrument ou de ses parties, de sorte que vous pouvez la/les recharger quand vous le souhaitez. Le but principal de cette fonction est celle d'avoir un nombre pratiquement illimité... -
Page 139: Chargement Des Combinaisons Et/Ou Reglages De L'orgue (Fonction Load)
Mode d’Emploi N.B. - Une fois insérée la clé USB, attendre quelques secondes avant que ne s’affiche le menu FILE. - En accédant à ces fonctions sans la clé insérée le message d'erreur "USB PEN NOT PRESENT" arrive. Si la clé est plutôt présente, cela signifie qu’elle n’est pas reconnus par le système. -
Page 140: Enregistrement Sur Fichier Des Combinaisons Et/Ou Reglages De L'orgue (Fonction Save)
Mode d’Emploi Après le chargement complet on ira avoir le message "FILE SUCCESFULLY LOADED". N.B. - Dans le cas de chargement de chaque style, cela peut être positionné que à la place d'un style du même type (Baroque au lieu du baroque, romantique au lieu du romantique). Pour une identification plus facile et rapide du type de style, donc, lors de l'enregistrement le système, présente comme choix initial du nom de fichier le nom du style. - Page 141 Mode d’Emploi Une fois sélectionné le type de sauvegarde on ira visualiser l’ecran de composition du nom de fichier: Pour sélectionner les lettres du nom utiliser les bouton [VALUE +] et [VALUE -] et pour déplacer le curseur utiliser [FIELD ] et [FIELD ].
-
Page 142: Enregistrement Et Reproduction De Morceaux De Musique (Séquenceur)
Mode d’Emploi 8. ENREGISTREMENT ET REPRODUCTION DE MORCEAUX DE MUSIQUE (SÉQUENCEUR) L’orgue Cantorum Duo est équipé d'un séquenceur interne (enregistreur digital). Le séquenceur peut enregistrer des chansons jouées, et les contrôles utilisés sur l'instrument et MIDI data reçu par la port MIDI [IN]. - Page 143 Mode d’Emploi Sélectionner le fichier MIDI à reproduire : La nouvelle page-écran informe l’utilisateur de toutes les commandes nécessaires pour utiliser le séquenceur : [ENTER]: lancement de la reproduction du morceau. [EXIT]: abandon du séquenceur. [FIELD ]: retour rapide (Rewind). ...
- Page 144 Mode d’Emploi UTILISATION DES MORCEAUX ENREGISTRES ET/OU MODIFIES A L’AIDE D’UN LOGICIEL SPECIFIQUEMENT CONÇU. Les bases MIDI enregistrées avec le séquenceur interne de l’instrument peuvent être modifiées en utilisant un des logiciels les plus communs de montage MIDI pour ordinateur. Cette fonction peut être utile pour corriger d’éventuelles erreurs qui seraient apparues durant l’enregistrement ou pour apporter des améliorations.
-
Page 145: Enregistrement D'un Morceau (Modalité Record)
Mode d’Emploi 8.2 ENREGISTREMENT D’UN MORCEAU (modalité RECORD) Sur la page-écran des modalités du séquenceur, sélectionner le champ RECORD, l’écran affichera: Comme pour la modalité Play, la page-écran informe l’utilisateur des fonctions des touches : [ENTER]: lancement de l’enregistrement. [EXIT]: abandon du séquenceur. Une fois l’enregistrement lancé, les fonctions changent : [ENTER]: pause/reprise de l’enregistrement. -
Page 146: Enregistrements Par Surimpression (Modalité Overdub)
Mode d’Emploi Dans la composition du nom, utiliser les touches [FIELD ] et [FIELD ] pour déplacer le curseur et [VALUE +] et [VALUE -] pour sélectionner le caractère. Les trois premiers caractères doivent être des nombres car ils sont nécessaires pour de futures expansions de l’instrument. Pour confirmer le nom et continuer l’enregistrement, appuyer sur la touche [ENTER] ;... - Page 147 Mode d’Emploi Le séquenceur est alors prêt à enregistrer: Comme l’écran l’indique, les touches sont alors associées aux fonctions suivantes: [ENTER]: lancement de l’enregistrement. [EXIT]: abandon du séquenceur. [VALUE -]: réduction de la vitesse de reproduction/enregistrement (indiquée en haut à gauche comme pourcentage de la valeur d’origine, qui est de 100% dans la page-écran illustrée ci-dessus).
- Page 148 Mode d’Emploi o PLAY: reproduit le morceau comportant le nouvel enregistrement afin d’en évaluer les modifications sans pour autant les rendre définitives. o PLAY FROM OVD (Overdub): reproduit le morceau depuis le premier élément qui a été enregistré par surimpression afin d’en évaluer les modifications sans pour autant les rendre définitives. o DISCARD: annule l’enregistrement par surimpression qui vient d’être effectué.
-
Page 149: Local Off Des Registres
Mode d’Emploi 9. LOCAL OFF DES REGISTRES Sélectionner un registre en Local Off signifie ne pas le jouer à travers la génération interne de l’orgue mais en transmettre le message MIDI correspondant (code de Système Exclusif) pour pouvoir l’allumer ou le jouer sur un instrument branché. - Page 150 Mode d’Emploi Le schéma ci-dessus, bien qu’il ne soit pas à l’échelle (l’écart serait pratiquement imperceptible au niveau graphique) donne une idée relativement claire du problème. Si l’on divise maintenant le comma pythagoricien en 12 parties identiques et si l’on soustrait le résultat obtenu à chaque quinte pure, on obtient une série de 12 quintes dont l’extrémité...
-
Page 151: Les Temperaments Dans Le Cantorum Duo
Mode d’Emploi tierce majeure pure. Les intervalles de quintes réduits de cette manière sont appelés quintes mésotoniques ; elles sont faussées mais demeurent cependant acceptables. Notons que si un tempérament récupère le comma syntonique afin de « fermer le cercle », il faut encore compenser la différence entre le comma pythagoricien et le comma syntonique. - Page 152 Mode d’Emploi PYTHAGOREAN tempérament définit onze quintes pures (pythagoriciennes) et un loup sur G#. Il ne peut être utilisé que pour jouer de la musique monodique ou tout morceau excluant les intervalles harmoniques de tierces. Il a une fonction essentiellement didactique et informative.
- Page 153 Mode d’Emploi VALLOTTI Ce tempérament répartit le comma pythagoricien, en six parties égales, sur six quintes. Les autres quintes sont donc pures. Les couples de tierces majeures sur Eb et B, Bb et E, F et A sont équivalentes ; le sont également les tierces majeures sur C, G et D.
- Page 154 Mode d’Emploi KIRNBERGER III (KIRNBERGER3 sur l'écran) Ce tempérament répartit ¼ du comma syntonique sur quatre quintes et réduit une autre quinte de la valeur du schisma. L’unique tierce majeure pure est sur C ; des tierces graduellement moins pures sont sur G, D, A, et de manière spéculaire, sur F, Bb et Eb.
- Page 155 Mode d’Emploi SILBERMANN Ce tempérament réduit cinq quintes d’1/6 du comma syntonique. Le loup se trouve sur G#. Les tierces qui dans le mésotonique classique sont pures sont ici augmentées d’1/3 du comma syntonique. En revanche le loup est moins prononcé et est à la limite entre acceptable et inacceptable.
- Page 156 Mode d’Emploi SAUVEUR 1, SAUVEUR 2 Le tempérament de Sauveur 1 se base sur onze quintes réduites d’1/5 du comma syntonique. Le loup se trouve sur G#. Dans le tempérament Sauveur 2, la quinte sur F# est pure. Les huit tierces majeures pures du mésotonique sont ici légèrement plus grandes tandis que le loup est moins prononcé.
- Page 157 Mode d’Emploi 10.4 CONTENU DES FICHIERS .SET, .CMB, .STS, .STA et .ALL FILE .SET PARAMETER POSITION NOTE SELECTED STYLE system data Local Off of each stop PEDAL VOLUMES function MAN. I VOLUMES function MAN. II VOLUMES function OUT 1 VOLUMES function OUT 2 VOLUMES function INPUT...
-
Page 158: Qu'est-Ce Que Le Midi
Mode d’Emploi FILE .ALL CONTENT NOTE the same of 1 .sta files the same of 1 .cmb file the same of 1 .set file Local Off of each stop 10.5 QU’EST-CE QUE LE MIDI? L’Interface MIDI (Musical Instrument Digital Interface, Interface Numérique pour Instruments de Musique) permet à... - Page 159 Mode d’Emploi N.B. Le message de Note On avec Velocity=0 équivaut à un message de Note Off. PROGRAM CHANGE Ce message est utilisé pour la sélection des programmes ou des sons sur l’instrument récepteur. Il existe aussi un standard spécifique appelé General MIDI qui décrit quel son rappeler pour chaque Program Change reçu.
-
Page 160: Detailed Midi Implementation
Mode d’Emploi 10.6 DETAILED MIDI IMPLEMENTATION CHANNEL MESSAGES Volume (CC 7) • Message which controls the sections volume. Using default settings, channel messages are sent and received on the following MIDI channels: Data format: BnH 07H vvH Ch.1: Manual II notes or controls n=channel number :0H–EH (1–15) Ch.2: Manual I notes or controls... - Page 161 6FH (111): Crescendo -- (OFF) Register on/off • 70H–7FH (112-127): Crescendo steps 1-16 Data format: F0H 31H snH xxH yyH F7H F0H : Exclusive status STANDARD SYSTEM EXCLUSIVE 31H : Viscount ID MESSAGES sH : switch 0H=voice off 4H=voice on Device Inquiry •...
- Page 162 Mode d’Emploi 31H : Viscount ID 31H : Viscount ID 2nH : channel number (s=0H–EH) 2FH : system control 5CH : 1st tremulant depth 67H : fine tuning vvH : depth value (04H–20H) 0nH 0nH 0nH: nibblezed data of tuning value...
- Page 163 Disposition concernant les anciens équipements électriques et électroniques (applicable dans l’Union Européenne et dans d’autres pays européens avec des systèmes de collecte séparés) Dir. 2002/95/CE, 2002/96/CE e 2003/108/CE Ce symbole sur le produit ou sur son emballage indique que ce produit ne sera pas traité comme perte ménagère.
- Page 164 MIDI IMPLEMENTATION CHART Viscount Cantorum Duo Version: 1.0 Portable 2 manuals 61-keys organ Date: 19 Jun. 2018 FUNCTION… TRANSMITTED RECEIVED REMARKS BASIC Default 1, 2, 4 1, 2, 4 CHANNEL Changed 1÷15 1÷15 MODE Default Mode 3 Mode 3 ********...
- Page 166 Viscount International S.p.A. Via Borgo, 68 / 70 – 47836 Mondaino (RN), ITALY Tel: +39-0541-981700 Fax: +39-0541-981052 Website: www.viscountinstruments.com...
Need help?
Do you have a question about the Cantorum Dou and is the answer not in the manual?
Questions and answers