Table of Contents
Advertisement
Quick Links
Advertisement
Table of Contents

Subscribe to Our Youtube Channel
Related Manuals for Baldor ID15J1F50-ER


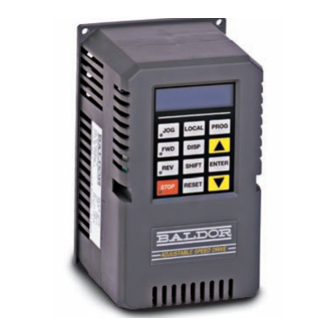
Summary of Contents for Baldor ID15J1F50-ER
- Page 1 Series 15J Inverter Control Installation and Operating Manual 7/04 MN715J...
-
Page 2: Table Of Contents
Table of Contents Section 1 Quick Start ............Overview . - Page 3 Selection of Operating Mode ........3-15 Keypad Connection .
- Page 4 Section 6 Specifications and Product Data ........Specifications: .
- Page 5 iv Table of Contents MN715J...
-
Page 6: Quick Start
Quick Start Overview If you are an experienced user of Baldor controls, you are probably already familiar with the keypad programming and keypad operation methods. If so, this quick start guide has been prepared for you. This procedure will help get your system up and running in the keypad mode quickly and will allow motor and control operation to be verified. -
Page 7: Power-Up Procedure
WARNING: Make sure that unexpected operation of the motor shaft during start up will not cause injury to personnel or damage to equipment. Power-up Procedure Turn power on. Be sure no faults are displayed on the keypad display. Set the Level 1 Input block, Operating Mode to “Keypad”. Set the Level 2 Output Limits block, “MIN Output FREQ”... -
Page 8: General Information
Limited Warranty For a period of two (2) years from the date of original purchase, BALDOR will repair or replace without charge controls and accessories which our examination proves to be defective in material or workmanship. -
Page 9: Safety Notice
Safety Notice This equipment contains voltages that may be as great as 1000 volts! Electrical shock can cause serious or fatal injury. Only qualified personnel should attempt the start–up procedure or troubleshoot this equipment. This equipment may be connected to other machines that have rotating parts or parts that are driven by this equipment. - Page 10 Do not connect AC power to the motor terminals T1, T2 and T3. Connecting AC power to these terminals may result in damage to the control. Caution: Baldor recommends not using “Grounded Leg Delta” transformer power leads that may create ground loops. Instead, we recommend using a four wire Wye. MN715J...
- Page 11 2-4 General Information MN715J...
-
Page 12: Receiving And Installation
Section 3 Receiving and Installation Receiving & Inspection The Series 15J Inverter Control is thoroughly tested at the factory and carefully packaged for shipment. When you receive your control, there are several things you should do immediately: Observe the condition of the shipping container and report any damage immediately to the commercial carrier that delivered your control. -
Page 13: Optional Remote Keypad Installation
If the phone jack is not installed and you wish to connect a remote keypad, contact Baldor. A separate keypad may be remotely mounted using an optional Baldor keypad extension cable (in addition to the keypad within the control). Keypad... -
Page 14: Electrical Installation
Only Class 1 wiring should be used. System Grounding Baldor Controls are designed to be powered from standard three phase lines that are electrically symmetrical with respect to ground. System grounding is an important step in the overall installation to prevent problems. -
Page 15: Line Impedance
NoLoad Line Reactors 3 phase line reactors are available from Baldor. The size of the line reactor to use is based on the maximum continuous load. If providing your own line reactor, use the following formula to calculate the minimum inductance required. - Page 16 Figure 3-1 Recommended System Grounding MN715J Receiving and Installation 3-5...
-
Page 17: Input Current Requirements
115VAC - 1f 230VAC - 3f 460VAC - 3f Catalog Input Catalog Input Catalog Input Numbers Amps Numbers Amps Numbers Amps ID15J1F33-ER ID15J201-ER ID15J401-ER ID15J1F50-ER ID15J201F5-ER ID15J401F5-ER ID15J1F75-ER ID15J202-ER ID15J402-ER ID15J101-ER 10.0 ID15J203-ER 11.0 ID15J403-ER ID15J205-ER 15.0 ID15J405-ER ID15J407-ER 10.0 ID15J410V-ER 13.0... -
Page 18: Terminal Identification
Terminal Identification The terminals for signal, AC power and motor connections are shown in Figure 3-3. Separate ground connections are provided for power and motor grounds. Figure 3-3 Terminal Identification Note: J5 is accessible with the cover on. Keypad may be plugged in or removed while control is ON. -
Page 19: Protective Devices
Protective Devices Recommended fuse sizes are based on the following: 115% of maximum continuous current for time delay. 150% of maximum continuous current for Fast or Very Fast action. Note: These general size recommendations do not consider harmonic currents or ambient temperatures greater than 40°C. -
Page 20: Phase Installation
T1, T2 and T3 terminals of the control. Refer to Figure 3-3 for terminal locations. Figure 3-4 3 Phase AC Power and Motor Connections Baldor Series 15J Control MN715J... -
Page 21: 115Vac 1 Phase Wire Size And Protection Devices
NEC and local codes. Recommended fuses are based on 40°C ambient, maximum continuous control output current and no harmonic current. Figure 3-5 Single Phase AC Power and Motor Connections Baldor Series 15J Control 3-10 Receiving and Installation MN715J... -
Page 22: 230Vac Single Phase Derating For Three Phase Controls
NEC and local codes. Recommended fuses are based on 40°C ambient, maximum continuous control output current and no harmonic current. Figure 3-6 Single Phase 230VAC Power and Motor Connections Baldor Series 15J Control MN715J Receiving and Installation 3-11... -
Page 23: Motor Brake Connections
Motor Brake Connections For motors with spring set brakes, connect the brake power leads and the motor power leads separately. Because the inverter has variable voltage output to the motor, the inverter may not supply enough power at low frequencies for proper brake operation. If using a motor with an internally connected brake, the brake power leads must be connected to a separate power source for proper brake operation. -
Page 24: Inputs And Outputs
Inputs and Outputs (Refer to Figure 3-8). Analog Inputs Two analog inputs are available: analog input #1 (J4-5 and J4-4) and analog input #2 (J4-7 and J4-8) as shown. Either analog input #1 or #2 may be grounded provided the common mode range is not exceeded. Either analog input may be selected in the Level 1 INPUT block, ANA CMD Select parameter value. -
Page 25: Analog Output
Analog Output One programmable analog output is provided at J4-10 and J4-9. The output is scaled 0 - 5 VDC, 0 - 10 VDC, 4-20mA or 0-20mA. The output function is programmed in the Level 1 Output block, Analog Out parameter value. The scaling of the output is programmed in the Level 1 Output block, Analog Scale. -
Page 26: Selection Of Operating Mode
Selection of Operating Mode (and Connection Diagram) Several operating modes are available that define the basic motor control setup and the operation of the input and output terminals. These operating modes are selected by programming the Operating Mode parameter in the Level 1 Input programming Block. -
Page 27: Keypad Connection
Keypad Connection The Keypad operating mode allows the control to be operated from the keypad. In this mode, no control connection wiring is required. However, the Stop, Accel/Decel select and External Trip inputs may optionally be used. All other digital inputs are inactive. The analog output and relay outputs remain active at all times. -
Page 28: Standard Run 3 Wire Connection
Standard Run 3 Wire Connection Figure 3-11 Standard Run 3-Wire Connection Diagram Table 3-7 Speed Select Function Speed Select 1 Speed Select 2 ANA CMD Select Open Open Preset Speed 1 Closed Open Preset Speed 2 Closed Closed Preset Speed 3 Open Closed J4-11... -
Page 29: Speed Connection
7 Speed Connection Figure 3-12 7 Speed Connection Diagram Table 3-8 Function Speed Select 1 Speed Select 2 Speed Select 3 ANA CMD Select Open Open Open Speed 1 Closed Open Open Preset Speed 2 Closed Closed Open Preset Speed 3 Closed Closed Closed... -
Page 30: Fan Pump 2 Wire Connection
Fan Pump 2 Wire Connection Figure 3-13 Fan/Pump 2 Wire Connection Diagram Table 3-9 Function Firestat Freezestat Comment ANA CMD Select Closed Closed Firestat and Freezestat are alarm inputs that override all speed t th t Speed 1 Open Closed Preset commands including the keypad commands including the keypad. -
Page 31: Fan Pump 3 Wire Connection
Fan Pump 3 Wire Connection Figure 3-14 Fan/Pump 3 Wire Connection Diagram Table 3-10 Function Firestat Freezestat Comment ANA CMD Select Closed Closed Firestat and Freezestat are alarm inputs that override all speed t th t Speed 1 Open Closed Preset commands including the keypad commands including the keypad. -
Page 32: Process Control Connection
Process Control Connection Figure 3-15 Process Control Connection Diagram J4-11 OPEN motor decels to stop (depending on Keypad Stop mode). CLOSED starts Forward motor rotation. J4-12 OPEN motor decels to stop (depending on Keypad Stop mode). CLOSED starts Reverse motor rotation. Note: Simultaneous closure of J4-11 and J4-12 will cause the motor to regen to stop (not coast). -
Page 33: Speed Analog 2 Wire Connection
3 Speed Analog 2 Wire Connection Figure 3-16 3 Speed Analog 2 Wire Connection Diagram Table 3-11 Function Speed Select 1 Speed Select 2 ANA CMD Select Open Open Speed 1 Closed Open Preset Speed 2 Closed Closed Preset Speed 3 Open Closed Preset... -
Page 34: Speed Analog 3 Wire Connection
3 Speed Analog 3 Wire Connection Figure 3-17 3 Speed Analog 3 Wire Connection Diagram Table 3-12 Function Speed Select 1 Speed Select 2 ANA CMD Select Open Open Speed 1 Closed Open Preset Speed 2 Closed Closed Preset Speed 3 Open Closed Preset... -
Page 35: Epot 2 Wire Connection
EPOT 2 Wire Connection Figure 3-18 Electronic POT 2 Wire Connection Diagram J4-11 OPEN motor decels to stop (depending on Keypad Stop mode). CLOSED to enable operation in the Forward direction. J4-12 OPEN motor decels to stop (depending on Keypad Stop mode). CLOSED to enable operation in the Reverse direction. -
Page 36: Epot 3 Wire Connection
EPOT 3 Wire Connection Figure 3-19 Electronic POT 3 Wire Connection Diagram J4-11 Momentary CLOSED starts Forward motor rotation. J4-12 Momentary CLOSED starts Reverse motor rotation. J4-13 Momentary OPEN motor decels to stop (depending on Keypad Stop mode). J4-14 OPEN selects ACC / DEC / S-CURVE group 1. CLOSED selects group 2. -
Page 37: Pre-Operation Checklist
Pre-Operation Checklist Check of electrical items. Verify AC line voltage at source matches control rating. Inspect all power connections for accuracy, workmanship and tightness as well as compliance to codes. Verify control and motor are grounded to each other and the control is connected to earth ground. -
Page 38: Programming And Operation
Section 4 Programming and Operation Overview The keypad is used to program the control parameters, to operate the motor and to monitor the status and outputs of the control (by accessing the display options, diagnostic menus and the fault log). Figure 4-1 Keypad Press JOG to select the preprogrammed jog speed. - Page 39 SHIFT Press SHIFT in the program mode to control cursor movement. Pressing the SHIFT key once moves the blinking cursor one character position to the right. While in program mode, a parameter value may be reset to the factory preset value by pressing the SHIFT key until the arrow symbols at the far left of the keypad display are flashing, then press an arrow key.
-
Page 40: Operation Examples
Operation Examples Operating the Control from the Keypad If the control is configured for remote or serial control, the LOCAL Mode must be activated before the control may be operated from the keypad. To activate the LOCAL Mode, first the motor must be stopped using the keypad STOP key (if enabled), remote commands or serial commands. -
Page 41: Speed Adjustment Using Local Speed Reference
Speed Adjustment using Local Speed Reference Speed Adjustment using Local Speed Reference. (This example changes the Local Speed Ref parameter from 0Hz to 10Hz). Action Description Display Apply Power If no faults and programmed for LOCAL operation. Press ENTER key Select the local speed reference. -
Page 42: Display Mode
Display Mode During normal operation the controller is in the display mode and the keypad displays the status of the control. Several output status values can be monitored. Motor Status Output Status Control Operation Value and Units The display mode also gives the user the ability to view diagnostic information and the fault log. -
Page 43: Display Screens
Display Screens Action Description Display Apply Power Display of mode & drive status. Press DISP key The fault log block. Press DISP key The diagnostic information block. Press DISP key The modified parameters block. Press DISP key Display of output frequency. Press DISP key Display of motor speed (based on output frequency). -
Page 44: Diagnostic Information Access
Diagnostic Information Access Action Description Display Apply Power Display of mode & drive status. Press DISP key Scroll to Diagnostic Info entry point. several times Press ENTER Access diagnostic information. Press DISP key Control temperature. 25.0 Press DISP key Bus voltage. Press DISP key PWM Frequency. -
Page 45: Program Mode
Program Mode Use the Program Mode to customize the control for a variety of applications by programming the operating parameters. In the Display Mode, press the PROG key to access the Program Mode. To return to the Display Mode, press the DISP key. Note that when a parameter is selected alternately pressing the DISP and PROG keys will change between the Display Mode and the selected parameter. -
Page 46: Changing Parameter Values
Changing Parameter Values Use the following procedure to program or change a parameter value. Action Description Display Apply Power If no faults and programmed for LOCAL operation. Press PROG key Access programming mode. Press Y or B key Scroll to Level 1 Input Block. Press ENTER key Access Input Block. -
Page 47: Reset Parameters To Factory Settings
Reset Parameters to Factory Settings Sometimes it is necessary to restore the parameter values to the factory settings (after new software is installed, etc.). This procedure describes how to restore factory settings. Note: All parameter values already programmed will be changed when resetting the control to factory settings. -
Page 48: Parameter Definitions
Parameter Definitions (Interface Version 2.01) – Level 1 Blocks Preset Speeds Output Preset Speed #1 Relay Output Preset Speed #2 Zero SPD Set PT Preset Speed #3 At Speed Band Preset Speed #4 Set Speed Point Preset Speed #5 Overload Set Pt Preset Speed #6 Underload Set Pt Preset Speed #7... - Page 49 Parameter Definitions – Level 2 Blocks Output Limits Brake Adjust Continued Min Output Frequency Brake on Reverse Max Output Frequency Stop Brake Time PK Current Limit Brake on Start PWM Frequency Start Brake Time Protection Process Control External Trip Process Feedback Foldback Protect Process Inverse Setpoint Source...
- Page 50 Parameter Block Definitions Level 1 PRESET SPEEDS Preset Speeds #1 – #7 Allows selection of 7 predefined motor operating speeds. Each speed may be selected using external switches connected to the control terminal strip (J4). For motor operation, a motor direction command must be given along with a preset speed command (at J4).
- Page 51 Parameter Block Definitions Level 1 Continued INPUT Operating Mode The “Operating Modes” are: Keypad, Standard Run, 7 Speed, Fan Pump 2 Wire, Fan Pump 3 Wire, Process Control, 3 Speed Analog 2 Wire, 3 Speed Analog 3 Wire, EPOT 2Wire, EPOT 3Wire. External connections to the control are made at the J4 terminal strip (wiring diagrams are shown in Section 3).
- Page 52 Parameter Block Definitions Level 1 Continued OUTPUT Continued Fault Active when a fault condition is present. Drive On Active when control is “Ready” and is being commanded to operate the motor. Reverse Active when control is operating in the reverse direction. Process Error Active when the PID control loop process is outside the range specified by the Level 2 Process Control block, AT Setpoint band parameter.
-
Page 53: Parameter Block Definitions
Parameter Block Definitions Level 1 Continued KEYPAD SETUP Keypad Stop Key Allows keypad STOP key to initiate motor stop during remote or serial operation (if set to Remote ON). Pressing STOP initiates the stop command and automatically selects Local mode. Keypad Stop Mode Causes the motor to coast to a stop or regen to a stop for a stop command. - Page 54 Parameter Block Definitions Level 1 Continued V/HZ AND BOOST Continued 3-PT Operation ON allows 3 point operation. OFF disables 3 point operation and the values of parameters V/Hz 3-PT Volts and V/Hz 3-PT Frequency are ignored. V/Hz 3-PT Volts The output voltage associated with the 3PT Frequency parameter. V/Hz 3-PT Frequency The output frequency associated with the 3PT Volts parameter.
- Page 55 Parameter Block Definitions Level 2 OUTPUT LIMITS MIN Output Frequency The minimum output frequency to the motor. During operation, the output frequency will not be allowed to go below this value except for motor starts from 0 Hz or during dynamic braking to a stop. MAX Output Frequency The maximum output frequency to the motor.
- Page 56 Note: Please record your access code and store it in a safe place. If you cannot gain entry into parameter values to change a protected parameter, please contact Baldor. Be prepared to give the 5 digit code located on the lower right side of the Keypad Display at the Enter Code prompt.
- Page 57 Parameter Block Definitions Level 2 Continued Stop Brake Time The maximum number of seconds that DC injection brake voltage will be applied to the motor windings after a stop command. After the time specified by this value, DC injection braking is automatically turned off. If DC injection braking starts at a frequency less than the DC brake frequency parameter, the stop brake time is calculated as follows: Output Frequency at Braking...
- Page 58 Parameter Block Definitions Level 2 Continued SKIP FREQUENCY Skip Frequency (#1, #2 and #3) The center frequency of the frequency band to skip or treat as a speed command dead-band. Skip Band (#1, #2 and #3) The width of the band centered about the Skip Frequency. For example, if Skip Frequency #1 is set to 20Hz and Skip Band #1 is set to 5Hz, continuous operation is not allowed in the dead-band of 15Hz to 25Hz.
- Page 59 4-22 Programming and Operation MN715J...
-
Page 60: Troubleshooting
Section 5 Troubleshooting The Baldor Series 15J Control requires very little maintenance, if any, and should provide years of trouble free operation when installed and applied correctly. Occasional visual inspection and cleaning should be considered to ensure tight wiring connections and to remove dust, dirt, or foreign debris which can reduce heat dissipation. -
Page 61: Wrong Language Selection
Wrong Language Selection The following procedure is used to set the language used by the keypad display. The table on this page shows the selections in each of the languages. Action Description Display Apply Power Press SHIFT Press PROG Displays selected language. Press ENTER Allows language selection. -
Page 62: Diagnostic Information Access
Diagnostic Information Access Action Description Display Apply Power Display of mode & drive status. Press DISP key Scroll to Diagnostic Info entry point. several times Press ENTER key Access diagnostic information. Press DISP key Control temperature. 25.0 Press DISP key Bus voltage. -
Page 63: How To Access The Fault Log
How to Access the Fault Log When a fault condition occurs, motor operation stops and a fault code is displayed on the Keypad display. The control keeps a log of the last 31 faults. If more than 31 faults have occurred, the oldest fault will be deleted from the fault log. - Page 64 Table 5-1 Fault Messages FAULT MESSAGE DESCRIPTION Invalid Base ID Failure to determine control horsepower and input voltage configuration from the Power Base ID value in software. Commun Timeout Communication failure between interface board and motor control. 2 SEC Overload Output current exceeded 3 second rating.
- Page 65 Retry test. ground. If Ground Fault is cleared, reconnect motor leads and retry the test. Repair motor if internally shorted. Replace motor lead wire with low capacitance cable. If Ground Fault remains, contact Baldor. Heatsink Motor Correct motor loading. Temp Temp Overloaded.
- Page 66 (greater load. than 250% of Increase Accel time. rated output Increase/Decrease torque boost value. current). Press “RESET” key on keypad. If fault remains, contact Baldor. Motor Will Not enough Increase Current Limit setting. Not Start Not Start starting torque.
- Page 67 Increase Decel Time. rating. Comm Communication Verify connections of all signals and grounds. Timeout failure between Press “RESET” key on keypad. If fault remains, contact Baldor. keypad and motor control. Software Keypad and Press “RESET” key on keypad. VER FLT control software Reset power.
-
Page 68: Electrical Noise Considerations
Electrical Noise Considerations All electronic devices are vulnerable to significant electronic interference signals (commonly called “Electrical Noise”). At the lowest level, noise can cause intermittent operating errors or faults. From a circuit standpoint, 5 or 10 millivolts of noise may cause detrimental operation. For example, analog speed inputs are often scaled at 5 to 10VDC maximum with a typical resolution of one part in 1,000. -
Page 69: Special Drive Situations
Special Drive Situations For severe noise situations, it may be necessary to reduce transient voltages in the wires to the motor by adding load reactors. Load reactors are installed between the control and motor. Reactors are typically 1% to 3% impedance and are designed for the frequencies encountered in PWM drives. -
Page 70: Specifications And Product Data
Section 6 Specifications and Product Data Specifications: Horsepower 0.33-1HP @ 115VAC 1-3 HP @ 230VAC 1-5 HP @ 460VAC 50/60Hz ± 5% Input Frequency Input Impedance Output Voltage 0 to Maximum Input VAC Output Current See Ratings Table Output Frequency 0 to 120Hz Service Factor Duty... -
Page 71: Keypad Display
Keypad Display: Display Backlit LCD Alphanumeric 2 Lines x 16 Characters Keys Membrane keypad with tactile response Functions Output status monitoring Digital speed control Parameter setting and display Fault log display Motor run and jog Local/Remote LED Indicators Forward run command Reverse run command Stop command Jog active... -
Page 72: Analog Inputs
Analog Inputs: (2 Inputs) Potentiometer Input 0 - 10VDC Differential Input Full Scale 0-5VDC, 0-10VDC, 4-20mA, 0-20mA Range Differential Input Common 40db Mode Rejection Input Impedance 20kW Analog Output: (1 Output) Analog Outputs 1 Assignable Full Scale Range 0-5 VDC, 0-10 VDC, 4-20mA, 0-20mA Resolution 8 bits Output Conditions... -
Page 73: Ratings
Output Current Rated Rated Rated Rated Catalog No. Input Output Continu- 60 Sec. 2 Sec. Volts Volts Overload Overload ID15J1F33-ER 0.33 0.25 ID15J1F50-ER 0.37 ID15J1F75-ER 0.75 0.56 ID15J101-ER 0.75 ID15J201-ER 0.75 ID15J201F5-ER 12.0 ID15J202-ER 10.2 13.4 ID15J203-ER 14.4 19.2 ID15J205-ER 15.2... -
Page 74: Mounting Dimensions
Mounting Dimensions MN715J Specifications and Product Data 6-5... - Page 75 6-6 Specifications and Product Data MN715J...
-
Page 76: Appendix A Dynamic Brake Hardware
Identify the control model number and determine which braking hardware is required based on the model number suffix: ER. Select appropriate braking hardware from Baldor 501 Catalog or Table A-2. Hoisting Load Calculations Calculate braking duty cycle:... - Page 77 Dynamic Braking (DB) Hardware Continued General Machinery Load Calculations: Calculate braking duty cycle: Braking Time Duty Cycle + Total Cycle Time Calculate deceleration torque: RPM change * Friction Decel (Lb*Ft) time where: = Deceleration torque in lb-ft Decel = Inertia in lb-ft time = In seconds Calculate watts to be dissipated in dynamic braking resistor: ( 0.0712 )
- Page 78 Dynamic Braking (DB) Hardware Continued Table A-3 Dynamic Braking Resistor Assemblies (RGJ) Input Continuous Watts Volts Volts Ohms Ohms 0.33 – 7.5 115 / 230 RGJ160 RGJ260 RGJ360 2 – 10 RGJ1120 RGJ2120 RGJ3120 1.0 – 1.5 RGJ1150 RGJ2150 RGJ3150 Figure A-5 100–300 Watts MN715J Dynamic Brake Hardware A-3...
- Page 79 A-4 Dynamic Brake Hardware MN715J...
-
Page 80: Appendix B Parameter Values
Appendix B Parameter Values Parameter Values (Interface Version 2.01) Level 1 PRESET SPEEDS Block Parameter Adjustable Range Factory User Setting Setting PRESET SPEED #1 0-Max Output Freq 0.00Hz PRESET SPEED #2 0-Max Output Freq 0.00Hz PRESET SPEED #3 0-Max Output Freq 0.00Hz PRESET SPEED #4 0-Max Output Freq... - Page 81 Parameter Values Level 1 Continued INPUT Block Parameter Adjustable Range Factory User Setting Setting OPERATING MODE Keypad Keypad Standard Run 7 Speed Fan Pump 2Wire Fan Pump 3Wire Process Control 3SPD ANA 2WIRE 3SPD ANA 3WIRE EPOT 2WIRE EPOT 3 WIRE ANA CMD SELECT Potentiometer Potentio-...
- Page 82 Parameter Values Level 1 Continued OUTPUT Block Continued Parameter Adjustable Range Factory User Setting Setting ANALOG OUT Frequency Frequency Freq Command AC Current AC Voltage Bus Voltage Control Temp Process Feedback Set Point Command Zero CAL 100% CAL ANALOG SCALE 10-160% 100% KEYPAD SETUP Block...
- Page 83 Parameter Values Level 2 OUTPUT LIMITS Block Parameter Adjustable Range Factory User Setting Setting MIN OUTPUT FREQ 000.0-Max Output Freq 0.00Hz MAX OUTPUT FREQ 000.0-120.00 60.00Hz PK CURRENT LIMIT 00.0-Peak Rated Current Factory Set PWM FREQUENCY 2.5, 5.0, 7.5 kHz Factory Set PROTECTION Block Parameter...
- Page 84 Parameter Values Level 2 Continued BRAKE ADJUST Block Parameter Adjustable Range Factory User Setting Setting RESISTOR OHMS 020.0-999.9 OHMS Factory Set RESISTOR WATTS 0-60000 Watts DC BRAKE VOLTAGE 00.0-15.0 5.0% DC BRAKE FREQ 000.00-Max Output Freq 6.00Hz BRAKE ON STOP OFF, ON BRAKE ON REVERSE OFF, ON...
- Page 85 SKIP FREQUENCY Block Parameter Adjustable Range Factory User Setting Setting SKIP FREQ #1 0–Max Output Freq 0.00Hz SKIP BAND #1 0–50.00Hz 0.00Hz SKIP FREQ #2 0–Max Output Freq 0.00Hz SKIP BAND #2 0–50.00Hz 0.00Hz SKIP FREQ #3 0–Max Output Freq 0.00Hz SKIP BAND #3 0–50.00Hz...
-
Page 86: Remote Keypad Mounting Template
Appendix C Remote Keypad Mounting Template MN715J Remote Keypad Mounting Template C-1... - Page 87 Remote Keypad Mounting Template 2.500 4.00 1.250 C-2 Remote Keypad Mounting Template MN715J...
- Page 88 Baldor District Offices UNITED STATES...
- Page 89 BALDOR ELECTRIC COMPANY P.O. Box 2400 Fort Smith, AR 72902–2400 (479) 646–4711 Fax (479) 648–5792 © Baldor Electric Company Printed in USA MN715J 7/04 C&J2500...
Need help?
Do you have a question about the ID15J1F50-ER and is the answer not in the manual?
Questions and answers