Sign In
Upload
Download
Table of Contents
Contents
Add to my manuals
Delete from my manuals
Share
URL of this page:
HTML Link:
Bookmark this page
Add
Manual will be automatically added to "My Manuals"
Print this page
×
Bookmark added
×
Added to my manuals
Manuals
Brands
Conair Manuals
Control Unit
Thermolator TW-1
User manual
Conair Thermolator TW-1 User Manual
Water temperature control units
Hide thumbs
1
2
3
4
5
6
7
8
9
10
11
12
13
14
15
16
17
18
19
20
21
22
23
24
25
26
27
28
29
30
31
32
33
34
35
36
37
38
39
40
41
42
43
44
45
46
47
48
49
50
51
52
53
54
55
56
57
58
59
60
61
62
63
64
65
66
67
68
69
70
71
72
73
74
75
76
77
78
79
80
81
82
83
84
85
86
87
88
89
90
91
92
93
94
95
96
97
98
99
100
101
102
103
104
105
106
107
108
109
110
111
112
113
114
115
116
page
of
116
Go
/
116
Contents
Table of Contents
Troubleshooting
Bookmarks
Table of Contents
Table of Contents
Introduction
Purpose of the User Guide
How the Guide Is Organized
Your Responsibility as a User
ATTENTION: Read this so no One Gets Hurt
D Escription
Description
What Is the Thermolator
Typical Applications
How It Works: Closed Circuit
How It Works
How It Works: Isolated Circuit
Specifications
Direct Injection (DI) Models
Isolated Circuit (IC) Models
Features and Options
Nstallation
Installation
Unpacking the Boxes
Preparing for Installation
Connecting Process and Water Supply Lines
Connecting Process and
Water Supply Lines
Purge Valve Hookups
Connecting the Main Power Supply
Connecting the Main Power
Testing the Installation TW Control
Testing the Installation TW-1, TW-2 Control
Testing the Installation
Controls
TW Control Initial Setup
TW Control Changing Temperature Units
Control Initial Setup
Control Changing Temperature Units
Temperature Units
TW-1, TW-2 Control Enabling and
Disabling Passcode Protection
Control Selecting the Temperature Control Point
Control Point
Parameters
Control Installing the Auto Start Feature
TW-2 Control Installing the
Auto Start Feature
Positioning the
Control Panel
O Peration
Operation
TW Control Features
TW Control Menu
Control Features
Starting the TW
Stopping the TW
Starting the TW-1, TW-2
Using the TW Purge Option
Using the TW-1 Purge Option
Using the TW-2 Purge Option
Using the TW Manual Purge Option
Tw Control Performing an Autotune
Cont
Control Performing an Auto Tune
An Auto Tune
Control Entering Passcodes
Passcodes
M Aintenance
Maintenance
Maintenance Schedule
Preventative Maintenance Schedule
Enclosure
Fluid Levels
Control Performing System Tests
TW-1, TW-2 Control Performing
System Tests
Control Key/Display Test
Control Input Test
Control Output Test
TW-1, TW-2 Control Disabling or
Control Calibrating Temperature Sensors
Temperature Sensors
Control Logging Operating Hours
Operating Hours
Control Pulse Mode Description
Control Pulse Mode Setup
Description
Alarm/Band and Delay
Adjustment
T Roubleshooting
Troubleshooting
Before Beginning
A few Words of Caution
Identifying the Cause of a Problem
Identifying the Cause of a Problem for the TW Control
TW Control Alarms
Control Shut down Alarms
Control Warning Alarms
Control Other Warnings
Control System Alarms
Thermolator will Not Power up
Replacing the TW Control
Checking and Replacing Fuses
Resetting Overloads
Replacing Pump Overload
Replacing the Motherboard TW-1, TW-2
Replacing the Motherboard
Replacing the Heater Contactor
Replacing the Heater
Contactor
Checking Thermocouples
Replacing Thermocouples
Repairing Cooling Valves
Repairing Solenoid Valves
Replacing Heater Elements
Removing the Pump
Disassembling and Assembling 3/4 to 2 HP Pumps
Disassembling and Assembling 3 to 7.5 HP Pumps
Disassembling and Assembling
Disassembling and Assembling
7.5 HP Pumps
Appendix
Pump Curves
Parts /Diagrams
Circuit Board
Advertisement
Quick Links
1
Tw Control Alarms
Download this manual
U S E R G U I D E
UGH025-0504
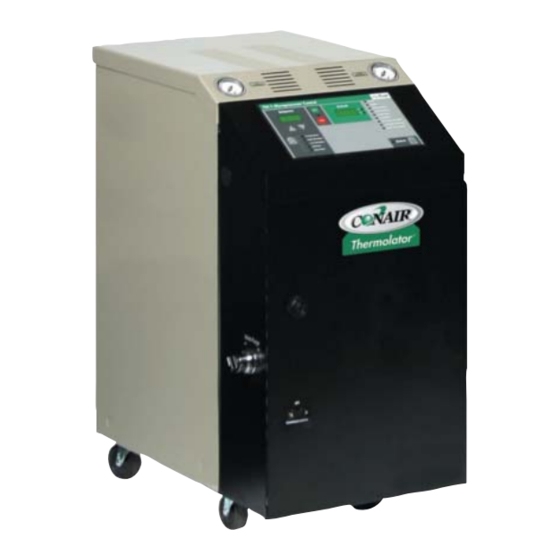
Thermolator
TW Series
Water Temperature Control Units
TW, TW-1 and TW-2
Corporate Office: 724.584.5500 | Instant Access 24/7 (Parts and Service): 800.458.1960 Parts and Service: 814.437.6861
®
www.conairgroup.com
Table of
Contents
Previous
Page
Next
Page
1
2
3
4
5
Advertisement
Chapters
Table of Contents
3
D Escription
9
Nstallation
17
O Peration
37
M Aintenance
53
T Roubleshooting
69
Table of Contents
Need help?
Do you have a question about the Thermolator TW-1 and is the answer not in the manual?
Ask a question
Questions and answers
Subscribe to Our Youtube Channel
Related Manuals for Conair Thermolator TW-1
Control Unit Conair Thermolator TW-2 User Manual
Water temperature control units (116 pages)
This manual is also suitable for:
Thermolator tw-2
Thermolator tw
Table of Contents
Save PDF
Print
Rename the bookmark
Delete bookmark?
Delete from my manuals?
Login
Sign In
OR
Sign in with Facebook
Sign in with Google
Upload manual
Upload from disk
Upload from URL


Need help?
Do you have a question about the Thermolator TW-1 and is the answer not in the manual?
Questions and answers