Panasonic KX-HNB600 User Manual
Home network system
Hide thumbs
Also See for KX-HNB600:
- Systems setup manual (40 pages) ,
- Setup manual (24 pages) ,
- Quick setup manual (2 pages)
Table of Contents
Advertisement
Advertisement
Table of Contents

Related Manuals for Panasonic KX-HNB600


Summary of Contents for Panasonic KX-HNB600
- Page 1 User’s Guide Text entity: en_us Model No.
-
Page 2: Table Of Contents
Table of Contents Welcome to the Panasonic Home Differences between window sensors and door sensors .............56 Network System! Sensor settings ..........56 Overview .............4 Camera features (overview) ......57 Monitoring ............5 Viewing the camera list ........57 Peace of mind .............6 Viewing live camera images ......57 Convenience ............7... - Page 3 Table of Contents New message alert ...........86 Standard remote access ........88 Remote commands ...........88 Answering system settings .......90 System expansion (overview) ......91 Registering devices ..........92 Deregistering devices ........92 Setting device profiles (device names, locations, and other settings) ..........92 Device signal strength ........96 Notification settings ...........96 General settings ..........98 Login password ..........99...
-
Page 4: Welcome To The Panasonic Home Network System
Welcome to the Panasonic Home Network System! Overview The Panasonic Home Network System is a wireless network of powerful devices that help you monitor, control, and manage your home. Its easy-to-use app allows you to stay in charge even when away from... -
Page 5: Monitoring
Welcome to the Panasonic Home Network System! Monitoring You can use your smartphone or tablet to watch live images from your cameras, even when away from home. You can even talk to and listen to your cameras. Select an item to learn more. -
Page 6: Peace Of Mind
Welcome to the Panasonic Home Network System! Peace of mind You can use a variety of sensors, including motion sensors, window sensors, door sensors, and the sensor features built in to cameras, to trigger camera recording features, call a pre-programmed phone number when the alarm system is triggered, sound a siren, or send a notification to your smartphone or tablet. -
Page 7: Convenience
Welcome to the Panasonic Home Network System! Convenience You can use your smartphone or tablet to turn on lights or other appliances that are connected to your smart plugs By installing keypads near frequently used entrances, you can arm and disarm the system easily on your way out or as soon as you walk in the door. -
Page 8: Damage Protection
Welcome to the Panasonic Home Network System! Damage protection You can use water leak sensors to notify your smartphone or tablet when water is detected. Select an item to learn more. -
Page 9: Communication
Welcome to the Panasonic Home Network System! Communication You can use your smartphone, tablet, or a cordless handset to make and receive phone calls using your landline while at home. Select an item to learn more. Overview The Home Network System can be expanded to suit your needs. You can choose a pre-configured bundle, add individual devices to an existing bundle, or build your own system by selecting the desired devices. - Page 10 Welcome to the Panasonic Home Network System! KX-HNB600 Indoor Camera KX-HNC200 KX-HNC210 Outdoor Camera KX-HNC600...
- Page 11 Welcome to the Panasonic Home Network System! Window/Door Sensor KX-HNS101 Motion Sensor KX-HNS102 Water Leak Sensor KX-HNS103 Glass Break Sensor KX-HNS104 Indoor Siren KX-HNS105 Smart Plug KX-HNA101 Access Keypad KX-HNK101 Keychain Remote KX-HNK102 Backup Battery KX-HNP100 Digital Cordless Handset KX-HNH100...
-
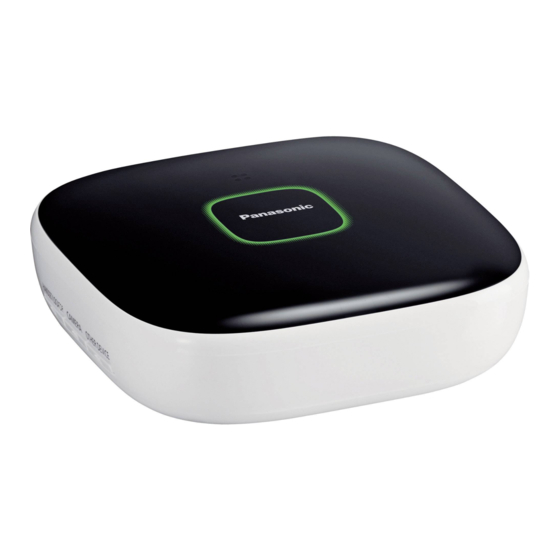
Page 12: Hub (Kx-Hnb600)
Welcome to the Panasonic Home Network System! Hub (KX-HNB600) R Joins all system devices together R Connects to your landline for making and receiving calls R Supports SD card connection for recording camera video and audio... -
Page 13: Indoor Camera (Kx-Hnc200, Kx-Hnc210)
Welcome to the Panasonic Home Network System! Indoor Camera (KX-HNC200, KX-HNC210) R Full-color camera with night vision and built-in microphone for live monitoring and recording R Built-in motion sensor (visual detection), sound sensor, and temperature sensor can be used to trigger other actions (camera recording, turning on a light, etc.) -
Page 14: Outdoor Camera (Kx-Hnc600)
Welcome to the Panasonic Home Network System! Outdoor Camera (KX-HNC600) R Full-color camera with night vision and built-in microphone for live monitoring and recording R Built-in motion detection features (image sensor and infrared sensor) can be used to trigger other actions (camera recording, turning on a light, etc.) -
Page 15: Window/Door Sensor (Kx-Hns101)
Welcome to the Panasonic Home Network System! Window/Door Sensor (KX-HNS101) R Detects when the corresponding window or door is opened R Can be used to trigger other actions (camera recording, turning on a light, etc.) -
Page 16: Motion Sensor (Kx-Hns102)
Welcome to the Panasonic Home Network System! Motion Sensor (KX-HNS102) R Uses an infrared sensor (i.e., heat sensor) to detect motion in the surrounding area R Can be used to trigger other actions (camera recording, turning on a light, etc.) -
Page 17: Water Leak Sensor (Kx-Hns103)
Welcome to the Panasonic Home Network System! Water Leak Sensor (KX-HNS103) R Uses a small probe that can detect water R Can be used to trigger other actions (camera recording, turning on a light, etc.) -
Page 18: Glass Break Sensor (Kx-Hns104)
Welcome to the Panasonic Home Network System! Glass Break Sensor (KX-HNS104) R Uses a microphone that can detect the unique sound frequencies that are produced when glass breaks R Can be used to trigger other actions (camera recording, turning on a light, etc.) -
Page 19: Indoor Siren (Kx-Hns105)
Welcome to the Panasonic Home Network System! Indoor Siren (KX-HNS105) R Uses a loudspeaker and strobe light to alert you when the alarm system is triggered R You can enable and disable the loudspeaker and strobe light for each siren... -
Page 20: Smart Plug (Kx-Hna101)
Welcome to the Panasonic Home Network System! Smart Plug (KX-HNA101) R Can be turned on and off using the app, when a sensor is triggered, or according to a schedule R Built-in overcurrent and overwattage detection for added peace of mind... -
Page 21: Access Keypad (Kx-Hnk101)
Welcome to the Panasonic Home Network System! Access Keypad (KX-HNK101) R Allows you to quickly confirm and change the system’s arm mode R Can be wall mounted inside your home near the entrances and exits for easy access... -
Page 22: Keychain Remote (Kx-Hnk102)
Welcome to the Panasonic Home Network System! Keychain Remote (KX-HNK102) R Allows you to quickly change the system’s arm mode when you come home or are going out R Can be used to trigger a pre-programmed operation, such as turning on a smart plug or sounding an... -
Page 23: Backup Battery (Kx-Hnp100)
Welcome to the Panasonic Home Network System! Backup Battery (KX-HNP100) R Supplies power to your hub or other devices in the event of a power outage R Can be used to trigger the hub to call a pre-programmed phone number in the event of a power outage... -
Page 24: Digital Cordless Handset (Kx-Hnh100)
Welcome to the Panasonic Home Network System! Digital Cordless Handset (KX-HNH100) R Makes and receives calls using your landline R Can be used to change the system’s arm mode R Displays system status... -
Page 25: System Setup
*1 Refer to the System Setup Guide included with your hub for more information. Download information is available at the web page listed below. {{"www.panasonic.net/pcc/support/tel/homenetwork/"|tolink("http://www.panasonic.net/pcc/ support/tel/homenetwork/")}} Requirements – Hub (KX-HNB600) – A wireless router – A compatible mobile device Compatible mobile devices – iPhone 4 and later, iPad (iOS 6.0 and later) –... -
Page 26: System Setup
System setup Before you begin In this procedure, the hub will enter “temporary access point mode”. In this mode, you can connect your mobile device directly to the hub using Wi-Fi®, and then use your mobile device to change the hub’s Wi-Fi settings so that the hub can connect to your wireless router. -
Page 27: System Setup
System setup When prompted, set the password used to log in to the hub while away from home and then tap [OK]. When prompted, enter a name for your mobile device and then tap [OK]. R This setting allows you to change the name assigned to your device. It can help you identify your mobile device when performing certain operations, such as deregistering or making intercom calls using a cordless handset. -
Page 28: System Setup
System setup When prompted, select whether you want to customize device profiles, i.e., the device name, location, and other settings for your devices. R If you choose not to customize the device profiles now, you can change them later if desired (see “Setting device profiles (device names, locations, and other settings)”, Page 92). -
Page 29: Usage Examples
Required devices R Mobile device (smartphone or tablet) with an Internet connection R Wireless router R Hub (KX-HNB600) R Any device equipped with a sensor that can trigger the alarm system – Indoor Camera (KX-HNC200, KX-HNC210) – Outdoor Camera (KX-HNC600) –... - Page 30 Required devices R Mobile device (smartphone or tablet) with an Internet connection R Wireless router R Hub (KX-HNB600) R Smart Plug (KX-HNA101) Required procedures R Hub initial setup and mobile device registration Refer to the System Setup Guide included with your hub.
-
Page 31: System Setup
Usage examples R Wireless router R Hub (KX-HNB600) R Indoor Camera (KX-HNC200, KX-HNC210) Required procedures R Hub initial setup and mobile device registration Refer to the System Setup Guide included with your hub. R Camera registration (if you didn’t purchase the camera as part of a pre-configured bundle) Refer to the Installation Guide included with your camera. -
Page 32: Using The App
Using the app App basics (overview) To begin, simply start the [Home Network] app on your mobile device by tapping its icon (shown below). To prevent unauthorized access to the system, you may need to enter a system password. Whether or not you need to enter the system password depends on how your mobile device is accessing the system, as explained below. -
Page 33: Using The Home Screen
Using the app your mobile device. You can change this setting later if desired in the privacy section your mobile device’s [Settings] app. Using the home screen The [Home Network] app home screen is displayed when you start the app. Connection mode The message displayed at the top of the app’s home screen indicates the current connection mode. - Page 34 Using the app [Arm: At Home] mode selected [Arm: Away] mode selected [Disarm] mode selected Mobile device is not connected to hub; arm mode is unknown Note: R If another user changes the arm mode, the arm mode icons displayed at the top of the home screen of your mobile device will not change immediately.
-
Page 35: Displaying The Options Menu
Using the app Displays the system configuration screen. Returning to the previous screen iPhone, iPad Android devices Press your device’s “back” button. Returning to the [Home Network] app home screen Press your mobile device’s home button and then start the [Home Network] app again. You can also use the shortcuts menu to return to the app’s home screen ( “Using the shortcuts menu”, Page 35). - Page 36 Using the app Accessing while away from home If a mobile device is accessing the system while away from home (i.e., accessing from a different network) R The next mobile device that tries to access the system while away from home will be allowed to access the system;...
-
Page 37: Exiting And Logging Out
Using the app R Landline calls can be received but not made. R Other settings and features may be temporarily unavailable. Exiting and logging out Exiting the app Use this procedure to exit the app. iPhone, iPad Use the standard iOS method for exiting an app. Android devices Use the standard Android method for exiting an app. - Page 38 Using the app Status notifications for Android devices The system provides information about system status by displaying status notifications, error messages, and the following icons in your mobile device’s status bar and notifications panel. Window sensor was triggered Door sensor was triggered Motion sensor was triggered Glass break sensor was triggered Water leak sensor was triggered...
-
Page 39: Confirming Status In The [Home Network] App Home Screen
Using the app Another user is using the device Hub is busy Hub’s date and time setting was corrected after a power outage Device was registered to the hub Arm mode was changed Entry delay countdown in effect Outdoor camera is too cold *1 You can disable these icons from being displayed in your mobile device’s status bar, if desired ( “[Connection Status Icon] (Android devices only)”, Page 98). - Page 40 Using the app Indicator blinking quickly Indicator blinking very quickly Indicator blinking slowly in two colors Indicator blinking in two colors Hub LED indicator No power, or LED indicator is turned off Green Normal operation, connected to wireless router Registration mode Hub is searching for wireless router Green and yellow Hub is starting up...
- Page 41 Using the app Motion sensor LED indicator The LED indicator on the motion sensor does not light during normal operation. You can press check the LED indicator to confirm the sensor’s status. No battery power Green No motion detected Registration mode (you pressed and held Motion detected Sensor is out of range of the hub, or is not registered to a hub Note:...
- Page 42 Using the app Note: R After pressing and confirming the sensor’s status, press again to turn off the LED indicator and conserve battery power. Glass break sensor LED indicator The LED indicator on the glass break sensor does not light during normal operation. You can press and check the LED indicator to confirm the sensor’s status.
- Page 43 Using the app Keychain remote LED indicator Normal operation, or no battery power Green [Disarm] mode selected (you pressed the disarm button), or you pressed the smart button Registration mode (you pressed and held Green and red Low battery Orange Signal is being sent to the hub (you are pressing a button) [Arm: Away] mode selected (you pressed the arm button) Keychain remote is out of range of the hub, or is not registered to a hub...
-
Page 44: Alarm System Features (Overview)
Important: R This system is an auxiliary system; it is not designed to provide complete protection from property loss. Panasonic will not be held responsible in the event that property loss occurs while this system is in operation. Arm modes You can arm and disarm the alarm system by changing the arm mode. -
Page 45: Arming And Disarming The Alarm System
Using the app The sensor makes a detection (a door sensor detects that its door was opened, a motion sensor detects motion, etc.). R If the sensor is configured to use entry time, entry time is in effect beginning when the sensor was triggered. -
Page 46: Alarm System Settings
Using the app – Glass break sensors: Enabled – Indoor camera motion detection features: Disabled – Outdoor camera motion detection features: Enabled Disarm Use this mode when alarm system features are not needed. Water leak sensors are always enabled, even when this mode is selected. All other sensors are disabled when this mode is selected. -
Page 47: Alert By Phone Call
Using the app Setting the exit delay alert volume The hub sounds an alert while the exit delay is counting down. To adjust the volume, tap , select the desired volume, and then tap [OK]. While adjusting this setting, the alert will sound from the hub so that you can confirm what the alert sounds like and its volume. - Page 48 Using the app Note: R In order to use this feature, the hub must be connected to your landline. For information about phone line connection, refer to the System Setup Guide included with your hub. Configuring the alert by phone call feature From the [Home Network] app home screen, tap [Settings].
-
Page 49: Alarm System Pin
Using the app Alarm system PIN The alarm system PIN is required when using certain devices to change the arm mode or cancel an alert. You can use the app to change the PIN. From the [Home Network] app home screen, tap [Settings]. Tap [Arm Settings]. -
Page 50: Creating Smart Control Scenarios
Using the app I want the lights to turn on automatically when I come home. Which device: Foyer smart plug When: When the alarm system is armed and the app detects that your mobile device has reconnected to your wireless router (because you came home) What: Turn the smart plug on I want to turn on my bedside lamp if my baby starts crying. - Page 51 Using the app Tap the field next to [Recording Duration] (for cameras) or [End Time] (for smart plugs), select the desired setting, and then tap [OK]. R The maximum recording time (for cameras) is 15 minutes. The maximum power-time (for smart plugs) is 24 hours.
-
Page 52: Turning Smart Control Scenarios On And Off
Using the app R When using a smart control scenario to record camera images, there may be a short delay after the sensor is triggered before recording starts. Using [Trigger when Home Wi-Fi Connects] to trigger smart control scenarios You can use your mobile device’s Wi-Fi connection to your wireless router as a trigger to turn on a smart plug. -
Page 53: Sensor Features (Overview)
Using the app Erasing all scenarios that control a device From the [Home Network] app home screen, tap [Smart Control]. iPhone, iPad Swipe the desired device to the left and then tap [Delete]. Android devices Tap and hold the desired device and then tap [OK]. Sensor features (overview) The system supports a wide range of sensors. -
Page 54: Viewing Sensor Status
Using the app Description Function Uses Temperature sensor in indoor Detects temperature – Smart control camera – Temperature alert feature (KX-HNC200, KX-HNC210) Overcurrent and overwattage Detects when the connected – Overcurrent or overwattage sensor in smart plug electric device draws too much alert feature (KX-HNA101) current or wattage... -
Page 55: Viewing Sensor History
Using the app Motion sensor Water leak sensor Glass break sensor Camera motion sensor Siren Keychain remote Keypad Backup battery Viewing sensor history You can view a log of previous alarm events, including the date and time when sensors were triggered and when the arm mode was changed. -
Page 56: Differences Between Window Sensors And Door Sensors
Using the app Tap [Alert Call Log]. R To update the information displayed and view the latest information, tap [Refresh]. Differences between window sensors and door sensors You can select whether a KX-HNS101 Window/Door Sensor functions as a window sensor or as a door sensor. -
Page 57: Camera Features (Overview)
Using the app Camera features (overview) You can use indoor and outdoor cameras to monitor and record the sights and sounds of the area where the cameras are located. Cameras have built-in motion detection features that, when triggered, allow cameras to record images automatically or send a notification to your mobile device. Additionally, built-in speakers and microphones allow you to talk to anyone who is near the camera. -
Page 58: Recording Camera Images (Manual Recording)
Using the app Using night vision If there is not adequate light to illuminate the subject, such as at night, the camera automatically switches to night vision mode. When night vision mode is active, colors may appear different from normal. Camera viewing options The following items are available in the options menu (see “Displaying the options menu”, Page 35) while viewing live images from a single camera. -
Page 59: Taking Snapshots
Using the app Tap [Stop] to stop recording. Note: R You can use smart control scenarios to record images. See “Smart control features (overview)”, Page 49. R The maximum recording time is 15 minutes. R If [The hub’s SD card is full.] is displayed, the hub’s SD card is full and new recordings cannot be saved. -
Page 60: Viewing The Recording List
Using the app Tap [Lullaby]. Select the desired lullaby and then tap [OK]. R The lullaby starts playing. To stop the lullaby, tap [Lullaby] again. R Lullaby playback stops automatically after 30 minutes. Note: R If you talk to the camera (see “Talking to the camera”, Page 59) while a lullaby is playing, the lullaby stops. -
Page 61: Playing Back Recordings
Using the app Playing back recordings From the [Home Network] app home screen, tap [Camera]. Tap [Recording List]. Select a recording date. Tap the desired recording. R The recording is played back. Playback controls The following controls are available during playback. Starts or resumes playback Pauses playback Stops playback... -
Page 62: Temperature Alert (Indoor Cameras Only)
Using the app To erase all recordings Tap [Delete All]. To erase selected recordings Tap [Delete Selected Contents], and then select the dates or recordings that you want to erase. Tap [OK]. Note: ® [OK]. R You can also erase a recording during playback by tapping Temperature alert (indoor cameras only) You can configure the camera to send notifications if the camera’s ambient temperature is too cold or too hot. -
Page 63: Camera Settings
Using the app Select the device that you want to change settings for. Tap [Sound Sensor]. Slide the [Sound Sensor] switch to select whether or not the system notifies you if the camera’s microphone detects sound. Select the desired setting. –... - Page 64 Using the app Note: R Higher frame rates mean images are refreshed faster and moving subjects are displayed more smoothly, however, images displayed on your mobile device may be delayed and sound may cut out or be delayed when talking to the camera, especially over a slow or congested network connection.
- Page 65 Using the app Select the desired setting. – [High]: The selected sensor is very sensitive to changes, i.e., even a small change will trigger the sensor. – [Normal]: The selected sensor is moderately sensitive to changes. – [Low]: The selected sensor is somewhat sensitive to changes. –...
-
Page 66: Information About Sd Cards
Using the app Tap the camera image of the desired camera. Open the options menu (see “Displaying the options menu”, Page 35). Tap [Outdoor Camera Settings] or [Indoor Camera Settings]. Tap [Brightness]. to decrease or increase the image brightness. Temperature alert (indoor cameras only) To configure the camera to send notifications if the camera’s ambient temperature is too cold or too hot, see “Temperature alert (indoor cameras only)”, Page 62. -
Page 67: Backup Battery Features (Overview)
Using the app Example: 2M123455.mp4 This file is a manual recording (“M”) from camera 2 (“2”) that started at 12:34 PM and 55 seconds (“123455”). Backup battery features (overview) In the event of a power outage, a backup battery can supply power to your hub or to another connected device. -
Page 68: Assigning A Device To A Backup Battery
Using the app Select the phone numbers that you want to erase, and then tap [OK]. R These phone numbers will also be erased from the alert by phone call feature ( “Alert by phone call”, Page 47). Assigning a device to a backup battery Set this setting to match the device that is connected to the backup battery. -
Page 69: Turning Smart Plugs On And Off
Using the app What is overcurrent and overwattage? Overcurrent and overwattage are potentially dangerous situations in which an electric device draws too much electrical current or wattage. They could be the result of short circuits and device malfunctions, which could cause fire and other hazards. If a smart plug’s overcurrent or overwattage sensor is triggered, the smart plug turns off and sends a notification. -
Page 70: Viewing Smart Plug History
Using the app Select the [Individual] tab. R The status of each smart plug is displayed under the appropriate category name as explained below. – [Excessive Power]: Smart plugs that are reporting overcurrent or overwattage. The time each smart plug detected the error is also displayed. –... -
Page 71: Phone Features (Overview)
Using the app R A smart plug’s power consumption will be displayed as 0.00 kWh for about an hour after it is connected, even if it has consumed power during that time. Phone features (overview) By connecting the hub to your landline, you can use your mobile device as an extension of your home phone. -
Page 72: Other Features Available During Landline Calls
Using the app Tap [Landline] or [Smartphone] according to the line you want to use to make the call. If you made a landline call, tap [Disconnect] to end the call. Note: R If you are talking on a landline call and then receive and answer a mobile call, the landline call is either disconnected or put on hold, according to the [Landline Call Handling] setting (see “App behavior settings”, Page 79). -
Page 73: Answering Landline Calls
R If the flash/recall feature does not function properly, you may need to change the [Flash Time] setting ( “Landline settings”, Page 81). R This icon varies depending on the hub’s model number. Model number Icon KX-HNB600 FLASH KX-HNB600C Callwait KX-HNB600LC... - Page 74 Using the app Select the cordless handset that you want to call. When finished, tap [Disconnect] to end the call. Note: R You cannot use the app to make intercom calls to other mobile devices. R iPhone, iPad When you are talking on an intercom call, the intercom call is disconnected automatically if you receive a mobile call.
-
Page 75: Call Logs
Using the app Call logs You can use call logs to confirm previous landline call history, call back previous callers, and add new phone numbers to your contacts. Viewing the call log From the [Home Network] app home screen, tap [Phone]. Open the [Call log] screen. -
Page 76: Phonebook Features
Using the app Tap the desired tab to view outgoing or incoming landline calls. Open the options menu (see “Displaying the options menu”, Page 35). To erase all calls Tap [Delete All Calls]. To erase selected calls Tap [Delete Selected Calls], tap next to the desired item, and then tap [Delete]. -
Page 77: Blocking Incoming Calls
Using the app Phone numbers stored with country codes If you have added the country code to phone numbers stored in your mobile device (i.e., if you begin certain phone numbers with “+” and a country code), those phone numbers will be converted according to the hub’s phone number conversion settings (see “Phone numbers with country codes”, Page 82). - Page 78 Using the app Blocking ranges of numbers By storing only the first few digits of a phone number, such as the area code, you can block all phone numbers that begin with the number you stored. From the [Home Network] app home screen, tap [Settings]. Tap [Telephone Settings].
-
Page 79: Sound Settings
Using the app Open the options menu (see “Displaying the options menu”, Page 35). Tap [Delete All] ® [OK]. Sound settings You can change various settings related to how your mobile device behaves when landline calls and intercom calls are received. From the [Home Network] app home screen, tap [Settings]. -
Page 80: Voicemail Settings
Tap [Telephone Settings]. R The next step varies depending on the hub’s model number. KX-HNB600, KX-HNB600C, KX-HNB600LC, KX-HNB600ME Tap [Call Block], and then slide the [First Ring] switch to the desired position. R This setting only applies when there are phone numbers saved in the blocked caller list. -
Page 81: Landline Settings
This setting automatically maintains receiver volume at the proper level depending on the current telephone line condition. Set the line mode to “[A]” if telephone line condition is not good. Model information *1 [Dial Mode] is available for the following hub model numbers. – KX-HNB600 – KX-HNB600C – KX-HNB600FR – KX-HNB600HM –... -
Page 82: Phone Numbers With Country Codes
KX-HNB600SA 100 ms KX-HNB600TW 600 ms *3 [Line Mode] is available for the following hub model numbers. – KX-HNB600 – KX-HNB600C – KX-HNB600LC – KX-HNB600ME Phone numbers with country codes If you store phone numbers in your mobile device’s contacts using “+” and the country code, we recommend that you use this procedure to store the following codes. -
Page 83: Caller Id Support
Using the app From the [Home Network] app home screen, tap [Settings]. Tap [Telephone Settings]. Tap [Country / Region]. Select the appropriate setting and then tap [OK]. R The hub restarts. Model information *1 This feature is available for the following hub model numbers. –... -
Page 84: Answering System Features (Overview)
Using the app Answering system features (overview) The hub features a built-in answering system that can answer calls received on your landline after a certain number of rings. When it answers a call, it plays a greeting message and can then record caller messages. -
Page 85: Playing Your Messages
Using the app Tap [Answer on] or [Answer off]. Playing your messages When the answering system has recorded new messages, is displayed in the status bar (Android devices only) and your mobile device’s notification feature displays a notification. To play back your messages easily, tap the notification and then use the playback controls described below. -
Page 86: Remote Operation Features (Overview)
Using the app The [Answering Device] setting may be called [Answering System]. Tap [Greeting]. Tap [Record Greeting]. Tap [OK] to start recording. R Recording starts after the beep. Tap [Stop] to stop recording and save your greeting message. R Your greeting message is played back for confirmation. Playing your greeting message From the [Home Network] app home screen, tap [Settings]. - Page 87 Using the app First time setup From the [Home Network] app home screen, tap [Settings]. Tap [Answering Device]. R Names of features and settings may vary depending on your mobile device’s language settings. The [Answering Device] setting may be called [Answering System]. Tap [New Message Alert].
-
Page 88: Standard Remote Access
Remote commands You can press dial keys to operate the answering system as explained below, without waiting for the voice guidance to prompt you. KX-HNB600, KX-HNB600C, KX-HNB600LC, KX-HNB600ME Repeat message (during playback) Skip message (during playback) - Page 89 End remote operation and end call *1 If pressed within the first 5 seconds of playback, the previous message is played. *2 Available for the following models only. – KX-HNB600 (when Spanish is selected as the voice prompt language) – KX-HNB600LC – KX-HNB600ME *3 Available for 10 seconds after listening to new messages.
-
Page 90: Answering System Settings
Using the app Turning on the answering system remotely Important: R The answering system must be activated in order to turn it on remotely ( “Activating the answering system”, Page 84). Dial your phone number from a touch-tone phone. Let the phone ring until a long beep is heard. R The number of rings varies by model, from 9–20 rings. -
Page 91: System Expansion (Overview)
[Voice Prompt] setting (certain models only) This setting determines the language used for answering system voice guidance prompts. *1 This feature is available for the following hub model numbers. – KX-HNB600 – KX-HNB600C System expansion (overview) You can expand the system by registering additional devices to the hub. -
Page 92: Registering Devices
Using the app *1 8 mobile devices can be registered to the hub, however, only the first 4 can use phone features. Registering devices If you purchased any devices separately from the hub, you must register them to the hub before you can use them. - Page 93 Using the app Device profiles for cameras From the [Home Network] app home screen, tap [Settings] ® [Device Profiles] ® [Camera]. Select the device that you want to change settings for. R Settings that affect all cameras are available by tapping [Common Settings]. See “General camera settings”, Page 63 for more information.
- Page 94 Using the app – [Strobe Light & Sound]: Allows you to select whether the siren’s strobe light flashes and its siren sounds when the alarm system is triggered. – [Installation Test]: Allows you to sound the siren as a test. –...
- Page 95 – [Key Tone]: This setting determines whether key tones are heard when you enter numbers using the touchpanel buttons. Tap [OK]. *1 [Talking Notification] is only available for the following hub model numbers. – KX-HNB600 – KX-HNB600E – KX-HNB600G Device profiles for backup batteries From the [Home Network] app home screen, tap [Settings] ®...
-
Page 96: Device Signal Strength
Using the app Device signal strength You can check the signal strength of each device’s wireless connection to the hub. From the [Home Network] app home screen, tap [Settings]. Tap [Device Registration]. Tap [Signal Strength]. Select the type of device that you want to check. Tap the name of the device that you want to check. - Page 97 Using the app [Hub Powered Up] This setting determines whether a notification is displayed when the hub starts up. This notification can be used to indicate that a power outage occurred. Camera notifications [Camera Recording] This setting determines whether a notification is displayed when camera images are being recorded. [Temperature Alert (Indoor Camera)] This setting determines whether a notification is displayed when an indoor camera’s temperature sensor is triggered.
-
Page 98: General Settings
Using the app General settings You can customize general system settings to suit your needs. From the [Home Network] app home screen, tap [Settings]. Tap [General]. Change the settings as desired. R Each setting is explained in this section. [Change Login Password] setting See “Login password”, Page 99. -
Page 99: Login Password
Using the app [Firmware Update] feature See “Hub firmware”, Page 99. [Firmware Version] information Information about the system’s firmware is displayed. [App Version] information Information about the [Home Network] app installed on your mobile device is displayed. Login password The login password is used to access the system while away from home. From the [Home Network] app home screen, tap [Settings]. -
Page 100: Network Features
Using the app If the “firmware update is available” message is displayed automatically If the hub finds that a firmware update is available, it will display a message automatically that prompts you to update the firmware. Follow the on-screen instructions to update the firmware. Network features Changing your mobile device’s name You can change the name assigned to your device. -
Page 101: Setting The Hub's Wi-Fi Settings Again
Using the app Note: R You cannot delete the wireless access point that your mobile device is currently connected to. [Port Forwarding] settings These settings are only required if you need to configure your wireless router’s port forwarding feature in order to access the hub while away from home. -
Page 102: Storing Your Security Service Account Number (Certain Models Only)
Using the app Storing your security service account number (certain models only) You can store your account number in the hub and integrate the hub with your security service. From the [Home Network] app home screen, tap [Settings]. Tap [Order Number]. Enter your account number and then tap [OK]. -
Page 103: Resetting The Hub's Settings
Using the app From the [Home Network] app home screen, open the options menu (see “Displaying the options menu”, Page 35). Tap [Deregistration from Hub] ® [OK]. Resetting the hub’s settings From the [Home Network] app home screen, tap [Settings]. Tap [Reset Hub]. -
Page 104: Open Source Software Information
{{"www.panasonic.net/pcc/support/tel/homenetwork/"|tolink("http://www.panasonic.net/pcc/support/tel/ homenetwork/")}} At least three (3) years from delivery of this product, Panasonic System Networks Co., Ltd. will give to any third party who contacts us at the contact information provided below, for a charge of no more than the cost of physically distributing source code, a complete machine-readable copy of the corresponding source code and the copyright notices covered under the GPL and the LGPL. -
Page 105: Troubleshooting
If you experience any trouble while using the system, the following information will solve most problems. If the trouble persists, refer to the appropriate section in this chapter according to the trouble you are experiencing. For the latest troubleshooting information, visit {{"www.panasonic.net/pcc/support/tel/ homenetwork/"|tolink("http://www.panasonic.net/pcc/support/tel/homenetwork/")}}. Power Use these steps to make sure that each of your system devices are receiving power. - Page 106 Troubleshooting Make sure your devices are registered to the hub. Register them if they are not ( “Registering devices”, Page 92). →Cameras Check the camera list ( “Viewing the camera list”, Page 57). If a camera is displayed in the camera list, it is registered;...
- Page 107 Troubleshooting →Deregister your mobile device ( “Deregistering devices”, Page 92) and register it again ( “Registering other mobile devices to the hub”, Page 28). [The hub is not responding. Use another handset to cancel the registration.] is displayed Error code: E2-04 R There was a problem when deregistering your mobile device.
- Page 108 Troubleshooting R If you continue to have trouble performing initial setup, you may be able to configure the hub’s Wi-Fi settings using the WPS feature of your wireless router. →See “Configuring the hub using your wireless router’s WPS feature”, Page 108. Configuring the hub using your wireless router’s WPS feature If you continue to have trouble performing initial setup, you may be able to configure the hub’s Wi-Fi settings using the WPS feature of your wireless router.
- Page 109 Troubleshooting →If you pause for too long while operating certain features, the system will cancel the operation so that other users can access the system. Try again. [Deregistered by other user] is displayed R Another user deregistered your mobile device. →Register your mobile device to the hub again ( “Registering other mobile devices to the hub”, Page 28).
- Page 110 Troubleshooting →Adjust the date and time setting ( “[Time Adjustment] setting”, Page 98). Sometimes I cannot access the system while at home R There is too much traffic on your home network. →Wait for network traffic to decrease. →Refer to the operating instructions included with your wireless router for other possible solutions. R Your mobile device is discovering too many nearby wireless networks.
- Page 111 Troubleshooting →If many notifications were sent from the hub in a short time, notifications may be received late. This is a characteristic your mobile device’s notifications service. The siren stops sounding or flashing before I cancel an alert R When the alarm system is triggered, the hub signals the siren to begin sounding or flashing its strobe light.
- Page 112 Troubleshooting Smart plugs stay on longer than they should be R If you configure a smart control scenario to turn on a smart plug when triggered by a sensor, and if the sensor is triggered multiple times, the smart plug may stay turned on longer than anticipated. →This is not a malfunction.
- Page 113 Troubleshooting →Format the card ( “SD card formatting”, Page 66). R You just inserted the SD card into the hub. →Wait and try again. [Failed] is displayed R An error occurred while saving the picture. →Check all connections and try again. Colors in camera images appear different from normal R The camera is aimed at a dark location, or it is nighttime.
- Page 114 Troubleshooting – Areas where animals move in a limited area, such as birds in a nest or small animals close to the ground – Areas where brightness significantly, such as when shadows form in the afternoon, lights turn on at night, or vehicles pass by at night with their headlights or brakelights on You can prevent these false detections by adjusting the position of the camera, by limiting the detection area so that the camera ignores motion in unneeded areas of the camera’s image ( “Detection area”, Page 65), or by turning video motion detection off (outdoor cameras only;...
- Page 115 Troubleshooting →Arm the alarm system ( “Arming and disarming the alarm system”, Page 45). R The sensor is not enabled for the current arm mode. →Change the settings for the current arm mode ( “Alarm system settings”, Page 46). R The desired feature is not enabled. →Temperature alert (indoor cameras only) and sound alert (indoor camera only) do not function as part of the alarm system.
- Page 116 Troubleshooting →Use a cordless handset to change the call restriction feature settings as appropriate. Refer to the Operating Instructions included with your cordless handset. (Note that this feature is supported by certain models only.) I cannot use phone features R You are away from home or your mobile device is not connected to the same wireless router as the hub.
-
Page 117: About This Document
About this document Compatible environments For best results when viewing this document, we recommend the following environments. When using a computer – Internet Explorer 9 or later – Firefox, latest version – Google Chrome, latest version – Safari 4.1 or later When using a mobile device –... - Page 118 Notes...
- Page 119 Notes...
- Page 120 PNQP1107MA/eng CC1014WK12016...
Need help?
Do you have a question about the KX-HNB600 and is the answer not in the manual?
Questions and answers