Table of Contents
Advertisement
Advertisement
Table of Contents

Related Manuals for Techkon SpectroDrive


Summary of Contents for Techkon SpectroDrive
- Page 1 TECHKON Manual Scan-Measurement-System SpectroDrive Software ExPresso 3...
- Page 2 TECHKON software is the intellectual property of TECHKON GmbH. Purchase of the soft- ware grants the user a license for the use on one computer only. Programs may only be copied for back-up purposes. TECHKON can not be held liable for any damages that may occur by the use of the software.
-
Page 3: Chapter 2: Installation Of Spectrodrive And The Software Expresso
We are happy that you have selected this high-quality measurement instrument. It will be a valuable tool for your day-to-day quality control tasks. With this manual we invite you to learn how to use SpectroDrive, the software ExPresso 3 and Spectro- Connect. -
Page 4: Table Of Contents
Chapter 2: Installation of SpectroDrive and the software ExPresso 3 2.1 Assembly of SpectroDrive ..............10 2.2 Installation of the software ExPresso 3 ........... 11 Chapter 3: How to use SpectroDrive and the software ExPresso 3 3.1 Operation of SpectroDrive ..............12 3.2 Care and maintenance ................. 15 3.3 Software overview ................ -
Page 5: Chapter 1: General Description Of The Measurement System
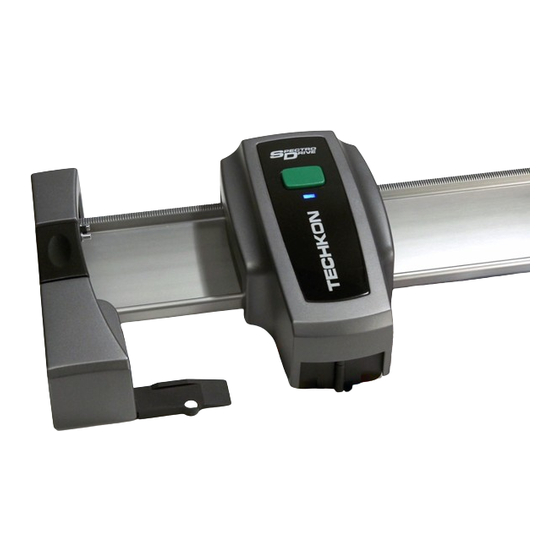
Installation is simple as well. After a few minutes the system is operable and ready to take measurements. SpectroDrive can be used as a scanning device as well as a hand-held instrument for single measurements. Just take the device from the horizontal track and position it wherever you want to take a color measurement. - Page 6 • The mounting table can be inclined up • Automatic polarizing filter function for to 45° densitometric and colorimetric mea- • Delivery contains all components surements supplied in a practical carrying case Page 6 Manual TECHKON SpectroDrive Chapter 1 – General description...
- Page 7 SpectroDrive is its flexi- SpectroDens is the mo- instantly to the PC. bility to be used with any bile, multi-purpose spectro- press type or format. densitometer which can be used at any location. Manual TECHKON SpectroDrive Chapter 1 – General description Page 7...
- Page 8 105: 1280 mm 1800 mm scan length) on request Two different performance packages The scan-measurement device SpectroDrive and the Microsoft Windows software ExPresso form a complete quality control system for increasing productivity and qual- ity of a printing press. There are two different versions available:...
-
Page 9: Packing List
Recommended touch-screen: Elotouch 1727L 17" Optional accessories: • Print control strips TECHKON TCS, available as EPS- and pdf-files on CD (can be downloaded free of charge at www.techkon.com) • Software-upgrades from ExPresso Basic to ExPresso Pro • Replacement parts: left holder with charging console and white standard, rechargeable battery, measurement lamp. -
Page 10: Assembly Of Spectrodrive
Chapter 2 Installation of SpectroDrive and the software ExPresso 3 2.1 Assembly of SpectroDrive • Connect the horizontal track with the left and right holder as shown on the images. Before placing the holders upside down, put a soft material underneath to avoid scratches. -
Page 11: Installation Of The Software Expresso 3
1. Make sure that the USB-dongle (software protection key) and the module for wireless Module data transmission are NOT connected to the for wire- PC. Insert the TECHKON CD into the CD less data drive of the computer. transmis- sion 2. -
Page 12: Operation Of Spectrodrive
It can be helpful to slide the measurement device from one side to the other in order to check that the measurement aperture covers the complete color bar during a scan. Page 12 Manual TECHKON SpectroDrive Chapter 3 – How to use SpectroDrive... - Page 13 White backing for single printed papers and black backing for double printed sheets in order to avoid that the back printed side might shine through the paper and influence the measurement. Manual TECHKON SpectroDrive Chapter 3 – How to use SpectroDrive Page 13...
- Page 14 A paper white calibration can be carried out by keeping the green button pressed for a few seconds. The measurement aperture has to be on top of a non-printed area of the sheet. When SpectroDrive is on the track, the paper white calibration is performed by software command (see p. 35). Automatic turn off When the device is not located at the left holder in the charging position and is not in use, it will switch off automatically after two minutes.
-
Page 15: Care And Maintenance
3.2 Care and maintenance SpectroDrive is a highly-precise optical instrument. It is designed to work in harsh, industrial environments. However, it should be handled with care. Avoid mechanical shocks, heat, dusty or humid environments! Cleaning The measurement head with the optical system is sealed against dust and dirt. -
Page 16: Error Handling
Error handling • Should SpectroDrive do not work properly, first check, if the ExPresso software is running correctly. The status bar in the lower right corner will display, if the device, the module for wireless data transmission and the USB-dongle communicate correctly with the PC. - Page 17 TECHKON SpectroDrive is to a large extend maintenance free. Nevertheless we recommend to validate the complete functionality of the devices in a 24 months time interval in the TECHKON service center. We offer a complete device check as a service package. Please contact us for details.
- Page 18 To prevent damages to the battery make sure only to pull the plug, not the cable. 3. Disconnect the lamp as shown in the picture. Be sure to disconnect the black cable only. Page 18 Manual TECHKON SpectroDrive Chapter 3 – How to use SpectroDrive...
- Page 19 12. Recalibrate the device on the white calibration standard. Open the window at “Settings Measuring conditions Mea- surement devices and press “Absolute White Calibration” (see p. 34). Manual TECHKON SpectroDrive Chapter 3 – How to use SpectroDrive Page 19...
-
Page 20: Software Overview
P. 46 P. 48 P. 51 (GrayGuide P. 52) P. 48 P. 53* P. 54* P. 57* P. 58* P. 57 P. 60 P. 61 * ExPresso Pro only Page 20 Manual TECHKON SpectroDrive Chapter 3 – How to use SpectroDrive... - Page 21 Settings: P. 26 P. 27 P. 26 P. 29 P. 31 P. 33 P. 31 P. 37 P. 38 P. 39 P. 39 Exit: P. 62 Manual TECHKON SpectroDrive Chapter 3 – How to use SpectroDrive Page 21...
- Page 22 The bottom area of the screen is a status line (4.), showing at the right side the connection status of the module for wireless data transmission, of the measurement device (SpectroDrive, SpectroDrive Simulator or SpectroJet) and of the USB-dongle. When moving the mouse pointer on the icons of one of these components, you get additional information, e.
-
Page 23: Software Settings
3.4 Software settings When the software is started by a double click on the TECHKON ExPresso icon, the software routine checks first, while displaying the intro icon, whether a measurement device, a dongle and a module for wireless data transmission are connected. - Page 24 Page 24 Manual TECHKON SpectroDrive Chapter 3 – How to use SpectroDrive...
- Page 25 “Settings”. Finally you have to click on the “Select” button in the “Print job” section to define or select a print job. Now all menu items in the “Print job” section can be used. Manual TECHKON SpectroDrive Chapter 3 – How to use SpectroDrive Page 25...
- Page 26 You find this possibility of quick editing in all of the “Print job”- and “Settings”-win- dows which contain such listings. The order of the listed elements can be changed by clicking in the header of the register. Page 26 Manual TECHKON SpectroDrive Chapter 3 – How to use SpectroDrive...
- Page 27 The definition of new inks makes it possible to edit and measure customary spot colors, for example the colors of a HKS color book. • First click on the “New” button“ (2.), to open the window “Define new ink”. Manual TECHKON SpectroDrive Chapter 3 – How to use SpectroDrive Page 27...
- Page 28 “Inks” menu. Thus any customary spot colors or individual colors can be measured and added to the ink listing. Page 28 Manual TECHKON SpectroDrive Chapter 3 – How to use SpectroDrive...
- Page 29 In this menu section the list of color bars included in the database is displayed. We recommend the use of the TECHKON TCS print control strips, because their design is based on ink zones and covers all relevant measurement patches. Other definitions can be loaded by using the “Import”...
- Page 30 • Finally the “Save” button will save the currently generated color bar (6.) and it will be listed automatically in the first place of the already existing color bars. Page 30 Manual TECHKON SpectroDrive Chapter 3 – How to use SpectroDrive...
- Page 31 Confirm the process with “OK”. The new target set will appear in the list of the already defined target sets in the menu window (2.), but it does not yet contain colors. Manual TECHKON SpectroDrive Chapter 3 – How to use SpectroDrive Page 31...
- Page 32 “Settings” Printing conditions Inks” (see p. 27). • Additionally you can change the target values and tolerances of this color manually by editing the text boxes or take the measurement data of SpectroDrive by pressing the “Measure” but- ton (2.).
- Page 33 By clicking on the “Settings” button in the right lower corner, of the “Measurement devices” menu, the window “TECHKON SpectroDrive” opens, which is divided into four sections and offers basic settings options.
- Page 34 “Reset slope values” function activated, the device will be reset into its factory-made state. The pre-settings for colorimetric measurements are: polarization filter off, white ref- erence is absolute white, illuminant is D50, observer is 2° and DE formula is CIELAB. Page 34 Manual TECHKON SpectroDrive Chapter 3 – How to use SpectroDrive...
- Page 35 “home position”. After a calibra- tion has been carried out properly, it will be confirmed by the information window. TECHKON SpectroCheck (optionally available) is a color reference used to check the measuring accuracy of the SpectroDrive device.
- Page 36 You can download the latest firmware for you device free of charge in the internet: www.techkon.com Service Software Folder: SpectroDrive / TECHKON Ex- Presso TECHKON SpectroDrive Firmware 3.x. The firmware version of the con- nected SpectroDrive can be seen in the information window “Measurement device”.
- Page 37 Here you can edit format specific settings. For example in “Digital Information Export” you can choose between text- and the JDF-format. For all export formats the option “Automatic export” (4.) can be activated. Manual TECHKON SpectroDrive Chapter 3 – How to use SpectroDrive Page 37...
- Page 38 GrayGuide targets” opens now a menu window, which allows to adjust the target values manually. Gray patches as well as the automatic paper white can be edited. If required all values can be reset to the G7™ defaults. Page 38 Manual TECHKON SpectroDrive Chapter 3 – How to use SpectroDrive...
- Page 39 Settings: • Touchscreen support: Must be active, when a touch-sensitive screen is connected, to provide a virtual keyboard for the text input. Manual TECHKON SpectroDrive Chapter 3 – How to use SpectroDrive Page 39...
- Page 40 You have to quit ExPresso for this procedure and start it again after the database has been restored. Restoring of the database leads to an overwriting of the recently saved data in ExPresso. Page 40 Manual TECHKON SpectroDrive Chapter 3 – How to use SpectroDrive...
-
Page 41: Defining And Running A Print Job
(for the top side as well as for the reverse side). Manual TECHKON SpectroDrive Chapter 3 – How to use SpectroDrive Page 41... - Page 42 During measurements it will be shown in the lower left section of the status bar. The section “Customer name” and a text box for detailed “Remarks” concerning the print job can be used optionally. Page 42 Manual TECHKON SpectroDrive Chapter 3 – How to use SpectroDrive...
- Page 43 An inking unit can be kept empty as well (2.). For example, if a 6-color press is used only for CMYK-print, the last two printing units can remain empty. Manual TECHKON SpectroDrive Chapter 3 – How to use SpectroDrive Page 43...
- Page 44 1. On the left side of the window a “Color bar” can be selected, after having been defined or pre-installed in “Settings Printing conditions Color bar” (see p. 29 f.). Page 44 Manual TECHKON SpectroDrive Chapter 3 – How to use SpectroDrive...
- Page 45 The green arrow located left from “Scan color bar length” indicates that the color bar has to be measured. By pressing the green measurement button (2. in picture p. 44), SpectroDrive scans the printing sheet an sets the length of the color bar. The green arrow disappears, if a color bar length has been scanned and captured successfully.
- Page 46 As the printing units have been filled with ink, now they are assigned with target and tolerance values; preferably tolerance sets according to the printing standard ISO 12647 for the paper classes 1 – 5, which are already pre-installed. Page 46 Manual TECHKON SpectroDrive Chapter 3 – How to use SpectroDrive...
- Page 47 When a target set has been confirmed, just click on the button above the printing unit (3.). It changes into an “Edit” button, which opens the follow- ing window: Manual TECHKON SpectroDrive Chapter 3 – How to use SpectroDrive Page 47...
- Page 48 2. Measurement values out of tolerance will be marked with red top. 3. This section displays in detail the average values of the measurement parameters of the single printing units. Page 48 Manual TECHKON SpectroDrive Chapter 3 – How to use SpectroDrive...
- Page 49 3. Clicking on the button with the printer icon opens the connection to the printer, which has been already defined in “Settings System / Software”. The printer option allows to print out the displayed window. Manual TECHKON SpectroDrive Chapter 3 – How to use SpectroDrive Page 49...
- Page 50 8. “To top side” respectively “to reverse side” switches between top- and reverse-printing, if a press with a reversing after a printing unit has been selected. Page 50 Manual TECHKON SpectroDrive Chapter 3 – How to use SpectroDrive...
- Page 51 C = 50 %, M = 40 % and Y = 40 %. The color bars TECHKON TCS Digital include a gray balance patch compliant with ISO 12647 in every ink zone. The gray balance display will show densitometric gray balance values for CMY in a bar graph.
- Page 52 GrayGuide function available in the menu bar. In the following example the adjustment recommendation (1.) shows, that all of the three inks CMY have to be increased to match the Gracol targets. Page 52 Manual TECHKON SpectroDrive Chapter 3 – How to use SpectroDrive...
- Page 53 Measure – Colorimetric (ExPresso Pro) Thanks to the spectral performance of SpectroDrive it is possible to calculate and display colorimetric values as well. Measurements in colorimetry modes have the advantage of an absolute description of color based on characteristic values. So it is possible to measure spot colors as well.
- Page 54 ISO 12647 are absolute values, but they are not suited to use them for handling the printing process. Thanks to the spectral measurement technology of SpectroDrive, the very useful “InkCheck” function combines the best of both worlds: Spectrally based recommen- dations how to set the ink keys as used from density in order to meet colorimetric targets required for printing within ISO standards.
- Page 55 Spot measurement To carry out a spot measurements just position the SpectroDrive device with the measurement head on a single measurement patch and press the green measurement button shortly. An acoustic signal confirms, that the measurement is completed and the measurement data are displayed by the ExPresso software in the window “Spot measurement”...
- Page 56 Page 56 Manual TECHKON SpectroDrive Chapter 3 – How to use SpectroDrive...
- Page 57 ISO 12647. The resulting evaluations of the different analyses can also be printed out in so called reports. Analyze – ISO-report single measurement (ExPresso Pro) Manual TECHKON SpectroDrive Chapter 3 – How to use SpectroDrive Page 57...
- Page 58 You can choose between a summary (1.) and the display of detailed reports of single parameters, which you can select from the pull-down-window in the lower left cor- ner of the menu window. Page 58 Manual TECHKON SpectroDrive Chapter 3 – How to use SpectroDrive...
- Page 59 The variation within a sheet is described by a vertical line within the dot. The heavier the varia- tion, the longer the vertical line. Manual TECHKON SpectroDrive Chapter 3 – How to use SpectroDrive Page 59...
- Page 60 “Solid density” and “Dot gain” refer only to individually defined target sets and tolerances. Up to eight colors can be displayed, e. g. CMYK and four spot colors. Page 60 Manual TECHKON SpectroDrive Chapter 3 – How to use SpectroDrive...
- Page 61 40 %, dot gain 80 %, slur / doubling, contrast and DE (ExPresso Pro only), which you select by clicking in the pull-down-menu in the lower left corner of the menu window (1.) (see page 58 for further information). Manual TECHKON SpectroDrive Chapter 3 – How to use SpectroDrive Page 61...
- Page 62 A window for confirmation will appear: There is no need to actively save a “Print job” or settings made. Since ExPresso has an “autosave” functionality, all data is securely stored already. Page 62 Manual TECHKON SpectroDrive Chapter 3 – How to use SpectroDrive...
-
Page 63: Chapter 4: How To Use The Windows Software Spectroconnect
2. The installation routine will start automatically. Follow the steps of the installation, until it is completed. 3. Now, after the installation was finished successfully you can connect the device with the USB cable to the computer. Manual TECHKON SpectroDrive Chapter 4 – SpectroConnect Page 63... -
Page 64: Overview
After launching SpectroConnect it is pre-set to display the module “Compare colors”. Page 64 Manual TECHKON SpectroDrive Chapter 4 – SpectroConnect... -
Page 65: Software Module "Spectrojet Settings
In this module device specific settings can be made. 1. SpectroDrive: All settings concerning the SpectroDrive device can be carried out with this software feature. It is very convenient for choosing density and colorimetric settings and according references as well as scan measurement settings. -
Page 66: Device Update
4.5 Device update By the application of this module SpectroDrive can be loaded with a new internal firmware which is selected by Device update. The procedure is explained in the program window: Page 66 Manual TECHKON SpectroDrive Chapter 4 – SpectroConnect... -
Page 67: Software Module "Export
Excel™, Word™ or other programs which can handle color data, e.g. a RIP calibra- tion software. SpectroDrive works like the keyboard: Pressing the measurement button will place the measurement value automatically at the location where the cursor is. 1. Here is defined, which data will be trans- 2. -
Page 68: Software Module "Colorcatcher
4. Shows the closest match to the current sample out of the selected color book. 5. Calculation of L*a*b*-, RGB-, L*C*h*- and CMYK values based on selected ICC profiles. Page 68 Manual TECHKON SpectroDrive Chapter 4 – SpectroConnect... -
Page 69: Software Module "Photolab
4.8 Software module “PhotoLab” TECHKON PhotoLab is a program module for evaluating and displaying L*a*b* color data graphically. Selected measurements can be displayed and analyzed. 1. In the upper section of the module win- Furthermore, color values and complete dow, the color differences between sample color books from the device memory or out and reference are shown numerically. - Page 70 5. Enlarged view of the tolerance circle 6. Display of the color components ∆L*, ∆a* and ∆b*. Page 70 Manual TECHKON SpectroDrive Chapter 4 – SpectroConnect...
- Page 71 The number of measurements which result in the calcula- tion of the average value is defined in this window.. Manual TECHKON SpectroDrive Chapter 4 – SpectroConnect Page 71...
-
Page 72: Software Module "Media Wedge
2. Overview of information concerning the printer, which can be stuck on the proof, or print job a detailed report of the measurement values can be printed out. 3. Selection of reference values Page 72 Manual TECHKON SpectroDrive Chapter 4 – SpectroConnect... - Page 73 1. After the import of the media wedge a short protocol will be generated and can be printed on a self-adhesive label with a Dymo label printer. 2. The software supports also the Ugra/Fogra media wedge in version 3.0. Manual TECHKON SpectroDrive Chapter 4 – SpectroConnect Page 73...
-
Page 74: Data Transmission
Approximately 160 mm/s for 4 mm patches Weight (equals approximately 3 seconds for 520 mm Measurement device: 820 grams sheet length); single measurement approx. 1 second (if SpectroDrive is used as hand held device) Contents see page 9 White reference Absolute and relative, Software TECHKON ExPresso... -
Page 75: Serial Number
Device: Scan-Measurement System TECHKON SpectroDrive Serial Number: Manufacturer: TECHKON GmbH • Wiesbadener Str. 27 • D-61462 Königstein Telephone: +49 (0)6174 9244 50 • Telefax: +49 (0)6174 9244 99 info@techkon.com • www.techkon.com Certification: The device is compliant with R&TTE directive 1999/5/EC concerning the electromagnetic compatibility EMC and is provided with the CE label. - Page 76 It can be cleaned with clean, compressed air and an optics brush. We recommend a functionality check-up every 24 months at the TECHKON service center, which includes the issue of a new Manufacturer certificate. Warranty: The warranty for TECHKON products is 24 months starting with the date of purchase.
- Page 77 Calibration: The integrated spectral sensor is calibrated by a white calibra- tion. After performing a white calibration with the supplied absolute white standard integrated in the charging console, the device is long term stable. We recommend to make a white calibration before every measurement series, to ensure the device is calibrated correctly.
- Page 78 Address / adresse / indirizzo erklärt, dass das Produkt: Declares that the product / déclare, que le produit / si dichiara che il prodotto Typ: SpectroDrive (WLAN Version) Type / tipo Verwendungszweck: Farbmessungen Intended use / utilisation prévue / uso previsto...
- Page 79 2. Sicherheit (Artikel 3.1.a der R&TTE-Richtlinie) Safety / sécurité électrique / sicurezza elettrica angewendete Normen: IEC 60950-1:2005 (2. Edition)/ A1:2009 applied standards / standards appliqués / norme applicate / édition pubblicato EN 60950-1:2006/A11:2009/ A1:2010/A12:2011 3. Elektromagnetische Verträglichkeit (Artikel 3.1.b der R&TTE-Richtlinie) Electromagnetic compatibility / compatibilité...
Need help?
Do you have a question about the SpectroDrive and is the answer not in the manual?
Questions and answers