Table of Contents

Advertisement

Quick Links

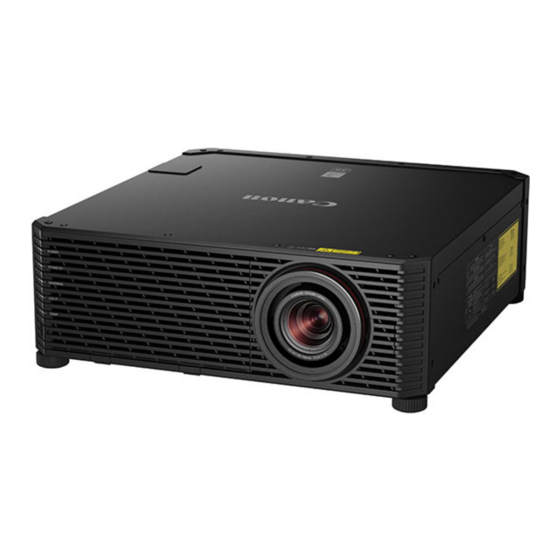
MULTIMEDIA PROJECTOR
User's Manual
Safety Instructions
Before Use
Installation Procedure
Connection Procedure
Projection Procedure
Convenient Features
Using Menus
Menu Configuration
Menu Settings
Using the Projector on a
Network
Advanced Projection
Maintenance
Product Specifications
Troubleshooting
ENG

Advertisement

Table of Contents
loading

Summary of Contents for Canon 4K600STZ

  • Page 1 MULTIMEDIA PROJECTOR Safety Instructions Before Use Installation Procedure Connection Procedure User’s Manual Projection Procedure Convenient Features Using Menus Menu Configuration Menu Settings Using the Projector on a Network Advanced Projection Maintenance Product Specifications Troubleshooting...
  • Page 2: How To Use This Manual

    This Manual This is the user’s manual for the 4K600STZ/4K601STZ/4K600Z/4K601Z Multimedia Projector (hereafter, “projector”). The “Basic Guide” section describes installation and basic use of the projector. Descriptions of menus and how to connect the projector to a network are given in the “Advanced Guide”...
  • Page 3: Table Of Contents

    Table of Contents How to Use This Manual....2 Convenient Features....72 Projector Highlights...... 4 Advanced Guide ....75 Safety Instructions......6 Using Menus ........76 Safety Symbols in this Manual ... 12 Menu Configuration ......76 Precautions for Use ......13 Basic Menu Operations ....... 77 Power Supply ........
  • Page 4: Projector Highlights

    Projector Highlights 4K Model With a High-Definition, 4096 x 2400 LCOS Panel Outstanding projection resolution of up to 4096 x 2400 is possible, using three 0.76 inch liquid crystal on silicon (LCOS) panels in conjunction with dual high- performance image processors and a new 4K-compatible wide zoom lens. Bright Yet Compact, With a Laser Light Source A bright (6,000 lumen) 4K projector that is also compact, at 559 x 624 x 201 mm (22.0 x 24.6 x 7.9 in., W x D x H).
  • Page 5 This iOS application is used to establish a Wi-Fi connection with the projector, and enables remote control operations and projector status management easily. Connect the projector as an access point (P137), or connect the projector using an existing access point (P137). A password (P163) is required when using Canon ST.
  • Page 6: Safety Instructions

    If your projector does not seem to be operating properly, read this manual again, check operations and cable connections, and try the solutions in the “Troubleshooting” section in the back of this manual. If the problem still persists, contact the Canon Customer Support Center. CAUTION RISK OF ELECTRIC SHOCK...
  • Page 7: Safety Precautions

    Safety Instructions Safety Precautions WARNING: • THIS APPARATUS MUST BE GROUNDED. • TO REDUCE THE RISK OF FIRE OR ELECTRIC SHOCK, DO NOT EXPOSE THIS APPLIANCE TO RAIN OR MOISTURE. • This projector produces intense light from the projection lens. Do not stare directly into the lens, otherwise eye damage could result.
  • Page 8 Safety Instructions ■ READ AND KEEP THIS OWNER’S MANUAL FOR LATER USE. All the safety and operating instructions should be read before beginning to operate the product. Read all of the instructions given here and retain them for later use. Unplug this projector from the AC power supply before cleaning.
  • Page 9 If you are not sure of the type of power supplied, contact the Canon Customer Support Center or local power company. Do not overload wall outlets and extension cords as this can result in fire or electric shock.
  • Page 10: Ac Power Cord Requirement

    EEE. Your cooperation in the correct disposal of this product will contribute to the effective usage of natural resources. For more information about the recycling of this product, please contact your local city office, waste authority, approved scheme or your household waste disposal service or visit www.canon-europe.com/weee, or www.canon-europe.com/battery.
  • Page 11: Federal Communication Commission Notice

    Safety Instructions Federal Communication Commission Notice This device complies with Part 15 of the FCC Rules. Operation is subject to the following two conditions: 1. This device may not cause harmful interference, and 2. This device must accept any interference received, including interference that may cause undesired operation.
  • Page 12: Safety Symbols In This Manual

    Safety Instructions Safety Symbols in this Manual This section describes the safety symbols used in this manual. Important projector safety information is identified by the following symbols. Always observe the safety information by these symbols. Denotes the risk of death or serious injury from improper handling if the information is not observed.
  • Page 13: Precautions For Use

    If the following situations occur, turn the power off, remove the power plug from the power outlet and contact the Canon Customer Support Center. Failure to do so could cause a fire or result in an electric shock.
  • Page 14: Installation And Use

    The interior of the projector contains high-voltage components as well as parts that are hot. If inspection, maintenance or repair is required, contact the Canon Customer Support Center. • Do not disassemble or modify the projector (including consumable parts) or the remote control.
  • Page 15 • Do not use the projector on a soft surface such as carpet or sponge mat, etc. • For ceiling mounting or other installation work, request service from a qualified technician or the Canon Customer Support Center. Poor installation work could result in an accident.
  • Page 16: Laser Light Source

    • For assistance when disposing of the projector, contact the Canon Customer Support Center. Do not disassemble the projector yourself when disposing of Explanatory and warning labels are located in the following positions on the...
  • Page 17 Safety Instructions...
  • Page 18: Remote Control Batteries

    Safety Instructions Remote Control Batteries Pay attention to the following points regarding handling of batteries. Failing to do so could result in a fire or personal injury. • Do not heat, short circuit or disassemble the batteries, or place them in a fire. •...
  • Page 19: Handling

    Safety Instructions Handling Pay attention to the following points regarding installation and handling of the projector. • If the projector will not be used for a long period of time, be sure to remove the power plug from the power outlet to ensure safety. Failure to do so presents a risk of fire if dust accumulates on the plug or outlet.
  • Page 20: For Safe Use

    For Safe Use Carrying and Installation Pay attention to the following points when carrying or transporting the projector. • This projector is a precision instrument. Do not knock it over or subject it to impacts. Doing so may cause a malfunction. •...
  • Page 21: Before Installation

    Before Installation Precautions When Carrying/Shipping the Projector Note the following precautions when carrying or shipping the projector. • Disconnect the cables connected to the projector. Carrying the projector with the cables attached may cause an accident. • Retract the adjustable feet. Leaving the feet extended when the projector is moved may cause damage.
  • Page 22 Before Installation ■ Do Not Touch the Lens with Bare Hands Do not touch the lens with bare hands. Any smudges or fingerprints on the lens may affect image quality. ■ Allow a 30 Min. Warm Up before Focus Adjustment (P59), if Possible Immediately after startup, the heat of the light source may prevent stable focus.
  • Page 23: When Using Mounted On The Ceiling

    Before Installation ■ When Using Mounted on the Ceiling When using the projector mounted on the ceiling or installed in a high location, clean around the air intake and exhaust vents periodically. Dust that accumulates in intake or exhaust vents may impair ventilation, raising the temperature inside and posing a risk of damage or fire.
  • Page 24: Light Source

    Before Installation ■ Precautions for Portrait (Upright) Installation • Do not block the air intake or exhaust vents. In particular, because there is an air intake vent on the bottom, always ensure a minimum clearance of 2 cm (0.8") from the bottom. •...
  • Page 25: Copyright Notice

    Ensure Network Security Take measures to ensure network security. Note that Canon is not liable in any way for direct or indirect loss from network security incidents, such as unauthorized access.
  • Page 26: Open Source Software

    HAS BEEN ADVISED OF THE POSSIBILITY OF SUCH DAMAGES. NO SUPPORT Canon Inc., and all its subsidiaries or its dealers do not make any support service regarding the source code. Canon Inc., and all its subsidiaries or its dealers shall not respond to any questions or enquiries, from you or any other customers, regarding the source code.
  • Page 27: Before Use

    Before Use Included Accessories Before use, make sure the following items are included in the package. • Remote control (part No.: RS-RC05) • Batteries for the remote control (AA size x2) • Lens cap The remote control can also be used in a wired connection with the projector.
  • Page 28: Part Names

    Before Use Part Names Projector ■ Front Side Terminals and connectors (P32) LED indicators (P30) Air intake vent Air filter (P194) Do not block the air Power cord intake. connector (P52) Doing so may cause a malfunction. Projection lens Always remove the lens cap before Anti-theft lock hole projection.
  • Page 29: Side Control

    Before Use ■ Bottom Air intake vent Side Control (1) POWER button (P53, P71) (4) KEYSTONE button (P65) Turns the projector on or off. Corrects keystone distortion. (2) INPUT button (P56) (5) OK button (P78) Switches the input signal. Determines the item selected from the menu.
  • Page 30: Led Indicators

    Before Use LED Indicators The projector status is shown by the LED indicators (off / lit / flashing). • POWER (green) : Illuminated during projection. Otherwise, flashes in the following situations. • As the projector transitions from standby to projection •...
  • Page 31: Led Indicator Displays

    Before Use ■ LED Indicator Displays Projector operating status is indicated by five LEDs, as shown in the following table. For details on warnings, see “LED Indicator Details” (P208). Example of when the POWER indicator is on; : Off : Lit : Flashing LED indicator Operating status...
  • Page 32: Input Terminal

    Before Use Input Terminal (1) Trigger terminal (TRIGGER) (P192) Used to trigger operation of a screen or other external device when the projector is turned on or off. (2) HDMI terminal (HDMI) (P45, P46) Receives digital video signals (HDMI). Carries both video and audio signals across a single cable. (3) Digital PC / DVI-D terminal (DVI-D) (P45) Connects the external monitor output from a computer.
  • Page 33 Before Use Remote Control (4) OK button (P78) Determines the item selected from the (11) menu. (5) ZOOM button (P60) (12) Adjusts the image size. [ ] / [ ] buttons: Increase the image size. [ ] / [ ] buttons: Decrease the image size.
  • Page 34 Before Use (13) Change input buttons (24) Terminal for wired remote Change the input signal between Digital control (P36) PC and HDMI. Connects the remote control to the ANALOG 1, ANALOG 2 and projector, for remote control operation. COMPONENT are not used with this product.
  • Page 35: Preparing The Remote Control

    Before Use Preparing the Remote Control ■ Installing Remote Control Batteries Open the battery Insert batteries. Close the compartment lid. Insert 2 new AA compartment lid. Raise the battery batteries in the Insert the tab into the cover tab while compartment with the remote control notch pushing it.
  • Page 36: Remote Control Operating Range

    Before Use ■ Remote Control Operating Range The remote control is an infrared type. Point it at the infrared remote receiver on the front or rear of the projector to operate it. 25° 25° 8 m (26.3') 8 m (26.3') 25°...
  • Page 37: Basic Guide

    Safety Instructions Before Use Basic Guide Installation Procedure Connection Procedure Projection Procedure Convenient Features Using Menus Menu Configuration Menu Settings Using the Projector on a Network Advanced Projection Maintenance Product Specifications Troubleshooting...
  • Page 38: Installation Procedure

    Installation Procedure Before setting up the projector, be sure to read “Before Installation” (P21). Setting Up the Projector ■ Positioning the Projector in Front of the Screen Place the projector in front of the screen. • To avoid keystone distortion, install the Screen projector so that it is at right angles to the screen.
  • Page 39: Ceiling Mounting Or Rear Projection

    Installation Procedure ■ Installation on High Surfaces Using the lens shift function (P43), you can project images toward a lower level. When setting the projector on a high surface for projection, make sure the surface is flat and stable, and install the projector right-side up with the adjustable feet facing down.
  • Page 40: Relationship Between Image Size And Projecting Distance

    (projection distance) and the zoom position. Refer to the following table and decide the distance between the projector and screen. Image Size (diagonal) Width 4K600STZ/4K601STZ Relationship between image size and projecting distance (reference values) 4096 x 2160 4096 x 2400...
  • Page 41 Installation Procedure 4096 x 2160 4096 x 2400 Image Size Projection Image Size Projection Image Size [cm (in)] distance [m (feet)] [cm (in)] distance [m (feet)] (Dia.) Wide Wide Width Height Tele limit Width Height Tele limit limit limit (229.9) (121.3) (19.7) (25.6)
  • Page 42 Installation Procedure 4096 x 2160 4096 x 2400 Image Size Projection Image Size Projection Image Size [cm (in)] distance [m (feet)] [cm (in)] distance [m (feet)] (Dia.) Wide Wide Width Height Tele limit Width Height Tele limit limit limit 10.6 10.3 (176.8) (93.3)
  • Page 43: Lens Shift Function

    Installation Procedure Lens Shift Function You can reposition the image in all directions by pressing the SHIFT button on the remote control, which moves the lens up, down, left, or right. For instructions, refer to “Adjusting the Image Position” (P62). ■...
  • Page 44 Installation Procedure Maximum vertical (A) and horizontal (B) movement using lens shift (reference values [cm (in)]) 4096 x 2160 4096 x 2400 Image size (Dia.) 28 (11.0) 9 (3.5) 31 (12.2) 9 (3.5) 43 (16.9) 13 (5.1) 46 (18.1) 13 (5.1) 57 (22.4) 18 (7.1) 62 (24.4)
  • Page 45: Connection Procedure

    Connection Procedure Before connecting the projector to other equipment, turn off both the projector and the other equipment. For instructions on connecting multiple sources of input for 4K projection, refer to “4K Projection” (P47). Connecting a Computer Computer Monitor output HDMI AUDIO output terminal...
  • Page 46: Connecting Av Equipment

    Connection Procedure Connecting AV Equipment AV equipment HDMI terminal HDMI cable (not included) Trigger HDMI AUDIO OUT terminal terminal terminal Audio cable Audio cable Audio cable (not included) (not included) (not included) Mini jack Mini jack RCA terminal Screen or other product Amplified speakers compatible with the trigger terminal...
  • Page 47: Projection

    Connection Procedure 4K Projection ■ Definition of 4K Several resolution specifications are described as being 4K, including 3840 x 2160, 3840 x 2400, 4096 x 2160, and 4096 x 2400, as shown in the following comparative simulation. 1920 x 1080 3840 x 2160 4096 x 2400 The projector supports input signals at resolutions up to the maximum 4K resolution...
  • Page 48 Connection Procedure Resolution DCI (4096 x 2160) Frequency 24 Hz 60 Hz Subsampling Color depth 8 bit 10 bit 8 bit 10 bit 8 bit 10 bit 8 bit 10 bit HDMI 1.4 (10.2 Gbps bandwidth) x 1 HDMI 2.0* (18 Gbps bandwidth) x 1 *1 HDCP, short for High-bandwidth Digital Content Protection, is a form of digital copy protection that prevents illegal copying of content by encrypting digital...
  • Page 49 Connection Procedure • HDMI Using two HDMI cables, you can project 4096 x 2160 (vertical frequency: 60 Hz) signals as one image. The signals supplied by the two cables are combined to form a single image. Connect desktop computers by using two HDMI cables •...
  • Page 50 Connection Procedure ■ Settings for Multi Input Mode Select how to combine two HDMI inputs or four DVI inputs to form an image. Check computer video output settings in advance, because you must match the display layout (whether split-screen display or display in four quadrants). Multi Input Mode Specify the type of image (including resolution) supplied to the terminals.
  • Page 51 Connection Procedure DVI input mode Specify the combination of DVI input. Choose from [Normal], [Single], [DVI 1x2], [DVI 2x2], or [DVI 1x4]. • To use signals not included in [Normal] (P200 – P201) when multi input in the [Input] menu (P56) is set to [DVI 1x2], [DVI 2x2], or [DVI 1x4], set the DVI input mode menu to [DVI 1x2], [DVI 2x2], or [DVI 1x4].
  • Page 52: Plugging The Projector In

    Connection Procedure Plugging the Projector In Connect the power cord to the projector and plug it in. • Unplug the power cord when the projector is not in use for an extended period. • [Date and time settings] may be reset if the projector is left unplugged for an extended period.
  • Page 53: Projection Procedure

    Projection Procedure Step 1 Turn the Projector On Check the connection between the projector and the computer or AV equipment. (P45, P46) For instructions on connecting the power cord, refer to “Plugging the Projector In” (P52). Press the POWER button. The [POWER] indicator initially flashes green, after which it remains lit.
  • Page 54: When The Language Selection Screen Appears

    Projection Procedure ■ When the Language Selection Screen Appears A screen appears when the projector is turned on for the first time. You can select a language to be used by the projector for displaying menus and messages in the window.
  • Page 55: Changing Notebook Computer Screen Output

    Projection Procedure Changing Notebook Computer Screen Output For projection from a notebook computer, the computer settings must be adjusted to switch display output. This operation is not required for a desktop computer. ■ Turning on External Monitor Output You can turn on the external monitor output via keyboard operation. To turn on the external monitor output with most computers, press the function key ([F1] to [F12]) which is marked with the external monitor icon while holding down the [Fn] key.
  • Page 56: Step 2 Select An Input Signal

    Projection Procedure Step 2 Select an Input Signal Select the input signal in the [Input] menu when you want to project a digital PC or AV equipment signal, or to switch between inputs when multiple computers or multiple sets of AV equipment are connected. Skip this step if you have not changed the input signal since the last projection.
  • Page 57 Projection Procedure Press the OK button to confirm the input signal type. For multiple input signals, the projection layout is divided as follows. The numbers 1, 2, 3, and 4 in squares represent the numbers of input terminals. [HDMI 1x2] [DVI 1x2] [DVI 2x2] [DVI 1x4]...
  • Page 58: Step 3 Adjust The Image

    Projection Procedure Step 3 Adjust the Image Setting the Display Resolution of the Computer Based on the maximum resolution of the projector, set the display resolution of the computer to the resolution closest to the output signal resolution of the projector. (P198) Maximum resolution •...
  • Page 59 Projection Procedure ■ Mac OS X Open the Apple Menu and select [System Preferences]. In the [System Preferences] window, click the [Displays] icon to display the Display window. Select the [Display] tab and select the resolution closest to the maximum output signal resolution of the projector from the [Resolutions] list.
  • Page 60: Adjusting Image Size

    Projection Procedure ■ Adjusting Image Size The size of the projected image can be adjusted by pressing the ZOOM button on the remote control or the LENS button on the projector. Change the projector installation position if your desired image is too large or too small to adjust it with the zoom function.
  • Page 61 Projection Procedure Press the pointer buttons to adjust the image size. Remote control Projector Screen To enlarge the image, use the [ ] button on the remote control or projector. To reduce the image, use the [ ] button on the remote control or projector. When the desired image size is selected, press the OK button or the ZOOM button.
  • Page 62: Adjusting The Image Position

    Projection Procedure ■ Adjusting the Image Position To adjust the screen position up, down, left, or right, press the SHIFT button on the remote control or the LENS button on the projector. It can change the projected screen to the most suitable position by moving the position of the lens up/down/left/ right.
  • Page 63: Resetting The Position

    Projection Procedure Press the pointer buttons to adjust. Remote control Projector Screen To raise or lower the image, use the [ ] / [ ] buttons on the remote control or projector. To move the image left or right, use the [ ] / [ ] buttons on the remote control or projector.
  • Page 64: Step 4 Select An Aspect Ratio (Screen Aspect) Matching The Screen

    Projection Procedure Step 4 Select an Aspect Ratio (Screen Aspect) Matching the Screen Select an optimum screen mode (aspect) according to the aspect ratio of the screen, type of input image signal and so on for the projection to make best use of the screen size.
  • Page 65: Step 5 Adjusting Keystone Distortion

    Projection Procedure Step 5 Adjusting Keystone Distortion To correct keystone distortion (Keystone adjustment), press the KEYSTONE button. Two types of adjustment are available: horizontal/vertical adjustment and corner adjustment. Use horizontal/vertical keystone adjustment to adjust image width or height distortion separately, and use corner adjustment to adjust the position of each corner of the image.
  • Page 66: Corner Adjustment

    Projection Procedure Press the pointer buttons to adjust the dimensions. Remote control Projector To correct bottom distortion, To correct top distortion, press the [ ] button. press the [ ] button. Screen To correct distortion on the left, To correct distortion on the press the [ ] button.
  • Page 67: Resetting The Keystone Adjustment

    Projection Procedure Press the pointer button of the corner for correction, and then press the OK button. Remote control Projector Press the pointer buttons to adjust the corner. Remote control Projector When you have finished correcting, press the OK button. ■...
  • Page 68: Step 6 Select The Image Quality (Image Mode)

    Projection Procedure Step 6 Select the Image Quality (Image Mode) You can select an image mode to suit the projected image. In each image mode, you can further adjust the brightness, contrast, sharpness, gamma, HDR range, color adjustment (P101), advanced adjustment (P101), light source mode (P105) and brightness level.
  • Page 69: Selecting An Image Mode

    Projection Procedure ■ Selecting an Image Mode Press the IMAGE button on the remote control to select. The image mode changes each time the IMAGE button is pressed. (The displayed image modes vary depending on the selected input signal.) Example: Remote control You can also select any image mode from the [Image mode] menu.
  • Page 70 Projection Procedure ■ Switching the mode to the DICOM SIM Mode Press the IMAGE button on the remote control until [DICOM SIM] is displayed or select [DICOM SIM] from [Image mode] in the [Image adjustment] menu. Display test patterns by pressing the TEST PATTERN button on the remote control or selecting [On] in [Test pattern] of the [Install settings] menu.
  • Page 71: Step 7 Turn The Projector Off

    Projection Procedure Step 7 Turn the Projector Off Press the POWER button to display the window shown below. Remote control Projector When this window is displayed, press the POWER button again to turn off the power. After you turn the projector off, projection stops, the [STAND BY] indicator flashes in red, and the projector starts cooling down.
  • Page 72: Convenient Features

    Convenient Features This section describes features convenient during presentations and in other situations. Temporarily Blacking Out an Image Projection can be temporarily blanked after a presentation, or to divert the audience’s attention away from the screen. Press the BLANK button to black out the image. Remote control Press the BLANK button again to show the image.
  • Page 73 Convenient Features Specifying Power-Saving Settings Set power-saving settings as needed. The following four settings are available. For details, refer to the page describing each function. • Light source mode (P105) Conserve energy by selecting a mode that is less bright. •...
  • Page 75: Advanced Guide

    Safety Instructions Before Use Advanced Guide Installation Procedure Connection Procedure Projection Procedure Convenient Features Using Menus Menu Configuration Menu Settings Using the Projector on a Network Advanced Projection Maintenance Product Specifications Troubleshooting...
  • Page 76: Using Menus

    Using Menus Use the menus to set the operation of the projector in detail. Menu Configuration The menu screen is divided into 6 tabs as shown below. [Input settings] tab (P93) You can set the type of signal or the method of projection of the images input.
  • Page 77: Basic Menu Operations

    Using Menus Basic Menu Operations Press the MENU button to display the menu window. Remote control Projector Press the [ ] / [ ] buttons to select a tab. Remote control Projector • If the tab position is not highlighted in orange, press the [ ] / [ ] buttons to move the current selection to the top.
  • Page 78 Using Menus Select contents. How to select the contents varies depending on the item. Selecting from a list Example: Aspect (P94) 1. Select [Aspect]. 2. Press the OK button or [ ] button to display a list of the contents. 3.
  • Page 79 Using Menus Selecting from a different screen (2) Example: Random noise reduction (P102) 1. Select [Advanced adjustment]. 2. Press the OK button to display a different screen. 3. Select [Random noise reduction]. 4. Use the [ ] / [ ] buttons to select the setting.
  • Page 80: Menu Configuration

    Menu Configuration Input settings (P93) Aspect Auto* True size Input level HDMI Auto* Normal Expanded Super white HDMI HDMI Color space Auto* YCbCr HDMI Progressive Film/auto* Video 1 Video 2 25p/30p(PsF) Input signal details Input signal HDR information HDMI EOTF Display primaries [0] Display primaries [1] Display primaries [2]...
  • Page 81 Menu Configuration User 1 P100 Create profile (Displayed when [Image mode] is not User 2 [User 1] - [User 3]) User 3 Save profile P100 (Displayed when [Image mode] is [User 1] - [User 3]) Baseline image mode P100 (Displayed when [Image mode] is [User 1] - [User 3]) Brightness P100...
  • Page 82 Menu Configuration MPEG noise reduction Off* P102 Weak Middle Strong Dynamic gamma Off*1 P103 Weak Middle Strong Dynamic contrast Off* P103 Mode 1 Mode 2 Mode 3 Colorimetry (1) Auto* P103 BT.709 BT.2020 Auto* P103 Mem. color correct Flesh Off*2 P104 Weak Green...
  • Page 83 Menu Configuration Install settings (P107) Positional lock Off* P108 Image flip H/V None* P108 Ceiling mounted Rear Rear, Ceiling mounted Keystone Horizontal-vertical keystone* P108 Corner adjustment Reset Professional settings P109 Panel drive mode 4096x2160* P109 4096x2400 Multi input mode select DVI input mode P109 Normal*...
  • Page 84 Menu Configuration High altitude Off* P112 Operating mode Normal* P112 Fixed brightness Long duration 1 Long duration 2 Marginal focus Off* P113 Reset Edge blending Off* P113 Adjust Left Right Bottom Color blending adjustment Black level adjustment Marker Reset Lens - Position Load position 1 - 3 P116 Save position 1 - 3...
  • Page 85 Menu Configuration Screen when blank Black* P119 Blue Light source off User logo Projector on Skip P119 Canon logo* User logo On screen P120 Menu position Upper L P120 Upper R Center* Lower L Lower R Menu display time Normal*...
  • Page 86 Menu Configuration Audio in terminal select P124 DVI-1 Audio in* DVI-2 Audio in* DVI-3 Audio in* DVI-4 Audio in* HDMI-1 Audio in HDMI-1* HDMI-2 Audio in HDMI-2* DVI 1x2 Audio in* DVI 2x2 / 1x4 Audio in* HDMI 1x2 Audio in HDMI-1* HDMI-2 Serial communication...
  • Page 87 Menu Configuration Motion blur reduction Off* P126 Weak Strong Language English* Turkish P127 German Polish French Hungarian Italian Czech Spanish Danish Portuguese Arabic Swedish Chinese (Simplified) Russian Chinese (Traditional) Dutch Korean Finnish Japanese Norwegian Other settings P128 Password settings Off* P128 Register password P129...
  • Page 88 Menu Configuration Special period 1 Off* Edit Period Day of week Edit schedule Reset Copy schedule to different day Special period 2 Off* Edit Period Day of week Edit schedule Reset Copy schedule to different day Special period 3 Off* Edit Period Day of week...
  • Page 89 Network settings (P136) Network settings lock Unlock P141 Lock* Network password setting P141 Register network password P141 Network (wired/wireless) Off/Off* P142 4K600STZ/4K600Z On/Off On/On (Pj AP) Off/On (Pj AP) Off/On (Infra) Network function Off* 4K601STZ/4K601Z Detailed settings (wired) P142 4K600STZ/4K600Z Detailed settings...
  • Page 90 Menu Configuration Detailed settings (wireless) P147 4K600STZ/4K600Z Mode SSID Security Channel Signal strength MAC address Wi-Fi Protected Setup Manual settings Mode SSID Security Open WPA2 AES WPA / WPA2 TKIP / AES Channel Key ID Key type Detailed IPv4 address settings...
  • Page 91 PJLink P152 AMX Device Discovery Off* P153 Crestron RoomView Off* P153 Information E-mail sender address P154 E-mail recipient address Detailed information (wired) 4K600STZ/4K600Z Detailed information 4K601STZ/4K601Z IPv4 IPv6 Link local Auto Manual Detailed information (wireless) 4K600STZ/4K600Z IPv4 IPv6 Link local...
  • Page 92 Menu Configuration The following settings are not reset even when factory defaults are restored. • Selected input signal Serial communication (Stop bit) • Image adjustment Standby power setting Save profile Quick startup Baseline image mode Language Light source mode Date and time settings Brightness level Schedule •...
  • Page 93: Menu Settings

    Menu Settings Input settings This section describes settings for aspect ratio, etc. Menu screen when the input signal is HDMI-1 Menu Function Details Aspect Select an image aspect ratio. Input level Select the input level for HDMI signal. Super white Select super white mode for HDMI signal.
  • Page 94 Menu Settings Aspect [Aspect] > [Input settings] > Select a projection aspect ratio for images. Option Function Auto An image is projected at the aspect ratio of the input signal. The image is projected with the original resolution of the input True size signal.
  • Page 95: Color Space

    Menu Settings Color space [Color space] > [Input settings] > Select the color space for HDMI signal. Option Function Auto Selects the optimal color format for input signals. Forces the projector to handle the input signal as an RGB signal. Forces the projector to handle the input signal as a color difference YCbCr signal.
  • Page 96 Menu Settings Input signal details [Input signal details] > [Input settings] > Shows input signal details for each input terminal used, for the selected input signals. In Multi Input mode, terminals with incorrect input can be identified by a “ ”...
  • Page 97 Menu Settings HDR information [HDR information] > [Input settings] > When HDMI signals are supplied, shows the Dynamic Range and Mastering InfoFrame information. The projector determines and indicates whether HDMI signals are SDR or HDR. HDR HDMI signals have an area that includes color and luminance information, and this information is indicated.
  • Page 98: Image Adjustment

    Menu Settings Image adjustment This section describes image quality settings such as brightness, contrast, and sharpness. Menu screen when the input signal is HDMI-1 Menu Function Details Image mode * Select overall image quality to suit the projected image. Create profile Save desired image quality settings as profiles.
  • Page 99: Image Mode

    Menu Settings Image mode [Image mode] > [Image adjustment] > Select the overall image quality for projected images. Can also be selected by pressing the IMAGE button on the remote control. Option Types of Images Characteristics Computer screens, or media Bright overall;...
  • Page 100 Menu Settings Create profile [Create profile] > [Image adjustment] > Save desired image quality settings in up to 3 user profiles. • The saved settings are [Brightness], [Contrast], [Sharpness], [Gamma], [HDR range], [Color adjustment], [Advanced adjustment], [Light source mode], and [Brightness level]. •...
  • Page 101 Menu Settings Color adjustment [Color adjustment] > [Image adjustment] > Adjust color-related settings such as color level, color balance, and color temperature. Menu screen in image modes other than DICOM SIM Submenu Function Color level Adjusts the intensity of colors. Color balance Adjusts the color balance of a purplish or greenish image.
  • Page 102: Ambient Light

    Menu Settings Ambient light Minimize the effect of ambient light on the screen. Submenu Function No correction is performed. For ambient light from conventional light bulbs Tungsten or fluorescent light of this color. Type For ambient light from a “day white” fluorescent Fluorescent Adjust source.
  • Page 103: Dynamic Gamma

    Menu Settings Dynamic gamma You can adjust the gradation representation of light and dark portions of an image automatically. Option Function Disable dynamic gamma adjustment. Weak Middle Specify one of three levels of dynamic gamma adjustment. Strong Dynamic contrast For dark images, makes dark image areas even darker. Option Function Disable dynamic contrast adjustment.
  • Page 104: Axis Color Adjust

    Menu Settings Mem. color correct (Flesh/Sky/Green) Enhances skin tones, blue skies, and greens, so that these colors are more consistent with people’s remembered impressions. Option Function Disable correction. Weak Middle Specify the level of correction. Strong Image resolution may seem lower when [Random noise reduction] or [MPEG noise reduction] is applied.
  • Page 105 Menu Settings Fine-Tune Gamma Adjust white, red, green, and blue gamma curves. Red, green, and blue can be adjusted separately. Adjustments to white are also applied to the three other colors. Note that adjusting any color will overwrite previous adjustments. Use the [ ] / [ ] buttons to select a color, and then press the OK button.
  • Page 106 Menu Settings Brightness level [Brightness level] > [Image adjustment] > Control the laser diode to adjust the projection brightness. Use the [ ] / [ ] buttons to adjust the brightness. [Brightness level] appears instead of [Light source mode] when the operating mode (P112) is not set to [Normal].
  • Page 107: Install Settings

    Menu Settings Install settings Adjust projection to suit the screen or the type of images, or how the projector is installed. Menu screen when the input signal is HDMI-1 Menu Function Details Operation of installation related functions can be Positional lock P108 prohibited.
  • Page 108 Select when the projector is installed upside-down. • When mounting the projector on a ceiling, use the optional ceiling attachment (RS- CL15) and ceiling-mount arm (RS-CL17). Contact the Canon Customer Support Center for more detailed information. • Image flipping will reset any adjustment for keystone distortion. In this case, redo the adjustment.
  • Page 109 Menu Settings Professional settings [Professional settings] > [Install settings] > Specify advanced installation settings. Panel drive mode Select the LCD panel vertical resolution to use. Option Function 4096x2160 Use a resolution of 4096 x 2160 lines. 4096x2400 Use a resolution of 4096 x 2400 lines. •...
  • Page 110 Menu Settings DVI optimizer Optimizes images from DVI signals. Submenu Option Function Disable automatic determination of single- or dual-link mode from DVI terminals, and project images in single- link mode. DVI dual link auto setting Automatically determine whether DVI terminals are used in single- or dual-link mode and switch settings accordingly.
  • Page 111 Menu Settings RGB alignment Correct color misalignment. Submenu Function Fine positioning enables adjustment of misalignment relative to images from other projectors used at the same time, in 1-pixel increments. Submenu Function Disable micro-digital image shift. Micro-digital image Submenu Function shift Adjust the image vertically and Adjust Adjust...
  • Page 112: High Altitude

    Menu Settings • [Registration] and [Advanced registration] settings are retained even if you change the panel drive mode. • 5-point adjustment enables basic correction of color misalignment across the screen, by moving adjustment points in the center and each corner. To correct registration only in certain areas, try manual adjustment.
  • Page 113 Menu Settings Marginal focus In dome projection, image focus can be adjusted on the edges of the screen, and the remote control can be used to activate and deactivate this focus adjustment. For detailed instructions, refer to “Adjusting Peripheral Focus” (P191). Option Function Disable remote focusing of image edges.
  • Page 114 Menu Settings Submenu Function Submenu Function Left Right Select the direction of the blending area to adjust. Bottom Width Specify the width between the start and end markers. Moves the position of the start marker. Side • Large blending areas may cover input signal dialog boxes and other interface elements.
  • Page 115 Menu Settings Submenu Function Because black is lighter in the blending area than in other areas, you can adjust the black level outside the blending area to make this difference in brightness less noticeable. Position of end marker (hidden) Left image Area A: Black level cannot be adjusted.
  • Page 116: Screen Color

    Menu Settings Lens - Position [Lens - Position] > [Install settings] > The projector can store information about the lens position. Up to three sets of lens information (including, focus, zoom, and lens shift settings) can be saved, and the lens can be restored to these positions as needed.
  • Page 117: Test Pattern

    Menu Settings Iris [Iris] > [Install settings] > Use this feature for projection emphasizing contrast over brightness. Submenu Function Open Disables aperture adjustment. Close 1-3 Specify the aperture value in a range of 1-3. The [Iris] setting does not affect power consumption. Test pattern [Test pattern] >...
  • Page 118: System Settings

    Menu Settings System settings Customize projector and remote control operation, beeping, and other details after startup, during standby, and in other situations. Menu screen when the input signal is HDMI-1 Menu Function Details Customize user screens shown at startup, when no User screen settings P119 signal is detected, and in other situations.
  • Page 119: Logo Capture

    Select a logo to project after startup until input signals can be projected. Option Function Skip A black screen is projected. Canon logo Displays the Canon logo that was registered in advance at the factory. User logo The user logo is projected.
  • Page 120: Menu Position

    Menu Settings On screen [On screen] > [Sysetm settings] > Specify display details for on-screen menus, help, and warning or precaution icons. Menu position Reposition menu display. Choose from upper left, upper right, center, lower left, or lower right. Only [Center] is available when edge blending is used. Other display positions are grayed out and not available.
  • Page 121 Menu Settings Menu rotation Rotate menu display. When projecting in portrait orientation, for example, with the projector installed at a 90° angle, specify the orientation of projected menus to align them with the top or bottom of projected images. Option Function Automatically rotates menus as needed after using an accelerometer to Auto...
  • Page 122: Key Lock

    Menu Settings Overheat warning display Shows a warning icon when the internal temperature is high and the projector may overheat. Option Function Disable high temperature warning icon display. Enable high temperature warning icon display. Remote control/Side control [Remote control/Side control] >...
  • Page 123 Menu Settings To Unlock Key Lock Function Turn off the projector and unplug the power plug. Hold down the OK button on the main unit and plug in the power cord, as you continue to hold down the OK button. In a moment, a beep will sound, and the controls will be unlocked.
  • Page 124: Serial Communication

    Menu Settings Audio in terminal select [Audio in terminal select] > [System settings] > Select the terminal for audio input used with various input signals. Submenu Function Select the terminal for audio input. DVI-1 DVI-2 Option Function No audio is output. DVI-3 Use audio signals from AUDIO IN for audio DVI-4...
  • Page 125: Quick Startup

    (P130). • [Standby power setting] is set to [Normal] and cannot be changed when wireless LAN is enabled (P137). (4K600STZ/4K600Z) Quick startup Enable faster startup next time by leaving some circuits on for 90 minutes after the projector is turned off.
  • Page 126: Direct Power On

    Menu Settings Power management duration Specify how much time must pass before the light source goes off or the projector enters standby mode, depending on the [Power management mode] setting. Option Function After 30 seconds without an input signal when the projector is idle, the 5 min.
  • Page 127 Menu Settings Language [Language] > [System settings] > Select the menu display language. Language English Russian Czech German Dutch Danish French Finnish Arabic Italian Norwegian Chinese (Simplified) Spanish Turkish Chinese (Traditional) Portuguese Polish Korean Swedish Hungarian Japanese...
  • Page 128: Other Settings

    Menu Settings Other settings [Other settings] > [System settings] > Register a password, set a password, reset the air filter counter, schedule operation, and access other settings and information. Password settings Disables the projector unless the correct password is entered. Option Function The projector can be used even if no password is entered.
  • Page 129: Date And Time Settings

    Menu Settings Register password You can register a password for starting projection. Enter a 4 digit password. Enter the password using the pointer buttons [ ] (1) / [ ] (2) / [ ] (3) / [ ] (4) or the number buttons on the remote control.
  • Page 130 Disable SNTP. SNTP • [SNTP] is not available when [Network (wired/wireless)] is set to [Off/Off]. (4K600STZ/4K600Z) • [SNTP] is not available when [Network function] is set to [Off]. (4K601STZ/4K601Z) • Use the web screen to set the IP address of the SNTP server.
  • Page 131 Menu Settings Detailed schedule setting Option Function Disable the schedule. Enable the schedule. Edit the schedule. ■ Default Edit...
  • Page 132 Menu Settings Option Function ■ Special period Select a day in [Day of week], and select the times, operations, and parameters. Light source calibration can also be scheduled during your specified period, by selecting CALIBRATION. (For details, see page 133.) However, the projector must project for at least 30 minutes before calibration, so it must be turned on in advance.
  • Page 133 Menu Settings Option Function Submenu Function Clears setting details for the selected schedule. Reset Setting details for [Period] and day of the week are reset. Copy the tasks scheduled for your selected [Day of week] to another day in the schedule copying menu. Edit Copy schedule to...
  • Page 134: Trigger Out

    Menu Settings Submenu Function Used when the gamma has changed in response to other changes, such as changes in ambient temperature. Compensates for changes in gradation caused by a change in LCOS panel temperature. This function can only be used after about 2 minutes Adjust panel of projection.
  • Page 135: Factory Defaults

    Check the version indicated before updating the firmware. Update the projector firmware as follows. 1. Download updated firmware from the Canon website and store it at the root directory on a USB flash drive. 2. Insert the USB flash drive in the USB port.
  • Page 136: Network Settings

    The following is an explanation of preparation on the computer side. Connection Methods 4K600STZ/4K600Z support both wired and wireless connections, and 4K601STZ/ 4K601Z support wired connections. Wired Networks To connect the projector to a computer network, use a LAN cable.
  • Page 137 Menu Settings Wireless Networks (4K600STZ/4K600Z) • Projector Access Point (PJ AP) Mode The projector can be used as an access point for direct communication with wireless LAN-compatible computers. Up to five computers can be connected at once. Projector (in PJ AP mode)
  • Page 138 Menu Settings Connections • The following network features are available in infrastructure mode. Web features Mail features User commands Other network features (specifically, SNMP, PJLink, AMX Device Discovery and Crestron RoomView) are not available. • The following restrictions apply in infrastructure mode. Access point SSIDs not in ASCII code (single-byte letters, numbers, or symbols) may cause character corruption in search result display.
  • Page 139: Wireless Lan (Wi-Fi)

    Use of the wireless LAN function is restricted under the laws, etc., of each country and region, and violation of these restrictions may be subject to punishment. Check the Canon website for a list of countries and regions where use of the wireless LAN function permitted.
  • Page 140: Completing Projector Settings

    Menu Settings Completing Projector Settings Settings described in this section apply to wired and wireless (4K600STZ/ 4K600Z) network connections, setting a network password, and other aspects of networked projection. Menu screen for 4K600STZ, when the input signal is HDMI-1 Menu...
  • Page 141 Menu Settings Network settings lock [Network settings lock] > [Network Settings] > You can lock/unlock the network settings so that they cannot be changed. Option Function Cancels the lock and allows other network settings to be changed. The password must be entered in order to cancel the lock. Use the [ ] / [ ] / Unlock [ ] / [ ] buttons or number buttons on the remote control to enter the four-digit network password.
  • Page 142 Enable or disable network function. Specifying [Off] can save energy. Option Function Disable the network function. Enable the network function. Detailed settings (wired) (4K600STZ/4K600Z) [Detailed settings (wired)] > [Network settings] > Detailed settings (4K601STZ/4K601Z) [Detailed settings] > [Network settings] >...
  • Page 143 Menu Function MAC address Wired MAC address of the projector. Configure details of the projector’s wired LAN (IPv4) function. Menu screen for 4K600STZ/4K600Z (For 4K601STZ/4K601Z, “(wired)” is not shown in the menu title.) Submenu Function IP address IP address of the wired LAN (IPv4).
  • Page 144 IP” is displayed if you specify the same subnetwork as in PJ AP mode. Enter a different subnetwork, or change [Network (wired/wireless)] to [On/Off] before entering the wired IP address again. (4K600STZ/ 4K600Z) Option Function Disables the projector’s wired LAN (IPv6) function.
  • Page 145 Menu Settings Menu Function Configure details of the projector’s wired LAN (IPv6) function. Menu screen for 4K600STZ/4K600Z (For 4K601STZ/4K601Z, “(wired)” is not shown in the menu title.) Submenu Function Link local Link-local address of the wired LAN (IPv6). Auto Automatic addresses (up to 5) of the wired LAN (IPv6).
  • Page 146 • Network password setting (P141) • Register network password (P141) • Network (wired/wireless) (4K600STZ/4K600Z) (P142) • Network function (4K601STZ/4K601Z) (P142) • Detailed settings (wired) (4K600STZ/4K600Z) / Detailed settings (4K601STZ/4K601Z) (P142) - Detailed IPv4 address settings (P143) - DHCP (wired LAN (IPv4)) (P143)
  • Page 147 Menu Settings Detailed settings (wireless) (4K600STZ/4K600Z) [Detailed settings (wireless)] > [Network settings] > Display and manually change the wireless IP address, gateway address, and other settings. Available only when wireless networking is [On]. Menu Function Mode Shows the wireless connection mode. (P137) SSID Shows the access point SSID.
  • Page 148 Menu Settings Menu Function Manually specify the projector’s wireless settings. Submenu Function Mode Shows the wireless connection mode. (P137) A list of available access point SSIDs is displayed. You can find available access points nearby or use the keyboard to enter an access point SSID. Manual settings SSID Select the wireless security from [Open], [WEP],...
  • Page 149 Menu Settings Menu Function Configure details of the projector’s wireless LAN (IPv4) function. Submenu Function IP address IP address of the projector’s wireless LAN (IPv4). Subnet mask Subnet mask of the projector’s wireless LAN (IPv4). Gateway Gateway address of the projector’s wireless LAN address (IPv4).
  • Page 150 Menu Settings Menu Function Option Function Disables the projector’s wireless LAN (IPv6) function. Enables the projector’s wireless LAN (IPv6) function. [Detailed IPv6 address settings] is now available. IPv6 IPv6 connectivity is not available in PJ AP mode (P137). The [IPv6] and [Detailed IPv6 address settings] menus are grayed out.
  • Page 151 Menu Settings Menu Function The following network settings are initialized. Settings configured from the projector menu • Standby power setting (P125) • Network settings lock (P141) • Network password setting (P141) • Register network password (P141) • Network (wired/wireless) (P142) •...
  • Page 152 Menu Settings PJLink [PJLink] > [Network settings] > You can enable or disable the PJLink network function of the projector. When the function is turned on, control is possible via the network using commands that meet PJLink standards. Option Function Disables the PJLink function.
  • Page 153: Amx Device Discovery

    Menu Settings AMX Device Discovery [AMX Device Discovery] > [Network settings] > This setting enables other equipment compatible with AMX Device Discovery to detect the projector over a network. For networks without AMX Device Discovery, select [Off]. Option Function Disables AMX Device Discovery. Enables AMX Device Discovery.
  • Page 154 Manual IP address of the wireless LAN (IPv6). • [Detailed information (wired)] menu information is displayed when [Network (wired/ wireless)] is set to [On/*]. (4K600STZ/4K600Z) • [Detailed information (wireless)] menu information is displayed when [Network (wired/ wireless)] is set to [*/On]. (4K600STZ/4K600Z) •...
  • Page 155: Checking Projector Information

    Menu Settings Checking Projector Information You can check information about the signal types of the images projected and other information. Menu screen for 4K600STZ/4K600Z Menu Information Model name Shows the model name. Details of the input signal currently selected Input signal Information such as the type, resolution, frequency, and color format of the signal is displayed.
  • Page 156 Menu Settings Availability of Information Some information may not be displayed, depending on whether wired or wireless functions are enabled or disabled. ( : displayed, —: not displayed) 4K600STZ/4K600Z Network On/On Off/On Off/On Off/Off On/Off (wired/wireless) (Pj AP) (Pj AP)
  • Page 157: Using The Projector On A Network

    Using the Projector on a Network Completing Computer Settings for a Network Connection Specifying an IP Address Instructions for setting a computer’s IP address (for wired connections or wireless connections) are as follows for each operating system. ■ Windows 10 Right-click the Start button (Windows logo) in the lower left of the screen.
  • Page 158 Using the Projector on a Network ■ Windows 8.1 Click the down arrow in the lower left of the start screen. Click [Control Panel]. • From the Desktop: Press Win+X. In the shortcut menu displayed in the lower left, click [Control Panel]. Click [View network status and tasks].
  • Page 159: Resetting The Ip Address Setting Of The Computer

    Using the Projector on a Network ■ Windows 7 From the PC [Start] menu, select [Control Panel]. Click on [Network and Internet], then click on [View network status and tasks]. From the menu on the left side of the window, click on [Change adapter settings].
  • Page 160: Setting Up The Network

    Using the Projector on a Network Setting Up the Network 4K600STZ screenshots are used in these instructions. ■ Displaying the Network Configuration Screen Turn on the computer and projector. Network functions are not available for the first 40 seconds after projector startup.
  • Page 161: Network Setting

    Using the Projector on a Network The factory default IP address is “192.168.254.254” for wired connections (IPv4) and “192.168.253.254” for wireless connections (IPv4). If DHCP settings are used, ask the network administrator for the projector IP address. It is possible to check the IP address from the projector menu.
  • Page 162 Using the Projector on a Network Enter setting details in the fields shown (1), and then click [OK] (2). A confirmation window appears. Check the contents and if they are correct, click [Apply].
  • Page 163 Using the Projector on a Network The settings are applied to the projector. Selecting [Wired], [Wireless] or [Password] in the menu will cause this message to be displayed: “Save completed. Please change setting and reconnect.” If you select functions other than above, “Save completed” is displayed. Click [Back to top] to return to the top page of the web screen.
  • Page 164 Using the Projector on a Network Setting the Date and Time [Date and time settings] From [Date and time settings] in the settings screen, you can set time settings such as the current date and time, date/time display format, time zone, and daylight saving time.
  • Page 165 Using the Projector on a Network Item Explanation Factory default setting Date and IPv4 SNTP Enter the IPv4 SNTP server 0.0.0.0 time server IP address IP address in 1-byte numbers. IPv6 SNTP Enter the IPv6 SNTP server <Blank> server IP address IP address in 1-byte numbers.
  • Page 166 Using the Projector on a Network Setting a Scheduling [Schedule] From [Schedule] in the settings screen, you can automate some projector tasks by scheduling them. As the timing of scheduled operation, choose from [Usually], which is not during a certain period, or one of five special period times (Period.1 – Period.5) that you set up.
  • Page 167 Using the Projector on a Network Item Explanation Factory default setting Schedule Period.1 Shows the timing of the Cleared (OFF) view scheduled period 1. Can be turned on or off by selecting the check box. Period.2 Shows the timing of the Cleared (OFF) scheduled period 2.
  • Page 168 Using the Projector on a Network Item Explanation Factory default setting Edit Shows the day of the week for — schedule the selected schedule. Time Enter the automatic execution <Blank> time in 1-byte numbers, in the range 00:00 to 23:59. Operation As the operation for automatic Power...
  • Page 169 Using the Projector on a Network Item Explanation Factory default setting Select a day of the week for Cleared schedule automatic execution. Multiple days can be selected. Time Enter the automatic execution <Blank> time in 1-byte numbers, in the range 00:00 to 23:59. Operation As the operation for automatic Power...
  • Page 170 Using the Projector on a Network Basic Wired Network Settings [Wired] From [Wired] on the settings screen, you can complete basic network information for wired connections. For the setting procedure, refer to “Network Setting” (P161). Item Explanation Factory default setting MAC address Shows the projector’s wired The projector’s wired MAC...
  • Page 171 Using the Projector on a Network Item Explanation Factory default setting IPv6 IPv6 Specify on or off for the IPv6 address function of the wired LAN (IPv6). Choosing OFF will prevent you from configuring the following settings. [Autoconfiguration] [IP address] [Prefix length] [Default gateway] Autoconfiguration Select on or off for the auto...
  • Page 172 Using the Projector on a Network Basic Wireless Network Settings [Wireless] (4K600STZ/4K600Z) From [Wireless] on the settings screen, you can complete basic network information for wireless connections. For the setting procedure, refer to “Network Setting” (P161). Item Explanation Factory default setting MAC address Shows the projector’s...
  • Page 173 Using the Projector on a Network Item Explanation Factory default setting IPv6 IPv6 Specify on or off for the address wireless LAN (IPv6) function. Choosing OFF will prevent you from configuring the following settings. [Autoconfiguration] [IP address] [Prefix length] [Default gateway] Autoconfiguration Select on or off for the auto setting function of the wireless LAN (IPv6).
  • Page 174 <Blank> 1-byte alphanumeric characters and symbols (1 - 63 characters). From: Enter the sender address for error mails Projector@canon.co.jp in 1-byte alphanumeric characters and symbols (1 - 63 characters). IPv4 SMTP server IP Enter the SMTP server IP address 0.0.0.0 address (IPv4) in 1-byte numbers.
  • Page 175 Using the Projector on a Network Item Explanation Factory default setting IPv6 SMTP server IP Enter the SMTP server IP address <Blank> address (IPv6) in 1-byte numbers. IPv6 SMTP server port Enter the SMTP server port number number (IPv6) in 1-byte numbers (1 - 65535). Mail resend interval* Enter the interval for resending mail when an error occurred (unit: seconds)
  • Page 176 Using the Projector on a Network Sending a Test Mail You can send a test mail to the mail address specified in [Mail] under [Mail] in the settings screen by clicking [Send test mail] at the bottom of the screen. SNMP Settings [SNMP] From [SNMP] in the settings screen, you can configure the settings related to control of projectors which use SNMP (Simple Network Management Protocol).
  • Page 177 For the setting procedure, refer to “Network Setting” (P161). Item Explanation Factory default setting Projector name Enter the projector name in 1-byte Canon Projector001 alphanumeric characters and symbols (1 - 63 characters). Comment Enter any relevant notes, such as <Blank>...
  • Page 178: Setting Errors

    Using the Projector on a Network Item Explanation Factory default setting PJLink Turn the PJLink function on or off. If OFF is selected, the other settings in this screen cannot be configured. PJLink authentication Select whether to turn the PJLink authentication function on or off.
  • Page 179 Using the Projector on a Network Error Meaning System failed to connect SMTP server. Failed to connect to the SMTP server when sending a test mail. System failed to connect POP3 server. Failed to connect to the POP3 server attempting to send a test mail.
  • Page 180: Error List

    Using the Projector on a Network ■ Error Notification Mails The messages shown in the following error list are sent when an error occurs in the projector. Error list Errors related to Error name Temperature abnormality temperature Text The internal temperature of the projector is abnormally high, or else the ambient air temperature exceeds the threshold.
  • Page 181: Controlling The Projector From A Computer

    The projector web screen appears. The factory default IP address is “192.168.254.254” for wired connections and “192.168.253.254” for wireless connections (4K600STZ/4K600Z). If DHCP settings are used, ask the network administrator for the projector IP address. It is possible to check the IP address from the projector menu.
  • Page 182 Using the Projector on a Network Item Explanation Mute Switches the mute setting on or off. (P34) Information Shows the results of control, or control error information, at the top of the screen. When the operations are finished, click [Back to top] to return the initial web screen.
  • Page 183: Advanced Projection

    Advanced Projection Projecting from Multiple Projectors at Once (Edge Blending) The brightness of overlapping image edges from multiple projectors used together can be adjusted to make them blend in better. ■ Basic Instructions Follow these steps when using two projectors side by side. In the [Install settings] menu, select [Professional settings] >...
  • Page 184: Black Level Adjustment

    Advanced Projection ■ Color Adjustment In overlapping projection, portions of images in the overlapping area that pick up other colors or are miscolored may be more noticeable. You can make this overlapping area appear less distracting by performing Color blending adjustment. In the [Install settings] menu, select [Professional settings] >...
  • Page 185 Advanced Projection In the [Install settings] menu, select [Professional settings] > [Edge blending] > [Adjust] > [Black level adjustment] > [Adjust]. Select [Adjustment type] > [Black level]. After selecting [D-area base], as you watch the image, adjust the values so that the brightness and colors of the blending area and area D match. Adjust [D-area base] to lighten the black level, and adjust [Red], [Green], and [Blue] to obtain an optimal black level color tone, as needed.
  • Page 186 Advanced Projection Select [B-width], and then specify the width of area B. Adjust the width of area B so that it roughly matches the area where the black level of area B stands out. This will make the width of area D narrower. Select [Adjustment type] >...
  • Page 187: Advanced Registration To Adjust Projected Images

    Advanced Projection Advanced Registration to Adjust Projected Images This feature enables precise correction of red, green, or blue misalignment in different areas of the screen by color and area. Two methods of registration are available: 5-point adjustment (using points in the corners and center of the screen) and more precise manual adjustment based on 54 points (in a 6 x 9 grid).
  • Page 188 Advanced Projection Use the [ ] / [ ] / [ ] / [ ] buttons to select the point for correction, and then press the OK button. The projector enters color selection mode. Press the MENU button to return to [Advanced registration]. Select [Red] or [Blue] as the color, and then press the OK button.
  • Page 189 Advanced Projection ■ Manual Registration Use manual adjustment to correct registration only in certain areas. Any manual adjustment values set before switching to 5-point adjustment are cleared. In the [Install settings] menu, select [Professional settings] > [RGB alignment] > [Advanced registration] > [Adjust] > [Manual adjustment]. The projector enters manual adjustment mode, and a chart is displayed.
  • Page 190 Advanced Projection Select [Red], [Green], or [Blue] as the color, and then press the OK button. • Each time you select [Chart] and press the OK button, display switches between the chart and the source signal. • Accessing the manual adjustment window during test pattern projection will show the test pattern instead of your supplied signal.
  • Page 191: Adjusting Peripheral Focus

    Advanced Projection Adjusting Peripheral Focus This feature enables focus adjustment around the edges of the screen. • Use marginal focus adjustment for curved screens, such as domes. • Use marginal focus adjustment to bring images on flat screens into focus if image edges remain warped after you adjust the overall focus.
  • Page 192 Advanced Projection Press the pointer buttons to adjust the focus at image edges. Remote control Projector Press the [ ] / [ ] / [ ] / [ ] buttons to adjust peripheral focus. Once image edges are in focus, press the OK or FOCUS button. ■...
  • Page 193: Other Information

    Safety Instructions Before Use Other Information Installation Procedure Connection Procedure Projection Procedure Convenient Features Using Menus Menu Configuration Menu Settings Using the Projector on a Network Advanced Projection Maintenance Product Specifications Troubleshooting...
  • Page 194: Maintenance

    Maintenance Cleaning the Projector Clean the projector frequently to prevent dust from settling on the surface. A dirty lens may ruin the quality of the projected image. Do not use adhesives, lubricants, oils, or alkaline detergents for maintenance of the projector. Before cleaning the projector, always turn it off, unplug it after the cooling fan stops, and wait at least one hour.
  • Page 195 Maintenance Follow the procedure below when replacing the air filter. Turn off the projector power and remove the power plug. Pull out the filter cover by gripping the two tabs at the bottom and lifting. Open the filter cover and remove Grasp the air filter by the handles and remove it.
  • Page 196 • After air filter replacement, reset [Air filter counter] (P134). • Handle the air filter carefully. If damaged, the air filter will not work properly. • To purchase a replacement air filter (part no: RS-FL04), contact the Canon Customer Support Center.
  • Page 197: Product Specifications

    Product Specifications Displayed Test Patterns To access the test pattern menu, from the [Install settings] menu, select [Test pattern] (P117) > [On], or press the TEST PATTERN button on the remote control. While the test pattern is displayed, you can use the [ ] / [ ] buttons to switch patterns.
  • Page 198: Supported Signal Types

    Product Specifications Supported Signal Types The projector automatically projects input signals correctly from computers or AV equipment compatible with any of these signals. HDMI (single) FP : Front porch SW : Sync width BP : Back porch Blanking information Horizontal Vertical Signal Dot clock...
  • Page 199 Product Specifications When you apply the settings in the HDMI multi input mode column, formats in corresponding rows are identified in the EDID. No information is provided in the EDID for fields that are blank, so the computer output format must be configured manually. HDMI 1x2 FP : Front porch SW : Sync width...
  • Page 200 Product Specifications Horizontal Vertical Blanking information Signal Dot clock DVI multi input frequency frequency Horizontal Vertical resolution [MHz] mode [kHz] [Hz] FP, SW, BP FP, SW, BP 66.636 59.978 181.250 48, 32, 80 3, 10, 18 2560x1080 66.000 60.000 198.000 Single 248, 44, 148 4, 5, 11...
  • Page 201 Product Specifications Blanking information Combined Resolution at Horizontal Vertical Dot clock DVI multi multi input each input frequency frequency Horizontal Vertical [MHz] input mode resolution terminal [kHz] [Hz] FP, SW, BP FP, SW, BP 74.006 59.924 130.250 2x2* 48, 32, 80 3, 4, 28 3200x2400 1600x1200...
  • Page 202: Specifications

    1.3x (motorized) (4K600STZ/4K601STZ) Zoom 1.76x (motorized) (4K600Z/4K601Z) Focus Motorized Lens shift V: ±60% (motorized) H: ±10% (motorized) f = 17.2 – 22.3 mm (4K600STZ/4K601STZ) Focal length f = 22.7 – 39.8 mm (4K600Z/4K601Z) F2.6 (4K600STZ/4K601STZ) F number F2.6 – F2.75 (4K600Z/4K601Z) Type Blue laser diode + yellow phosphor Minimum: 101.6 cm (40");...
  • Page 203 Product Specifications Model name 4K600STZ/4K601STZ/4K600Z/4K601Z 640 x 480, 800 x 600, 1280 x 720, 1024 x 768, 1366 x 768, 1440 x 900, 1280 x 1024, 1920 x 1080, 2048 x 1080, 2560 (single) x 1080, 1920 x 1200, 2048 x 1200, 2560 x 1440, 3840 x...
  • Page 204 (*6) When [Panel drive mode] is set to [4096x2400]. (*7) When [Close 3] is selected in [Iris]. (*8) 4K600STZ/4K600Z only * 99.99% or more of the LCD panel pixels are effective. During projection, 0.01% or less of pixels may stay lit or unlit due to the characteristics of the LCD panel.
  • Page 205: External View

    Product Specifications ■ External View 4K600STZ/4K601STZ/ 4K600Z/4K601Z 605 mm (23.8") 133 mm (5.2") 559 mm (22.0") 624 mm (24.6") ■ Service Port (CONTROL) Pin assignment Pin No. Signal OPEN OPEN OPEN Internal pull-up OPEN OPEN Communication format Communication mode : RS-232C, asynchronous, half-duplex communication...
  • Page 206 Product Specifications Main user commands Commands ASCII representation Binary representation Power on POWER=ON<CR> 50h 4Fh 57h 45h 52h 3Dh 4Fh 4Eh 0Dh Power supply 50h 4Fh 57h 45h 52h 3Dh 4Fh 46h 46h Power off POWER=OFF<CR> 47h 45h 54h 3Dh 50h 4Fh 57h 45h 52h Power status acquisition GET=POWER<CR>...
  • Page 207 Product Specifications Commands ASCII representation Binary representation Brightness acquisition GET=BRI<CR> 47h 45h 54h 3Dh 42h 52h 49h 0Dh Sharpness 53h 48h 41h 52h 50h 3Dh <numeric Sharpness SHARP=<value><CR> value setting code> 0Dh 47h 45h 54h 3Dh 53h 48h 41h 52h 50h Sharpness acquisition GET=SHARP<CR>...
  • Page 208: Troubleshooting

    If the same warning occurs again, there may be a malfunction in the projector. Unplug the projector from the electrical outlet.* * Contact the Canon Customer Support Center.
  • Page 209: Symptoms And Solutions

    You cannot disable this safety device. vent is blocked and the Remove any obstacle that is blocking the air intake or internal temperature of exhaust vent and contact the Canon Customer the projector has Support Center. increased. The air filter is not Check whether the air filter is installed correctly.
  • Page 210: There Is No Sound

    Troubleshooting Cause Countermeasure The BLANK function has Press the BLANK button on the remote control. been selected. (P72) No image is projected Turn first the projector and then the computer off and due to a problem with then back on again. the computer.
  • Page 211: The Projected Image Is Blurred

    Troubleshooting ■ The Projected Image Is Blurred Cause Countermeasure The image is out of Adjust the focus. (P59) focus. The distance to the Check whether the distance to the screen is screen is too short. appropriate. (P40) The projector is not Check whether the projector is placed obliquely to placed straight in front of the screen.
  • Page 212: You Cannot Operate The Remote Control

    (P147 – P148). In infrastructure mode, try changing the wireless channel on the access point. If connection is still not possible, contact the Canon Customer Support Center. ■ You Cannot Operate the Remote Control Cause...
  • Page 213 Troubleshooting Cause Countermeasure You are operating the Check whether the infrared remote receiver of the remote control in an main unit of the projector is exposed to direct sunlight unsuitable operating or strong light of lighting apparatus. (P36) environment. The channel setting of Check whether the channel setting of the remote the remote control does control has been changed.
  • Page 214: Index

    Index Numerics 6-axis color adjust ......104 Gamma ...........100 Adjusting keystone distortion .... 65 HDMI terminal .......32, 45, 46 Air filter........28, 194 Ambient light ........102 AMX Device Discovery ....153 IMAGE..........69 ASPECT..........64 Image adjustment......76, 98 Aspect ..........64 Image mode (Image quality) .....68 AUDIO IN terminal ......
  • Page 215 Index Wired Networks .......142 Wireless Networks ..137, 142, 147 OK..........29, 33 Optical zoom ........60 Password ........ 128, 129 PJLink ........152, 177 POWER ........53, 71 Projecting from Multiple Projectors at Once (Edge Blending) ....183 Projector on........119 Rear projection......
  • Page 216: Option

    Option • Ceiling attachment • Ceiling-mount pipe Part No.: RS-CL15* (600 - 1000 mm / 23.6 - 39.4 in) • Ceiling-mount arm Part No.: RS-CL09* Part No.: RS-CL17* • Air filter • Ceiling-mount pipe Part No.: RS-FL04 (400 - 600 mm / 15.7 - 23.6 in) •...
  • Page 217 30-2, Shimomaruko 3-chome, Ohta-ku, Tokyo 146-8501, Japan CANON U.S.A. INC. One Canon Park, Melville, New York 11747, U.S.A. For all inquires concerning this product, call toll free in the U.S. 1-800-OK-CANON CANON EUROPE LTD. 3 The Square, Stockley Park, Uxbridge, Middlesex, UB11 1ET United Kingdom CANON EUROPA N.V.

This manual is also suitable for:

4k601stz4k600z4k601z

Table of Contents