Table of Contents
Advertisement
Quick Links
MULTIMEDIA PROJECTOR
User's Manual
Safety Instructions
Before Use
Projection Procedure
Convenient Projection
Features
Installation Procedure
Connection Procedure
Adjusting the Image
Special Arrangements
Using Menus
Menu Configuration
Menu Description
Maintenance
Product Specifications
Troubleshooting
ENG
Advertisement
Table of Contents
Troubleshooting

Subscribe to Our Youtube Channel
Related Manuals for Canon 4K6021Z


Summary of Contents for Canon 4K6021Z
- Page 1 MULTIMEDIA PROJECTOR Safety Instructions Before Use Projection Procedure User’s Manual Convenient Projection Features Installation Procedure Connection Procedure Adjusting the Image Special Arrangements Using Menus Menu Configuration Menu Description Maintenance Product Specifications Troubleshooting...
- Page 2 This Manual This is the user’s manual for 4K6021Z Multimedia Projector (hereafter, “projector”). The “Basic Guide” describes basic steps before projection and introduces features that are convenient in presentations and other situations. The “Installation Guide”...
- Page 3 4K6021Z/4K6020Z/4K5020Z/WUX7000Z/WUX6600Z/ WUX5800Z/WUX7500/WUX6700/WUX5800 Notification of an Addition to Functions with a Firmware Upgrade 4K6021Z (Ver. 01.010100) 4K6020Z/4K5020Z (Ver. 01.040300) WUX7000Z/WUX6600Z/WUX5800Z (Ver. 01.040400) WUX7500/WUX6700/WUX5800 (Ver. 01.040200) ■ Addition of a Dynamic Contrast Function (4K6021Z/4K6020Z/ 4K5020Z/WUX7000Z/WUX6600Z/WUX5800Z only) Refer to “Contrast detail adjustment” in this manual.
-
Page 4: How To Use This Manual
(*2) Refer to “Network settings” in this manual for details. (*3) Operating conditions: • The projector should be in the projection or standby state (4K6021Z/4K6020Z/4K5020Z/ WUX7000Z/WUX6600Z/WUX5800Z) • The projector should be in the projection state (WUX7500/WUX6700/WUX5800) •... -
Page 5: Table Of Contents
Table of Contents How to Use This Manual....2 Connection Procedure....62 Connecting Other Equipment ..... 62 Projector Highlights...... 4 Connecting to a Network..... 65 Safety Instructions......6 Controlling the Projector from a Safety Symbols in this Manual ... 12 Computer ..........79 Precautions for Use ...... -
Page 6: Projector Highlights
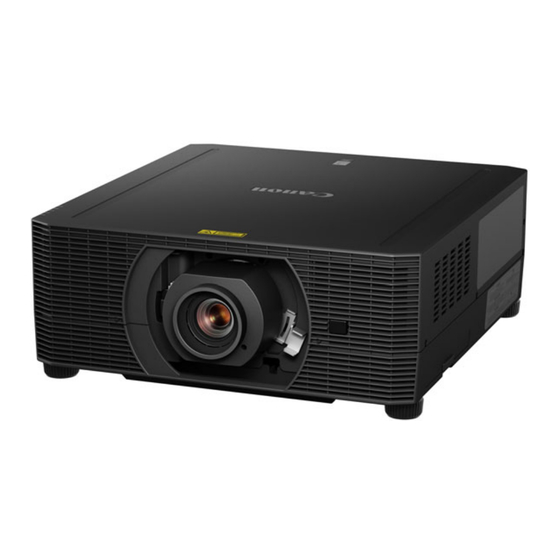
Projector Highlights Bright Yet Compact, With a Laser Light Source A bright projector that is also compact, at 480 x 545 x 196 mm (18.9 x 21.5 x 7.7 in., W x D x H). Features a laser light source that lasts longer than traditional mercury lamps. - Page 7 An iOS app for easy remote control and status management of projectors over Wi-Fi. Connect to a projector used as an access point (P66), or connect via an existing access point (P66). Note that a password is required when using Canon ST (P174).
-
Page 8: Safety Instructions
If your projector does not seem to be operating properly, read this manual again, check operations and cable connections, and try the solutions in the “Troubleshooting” section in the back of this manual. If the problem still persists, contact the Canon Customer Support Center. CAUTION RISK OF ELECTRIC SHOCK... - Page 9 Safety Instructions Safety Precautions WARNING: • THIS APPARATUS MUST BE GROUNDED. • TO REDUCE THE RISK OF FIRE OR ELECTRIC SHOCK, DO NOT EXPOSE THIS APPLIANCE TO RAIN OR MOISTURE. • This projector produces intense light from the projection lens. Do not stare directly into the lens, otherwise eye damage could result.
- Page 10 Safety Instructions ■ READ AND KEEP THIS OWNER’S MANUAL FOR LATER USE. All the safety and operating instructions should be read before beginning to operate the product. Read all of the instructions given here and retain them for later use. Unplug this projector from the AC power supply before cleaning.
- Page 11 If you are not sure of the type of power supplied, contact the Canon Customer Support Center or local power company. Do not overload wall outlets and extension cords as this can result in fire or electric shock.
- Page 12 Safety Instructions AC Power Cord Requirement The AC Power Cord supplied with this projector meets the requirements for use in the country you purchased it. AC Power Cord for the United States and Canada: The AC Power Cord used in the United States and Canada is listed by the Underwriters Laboratories (UL) and certified by the Canadian Standard Association (CSA).
- Page 13 EEE. Your cooperation in the correct disposal of this product will contribute to the effective usage of natural resources. For more information about the recycling of this product, please contact your local city office, waste authority, approved scheme or your household waste disposal service or visit www.canon-europe.com/weee, or www.canon-europe.com/battery.
-
Page 14: Safety Symbols In This Manual
Safety Instructions Safety Symbols in this Manual This section describes the safety symbols used in this manual. Important projector safety information is identified by the following symbols. Always observe the safety information by these symbols. Denotes the risk of death or serious injury from improper handling if the information is not observed. -
Page 15: Precautions For Use
If the following situations occur, turn the power off, remove the power plug from the power outlet and contact the Canon Customer Support Center. Failure to do so could cause a fire or result in an electric shock. - Page 16 Safety Instructions Pay attention to the following points regarding the power source, power plug and handling of the connector. Failure to do so may cause a fire or electric shock. • Insert the power plug and connector securely up to the base. Additionally, do not use a damaged power plug or an outlet that is loose.
-
Page 17: Installation And Use
The interior of the projector contains high-voltage components as well as parts that are hot. If inspection, maintenance or repair is required, contact the Canon Customer Support Center. • Do not disassemble or modify the projector (including consumable parts) or the remote control. -
Page 18: Laser Light Source
• For ceiling mounting or other installation work, request service from a qualified technician or the Canon Customer Support Center. Poor installation work could result in an accident. • To avoid hazards such as parts falling when the lens of a ceiling- mounted projector is replaced, request service from a qualified technician or the Canon Customer Support Center. -
Page 19: Remote Control Batteries
Safety Instructions Remote Control Batteries Pay attention to the following points regarding handling of batteries. Failing to do so could result in a fire or personal injury. • Do not heat, short circuit or disassemble the batteries, or place them in a fire. •... - Page 20 Safety Instructions Pay attention to the following points regarding installation and handling of the projector. • Do not place any heavy objects on top of the projector or sit/ stand on it. Pay particular attention to prevent small children from doing so.
-
Page 21: For Safe Use
For Safe Use Carrying and Installation Pay attention to the following points when carrying or transporting the projector. • If transportation is necessary, the lens unit should be removed before transporting the projector. If the projector is subjected to excessive impacts during transportation, the lens unit or projector may be damaged. - Page 22 For Safe Use Pay attention to the following points when installing or using the projector. • Be careful of condensation. If the projector is abruptly taken to a warmer location, or if the room temperature rises abruptly, moisture in the air may condense on the lens or mirror and affect projected images.
-
Page 23: Before Installation
Before Installation Precautions When Carrying / Shipping the Projector Prepare the projector as described below before carrying it. • Disconnect the cables connected to the projector. Carrying the projector with the cables attached may cause an accident. • Retract the adjustable feet before moving the projector. Leaving the feet extended may cause damage. - Page 24 Before Installation ■ Do Not Touch the Lens with Bare Hands Do not touch the lens with bare hands. Any smudges or fingerprints on the lens may affect image quality. ■ Allow a 30 Min. Warm Up before Focus Adjustment (P43), if Possible Immediately after startup, the heat of the light source may prevent stable focus.
- Page 25 Before Installation ■ When Using Mounted on the Ceiling When the projector is used mounted on the ceiling or installed in a high location, it is necessary to periodically clean the air intake and exhaust vents, and the area around the air filter. Dust that accumulates in intake or exhaust vents may impair ventilation, raising the temperature inside and posing a risk of...
- Page 26 Before Installation ■ Precautions for Portrait (Upright) Installation • Do not block the air intake or exhaust vents. In particular, because there is an air intake vent on the bottom, always ensure a minimum clearance of 2 cm (0.8") from the bottom. •...
- Page 27 Ensure Network Security Take measures to ensure network security. Note that Canon is not liable in any way for direct or indirect loss from network security incidents, such as unauthorized access.
-
Page 28: Open Source Software
(iii) Product Name / Application Name [mandatory] (iv) Version [mandatory] Please check “Firmware” in the “Information” menu. - Addressee: Open Source Promotion Division, Canon Inc. 30-2, Shimomaruko 3-chome, Ohta-ku,Tokyo 146-8501, Japan - Please see Privacy Notice at Canon Global <https://global.canon/>. -
Page 29: Before Use
Before Use Included Accessories Before use, make sure the following items are included in the package. • Remote control • Batteries for the remote control (AAA size x2) (part no.: RS-RC07) • Power cord • Important Information For Continental (1.8 m / 5.9') Europe For the U.S.A. -
Page 30: Projector Part Names And Functions
Before Use Projector Part Names and Functions ■ Front Side (1) Power cord connector (P64) (2) Infrared remote receiver (P36) (3) Lens unit (sold separately) (4) Air intake vent Do not block the air intake. Doing so may cause a malfunction. (5) Side control (P29) (6) Terminals and connectors (P32) - Page 31 Before Use ■ Side Control (1) POWER button (P41, P46) (5) Pointer / VOL buttons (P102) Turns the projector on or off. Up, down, left, or right in menu navigation or other operations. (2) INPUT button (P42) Adjusts the sound volume. Switches the input signal.
- Page 32 Before Use ■ LED Indicators The projector status is shown by the LED indicators (off / lit / flashing). • POWER (green) : Illuminated during projection. Otherwise, flashes in the following situations. • As the projector transitions from standby to projection •...
- Page 33 Before Use LED Indicator Displays The LED indicators flash or illuminate to indicate the operating status of the projector. Legend: Example of when the POWER indicator is on; : Off : Lit : Flashing LED indicator Operating status POWER STANDBY WARNING LIGHT TEMP...
- Page 34 Before Use ■ Terminals and Connectors (1) USB port (P157) Connects a USB flash drive. Used for firmware updates. (2) LAN / HDBaseT port (P63, P65) Receives HDBaseT input including digital video and audio signals. Carries both video and audio signals across a single LAN cable (shielded twisted pair).
-
Page 35: Remote Control
Before Use Remote Control ■ Part Names and Functions (6) FOCUS button (P43) Adjusts focusing. [ ] / [ ] buttons: Moves the focus position further away. [ ] / [ ] buttons: Moves the focus position nearer. (7) ZOOM button (P43) Adjusts the image size. - Page 36 Before Use (19) EXIT button (P103) Cancels functions such as menu (14) display or test pattern during operation and returns to the image display. (20) LENS-SHIFT button (P56) (15) Moves the lens up, down, left, or right. [ ] / [ ] / [ ] / [ ] buttons: (16) Moves the image.
- Page 37 Before Use ■ Installing Remote Control Batteries Open the battery Insert batteries. Close the compartment lid. Insert 2 new AAA compartment lid. Slide the lid while batteries in the Slide the lid until you pressing it down. compartment with the + hear a click to securely and –...
- Page 38 Before Use ■ Remote Control Operating Range The remote control is an infrared type. Point it at the infrared remote receiver on the front or rear of the projector to operate it. 25° 8 m (26.3') 25° 8 m (26.3') 25°...
- Page 39 Before Use ■ Using an Optional Wired Remote (RS-RC05) To use a wired remote control with the projector, use the RS-RC05, sold separately. Use a cable with a ø3.5 mm stereo mini jack (not included). Remote control (RS-RC05) Terminal for wired remote control ø3.5 mm stereo mini jack cable (not included)
-
Page 40: Basic Guide
Basic Guide... -
Page 41: Projection Procedure
Projection Procedure The steps to prepare for projection are as follows. Connect Other Equipment (P40) Step 1 Configure the computer’s network settings (P68) Turn the Projector On (P41) Step 2 Select an Input Signal (P42) Step 3 Adjust the Image (P43) Step 4 Select the Image Quality (Image Mode) -
Page 42: Step 1 Connect Other Equipment
Projection Procedure Step 1 Connect Other Equipment HDMI input... -
Page 43: Step 2 Turn The Projector On
Projection Procedure Step 2 Turn the Projector On Press the POWER button. Remote control Projector Turn on the computer or other equipment. • If a window is projected for menu language selection, use the pointer buttons to choose a language, and then press the OK button. •... -
Page 44: Step 3 Select An Input Signal
Projection Procedure Step 3 Select an Input Signal To switch between signals from connected devices, select an input signal in the [Input] menu. The selected signal changes each time you press the INPUT button, or each time you press the [ ] / [ ] buttons when the [Input] window is shown. The currently active input signal is marked with a green circle and enclosed by a orange border. -
Page 45: Step 4 Adjust The Image
Projection Procedure Step 4 Adjust the Image ■ Adjusting the Computer’s Output Resolution The projector’s maximum resolution is 4096x2160 (P193). For details on adjusting your computer’s output resolution, refer to the manual for your computer. ■ Focusing / Resizing the Image Press the ZOOM button on the remote control to adjust the image size, and press the FOCUS button to adjust the focus. -
Page 46: Step 5 Select The Image Quality (Image Mode)
Projection Procedure Step 5 Select the Image Quality (Image Mode) Pressing the IMAGE button on the remote control, you can select an image mode to suit the projected image. In each image mode, you can further adjust the brightness, contrast, sharpness, gamma, HDR range, color adjustment, advanced adjustment, light source mode (P125) and brightness level (P125). - Page 47 Projection Procedure ■ Projecting an Image in the DICOM SIM Mode In the DICOM simulation mode (hereinafter referred to as “DICOM SIM”), this projector can project a monochrome medical image such as an X ray radiography, CT image, MRI image, etc. in the tone similar to the DICOM (Digital Imaging and Communications in Medicine) standard.
-
Page 48: Turn The Projector Off
Projection Procedure As you view the test pattern, perform [Gamma] (P119) adjustment from the [Image adjustment] menu until the image is optimal. Press the OK button after the setting. Perform one of the followings to obtain an appropriate projection: • Darken the ambient light •... -
Page 49: Convenient Projection Features
Convenient Projection Features Convenient Features This section describes convenient features during presentations and in other situations. Temporarily Blacking Out an Image Projection can be temporarily blanked after a presentation, or to divert the audience’s attention away from the screen. Press the BLANK button on the remote control to black out the Remote control image. - Page 50 Convenient Projection Features Projecting a Test Pattern from the Menu Even without any input signals, the projector can project a test pattern. Test patterns can be projected during installation to check how the projector is installed. For details on projecting test patterns, see “Test pattern” (P138) or “Adjustment Using a Test Pattern”...
- Page 51 Convenient Projection Features Adjusting the Volume Useful when: • You want to adjust the volume level of external speakers connected via the audio output terminal. Press the VOL button. The following screen appears. Remote control • You can also adjust the volume level with the [ ] / [ ] buttons of the projector.
-
Page 52: Installation Guide
Installation Guide Before setting up the projector, be sure to read “Before Installation” (P21). -
Page 53: Installation Procedure
Installation Procedure Relationship Between Projecting Distance and Image Size The projected image size is determined by the distance between the projector and screen (projection distance) and the zoom position. Refer to the following table and decide the distance between the projector and screen. Lower edge Screen size of image... - Page 54 Installation Procedure Lens unit RS-SL03WF RS-SL06UW RS-SL07RST Height H** [cm] Projection ratio* 0.74:1 0.5:1 1.34 – 2.35:1 Image size Projection distance L [m (feet)] RS-SL03WF RS-SL06UW RS-SL07RST Diagonal [cm] Width Height Fixed Fixed Wide limit Tele limit 0.67 0.45 1.20 2.11 -27 –...
-
Page 55: Installing / Removing The Lens Unit
• If transportation is necessary, the lens unit should be removed before transporting the projector. If the projector is subjected to excessive impacts during transportation, the lens unit or projector may be damaged. • For details about which devices the projector is compatible with, contact the Canon Customer Support Center. - Page 56 Installation Procedure ■ Installing the Lens Unit After confirming that the lens lever is raised, hold the lens unit with the lens connector on the left side and insert it in the projector, keeping the lens connector aligned with the connector in the projector. Lens lever Connector Lens connector...
- Page 57 Installation Procedure Removing the Lens Unit Raise the lens lever by Lens lever turning it counterclockwise. Hold the lens unit securely as you remove it. When removing the lens unit, keep it level as you pull it straight out of the projector.
-
Page 58: Installation
Installation Procedure Installation Place the projector in front of the screen. • To avoid keystone distortion, install the Screen projector so that it is at right angles to the screen. • The screen must not be exposed to direct sunlight or light from lighting equipment. In a bright room, it is recommended that lights be turned off, curtains be drawn, and other steps taken to make the screen... - Page 59 Installation Procedure Press the LENS button on the projector repeatedly to switch between windows for parameters adjusted by controlling the lens. To access the lens shift adjustment window, press the LENS button three times (or four times if you have set [Marginal focus] to [On]). Projector Press three times.
- Page 60 Installation Procedure Adjustment Using Lens Shift You can reposition the image in all directions by shifting the lens up, down, left, or right. This feature is referred to as lens shift. The projector’s lens shift range is as follows. Amount movable in up/down direction 90°...
- Page 61 Installation Procedure Area Outside the Lens Shift Range (in [Normal] Lens Shift Mode*) • Zoom Lenses: RS-SL01ST/RS-SL02LZ/RS-SL04UL/RS-SL05WZ When the shift exceeds 49% (*1) in the upward direction, the amount of available shift in the left/right directions decreases. When the lens is shifted upward to the maximum of 60% (*2) (1), the lens cannot be shifted left or right.
- Page 62 Installation Procedure Resetting the Position During screen position adjustment, press and hold the LENS-SHIFT button on the remote control or the LENS button on the projector to display the [Lens shift reset] window. The selections for the lens currently used are displayed. Use the pointer buttons to select one of them, then press the OK button.
- Page 63 (part no.: RS-CL17). Depending on the installation environment, an extension pipe (part no.: RS-CL08 or RS-CL09) may also be required. Contact the Canon Customer Support Center for more detailed information. • Make sure to use the optional ceiling attachment.
-
Page 64: Connection Procedure
Connection Procedure Connecting Other Equipment Before connecting the projector to other equipment, turn off both the projector and the other equipment. ■ HDMI Connections HDMI cable (not included) Computer equipment HDMI terminal ■ DisplayPort Connections DisplayPort cable (not included) Computer equipment DisplayPort port... - Page 65 Connection Procedure ■ LAN / HDBaseT Connections LAN cable (CAT5e or better; shielded; not included) HDMI cable HDBaseT (not included) transmitter Computer equipment HDMI terminal Notes on HDBaseT • Use a shielded cable rated at CAT5e or better. • Maximum transmission distance is 70 m (229.7') (maximum distance for 2K signals: 100 m (328.1')).
- Page 66 Connection Procedure ■ Audio Output Connections Audio cable (not included) Amplified Computer equipment speakers RCA terminal ■ Plugging the Projector In Connect the power cord to the projector and plug it in. Insert the power plug and connector securely up to the base. •...
-
Page 67: Connecting To A Network
Connection Procedure Connecting to a Network ■ Network Connection Overview Connecting the projector to a network enables you to control the projector from a computer and receive notification of projector errors via email. Depending on the method of network connection, preparation on the computer side may be necessary. - Page 68 Connection Procedure Wireless Networks • Projector Access Point (PJ AP) Mode The projector can be used as an access point for direct communication with wireless LAN-compatible computers. Up to five computers can be connected at once. Projector (in PJ AP mode) Wireless LAN-compatible computers The following network features are available in PJ AP mode.
- Page 69 Connection Procedure Network connection • The following network features are available in infrastructure mode. - Web features - Mail features - User commands - SNMP features Other network features (PJLink, AMX Device Discovery and Crestron RoomView) are not available. • The following restrictions apply in infrastructure mode. - Access point SSIDs not in ASCII code (single-byte letters, numbers, or symbols) may cause character corruption in search result display.
- Page 70 Connection Procedure ■ Configuring the Computer’s Network Settings Instructions for setting a computer’s IP address (for wired connections or wireless connections) are as follows for each operating system. Windows 10 Click the Start button (Windows logo) in the lower left of the screen. From [Windows system tools] on the Start menu that is displayed, click [Control Panel].
- Page 71 Connection Procedure Windows 8.1 Click the down arrow in the lower left of the start screen. Click [Control Panel]. • From the desktop screen: Press Win+X. In the shortcut menu displayed in the lower left, click [Control Panel]. Click [View network status and tasks]. •...
- Page 72 Connection Procedure Windows 7 From the PC [Start] menu, select [Control Panel]. Click [Network and Internet], and then click [View network status and tasks]. From the menu on the left side of the window, click [Change adapter settings]. For a wired connection, right-click [Local Area Connection], or for a wireless connection, right-click [Wireless Network Connection].
- Page 73 Connection Procedure ■ Setting Up the Network Displaying the Network Configuration Screen Turn on the computer and projector. Network functions are not available until about 40 seconds after the projector is plugged Launch a web browser, enter “http://(projector IP address)” in the address bar, and press the Enter key.
- Page 74 Connection Procedure Click [Settings] on the web screen. The password input window appears. Enter the user name and password on the password input window, then click [OK]. The factory default user name is “root” and the password is “system”. The settings screen is displayed. Complete the network settings on this screen. For details on the projector’s web screen, see “Projector Web Screen Menu”...
- Page 75 Connection Procedure Network Setting Select a function to set up from the settings screen menu. Enter setting details in the fields shown (1), and then click [OK] (2).
- Page 76 Connection Procedure A confirmation window appears. Check the contents and if they are correct, click [Apply]. The settings are applied to the projector. Selecting [Wired], [Wireless] or [Password] in the menu will cause this message to be displayed: “Save completed. Please change setting and reconnect.”...
- Page 77 Connection Procedure Setting Errors When a setting-related error occurs, the error name is displayed on the screen, and a “ ” mark is displayed next to the input field which caused the error. The error meanings are as shown below. Error Meaning Input error...
- Page 78 Connection Procedure Resetting Network Settings to the Default Settings Perform steps 1 – 3 on “Setting Up the Network” (P71) to display the settings screen. Click [Initialize network settings]. A confirmation window appears. Click [OK].
- Page 79 If the air filter is clogged, replace it. If the same warning occurs again, there may be a malfunction in the projector. Contact the Canon Customer Support Center. Errors related...
- Page 80 If the same warning occurs again, there may be a malfunction in the projector. Unplug the projector from the power outlet. Contact the Canon Customer Support Center. Errors related Error name...
-
Page 81: Controlling The Projector From A Computer
Connection Procedure Controlling the Projector from a Computer The projector can be controlled from a computer over a wired or wireless network connection. Turn on the computer and projector. Launch a web browser, enter “http://(projector IP address)” in the address bar, and press the Enter key. The projector web screen appears. - Page 82 Connection Procedure Item Explanation Projector name The name of the connected projector is displayed (P188). Comment Shows notes, such as where the projector is installed (P188). Refresh Refreshes the displayed contents with the most recent information. Power Turns projector power on or off. Input Select an input signal and click [Apply] to change to that input signal (P42).
-
Page 83: Adjusting The Image
Adjusting the Image Filling the Screen ■ Selecting an Aspect Ratio Select an aspect ratio type based on the input signal type, aspect ratio of the screen and resolution. Press the ASPECT button on the remote control to change the aspect ratio type.* Option Function An image is projected at the aspect ratio of the input signal. - Page 84 Adjusting the Image ■ Horizontal/Vertical Keystone Correction Select [Install settings] > [Keystone] > [Horizontal-vertical keystone]. You can also display the [Horizontal-vertical keystone adjustment] window by pressing the KEYSTONE button on the remote control. Remote control Press the pointer buttons to adjust the dimensions, and then press the OK button.
- Page 85 Adjusting the Image ■ Corner Adjustment Select [Install settings] > [Keystone] > [Corner adjustment]. You can also display the [Corner adjustment] window by pressing the KEYSTONE button on the remote control. Remote control Press the pointer button of the corner for correction, and then press the OK button.
- Page 86 Adjusting the Image Press the pointer buttons to adjust the corner, and then press the OK button. Remote control [Zoom] (P128) is not available when [Keystone] is set to [Corner adjustment]. Resetting the Keystone Adjustment First, press the KEYSTONE button on the remote control twice to display the [Keystone reset] window.
-
Page 87: Advanced Registration To Adjust Projected Images
Adjusting the Image Advanced Registration to Adjust Projected Images This feature enables precise correction of red, green, or blue misalignment in different areas of the screen by color and area. Two methods of registration are available: 5-point adjustment (using points in the corners and center of the screen) and more precise manual adjustment based on 54 points (in a 6 x 9 grid). - Page 88 Adjusting the Image Use the [ ] / [ ] / [ ] / [ ] buttons to select the point for correction, and then press the OK button. The projector enters color selection mode. Press the MENU button to return to [Advanced registration]. Select [Red] or [Blue] as the color, and then press the OK button.
- Page 89 Adjusting the Image ■ Manual Registration Use manual adjustment to correct registration only in certain areas. Any manual adjustment values set before switching to 5-point adjustment are cleared. In the [Install settings] menu, select [Professional settings] > [RGB alignment] > [Advanced registration] > [Adjust] > [Manual adjustment]. The projector enters manual adjustment mode, and a chart is displayed.
- Page 90 Adjusting the Image Select [Red], [Green], or [Blue] as the color, and then press the OK button. • Each time you select [Chart] and press the OK button, display switches between the chart and the source signal. • Accessing the manual adjustment window during test pattern projection will show the test pattern instead of your supplied signal.
-
Page 91: Adjusting Projected Images With Partial Distortion Correction
Adjusting the Image Adjusting Projected Images with Partial Distortion Correction This feature enables precise correction of partial projected image distortion in your specified areas. Red, green, and blue are adjusted together. • Correction separate from [Advanced registration] is possible. • Correction is not possible from adjustment points on the outermost edge toward the outside of the projected image. - Page 92 Adjusting the Image Use the [▲] / [▼] / [ ] / [ ] buttons to select the point to fine-tune. After selecting the point to fine-tune, press the OK button. The projector is now in partial distortion correction mode. •...
- Page 93 Adjusting the Image ■ Resetting Image Registration Clears the values set in partial distortion correction. In the [Install settings] menu, select [Professional settings] > [Partial distortion correction] > [Reset]. A confirmation message for resetting is displayed. Select [OK] to reset the adjustment.
-
Page 94: Adjustment Using A Test Pattern
Adjusting the Image Adjustment Using a Test Pattern Resolution and colors can be adjusted during installation by using test patterns. To access the test pattern menu, select [Test pattern] > [On] (P138) in the [Install settings] menu or press the TEST PATTERN button on the remote control. While the test pattern is displayed, you can use the [ ] / [ ] buttons to switch patterns. -
Page 95: Special Arrangements
Special Arrangements Adjusting Peripheral Focus This feature enables focus adjustment around the edges of the screen. • Use marginal focus adjustment for curved screens, such as domes. • Use marginal focus adjustment to bring images on flat screens into focus if image edges remain warped after you adjust the overall focus. - Page 96 Special Arrangements Pressing the LENS button on the projector repeatedly switches between windows for lens-related parameters. Press the LENS button twice to display the marginal focus adjustment window. Projector Press twice. When [Marginal focus] is set to [On]. When [Marginal focus] is set to [Off].
- Page 97 Special Arrangements Once image edges are in focus, press the OK or FOCUS button. ■ Resetting Adjustment Clears the values set in marginal focus adjustment and returns the lens marginal focus to the standard position. In the [Install settings] menu, select [Professional settings] > [Marginal focus] > [Reset] to reset the adjustment.
-
Page 98: Projecting From Multiple Projectors At Once (Edge Blending)
Special Arrangements Projecting from Multiple Projectors at Once (Edge Blending) Overlapping edges of images from multiple projectors used together can be blended to make the overall image more seamless. This feature is called edge blending. Follow these steps for basic edge blending with two projectors side by side. - Page 99 Special Arrangements In [Side], select [Start position] and use the [ ] / [ ] buttons to move the start marker to the outer edge of the overlapping area. Do this for each edge; on the top, bottom, left, and right. Select [Width] and use the [ ] / [ ] buttons to move the end marker to the inner edge of the overlapping area.
- Page 100 Special Arrangements ■ Adjusting the Overlapping Area Adjust the overlapping area to create a smoother transition between projected images. Matching Colors in the Overlapping Area In overlapping projection, portions of images in the overlapping area that pick up other colors or are miscolored may be more noticeable.
- Page 101 Special Arrangements Matching Black in the Overlapping Area In overlapping projection, dark Left image Right image colors are projected with less intensity than other colors in the Area where dark overlapping area. You can make colors look lighter this overlapping area less Position of end distracting by adjusting the black marker (hidden)
- Page 102 Special Arrangements ■ Making Overlapping Edges Less Noticeable The black level along the right edge of area Position of end Left image D (along the blending area) may be more marker (hidden) noticeable than that of surrounding areas. By adjusting the black level of area B, you can make the transition smoother.
-
Page 103: Menu Guide
Menu Guide... -
Page 104: Using Menus
Using Menus Use the menus to set the operation of the projector in detail. Press the MENU button to display the menu window. Remote control Projector Press the [ ] / [ ] buttons to select a tab. Projector Remote control •... - Page 105 Using Menus Adjusting with the [ ] / [ ] buttons Example: Contrast (P118) 1. Select [Contrast]. 2. Use the [ ] / [ ] buttons to adjust the setting. Selecting from a different screen (1) Example: Logo capture (P140) 1.
- Page 106 Using Menus The menu screen is divided into 6 tabs as shown below. [Input settings] tab (P113) You can set the type of signal or the method of projection of the images input. [Image adjustment] tab (P117) You can adjust the image quality and colors according to your preference.
-
Page 107: Menu Configuration
Menu Configuration Input settings (P113) Menu Option / Submenu Details Aspect Auto*, True size P113 Input level Auto*, Normal, Expanded P114 Super white Off, On* P114 Color space Auto*, RGB, YCbCr P114 Progressive Off, Film/auto*, Video 1, Video 2, 25p/30p(PsF) P115 Input signal details Format information, Color/Range information... - Page 108 Menu Configuration Menu Option / Submenu Details Off* Ambient light (2) P120 Adjust Type, Level Random noise reduction Off*, Low, Middle, High P121 Off*, MPEG-NR: Low, MPEG-NR: Middle, MPEG-NR: High, Frame-NR: Digital noise reduction P121 Low, Frame-NR: Middle, Frame-NR: High Dynamic gamma Off* (7), Low (8), Middle, High P121...
- Page 109 Menu Configuration Install settings (P127) Menu Option / Submenu Details Positional lock Off*, On P128 Image flip H/V None*, Ceiling mounted, Rear, Rear, Ceiling mounted P128 Zoom (12) P128 Off (10), Horizontal-vertical keystone (11), Corner adjustment Keystone P129 Reset OK, Cancel Wide bandwidth HDMI-1 EDID (4K60Hz)*, High...
- Page 110 Black, Blue*, User logo P140 Black, Blue, Light source off*, User Screen when blank P140 logo Projector on Skip, Canon logo*, User logo P141 Upper L, Upper R, Center*, Lower L, Menu position P141 Lower R Menu display time Normal*, Extended...
- Page 111 Menu Configuration Menu Option / Submenu Details Standby power setting Normal, Low-power* P147 Quick startup Off*, On P148 Power management mode Disabled, Light source off, Standby* P148 Power supply settings 5 min., 10 min., 15 min.*, 20 min., Power management duration P148 30 min., 60 min.
- Page 112 Menu Configuration Network settings (P158) Menu Option / Submenu Details Unlock Password input Network settings lock P159 Lock* Network password Off, On* P159 setting Register network Password input P159 password Network (wired/ Off/Off*, On/Off, On/On (Pj AP), Off/On (Pj AP), Off/On (Infra) P160 wireless) MAC address...
- Page 113 Menu Configuration Menu Option / Submenu Details E-mail sender address E-mail recipient address IPv4 Detailed information (wired) Link local, Auto, Information IPv6 P172 Manual IPv4 Detailed information (wireless) Link local, Auto, IPv6 Manual *: Factory default, or state after [Factory defaults] is executed.
- Page 114 Menu Configuration Information (P173) Menu Model name Input signal Firmware Serial no. Projector usage time IP address (wired) IP address (wireless) Projector name Comments System information ID The following settings are not reset even when factory defaults are restored. • Selected input signal •...
-
Page 115: Menu Description
Menu Description Input settings This section describes settings for aspect ratio and resolution. Menu screen when the input signal is HDMI-1 Menu Function Details Aspect Select an image aspect ratio. P113 Select the input level for HDMI, HDBaseT or Input level P114 DisplayPort signals. - Page 116 Menu Description Input level [Input level] > [Input settings] > Adjust the input level for content projected via HDMI, HDBaseT or DisplayPort. Option Function Auto Automatically switches the input level based on the input signal. Normal Limits the input level to 16 – 235. Expanded Enables a full input level of 0 –...
- Page 117 Menu Description Progressive [Progressive] > [Input settings] > Performs progressive processing optimized for still images in cinematic content or moving images in videos, when interlaced HDMI or DisplayPort signals are supplied. Option Function Does not perform progressive processing. Suitable for still images or typical moving images. Performs progressive Film/auto processing for video or cinematic content.
- Page 118 Menu Description HDR information [HDR information] > [Input settings] > When HDMI or HDBaseT signals are supplied, shows the Dynamic Range and Mastering InfoFrame information. The projector determines and indicates whether input signals are SDR or HDR. HDR signals have an area that includes color and luminance information, and this information is indicated.
-
Page 119: Image Adjustment
Menu Description Image adjustment This section describes image quality settings such as brightness, contrast, and sharpness. Menu screen when the input signal is HDMI-1 Menu Function Details Select overall image quality to suit the projected Image mode* P118 image. Create profile Save desired image quality settings as profiles. - Page 120 Menu Description Image mode [Image mode] > [Image adjustment] > Select the overall image quality for projected images. Can also be selected by pressing the IMAGE button on the remote control (P33). Option Types of Images Effect Computer screens, or media Bright overall;...
- Page 121 Menu Description Sharpness [Sharpness] > [Image adjustment] > Adjust image sharpness. Gamma [Gamma] > [Image adjustment] > Correct image areas that are too dark or too bright to see clearly. For more detailed adjustment, use “Fine-Tune Gamma” (P124). HDR range [HDR range] >...
- Page 122 Menu Description In [DICOM SIM] image mode, [Color temperature] is not adjusted with numeric values but set to one of the following five presets. Preset 1: Prioritize brightness, relative to DICOM Standard Part 14. Preset 2: Prioritize color tone, relative to DICOM Standard Part 14. Preset 3: Adjust color to conform to DICOM Standard Part 14.
- Page 123 Menu Description Random noise reduction Reduce random image noise*. * Effective on noise with an irregular frequency or amplitude. Option Function Disables random noise reduction. Middle Specify one of three levels of intensity of the random noise reduction. High Select [Low] for fast-moving images or [High] for slow-moving images. Digital noise reduction Reduce digital image noise.
- Page 124 Menu Description Contrast detail adjustment When the projected image is dark, you can make the dark portions appear even darker by adjusting the luminance of the light source and the amount of signal adjustment. To use [Light off control], [Light off detection signal level], [Light off detection time], and [Light off speed], set [Dynamic contrast] to [High].
- Page 125 Menu Description HDR (High Dynamic Range) Projection conforms to HDR signals (HDR10 or HLG) with an expanded range of image luminance, preserving detail in highlights and shadows. Option Function Auto Automatically use HDR when HDR signals are supplied. Prevent use of HDR. HDR10 Require HDR 10-compliant projection.
- Page 126 Menu Description Fine-Tune Gamma Adjust white, red, green, and blue gamma curves. Red, green, and blue can be adjusted separately. Adjustments to white are also applied to the three other colors. Note that adjusting any color will overwrite previous adjustments. Use the [ ] / [ ] buttons to select a color, and then press the OK button.
- Page 127 Menu Description Light source mode [Light source mode] > [Image adjustment] > Reducing projection brightness reduces power consumption and fan noise. Option Function Normal Projects images at full brightness. Quiet 1 Select to reduce brightness, or when quiet projection is required. Quiet 2 Reduces brightness and noise further.
- Page 128 Menu Description Reset [Reset] > [Image adjustment] > Restore the current image quality settings to the factory defaults. Option Function Resets the image adjustment settings. Cancel Cancels resetting of the image adjustment settings. • Performing reset when [Image mode] is set to a profile from [User 1] to [User 5] will restore the settings originally saved for that user profile.
-
Page 129: Install Settings
Menu Description Install settings Adjust projection to suit the screen or the type of images, or how the projector is installed. Menu screen when the input signal is HDMI-1 Menu Function Details Operation of installation-related functions can be Positional lock P128 prohibited. - Page 130 The projected image is inverted in the vertical direction. • When mounting the projector on a ceiling, use the optional ceiling attachment (RS- CL15) and ceiling-mount arm (RS-CL17). Contact the Canon Customer Support Center for more detailed information. • Image flipping will reset any adjustment for keystone distortion. In this case, redo the adjustment.
- Page 131 Menu Description • D.ZOOM buttons on the remote control cannot be used for this [Zoom] function. • [Zoom] is not available unless [Keystone] is set to [Off]. • [Zoom] is canceled if, after setting up [Zoom], you change the [Keystone] setting to an option other than [Off].
- Page 132 Menu Description EDID mode setting Switch to a mode for compatible signals, as registered in the HDMI-1 or HDMI-2 EDID. Submenu Function Option Function HDMI-1 EDID mode Wide Wide-bandwidth 9–18 Gbps signals (such as 8-bit 4K bandwidth YCbCr 4:4:4 at 60 Hz or 10-bit 4K YCbCr 4:4:4 at (4K60Hz) 24 Hz) are registered in the EDID.
- Page 133 Menu Description Submenu Function Sub- Function menu Disable local correction of color misalignment. Display a menu for local correction of color misalignment. Sub- Function menu Sub- Function menu Disable adjustment. Enter 5-point adjustment mode (in screen corners and at the center). Sub- Function menu...
- Page 134 Menu Description Submenu Function • With advanced registration, checkered or halftone image areas may be affected by uneven colors or image artifacts. • 5-point adjustment enables basic correction of color misalignment across the screen, by moving adjustment points in the center and each corner. To correct registration only in certain areas, try manual adjustment.
- Page 135 Menu Description High altitude Switch the fan mode to suit installation at low or high altitudes (above 2,300 m [7,545.8']). Option Function Setting for altitudes lower than 2,300 m (7,545.8'). Setting for altitudes of 2,300 m (7,545.8') or higher. Incorrect settings may shorten the useful life of the projector components. Operating mode Switch the method of controlling the light source and fan.
- Page 136 Menu Description Marginal focus In dome projection, image focus can be adjusted on the edges of the screen, and the remote control can be used to activate and deactivate this focus adjustment. For detailed instructions, refer to “Adjusting Peripheral Focus” (P93). Option Function Disable remote focusing of image edges.
- Page 137 Menu Description Submenu Function Left / Right / Top / Select the direction of the blending area to adjust. Bottom Width Specify the width between the start and end markers. Start Moves the position of the start marker. position Side •...
- Page 138 Menu Description Submenu Function Because black is lighter in the blending area than in other areas, you can adjust the black level outside the blending area to make this difference in brightness less noticeable. Position of end marker (hidden) Left image Area A: Black level cannot be adjusted.
- Page 139 Menu Description Submenu Function Show the blending area markers. Option Function Marker Hide the blending area markers. Show the blending area markers. The start marker is red, and the end marker is green. Reset Reset the marker settings. Lens - Position [Lens - Position] >...
- Page 140 Menu Description Screen color [Screen color] > [Install settings] > You can adjust the color quality of the images projected according to the color of the projection screen. Submenu Function Select this if a standard type of projection screen is used. The images Normal are projected in a light quality similar to that of natural light.
-
Page 141: System Settings
Menu Description System settings Customize projector and remote control operation, beeping, and other details after startup, during standby, and in other situations. Menu screen when the input signal is HDMI-1 Menu Function Details Customize user screens shown at startup, when no User screen settings P140 signal is detected, and in other situations. - Page 142 Menu Description User screen settings [User screen settings] > [System settings] > Capture a logo and specify logo display settings. Logo capture Registers the current image as a user logo. Registered user logos can be shown when no signal is received, when the BLANK button is pressed, or as the startup image. Option Function Display the image for logo registration.
- Page 143 Select a logo to project after startup until input signals can be projected. Option Function Skip A black screen is projected. Canon logo Displays the Canon logo that was registered in advance at the factory. User logo The user logo is projected. On screen [On screen] > [System settings] >...
- Page 144 Menu Description The following display times are also changed. Item [Normal] [Extended] - Menu screen 30 seconds 3 minutes - Edge blending (P134) - Input (P42) - Keystone (P81) - Keystone reset (P84) - Focus (P43) - Zoom (P43) - Lens shift (P58) 10 seconds 3 minutes - Lens shift reset (P60) - Marginal focus (P93)
- Page 145 Menu Description Show input status Specify whether signal status is shown when there is no signal or when you are completing signal settings. Option Function The input status is not displayed. The input status is displayed. Air filter warning display Shows a warning to replace the air filter when replacement is required.
- Page 146 Menu Description Key repeat Key repeat enables projector or remote control buttons to be held down instead of pressing them repeatedly. Option Function Key repeat is not enabled. Key repeat is enabled. Key lock Lock the projector or remote (wireless) to prevent operation. Option Function Disables key lock.
- Page 147 Menu Description Remote control channel Separate channels can be assigned to up to four projectors so that a single remote control can be used with each projector. Selecting the Projector Channel If a wired remote control is used, there is no need to set the remote control channel. Option Function Select the remote control channel to use with this projector.
- Page 148 Menu Description HDBaseT signal quality [HDBaseT signal quality] > [System settings] > Display the video signal quality of HDBaseT input. The HDBaseT input signal value received is indicated by a white line. High Indicated by the green portion. This is the recommended level. Middle Indicated by the yellow portion.
- Page 149 Menu Description Submenu Function Log, show, hide, or clear user commands. Command monitor You can log and view the type, execution time, and IP address (limited to the last octet at the time of reception) of sent and received user commands. Option Function Disable user command logging.
- Page 150 Menu Description Quick startup Enable faster startup next time by leaving some circuits on for 90 minutes after the projector is turned off. However, to avoid sudden surges in intensity, projection is delayed by at least approximately 1.7 seconds. Option Function Disable quick startup.
- Page 151 Menu Description Motion blur reduction [Motion blur reduction] > [System settings] > Motion blur is blurring that occurs during video playback. Motion blur reduction can make this blurring less noticeable. Option Function Motion blur reduction is not performed. Reduce motion blur for fast-moving images. Note that images may Weak be slightly darker, and flickering may occur.
- Page 152 Menu Description Other settings [Other settings] > [System settings] > Register a password, set a password, reset the air filter counter, schedule operation, and access other settings and information. Password settings Disables the projector unless the correct password is entered. Option Function The projector can be used even if no password is entered.
- Page 153 Menu Description Register password You can register a password for starting projection. Enter a 4 digit password. Enter the password using the pointer buttons [ ] (1) / [ ] (2) / [ ] (3) / [ ] (4) or the number buttons on the remote control.
- Page 154 Menu Description Submenu Function Select whether to sync the time on the projector using SNTP (Simple Network Time Protocol). Submenu Function On (IPv4) Use SNTP over an IPv4 connection. On (IPv6) Use SNTP over an IPv6 connection. Disable SNTP. SNTP •...
- Page 155 Menu Description Detailed schedule setting Option Function Disable the schedule. Enable the schedule. Edit the schedule. ■ Default Edit...
- Page 156 Menu Description Option Function ■ Special period Select a day in [Day of week], and select the times, operations, and parameters. Submenu Function Edit the period (start and end dates) for scheduled Edit Period operation. Note that no [Period] setting is used for the [Default] schedule.
- Page 157 Menu Description Option Function Submenu Function Clears setting details for the selected schedule. Reset Setting details for [Period] and day of the week are reset. Copy the tasks scheduled for your selected [Day of week] to another day in the schedule copying menu. Edit Copy schedule to...
- Page 158 Menu Description Submenu Function Use when there is concern about deterioration of the color and luminance of the light source due to extended use. Light source Option Function calibration Execute light source calibration. Cancel Do not execute light source calibration. Light source calibration can only be used after about 30 minutes of projection.
- Page 159 Check the version indicated before updating the firmware. Update the projector firmware as follows. 1. Download updated firmware from the Canon website and store it at the root directory on a USB flash drive. 2. Insert the USB flash drive in the USB port.
-
Page 160: Network Settings
Menu Description Network settings Settings described in this section apply to wired and wireless network connections, setting a network password, and other aspects of networked projection. Menu screen when the input signal is HDMI-1 Menu Function Details Lock or unlock network settings, depending on Network settings lock P159 whether you wish to prevent changes. - Page 161 Menu Description Network settings lock [Network settings lock] > [Network settings] > You can lock/unlock the network settings so that they cannot be changed. Option Function Cancels the lock and allows other network settings to be changed. The password must be entered in order to cancel the lock. Use the [ ] / [ ] / Unlock [ ] / [ ] buttons or number buttons on the remote control to enter the 4-digit network password.
- Page 162 Menu Description Network (wired/wireless) [Network (wired/wireless)] > [Network settings] > Enable or disable wired or wireless network connectivity and the mode of operation. Specifying [Off] can save energy. Option Function Off/Off Disable the network function. On/Off Enable only wired networking. On/On (Pj AP) Enable both wired and wireless (PJ AP mode) networking.
- Page 163 Menu Description Detailed settings (wired) [Detailed settings (wired)] > [Network settings] > Display and manually change the wired IP address, gateway address, and other settings. Available only when wired networking is [On]. Menu Function MAC address Wired MAC address of the projector. Configure details of the projector’s wired LAN (IPv4) function.
- Page 164 Menu Description Menu Function Submenu Function Change or specify the IP address, subnet mask, and gateway address used for connections. Detailed IPv4 TCP/IP address settings settings • This menu is not available (grayed out) when [DHCP] (P161) is [On]. • If an invalid value is entered, “Invalid entry.” is displayed.
- Page 165 Menu Description Menu Function Configure details of the projector’s wired LAN (IPv6) function. Submenu Function Link local Link-local address of the wired LAN (IPv6). Auto Automatic addresses (up to 5) of the wired LAN (IPv6). Manual Manual address of the wired LAN (IPv6). Detailed IPv6 address settings Gateway...
- Page 166 Menu Description Menu Function The following network settings are initialized. Settings configured from the projector menu • Network settings lock (P159) • Network password setting (P159) • Register network password (P159) • Network (wired/wireless) (P160) • Detailed settings (wired) (P161) - Detailed IPv4 address settings (P161) - DHCP (wired LAN (IPv4)) (P161) - TCP/IP settings (P162)
- Page 167 Menu Description Detailed settings (wireless) [Detailed settings (wireless)] > [Network settings] > Display and manually change the wireless IP address, gateway address, and other settings. Available only when wireless networking is [On]. Menu Function Mode Shows the wireless connection mode (P66). SSID Shows the access point SSID.
- Page 168 Menu Description Menu Function Manually specify the projector’s wireless settings. Submenu Function Mode Shows the wireless connection mode (P66). A list of available access point SSIDs is displayed. You can find available access points nearby or use the keyboard to enter an access point SSID. Manual settings SSID Select the wireless security from [Open], [WEP],...
- Page 169 Menu Description Menu Function Configure details of the projector’s wireless LAN (IPv4) function. Submenu Function IP address IP address of the projector’s wireless LAN (IPv4). Subnet mask Subnet mask of the projector’s wireless LAN (IPv4). Gateway Gateway address of the projector’s wireless LAN address (IPv4).
- Page 170 Menu Description Menu Function Option Function Disables the projector’s wireless LAN (IPv6) function. Enables the projector’s wireless LAN (IPv6) function. [Detailed IPv6 address settings] is now available. IPv6 IPv6 connectivity is not available in PJ AP mode (P160). The [IPv6] and [Detailed IPv6 address settings] menus are grayed out.
- Page 171 Menu Description Menu Function The following network settings are initialized. Settings configured from the projector menu • Network settings lock (P159) • Network password setting (P159) • Register network password (P159) • Network (wired/wireless) (P160) • Detailed settings (wireless) (P165) - Detailed IPv4 address settings (P167) - DHCP (wireless LAN (IPv4)) (P167) - TCP/IP settings (P167)
- Page 172 Menu Description PJLink [PJLink] > [Network settings] > You can enable or disable the PJLink network function of the projector. When the function is turned on, control is possible via the network using commands that meet PJLink standards. Option Function Disables the PJLink function.
- Page 173 Menu Description AMX Device Discovery [AMX Device Discovery] > [Network settings] > This setting enables other equipment compatible with AMX Device Discovery to detect the projector over a network. For networks without AMX Device Discovery, select [Off]. Option Function Disables AMX Device Discovery. Enables AMX Device Discovery.
- Page 174 Menu Description Information [Information] > [Network settings] > Shows network information. Menu Function E-mail sender address Sender e-mail address for sending error messages (P185). [Already set] or [Not set] is shown, indicating whether a E-mail recipient address recipient e-mail address has been set for error messages (P185).
-
Page 175: Checking Projector Information
Menu Description Checking Projector Information You can check information about the signal types of the images projected and other information. Menu Function Model name Shows the model name. Details of the input signal currently selected Input signal Information such as the type, resolution, frequency, and color format of the signal is displayed. -
Page 176: Projector Web Screen Menu
Projector Web Screen Menu This section describes the projector’s web screen menu. Setting a Password [Password] From [Password] in the settings screen, you can set a user name and password for web screen login. For the setting procedure, see “Network Setting” (P73). Item Explanation Factory default setting... - Page 177 Projector Web Screen Menu Setting the Date and Time [Date and time settings] From [Date and time settings] in the settings screen, you can set time settings such as the current date and time, date/time display format, time zone, and daylight saving time.
- Page 178 Projector Web Screen Menu Item Explanation Factory default setting Summer ON / OFF Select whether to turn the summer time time function on or off (Time adjustment one hour ahead at the beginning of daylight saving time and one hour back at the end).
- Page 179 Projector Web Screen Menu Setting a Scheduling [Schedule] From [Schedule] in the settings screen, you can automate some projector tasks by scheduling them. As the timing of scheduled operation, choose from [Usually], which is not during a certain period, or one of five special period times (Period.1 – Period.5) that you set up.
- Page 180 Projector Web Screen Menu Item Explanation Factory default setting Schedule Period.5 Shows the timing of the scheduled Cleared (OFF) view period 5. Can be turned on or off by selecting the check box. Time Schedule Shows times and days of the week of —...
- Page 181 Projector Web Screen Menu Clicking [Add schedule] in [Time Schedule] displays the [Add schedule] screen, enabling you to add a new schedule to the selected usual schedule or period schedule. Item Explanation Factory default setting Select a day of the week for automatic Cleared schedule execution.
- Page 182 Projector Web Screen Menu Item Explanation Factory default setting Schedule Copy origin Select the day to copy from. copy Registration Shows schedule details on the selected <Blank> Events day. Copy to day Select the day to copy to. Multiple days Cleared can be selected.
- Page 183 Projector Web Screen Menu Item Explanation Factory default setting IPv6 The projector’s wired Link local Shows the projector’s wired LAN (IPv6) address LAN (IPv6) link-local IP address link-local IP address. address Automatically assigned Shows the projector’s automatically Auto IP address as acquired assigned wired LAN (IPv6) address.
- Page 184 Projector Web Screen Menu Basic Wireless Network Settings [Wireless] From [Wireless] on the settings screen, you can complete basic network information for wireless connections. For the setting procedure, see “Network Setting” (P73). For IPv4 For IPv6 Item Explanation Factory default setting MAC address Shows the projector’s wireless MAC The projector’s wireless...
- Page 185 Projector Web Screen Menu Item Explanation Factory default setting IPv6 The projector’s wireless Link local Shows the projector’s wireless LAN address LAN (IPv6) link-local IP address (IPv6) link-local IP address. address Automatically assigned Shows the projector’s automatically Auto IP address as acquired assigned wireless LAN (IPv6) address.
- Page 186 Projector Web Screen Menu Item Explanation Factory default setting Wireless Wi-Fi Select a method of establishing a None (Manual) setting Protected wireless connection. Not available in PJ Setup AP wireless LAN mode. Mode Display or select the wireless infrastructure mode connection mode.
- Page 187 <Blank> 1-byte alphanumeric characters and symbols (1 – 63 characters). From: Enter the sender address for error mails Projector@canon.co.jp in 1-byte alphanumeric characters and symbols (1 – 63 characters). IPv4 SMTP server IP Enter the SMTP server IP address 0.0.0.0 address (IPv4) in 1-byte numbers.
- Page 188 Projector Web Screen Menu * When the interval is set to 0 seconds, repeated attempts to send mail are made (as set in [Mail resend times]) without pausing between attempts. Mail Authentication Settings From [Mail auth] under [Mail] in the settings screen, you can configure the settings for authentication of mail that is sent when an error occurs.
- Page 189 Projector Web Screen Menu SNMP Settings [SNMP] From [SNMP] in the settings screen, you can configure the settings related to control of projectors which use SNMP (Simple Network Management Protocol). For the setting procedure, see “Network Setting” (P73). Item Explanation Factory default setting SNMP Select the SNMP function version.
- Page 190 For the setting procedure, see “Network Setting” (P73). Item Explanation Factory default setting Projector name Enter the projector name in 1-byte Canon Projector001 alphanumeric characters and symbols (1 – 63 characters). Comment Enter any relevant notes, such as <Blank>...
- Page 191 Projector Web Screen Menu Item Explanation Factory default setting PJLink Turn the PJLink function on or off. If [OFF] is selected, the other settings in this screen cannot be configured. PJLink authentication Select whether to turn the PJLink authentication function on or off. If [OFF] is selected, it is not possible to change the following items.
-
Page 192: Maintenance / Product Specifications / Troubleshooting
Maintenance / Product Specifications / Troubleshooting... -
Page 193: Maintenance
Maintenance Cleaning the Projector Clean the projector frequently to prevent dust from settling on the surface. A dirty lens may ruin the quality of the projected image. Do not use adhesives, lubricants, oils, or alkaline detergents for maintenance of the projector. They could adhere to the cabinet and damage it, possibly resulting in the projector falling from its mounting and causing an accident or personal injury. - Page 194 • After air filter replacement, reset [Air filter counter] (P156). • Handle the air filter carefully. If damaged, the air filter will not work properly. • To purchase an air filter (part no: RS-FL05), contact the Canon Customer Support Center.
-
Page 195: Product Specifications
Product Specifications ■ Supported Signal Types This projector supports the following signal types. The projector automatically projects input signals correctly from computers or AV equipment compatible with any of these signals. YCbCr422 can be received at 12-bit color depth for all signal types (excluding frequencies preceded by (*6)). - Page 196 Product Specifications Frequency Blanking information Supported color depth Resolution Horizontal Vertical Dot clock Horizontal Vertical [kHz] [Hz] [MHz] FP, SW, BP FP, SW, BP [bit] 52.561 (*1)23.979 284.250 224, 432, 656 3, 10, 19 8/10/12 52.397 (*1)23.980 223.000 48, 32, 80 3, 10, 12 8/10/12 54.000...
- Page 197 Product Specifications Frequency Blanking information Supported color depth Resolution Horizontal Vertical Dot clock Horizontal Vertical [kHz] [Hz] [MHz] FP, SW, BP FP, SW, BP [bit] 52.593 (*1)23.993 266.750 216, 400, 616 3, 5, 24 8/10/12 52.438 (*1)23.999 209.750 48, 32, 80 3, 5, 17 8/10/12 54.000...
- Page 198 Product Specifications Frequency Blanking information Supported color depth Resolution Horizontal Vertical Dot clock Horizontal Vertical [kHz] [Hz] [MHz] FP, SW, BP FP, SW, BP [bit] 18.000 24.000 59.400 1760, 40, 220 5, 5, 20 8/10/12 1280x720 37.500 50.000 74.250 440, 40, 220 5, 5, 20 8/10/12 45.000...
- Page 199 Product Specifications ■ Projector Model name 4K6021Z Display system Reflective liquid crystal panel (LCOS) : 3 panels Color separation by dichroic mirror / polarizing beam Optical system splitter and color composition by prism Effective display area size 0.74'' / approx. 17:9...
- Page 200 Product Specifications Model name 4K6021Z Networking off, Serial 0.25W communication: Service port Networking on, Serial 1.6W communication: Service port Networking off, Serial 1.5W communication: HDBaseT Networking on, Serial 1.6W communication: HDBaseT 480 mm (W) x 196 mm (H) x 545 mm (D) / 18.9 (W) x 7.7 (H) x 21.5 (D) in...
- Page 201 Product Specifications ■ Remote Control Type RS-RC07 Power supply DC 3.0V, using two AAA-size batteries Operating range Approx. 8 m ±25° horizontal and vertical (to infrared remote receiver) Dimensions 46.5 mm (W) x 23 mm (H) x 159 mm (D) / 1.8 (W) x 0.9 (H) x 6.3 (D) in. Weight 56 g / 2.0 oz ■...
- Page 202 Product Specifications Name Ultra-long Zoom Lens Wide Zoom Lens Model number RS-SL04UL RS-SL05WZ External View Focal length 53.6 – 105.6 mm (2.1 – 4.2'') 15.56 – 23.34 mm (0.6 – 0.9'') F number 2.34 – 2.81 2.09 – 2.34 Width 143.4 mm (5.6'') 143.4 mm (5.6'') Height...
- Page 203 Product Specifications Name Short Fixed Lens Ultra-wide Zoom Lens Model number RS-SL03WF RS-SL06UW External View Focal length 12.8 mm (0.5") 8.39 mm (0.33") F number 2.40 Width 143.4 mm (5.6'') 143.4 mm (5.6'') Height 106.7 mm (4.2") 113.7 mm (4.8") Length 175.3 mm (6.9") 304.3 mm (12.0")
- Page 204 Product Specifications ■ External View 4K6021Z 545 mm (21.5") 480 mm (18.9") 38.8 mm (1.5") 451.7 mm (17.8")
- Page 205 Product Specifications ■ Service Port (CONTROL) Pin assignment Pin No. Signal OPEN OPEN OPEN Internal pull-up OPEN OPEN Communication format Communication mode : RS-232C, asynchronous, half-duplex communication Communication speed : 19200bps Character length : 8 bits Stop bits : Switchable between 1 bit and 2 bits. Factory default, or state after [Factory defaults] is executed, is 1 bit.
- Page 206 Product Specifications Commands ASCII representation Binary representation 49h 4Dh 41h 47h 45h 3Dh 53h 54h 41h Standard IMAGE=STANDARD<CR> 4Eh 44h 41h 52h 44h 0Dh 49h 4Dh 41h 47h 45h 3Dh 50h 52h 45h Presentation IMAGE=PRESENTATION<CR> 53h 45h 4Eh 54h 41h 54h 49h 4Fh 4Eh 49h 4Dh 41h 47h 45h 3Dh 44h 59h 4Eh Dynamic IMAGE=DYNAMIC<CR>...
-
Page 207: Troubleshooting
Troubleshooting LED Indicator Details When there is a problem with the projector, the LED indicator on the side of the projector illuminates or flashes continuously after the projector is turned off. • Wait until the cooling fan stops and disconnect the power plug from the power outlet before dealing with the problem. -
Page 208: Symptoms And Solutions
If the same warning repeatedly. installation occurs again, there may be a malfunction in the projector.* * Contact the Canon Customer Support Center. Symptoms and Solutions ■ You Cannot Turn on the Projector Cause Countermeasure... - Page 209 Troubleshooting ■ You Cannot Project an Image from the Projector Cause Countermeasure A cable is not connected Check whether the projector is connected to the correctly. computer or AV equipment correctly (P62 – P64). 20 seconds have not When the projector is turned on, the opening window elapsed since the is displayed for approximately 20 seconds.
- Page 210 Troubleshooting ■ There is no Sound Cause Countermeasure The MUTE function is Press the MUTE button on the remote control (P34). enabled. The volume level is Press the VOL button on the remote control or the adjusted to the VOL+ button on the side control to adjust the volume minimum.
- Page 211 Troubleshooting ■ You Cannot Project an Image Appropriately Cause Countermeasure The projected image is The ceiling mounted / rear projection setting is inverted in the vertical or incorrect. Check the [Image flip H/V] setting in the horizontal direction. [Install settings] menu (P128). A computer cable is Use a computer cable in which all pins are used in which some pins...
- Page 212 (P165 – P169). In infrastructure mode, try changing the wireless channel on the access point. If connection is still not possible, contact the Canon Customer Support Center. A HDBaseT transmitter Check the power of the HDBaseT transmitter.
-
Page 213: Index
Index Numerics FREEZE ..........47 6-axis color adjust ......123 Gamma ...........119 Adjusting the Volume ......49 Advanced registration ..... 131 HDBaseT........4, 146 Air filter..........191 HDBaseT terminal ....32, 63, 65 Ambient light ........120 HDMI terminal ......32, 62 AMX Device Discovery ....171 HDR ..........123 AUDIO OUT terminal ...... - Page 214 Index Muting the sound ......49 USB Port ........32, 157 Network password ......159 Network settings ..... 104, 158 WARNING indicator ....30, 205 Wireless Networks ....66, 165 On screen ........141 Operating mode ......133 Partial distortion correction ..... 132 Password ........
- Page 215 Option • Ceiling attachment • Air filter Part No.: RS-CL15* Part No.: RS-FL05 • Ceiling-mount arm • Remote control Part No.: RS-CL17* Part No.: RS-RC07 • Ceiling-mount pipe • Remote control (350 – 550 mm / 13.8 – 21.7 in) Part No.: RS-RC05 Part No.: RS-CL08* •...
- Page 216 30-2, Shimomaruko 3-chome, Ohta-ku, Tokyo 146-8501, Japan CANON U.S.A. INC. One Canon Park, Melville, New York 11747, U.S.A. For all inquires concerning this product, call toll free in the U.S. 1-800-OK-CANON CANON EUROPE LTD. 3 The Square, Stockley Park, Uxbridge, Middlesex, UB11 1ET United Kingdom CANON EUROPA N.V.
Need help?
Do you have a question about the 4K6021Z and is the answer not in the manual?
Questions and answers