
Related Manuals for New Rock Technologies NRP1002/P


Summary of Contents for New Rock Technologies NRP1002/P
- Page 1 New Rock Technologies, Inc. NRP1002/P IP Phone User Manual Version 1.0 http://www.newrocktech.com Email: gs@newrocktech.com Document Version: 201708...
-
Page 2: Table Of Contents
NRP1002/P IP Phone User Manual Contents Contents ................................. 1 Figures ................................4 Tables ................................6 Safety Instruction ..........................8 Overview .............................. 9 Installation ............................10 Use PoE or external Power Adapter ..................10 Desktop and Wall-mount Installation ..................10 Introduction to the Phone User Interface ..................12 Keypad ............................ - Page 3 NRP1002/P IP Phone User Manual Adjust LCD Energy Saving ...................... 35 Set Device Time/Date ....................... 36 Set Device Language ........................ 37 Reboot the Device ........................37 Reset to Factory Default ......................37 Web Portal ............................38 Web Portal Authentication ....................... 38 Web Call ...........................
- Page 4 NRP1002/P IP Phone User Manual 10.3 Reset Device to Factory Default ....................60 10.4 Network Packets Capture ......................60 10.5 Entering Post Mode and Recover System Image ..............61 10.6 Common Trouble Cases ......................62 Appendix I - Icon Illustration ........................63 Appendix II –...
-
Page 5: Figures
NRP1002/P IP Phone User Manual Figures Figure 1 - Desktop Installation ........................10 Figure 2 - Wall-mount Installation ........................11 Figure 3 - Connecting to the Device ......................11 Figure 4 - Keypad ............................. 12 Figure 5 - Screen Layout / Default Standby Screen ..................14 Figure 6 - Vertical Scroll Bar ........................... - Page 6 NRP1002/P IP Phone User Manual Figure 39 - Second Incoming Call Screen ....................25 Figure 40 - Dual Calls ............................25 Figure 41 - Conference Call ..........................26 Figure 42 - Phonebook screen ........................26 Figure 43 - Phonebook is Empty ........................26 Figure 44 - Browsing Phonebook ........................
-
Page 7: Tables
NRP1002/P IP Phone User Manual Tables Table 1 - Time Settings Parameters ......................36 Table 2 - SIP Settings for Lines on Web ....................... 40 Table 3 - Dial Peer Settings for Lines on Web ..................... 44 Table 4 - Basic Settings for Lines on Web ....................48 Table 5 - Common Phone Feature Settings on Web .................. - Page 8 NRP1002/P IP Phone User Manual www.newrocktech.com 7/68...
-
Page 9: Safety Instruction
NRP1002/P IP Phone User Manual Safety Instruction Please read the following safety notices before installing or using this unit. They are crucial for the safe and reliable operation of the device. Please use the external power supply that is included in the package. Other power supply may cause damage to the phone, affect the behavior or induce noise. -
Page 10: Overview
NRP1002/P IP Phone User Manual Overview The new NRP1002/P IP Phone is a high-end enterprise desktop phone which comes with intelligent LCD to increase users’ productivity at a cost-effective price. NRP1002/P inherits all features from enterprise phones, such as HD voice in handset, headset, and full-duplex speakerphone modes, PoE, Fast/Gigabit Ethernet, QoS, secure transmission, auto-provisioning, and more. -
Page 11: Installation
Installation 3.1 Use PoE or External Power Adapter NRP1002/P, called as ‘the device’ hereafter, supports two power supply modes, power supply from external power adapter and NRP1002/P supports 802.3af Class 2 Power over Ethernet (PoE) complied switch. PoE power supply saves the space and cost of providing the device additional power outlet. With a PoE switch, the device can be powered through a single Ethernet cable which is also used for data transmission. -
Page 12: Figure 2 - Wall-Mount Installation
NRP1002/P IP Phone User Manual Figure 2 - Wall-mount Installation Please connect power adapter, network, PC, handset, and headphone to the corresponding ports as described in below picture. Figure 3 - Connecting to the Device www.newrocktech.com 11/68... -
Page 13: Introduction To The Phone User Interface
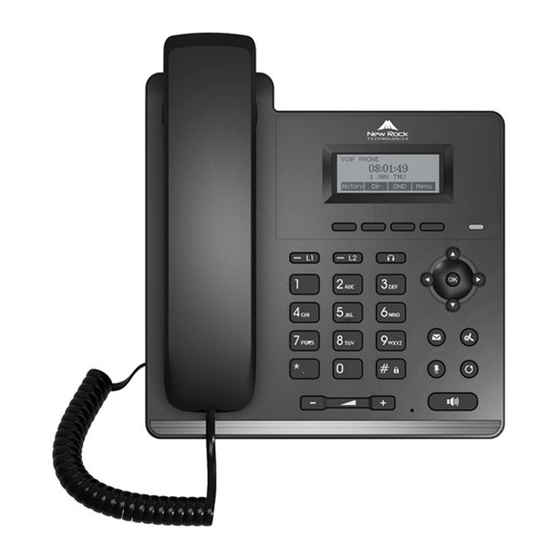
NRP1002/P IP Phone User Manual Introduction to the Phone User Interface 4.1 Keypad Figure 4 - Keypad The above picture shows the keypad layout of the device. Each key provides its own specific function. User should refer to the illustration in this section about the usage of each key and the description in this document about each function. -
Page 14: Using Handset / Hands-Free Speaker / Headphone
NRP1002/P IP Phone User Manual Line 2 - You could use line 2 to make a call by pressing the button. Headset key - When you pressed the key, you could make a call using the headset. ... -
Page 15: Screen User Interface
NRP1002/P IP Phone User Manual 4.3 Screen User Interface Figure 5 - Screen Layout / Default Standby Screen The screen user interface is mostly presented in the above layout except some prompt messages. The upper area is the main screen to display the device’s status and information or data for viewing or editing. The lower area is the software menu (soft-menu) buttons which will change against user’s action or device’s status. -
Page 16: Figure 7 - Check The Device's Ip Address
NRP1002/P IP Phone User Manual Figure 7 - Check the Device’s IP Address The first screen of the device’s web portal is the login page. Figure 8 - Web Portal Login Page User must enter the username and password to log in to the web portal. The default username and password are both ‘admin’. -
Page 17: Setting Up
NRP1002/P IP Phone User Manual Setting Up In order to get the device ready for making and receiving phone calls, the device must be configured with correct network configurations and at least one of the lines must be configured with a SIP telephony service. -
Page 18: Figure 9 - Configure Sip Proxy Server Address
NRP1002/P IP Phone User Manual To configure a line manually, user may open the line configuration screen through soft-menu button [Menu] -> [Settings] -> [Advanced Settings] -> [Accounts] -> [SIP1] / [SIP2] -> [Basic Settings] from the standby screen. NOTICE! User must enter correct password to be able to enter advanced settings to edit line configuration. -
Page 19: Figure 13 - Configure Sip Authentication Password
NRP1002/P IP Phone User Manual Figure 13 - Configure SIP Authentication Password Figure 14 - Configure Display Name Figure 15 - Enable / Disable Outbound Proxy Figure 16 - Enable / Disable Sip Line Save the adjustment by pressing [OK] or [Save] button when done. -
Page 20: Figure 17 - Configure Advanced Line Options
NRP1002/P IP Phone User Manual Figure 17 - Configure Advanced Line Options Figure 18 - Configure SIP Realm/Domain Figure 23 - Configure Local Port Figure 19 - Configure Unregistered Dial Figure 24 - configure Ring Type Figure 20 - Enable / Disable Anonymous... -
Page 21: Figure 28 - Configure Join Call Number
NRP1002/P IP Phone User Manual Figure 28 - Configure Join Call Number Figure 30 - Enable / Disable Feature Sync Figure 29 - Enable / Disable Missed Call Figure 31 - Enable / Disable SCA NOTICE! On the device, user can only configure whether STUN / Outbound Proxy is enabled, to change the STUN / Outbound Proxy server address, user must edit in the device web portal. -
Page 22: Using The Phone
NRP1002/P IP Phone User Manual Using the Phone 6.1 Making Phone Calls Default Line The device provides 2 line services. If all lines are configured, user can make or receive phone calls on any line. If default line is configured by user, there will be a default line to be used for making outgoing call which is indicated on the top left corner. -
Page 23: Figure 34 - Dial A Number After Audio Channel Opened
NRP1002/P IP Phone User Manual hands-free speaker or headphone by pressing hands-free button, or line key, and then dial the number with one of the above methods. When number dialed completed, user can press [Dial] button or [OK] button to call out, or the number will be dialed out automatically after timeout. -
Page 24: Figure 35 - Calling Remote Party
NRP1002/P IP Phone User Manual Cancel Call While calling the number, user can press [End] button or close the audio channel by putting back the handset or pressing the hands-free button to drop the call. Figure 35 - Calling Remote Party ... -
Page 25: Make / Receive Second Call
NRP1002/P IP Phone User Manual Talking When the call is connected, user will see a talking mode screen as the following figure. Figure 37 - Talking Mode Screen 1. Audio Channel – The icon reflects the current audio channel being used. -
Page 26: Join / Split Two Calls (3-Way Local Conference)
NRP1002/P IP Phone User Manual reject the call same as normal incoming call. When the waiting call is answered, the first call will be put on hold automatically. Figure 39 - Second Incoming Call Screen Second Outgoing Call To make a second call, user may press [XFER] / [Conf] button to make a new call on the default line or press the line key to make new call on specific line. -
Page 27: Call Transfer
NRP1002/P IP Phone User Manual Figure 41 - Conference Call Call Transfer 6.1.3 When the user is talking with a remote party and wish to transfer the call to another remote party, there are two way to transfer the call, attended and unattended. -
Page 28: Add / Edit / Delete Contact
NRP1002/P IP Phone User Manual When there are contact records in the phonebook, the contact records will be arranged in the alphabet order. User may browse the contacts with up/down navigation keys. User may fast scroll the contact list by holding the up/down navigation keys. -
Page 29: Browse And Add / Remove Contacts In Group
NRP1002/P IP Phone User Manual To edit a group, press [Edit] button. Figure 46 - Group List Browse and Add / Remove Contacts in Group 6.2.3 User can browse contacts in a group by opening the group in group list with [OK] button. -
Page 30: Open Cloud Phonebook
NRP1002/P IP Phone User Manual To open cloud phonebook list, press [Cloud Phonebook] in phonebook screen. Figure 49 - Cloud Phonebook List Open Cloud Phonebook 6.3.1 In cloud phonebook screen, user can open a cloud phonebook by pressing [OK] / [Enter] button. The device will start downloading the phonebook. -
Page 31: Voice Message
NRP1002/P IP Phone User Manual Figure 52 - Call Logs User can also filter call logs with specific call log type to narrow down the call log records by pressing the left/right navigation button and select one of the call log types in the soft-menu buttons. -
Page 32: Do-Not-Disturb
NRP1002/P IP Phone User Manual You can also press [Menu] / [Applications] / [Voice Massage] to enter MWI interface When you opened voice message configuration interface, select the line to be configured with up/down navigation keys. Press [Edit] button to enable and edit the voice message number, when done, press [OK] / [Save] button to save the configuration. -
Page 33: Auto-Answering
NRP1002/P IP Phone User Manual Press soft-button [Menu] till you find the [Features] item. Enter [Features] item till you find the [DND] item. Enter [DND] item till you find [DND item. Press left/right navigation key to change the DND mode or DND state on specific line. When done, press [Save] button to save the changes. -
Page 34: Call Forward
NRP1002/P IP Phone User Manual Figure 60 - Auto-answering Enabled on Line1 Call Forward Call forward is also known as ‘Call Divert’ which is to divert the incoming call to a specific number based on the conditions and configurations. User can configure the call forward settings of each line. -
Page 35: Figure 62 - Select Call Forward Type
NRP1002/P IP Phone User Manual Figure 62 - Select Call Forward Type Figure 63 - Activate Call Forward and configure Call Forward Number Figure 64 - Set Delay Time for Call Forward on No Answer www.newrocktech.com 34/68... -
Page 36: Phone Settings
NRP1002/P IP Phone User Manual Phone Settings 7.1 Adjust Audio Volume When the device is in the default standby mode, Press soft-button [Menu] till you find the [Settings] item. Enter [Settings] item till you find the [Basic Settings] item. -
Page 37: Set Device Time/Date
NRP1002/P IP Phone User Manual 7.4 Set Device Time/Date When the device is in the default standby mode, Press soft-button [Menu] till you find the [Settings] item. Enter [Settings] item till you find the [Basic Settings] item. ... -
Page 38: Set Device Language
NRP1002/P IP Phone User Manual 7.5 Set Device Language When the device is in the default standby mode. Press soft-button [Menu] till you find the [Settings] item. Enter [Settings] item till you find the [Basic Settings] item. ... -
Page 39: Web Portal
NRP1002/P IP Phone User Manual Web Portal 8.1 Web Portal Authentication User can log in onto the device web portal to manage the device or user’s profile. User must provide correct username and password to be able to log in. -
Page 40: System / Information
NRP1002/P IP Phone User Manual Figure 66 - Web Call, Entering Number and Select Line 8.3 SYSTEM / Information User can get the system information of the device in this page including. Model Hardware Version Software Version ... -
Page 41: System / Upgrade
NRP1002/P IP Phone User Manual 8.6 SYSTEM / Upgrade The device supports online upgrade by periodically checking the software release version on the cloud server. Meanwhile, user can download the software and upgrade the device manually when there is trouble for the device to connect to the cloud server. - Page 42 NRP1002/P IP Phone User Manual Display the current line status at page loading. To get the up to Line Status date line status, user has to refresh the page manually. Username Enter the username of the service account. Display Name Enter the display name to be sent in a call request.
- Page 43 NRP1002/P IP Phone User Manual answered it Enable the device to subscribe a voice message waiting Subscribe For Voice Message notification, if enabled, the device will receive notification from the server if there is voice message waiting on the server...
- Page 44 NRP1002/P IP Phone User Manual Disable Call Forward on Busy Set the feature code to dial to the server Enable Call Forward on No Set the feature code to dial to the server Answer Disable Call Forward on No Set the feature code to dial to the server...
-
Page 45: Lines / Dial Peer
NRP1002/P IP Phone User Manual Enable GRUU Support Globally Routable User-Agent URI (GRUU) The registered server will receive the subscription package from ordinary application of BLF phone. BLF Server Please enter the BLF server, if the sever does not support subscription package, the registered server and subscription server will be separated. -
Page 46: Figure 67 - Global Substitution Configuration
NRP1002/P IP Phone User Manual all: xxx – xxx will replace the phone number. add: xxx – xxx will be dialed before any phone number. del –The characters will be deleted from the phone number. rep: xxx – xxx will be substituted for the specified characters. - Page 47 NRP1002/P IP Phone User Manual Figure 68 - Local Substitution Configuration Example 3: Add Prefixes If the dialed number starts with the fixed prefix number, the phone will send out your dialed phone number adding prefix number automatically. For example, when users dial “9312”, the device will send out “0079312”.
-
Page 48: Figure 68 - Deletion Configuration
NRP1002/P IP Phone User Manual Figure 70 - Add Suffixes Configuration Example 5: Deletion If the dialed number ends with the fixed prefix number, the phone will send out your dialed phone number deleting prefix number automatically. For example, when users dial “98322”, the device will send out “8322” . -
Page 49: Lines / Dial Plan
NRP1002/P IP Phone User Manual 8.14 LINES / Dial Plan Figure 69 - Dial Plan Configuration The device supports 8 dialing modes: Press # to Send - Dial the desired number, and press # to send it to the server. -
Page 50: Phone / Features
NRP1002/P IP Phone User Manual Server Port Set the STUN server port, default is 3478 Set the STUN binding period which can be used to keep the Binding Period NAT pinhole opened. SIP Waiting Time Set the timeout of STUN binding before sending SIP messages... - Page 51 NRP1002/P IP Phone User Manual answer the call after specific delay. Enable Intercom Mute Enable mute mode during the intercom call Enable Intercom Tone If the incoming call is intercom call, the phone plays the intercom tone Enable Intercom Barge by selecting it, the phone auto answers the Enable Intercom Barge intercom call during a call.
-
Page 52: Phone / Audio
NRP1002/P IP Phone User Manual “SIP Display Name” > “SIP URI”. User may select one of the options to change the desired caller ID display priority. Hotline Number Set the Hot line Number Hotline Delay Set the Hot line Delay time. -
Page 53: Phone / Mcast
NRP1002/P IP Phone User Manual ILBC,AMR,AMR-WB,NONE The sixth preferential DSP codec: Sixth Codec G.711A/U,G.722,G.723,G.729,G.726-32, ILBC,AMR,AMR-WB,NONE Configure the least reflection time of Hand down, the default is Onhook Time 200ms. Set the country standard of call progress tones, including dial tone, Tone Standard busy tone, ring-back tone, etc. -
Page 54: Phone / Time/Date
NRP1002/P IP Phone User Manual The voice call in progress shall take precedence over all incoming Enable Page Priority paging calls. Name Listened multicast server name Listened multicast server’s multicast IP address and port. Host:port 8.19 PHONE / Time/Date User can configure the device time settings in this page. -
Page 55: Phone / Advanced
NRP1002/P IP Phone User Manual 8.20 PHONE / Advanced User can configure the advanced configuration settings in this page. Screen Configuration. Enable Energy saving Backlight Time LCD Menu Password Settings. The password is 123 by default. Keyboard Lock Settings. -
Page 56: Phonebook / Blacklist
NRP1002/P IP Phone User Manual To configure a LDAP phonebook, the following information should be entered, Display Title (must) LDAP Server Address (must) LDAP Server Port (must) Search Base (must) Access username (optional) Access password (optional) 8.23 PHONEBOOK / Blacklist By adding a number into the blacklist, user will no longer receive phone call from that number and it will be rejected automatically by the device until user delete it from the blacklist. -
Page 57: Function Key / Softkey
NRP1002/P IP Phone User Manual Presence: Compared to BLF, the Presence is also able to view whether the user is online. Note: You cannot subscribe the same number for BLF and Presence at the same time Speed Dial: You can call the number directly which you set. This feature is convenient for you to dial the number which you frequently dialed. -
Page 58: Figure 70 - Softkey Configuration
NRP1002/P IP Phone User Manual Figure 70 - Softkey Configuration www.newrocktech.com 57/68... -
Page 59: Advanced Features
NRP1002/P IP Phone User Manual Advanced Features 9.1 VPN Virtual Private Network (VPN) is a technology to allow device to create a tunneling connection to a server and becomes part of the server’s network. The network transmission of the device may be routed through the VPN server. - Page 60 NRP1002/P IP Phone User Manual user should check “Enable VPN” and select “OpenVPN” in VPN Mode and click “Apply” to enable OpenVPN connection. Same as L2TP connection, the connection will be established every time when system rebooted until it is disabled manually.
-
Page 61: Troubleshooting
NRP1002/P IP Phone User Manual 10 Troubleshooting When the device does not work properly, users may try the following methods to recover the device or gather relative information and send an issue report to support. 10.1 Get Device System Information Users may get the device system information by pressing [Settings] ->... -
Page 62: Entering Post Mode And Recover System Image
NRP1002/P IP Phone User Manual 10.5 Entering Post Mode and Recover System Image WARNING! P LEASE AVOID UPDATING SYSTEM IMAGE FROM OST MODE UNLESS THE SYSTEM IMAGE IS DAMAGED If the device could not boot up and entered into POST MODE, it is usually because of system image damaged due to power failure during software upgrade. -
Page 63: Common Trouble Cases
NRP1002/P IP Phone User Manual 10.6 Common Trouble Cases Table 10 - Trouble Cases Trouble Case Solution 1. The device is powered by external power supply via power adapter or PoE switch. Please use standard power adapter provided or PoE switch... -
Page 64: Appendix I - Icon Illustration
NRP1002/P IP Phone User Manual Appendix I - Icon Illustration Table 11 - Keypad Icons Redial Handsfree (HF) speaker Hold a call Mute microphone (during call) Volume up Volume down Table 12 - Status Prompt and Notification Icons Call out... - Page 65 NRP1002/P IP Phone User Manual Microphone muted Mixed type input Lower case input Upper case input Numeric input www.newrocktech.com 64/68...
-
Page 66: Appendix Ii - Text Input From Keypad
NRP1002/P IP Phone User Manual Appendix II – Text Input from Keypad Look-up Table of Characters Table 13 - Mode Icon Text Mode Key Button Characters of Each Press Numeric *#(space)@,.:/?<>[]%! &$~+- + - * % / | @ ! :... - Page 67 NRP1002/P IP Phone User Manual + - * % / | @ ! : A B C D E F G H I J K L M N O Upper Case Alphabets P Q R S T U V WZYX (space) *#(space)@,.:/?<>[]%! &$~+-...
-
Page 68: Appendix Iii - Led Definition
NRP1002/P IP Phone User Manual Appendix III – LED Definition Table 14 - LED Indicator State of DSS Key Type LED Light State Line inactive Line Key Green On Line ready (registered) Green Blinking Dialing / ringing / call holding Green On Subscribed number is idle.