
Related Manuals for New Rock Technologies NRP2000/W


Summary of Contents for New Rock Technologies NRP2000/W
- Page 1 NRP2000/W IP Phone User Manual Version: 2.0 2017-08 Website: http://www.newrocktech.com Email: gs@newrocktech.com...
-
Page 2: Table Of Contents
NRP2000/W IP Phone User Manual Content Overview of NRP2000/W ..........................5 Interface ............................5 Hardware ............................5 Software ............................6 Network ............................6 Management and Maintenance ....................6 Protocol ............................7 Compliant and Certified Standard ....................7 Packing list ............................ 7 Installation ............................. - Page 3 NRP2000/W IP Phone User Manual Keypad ............................20 Starting............................21 Standby ............................22 Configuration ..........................23 4.4.1 Status Info ........................... 24 4.4.2 Call Features ........................25 4.4.3 Contacts ..........................34 4.4.4 History ..........................39 4.4.5 Message ..........................41 4.4.6 Settings ..........................42 4.4.7...
- Page 4 NRP2000/W IP Phone User Manual TR069 ............................70 Action URL ..........................71 5.10 Remote Control ........................... 72 Wi-Fi ................................73 Configure the Wi-Fi on the Phone ....................73 Configure the Wi-Fi on the Web ....................73 Enterprise Wi-Fi .......................... 74 FAQ ................................
-
Page 5: Overview Of Nrp2000/W
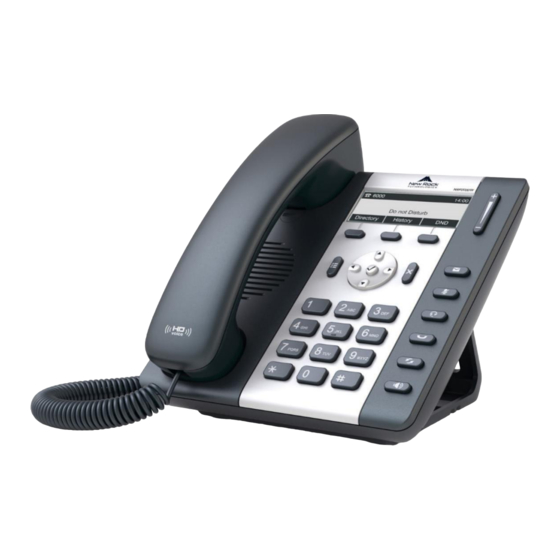
NRP2000/W IP Phone User Manual 1 Overview of NRP2000/W NRP2000/W 1.1 Interface Power Input DC 5V-1000mA or PoE LAN Port RJ45 PC Port RJ45 Headset Jack Handset Jack 1.2 Hardware 132*52 400MHz Dual-Core LED Indicator 1 Status Light New Rock Technologies, Inc. -
Page 6: Software
NRP2000/W IP Phone User Manual 1.3 Software SIP 2.0 (RFC3261) and other related SIP RFCs 1 SIP account registered STUN Jitter Buffer, VAD,CNG G711A, G711U, G722, G726-16, G726-24, G726-32, G726-40, G729, L16, iLBC_13_3, iLBC_15_2 ... -
Page 7: Protocol
NRP2000/W IP Phone User Manual Support firmware updating under safe mode Support different level user management Configuration via Web and keyboard Support multi-language Firmware and configuration file auto provisioning Support system log 1.6 Protocol ... -
Page 8: Installation
Headset Optional 1.9 Installation Connecting Network Cable NRP2000/W connects with network via LAN port. Under the Bridge mode, other devices (Laptop, IP phone) may access network via connecting to the PC port of NRP2000/W. Connect Wi-Fi New Rock Technologies, Inc. - Page 9 NRP2000/W IP Phone User Manual 1. Stand Bracket Installation Instruction A. Put the bottom side of the IP phone upside and press one-side joints of stand bracket into the slot, please refer the picture as below: B. Press the other side joints into the slot:...
- Page 10 NRP2000/W IP Phone User Manual C. It is the picture after fixing the stand bracket below: D. Disassemble the stand bracket: Push the spring joint of stand and pull the stand. When the joints are pulled out of the slot, you can take off the stand bracket.
- Page 11 NRP2000/W IP Phone User Manual 2. Wall-hung Installation A. Put the bottom side of the IP phone upside and press one-side joints of wall-hung stand bracket into the slot, please refer the picture as below: B. Press the other side joints into the slot...
- Page 12 NRP2000/W IP Phone User Manual C. After install the wall-hung stand bracket, press one-side joints of stand bracket into the slot, please refer to the picture as below: D. Press the other side joints into the slot New Rock Technologies, Inc.
- Page 13 NRP2000/W IP Phone User Manual E. Knock in nails or screws on the wall according to the proportion of the distance between the hanging holes as below: F. It is the picture after fixing the stand bracket below: New Rock Technologies, Inc.
-
Page 14: Play-And-Plug (Working Together With Om Series Ip Pbx)
2 Play-and-Plug (Working Together with OM Series IP PBX) When the NRP2000/w acts as an extension of New Rock OM series IP PBX, it supports Plug-and-Play function, which allows the NRP2000/w to automatically discover the OM and download the configuration files and make registration. -
Page 15: Call Function
NRP2000/W IP Phone User Manual Here are step for activating the phone after installation: Power up the phone. Select a language. Input the PIN (obtained from your administrator). Press the “Enter” soft key to complete registration. Note: If you don’t want to register, press the button on the phone to quit the PIN-entering interface and return to the home page. -
Page 16: Make Calls
NRP2000/W IP Phone User Manual Press key and talk with callers by built-in Micro-phone and Speaker. If you want to hang up, please press key again. Switch calling or talking into handset mode by lifting the handset under speaker mode. Press key will switch calling or talking into headset mode. -
Page 17: Pre-Dial
3.4 Multiple Line Dial-Up NRP2000/W supports up to 8 concurrent calls. If there is a new incoming call when you’re talking on NRP2000/W, the new incoming call will be displayed on LCD and status indicator LED will be fast blinking. -
Page 18: Call Hold
If the target number has been setup in the current BLF list, and you have already finished the necessary setup on Webpage of NRP2000/W, there is an easier way to complete the Blind transfer. While calling, press the corresponding BLF key of the target number, the blind transfer will be achieved. -
Page 19: 3-Way Conference
NRP2000/W IP Phone User Manual 3.8 3-Way Conference 1. While on calling, press the soft key “Conf”, input the third party’s phone number and then press the softkey “Dial” or press the soft key “Conf” and press the corresponding BLF key to invite the third party to join a conference call. -
Page 20: Keypad
NRP2000/W IP Phone User Manual 4.1 Keypad Description of the keys and Screen Status Indicator LED Volume Soft Key Navigation Menu VoiceMail Cancel Mute Headset Hold Dial pad Redial Speaker Soft Keys Press to select a function which displayed at the softkey zone of screen Display all optional functions at the last line of LCD screen. -
Page 21: Starting
“History”. Adjust the volume (speaker/handset/headset/ring). Volume level will be displayed on LCD when pressing volume key. Confirm users’ operation and show status when NRP2000/W is idle. Cancel users’ operation. Enter menu settings. Pick up and hung up under the speaker mode. -
Page 22: Standby
NRP2000/W IP Phone User Manual When start on the phone, it turns to standby status in about 50 seconds. 4.3 Standby Area Item Description Status: to indicate the call status Time Softkey: “History”, “Contacts”, “DND” Date Icon on Standby UI... -
Page 23: Configuration
NRP2000/W IP Phone User Manual Call hold. Unavailable Network. Calling via handset Calling via Speaker. Calling via headset. Wi-Fi Signal indicator Call Forward is activated. New Voicemail. Auto-Answer is activated. DND is activated 4.4 Configuration Press the key to enter the Main Menu: Move the navigation key and press the softkey “Enter”... -
Page 24: Status Info
NRP2000/W IP Phone User Manual Number Key “5” Enter “History” Number Key “6” Enter “Message” Number Key “7” Enter “Settings” Number Key “8” Enter “Display” 4.4.1 Status Info It’s able to check the status info via LCD Display or Web. -
Page 25: Call Features
NRP2000/W IP Phone User Manual Press the softkey “Enter” to check status info, and “Back” to return the Basis Status page. Check the Status info via Web 1. Check the IP address of IP phone; 2. Type the IP address on a web browser;... - Page 26 NRP2000/W IP Phone User Manual Always Forward All incoming calls will be forwarded to target phone number once the “Always Forward” activated, setup this feature as follow and please move the navigation to check more: Item Operation Description Switch on or Switch off the feature. “Enable”...
- Page 27 NRP2000/W IP Phone User Manual Switch on or Switch off the feature. “Enable” Busy means this feature is enabled, “Disable” means Press the key softkey “Switch” to setup this feature is disabled. The Number key, “*”key, and Forward to Setup the target phone number which all “#”are permitted to be input.
- Page 28 NRP2000/W IP Phone User Manual Setup Call Forward Via Web Set Call Forward via web: Phone > Forward&DND. 2. Call Waiting The feature of “Call Waiting” is available by default. If switch off this feature, whatever multiple SIP accounts had been registered successfully, only one single active calling is permitted (for example Dialing, Ringing, Calling, and Holding).
- Page 29 NRP2000/W IP Phone User Manual Switch on or Switch off the feature. “Enable” Call Waiting means this feature is enabled, “Disable” Press the key softkey “Switch” to setup means this feature is disabled. Call Waiting Tone Switch on or Switch off the prompt playing.
- Page 30 NRP2000/W IP Phone User Manual The configuration item Label is a name to identify the key on LED, can be set as “conference”. Hold .For more info, please refer to Chapter 2.5. The same feature as the key The configuration item Label is a name to identify the key on LED, can be set as “hold”.
- Page 31 NRP2000/W IP Phone User Manual Press this key while on calling, the phone will dial the specified phone number, user will receive a code on the phone prompt, and then press the soft key “Transfer”, the current calling will be parked successfully. At this moment, user is able to continue the parked calling with any other phones which registered on the same SIP server by dialing the code which user have received.
- Page 32 NRP2000/W IP Phone User Manual Reminding: This key is not available while pre-dial. It’s the only way to press the soft key “Dial” or pick up the handset to finish pre-dial. The default value is “#”, and it could be set as “*”. If set the value as “disable”, it means the function “Key as Send”...
- Page 33 NRP2000/W IP Phone User Manual Item Operation Description Accounts Select the Account for anonymous call. Press the soft key “Switch” or to modify, Anonymous Call Switch on/off the feature of making Press the soft key “Switch” or anonymous calls. to modify,...
-
Page 34: Contacts
NRP2000/W IP Phone User Manual 4.4.3 Contacts The content of Directory includes local phonebook and blacklist. Enter Directory as follow, 1. Press the soft key “Contacts” when the phone is standby 2. Press the navigation key 3. Press the menu key , and then select “Contacts”... - Page 35 NRP2000/W IP Phone User Manual Name and phone number are permitted to be saved into the local phonebook, and up to 400 items. It’s able to add new group, new contact, edit or delete exist contact or dial, also move the item to blacklist.
- Page 36 NRP2000/W IP Phone User Manual incoming call happened, otherwise the selected ringtone will be played. Add new contact via web: Contacts > Contacts > Input messages > Add > Save. Edit the Contact User must re-edit the contact item while updating one item of local phonebook.
- Page 37 NRP2000/W IP Phone User Manual Path to move to blacklist on the phone: Press > Contacts > Local Contacts > All contacts > Select the item to move > Option > Move to Blacklist > OK > OK. Press the soft key “Cancel” at the Warning UI to stop this operation.
- Page 38 NRP2000/W IP Phone User Manual 1. Remote URL: Set a remote phonebook download path. Support the TFTP, FTP, HTTP and HTTPs server. 2. Display name: Set a display name on the phone. 3. Search Remote Phonebook name: Select “Yes” or “No” to enable or disable search remote phonebook name.
-
Page 39: History
NRP2000/W IP Phone User Manual Base: Set the LDAP search base. Username: Set the LDAP server username. Password: Set the LDAP server password. Max Hits (1~32000): Set the maximum number of search results from the LDAP server. LDAP Name Attributes: Set the name of the attributes returned from the server. - Page 40 NRP2000/W IP Phone User Manual Make Calls From History Path to make calls from history on the phone: Enter history UI > Select the item to dial > Dial. Delete One Item From History Path to delete one item from history on the phone: Enter history UI > Select the item to delete > Delete.
-
Page 41: Message
NRP2000/W IP Phone User Manual key “Confirm”. At this moment an “edit” page will be popped up. Please move the navigation key to check more The item of “Office”, “Mobile” and “Other” are able to be switched over between “Old Number” and current number. -
Page 42: Settings
NRP2000/W IP Phone User Manual 1. Press the key after factory set 2. Press the key for a while > Select “Message” > Setup Voicemail 3. Press the key View Voice Mail User is able to check voicemail in below ways: 1. - Page 43 2. Time &Date Time & Date will be displayed at the standby page of NRP2000/W, and these info will be related with all process of IP phone. “Time & Date” can be gained by NTP Server automatically or set manually.
- Page 44 NRP2000/W IP Phone User Manual Please move the navigation key to check more: Item Operation Description Select the correct Time Zone Time Zone Press the key or soft key for the IP phone. “Switch” to modify it. NTP Server Key in the IP address of domain name by Specify the NTP Server the number keys,”*”,”#”...
- Page 45 NRP2000/W IP Phone User Manual Item Operation Description Time Zone Set a time zone matches condition Click drop-down box to select The primary NTP server that provide time and Primary NTP Server Manual input date Secondary NTP The secondary NTP server that provide time...
- Page 46 NRP2000/W IP Phone User Manual Start Month The month that the daylight rule begins taking Click drop-down box to select effect Start Date The day that the daylight rule begins taking Manual input effect Start Hour of Day The hour of day that the daylight rule begins...
- Page 47 NRP2000/W IP Phone User Manual Item Operation Description Key in “Year” with the number Year key, “*”and “#” Date info Key in “Month” with the number Month key, “*”and “#” Key in “Day” with the number key, “*”and “#” Key in “Hour” with the number Hour key, “*”and “#”...
- Page 48 Set the Time &Date Format via Web: Phone > Preference 4. Ringtones 10 different ringtones have been provided by NRP2000/W for selection. Path to set on the phone: Press the > Settings > Basic Settings > Ringtones. For the selected ringtone, there is a dot inside the circle. Press the key to select other ringtone for playing.
- Page 49 NRP2000/W IP Phone User Manual Set ringtones via Web: Account > Basic > Ring tones. 5. Headset Memory Mode Headset memory mode can be used to control the default device to make or answer calls. This function is disabled by default, which means the phone will communicate with others by hand-free when pre-dial or making calls from history or contacts, and so is the situation that pressing “Answer”...
- Page 50 NRP2000/W IP Phone User Manual New PIN Manual input Set the new PIN Confirm PIN Manual input Confirm the new PIN Advanced Settings Password will be requested while accessing the page of “Advanced Settings”. This password is the same as the user’s (“admin”) to access.
- Page 51 NRP2000/W IP Phone User Manual The status of Stun Server, “off” by default Stun Status Stun Server IP address of Stun Server Configure account via web: Account > Basic 2. Set Password The password for Advanced Settings also is used for Web access as the role “admin”. Path to set password on phone: Press >...
- Page 52 NRP2000/W IP Phone User Manual The current password for web access as the role of “admin”, it’s “admin” by Current PWD default. New PWD To set the new password, blank is acceptable. Confirm PWD Input the new password again, to confirm the new password.
- Page 53 NRP2000/W IP Phone User Manual LAN Port Connect the phone with local network via LAN port, there are three modes to choose: IPV4, IPV6, IPv4&IPv6 Set the LAN port via Web: Network > Basic. IPv4 The phone gains network via IPv4 by default;...
- Page 54 NRP2000/W IP Phone User Manual IPv6 The phone supports IPV6 network mode, it needs the IPV6 Switch support. And gains IP address via DHCP and Static IP two modes. IPv4&IPv6 The phone also supports IPV4&IPV6 network mode. PC Port Only bridge mode support by PC port.
- Page 55 Set the VPN via Web: Network > Advanced > VPN. LLDP NRP2000/W supports LLDP, and enable in default. If the phone is connected to a switch and using LLDP, the switch would notifies IP phone of VLAN information. Set the LLDP via Web: Network > Advanced > LLDP...
- Page 56 NRP2000/W IP Phone User Manual 802.1X IEEE 802.1X authentication is an IEEE standard for Port-based Network Access Control (PNAC), part of the IEEE 802.1 group of networking protocols. It offers an authentication mechanism for devices to connect to a LAN or WLAN.
- Page 57 NRP2000/W IP Phone User Manual Keypad lock via webpage: phone > Phone lock 1. Keypad Lock Enable: select “Yes” or “No” to enable or disable keypad lock 2. Keypad Lock Type: Menu key/Function keys/All keys/Answer call only. 3. Phone Unlock PIN (0~15 Digit): set the phone unlock PIN. Range: 0~15 digit.
- Page 58 NRP2000/W IP Phone User Manual Reboot via webpage: Phone > Upgrade > Reboot 6. Reset to Factory Once reset to factory, all parameter settings will back to the factory default value, and all configure will be cleared, users must be careful on this.
-
Page 59: Display
NRP2000/W IP Phone User Manual 4.4.7 Display For more convenient, users are able to adjust the contrast grade and backlight of the main LCD display. 1. Slave Contrast There are 9 different contrast grades for options, press the soft key “Switch” or the key modification, 8 is the default value. -
Page 60: Advanced Feature
NRP2000/W IP Phone User Manual 5 Advanced Feature 5.1 Codecs NRP2000/W support multiple codecs, users can select the codes via Web. means to enable the item of “Disabled Codes”; means to disable the item of “Enabled Codes”; Click the button to sort all enabled codes, the top item has the highest priority. -
Page 61: Capture And Upgrading
NRP2000/W IP Phone User Manual Note: Multiple different items of G726, iLBC should not activated simultaneously. 5.2 Capture and Upgrading Capture package: It would record the phone current info. Via webpage: phone > Debug > PCAP Feature Click the button “Start” to start the capture and click the button “Stop” to end the capture. Then click the button “export”... -
Page 62: Auto Provision
NRP2000/W IP Phone User Manual Via webpage: phone > Upgrade > Upgrade Firmware Before upgrading the firmware of phone, users are suggested to check the version of current firmware. Click the button “Choose file” to select the target local file and click “Upgrade” to process upgrading, this will cost a couple of minutes. - Page 63 NRP2000/W IP Phone User Manual Item Description Select “On” or “Off” to enable or disable PnP automatic updates PnP Active Select “On” or “Off” to enable or disable DHCP option automatic updates DHCP Active Provisioning Server The address to save control file for auto upgrading, it can be http, https, tftp and ftp server, for example, tftp://192.168.1.111...
-
Page 64: Export & Import Configuration File
NRP2000/W IP Phone User Manual If set this parameter as “On”, the phone will do some check for upgrading after Repeatedly “Interval(minutes)”, and it will upgrade automatically once the conditions are met This parameter is configurable once the Repeatedly is “On”... -
Page 65: Import Configuration File
NRP2000/W IP Phone User Manual Check the “Export User Data” and then click “Export”, it will export a configuration file that carries with user’s configured data. To modify the exported configuration file, you should to decompress it until you get a file names as configuration. -
Page 66: Export System Log
NRP2000/W IP Phone User Manual It downloads the phone configuration CFG file. 5.6 Export System Log When the phone doesn’t working well, System log is the best assistant tools for troubleshooting, all operation details has been recorded. This operation is available via Web only. -
Page 67: Replace Rule
NRP2000/W IP Phone User Manual 5.7.1 Replace Rule Dial plan “Replace Rule” means to replace a batch of complicated character string by some simple characters, to make a speed dial. Item Description Sample Set Number as “6”, Number The string works as replacer, not null Set Replace as”6032”,... -
Page 68: Dial-Now
NRP2000/W IP Phone User Manual Any alteration won’t take effect until the button Save “Save” is clicked. 5.7.2 Dial-Now Dial plan “Dial-now” permits the corresponding phone to be dialed instantly without pressing the soft key “Dial”, once the input has been matched. It works like a hotline. -
Page 69: Area Code
NRP2000/W IP Phone User Manual dial-now dial plan before delete it, and then click effect in situation that the button “Delete” phone is in dialing state Any alteration won’t take effect until the button Save “Save” is clicked. Set “Dial-now Time-out” via web: Phone > Features > General Information > Dial-now Time-out (secs). -
Page 70: Block Out
NRP2000/W IP Phone User Manual Cancel 5.7.4 Block Out Dial plan “Block out” is used to prohibit the phone number outgoing call from some accounts. Item Description Sample Set “Block Out Number Block Out Number The number that prohibited 1”as”10086”... -
Page 71: Action Url
NRP2000/W IP Phone User Manual Item Description Enable TR069 It enables or disables the TR069 feature ACS URL It configures the access URL of the ACS(Auto Configuration Servers) ACS Username It configures the user name for the phone to authenticate with the ACS... -
Page 72: Remote Control
NRP2000/W IP Phone User Manual Mainly used in CTI (Computer Telephony Integration) scene, such as: call center. 5.10 Remote Control Remote control (Active URL) refers to the remote control of the phone for a variety of operations, mainly used in CTI (Computer Telephony Integration) scene, Such as: call center, the operator on the computer to operate the phone, then make the call, answer the call and other function. -
Page 73: Wi-Fi
4. The last option is Manual setting, press ‘Enter’, then input the SSID and password. 6.2 Configure the Wi-Fi on the Web NRP2000/W connects to network via Wi-Fi acquiescently, click “Search Wi-Fi” button to search the available Wi-Fi. After all available Wi-Fi hotspots are list out, click the round behind the available Wi-Fi which you want to connect. -
Page 74: Enterprise Wi-Fi
NRP2000/W IP Phone User Manual Input the right “Secret Key” and then click the “Confirm” button, the phone will reboot, after rebooting, the Wi-Fi icon will display on the home screen, it means connect failed when the icon come with , then you should check the configuration. -
Page 75: Faq
NRP2000/W IP Phone User Manual Press the “Search Wi-Fi”, and select the SSID, then input the radius ID and password. Via the phone: Press “Menu” > “Wi-Fi Settings”, and select the SSID, then input the radius ID and password. 7 FAQ 7.1 How to Reset to Factory... -
Page 76: Upgrade The Firmware On Safe Mode
NRP2000/W IP Phone User Manual The phone will be reboot and resumed to factory default setting 7.2 Upgrade the Firmware on Safe Mode If the phone can’t be started successfully, user is able to upgrade the firmware on post mode, Setup a TFTP Server and set the PC’s IP address as “192.168.1.200”... -
Page 77: Trouble Shooting
NRP2000/W IP Phone User Manual 8 Trouble shooting 8.1 The Phone Failed to Register to SIP Server First of all, check the IP address. If the LAN port is DHCP, please ensure the DHCP server has been enabled. Check the network gateway... -
Page 78: Only One Party Can Hear From Another On Calling
NRP2000/W IP Phone User Manual Make sure the network cable has been plugged into the LAN port Make sure the network cable or port of network switch are working fine, Make sure the DHCP server has been enabled, and there are available IP address Try to set the LAN port as Statics IP 8.3 Only one Party can Hear From Another on Calling... -
Page 79: Fcc Caution
NRP2000/W IP Phone User Manual TCP: Transmission Control Protocol TLS: Transport Layer Security Protocol BLF: Busy Lamp Field DNS: Domain Name System SRTP: Secure Real-time Transport Protocol NTP: Network Time Protocol VAD: Voice Activity Detection CNG: Comfort Noise Generator 10 FCC Caution Any Changes or modifications not expressly approved by the party responsible for compliance could void the user’s authority to operate the equipment.
Need help?
Do you have a question about the NRP2000/W and is the answer not in the manual?
Questions and answers