Table of Contents
Advertisement
Advertisement
Table of Contents

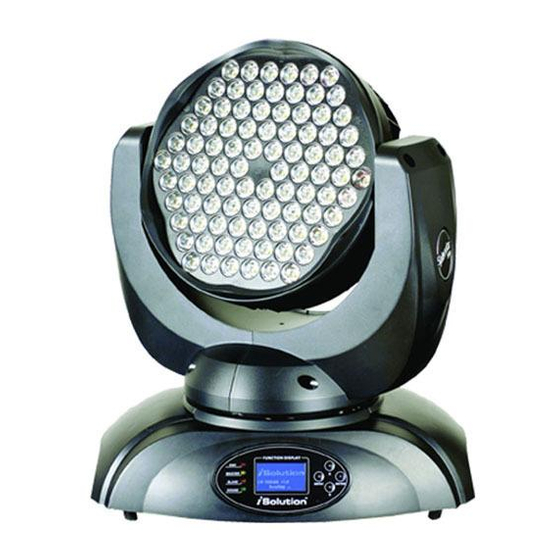
Summary of Contents for ACME SPLENDOR 90
- Page 1 Splendor 90 CM-90 User Guide Professional Entertainment Technology...
-
Page 2: Table Of Contents
TABLE OF CONTENTS 1. Safety Instruction 2. Technical Specification 3. Change Beam Angle 4. How To Set The Unit 4.1 Control Panel 4.2 Main Function 5. How To Control The Unit 5.1 Master/Slave Built-in Preprogram Function 5.2 Easy Controller 5.3 DMX Controller 6. -
Page 3: Safety Instruction
1. Safety Instruction Please read carefully the instruction, which includes important information about the installation, usage and maintenance. WARNING Please keep this User Guide for future consultation. If you sell the unit to another user, be sure that they also receive this instruction booklet. ... -
Page 4: Technical Specification
Caution There are no user serviceable parts inside the unit. Do not open the housing or attempt any repairs yourself. In the unlikely event your unit may require service, please contact your nearest dealer. Installation The unit should be mounted via its metal hole on the bracket. Always ensure that the unit is firmly fixed to avoid vibration and slipping while operating. -
Page 5: Change Beam Angle
3. Change Beam Angle If you want to change the beam angle of the fixture, you can change lens of the fixture refer to the photo below: Turn off the mains power first, or high voltage may cause electric shock! 4. -
Page 6: Main Function
Button MENU To select the programming functions DOWN To go backward in the selected functions To go forward in the selected functions ENTER To confirm the selected functions Fuse For over current protection. Only for remote control By connect to the 1/4’’ microphone jack to control the unit for Stand by, Function and Mode function. - Page 8 DMX Address Press the MENU button up to when the DMX Address is showing on the display. Press ENTER button and the display will blink. Use DOWN and UP button to change the DMX512 address. Once the address has been selected, press the ENTER button to store. Back to the main functions without any change press the MENU button or wait for 8 seconds.
- Page 9 ENTER button and the display will blink. Use DOWN and UP button to select the yes (yes blackout) or no (no blackout) mode. Once selected, press the ENTER button to store. Back to the main functions without any change press the MENU button or wait for 8 seconds. Pan Inverse Press the MENU button up to when the Pan Inverse is showing on the display.
- Page 10 main functions without any change please press the MENU button. White Balance Press the MENU button up to when the White Balance is showing on the display. Press ENTER button and the Red will blink, press UP and Down button to adjust the value, press ENTER button to store and Green will blink on the display, press UP and Down button to adjust the value, press ENTER button to store and Blue will blink on the display, press UP and Down button to adjust the value, and press ENTER button to store.
-
Page 11: How To Control The Unit
5. How To Control The Unit You can operate the unit in three ways: 1. By master/slave built-in preprogram function 2. By easy controller 3. By universal DMX controller 5.1 Master/Slave Built-in Preprogram Function By linking the units in master/slave connection, the first unit will control the other units to give an automatic, sound activated, synchronized light show. -
Page 12: Dmx Controller
5.3 DMX Controller Use universal DMX controller to control the units, you have to set DMX address from 1 to 512 channel so that the units can receive DMX signal. Press the MENU button up to when the DMX Address is showing on the display. Press ENTER button and the display will blink. - Page 13 16 Channel DMX512 Configuration(Mode2) Pan/Tilt Macro Pan/Tilt Function Pan Fine Tilt Tilt Fine Speed Speed Macro ° ° 236-255 Macro12 216-235 Macro11 240-255 Stand alone 196-215 Macro10 176-195 Macro 9 200-209 156-175 Macro 8 Reset 136-155 Macro 7 80-89 116-135 Macro 6 Disable blackout 096-115...
- Page 14 5.5 DMX512 Connection 1. If you using a controller with 5 pins DMX output, you need to use a 5 to 3 pin adapter-cable. 2. At last unit, the DMX cable has to be terminated with a terminator. Solder a 120 ohm 1/4W resistor between pin 2(DMX-) and pin 3(DMX+) into a 3-pin XLR-plug and plug it in the DMX-output of the last unit.
-
Page 15: Troubleshooting
6. Troubleshooting Following are a few common problems that may occur during operation. Here are some suggestions for easy troubleshooting: A. The unit does not work, no light and the fan does not work 1. Check the connection of power and main fuse. 2. -
Page 16: Declaration Of Conformity
Declaration of Conformity We declare that our products (lighting equipments) comply with the following specification and bears CE mark in accordance with the provision of the Electromagnetic Compatibility (EMC) Directive 2004/108/EC. EN55103-1: 2009 ; EN55103-2: 2009; EN61000-3-2: 2006 + A1:2009 + A2:2009; EN61000-3-3: 2008. &... - Page 17 Innovation, Quality, Performance...


Need help?
Do you have a question about the SPLENDOR 90 and is the answer not in the manual?
Questions and answers