Table of Contents
Advertisement
Quick Links
Download this manual
See also:
User Manual
Advertisement
Table of Contents

Related Manuals for Intec CP2020


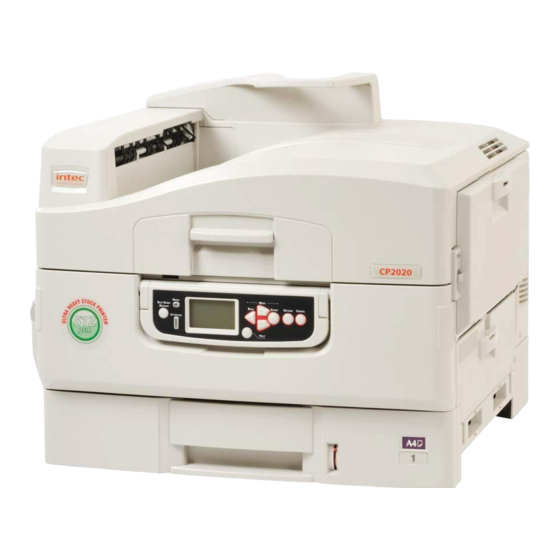
Summary of Contents for Intec CP2020
- Page 1 CP2020 Confi guration Guide...
-
Page 2: Ontents Preface
Copyright © 2011 Intec Printing Solutions. All rights reserved. Microsoft, MS-DOS and Windows are registered trademarks of Microsoft Corporation. -
Page 3: Table Of Contents
Step 2: add the printer to the utility ... 25 Using Intec LPR ......25 Section 3: printing from Windows . - Page 4 Menu options ......37 Discover Printers ......37 Printer status monitor .
- Page 5 Security setup ......79 Storage Setup ......79 Power setup .
-
Page 6: Notes, Cautions And Warnings
OTES CAUTIONS AND WARNINGS NOTE A note provides additional information to supplement the main text. CAUTION! A caution provides additional information which, if ignored, may result in equipment malfunction or damage. WARNING! A warning provides additional information which, if ignored, may result in a risk of personal injury. Specifications subject to change without notice. -
Page 7: Introduction
NTRODUCTION NOTE The network addresses used in this manual are shown for example only. Network addresses used in your installation should be within the appropriate address range and have the correct subnet mask for your network segment. The IntecLAN Internal Print Server is a fast 10BASE-T/ 100BASE-TX/1000Base-T network interface. -
Page 8: Sections
ECTIONS This book is divided into the following sections: > “Section 1: configuring the print server” on page 14 > “Section 2: utilities” on page 22 > “Section 3: printing from Windows” on page 26 > “Section 4: printing using MacOS” on page 30 >... -
Page 9: Specifications
PECIFICATIONS Frame types • IEEE 802.2 • IEEE 802.3 • Ethernet-II, SNAP, AUTO Network • 1000BASE-T interface • 100BASE-TX • 10BASE-T Network • TCP/IP protocols – Network layer: ARP, RARP, IP, ICMP, PnP – Session layer: TCP, UDP – Application layer: PR, FTP, TELNET, HTTP, IPP, BOOTP, DHCP, SNMP, DNS, SMTP, POP3 •... - Page 10 Print Service • LPR • FTP • Port 9100 • Web Direct Printing • QSERVER Binder • QSERVER NDS Functions • Self-diagnostic test printing • Banner supported • Monitoring/configure by Web browser • Printer status notification by E-Mail Introduction > 10...
-
Page 11: Network Summary Printout
ETWORK SUMMARY PRINTOUT The printer server’s network summary reports the printer’s MAC Address (Ethernet address). Turn the printer on. Press the print server Test button for more than three seconds and release. The printer’s MAC Address (Ethernet address) appears on the first page under General Information. -
Page 12: Configuration Methods
ONFIGURATION METHODS You can configure the print server by using one of the following methods: UTILITY FEATURES SYSTEM REQUIREMENTS Quick Setup Configure the print server Windows* easily and simply without • Windows 2000 Server/ installing any software Professional packages into your •... - Page 13 UTILITY FEATURES SYSTEM REQUIREMENTS Web Browser Configure the print server Microsoft Internet and printer by using a Explorer or similar. Web browser such as Operating system that Microsoft Internet supports the Web Explorer or Mozilla browser. Firefox. TELNET Configure the print server Third-party vendor using TELNET.
-
Page 14: Section 1: Configuring
ECTION CONFIGURING THE PRINT SERVER This section explains the various ways you can configure your print server. It consists of the following: > “Using a web browser” on page 15 > “Using TELNET” on page 20 Section 1: configuring the print server > 14... -
Page 15: Using A Web Browser
SING A WEB BROWSER If the print server is connected to the network using TCP/IP, its settings and the printer menu settings can be configured using a Web browser. NOTE The network addresses used in this manual are shown for example only. - Page 16 Enter the print server’s IP Address. Press the ENTER key. The Printer Status window displays. To ensure correct operation, change the browser cache or temporary internet settings to ensure the latest version is viewed at each session. For example, using Internet Explorer: In the Tools pull-down menu, select Internet Options.
- Page 17 Enter “root” for the User Name and your password—the default is the last six digits of the MAC address (case sensitive, use uppercase)—under Password. Click OK. Click Skip to navigate to the main menu page. Using a web browser > 17...
- Page 18 In the left column, click the category for which you wish to make changes. When you are finished, click Submit to send the changes to the print server. Using a web browser > 18...
-
Page 19: Changing The Password
HANGING THE ASSWORD Open the browser and enter the IP Address for the print server, then login with your current password. Click Security > Password Configuration. Under Administrator(root/admin) Password Configuration, enter the new password, then enter it again under Confirm New Admin Password. NOTE Maximum 15 characters. -
Page 20: Using Telnet
TELNET SING CAUTION! Please ensure that a valid IP address for your network environment is used. Use of an incorrect IP address can cause serious problems on your network. TELNET XAMPLE CONFIGURATION TELNET requires the print server to have a valid IP address configured. - Page 21 You should see a sequence similar to the following example: Trying 172.168.20.127 Connected to 172.168.20.127 Escape character is ‘^]’. EthernetBoard LAN PRINTER". login: root ‘root’ user needs password to login. password: User ‘root’ logged in. No. MENU (level.1) ------------------------------------ 1:Status / Information 2:Printer Config 3:Network Config 4:Security Config...
-
Page 22: Section 2: Utilities
ECTION UTILITIES This section covers the following: > “Intec LPR printing utility” on page 23 Section 2: utilities > 22... -
Page 23: Intec Lpr Printing Utility > 23
NTEC PRINTING UTILITY The Intec LPR Utility is a utility that allows sending data to printers connected to the network via TCP/IP. Can be used as an alternative to using Microsoft Standard TCP/IP. The utility redirects printing data to the lpr port of the specified IP address. - Page 24 NEXT If you wish to view the readme file, click Yes, I want to view the ReadMe File before proceeding. Check Yes, I want to launch Intec LPR Utility now. Click Finish. The utility starts. Intec LPR printing utility > 24...
-
Page 25: Step 2: Add The Printer To The Utility
When the Discovery window opens, click the printer in the box, then click OK. Click OK. The printer is added to the main window. SING NTEC Refer to the on-line Help for information on how to use the utility. Intec LPR printing utility > 25... -
Page 26: Section 3: Printing From Windows
ECTION PRINTING FROM INDOWS This section provides guidelines on how to print over the network from various Microsoft Windows operating systems. There are numerous ways of printing from Windows and the exact set-up will vary depending upon your environment. There are also numerous versions of Windows, which can be configured as either a client, server or both. -
Page 27: Installing A Network Printer > 27
The Intec driver installer program searches for compatible printers on the Network and installs and configures the printer drivers with the correct port settings automatically. Using the Intec driver installer program, you can install to the following connected printer types: Locally connected printers >... -
Page 28: Using The Add Printer Wizard
TCP/IP protocol in order to print. You can configure this to use either LPR or Raw (e.g. Port 9100). Intec LPR Used to connect your printer over TCP/IP using an LPR port. Installing a network printer > 28... - Page 29 Intec LPR also includes useful tools enabling you to download PS and PRN files directly to your printer, and automatically redirect jobs to other printers on the network. The IPP (Internet Printing Protocol), defines a standard protocol for printing as well as managing print jobs, media, resolution, etc.
-
Page 30: Section 4: Printing Using Macos
ECTION PRINTING USING This section covers the following: > “Overview” on page 31 > “Network summary printout” on page 32 > “MacOS printer setup utility” on page 33 > “Connecting to your printer” on page 45 > “Configuring printer hardware options” on page 48 Section 4: printing using MacOS >... -
Page 31: Overview
> Printer colour matching NOTE The PPD file must be installed using the Intec Driver Installer to ensure that all essential files are copied. ETTING UP A NETWORK PRINTER If the printer does not already have an IP address, use the Printer Setup Utility to assign an IP address. -
Page 32: Network Summary Printout
ETWORK SUMMARY PRINTOUT The printer server’s network summary reports the printer’s MAC Address (Ethernet address), required for MacOS configuration. Turn the printer on. Press the print server Test button for more than three seconds and release. The MAC Address appears on the first page under General Information. -
Page 33: Macos Printer Setup Utility
PRINTER SETUP UTILITY You can use the Setup Utility to: > Assign IP addresses and modify TCP/IP settings > Configure settings for Netware, Ethertalk, NetBEUI and SNMP The Printer Setup Utility is a powerful MacOS-based utility for configuring all print server functions using a graphical user interface. -
Page 34: The Printer Setup Utility Interface
Select the destination directory, then click Next. Ensure the Yes option is selected to activate the utility, then click Finish. HE PRINTER SETUP UTILITY INTERFACE The Printer Setup Utility auto-discovers Intec compatible network cards. MacOS printer setup utility > 34... - Page 35 Select the correct printer NIC to configure and choose Setup menu > Device Setup. At the prompt, enter the Admin password. NOTE The default admin password is the last six digits of the MAC Address, minus any punctuation marks. e.g., for a MAC (Ethernet) Address of 00:80:87:A4:55:79, the password would be A45579.
- Page 36 Click Apply. MacOS printer setup utility > 36...
-
Page 37: Menu Options
ENU OPTIONS ISCOVER RINTERS Locates and lists all printers in your network which have an Intec compatible network card installed. RINTER STATUS MONITOR Displays the current status of the printer. RINTER CARD SUMMARY Displays the network card summary details. HANGE SETTINGS Use this to configure the network card settings (requires Admin password). - Page 38 Enter the current value, then enter the new value and re- enter it under Confirm …. NOTE The default admin password is the last six digits of the MAC Address, minus any punctuation marks. e.g., for a MAC (Ethernet) Address of 00:80:87:A4:55:79, the password would be A45579.
- Page 39 Netware Tab ITEM COMMENTS Use NetWare Protocol Enable/disable NetWare protocol. Print Server Name Set a Print Server name. Frame Type Set the primary NetWare frame type. Operation Mode Select the NetWare mode: PSERVER Mode (the default) RPRINTER Mode Bindery Setup Configure Bindery mode items, including: File Server to be Specify up to 8 file...
- Page 40 EtherTalk Tab ITEM COMMENTS Use EtherTalk Enable/disable EtherTalk protocol. Protocol Printer Name Set the EtherTalk Printer object name. Zone Name Set the name of the zone to which the print server belongs. MacOS printer setup utility > 40...
- Page 41 NetBEUI Tab ITEM COMMENTS Use NetBEUI Enable/disable NetBEUI protocol. Protocol Short Printer Name Set a name for the print server. Workgroup Set a name for the work group to which the print server belongs. Comment Set the comments for the print server. MacOS printer setup utility >...
-
Page 42: Open Web Browser
SNMP Tab ITEM COMMENTS SysContact Set the printer manager name. SysName Set the printer model name. SysLocation Set the location where the printer is installed. PEN WEB BROWSER Displays the printer web page. HANGE UTILITY PREFERENCES Use this to configure the utility preferences for broadcast addresses for TCP/IP protocol and Time Out. - Page 43 TCP/IP Tab (Environmental Setup) ITEM COMMENTS Set Broadcast Set broadcast addresses that are used to search Intec Address network interface cards using the TCP/IP protocol. Click Add to add the address to the list in the box. Delete Select an address in the box, then click Delete to remove it.
- Page 44 Timeout Tab (Environmental Setup) ITEM COMMENTS Set Timeout: Printer Search Every (20-180sec) Search Set the response waiting time from the network card in seconds. Default is 30 seconds. Set Timeout: Time Outs (1-60sec) Data Send/Receive Set time out between AdminManager and the network interface card in seconds.
-
Page 45: Connecting To Your Printer
ONNECTING TO YOUR PRINTER NOTE The steps below are for Snow Leopard (10.6) and Leopard (10.5) Operating Systems. The principle of connecting to your printer is the same, though the steps may vary for different Operating Systems. Please refer to the ReadMe file on the driver DVD. -
Page 46: Bonjour
ONJOUR Choose Apple Menu > System Preferences > Print & Fax. Click “+”. Select your printer model from the Default Browser. Click Add…. Depending on the connection type, you may be prompted to configure any additional printer hardware options. If your printer has options such as a storage device or second tray, switch on the relevant options. - Page 47 To find the printer's IP address, you can print a configuration page from the printer's operator panel. Press the Menu keys until Print Information is displayed. Press the Enter button. Press the Menu keys until Configuration is displayed. Press the Enter button. Confirm that Execute is displayed, then press the Enter button.
-
Page 48: Configuring Printer Hardware Options
ONFIGURING PRINTER HARDWARE OPTIONS NOTE Applies to IP and Rendezvous network connections only. If you have added additional hardware, for example additional paper trays, to your printer these must be enabled in the printer driver. Choose Apple Menu > System Preferences > Print and Fax. -
Page 49: Section 5: Troubleshooting
ECTION TROUBLESHOOTING NOTE The network addresses used in this manual are shown for example only. Network addresses used in your installation should be within the appropriate address range and have the correct subnet mask for your network segment. IAGNOSTIC RINTER DOES NOT PRINT >... -
Page 50: Cannot Print With Lpr And Ftp
> Check the IP Address, Subnet Mask and Gateway are correct. > Check that the TCP/IP protocol is set to Enable. > Reset the network interface card to factory default settings. > If DHCP, BOOTP and RARP are not used, ensure they have been set to Disable. -
Page 51: Microsoft Internet Explorer
ICROSOFT NTERNET XPLORER Select Tools > Internet Options. Select the General tab and, in Temporary Internet files, click Settings. Under Check for newer versions of stored pages, select Every visit to the page. Click OK. Section 5: troubleshooting > 51... -
Page 52: Mozilla Firefox
OZILLA IREFOX In the Firefox address bar, type about:config. In the Filter field, type frequency. Double click on the entry browser.cache.check_doc_frequency. Change the Value to 1. > 0: Check once per browser session > 1: Check every time I view the page >... -
Page 53: Appendix: The Printer Menu
PPENDIX THE PRINTER MENU ASICS EVEL UNCTIONS The top-level Functions menus are: > Configuration > Print Information > Print Secure Job > Menus > Admin Setup: password protected (see page > Calibration (see page > Print Statistics: password protected (see page PECIAL Boot Menu (see page 77) VERVIEW... -
Page 54: Functions Menu Tree: Admin Setup
UNCTIONS DMIN ETUP ALIBRATION RINT TATISTICS FUNCTION SUBMENU 1 SUBMENU 2 Admin Setup Enter Password – (password (see page protected) NetworkSetup TCP/IP (see page IP Version NetBEUI NetWare EtherTalk Frame Type IP Address Set IP Address Subnet Mask Gateway Address Telnet SNMP Network Scale... - Page 55 FUNCTION SUBMENU 1 SUBMENU 2 Admin Setup Print Setup Personality (cont.) (see page Copies Duplex Binding Job Offset Output Bin Finisher Setup Media Check Transparency Detect Resolution Toner Save Mode Mono-print speed Default Orientation Form Length Edit Size Trapping X Dimension Y Dimension PS Setup Network Protocol...
- Page 56 FUNCTION SUBMENU 1 SUBMENU 2 Admin Setup Epson FX Setup Character Pitch (cont.) (see page Character Set Symbol Set Letter O Style Zero Character Line Pitch White Page Skip CR Function Line Length Form Length TOF Position Left Margin Fit to Letter Text Height Continuous Paper Mode Colour Setup...
- Page 57 FUNCTION SUBMENU 1 SUBMENU 2 Calibration Auto Density Mode (see page Auto BG Adjust Mode Off, -1, 0, +1, +2 Adjust Density Execute Adjust Registration Execute Heavy Media Adjust Print Tuning Pattern Execute Cyan Tuning Highlight Mid-Tone Dark Magenta Tuning Highlight Mid-Tone Dark...
- Page 58 FUNCTION SUBMENU 1 SUBMENU 2 Print Statistics Enter Password – (see page Statistics Log Enable Disable Log Size 1 ~ 30 ~ 100 Reset Counter Execute Change Password – New Password – Verify Password – Appendix: the printer menu > 58...
-
Page 59: Boot Menu Tree
USB Setup Security Setup Storage Setup CATEGORY ITEM Parallel Setup Parallel (see page Bi-Direction Ack Width ACK Busy Timing I-Prime Offline Receive USB Setup (see page Speed Soft Reset Offline Receive Serial Number Security Setup Job Limitation (see page Reset Cipher Key Storage Setup Check File System (see page... -
Page 60: Printer Menu: Making Changes In The Menu
RINTER AKING HANGES IN THE AKING HANGES IN THE UNCTION Ensure that the LCD panel indicates that the printer is ready to print. Press the Enter button to switch to the Menu mode. Press the Up-arrow or Down-arrow buttons to scroll down to the Function you wish to change, then press the Enter button. -
Page 61: Making Changes In The Boot Menu
Press the Up-arrow or Down-arrow buttons repeatedly until FTP is highlighted. Use the Up-arrow or Down-arrow buttons to highlight Enable. Press the Enter button to engage the setting. An asterisk (*) appears next to the new setting. Press the Online button to exit menu mode and return to the Ready to print status. -
Page 62: Printer Menu: Functions List
RINTER UNCTIONS DMIN ETUP Password ITEM VALUE DESCRIPTION Enter nnnn Enter a password to enter the Administrator password menu. The default password is aaaaaa. ETWORK ETUP ITEM VALUE DESCRIPTION TCP/IP Enable Enables/Disables the TCP/IP protocol. Disable IP Version IP v4 Set up the IP Version. - Page 63 ITEM VALUE DESCRIPTION Enable Enables/Disables the Web/IPP (TCP/IP). Disable Telnet Enable Enables/Disables Telnet (TCP/IP). Disable Enable Enables/Disables FTP (TCP/IP). Disable SNMP Enable Enables/Disables SNMP of FTP (TCP/IP or Disable NetWare). Network Scale Normal Normal: Can work effectively even when Small connected to a HUB that has a spanning tree feature.
- Page 64 ITEM VALUE DESCRIPTION Binding LongEdge Specifies how to bind duplex ShortEdge printing. Job offset Enables/Disables Job offset. Output bin Facedown Specifies where to eject prints. Faceup Facedown Specifies where to eject prints when Finisher a Finisher is installed. Finisher Setup This appears only if the optional finisher is installed.
- Page 65 ITEM VALUE DESCRIPTION Edit size Cassette size Specifies the size of an area to draw Letter short edge when there is no specification of a Letter long edge size by predefined paper edit size Executive command from a host PC (only valid Legal 14 for PCL).
- Page 66 PS Setup ITEM VALUE DESCRIPTION Network ASCII Specifies PS transmission protocol for network protocol data. It does not appear for Non-PS type. Parallel ASCII Specifies PS transmission protocol for protocol Centronics data. It does not appear for Non-PS type. USB protocol ASCII Specifies PS transmission protocol for USB data.
- Page 67 ITEM VALUE DESCRIPTION Symbol PC-8, PC-8 Dan/Nor, PC-8 TK, PC-775, PC-850, PC-852, PC-855, PC- 857 TK, PC-858, PC-864L/A, PC-866, PC-869, PC-1004, Pi Font, Plska Mazvia, PS Math, PS Text, Roman-8, Roman-9, Roman Ext, Serbo Croat1, Serbo Croat2, Spanish Ukrainian, VN Int'l, VN Math, VN US, Win 3.0, Win 3.1 Blt, Win 3.1 Cyr, Win 3.1 Grk, Win 3.1 Heb, Win 3.1 L1, Win 3.1 L2, Win 3.1 L5, Wingdings Dingbats MS, Symbol, OCR-A, OCR-B, HP ZIP, USPSFIM, USPSSTP, USPSZIP, Bulgarian, CWI Hung...
- Page 68 PCL Setup (continued) ITEM SUBMENU VALUE DESCRIPTION ITEM Tray ID# Tray2 1 ~ 5 ~ 59 Sets the number to specify Tray2, Tray3, Tray3 1 ~ 20 ~ 59 Tray4, and Tray5 for the Tray4 1 ~ 21 ~ 59 paper feed destination command in PCL5e Tray5...
- Page 69 ITEM VALUE DESCRIPTION Zero character Normal Sets the 0 style. Slashed Line pitch 6LPI Sets the line pitch. 8LPI White page skip Sets whether a blank sheet is ejected. CR function Sets the action when the CR CR+LF code is received. LF function Sets the action when the LF LF+CR...
- Page 70 Epson FX setup ITEM VALUE DESCRIPTION Character pitch 10CPI Sets the character pitch. 12CPI 17CPI 20CPI Proportional Character set SET-2 Sets the character set to be SET-1 used. Symbol set IBM-437, IBM-850, IBM-860, IBM-863, IBM-865, PC Set1, PC Ext US, PC Ext D/N, PC Set2 US, PC Set2 D/N, Roman-8, ISO L1, PC-8, PC-8 Dan/Nor, PC-850, Legal, ISO-2 IRV, ISO-4 UK, ISO-6 ASC, ISO-10 S/F, ISO-11 Swe, ISO-14 JASC, ISO-15 Ita, ISO-16...
- Page 71 ITEM VALUE DESCRIPTION Left margin 0.0 inch Sets the print position from 0.1 ~ 1.0 inch the left edge of the paper. Fit to letter Enable Sets the print mode that fits Disable print data equivalent to 11 inch (66 lines) into Letter size printable area.
- Page 72 Memory setup ITEM VALUE DESCRIPTION Receive buffer size Auto Sets the size of the receive buffer. 0.5 MB 1 MB 2 MB 4 MB 8 MB 16 MB 32 MB Resource save Auto Sets the size of the resource saving area. 0.5 MB 1 MB 2 MB...
- Page 73 System setup ITEM VALUE DESCRIPTION Near life LED Enable Enables the Attention LED to be turned on Disable when a warning for NEAR LIFE of a toner, a drum, a fuser, or a belt occurs. Change password ITEM VALUE DESCRIPTION New password nnnn Sets a new password to enter Admin Setup.
- Page 74 Calibration Menu ITEM VALUE OR VALUE DESCRIPTION SUBMENU ENTRY Auto density – Sets whether density adjustment mode and TRC compensation is automatically performed. ON: density adjustment is automatically run under the printer specified conditions and reflected in TRC compensation. OFF: the printer does not carry out density adjustment automatically.
- Page 75 ITEM VALUE OR VALUE DESCRIPTION SUBMENU ENTRY Print tuning Execute – Allows you to print a pattern to pattern help you adjust TRC manually. (Normally, TRC is automatically adjusted to the recommended levels through density adjustment and TRC compensation.) Cyan Tuning Highlight Adjusts highlight (light area) of Cyan, Magenta, Yellow, or Black...
- Page 76 Print statistics menu ITEM VALUE DESCRIPTION Password entry nnnn Enter password. The default password is 0000 (four zeroes). When there is no support for the print statistics function, Print Statistics is not displayed. Statistics log Enable Enables/Disables the print statistics function. Disable Log size 1 ~ 30 ~...
-
Page 77: Printer Menu: Boot Menu
RINTER BOOT MENU To access the Boot Menu: Turn the printer off. Press and hold the ENTER key while turning the printer back on. NOTE Keep pressing the Enter button until INITIALISING appears on the display. ARALLEL ETUP ITEM VALUE DESCRIPTION Parallel Enable... -
Page 78: Usb Setup
USB S ETUP ITEM VALUE DESCRIPTION Enable Enables/Disables the USB interface. Disable Speed 480Mbps Sets the maximum USB interface transfer 12Mbps speed. Soft Reset Enable Enables/Disables the Soft Reset Disable command. Offline Receive Enable Enables/disables a function that maintains Disable the receive-possible state without changing an interface signal even though an alarm occurs. -
Page 79: Security Setup
ECURITY SETUP ITEM VALUE DESCRIPTION Job Limitation Controls the job limitation mode. If Encrypted Job Encrypted Job is selected the printer will only allow this type of job to be printed and will discard all others. Reset Cipher Key Execute Resets the cipher key used for the encrypted hard disk. - Page 80 ITEM VALUE DESCRIPTION Enable HDD Even if a machine is inoperable at installation because an HDD has been damaged, you can make the machine operable by setting to NO to signify that no HDD is attached, regardless of the existence of an HDD. While NO is set, access to an HDD results in FAIL because the HDD is regarded as not attached even if the HDD is operating normally.
-
Page 81: Power Setup
OWER SETUP ITEM VALUE DESCRIPTION Peak Power Normal The fuser of the printer has two lamps. Control When the lamps turn on, the printer’s power draw increases dramatically. Normal: Both lamps light at the same time. When this happens, the printer’s power draw increases dramatically. -
Page 82: Index
Web browser ......15–19 changing password....19 launching......15–17 IBM PPR Setup menu ....68–69 If..........15 Intec LPR utility ......23 IP Address Zone name, EtherTalk Mac printer setup utility .... 38 Mac printer setup utility .....40 Mac printer setup utility.... 33–44 Mac printing network summary .... - Page 83 Intec Printing Solutions Unit 11B Dawkins Road Industrial Estate Hamworthy Poole Dorset BH15 4JP United Kingdom Tel: +44 (0)1202 845960 +44 (0)1202 845961 Fax: 250811 iss.1...
Need help?
Do you have a question about the CP2020 and is the answer not in the manual?
Questions and answers