
Subscribe to Our Youtube Channel
Related Manuals for SATO CW408


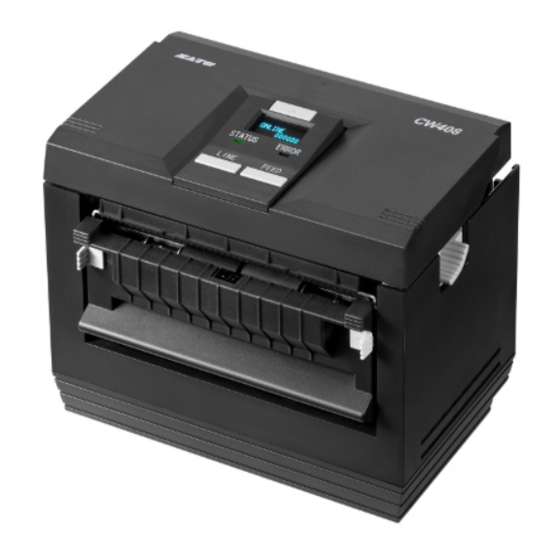
Summary of Contents for SATO CW408
- Page 1 Preliminary Operator Manual For printer model: CW408 Read this Operator Manual before using this product. Keep this document available for future reference.
- Page 2 Specifications and contents in this document are subject to change without notice. Trademarks SATO is a registered trademark of SATO Corporation and its subsidiaries in Japan, the U.S. and other countries. All other trademarks are the property of their respective owners.
- Page 3 Doing so could from the outlet, and contact result in fire or electric shock. your SATO reseller or Contact your SATO reseller or technical support center. technical support center to Using the printer in this conduct internal inspections, condition could cause a fire or adjustments, and repairs.
- Page 4 Doing so could result in During maintenance and cleaning electric shock. • When maintaining and cleaning the printer, unplug the power cord from the outlet to maintain safety Page ii CW408 Operator Manual...
- Page 5 Precautions for Installation and Handling Printer operation can be affected by the printer environment. Refer to the following instructions for installation and handling of CW408 printer. Select a Safe Location Do not place the printer in a location subject to water or oil.
-
Page 6: Table Of Contents
3.14.4 Service Test Print ..................3 - 36 3.14.5 Barcode Test Print ..................3 - 36 3.14.6 Head Check Test Print................... 3 - 36 3.14.7 Font Test Print ....................3 - 36 3.15 Maintenance Mode....................3 - 37 Page iv CW408 Operator Manual... - Page 7 7.3 Local Area Network (LAN) Ethernet ................7 - 3 7.3.1 Basic Specifications ................... 7 - 3 7.3.2 Software Specifications ..................7 - 5 7.3.3 TCP/IP Specifications ..................7 - 5 7.3.4 LPD Specifications..................... 7 - 5 7.3.5 FTP Specifications ..................... 7 - 5 CW408 Operator Manual Page v...
- Page 8 8.7 Information on Media When Using Cutter ..............8 - 12 8.7.1 Cutting of Labels ....................8 - 12 8.7.2 Cutting Media with Perforation ................ 8 - 12 8.7.3 Cutter Replacement ..................8 - 12 Page vi CW408 Operator Manual...
-
Page 9: Introduction
Preliminary Section 1: Introduction INTRODUCTION Thank you for your investment in this SATO printer product. This operators manual contains the basic information about the installation, setup, configuration, operation and maintenance of the printer. A total of eight topics are covered herein, and they are organized as follows:... -
Page 10: Features Of The Printer
Section 1: Introduction 1.1 FEATURES OF THE PRINTER SATO CW408 is a 4 inch, direct thermal, compact desktop printer. It has a maximum print speed of 6 inches/ second and a 32-bit RISC CPU with 8 MB flash memory. The CW408 printer is specifically designed for ticketing applications. -
Page 11: Parts Identification
(online/ offline) or to start/ pause a print job. Display panel When printer is in various mode settings: The OLED display indicates the current status Press this button to select the item or change of the printer. the value. CW408 Operator Manual Page 1-3... - Page 12 To connect printer to the host computer using LAN interface. USB connector To connect printer to the host computer using the USB interface. AC input terminal Supplies power to the printer through the inserted power cord. Page 1-4 CW408 Operator Manual...
- Page 13 Media guide and I-mark/ Gap sensor Platen roller A guide for the media to feed properly. This roller feeds the media. Perform Detects the I-mark of the media or gap maintenance at regular intervals. between labels. CW408 Operator Manual Page 1-5...
- Page 14 Push the latches on two sides inwards to open the dispenser bracket. Liner discharge outlet Cutter unit Opening for label liner output. Platen roller Media roll holder This roller feeds the media. Perform maintenance at regular intervals. Page 1-6 CW408 Operator Manual...
-
Page 15: Installation
This section assists you in connecting the printer and installing the consumable media in the printer. The following information is provided: • 2.1 Site Location • 2.2 Connections • 2.3 Media Selection • 2.4 How to Load the Media CW408 Operator Manual Page 2-1... -
Page 16: Site Location
Length of the media Length of the media • Put the printer away from hazardous materials or dusty environments. • Put the printer within operational distance of the host computer, within the interface cable specifications. Page 2-2 CW408 Operator Manual... -
Page 17: Connections
Refer to Section 3.10 Interface Setting Mode for details on setting Interface mode. When connecting to LAN interface, you can use SATO All-In-One Application to set up the network. Contact your SATO reseller or technical support center for more details. Or you can download the software directly from our official website, www.satoworldwide.com. -
Page 18: To Connect The Power Cord
Make sure that the AC voltage of your region is within the range of AC 100 to 240 V, 50/60 Hz. * The shape of the power plug varies depending on the region in which it was purchased. Page 2-4 CW408 Operator Manual... -
Page 19: To Set The Power To On
If not, press the LINE button to enter OFFLINE OFFLINE mode. 000000 Note: If there is any printed media remaining in the printer, press the FEED button to discharge the media. Press and hold the power button until the display turns off. CW408 Operator Manual Page 2-5... -
Page 20: Media Selection
For optimal print performance and durability, use only SATO-certified media supplies with this printer. Using supplies not tested and approved by SATO can result in unnecessary wear and damage to vital parts of the printer, and may void the warranty. -
Page 21: How To Load The Media
When cutter is installed on the printer It is necessary to adjust the Cut position in the Adjustment screen. Refer to Section 3.4 Adjustment Mode and Section 8.4.2 Adjustment of the Stop Position for details. CW408 Operator Manual Page 2-7... -
Page 22: How To Remove Media From The Printer
Close the top cover and press the two front corners of the top cover until a click sound is heard. Make sure that the top cover is locked. Note: Be careful not to get your fingers pinched while closing the top cover. Page 2-8 CW408 Operator Manual... -
Page 23: How To Load The Media Roll (Option)
Put the shaft onto the top horizontal frame of the media roll holder. Make sure that the groove on both sides of the shaft are attached to the frame Make sure that the printed side of the media roll is facing upward. CW408 Operator Manual Page 2-9... - Page 24 When the automatic media feed function is enabled should face upwards in tear-off or cutter mode, the position of the first media is not correctly set. Press the FEED button in offline mode to adjust the position. Page 2-10 CW408 Operator Manual...
-
Page 25: How To Load Label To The Optional Dispenser
From the leading edge of the label, peel off the first few labels until the liner is about 100 mm (3.9”) long. Insert the leading edge of the liner into the media feed inlet of the printer and pass through the media guide. CW408 Operator Manual Page 2-11... - Page 26 When dispenser is installed on the printer It is necessary to adjust the Offset position in the Adjustment screen. Refer to Section 3.4 Adjustment Mode and Section 8.4.2 Adjustment of the Stop Position for details. Page 2-12 CW408 Operator Manual...
-
Page 27: Operation And Configuration
OLED display, the manually set values will be used by the printer. If you set the values manually and then download a job with software settings, the software settings will be used. CW408 Operator Manual Page 3-1... -
Page 28: Operator Panel
FEED button Press this button in offline mode to feed a piece of media. This button is also used to confirm the selected item or save the value set in various printer setting display menus. Page 3-2 CW408 Operator Manual... - Page 29 Displayed in printing mode. Displayed when printing is paused. (Remaining item exists) Displayed when printing is stopped. (Remaining item does not exist) 2. Message display (Color of display: Blue) Displays messages up to 2 rows. CW408 Operator Manual Page 3-3...
- Page 30 Displays information of the printer. 2. Setting item display (Color of display: Blue) Displays name of the setting items. 3. Setting contents display (Color of display: Blue) Displays current setting contents. Display varies depending on the settings. Page 3-4 CW408 Operator Manual...
-
Page 31: Operating Modes
7. Maintenance mode 8. Service mode 9. Download mode The various modes are accessed by pressing the LINE button and/ or FEED button while the printer is Off, On or with certain printer settings enabled. CW408 Operator Manual Page 3-5... - Page 32 SETTING MENU FEED button Enter Hex dump HEX DUMP MODE mode SKIP SELECT LINE button SETTING MENU FEED button Default printer DEFAULT MODE settings SKIP SELECT LINE button More operations are shown on the next page. Page 3-6 CW408 Operator Manual...
- Page 33 MAINTENANCE MODE MODE + SERVICE MODE FEED button FACTORY MODE MODE SELECT MENU Service mode DOWNLOAD MODE SENSOR ADJUST Press LINE button to select DOWNLOAD MODE + DOWNLOAD MODE FEED button Download DOWNLOAD READY mode CW408 Operator Manual Page 3-7...
-
Page 34: Online And Offline Modes
Preliminary Section 3: Operation and Configuration 3.3 ONLINE AND OFFLINE MODES The general and basic operation of the CW408 printer is via the Normal mode, which consists of the Online and Offline modes. 3.3.1 Online Mode Pressing the LINE button causes the printer to go ONLINE or OFFLINE alternately. -
Page 35: Adjustment Mode
Press the LINE and FEED buttons simultaneously to shift the cursor back to previous unit or previous adjustment screen. Press and hold the LINE and FEED buttons simultaneously for more than three seconds to return to OFFLINE or PAUSE mode. CW408 Operator Manual Page 3-9... - Page 36 Setting range is 1 (dark) to 3 (bright). BRIGHTNESS The initial value is 2. Press the LINE button to set the value and press the FEED button to shift the cursor to the next unit. Page 3-10 CW408 Operator Manual...
-
Page 37: Cancel Print Job Mode
If you have selected YES, the printer cleared all the print jobs from the memory. The display shows the message, CANCEL PRINT JOB COMPLETED. The printer beeps three times, and then returns to OFFLINE mode. CW408 Operator Manual Page 3-11... -
Page 38: Basic Settings Mode
2. The BASIC SETTINGS menu has three sub menus, PRINT SETTINGS, FONT SETTINGS, and OP SET- TINGS. Press the LINE button to switch between these menus and then press the FEED button to enter to the menu. Page 3-12 CW408 Operator Manual... -
Page 39: Print Settings Mode
Then press the FEED button to shift the cursor to the next digit or to save the setting and move to the next screen. Do a test print after completing the adjustments to make sure that the settings are correct. Refer to Section 3.14 Test Print Mode for details. CW408 Operator Manual Page 3-13... - Page 40 V:±0 to 3200 dots H:±0 to 832 dots ref point 0,0 The initial values are V:+0000, H:+000. Press the LINE button to set the value and press the FEED button to shift the cursor to the next unit. Page 3-14 CW408 Operator Manual...
-
Page 41: Font Settings Mode
CHARACTER PITCH ENABLE: Data will be printed with proportional pitch font. ENABLE DISABLE DISABLE: Data will be printed with fixed pitch character fonts. The initial setting is ENABLE. Available fonts: XU, XS, XM, XB, XL CW408 Operator Manual Page 3-15... -
Page 42: Operation Settings Mode
To return to the previous setting option, press the LINE and FEED buttons simultaneously. To return to the BASIC SETTINGS screen, press and hold the LINE and FEED buttons simultaneously for more than three seconds. Page 3-16 CW408 Operator Manual... - Page 43 Set the time between 00 to 15 MIN. This power saving function is disabled when it is 00 MIN, and the brightness of the display will be lit constantly. The initial value is 00 MIN. CW408 Operator Manual Page 3-17...
-
Page 44: Interface Setting Mode
3. When the desired setting option is displayed, press the LINE button to select the item. Then press the FEED button to save the setting and move to the next screen. Page 3-18 CW408 Operator Manual... - Page 45 ENQ: Returns status after receiving Status Request (ENQ), which is sent from REPLY TIMING the host. CYCLE: Returns status from the printer to the host at 900 ms intervals. CYCLE The initial setting is ENQ. CW408 Operator Manual Page 3-19...
-
Page 46: Advance Settings Mode
LINE + FEED button ADVANCE SETTINGS for more than 3 secs CONTROL CODE ADVANCE SETTINGS STANDARD CONTROL CODE ALT. PROTOCOL FEED button LINE + FEED button Continue to PRIORITY SETTING screen on the next page. Page 3-20 CW408 Operator Manual... - Page 47 ADVANCE SETTINGS ENABLE: Executes the command error display when error is occurred. DISPLAY ERROR DISABLE: Do not execute the command error display and do not display command error warnings. ENABLE DISABLE The initial setting is DISABLE. CW408 Operator Manual Page 3-21...
- Page 48 This function sets the printer status at the time of power on. AUTO ONLINE ENABLE: Starting up the printer in online mode. ENABLE DISABLE DISABLE: Starting up the printer in offline mode. The initial setting is ENABLE. Page 3-22 CW408 Operator Manual...
- Page 49 Description To set the control code. The ESC sequence in SBPL commands can be defined as standard (using non-printable code 1BH) or alternative protocol (some other user code). STANDARD [Control code of Sato standard] STX: <02H> ETX: <03H> ESC: <1BH>...
-
Page 50: Hex Dump Mode
ONLINE AUTO FEEDING...: This message appears when the printer is auto-feeding the media while waiting to receive data in online mode. 00000 0 AUTO FEEDING... 000000 Page 3-24 CW408 Operator Manual... - Page 51 PAUSE: This message appears when the print job pauses. AUTO FEEDING...: This message appears when the printer is auto-feeding the PAUSE media while waiting to receive data in online. 00000 5 AUTO FEEDING... 000000 CW408 Operator Manual Page 3-25...
-
Page 52: Default Mode
FACTORY SETTING of the screen. DEFAULT SETTING? Selecting YES and pressing the FEED button will initialize the printer setting. The initial setting is NO. If NO, it returns to DEFAULT MODE without initializing the printer setting. Page 3-26 CW408 Operator Manual... -
Page 53: Table Of Default Settings
— — 0.0.0.0 PORT NUMBER 1 — — — — 1024 PORT NUMBER 2 — — — — 1025 PORT NUMBER 3 — — — — 9100 PROTOCOL — — STATUS4 REPLY TIMING — — CW408 Operator Manual Page 3-27... - Page 54 — NONE LIFE COUNTER — — — — 0.0M HEAD COUNTER — — — — 0.0M CUT COUNTER — — — — TEST PRINT — — — — SIZE SELECT — — — — LARGE Page 3-28 CW408 Operator Manual...
-
Page 55: Test Print Mode
5. Press the FEED button to start printing. Press the FEED button while printing to pause the test print operation. Press the FEED button again to continue printing. To exit the Test print mode Make sure that the printer is in pause mode, press the power button to set printer to off. CW408 Operator Manual Page 3-29... - Page 56 FEED button again to continue printing. To exit the Test print mode TEST PRINT Make sure that the printer is in pause mode, press the power button to set PRESS FEED KEY printer to off. Page 3-30 CW408 Operator Manual...
-
Page 57: Types Of Test Prints
Darkness [00~99] Darkness adjustment value Factory Pitch Print position adjustment ±xx(dot) value for factory setting Factory Cutter Cut position adjustment value ±xx(dot) for factory setting Factory Disp Dispense position adjustment ±xx(dot) value for factory setting CW408 Operator Manual Page 3-31... - Page 58 Sensor type Paper Check Slice Level Sensor level The sensor level selected by the sensor type will be Adjust Level(Recv) shown. 1. When the slice level is automatic, it will be indi- cated as “Auto”. Page 3-32 CW408 Operator Manual...
- Page 59 Ignore CAN/DLE Enable/ Disable Protocol Code Protocol code setting Standard code: Standard Non-standard code: Non-standard Also, the protocol code set for the printer will be printed out. STX:xxH, ETX:xxH, ESC:xxH, ENQ:xxH, CAN:xxH, NULL:xxH, OFFLINE:xxH, EURO:xxH CW408 Operator Manual Page 3-33...
- Page 60 Mac address xx:xx:xx:xx:xx:xx IP Address IP address xxx.xxx.xxx.xxx Subnet Mask Subnet mask xxx.xxx.xxx.xxx Gateway Address Default gateway xxx.xxx.xxx.xxx DHCP/RARP DHCP/RARP setting Enable / Disable PORT 1/2/3 LAN port number 1, 2 and 3 xxxx/ xxxx/ xxxx Page 3-34 CW408 Operator Manual...
- Page 61 Protocol Code Standard/ Non-Standard Printing out the protocol code set for the printer. STX:xxH, ETX:xxH, ESC:xxH, ENQ:xxH, CAN:xxH, NULL:xxH, OFFLINE:xxH, EURO:xxH Printed contents of the interfaces will be the same as that of factory test print. CW408 Operator Manual Page 3-35...
-
Page 62: Head Check Test Print
Printing out the results of the head check. 3.14.7 Font Test Print The fonts used for test print are as follows. 1. OCR-A FONT(15X22) 2. OCR-B FONT(15X22) 3. XU FONT(5X9) 4. XS FONT(17X17) 5. XM FONT(24X24) 6. XB FONT(48X48) 7. XL FONT(48X48) Page 3-36 CW408 Operator Manual... -
Page 63: Maintenance Mode
4. Press the LINE button to select SERVICE MODE or DOWNLOAD MODE, and then press the FEED button to enter to the selected mode. Note: FACTORY MODE is strictly for SATO authorized service personnel use. Any mis-adjustment or setting may disrupt the performance of the printer and may cause malfunction. Note: In Maintenance mode, all menu screens are displayed in English only. -
Page 64: Service Mode
SENSOR ADJ(MAN) LINE + FEED button to the SERVICE MODE menu. for more than 3 secs PAPER(R) X.XV TEST PRINT SLICE LEVEL PRESS FEED KEY FEED button Test print Return to SERVICE MODE menu Page 3-38 CW408 Operator Manual... - Page 65 In this screen, you can choose to print the test results in LARGE or SMALL TEST PRINT print widths. SIZE SELECT SMALL: Test print in 50 mm (1.97”) wide LARGE SMALL LARGE: Test print in 104 mm (4.09”) wide The initial setting is LARGE. CW408 Operator Manual Page 3-39...
- Page 66 The adjustment range is between 00 to 15 and is shown on the bottom line of ADJUST LEVEL the display. The initial setting is 07. Press the FEED button to save the setting and move to the next screen. Page 3-40 CW408 Operator Manual...
- Page 67 The slice level is automatically set by firmware when the value is set to SLICE LEVEL 0.0V. • In the case of automatic calculation, calculated value will be displayed auto- matically after printing. Press the FEED button to save the setting and move to the SERVICE MODE menu. CW408 Operator Manual Page 3-41...
-
Page 68: Overview Of Machine Setting Menu
The printer is in online mode. POWER ON SETTING STANDBY: The printer is in standby mode and will only power on once the ONLINE STANDBY power button is pressed. The initial value is STANDBY. Page 3-42 CW408 Operator Manual... - Page 69 • Factory preset is set as default. Default value is not initialized by executing factory all clear. • You can confirm the settings by referring to the FACTORY ALF in FAC- TORY TEST PRINT. CW408 Operator Manual Page 3-43...
-
Page 70: Download Mode
DOWNLOAD MODE VERIFYING. . . WRITING. . . DOWNLOAD MODE DOWNLOAD MODE DOWNLOAD MODE PROGRAM DOWNLOAD FONT REGISTRY FONT DELETE COMPLETED COMPLETED COMPLETED After 3 beeps sound, the printer returns to to the DOWNLOAD READY screen. Page 3-44 CW408 Operator Manual... - Page 71 The progress bar shown on the lower portion of screen indicates writing status DOWNLOAD MODE of download data. WRITING. . . After writing the download data, it goes to FONT REGISTRY COMPLETED screen when downloading font and logo. Or, it goes to VERIFYING… screen when downloading firmware. CW408 Operator Manual Page 3-45...
- Page 72 Goes to DOWNLOAD READY screen automatically three seconds later. COMPLETED Completion of font data deletion. DOWNLOAD MODE Emitting three short beeps when font delete is completed. FONT DELETE Goes to DOWNLOAD READY automatically three seconds later. COMPLETED Page 3-46 CW408 Operator Manual...
-
Page 73: Protective Function
[maximum dots] Is print speed 4/5/6 ips? Is max.number of dots over 583? Set print speed to 4 ips Calculate strobe length Strobe length > defined value Set print speed to 3.7 ips Resume printing CW408 Operator Manual Page 3-47... -
Page 74: Power Saving Mode
* When print job exists in the printer or ONLINE indicator is off, the printer will stop detecting commands in receive data. * For “data start command”, refer to CW408 Reference Command. • No button is pressed for more than the set time period. -
Page 75: Cleaning And Maintenance
Preliminary Section 4: Cleaning and Maintenance CLEANING AND MAINTENANCE This section provides information on user maintenance for the CW408 printer. The informations in this section are as follows: • 4.1 When to Clean the Print Head and Platen Roller •... -
Page 76: When To Clean The Print Head And Platen Roller
Furthermore, dirt can accumulate along the media path, affecting parts like sensors and guides, and reducing their performance. You can get the cleaning kit and the cleaning sheet from your SATO reseller or technical support center. The cleaning kit •... -
Page 77: How To Clean The Printer (Cleaning Sheet)
You can stop to clean with the cleaning sheet when no more additional dirt appears on it. Use the cleaning pen from the cleaning kit or use a cotton swab moistened with head cleaner to gently remove any remaining dirt from the print head. CW408 Operator Manual Page 4-3... -
Page 78: Easy Replacement Of Parts
Section 4: Cleaning and Maintenance 4.4 EASY REPLACEMENT OF PARTS It is easy to replace the print head and platen roller of the CW408 printer. The one-touch, tool-less print head release mechanism enables the print head to be quickly and easily replaced. -
Page 79: How To Replace The Platen Roller
Follow the above steps, in reverse sequence, to reassemble the new platen roller. Make sure that the dispenser bar snaps back in position. Perform a media feed to make sure that the platen roller is assembled correctly. CW408 Operator Manual Page 4-5... -
Page 80: Adjusting Print Quality
Print speed software command from the host PRINT SPEED computer. Setting range is from 2 to 6 IPS (inches per second) The initial value is 4 IPS. For instructions on setting Print speed, refer to Section 3.7 Print Settings Mode. Page 4-6 CW408 Operator Manual... -
Page 81: Troubleshooting
Section 5: Troubleshooting TROUBLESHOOTING If you are unable to produce printouts on the CW408 printer, use this section to make sure the basics have been checked, before deciding you are unable to proceed any further. The section is divided into four parts: •... -
Page 82: Error Signal Troubleshooting
5.1.2 Error Messages ERROR DISPLAY LED/ BUZZER ERROR CONDITION CORRECTIVE ACTION MACHINE ERROR ONLINE: Off 1) Defective PCB board 1) Consult your SATO reseller or technical support center to ERROR: On ERROR01 replace the PCB board Message: MACHINE MACHINE ER ERROR... - Page 83 • This screen appears when setting [DISPLAY ERROR] to “ENABLE”. • Detected command information will be shown at the bottom of the screen. To clear error: Leave the printer for a certain period. Press the LINE button CW408 Operator Manual Page 5-3...
-
Page 84: More Information About Command Error
In this case, C002 is the location of error. Name of error command <bb> in error message shows a name of command where error was detected. * When it is 1 byte command, it will be left aligned. Page 5-4 CW408 Operator Manual... - Page 85 Cause Analyzed improper command Received improper parameter Analyzed improper graphic and external character data (Not applicable for CW408 printer.) Number specified by registration command is already taken (Not applicable for CW408 printer.) Data is not registered Specified print start position is outside the printable area Print rate of print data is high when using darkness range B.
-
Page 86: Warning Messages
To clear error: Power off No beep sound (Print head replacement) PRINT PAUSE ONLINE: Blinks 1) Print ratio per one media 1) Wait for a while. exceeded certain level. ERROR: Off PAUSE No beep sound Page 5-6 CW408 Operator Manual... -
Page 87: More About Head Check Function
Check the printed media to make sure the output is usable in spite of the head error. As soon as possible, stop using the print head to prevent further damage. If necessary, get the print head replaced. CW408 Operator Manual Page 5-7... -
Page 88: Troubleshooting Table
Incorrect media sensor selected. Check printer configuration for proper sensor selection. No voltage output. Have SATO authorized service personnel to test power supply and replace as required. Drive motor not operating. Have SATO authorized service personnel to check the wiring harness connection. - Page 89 Defective print head. Replace print head as required. Defective main circuit board. Have SATO authorized service personnel to replace main board. NO DISPLAY AT ALL Power supply issues. Make sure that the cable is properly connected. Check/ replace power supply.
-
Page 90: Interface Troubleshooting
Click on the Device Manager tab. Make sure that the View Device By Type is checked. Scroll to SATO-USB Device and make sure that errors do not exist. Reinstall as required. Reboot the PC and the printer. LAN ETHERNET INTERFACE TROUBLESHOOTING STEP Make sure that the interface has been correctly configured. -
Page 91: Basic Specifications
ENVIRONMENTAL (EXCLUDING MEDIA) Operating Temperature 0 to 40°C (32 to 104 °F) Storage Temperature -5 to 60°C (23 to 140 °F) Operating Humidity 30 to 80% RH, Non-condensing Storage Humidity 30 to 90% RH, Non-condensing CW408 Operator Manual Page 6-1... - Page 92 Pitch: 127 to 397 mm (5.0” to 15.6”) Pitch including liner: 130 to 400 mm (5.1” to 15.7”) Direct thermal Type Use media roll, fan-fold media or single label specified by SATO. Roll Diameter (Media Roll) Maximum outer diameter 115 mm (4.5”) Core Diameter (Media Roll) Inner core diameter 40 mm (1.6”)
- Page 93 Preliminary Section 6: Basic Specifications MEDIA (Be sure to use media manufactured or certified by SATO) Max. folded height 100 mm (3.9”) (External media feed) Fan-fold Media (Height restriction may apply to the media setting location) Cutter:0.08 to 0.12 mm (0.003” to 0.005”) Thickness Others:0.08 to 0.21 mm (0.003”...
- Page 94 1:2, 1:3, 2:5, User definable bar widths Rotation Parallel 1 (0°), Parallel 2 (180°), Serial 1 (90°) and Serial 2 (270°) 2 to 12 times Magnification * Onefold of barcode is excluded from this specifications. Page 6-4 CW408 Operator Manual...
- Page 95 Pause print when printer chassis reaches a certain level of temperature. HARDWARE AND RELATED Power button Operation Buttons 2) LINE button 3) FEED button OLED: Yellow/ blue Indicators ONLINE: Green LED ERROR: Red LED Buzzer Built-in buzzer with sound ON/OFF function CW408 Operator Manual Page 6-5...
- Page 96 Hexavalent chromium------------------------- Max. 0.1% Lead and lead compounds------------------- Max. 0.1% Environmental (RoHS) Mercury and mercury compounds---------- Max. 0.1% Cadmium and cadmium compounds------ Max. 0.01% Polybrominated biphenyls (PBB)------------ Max. 0.1% Polybrominated diphenyl ethers (PBDE)--- Max. 0.1% Page 6-6 CW408 Operator Manual...
-
Page 97: Optional Accessories Specifications
Unit: 150 km, Nip roller: 30 km Detection Sensor Dispenser sensor (Transmissive type) Adjustment is available with the offset position in Adjustment mode by using OLED Dispensed Position Adjustment and buttons on the operator panel. CW408 Operator Manual Page 6-7... - Page 98 Preliminary Section 6: Basic Specifications This page is intentionally left blank. Page 6-8 CW408 Operator Manual...
-
Page 99: Interface Specifications
• 7.3 Local Area Network (LAN) Ethernet 7.1 INTERFACE TYPES CW408 printer is equipped with a multiple interfaces board to perform data communication with the host. The following built-in interfaces are available. 1) USB interface (USB2.0 High-speed, B type connector) -
Page 100: Universal Serial Bus (Usb) Interface
Status 4 Maximum Receive 2.95 MB Buffer Capacity 0 MB 2.95 MB Buffer near full occurred Remaining 0.95 MB Buffer near full released Remaining 1.95 MB 7.2.2 Pin Assignments Pin No. Description VBus -Data(D-) +Data(D+) Page 7-2 CW408 Operator Manual... -
Page 101: Local Area Network (Lan) Ethernet
Lights up for 10 ms when receiving packets Lights off when recognizing the connection to 10BASE-T Lights up when recognizing the connection LED2 Orange to 100BASE-TX Lights up when LAN interface cable is not connected. CW408 Operator Manual Page 7-3... - Page 102 Default: Disable * IP address, Subnet mask, Gateway address can be set by printer setting tool, such as SATO All-In-One application. * If the printer cannot obtain IP address from DHCP server at DHCP enabled, default of IP address becomes [0.0.0.0].
-
Page 103: Software Specifications
In socket connection, monitor the transmission of print data and the printer status by using [Printer Driver] and [Status Monitor]. Note that multiple sessions cannot be established at the same time. For more information about [Printer Driver] and [Status Monitor], refer to your SATO reseller or technical support center. 7.3.4 LPD Specifications LPD protocol complies with RFC1179 and handles the list of logical printer names as queue name such as lp, sjis and euc. -
Page 104: Telnet Specifications
<Example of TELNET command> In MS-DOS command prompt, type in [ TELNET xxx.xxx.xxx.xxx (IP address) ] and enter user name and password to advance to the display below. SATO PRINTER [ModelName] TELNET server. Copyright 2011(C) SATO Corporation. login: root 'root' user needs password to login. -
Page 105: Common Notes For Lan Interface
7.3.8 Common Notes for LAN Interface For LAN interface setting, you can use the printer setting tool, such as SATO All-In-One application. Refer to your SATO reseller or technical support center for more information. Or you can visit our SATO home page at www.satoworldwide.com. - Page 106 Preliminary Section 7: Interface Specifications This page is intentionally left blank. Page 7-8 CW408 Operator Manual...
-
Page 107: Appendix
8.1 Positions of Sensors and Options • 8.2 Operation Mode Selection • 8.3 Base Reference Point • 8.4 Base Reference Point Adjustment • 8.5 Paper End • 8.6 Automatic Media Feed • 8.7 Information on Media When Using Cutter CW408 Operator Manual Page 8-1... -
Page 108: Positions Of Sensors And Options
7.7 mm (0.30”) 5.05 mm (0.19”) I-mark sensor 54.11 mm 43.91 mm Gap sensor (2.13”) (1.73”) Print head 12.9 mm (0.51”) Paper sensor 13.0 mm 20.0 mm 24.0 mm (0.51”) (0.79”) Dispenser (0.95”) Tear-off Cutter Page 8-2 CW408 Operator Manual... -
Page 109: Operation Mode Selection
This operation mode is specifically applicable to print operations where the label is to be immediately adhered. CW408 Operator Manual Page 8-3... -
Page 110: Base Reference Point
Base reference reference point for point for printing printing Dispenser Mode I-mark label Gap label Base Base reference reference point for point for dispensing dispensing Base Base reference reference point for point for printing printing Page 8-4 CW408 Operator Manual... -
Page 111: Base Reference Point Adjustment
Adjustment for “+” value Adjustment Adjustment for “-” value +3.75 mm (+0.15”) -3.75 mm (-0.15”) Note: The above base reference point for printing is the stop position when sensor type is set to Gap sensor. CW408 Operator Manual Page 8-5... -
Page 112: Adjustment Of The Stop Position
Dispenser: The label stop position from the dispenser is 2.0 mm ± 1.0 mm (0.08” ± 0.04”). Cutter: For perforated media, cut the media after the perforation. (For the non-perforated media, cut the center position +/- 0.5 mm (+/- 0.02”) of the media.) Page 8-6 CW408 Operator Manual... -
Page 113: Limitation On Base Reference Point Adjustment
Types of Options Initial Distance (Min.) (Max.) Tear-off 12.5 mm (0.49”) 20.0 mm (0.78”) 27.5 mm (1.08”) Cutter 16.5 mm (0.65”) 24.0 mm (0.94”) 31.5 mm (1.24”) Dispenser 5.5 mm (0.22”) 13.0 mm (0.51”) 20.5 mm (0.81”) CW408 Operator Manual Page 8-7... -
Page 114: Paper End
The printer behavior when paper end is detected is as follows: • After completing the print of media (1), “Paper end error” will occur. • After releasing the error, media (1) will not be printed again. Page 8-8 CW408 Operator Manual... -
Page 115: Paper End Detection (Fan-Fold Media)
In cutter mode, cut operation is not performed when “paper end error” occurs. • When “ignore pitch sensor” is set, the paper end sensor will detect “No media” state and notify paper end error after feeding the media 15 mm (0.6”). CW408 Operator Manual Page 8-9... -
Page 116: Automatic Media Feed
Distance between I-mark Paper sensor the paper sensor is more than 28 mm (1.1”) I-mark Media feed direction Label without I-mark (label with gap) Label not recommended Labels recommended for automatic media feed for automatic media feed Page 8-10 CW408 Operator Manual... -
Page 117: Automatic Media Feed (Disable)
3. Make sure to set the new media as the printer is ready for printing after automatic media feed is com- pleted. If you set a printed media, the printing overlaps the printed area of the media. CW408 Operator Manual Page 8-11... -
Page 118: Information On Media When Using Cutter
Over time, the cutter loses its cutting ability and begins to show signs of wear. Replace the cutter unit when the blade becomes blunt and cut edges are rough. (Please contact an authorized SATO representative for replacement.) 1 23 —... - Page 119 Preliminary Section 8: Appendix This page is intentionally left blank. CW408 Operator Manual Page 8-13...
- Page 120 Preliminary Extensive contact information of worldwide SATO operations can be found on the Internet at www.satoworldwide.com...
Need help?
Do you have a question about the CW408 and is the answer not in the manual?
Questions and answers