Table of Contents
Advertisement
Quick Links
Download this manual
See also:
Programming Manual
Advertisement
Table of Contents

Related Manuals for SATO CX Series


Summary of Contents for SATO CX Series
- Page 1 All manuals and user guides at all-guides.com ® CX200 Desktop Label Printer...
-
Page 2: General Information
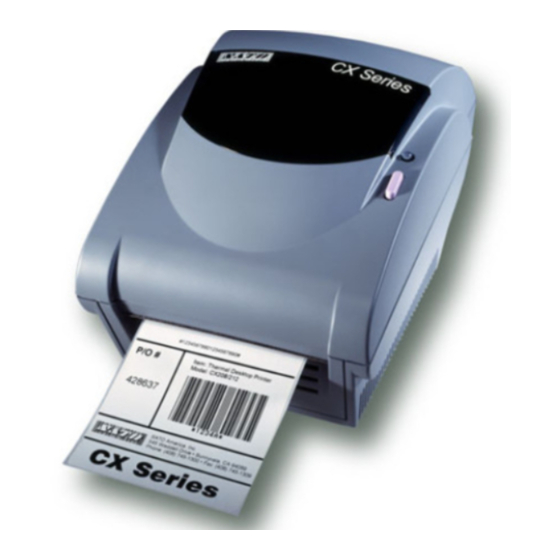
General Information 1-1 Overview The SATO CX Series Printers are compact desktop printers designed especially for bar code labeling and tagging. The CX uses SATO Command Language, making it simple to integrate with any other SATO printer models. Designed for convenience the CX... - Page 3 All manuals and user guides at all-guides.com SECTION 1 - GENERAL INFORMATION 1-2 Dimensions CX200DT CX200TT Weight 3.1lb./1.41 kg 3.6 lb./1.63 kg Depth 10 in. (254 mm) Heigth 6.6 in (168 mm) Width 6.9 in. (175 mm) Rev B SATO SERVICE MANUAL CX Series Printers...
-
Page 4: Specifications
0.375 inches 9.5 mm Text Fonts 12 proportional and monospaced fonts up to 12X expansion Graphics PCX and SATO Hex/Binary Bar Codes UPC-A/E, EAN-8/13, UCC/EAN-128, Bookland, Code 39, I 2 of 5, Code 128, Codabar, Plessey, MSI, Code 93, Postnet, PDF417, Maxicode... - Page 5 ON-LINE/OFF LINE BUTTON FEED BUTTON PAPER GUIDE BOTTOM CASE FRONT CASE EXTERNAL MEDIA FEED KNOCKOUT SERIAL PORT PARALLEL PORT PLATEN ROLLER REMOVAL ACCESS SLOTS WALL MOUNTING SLOTS POWER CABLE POWER INPUT ROUTING CHANNEL Rev B SATO SERVICE MANUAL CX Series Printers...
- Page 6 All manuals and user guides at all-guides.com SECTION 1 - GENERAL INFORMATION 1-4 Attributes PAPER GUIDE (SHOWN WITH LABELS) PAPER GUIDE (SHOWN WITHOUT LABELS) RELEASE LEVERS FOR PRINT HEAD/RIBBON MECHANISM Rev B SATO SERVICE MANUAL CX Series Printers...
-
Page 7: Controls, Indicators And Connections
Push both releases toward rear of Print head Unlocks print head printer to release print head release Lift to open Media cover Protects print media Push outward at hinge to remove mechanism Rev B SATO SERVICE MANUAL CX Series Printers... - Page 8 +5 VDC, 200 mA max 14-15 No connection Chassis ground +5 VDC Reset PARALLEL INPUT CONNECTOR Error CENTRONICS 36 PIN SERIAL INPUT CONNECTOR DB9S 16,33 Signal Ground 19-30 34-36 No connection BACK END OF PRINTER Rev B SATO SERVICE MANUAL CX Series Printers...
- Page 9 Press the READY indicator/ON-O.. (a combined control) to reset the printer and switch from O..-Line to On-Line mode. POWER SUPPLY UNDERSIDE OF PRINTER POWER INPUT AC OUTLET READY INDICATOR ON-LINE/OFF LINE BUTTON FEED BUTTON Rev B SATO SERVICE MANUAL CX Series Printers...
-
Page 10: Parallel Port
PARALLEL PORT SERIAL PORT CONNECT THIS END OF THE PARALLEL CABLE TO THE CONNECT THIS END OF THE PORT ON THE COMPUTER CENTRONICS 36 PIN CABLE TO THE PARALLEL PORT ON THE PRINTER Rev B SATO SERVICE MANUAL CX Series Printers... - Page 11 If the printer feeds out 7 inches of label and stops and the indicator glows red, recalibrate for the media installed. See calibration. Rev B SATO SERVICE MANUAL CX Series Printers...
-
Page 12: Ready Indicator
SECTION 1 - GENERAL INFORMATION 1-6 Printer Setup Loading Labels or Tags PRESS BACK THE RELEASES TO UNLOCK PAPER GUIDE MEDIA ROLL LIFT PRINT HEAD AND SLIDE UNDER MEDIA READY INDICATOR FEED BUTTON Rev B SATO SERVICE MANUAL CX Series Printers... - Page 13 Note: Make sure the (coated) dull side of the ribbon is to the outside where it will be in contact with the label media. Rev B SATO SERVICE MANUAL CX Series Printers...
- Page 14 See calibration. PRESS BACK THE RELEASES TO UNLOCK DIRECT THERMAL UNIT SHOWN (NO RIBBON) SPINDLE UNWIND ABOUT 4" NOTCHES BOTH ENDS SPINDLE ROLL SEVERAL NOTCHES TURNS ON THE BOTH ENDS TAKE-UP CORE Rev B SATO SERVICE MANUAL CX Series Printers...
- Page 15 Loading Ribbon (Continued) PLACE TAKE-UP CORE INTO LEFT TAKE-UP SPINDLE SUPPLY TAKE-UP KNOB CORE SPRING LOADED RIBBON TAKE-UP KNOB PRINT HEAD SUPPLY ROLL PULL THE RIBBON OVER THE PRINT HEAD TAKE-UP KNOB Rev B SATO SERVICE MANUAL CX Series Printers...
-
Page 16: Selecting The Label Sensor Type
If you are writing your own software or controlling the printer using direct commands, you must use printer commands to set up the print mode and sensing method. Refer to the programming manual. Rev B SATO SERVICE MANUAL CX Series Printers... - Page 17 At the prompt, type dir and press the Enter key. Copy the file CX200.exe to your hard drive. Type CX200.exe to view the opening screen. Refer to the following pages to continue with the program. Rev B SATO SERVICE MANUAL CX Series Printers...
- Page 18 Change RS232 Settings - Sets the RS232 settings through the LPT1 port Set Top of .orm - Positions the label towards or away from the sensor. Calibrate Printer - Calibrates printer to current label and/or ribbon installed in the machine. Rev B SATO SERVICE MANUAL CX Series Printers...
- Page 19 Print Head / Status Print Access the software Enter 1 at the prompt. As the sequential screens appear, respond to the prompts. Refer to page 26 for an example of a test label. Rev B SATO SERVICE MANUAL CX Series Printers...
- Page 20 All manuals and user guides at all-guides.com 1-7 Printer Test and Calibration Change RS232 Settings Access the software Enter 2 at the prompt. As the sequential screens appear, respond to the prompts. Rev B SATO SERVICE MANUAL CX Series Printers...
- Page 21 Continue to respond to the prompts or enter a choice on the sequential screens. Run a test label to verify that the new RS232 parameters were entered correctly. Select 1. Print Head / Status Print from the main menu. Rev B SATO SERVICE MANUAL CX Series Printers...
- Page 22 All manuals and user guides at all-guides.com 1-7 Printer Test and Calibration Set Top of Form (Pitch Offset) Access the software Enter 3 at the prompt. As the sequential screens appear, respond to the prompts. Rev B SATO SERVICE MANUAL CX Series Printers...
- Page 23 Compare them to make sure the desired change was effected. The new setting will be printed on the last line of the first label. Rev B SATO SERVICE MANUAL CX Series Printers...
- Page 24 All manuals and user guides at all-guides.com 1-7 Printer Test and Calibration Calibrate Printer Access the software Enter 4 at the prompt. As the sequential screens appear, respond to the prompts. Rev B SATO SERVICE MANUAL CX Series Printers...
- Page 25 The motor slowly feeds a label until a gap or mark is found. The indicator glows green and prints one label with the message "calibration successful". If the label does not print and the indicator glows red, repeat the calibration procedure. Rev B SATO SERVICE MANUAL CX Series Printers...
- Page 26 It cannot print normal labels in hex dump mode, instead it prints the hex value for each character received. The printer will return to normal operation after you reset it as described in step 4 above. READY INDICATOR ON-LINE/OFF LINE BUTTON FEED BUTTON Rev B SATO SERVICE MANUAL CX Series Printers...
- Page 27 If it is the same, the command sent could be wrong. Refer to the Programming Guide for information on programming the printer and the correct use of the printer commands. Rev B SATO SERVICE MANUAL CX Series Printers...
-
Page 28: Label Reprint
Resetting the microprocessor will: • Stop any printing. • Delete the label format in process from memory. • Reset the printer communication ports. • Return all printer parameters to their default (first power-on) state. Rev B SATO SERVICE MANUAL CX Series Printers... -
Page 29: Printing Labels
If you are using the Label Wizard CX label printing software supplied on the CD-ROM (included with the printer), the computer and software control the entire printing process. You only need to set up the SATO generic printer, start your label printing program, and follow its instructions. If you are using another vendor's software package, contact the software supplier or manufacturer if you encounter difficulties. -
Page 30: Maintenance
The print head will pop up slightly. Lift it up until it is fully raised and latched in the up position. Using a SATO Direct Thermal Print Head Cleaning Sheet or a soft coth moistened with 99% pure isopropyl or denatured alcohol, clean all dirt and label residue from the print head, paying particular attention to the "burn... - Page 31 Resume the media loading procedure, or if there is already media in the printer, lower and lock the print head. Resume normal operation. PRESS BACK THE RELEASES TO UNLOCK RAISE THE PRINT HEAD CLEAN THE PRINTHEAD NOTE THE "BURN LINE" Rev B SATO SERVICE MANUAL CX Series Printers...
-
Page 32: Clean The Platen Roller
All manuals and user guides at all-guides.com 2-1 Cleaning CLEAN THE LABEL FEED PLATEN ROLLER DIRECTION PLATEN LABEL SENSOR ROLLER MUST REMAIN UNOBSTRUCTED Rev B SATO SERVICE MANUAL CX Series Printers... - Page 33 All manuals and user guides at all-guides.com SATO SERVICE MANUAL CX Series Printers...
-
Page 34: Parts Replacement
After making the necessary repairs, reconnect the printer power supply and reinstall the print media. Confirm that the printer status LED glows green, and that the printer will feed a label when you press the .EED button. Rev B SATO SERVICE MANUAL CX Series Printers... -
Page 35: Replaceable Parts
All manuals and user guides at all-guides.com 3-2 Replaceable Parts The following is a list of replaceable parts covered in these instructions. Refer to the Section Number for method of replacement Rev B SATO SERVICE MANUAL CX Series Printers... - Page 36 All manuals and user guides at all-guides.com 3-2 Replaceable Parts TOP CASE BOTTOM CASE PRINT HEAD FRONT CASE PLATEN PLATEN GEAR CLUSTER PCBA MODULE MOTOR SWITCH PCA BASE BOARD Rev B SATO SERVICE MANUAL CX Series Printers...
- Page 37 All manuals and user guides at all-guides.com 3-2 Replaceable Parts Location PRINT HEAD SWITCH GEAR PLATEN CLUSTER TOP CASE PRINT HEAD BOTTOM CASE PCBA MODULE MOTOR FRONT CASE PCA BASE BOARD Rev B SATO SERVICE MANUAL CX Series Printers...
- Page 38 3-3 Top Case Removal/Replacement REFER TO THE ILLUSTRATION Lift open the top case Press the two sides of the top case outward to unlatch from the bottom case, and remove. PRESS OUTWARD PRESS OUTWARD Rev B SATO SERVICE MANUAL CX Series Printers...
- Page 39 INTO EACH SLOT, PUSH UP ON THE RIGHT SIDE, CASE PUSH DOWN ON THE LEFT SIDE INSERT SCREWDRIVER BETWEEN TAB AND CASE RIGHT SIDE TAB PUSH DOWN TO THE REAR LEFT SIDE TAB Rev B SATO SERVICE MANUAL CX Series Printers...
-
Page 40: Front Case
Gently press the printer chassis all the way down into the bottom case while guiding the side edges on the front case into the recesses of the bottom case. Rev B SATO SERVICE MANUAL CX Series Printers... - Page 41 Lift the platen clear of the chassis. INSERT FLAT BLADED SCREWDRIVER INTO SLOTS PRESS BACK THE RELEASES TO UNLOCK Platen installation: Lower the platen into the printer chassis and press down until it snaps into place. Rev B SATO SERVICE MANUAL CX Series Printers...
- Page 42 Unplug the print head connector. PRESS PRINT HEAD DOWN AND SLIDE FRONT EDGES AWAY FROM THE SLOTS PRINT HEAD PRESS BACK THE RELEASES TO UNLOCK Rev B SATO SERVICE MANUAL CX Series Printers...
- Page 43 AWAY FROM SLOTS PULL PRINT HEAD AWAY FROM FRAME UNPLUG PRINT UNPLUG GROUND HEAD CONNECTOR LEAD FROM PUSH-ON CONNECTOR UNPLUG LED CONNECTOR Print head installation: Reverse the above steps to install the print head. Rev B SATO SERVICE MANUAL CX Series Printers...
- Page 44 Press the module firmly into its connector on the PCBA base board. Press the top edge of the module in toward the printer body until the connector spring clips engage. Reinstall the chassis in the case according to the directions in Section 3-4. Rev B SATO SERVICE MANUAL CX Series Printers...
- Page 45 Turn the PCA board over and unplug all other connectors. BACK OF THE REMOVE (2) PCA BOARD SCREWS UNPLUG CONNECTOR AT J13 UNPLUG ALL CONNECTORS PCA board installation: Reverse the above steps to install the main PCA board. Rev B SATO SERVICE MANUAL CX Series Printers...
- Page 46 Turn the motor body until the motor flanges clear the printer chassis, then remove the motor. UNPLUG THE CONNECTOR AT J10 REMOVE PHILLIPS- HEAD SCREW AND LIFT THE MOTOR Motor installation: Reverse the above steps to install the motor. Rev B SATO SERVICE MANUAL CX Series Printers...
- Page 47 Unplug the two connectors. UNPLUG CONNECTORS GENTLY PRY THE SWITCH SCREWDRIVER BODY WITH A FLAT-BLADED BLADE SCREWDRIVER Switch installation: Reverse the above steps to install the switch. Rev B SATO SERVICE MANUAL CX Series Printers...
- Page 48 Pull the damaged gear or gears off of the printer chassis. CLUSTER GEAR MOTOR DRIVE GEAR (DO NOT REMOVE) Cluster gear installation: Reverse the above steps to install the gear(s). Rev B SATO SERVICE MANUAL CX Series Printers...
- Page 49 All manuals and user guides at all-guides.com Rev B SATO SERVICE MANUAL CX Series Printers...
-
Page 50: Troubleshooting
Section Troubleshooting 4-1 Preliminary Tests SATO printers are very reliable, so printing problems are unlikely. If you do think you have a printer problem, proceed as follows: REFER TO THE ILLUSTRATIONS ELSEWHERE IN THIS MANUAL Confirm that the printer has the right media installed, and that it is loaded correctly as described in this manual. -
Page 51: Common Problems And Their Solutions
If the printer still does not feed, disconnect the communications cable and repeat step 2. If the printer feeds with the cable disconnected, suspect a problem with the host computer or cable. Rev B SATO SERVICE MANUAL CX Series Printers... - Page 52 Check your software's print darkness and print speed settings. These settings may need adjustment for optimum results. Try different print media. Old or inferior quality media will degrade print quality. Rev B SATO SERVICE MANUAL CX Series Printers...
- Page 53 Scan the photocopy. If the copy scans properly and the original does not, your direct thermal label stock is not infrared scannable. Inspect and confirm that the print head is not damaged. Run a Self Test label and examine the head pattern. Rev B SATO SERVICE MANUAL CX Series Printers...
- Page 54 Confirm that the label as defined by the label format is smaller than the physical label size. If none of the above steps correct the problem, the label sensor may be defective. Rev B SATO SERVICE MANUAL CX Series Printers...
- Page 55 Refer to this manual for instructions. If this still does not resolve the problem, assume the main printed circuit board and label sensor module are defective. Replace both components and recalibrate. Rev B SATO SERVICE MANUAL CX Series Printers...
Need help?
Do you have a question about the CX Series and is the answer not in the manual?
Questions and answers