Table of Contents
Advertisement
Quick Links
Advertisement
Table of Contents

Related Manuals for ALLIANCE CDS9GC


Summary of Contents for ALLIANCE CDS9GC
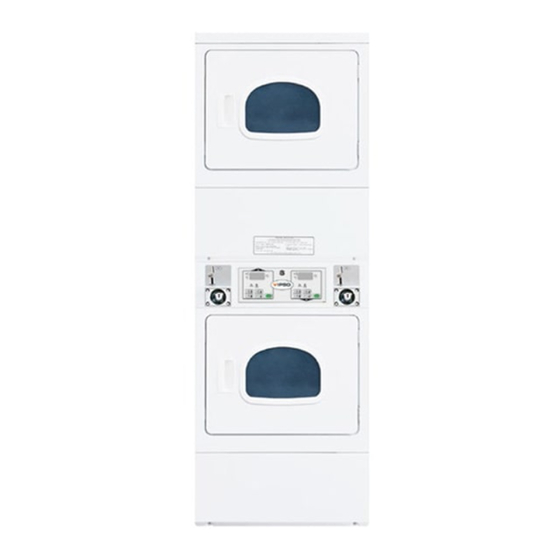
- Page 1 Stacked Clothes Dryers Nonmetered and Metered Electric and Gas Models D009C Keep These Instructions for Future Reference. (If this machine changes ownership, this manual must accompany machine.) Part No. 512691R4 www.alliancelaundry.com April 2014...
- Page 3 Do not store or use gasoline or other flammable vapors and liquids in the vicinity of this or any other appliance. W053 WARNING Risk of fire. Highly flammable material. W881 512691R4 © Copyright, Alliance Laundry Systems LLC – DO NOT COPY or TRANSMIT...
-
Page 4: Table Of Contents
All rights reserved. No part of the contents of this book may be reproduced or transmitted in any form or by any means without the expressed written consent of the publisher. © Copyright, Alliance Laundry Systems LLC – DO NOT COPY or TRANSMIT 512691R4... - Page 5 Control Panel ................... 40 Exhaust System ................40 Lint Filter ....................41 Motor Overload Protector..............41 For Energy Conservation..............41 Troubleshooting .................. 42 Contact Information................43 Installer Checklist..............Back Cover © Copyright, Alliance Laundry Systems LLC – DO NOT COPY or TRANSMIT 512691R4...
-
Page 6: Safety Information
7. Do not tumble fiberglass curtains and draperies unless the label says it can be done. If they are dried, wipe out the cylinder with a damp cloth to remove particles of fiberglass. 512691R4 © Copyright, Alliance Laundry Systems LLC – DO NOT COPY or TRANSMIT... - Page 7 START mechanism. Remove the dryer from use and call the service person. © Copyright, Alliance Laundry Systems LLC – DO NOT COPY or TRANSMIT 512691R4...
-
Page 8: Installation
512691R4 © Copyright, Alliance Laundry Systems LLC – DO NOT COPY or TRANSMIT... -
Page 9: Before You Start
Level Gloves Teflon Tape Duct Tape Safety Glasses Figure 1 NOTE: A 20.32 cm (8 in.) coin drawer is required for coin operated MDC and NetMaster models. © Copyright, Alliance Laundry Systems LLC – DO NOT COPY or TRANSMIT 512691R4... -
Page 10: Installing The Dryer
30.5 cm (12 in.) Dryer Rear 10.2 cm (4 in.) Dryer Top (Front 4 in.) 1.3 cm (0.5 in.) Exhaust Duct from Combustible Construction 5.1 cm (2 in.) Figure 2 © Copyright, Alliance Laundry Systems LLC – DO NOT COPY or TRANSMIT 512691R4... -
Page 11: Step 2: Connect Dryer Unit Exhaust System
IMPORTANT: Installing in-line filters or lint collectors will cause increased static pressure. Failure to maintain the secondary lint system will decrease dryer efficiency and may void machine warranty. © Copyright, Alliance Laundry Systems LLC – DO NOT COPY or TRANSMIT 512691R4... - Page 12 • Dryer exhausts 180 cfm per unit (measured at back of dryer). • DO NOT install flexible duct in concealed spaces, such as a wall or ceiling. © Copyright, Alliance Laundry Systems LLC – DO NOT COPY or TRANSMIT 512691R4...
-
Page 13: Exhaust Direction
NOTE: The maximum length of a 10.2 cm (4 in.) diameter flexible metal duct must not exceed 2.4 m (7.87 ft.), as required to meet UL2158, clause 7.3.2A. © Copyright, Alliance Laundry Systems LLC – DO NOT COPY or TRANSMIT 512691R4... - Page 14 58786 Backdraft Damper (Available through Weather Hood or Sweep Elbow your local authorized parts source) (No cap or screen) Clean Out Cover (Must be provided). Inspect monthly. Figure 5 © Copyright, Alliance Laundry Systems LLC – DO NOT COPY or TRANSMIT 512691R4...
- Page 15 VERTICAL duct system. This will prevent a backdraft when dryer is not in use, and will keep the exhaust air in balance within the central exhaust system. © Copyright, Alliance Laundry Systems LLC – DO NOT COPY or TRANSMIT 512691R4...
-
Page 16: Step 3: (Gas Dryer Only) Connect Gas Supply Pipe
• Do not use an open flame to check for gas leaks. Use a non-corrosive leak detection fluid. • Any disassembly requiring the use of tools must be performed by a suitably qualified service person. W315 © Copyright, Alliance Laundry Systems LLC – DO NOT COPY or TRANSMIT 512691R4... - Page 17 Each dryer is shipped with the valve open. 3355 11,000 1.18 0.0465 503786 8. The dryer gas valve is equipped with a pressure Table 3 test point for checking manifold pressure. © Copyright, Alliance Laundry Systems LLC – DO NOT COPY or TRANSMIT 512691R4...
-
Page 18: Step 4: Reverse Door, If Desired
3. Pull bottom of door liner out, then pull down, removing door liner from door panel. DRY1918N DRY1918N Figure 14 7. Reinstall nine screws removed in Step 2. DRY1916N DRY1916N Figure 11 DRY1919N DRY1919N Figure 15 © Copyright, Alliance Laundry Systems LLC – DO NOT COPY or TRANSMIT 512691R4... -
Page 19: Step 5: Wipe Out Inside Of Dryer
D317S D317S Figure 16 9. Reinstall four hinge attaching screws, removed in Step 1. D604I D604I Figure 18 D606I D606I Figure 17 © Copyright, Alliance Laundry Systems LLC – DO NOT COPY or TRANSMIT 512691R4... -
Page 20: Step 6: Plug In The Dryer Unit
W563 If the supply cord is damaged, it must be replaced by the manufacturer, its special agent or similarly qualified persons in order to avoid a hazard. © Copyright, Alliance Laundry Systems LLC – DO NOT COPY or TRANSMIT 512691R4... - Page 21 W563 If the supply cord is damaged, it must be replaced by the manufacturer, its special agent or similarly qualified persons in order to avoid a hazard. © Copyright, Alliance Laundry Systems LLC – DO NOT COPY or TRANSMIT 512691R4...
-
Page 22: Step 7: Recheck Steps 1-6
If this happens, after approximately two minutes igniter will again attempt gas ignition. IMPORTANT: If igniter does not light, make sure gas is turned on. © Copyright, Alliance Laundry Systems LLC – DO NOT COPY or TRANSMIT 512691R4... - Page 23 4. Reinstall the lower front panel. DRY212N DRY212N Closed Position 1/8 in. (3.1 mm) Pipe Plug Shut-Off Valve Handle (For checking manifold pressure) Air Shutter Lockscrew Open Position Air Shutter Figure 21 © Copyright, Alliance Laundry Systems LLC – DO NOT COPY or TRANSMIT 512691R4...
-
Page 24: Vending
In Start Mode, the vend has been satisfied, but the Start button has not been pressed. The IN USE LED will be lit. The timer will not count down until the Start button is pressed. 512691R4 © Copyright, Alliance Laundry Systems LLC – DO NOT COPY or TRANSMIT... -
Page 25: Topoffs
This sequence is repeated as long as the Shorted NOTE: The control must be powered down for Thermistor error is sensed. 10 seconds before the dipswitch can be changed. © Copyright, Alliance Laundry Systems LLC – DO NOT COPY or TRANSMIT 512691R4... -
Page 26: Models Starting Serial No. 0909
ON position. Restore power to the dryer for 10 seconds and once again unplug dryer. Set dipswitch 8 to OFF position and restore power to the dryer. © Copyright, Alliance Laundry Systems LLC – DO NOT COPY or TRANSMIT 512691R4... -
Page 27: Dipswitch Settings
Vending Dipswitch Settings Heat Switch Number Heat Time Per Coin Pulse (in minutes) Table 4 (continued) © Copyright, Alliance Laundry Systems LLC – DO NOT COPY or TRANSMIT 512691R4... -
Page 28: Models Through Serial No 0908
Cool Down Per Cycle Cool Down Switch Number (in minutes) 3 (preset at factory) Total Cycle Time = Heat Time + Cool Down Time Table 4 (continued) © Copyright, Alliance Laundry Systems LLC – DO NOT COPY or TRANSMIT 512691R4... -
Page 29: Models Starting Serial No 0909
Then set them all to the off position. Refer to Figure 23. 5. Plug in the machine. 1 2 3 4 5 6 7 8 DRY2225P DRY2225P Figure 23 © Copyright, Alliance Laundry Systems LLC – DO NOT COPY or TRANSMIT 512691R4... -
Page 30: Slide Extension
NOTE: During coin slide installation, make sure Rounded Corner activation lever is up and off the switch. Refer to Figure 27. Loops Extension Bracket Extension Lever TLW2089N Star(s) Facing Down TLW2089N Figure 25 © Copyright, Alliance Laundry Systems LLC – DO NOT COPY or TRANSMIT 512691R4... -
Page 31: Slide Extension Assembly - Models Starting Serial No. 1404
NOTE: To avoid long run-down time (45 minutes Refer to Figure 30. factory default) when testing operation, refer to Test Setting section. © Copyright, Alliance Laundry Systems LLC – DO NOT COPY or TRANSMIT 512691R4... - Page 32 Place lockwashers under head of screws, above bracket “A”. Refer to Figure 31. Spring Installed Coin Slide Extension Assembly TLW2164N TLW2164N Figure 31 © Copyright, Alliance Laundry Systems LLC – DO NOT COPY or TRANSMIT 512691R4...
-
Page 33: Operation
Piling, stacking or storing oil-affected items can prevent heat from escaping and so create a fire hazard. D609I D609I Figure 33 © Copyright, Alliance Laundry Systems LLC – DO NOT COPY or TRANSMIT 512691R4... -
Page 34: Step 3: Close Loading Door
D688I D688I Figure 34 Step 4: Determine Proper Dryer The direction of the arrow indicates which dryer is DRY2100N being used. Figure 36 DRY2140N Figure 35 © Copyright, Alliance Laundry Systems LLC – DO NOT COPY or TRANSMIT 512691R4... -
Page 35: Step 6: Start Dryer
To prevent the risk of fire, never stop a dryer before the end of the drying cycle unless all items are quickly removed and spread out so that the heat is dissipated. W756 © Copyright, Alliance Laundry Systems LLC – DO NOT COPY or TRANSMIT 512691R4... -
Page 36: Operation Instructions For Mdc Dryers
Piling, stacking or storing oil-affected items can prevent heat from escaping and so create a fire hazard. D609I D609I Figure 40 © Copyright, Alliance Laundry Systems LLC – DO NOT COPY or TRANSMIT 512691R4... -
Page 37: Step 3: Close Loading Door
NOTE: Always follow manufacturer’s care label dryer is running. instructions. Remove knits when slightly damp because overdrying may cause shrinkage. Do not tumble dry knit woolens. DRY1926N DRY1926N Figure 43 © Copyright, Alliance Laundry Systems LLC – DO NOT COPY or TRANSMIT 512691R4... -
Page 38: Step 7: Start Dryer
To prevent the risk of fire, never stop a dryer before the end of the drying cycle unless all items are quickly removed and spread out so that the heat is dissipated. W756 © Copyright, Alliance Laundry Systems LLC – DO NOT COPY or TRANSMIT 512691R4... -
Page 39: Operation Instructions For Netmaster Dryers
Piling, stacking or storing oil-affected items can prevent heat from escaping and so create a fire hazard. D609I D609I Figure 48 © Copyright, Alliance Laundry Systems LLC – DO NOT COPY or TRANSMIT 512691R4... -
Page 40: Step 3: Close Loading Door
Remove knits when slightly damp because overdrying may cause shrinkage. Do not tumble dry knit woolens. D777I D777I Figure 51 © Copyright, Alliance Laundry Systems LLC – DO NOT COPY or TRANSMIT 512691R4... -
Page 41: Step 7: Start Dryer
It will also flash alternately with ADD TIME when a card is inserted while a cycle is running or when a card is left in the reader. © Copyright, Alliance Laundry Systems LLC – DO NOT COPY or TRANSMIT 512691R4... -
Page 42: Maintenance
Keep dryer area clear and free from combustible materials, gasoline and other flammable vapors and liquids. Do not obstruct the flow of combustion and ventilation air. NOTE: Verify proper operation after servicing. 512691R4 © Copyright, Alliance Laundry Systems LLC – DO NOT COPY or TRANSMIT... -
Page 43: Lint Filter
• Should you plan to dry several loads, do them one after another, then you do not have to reheat the dryer unit’s interior parts each time. © Copyright, Alliance Laundry Systems LLC – DO NOT COPY or TRANSMIT 512691R4... -
Page 44: Troubleshooting
Check room for odors before drying clothes. Any odor (fried foods, paint, Clothes have odor varnish, cleaners, burning wood, etc.) will transfer to clothing as the dryer draws air from the room. Ventilate room before drying clothes. 512691R4 © Copyright, Alliance Laundry Systems LLC – DO NOT COPY or TRANSMIT... -
Page 45: Contact Information
The nameplate will be in the location shown in the illustration below. Please include a copy of your bill of sale and any service receipts you have. D063K Nameplate Figure 56 © Copyright, Alliance Laundry Systems LLC – DO NOT COPY or TRANSMIT 512691R4... -
Page 48: Installer Checklist
• Check for Gas Leaks. D258I CHECK CHECK • Reverse Door, • Start and Run Dryer in Heat Setting to if Desired. Verify Dryer is Heating. CHECK W675I CHECK D675I © Copyright, Alliance Laundry Systems LLC – DO NOT COPY or TRANSMIT...
Need help?
Do you have a question about the CDS9GC and is the answer not in the manual?
Questions and answers