
Related Manuals for ALLIANCE AT050L


Summary of Contents for ALLIANCE AT050L
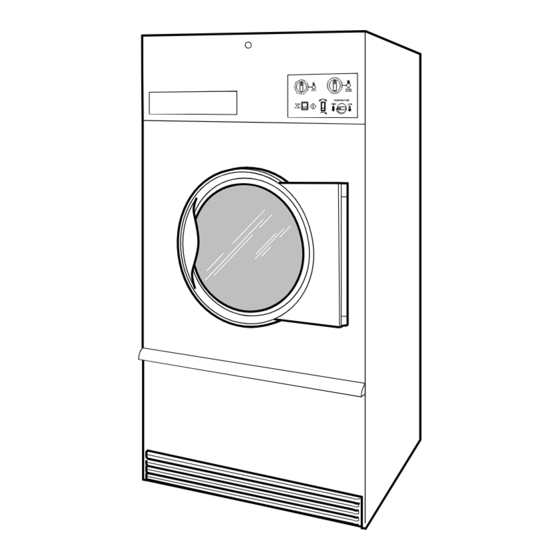
- Page 1 Drying Tumblers 50 Pound Capacity Refer to Page 5 for Model Numbers TMB795C Part No. 70269301 www.comlaundry.com January 2003...
-
Page 2: Table Of Contents
All rights reserved. No part of the contents of this book may be reproduced or transmitted in any form or by any means without the expressed written consent of the publisher. 70269301 © Copyright, Alliance Laundry Systems LLC – DO NOT COPY or TRANSMIT... - Page 3 61. Leveling Legs ..........55 62. Main Gas Burner Air Inlet Shutters....56 63. Airflow Switch..........57 64. Loading Door Strike ........59 65. Drive Belt Tension...........59 66. Cylinder Clearance ..........62 © Copyright, Alliance Laundry Systems LLC – DO NOT COPY or TRANSMIT 70269301...
-
Page 4: Section 1 -Safety Information
NOTE: The word “NOTE” is used to communicate installation, operation, maintenance or servicing information that is important but not hazard related. 70269301 © Copyright, Alliance Laundry Systems LLC – DO NOT COPY or TRANSMIT... -
Page 5: Locating An Authorized Service Person
The manufacturer will not be responsible for any injury or property damage arising from improper service and/or service procedures. W008 70269301 © Copyright, Alliance Laundry Systems LLC – DO NOT COPY or TRANSMIT... -
Page 6: Section 2 -Introduction
ZX - NetMaster prep for coin network ready CX - prep for coin drop OM - OPL micro ZY - NetMaster prep for card network ready CY - prep for card 70269301 © Copyright, Alliance Laundry Systems LLC – DO NOT COPY or TRANSMIT... -
Page 7: Customer Service
When calling or writing about your product, be sure to mention model and serial numbers. Model and serial numbers are found on serial plate on the rear of machine and inside door. SERIAL PLATE TMB803N © Copyright, Alliance Laundry Systems LLC – DO NOT COPY or TRANSMIT 70269301... -
Page 8: Safety Warnings And Decals
DO NOT USE AN OPEN FLAME TO CHECK FOR GAS LEAKS! • The loading door switch, lint door switch and airflow switch must be operating properly. 70269301 © Copyright, Alliance Laundry Systems LLC – DO NOT COPY or TRANSMIT... -
Page 9: How A Tumbler Works
The heated air moves into the cylinder, where it is circulated through the laundry by the tumbling action of the cylinder. The air then passes through the lint filter, exhaust fan, and is vented to the outdoors. © Copyright, Alliance Laundry Systems LLC – DO NOT COPY or TRANSMIT 70269301... -
Page 10: Section 3 -Troubleshooting
Metered Models (CD models): Inoperative run • Test run switch and replace if inoperative. switch (accumulator). Broken, loose, or incorrect wiring. • Refer to wiring diagram located inside contactor box. 70269301 © Copyright, Alliance Laundry Systems LLC – DO NOT COPY or TRANSMIT... -
Page 11: Motor Overload Protector Cycles Repeatedly
• Test accumulator and replace if inoperative. Incorrect wiring. • Refer to wiring diagram located inside contactor box. Inoperative motor relay or motor contactor. • Check relay/contactor and replace if inoperative. © Copyright, Alliance Laundry Systems LLC – DO NOT COPY or TRANSMIT 70269301... -
Page 12: Heating Element Does Not Heat Or Burner Does Not Ignite
Gas Models: Inoperative igniter. • Test igniter and replace if inoperative. Gas Models: Inoperative igniter control. • Test igniter control and replace if inoperative. (continued on next page) 70269301 © Copyright, Alliance Laundry Systems LLC – DO NOT COPY or TRANSMIT... - Page 13 • Open lint door panel. Place lint door panel back on tumbler ensuring a tight fit. Broken, loose, or incorrect wiring. • Refer to wiring diagram located inside contactor box. © Copyright, Alliance Laundry Systems LLC – DO NOT COPY or TRANSMIT 70269301...
-
Page 14: Igniter Does Not Shut Off After Gas Ignition - Gas Burner
Improperly adjusted burner flame. Cycling off on high limit thermostat. • Refer to Paragraph 8. Broken, loose or incorrect wiring. • Refer to wiring diagram located inside contactor box. 70269301 © Copyright, Alliance Laundry Systems LLC – DO NOT COPY or TRANSMIT... -
Page 15: Heating Element Or Burner Repeatedly Cycles Off On High Limit Thermostat
• Set selector for higher setting. Incorrect voltage. • Refer to Installation Manual for electrical requirements. Inadequate make-up air. • Refer to Installation Manual for make-up air requirements. © Copyright, Alliance Laundry Systems LLC – DO NOT COPY or TRANSMIT 70269301... -
Page 16: Tumbler Overheating
TO CORRECT Door strike improperly adjusted. • Refer to Adjustment Section for door strike adjustment. Tumbler improperly leveled. • Refer to Adjustment Section for leveling leg adjustment. 70269301 © Copyright, Alliance Laundry Systems LLC – DO NOT COPY or TRANSMIT... -
Page 17: Tumbler Runs But No Steam To Coils - Steam Models
Trap functioning improperly. • Check trap for size and capacity. If trap is dirty or sluggish clean thoroughly or replace. Check return line for high back pressure. © Copyright, Alliance Laundry Systems LLC – DO NOT COPY or TRANSMIT 70269301... -
Page 18: Troubleshooting Electronic Control Models
If the temperature of the tumbler is above 24°F and signal sounds (-4.4°C). (-4.4°C), replace temperature sensor. three minutes after Temperature sensor open. Replace temperature sensor. tumbler is started 70269301 © Copyright, Alliance Laundry Systems LLC – DO NOT COPY or TRANSMIT... -
Page 19: Tumbler Will Not Start, Time On Drying Timer, Door Closed
IN AND OUT OF PER WIRING AT MOTOR RELAY DIAGRAM TERMINALS CHECK POWER CHECK CORRECT SUPPLY TO CONNECTIONS WIRING TUMBLER AND AND HARNESS WIRES TO RELAY CONTINUITY © Copyright, Alliance Laundry Systems LLC – DO NOT COPY or TRANSMIT 70269301... -
Page 20: Motor Runs, Time On Drying Timer But No Heat
HIGH LIMIT BURNED SWITCH THERMOSTAT THERMOSTAT CONNECTION AT HARNESS PLUGS AIRFLOW CHECK FOR SWITCH REPLACE BROKEN WIRE THERMOSTAT CLOSED FROM MOTOR SWITCH ADJUST REPLACE AIRFLOW AIRFLOW SWITCH SWITCH 70269301 © Copyright, Alliance Laundry Systems LLC – DO NOT COPY or TRANSMIT... -
Page 21: No Main Burner Flame, Igniter Does Not Spark
TERMINAL? GAS SHUT-OFF OPEN GAS VALVE SHUT-OFF OPEN? VALVE 24 VOLTS REPLACE PRESENT ON WHITE/BLACK CONTROL WIRE FROM IEI CONTROL CHECK GAS VALVE COILS REPLACE AS REQUIRED © Copyright, Alliance Laundry Systems LLC – DO NOT COPY or TRANSMIT 70269301... -
Page 22: Steam Om Models: No Heat With Cycle Selected, Unit Running And Calling For Heat
Is there voltage across the steam valve coil? If yes, Correct wiring to steam valve coil. continue to next step. Unit operational. If unit still doesn’t heat, check steam supply. 70269301 © Copyright, Alliance Laundry Systems LLC – DO NOT COPY or TRANSMIT... -
Page 23: Om And Rm Models: No Start With Cycle Selected, Start Button Pressed And Door Closed
Is there voltage to the output of the motor relay? If yes, Replace motor relay. continue to next step. Does the motor operate? If yes, continue to next step. Replace motor. Unit operational. © Copyright, Alliance Laundry Systems LLC – DO NOT COPY or TRANSMIT 70269301... -
Page 24: Om Models: No Display After Selecting One Of The On/Select Keys
Is there voltage to the opposite side of the fuse on the Check fuse making sure it is not blown. Replace if micro control? If yes, continue to next step. necessary. Replace micro control. 70269301 © Copyright, Alliance Laundry Systems LLC – DO NOT COPY or TRANSMIT... -
Page 25: Electric Om Models: No Heat With Cycle Selected, Unit Running And Calling For Heat
Do the elements produce heat? If yes, continue to Step 16. Check for opens or shorts in the elements. NOTE: If elements are glowing a bright red/orange, there is not enough airflow. Unit operational. (continued) © Copyright, Alliance Laundry Systems LLC – DO NOT COPY or TRANSMIT 70269301... -
Page 26: Gas Om Models: No Heat With Cycle Selected, Unit Running And Calling For Heat
Is there a flame? If yes, continue to next step. Check for gas flow and proper gas pressure. Replace gas valve or coils of gas valve. Unit operational. 70269301 © Copyright, Alliance Laundry Systems LLC – DO NOT COPY or TRANSMIT... -
Page 27: Om Models: No Fan Motor Rotation With Cycle Selected And Start Pressed
If yes, continue to next step. Is there voltage across L1, L2 and L3 of the motor? Correct wiring between motor and M contactor. If yes, continue to next step. Unit operational. © Copyright, Alliance Laundry Systems LLC – DO NOT COPY or TRANSMIT 70269301... -
Page 28: Om Reversing Models: No Cylinder Rotation Or Reversing Capabilities
Does the motor turn? If yes, continue to next step. Replace motor. Does the cylinder rotate? If yes, continue to next step. Check drive components between motor and cylinder. Unit operational. 70269301 © Copyright, Alliance Laundry Systems LLC – DO NOT COPY or TRANSMIT... -
Page 29: Cd Models: No Start With Vend Satisfied And Start Button Pressed In
Is the internal wiring of the motor correct for the supply Change the wiring accordingly. voltage? Thermal overload cycled, allow motor to cool and recheck. Replace motor. Unit operational. © Copyright, Alliance Laundry Systems LLC – DO NOT COPY or TRANSMIT 70269301... -
Page 30: Cd Models: No Heat With Vend Satisfied And Unit Running
† Proper gaps for igniter: 5/16 above burner and 5/32 between electrode and grounding tab. The proper resistance of the high voltage lead is between 5,000 Ohms and 25,000 Ohms. 70269301 © Copyright, Alliance Laundry Systems LLC – DO NOT COPY or TRANSMIT... -
Page 31: Cd Models: No Start With Vend Satisfied And Start Button Pushed
Unit operational. NOTE: If the motor only runs with the start switch pressed in, that means the centrifugal switch in the motor is bad. Replace the motor. © Copyright, Alliance Laundry Systems LLC – DO NOT COPY or TRANSMIT 70269301... -
Page 32: Section 4 -Grounding
To reduce the risk of electrical shock, de- energize the electrical circuit being connected to the tumbler before making any electrical connections. Never attempt to connect a live circuit. W070 70269301 © Copyright, Alliance Laundry Systems LLC – DO NOT COPY or TRANSMIT... -
Page 33: Section 5 -Service Procedures
If a wrist strap is not available, touch tumbler while NOTE: Refer to wiring diagram when rewiring it is plugged in before handling control to dissipate light. any charge. 70269301 © Copyright, Alliance Laundry Systems LLC – DO NOT COPY or TRANSMIT... -
Page 34: Coin Meter
Disconnect motor leads. e. Slide cam and drive fork out from under motor mounting bracket. NOTE: Refer to wiring diagram when rewiring timer motor. © Copyright, Alliance Laundry Systems LLC – DO NOT COPY or TRANSMIT 70269301... - Page 35 Section 5 Service Procedures COIN METER TIMER MOTOR CAM AND DRIVE FORK SWITCH ACTUATOR BRACKET SWITCH HEAT SWITCH TMB1749S Figure 1 70269301 © Copyright, Alliance Laundry Systems LLC – DO NOT COPY or TRANSMIT...
-
Page 36: Igniter
IMPORTANT: Purge air in the gas service line by operating the tumbler in drying mode. Use pipe compound resistant to action of Liquid Petroleum (L.P.) Gas on all pipe threads. © Copyright, Alliance Laundry Systems LLC – DO NOT COPY or TRANSMIT 70269301... - Page 37 (Non-EU Models) MAIN IGNITION RESET HARNESS SWITCH (EU Gas Models Only) FUSE (Non-EU Models) IGNITION CONTROL HIGH VOLTAGE LEAD ICM RETURN (Australian Models) CONTROL TMB1256P HARNESS Figure 2 70269301 © Copyright, Alliance Laundry Systems LLC – DO NOT COPY or TRANSMIT...
-
Page 38: Contactors And Terminal Block
Tilt element up and gently slide it out of housing. IMPORTANT: Bottom guard must be put back on bottom of housing before reinstalling heater on tumbler. © Copyright, Alliance Laundry Systems LLC – DO NOT COPY or TRANSMIT 70269301... - Page 39 HIGH LIMIT ASSEMBLY THERMOSTAT HEATER ELEMENT HEATER CABLE JUMPER WIRE TMB1249P EU MODELS HEATER CABLE HARNESSES JUMPER HIGH LIMIT THERMOSTAT HEATER ELEMENT JUMPER TMB1248P WIRE Figure 3 70269301 © Copyright, Alliance Laundry Systems LLC – DO NOT COPY or TRANSMIT...
-
Page 40: Stove High Limit Thermostat
Remove two screws holding thermostat to mounting bracket. Refer to Figure 5. T025SE1A Figure 4 SCREWS COVER STOVE HIGH LIMIT THERMOSTAT MOUNTING SCREWS BRACKET TU026-SV Figure 5 © Copyright, Alliance Laundry Systems LLC – DO NOT COPY or TRANSMIT 70269301... -
Page 41: Cabinet High Limit Thermostat
Remove two screws holding thermostat to thermostat wires. mounting bracket. CABINET HIGH LIMIT THERMOSTAT THERMISTOR CABINET HIGH LIMIT BRACKET COVER COVER THERMISTOR BRACKET TMB1806B Figure 6 70269301 © Copyright, Alliance Laundry Systems LLC – DO NOT COPY or TRANSMIT... -
Page 42: High Limit Thermostat
IMPORTANT: When removing or replacing steam NOTE: Refer to the wiring diagram when coils, be careful not to damage fins on steam coils. reconnecting the wires to the thermistor. © Copyright, Alliance Laundry Systems LLC – DO NOT COPY or TRANSMIT 70269301... -
Page 43: Loading Door Assembly
HINGE CAM HINGE 49. LOADING DOOR HANDLE T252SE1C Refer to Figure 8. a. Open loading door. Figure 7 b. Remove screws holding door handle to door frame. 70269301 © Copyright, Alliance Laundry Systems LLC – DO NOT COPY or TRANSMIT... -
Page 44: Front Panel
Unlock, open and remove lint panel. Set aside Figure 9. to prevent damage. e. Disconnect door switch harness. SCREWS SCREWS SCREWS TMB1553P SCREWS (4 Total) Figure 9 © Copyright, Alliance Laundry Systems LLC – DO NOT COPY or TRANSMIT 70269301... -
Page 45: Airflow Switch
(1) Remove two screws attaching reversing motor belt guard to rear of cabinet and remove guard. (2) Lift idler assembly and run belt off from idler sheave. 70269301 © Copyright, Alliance Laundry Systems LLC – DO NOT COPY or TRANSMIT... -
Page 46: Drive Belt
Remove lower bolt and nut from guide rail. Hinge guide rail out and slip belt out from under guide rails. e. Slip new belt under guide rail and onto sheave and motor pulley. © Copyright, Alliance Laundry Systems LLC – DO NOT COPY or TRANSMIT 70269301... -
Page 47: Idler Shaft
NOTE: After installing sheave, adjust belt. hardwood dowel. IDLER HOUSING IDLER SHAFT BEARINGS BOLT IDLER TMB1530P HOUSING ASSEMBLY Figure 13 70269301 © Copyright, Alliance Laundry Systems LLC – DO NOT COPY or TRANSMIT... -
Page 48: Trunnion Housing Assembly
Use a hammer and hardwood dowel to remove bearings. MOUNTING ADJUSTING SCREW SCREW (4 Total) (2 Total) BEARING BEARING RETAINER SCREW (4 Total) TRUNNION HOUSING BEARING TMB1540_P Figure 14 © Copyright, Alliance Laundry Systems LLC – DO NOT COPY or TRANSMIT 70269301... -
Page 49: Trunnion Shaft Assembly
Reinstall drive guard on tumbler. Measure the distance between the center of the TRUNNION MEASURE AT ASSEMBLY FOUR POINTS TAPE MEASURE CYLINDER T089SE3C Figure 15 70269301 © Copyright, Alliance Laundry Systems LLC – DO NOT COPY or TRANSMIT... -
Page 50: Motor And Fan Assembly
Refer to Figure 24. l. Remove four sets of nuts, washers and bolts holding mounting bracket to motor. Refer to Figure 16. © Copyright, Alliance Laundry Systems LLC – DO NOT COPY or TRANSMIT 70269301... - Page 51 NOTE: A puller may be required to remove pulley from motor shaft. NOTE: After installing motor and fan assembly, adjust belt. MOTOR AND FAN ASSEMBLY T045SE3A Figure 17 70269301 © Copyright, Alliance Laundry Systems LLC – DO NOT COPY or TRANSMIT...
-
Page 52: Fan And Motor Assembly
Remove spacer washer from motor shaft. Refer tumbler cabinet. Refer to Figure 16. to Figure 18. MOTOR FAN HOUSING COVER SPACER WASHER PULLEY JAM NUT MOTOR PULLEY LOCKNUT T046SE3A Figure 18 © Copyright, Alliance Laundry Systems LLC – DO NOT COPY or TRANSMIT 70269301... -
Page 53: Cylinder Drive Motor
After installing motor, adjust drive belt tension, and adjust motor position on mounting bracket. SCREW LOCKWASHER PULLEY FLAT WASHER CYLINDER DRIVE MOTOR MOUNTING BRACKET ADJUSTING BOLT TMB1689P Figure 19 70269301 © Copyright, Alliance Laundry Systems LLC – DO NOT COPY or TRANSMIT... -
Page 54: Section 6 -Adjustments
NOTE: Keep the tumbler as close to the floor as possible. All four legs must rest firmly on the floor T451I so weight of tumbler is evenly distributed. Tumbler must not rock. Figure 20 70269301 © Copyright, Alliance Laundry Systems LLC – DO NOT COPY or TRANSMIT... -
Page 55: Main Gas Burner Air Inlet Shutters
Adjust air shutter as follows: PROPER INSUFFICIENT NO AIRFLOW AIRFLOW AIRFLOW AIR SHUTTER AIR SHUTTER AIR SHUTTER ADJUSTING SCREWS ADJUSTING SCREWS ADJUSTING SCREWS TMB1780S Figure 21 © Copyright, Alliance Laundry Systems LLC – DO NOT COPY or TRANSMIT 70269301... -
Page 56: Airflow Switch
The cylinder and fan will continue to operate even though the airflow IMPORTANT: Remove tape from lint panel switch. switch is opened. 70269301 © Copyright, Alliance Laundry Systems LLC – DO NOT COPY or TRANSMIT... - Page 57 AIR FLOW PANEL OF TUMBLER SWITCH SCREW AIR FLOW SWITCH SWITCH LEVER VANE SWITCH DISC LEVER LEVER SPRING COUNTERWEIGHT CLIP DISC COUNTERWEIGHT SPRING CLIP T041IE3A Figure 22 © Copyright, Alliance Laundry Systems LLC – DO NOT COPY or TRANSMIT 70269301...
-
Page 58: Loading Door Strike
Figure 23 f. Once proper belt tension is reached, retighten the adjusting nut and locking bolt. g. Replace the guard on rear of tumbler. 70269301 © Copyright, Alliance Laundry Systems LLC – DO NOT COPY or TRANSMIT... - Page 59 Section 6 Adjustments NONREVERSING TRUNNION HOUSING ADJUSTING BOLTS TRUNNION POLY HOUSING V-BELT BOLTS (Self-adjusting) IDLER HOUSING BOLTS ADJUSTING BOLT IDLER HOUSING ASSEMBLY DRIVE V-BELT GUIDE RAILS T234IE3F Figure 24 © Copyright, Alliance Laundry Systems LLC – DO NOT COPY or TRANSMIT 70269301...
- Page 60 Section 6 Adjustments REVERSING LOCKING BOLT DRIVE BELT ADJUSTING ADJUSTING ADJUSTING BOLT SCREW (Not Shown) CYLINDER BELTS IDLER HOUSING BOLTS IDLER HOUSING ASSEMBLY T322IE3A Figure 25 70269301 © Copyright, Alliance Laundry Systems LLC – DO NOT COPY or TRANSMIT...
-
Page 61: Cylinder Clearance
(12.7 - 19.05 mm) CYLINDER RIM / FRONT PANEL FLANGE 9/32" ± 1/32" CLEARANCE FRONT PANEL FRONT PANEL FLANGE (Top Shown) FORE / AFT CLEARANCE T218SE3C Figure 26 © Copyright, Alliance Laundry Systems LLC – DO NOT COPY or TRANSMIT 70269301...
Need help?
Do you have a question about the AT050L and is the answer not in the manual?
Questions and answers