Mercury 200 Verado FourStroke Operation And Maintenance Manual
Including pro series
Hide thumbs
Also See for 200 Verado FourStroke:
- Operation and maintenance manual (123 pages) ,
- Operation, maintenance & warranty manual (144 pages) ,
- Installation manual (44 pages)
Table of Contents
Advertisement
Advertisement
Table of Contents

Related Manuals for Mercury 200 Verado FourStroke


Summary of Contents for Mercury 200 Verado FourStroke
- Page 1 Operation Maintenance Manual...
-
Page 3: Read This Manual Thoroughly
Thank you for purchasing one of our products. We sincerely hope your boating will be pleasant! Mercury Marine, Fond du Lac, Wisconsin, U.S.A. Name / function: John Pfeifer, President, Mercury Marine... - Page 4 Warranty Message The product you have purchased comes with a limited warranty from Mercury Marine; the terms of the warranty are set forth in the Warranty Manual included with the product. The Warranty Manual contains a description of what is...
- Page 5 Identification Records Please record the following applicable information: Outboard Engine Model and Horsepower Engine Serial Number Gear Ratio Propeller Number Pitch Diameter Hull Identification Number (HIN) Purchase Date Boat Manufacturer Boat Model Length Exhaust Gas Emissions Certification Number (Europe Only)
-
Page 7: Table Of Contents
General Information Boater's Responsibilities..................1 Before Operating Your Outboard................ 1 Boat Horsepower Capacity................. 1 High‑Speed and High‑Performance Boat Operation.......... 2 Outboard Remote Control Models ..............2 Lanyard Stop Switch................... 2 Protecting People in the Water................5 Exhaust Emissions..................... 5 Passenger Safety Message ‑ Pontoon Boats and Deck Boats......7 Wave and Wake Jumping................... - Page 8 Features and Controls Panel Mount Control Features and Operation..........27 Slim Binnacle Control Features and Operation..........29 Dual‑Handle Console Control Features and Operation........35 Shadow Mode Control with CAN Trackpad Features and Operation....43 Hot Foot......................46 Zero Effort Controls..................49 Warning System....................
- Page 9 Maintenance Cleaning Care Recommendations..............66 EPA Emissions Regulations................68 Inspection and Maintenance Schedule............. 69 Flushing the Cooling System................70 Cowl Removal and Installation................. 71 Battery Inspection .................... 72 Verado Engine Battery Specifications.............. 72 Air Filter (200–300)................... 74 Air Filter (350, 350 Pro)..................75 Fuel System......................
- Page 10 Owner Service Assistance Service Assistance..................102 Ordering Literature..................104 Installation Information Mercury Marine Validated Engine Mounting Hardware........106 Fastening Hardware Specification (Not Factory Supplied)......106 Accessories Mounted to the Transom Clamp Bracket........108 Fastening the Outboard.................. 111 Maintenance Log Maintenance Log.................... 113...
-
Page 11: General Information
GENERAL INFORMATION Boater's Responsibilities The operator (driver) is responsible for the correct and safe operation of the boat and the safety of its occupants and general public. It is strongly recommended that each operator read and understand this entire manual before operating the outboard. -
Page 12: High-Speed And High-Performance Boat Operation
Hi‑Performance Boat Operation booklet from your dealer, distributor, or Mercury Marine. Outboard Remote Control Models The outboard must be equipped with a Mercury remote control designed for digital throttle and shift. Start‑in‑gear protection is provided by the remote control system. - Page 13 GENERAL INFORMATION The lanyard cord is usually 122–152 cm (4–5 feet) in length when stretched out, with an element on one end made to be inserted into the switch and a clip on the other end for attaching to the operator's PFD or wrist. The lanyard is coiled to make its at‑rest condition as short as possible to minimize the likelihood of lanyard entanglement with nearby objects.
- Page 14 GENERAL INFORMATION While activation of the lanyard stop switch will stop the engine immediately, a boat will continue to coast for some distance depending upon the velocity and degree of any turn at shut down. However, the boat will not complete a full circle.
-
Page 15: Protecting People In The Water
GENERAL INFORMATION Protecting People in the Water WHILE YOU ARE CRUISING It is very difficult for a person standing or floating in the water to take quick action to avoid a boat heading in his/her direction, even at slow speed. 21604 Always slow down and exercise extreme caution any time you are boating in an area where there might be people in the water. - Page 16 GENERAL INFORMATION WARNING Inhaling engine exhaust gases can result in carbon monoxide poisoning, which can lead to unconsciousness, brain damage, or death. Avoid exposure to carbon monoxide. Stay clear from exhaust areas when engine is running. Keep the boat well‑ventilated while at rest or underway. STAY CLEAR OF EXHAUST AREAS 41127 Engine exhaust gases contain harmful carbon monoxide.
-
Page 17: Passenger Safety Message - Pontoon Boats And Deck Boats
GENERAL INFORMATION 1. Examples of poor ventilation while the boat is stationary: 21626 Operating the engine when the boat is moored in a confined space Mooring close to another boat that has its engine operating 2. Examples of poor ventilation while the boat is moving: 21628 Operating the boat with the trim angle of the bow too high Operating the boat with no forward hatches open (station wagon effect) - Page 18 GENERAL INFORMATION Persons on the front deck could easily be thrown overboard or persons dangling their feet over the front edge could get their legs caught by a wave and pulled into the water. 26782 WARNING Sitting or standing in an area of the boat not designed for passengers at speeds above idle can cause serious injury or death.
-
Page 19: Wave And Wake Jumping
GENERAL INFORMATION Wave and Wake Jumping Operating recreational boats over waves and wake is a natural part of boating. However, when this activity is done with sufficient speed to force the boat hull partially or completely out of the water, certain hazards arise, particularly when the boat enters the water. - Page 20 GENERAL INFORMATION Reduce speed and proceed with caution whenever you drive a boat in shallow water areas or in areas where you suspect underwater obstacles may exist that could be struck by the outboard or the boat bottom. The most significant action you can take to help reduce injury or impact damage from striking a floating or underwater object is to control the boat speed.
-
Page 21: Selecting Accessories For Your Outboard
Operating a boat or engine with impact damage can result in product damage, serious injury, or death. If the vessel experiences any form of impact, have an authorized Mercury Marine dealer inspect and repair the vessel or power package. Selecting Accessories for Your Outboard Genuine Mercury Precision or Quicksilver Accessories have been specifically designed and tested for your outboard. - Page 22 (refer to your boat's capacity plate). Know your boat's operating and loading limitations. Know if your boat will float if it is full of water. When in doubt, contact your authorized Mercury Marine dealer or the boat manufacturer. Ensure that everyone in the boat is properly seated.
- Page 23 GENERAL INFORMATION • Do not allow anyone to sit or ride on any part of the boat that was not intended for such use. This includes the backs of seats, gunwales, transom, bow, decks, raised fishing seats, and any rotating fishing seat. Passengers should not sit or ride anywhere that sudden unexpected acceleration, sudden stopping, unexpected loss of boat control, or sudden boat movement could cause a person to be thrown overboard or into the...
-
Page 24: Specifications
GENERAL INFORMATION Specifications Models Horsepower Kilowatts Full throttle RPM 5800–6400 range Idle RPM in neutral gear* Number of cylinders Displacement 2,598 cc (158.5 cid) Cylinder bore 82 mm (3.23 in.) Stroke 82 mm (3.23 in.) Spark plug NGK ILFR6G‑E Spark plug gap 0.8 mm (0.0315 in.) Spark plug hex size 16 mm... -
Page 25: Recording Serial Number
GENERAL INFORMATION Models 300 Pro 350 Pro Displacement 2,598 cc (158.5 cid) Cylinder bore 82 mm (3.23 in.) Stroke 82 mm (3.23 in.) Spark plug NGK ILFR6G‑E Spark plug gap 0.8 mm (0.0315 in.) Spark plug hex size 16 mm 1 inch shaft 1.85:1 1.75:1... -
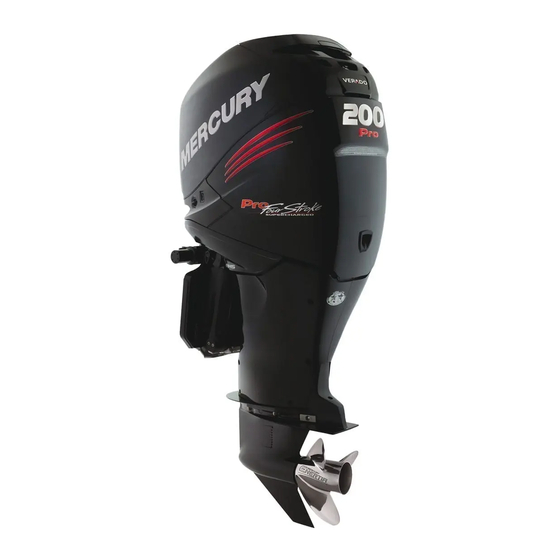
Page 26: Component Identification 200-300
GENERAL INFORMATION Component Identification 200–300 Rear cowl Lower cowl chaps Antiventilation plate Gearcase Cooling water intake holes Spray plate Pedestal Engine flush Auxiliary tilt switch Top cowl 28919... -
Page 27: 350 Hp Component Identification
When choosing a propeller, a full selection of aluminum and stainless steel propellers specifically designed for your outboard are available through Mercury Marine. To view the entire product offering and find the correct propeller that is best suited for your application, visit www.mercmarinepropellers.com or see your local authorized Mercury dealer. - Page 28 RPM. IMPORTANT: To ensure proper fit, and performance, Mercury Marine recommends the use of Mercury or Quicksilver branded propellers and mounting hardware. Propellers are designated by the diameter, pitch, number of blades, and material.
- Page 29 PROPELLER MATERIAL Most propellers manufactured by Mercury Marine are made from either aluminum or stainless steel. Aluminum is suitable for general purpose use and is standard equipment on many new boats. Stainless steel is over five times more durable than aluminum and typically provides performance gains in acceleration and top end speed due to design efficiencies.
-
Page 30: Transporting
TRANSPORTING Trailering Boat/Outboard When transporting the boat on a trailer, the outboard should be positioned and supported in one of the following ways: 1. If the boat trailer provides sufficient ground clearance, the outboard may be tilted down to the vertical operating position with no additional support required. - Page 31 TRANSPORTING 3. For maximum ground clearance, the outboard can be tilted to the full tilt position and supported using the outboard tilt support bracket or an accessory transom support device. 28779 Additional clearance may be required for railroad crossings, driveways, and trailer bouncing.
-
Page 32: Fuel And Oil
USA is alcohol (ethanol, methanol, or butanol). GASOLINES CONTAINING ALCOHOL Bu16 Butanol Fuel Blends Fuel blends of up to 16.1% butanol (Bu16) that meet the published Mercury Marine fuel rating requirements are an acceptable substitute for unleaded gasoline. Contact your boat manufacturer for specific recommendations on... -
Page 33: Fuel Additives
Fuel Additives To minimize carbon deposit buildup in the engine, add Mercury or Quicksilver Quickleen Engine and Fuel System Cleaner to the engine's fuel at each tank throughout the boating season. Use the additive as directed on the container. -
Page 34: Fuel Demand Valve
Vent/water drain holes 46273 Engine Oil Recommendations 200–350 HP MODELS Mercury 25W‑40 NMMA certified FC‑W Catalyst Compatible® Synthetic Blend Marine Engine Oil is the preferred choice for general, all‑temperature use in all 200–350 HP Verado engines. 57244 In lieu of the preferred grade oil, the following may be used (listed in the order of preference): •... - Page 35 FUEL AND OIL 1. Before starting (cold engine) tilt outboard out/up past vertical to allow trapped oil to drain back to the oil sump. Allow outboard to remain tilted for approximately one minute. 2. Tilt the outboard to a vertical operating position. 3.
- Page 36 FUEL AND OIL 6. If the oil level is below the operating range (crosshatched region), remove the oil filler cap and add approximately 500 ml (16 oz) of specified outboard motor oil. 28761 7. Tilt outboard out/up past vertical to allow trapped oil to drain back to the oil sump.
-
Page 37: Features And Controls
FEATURES AND CONTROLS Panel Mount Control Features and Operation 1. Operation of the shift and throttle is controlled by the movement of the control handle. Push the control handle forward from neutral to the first detent for forward gear. Continue pushing forward to increase speed. Pull the control handle back from neutral to the first detent for reverse gear. - Page 38 FEATURES AND CONTROLS 4. Throttle only button ‑ Allows the boat operator to increase engine RPM for warm‑up, without shifting the engine into gear. To engage throttle only, move the control handle into the neutral position. Press the throttle only button while moving the control handle ahead to the forward detent.
-
Page 39: Slim Binnacle Control Features And Operation
FEATURES AND CONTROLS 7. Control handle tension adjustment screw ‑ This screw can be adjusted to increase or decrease the tension on the control handle (cover must be removed). This will help prevent unwanted motion of the handle in rough water. - Page 40 FEATURES AND CONTROLS 2. Trim Switch (if equipped) ‑ When the power trim switch is activated on the ERC handle, the DTS command module senses a closed circuit for either up or down trim. The DTS command module formulates a signal and sends it to the PCM.
- Page 41 FEATURES AND CONTROLS Special Digital Throttle and Shift (DTS) Features The DTS system features several alternate operational modes for the electronic remote control (ERC) levers. STOP/ START DOCK TRANSFER THROTTLE - ONLY 52365 Slim binnacle ERC Item Control Function Trim control Raises and lowers the engine for best efficiency, or (handle) for conditions such as shallow water, trailering, etc.
- Page 42 FEATURES AND CONTROLS HELM TRANSFER Some boats are designed to allow control of the vessel from more than one location. These locations are commonly referred to as helms or stations. Helm transfer is a term used to describe the method of transferring control from one helm (or station) to another helm.
- Page 43 FEATURES AND CONTROLS 1. At the helm you are requesting be made active and with the ERC levers in neutral, press the transfer button one time. After the transfer button is pressed, the transfer button light turns on and one beep will sound confirming the impending transfer.
- Page 44 FEATURES AND CONTROLS 3. Place either ERC lever into gear. The warning horn will beep each time the lever is moved in and out of gear while in throttle only, but will remain in neutral. 4. The RPM of the engines can be increased. NOTE: Pressing the "Throttle‑Only"...
-
Page 45: Dual-Handle Console Control Features And Operation
FEATURES AND CONTROLS Dual‑Handle Console Control Features and Operation DUAL-HANDLE ELECTRONIC REMOTE CONTROL (ERC)— OPERATION AND ADJUSTMENT Operation The electronic remote control (ERC) handle controls the shift and throttle operation. Push the control handle forward from neutral to the first detent for forward gear. - Page 46 FEATURES AND CONTROLS To adjust handle tension: 1. Remove the side cover plugs of the handle that needs adjustment. 2. Turn the adjustment screw clockwise to increase tension on the control handle and counterclockwise to decrease tension. 3. Adjust to the tension desired. Detent tension adjustment screw Handle tension...
- Page 47 FEATURES AND CONTROLS SPECIAL DIGITAL THROTTLE AND SHIFT (DTS) FEATURES The DTS system features several alternate operational modes for the electronic remote control (ERC) levers. Any of the listed features can operate simultaneously. 55232 Dual engine ERC Item Control Function Trim control Raises and lowers the engines for best efficiency, or (handle)
- Page 48 FEATURES AND CONTROLS Item Control Function Enables the throttle and shift functions of both engines 1 LEVER to be controlled by the port lever. Turns off or on the auto‑synchronization feature. Refer SYNC to Sync. NOTE: Not all functions may be active. Dock Dock mode reduces throttle capacity to approximately 50% of normal throttle demand, allowing finer control of engine power in close quarter situations.
- Page 49 FEATURES AND CONTROLS 2. Press the THROTTLE ONLY button. The button light will turn on and the neutral lights will blink. 3. Place either ERC lever into gear. The warning horn will beep each time the levers are moved in and out of gear while in throttle only, but will remain in neutral.
- Page 50 FEATURES AND CONTROLS Sync Sync is an automatic engine synchronization feature that is always on unless it is turned off. Sync monitors the position of both ERC levers. When both levers are within 10% of one another, the port engine synchronizes to the starboard engine's RPM.
- Page 51 FEATURES AND CONTROLS Transfer (Boats equipped with dual helms) The TRANSFER button allows the boat operator to transfer control of the boat from the active helm to the inactive helm on boats equipped with dual helms. Refer to Helm Transfer. 51858 TRANSFER button HELM TRANSFER...
- Page 52 FEATURES AND CONTROLS NOTICE The ERC levers must be in neutral to perform a helm transfer. While in neutral your vessel could drift and collide with objects nearby resulting in damage. Keep an adequate look out while performing the helm transfer. To avoid damage, use extra care when attempting a helm transfer while the vessel is close to docks, piers, or other fixed items or when near other vessels.
-
Page 53: Shadow Mode Control With Can Trackpad Features And Operation
FEATURES AND CONTROLS Shadow Mode Control with CAN Trackpad Features and Operation TRIPLE ENGINE THROTTLE AND SHIFT OPERATION Movement of the handles on the remote control allows the boat operator to control the engine throttle speed and gear shift positions of all three engines. The throttle and shift function is dependant on what engines are running. - Page 54 FEATURES AND CONTROLS Turning off one of the outer engines while underway will cause the center engine to go into forced neutral/idle. Operation to the center engine can be restored by moving the control handle of the functioning outer engine back into neutral position and then engaging.
- Page 55 FEATURES AND CONTROLS Port Starboard Port Outer Starboard Inner Inner Control Handle Function Engine Outer Engine Engine Engine Off (ignition Port inner engine throttle key switch Running Running Running and shift = controlled by turned on) port control handle Starboard inner engine Off (ignition throttle and shift = Running...
-
Page 56: Hot Foot
FEATURES AND CONTROLS Turning off one of the inner engines while underway will have no effect on the operation of the outer engines. If a failure should occur while underway which causes the starboard outer engine into forced neutral/idle condition, the inner starboard engine will also be forced to neutral/idle. - Page 57 FEATURES AND CONTROLS DTS HOT FOOT OPERATION DTS Hot Foot DTS hot foot operation use is unique and is generally used on boats that can reach significant speeds. The use of a hot foot allows the operator to keep both hands on the steering wheel at all speeds, which allows the operator a greater control of the boat.
- Page 58 FEATURES AND CONTROLS e. Throttle control at the panel mount remote control handle. NOTE: If the transfer fails, a double horn beep will sound. 4. To return throttle control to the foot throttle: a. Place the throttle control handle in neutral or in the forward/reverse detent position.
-
Page 59: Zero Effort Controls
FEATURES AND CONTROLS Zero Effort Controls Zero Effort controls allow the operator to control the shifting and throttle with separate control handles. Zero Effort controls are available in single, and multiengine applications including shadow mode operation. 58266 Warning System WARNING HORN SIGNALS When the key switch is turned to the ON position, the horn will turn on for a moment as a test to indicate the horn is working. - Page 60 2. Engage the throttle. If the engine does not respond, repeat step one. SMARTCRAFT PRODUCT A Mercury SmartCraft System instrument package can be purchased for this outboard. A few of the functions the instrument package will display are engine RPM, coolant temperature, oil pressure, water pressure, battery voltage, fuel consumption, and engine operating hours.
-
Page 61: Power Trim And Tilt
FEATURES AND CONTROLS Power Trim and Tilt The outboard has a trim/tilt control called power trim. This enables the operator to easily adjust the position of the outboard by pressing the trim switch. Moving the outboard in closer to the boat transom is called trimming in or trimming down. - Page 62 FEATURES AND CONTROLS • Generally improve the ride in choppy water. • In excess, can lower the bow of some boats to a point where they begin to plow with their bow in the water while on plane. This can result in an unexpected turn in either direction (called bow steering or oversteering) if any turn is attempted, or if a significant wave is encountered.
- Page 63 FEATURES AND CONTROLS 3. Disengage the tilt support bracket, by raising the outboard up and rotating the tilt support lever up. Lower the outboard. Tilt support lever Tilt support bracket 28922 MANUAL TILTING If the outboard cannot be tilted using the power trim/tilt switch, the outboard can be manually tilted.
- Page 64 FEATURES AND CONTROLS AUXILIARY TILT SWITCH The auxiliary tilt switch can be used to tilt the outboard up or down using the power trim system. 28927 SHALLOW WATER OPERATION When operating your boat in shallow water, you can tilt the outboard beyond the maximum trim range to prevent hitting bottom.
-
Page 65: Operation
OPERATION Important Daily Inspection Before Each Use Any outboard mounted on the boat must have the mounting hardware inspected and checked to ensure that the hardware has not become loose. A decal on the transom bracket reminds the owner to check the fasteners securing the outboard to the transom before each use. -
Page 66: Operating In Freezing Temperatures
Wash the outboard exterior and flush out the exhaust outlet of the propeller and gearcase with fresh water after each use. Each month, spray Mercury Precision or Quicksilver Corrosion Guard on external metal surfaces. Do not spray on corrosion control anodes as this will reduce the effectiveness of the anodes. -
Page 67: Effects Of Elevation And Weather On Performance
OPERATION If changing conditions cause the RPM to drop below the recommended range, such as warmer, more humid weather, operation at higher elevations, increased boat load, or a dirty boat bottom/gearcase, a propeller change or cleaning may be required to maintain performance and ensure the outboards durability. -
Page 68: Setting Trim Angle While Running Engine At Idle Speed
OPERATION Setting Trim Angle While Running Engine at Idle Speed The exhaust relief hole on the outboard can become submerged on some boats if the engine is trimmed full in while running at idle speed. This may result in exhaust restriction, rough idle, excessive smoke, and fouled spark plugs. If this condition exists, trim outboard up until exhaust relief hole is out of the water. - Page 69 OPERATION PRIMING THE FSM WITH A PURGE TOOL The use of a purge tool for priming the FSM is the preferred method, but is not always practical. The objective is to purge the air entrained in the fuel system through a purge tool connected to the fuel rail Schrader valve test port. During the key "ON,"...
-
Page 70: Starting The Engine
OPERATION 3. Turn the ignition key "ON." The fuel pumps will run for approximately five seconds. 4. Turn the ignition key to the "START" position and release the key. The ECM controls the activation of the starter. The starter may continue cranking for up to eight seconds. - Page 71 OPERATION 2. Check the engine oil level. 27780 3. Open the fuel tank vent on manual venting type tanks. 19748 4. Set the lanyard stop switch to the RUN position. Refer to General Information ‑ Lanyard Stop Switch. NOTE: The engine will not start unless the lanyard switch is set to the RUN position.
- Page 72 OPERATION 5. Shift the outboard to neutral (N) position. 51902 Forward Neutral Reverse NOTE: For initial start of a new engine or for an engine that ran out of fuel, refer to Fuel Supply Module Priming Procedure . 6. Ignition key starting ‑ Turn the ignition key to the START position and release the key.
-
Page 73: Gear Shifting
OPERATION Gear Shifting IMPORTANT: Observe the following: • Never shift the outboard into or out of gear unless the engine speed is at idle. Shifting at higher than engine idle speed could cause damage to the gearcase. • Do not shift the outboard into reverse when the forward motion of the boat is greater than a no wake speed. - Page 74 OPERATION • Panel mount remote control requires the operator to always press shift lock while moving the control handle out of the neutral position. 3428 • Advance the control lever to further increase speed. DTS CONSOLE MOUNT REMOTE CONTROL IMPORTANT: Never shift the outboard into gear unless the engine speed is at idle.
-
Page 75: Stopping The Engine
OPERATION ZERO EFFORT CONTROL GEAR SHIFTING 1. Verify the throttle lever is at the idle position. 2. Move the shift lever forward or reverse. 3. Advance the throttle lever to apply power. 58267 Shift levers in neutral position Trim switch Throttle levers at the idle position Stopping the Engine IMPORTANT: Turning key to the "START"... -
Page 76: Cleaning Care Recommendations
Record maintenance performed in the Maintenance Log at the back of this book. Save all maintenance work orders and receipts. Selecting Replacement Parts For Your Outboard We recommend using original Mercury Precision or Quicksilver replacement parts and Genuine Lubricants. DO NOT USE CAUSTIC CLEANING CHEMICALS IMPORTANT: Do not use caustic cleaning chemicals on the outboard power package. - Page 77 Keep water spray out of the air filter/intake and alternator. After washing, allow the powerhead and components to dry. Apply Quicksilver or Mercury Precision Lubricants Corrosion Guard spray on the external metal surfaces of the powerhead and powerhead components.
-
Page 78: Epa Emissions Regulations
MAINTENANCE EPA Emissions Regulations All new outboards manufactured by Mercury Marine are certified to the United States Environmental Protection Agency, as conforming to the requirements of the regulations for the control of air pollution from new outboard motors. This certification is contingent on certain adjustments set to factory standards. For this reason, the factory procedure for servicing the product must be strictly followed and, wherever practicable, returned to the original intent of the design. -
Page 79: Inspection And Maintenance Schedule
MAINTENANCE Inspection and Maintenance Schedule DAILY CHECKS • Check the engine oil level • Check the lanyard stop switch • Inspect the fuel system for leaks • Inspect the engine tightness on the transom • Check the steering system for binding •... -
Page 80: Flushing The Cooling System
MAINTENANCE • Inspect the engine motor mounts—dealer item 600 HOURS • Check the valve lash—dealer item Flushing the Cooling System Flush the internal water passages of the outboard with fresh water after each use in salt, polluted, or muddy water. This will help prevent a buildup of deposits from clogging the internal water passages. -
Page 81: Cowl Removal And Installation
MAINTENANCE Cowl Removal and Installation COWL REMOVAL IMPORTANT: Most maintenance points are accessible by removing the top cowl only. 1. Pull up on the top cowl lock latch. 28946 2. Pull top cowl forward and lift off. 3. Pull lower cowl release latch up. 4. -
Page 82: Battery Inspection
IMPORTANT: Verado engines require a 12‑volt absorbed glass mat (AGM) marine starting battery that meets the minimum ratings. For best performance, Mercury Marine does not recommend using flooded (wet cell), gel cell type lead acid batteries, or lithium ion batteries for starting Verado engines. - Page 83 MAINTENANCE Choose a 12‑volt absorbed glass mat (AGM) battery that meets the following ratings. USA (SAE) Verado Starting Battery Rating Required Verado starting 12‑volt absorbed glass mat (AGM) battery battery 800 minimum marine cranking amps with a Required marine cranking amps minimum reserve capacity of 135 minutes (MCA) and reserve capacity RC25 rating...
-
Page 84: Air Filter (200-300)
MAINTENANCE A decal advising against using deep cycle batteries and wing nuts should be placed on or near the battery box for future service reference. One 5/16 in. and one 3/8 in. hex nut are supplied per battery for wing nut replacement. Metric hex nuts are not supplied. -
Page 85: Air Filter (350, 350 Pro)
MAINTENANCE Tube Ref Description Where Used Part No. 4 Stroke 10W30 Air filter element 92-8M0078625 Outboard Oil AIR FILTER INSTALLATION 1. Install crankcase ventilation hose. 2. Install air filter assembly and tighten clamp screw securely. Air Filter (350, 350 Pro) The air filter is an integral component of the flywheel guard. - Page 86 MAINTENANCE FUEL LINE INSPECTION Visually inspect the fuel line for cracks, swelling, leaks, hardness, or other signs of deterioration or damage. If any of these conditions are found, the fuel line must be replaced. IN-LINE FUEL FILTER SLEEVE REMOVAL This engine is equipped with an in‑line fuel filter sleeve installed in the fuel inlet hose, inside the engine cowl.
- Page 87 MAINTENANCE VESSEL MOUNTED WATER-SEPARATING FUEL FILTER This engine requires a vessel mounted water‑separating fuel filter. The filter should be replaced annually or every 100 hours, whichever occurs first. WARNING Fuel is flammable and explosive. Ensure that the key switch is off and the lanyard is positioned so that the engine cannot start.
-
Page 88: Corrosion Control Anodes
MAINTENANCE 9. Open the fuel valve, if equipped. 10. Start the engine and inspect the area for fuel leaks. Repair as required. NOTE: After replacing the water‑separating fuel filter, the engine may stall or develop a slight hesitation and should clear itself of entrained air within a few minutes. -
Page 89: Trim Wear Pad Replacement
MAINTENANCE Two anodes are located on each side of the gearcase, with a third positioned on the underside of the antiventilation plate. Another anode is installed on the bottom of the pedestal. Two more anodes are located on the bottom of each power trim ram. -
Page 90: Propeller Replacement
MAINTENANCE IMPORTANT: Always use new mounting screws when installing trim wear pads. 36869 M6 x 20 screw with patch lock pad (8) Trim wear pad (2) Trim manifold Description lb‑in. lb‑ft M6 x 20 screw (8) – Propeller Replacement 1. Shift the outboard into the neutral position. 2. - Page 91 Remove the propeller nut. 29592 4. Pull the propeller straight off of the shaft. 5. To aid in the future removal of the propeller, liberally coat the propeller shaft splines with one of the following Mercury products: Tube Ref Description Where Used Part No.
- Page 92 MAINTENANCE 45233 Flo-Torq ll propeller with a hub bushing Forward thrust washer Hub bushing Drive sleeve Propeller Drive sleeve adapter Propeller nut retainer Propeller nut Raised pins Tabs bent against the locknut b. Place a block of wood between the gearcase and the propeller. Tighten the propeller nut to the specified torque.
-
Page 93: Spark Plug Inspection And Replacement
MAINTENANCE a. Install the hub components in the sequence shown. 58119 Propeller nut Washer, 38 mm (1.5 in.) diameter Belleville washer, 38 mm (1.5 in.) diameter Thick washer, 46 mm (1‑13/16 in.) diameter Propeller hub b. Place a block of wood between the gearcase and the propeller. Tighten the propeller nut to the specified torque. - Page 94 MAINTENANCE 5. Remove the spark plugs. Replace the spark plug if the electrode is worn; the insulator is rough, cracked, broken, or blistered; or if the precious metal is not visible on the spark plug electrode. IMPORTANT: The color of the plug may not accurately reflect its condition. To accurately diagnose a faulty plug, inspect the precious metal on the plug's electrode.
-
Page 95: Fuses
MAINTENANCE 7. Saltwater use ‑ Apply Anti‑Seize Compound only onto the threads of the spark plugs. Tube Ref Description Where Used Part No. Anti-Seize Spark plug threads 92-898101385 Compound 8. Before installing spark plugs, clean off any dirt on the spark plug seats. Install the plugs finger‑tight and then tighten an additional 1/4 turn or tighten to the specified torque. - Page 96 MAINTENANCE The electrical wiring circuits on the outboard are protected from overload with fuses. If a fuse is blown, try to locate and correct the cause of the overload. If the cause is not found, the fuse may blow again. Remove the fuse puller from the holder.
-
Page 97: Dts Wiring System
MAINTENANCE DTS Wiring System WARNING Splicing or probing will damage the wire insulation allowing water to enter the wiring. Water intrusion may lead to wiring failure and loss of throttle and shift control. To avoid the possibility of serious injury or death from loss of boat control, do not splice or probe into any wire insulation of the DTS system. -
Page 98: Checking Power Trim Fluid
Pedestal 29312 5. The fluid level should be approximately 25 mm (1 in.) from the top of the fill neck. Add Quicksilver or Mercury Precision Lubricants Power Trim and Steering Fluid. If not available, use automotive automatic transmission fluid (ATF). -
Page 99: Changing Engine Oil
2. Place the outboard in a vertical position. 3. Remove the dipstick. 4. Install the oil extraction tube to the crankcase oil pump. NOTE: The oil extraction tube can be purchased from a Mercury Marine Outboard or MerCruiser service dealership. - Page 100 MAINTENANCE 5. Insert the oil extraction tube into the oil dipstick hole until the tube is at the bottom of the engine oil sump. 6. Pump the engine oil into an appropriate container. Crankcase Oil Pump 91‑90265A 5 Aids in the removal of engine oil without draining the crankcase.
- Page 101 MAINTENANCE Oil Drain Funnel 91‑892866A01 Diverts draining engine oil from contacting the antisplash and anticavitation plates. 4993 5. Remove the drain plug/seal washer and drain the engine oil into a container. 6. Install the drain plug/seal washer. CHANGING OIL FILTER IMPORTANT: To reduce or prevent oil spillage when removing the oil filter, ensure the outboard is upright (not tilted) and the engine is cold or has not run for at least one hour.
-
Page 102: Gearcase Lubrication
MAINTENANCE OIL FILLING 1. Remove the oil fill cap and add the recommended oil to the midpoint of the operating range (midpoint of crosshatched region on the dipstick). Adding approximately 7.0 L (7.4 US qt) will bring the oil level to midpoint of the crosshatched region on the dipstick. - Page 103 Gearcase Lubricant Capacity Gearcase lubricant capacity is approximately 970 ml (32.8 fl oz). Gearcase Lubricant Recommendation Mercury or Quicksilver High Performance Gear Lubricant. Checking Lubricant Level and Refilling Gearcase 1. Place outboard in a vertical operating position. 2. Remove vent plug/sealing washer.
- Page 104 Gearcase Lubricant Capacity Gearcase lubricant capacity is approximately 850 ml (28.7 fl oz). Gearcase Lubricant Recommendation Mercury or Quicksilver High Performance Gear Lubricant. Draining Gearcase 1. Place the outboard in a vertical operating position. 2. Remove the propeller. Refer to Propeller Replacement.
- Page 105 7. Tighten the plugs to the specified torque. Description lb‑in. lb‑ft Plugs 11.3 – HEAVY DUTY 137 MM (5.4 IN.) DIAMETER GEARCASE Gearcase Lubricant Capacity Gearcase lubricant capacity is approximately 510 ml (17.2 fl oz). Gearcase Lubricant Requirement Mercury or Quicksilver High Performance Gear Lubricant.
- Page 106 MAINTENANCE Tube Ref Description Where Used Part No. High Performance Gearcase 92-858064K01 Gear Lubricant Draining Gearcase 1. Place the outboard in a vertical operating position. 2. Remove the propeller. Refer to Propeller Replacement. 3. Place a pan below the gear housing to capture the lubricant. 4.
- Page 107 MAINTENANCE 2. Remove the lubricant level plug. Verify the sealing washer is not adhered to the bearing carrier. The lubricant should be level with the hole or slowly leak from the hole. IMPORTANT: Replace the sealing washers if damaged. 3. If lubricant is not visible at the lubricant level hole, remove the fill/drain plug and add lubricant until it appears at the lubricant level hole.
-
Page 108: Storage Preparation
Stabilizer Protecting External Outboard Components • Touch up any paint nicks. See your dealer for touch‑up paint. • Spray Quicksilver or Mercury Precision Lubricants Corrosion Guard on external metal surfaces (except corrosion control anodes). Tube Ref Description Where Used Part No. -
Page 109: Gearcase
STORAGE • Remove pencil coils and spark plugs. • Spray approximately 30 ml (1 fl oz) of Storage Seal Rust Inhibitor into each spark plug hole. Tube Ref Description Where Used Part No. Storage Seal Rust Spark plug holes 92-858081K03 Inhibitor •... -
Page 110: Troubleshooting
TROUBLESHOOTING Starter Motor Will Not Crank the Engine POSSIBLE CAUSES • Lanyard stop switch not in RUN position. • Blown 5‑amp fuse. Check DTS power harness circuit fuse. Refer to Maintenance section. • Remote control is not shifted to the neutral position. •... -
Page 111: Performance Loss
TROUBLESHOOTING a. Engine fuel filter is obstructed. Refer to Maintenance section. b. Fuel tank filter obstructed. c. Stuck anti‑siphon valve located on permanently built‑in type fuel tanks. d. Fuel line is kinked or pinched. • Fuel system is not primed. •... -
Page 112: Owner Service Assistance
STOLEN POWER PACKAGE If your power package is stolen, immediately advise the local authorities and Mercury Marine of the model and serial numbers and to whom the recovery is to be reported. This information is maintained in a database at Mercury Marine to aid authorities and dealers in the recovery of stolen power packages. - Page 113 OWNER SERVICE ASSISTANCE RESOLVING A PROBLEM Satisfaction with your Mercury product is important to your dealer and to us. If you ever have a problem, question or concern about your power package, contact your dealer or any authorized Mercury dealership. If you need additional assistance: 1.
-
Page 114: Ordering Literature
Before ordering literature, have the following information about your power package available: Model Serial Number Horsepower Year UNITED STATES AND CANADA For additional literature for your Mercury Marine power package, contact your nearest Mercury Marine dealer or contact: Mercury Marine Telephone Mail Mercury Marine (920) 929‑5110 (920) 929‑4894... - Page 115 OWNER SERVICE ASSISTANCE Mercury Marine Submit the following Attn: Publications Department order form with payment W6250 Pioneer Road P.O. Box 1939 Fond du Lac, WI 54936-1939 Ship To: (Copy this form and print or type–This is your shipping label) Name...
-
Page 116: Installation Information
51965 Fastening Hardware Specification (Not Factory Supplied) IMPORTANT: Mercury Marine has designed and tested the engine when it is directly mounted to the transom, jack plate, or setback plate using the mounting hardware included with the engine. Torque requirements have been established using the hardware included with the engine. - Page 117 INSTALLATION INFORMATION Must be a hex head bolt with an unthreaded shank length of not less than 1 inch Thread size 0.50‑20 inch UNF ‑ 2A thread Material Austenitic stainless steel grade 304 or 316 90,000 psi ultimate tensile strength/50,000 psi Minimum mechanical yield strength.
-
Page 118: Accessories Mounted To The Transom Clamp Bracket
INSTALLATION INFORMATION Accessories Mounted to the Transom Clamp Bracket Mercury Marine has been made aware that certain aftermarket marine accessories, such as emergency boarding ladders, shallow water anchors, transom wedge kits, and tow sport attaching devices, have been mounted to the boat by use of the same fasteners that secure the outboard to the transom or jack plate. - Page 119 INSTALLATION INFORMATION • The installation must not create interference issues, as would an accessory mounting plate resting in the radius of the transom clamp bracket. Refer to Figure 1. 54624 Figure 1 Minimum clearance 3.175 mm (0.125 in.) Edge of accessory bracket Transom clamp bracket wall Radius Engine supplied mounting fasteners...
- Page 120 INSTALLATION INFORMATION UNACCEPTABLE ACCESSORY MOUNTING IMPORTANT: Do not use the fasteners that secure the engine to the boat (either the transom or the jack plate) for any purpose other than securing the engine to the boat. 1. Do not mount an accessory to the transom clamp bracket in an unsupported condition.
-
Page 121: Fastening The Outboard
INSTALLATION INFORMATION 3. Do not install wedges or plates between the transom clamp brackets and the transom (or jack plate). Refer to Figure 4. Figure 4 Boat transom or jack plate Transom clamp bracket Wedge/plate 54058 Fastening the Outboard WARNING Failure to correctly fasten the outboard could result in the outboard propelling off the boat transom resulting in property damage, serious injury, or death. - Page 122 INSTALLATION INFORMATION REQUIRED MOUNTING INSTALLATION 200–350 HP The outboard must be secured to the boat transom with the four 12.7 mm (1/2 in.) diameter mounting screws, locknuts, and washers provided. Install two screws through the upper set of mounting holes and two screws through the lower set of mounting slots.
-
Page 123: Maintenance Log
MAINTENANCE LOG Maintenance Log Record all maintenance performed on your outboard here. Be sure to save all work orders and receipts. Date Maintenance Performed Engine Hours...
Need help?
Do you have a question about the 200 Verado FourStroke and is the answer not in the manual?
Questions and answers