Table of Contents
Advertisement
Quick Links
Advertisement
Table of Contents
Troubleshooting

Related Manuals for Mercury MerCruiser Diesel Inboard 2.8L


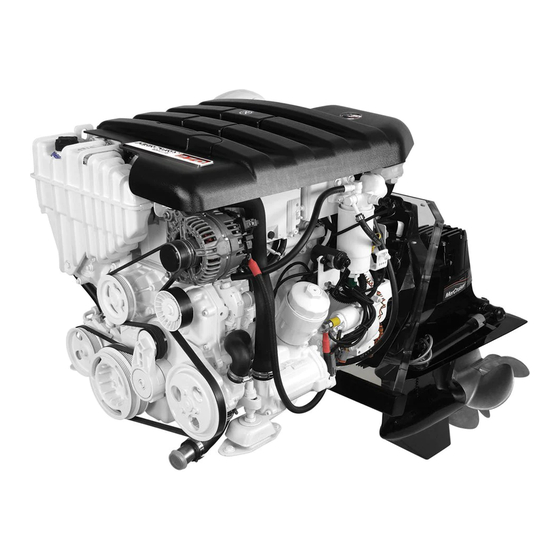
Summary of Contents for Mercury MerCruiser Diesel Inboard 2.8L
- Page 1 2.8L and 4.2L Diesel Inboard Models OPE RA TIO N & M A I NTE NA NC E M AN U AL...
- Page 3 The engine exhaust from this product contains chemicals known to the state of California to cause cancer, birth defects or other reproductive harm. The serial numbers are the manufacturer’s keys to numerous engineering details that apply to your Mercury Marine power package. When contacting Mercury Marine about service, always specify model and serial numbers.
- Page 4 At Mercury Marine every engine is operated and tested before it is boxed for shipment to make sure that the product is ready for use. In addition, certain Mercury Marine products are tested in a controlled and monitored environment, for up to 10 hours of engine run time, in order to verify and make a record of compliance with applicable standards and regulations.
-
Page 5: Table Of Contents
TABLE OF CONTENTS Section 1 - Getting to Know Your Power Package Identification................2 VesselView..............6 Serial Number Decal............2 SmartCraft Digital Instruments........6 Engine Data Label.............. 2 System Link Digital Instruments........7 ZF Marine Transmissions........... 3 Emergency Stop Switch............7 Technodrive Transmissions.......... - Page 6 Section 4 - Maintenance Owner and Operator Responsibilities........32 Draining................49 Dealer Responsibilities............32 Replacing................ 49 Cleaning Care Recommendation........... 32 Filling................51 Do Not Use Caustic Cleaning Chemicals......32 Fuel System................52 Cleaning Gauges............. 32 Priming................52 Cleaning Remote Controls..........32 Filling (Bleeding)..............
- Page 7 Section 7 - Customer Assistance Information Owner Service Assistance............78 Contact Information for Mercury Marine Customer Service Local Repair Service............78 ................... 79 Service Away From Home..........78 Customer Service Literature............ 79 Stolen Power Package............78 English Language.............. 79 Attention Required After Submersion......... 78 Other Languages..............
- Page 8 Page iv 90-8M0133679 JUNE 2017...
- Page 9 Section 1 - Getting to Know Your Power Package Section 1 - Getting to Know Your Power Package Table of Contents Identification................2 SmartCraft Digital Instruments ........ 6 Serial Number Decal............2 System Link Digital Instruments ......7 Engine Data Label............2 Emergency Stop Switch...........
-
Page 10: Identification
Section 1 - Getting to Know Your Power Package Identification The serial numbers are the manufacturer's keys to numerous engineering details that apply to your Mercury Marine power package. When contacting Mercury Marine about service, always specify model and serial numbers. -
Page 11: Zf Marine Transmissions
Section 1 - Getting to Know Your Power Package ZF Marine Transmissions On the ZF Marine 63A 8° down‑angle and 63IV V‑drive transmissions, the transmission identification plate indicates gear ratio, serial number, and model. Typical ZF Marine down-angle transmission show (V-drive similar) Transmission identification plate 7449 Technodrive Transmissions... -
Page 12: Switches
Section 1 - Getting to Know Your Power Package NOTICE The sound from an audio warning horn indicates that a critical fault malfunction has occurred. Operating a power package with a critical fault can damage components. If the audio warning horn emits a sound, do not continue operations unless avoiding a hazardous situation. -
Page 13: Keep The Lanyard Stop Switch And Lanyard Cord In Good Operating Condition
Section 1 - Getting to Know Your Power Package A decal near the lanyard stop switch reminds the operator to attach the lanyard to his or her personal flotation device or wrist. ATTACH LANYARD Lanyard cord clip Lanyard decal Lanyard stop switch 53910 Accidental ejections, such as falling overboard, are more likely to occur in: •... -
Page 14: Instrumentation
Section 1 - Getting to Know Your Power Package Before each use, inspect the lanyard cord to ensure that it is in good working condition and that there are no breaks, cuts, or wear to the cord. Check that the clips on the ends of the cord are in good condition. Replace any damaged or worn lanyard cords. -
Page 15: System Link Digital Instruments
30 seconds will restart the engine but cause fault codes to be set. Unless you are in a potentially hazardous situation, turn the key switch off and wait at least 30 seconds before restarting the engine or engines. If after restarting, some fault codes are still being displayed, contact your authorized Mercury Diesel repair facility. 90-8M0133679... -
Page 16: Remote Controls
Section 1 - Getting to Know Your Power Package Remote Controls Your boat may be equipped with Mercury Precision Parts or Quicksilver remote controls. All controls may not have all features shown. Consult your dealer for a description and/or demonstration of your remote control. -
Page 17: Overload Protection-Upper Engine Circuit Breaker Panel
If the breaker remains open, the electrical overload has not been eliminated. Further checks must be made on the electrical system. Contact your Mercury Diesel authorized repair facility. Circuit breakers provide protection for the engine electrical system. The circuit breaker panel is located beneath a small access panel in the engine cover on top of the engine. -
Page 18: Overload Protection-Port Side Power Distribution Box
After finding and correcting the cause of the overload, connect the starting battery and turn the ignition switch to the run position. The circuit breaker should automatically reset. If a circuit breaker fails to reset, contact your Mercury Diesel authorized repair facility. -
Page 19: Vessel Integration Panel (Vip) Overload Protection
Section 1 - Getting to Know Your Power Package Vessel Integration Panel (VIP) Overload Protection A vessel integration panel (VIP) is typically mounted in the engine compartment. The VIP contains three circuit breakers that help protect system wiring. Helm circuit breaker (10 A) Gear circuit breaker (15 A) SIM/Vessel circuit breaker (10 A) 50465... - Page 20 Section 1 - Getting to Know Your Power Package Notes: Page 12 90-8M0133679 JUNE 2017...
- Page 21 Section 2 - On the Water Section 2 - On the Water Table of Contents Safe Boating Recommendations.......... 14 Engine Shut Down (Stopping)........20 Carbon Monoxide Exposure..........15 Protecting People in the Water..........20 Be Alert To Carbon Monoxide Poisoning ..... 15 While Boat is in Operation ........
-
Page 22: Safe Boating Recommendations
Most boats are rated and certified for maximum load (weight) capacities (refer to your boat's capacity plate). Know your boat's operating and loading limitations. Know if your boat will float if it is full of water. When in doubt, contact your authorized Mercury Marine dealer or the boat manufacturer. Ensure that everyone in the boat is properly seated. -
Page 23: Carbon Monoxide Exposure
Section 2 - On the Water Be alert. • The operator of the boat is responsible by law to maintain a proper lookout by sight and hearing. The operator must have an unobstructed view particularly to the front. No passengers, load, or fishing seats should block the operator's view when the boat is above idle or planing transition speed. -
Page 24: Poor Ventilation
The power package must be equipped with a gear ratio and propeller that allows the engine to operate at wide‑open throttle (WOT) at the engine's rated speed (RPM). Use of Mercury Diesel engines in applications that do not meet specified operational parameters is not approved. -
Page 25: Operation Chart
At temperatures of –20° C (–4° F) and below, use a coolant heater to improve cold starting. • If operating in arctic temperatures of –29° C (–20° F) or lower, consult your Mercury Diesel authorized repair facility for information about special cold weather equipment and precautions. -
Page 26: Drain Plug And Bilge Pump
• Check all applicable items in the Maintenance Schedules and Operation Chart. • Perform any other necessary checks as indicated by your Mercury Diesel authorized repair facility or specified in your boat owner's and operation manual. Important Information—SmartStart IMPORTANT: This power package is equipped with SmartStart. SmartStart performs all appropriate starting operations upon initial start switch actuation. -
Page 27: Engine Warm-Up
Check the engine and the transmission, oil filter, oil lines, oil line connectors, and oil pan for leaks. Check the coolant hoses, heat exchanger connections, aftercooler, water pump, and drain fittings for leaks. Locate and correct any problems, or see your Mercury Diesel authorized repair facility if you are unable to determine the problem. -
Page 28: Engine Shut Down (Stopping)
If your boat is considered a high‑speed or high‑performance boat, we recommend that you never operate it at its high‑speed capability without first requesting an initial orientation and demonstration ride with your dealer or an operator experienced with your boat. For additional information, refer to the Hi‑Performance Boat Operation booklet from your Mercury Diesel authorized repair facility. -
Page 29: Boats With Front-Mounted, Raised Pedestal Fishing Seats
Section 2 - On the Water Persons on the front deck could easily be thrown overboard or persons dangling their feet over the front edge could get their legs caught by a wave and pulled into the water. mc79555-1 WARNING Sitting or standing in an area of the boat not designed for passengers at speeds above idle can cause serious injury or death. -
Page 30: Impact With Underwater Hazards
Operating a boat or engine with impact damage can result in product damage, serious injury, or death. If the vessel experiences any form of impact, have an authorized Mercury Marine dealer inspect and repair the vessel or power package. Conditions Affecting Operation... -
Page 31: Elevation And Climate
It is important to follow this procedure to properly break in the engine. IMPORTANT: Mercury Marine recommends that the boat not be accelerated hard until this procedure has been completed. IMPORTANT: Never operate the starter motor longer than 15 seconds at a time to avoid overheating the starter motor. If the engine does not start, wait one minute to allow the starter motor to cool;... -
Page 32: Engine Break-In
Check the engine oil level frequently. Add oil as needed. High oil consumption is normal during the break‑in period. After the 20-Hour Break-In Period To help extend the life of your power package, Mercury Marine recommends the following: • Change the engine oil and filter and the transmission fluid at the interval indicated in the Maintenance Schedule. Refer to Specifications and Maintenance. -
Page 33: Section 3 - Specifications
Section 3 - Specifications Section 3 - Specifications Table of Contents Fuel Requirements............... 26 Fluid Specifications............... 28 Diesel Fuel in Cold Weather..........26 Engine................28 Antifreeze/Coolant..............26 2.8L ............... 29 Engine Oil................27 4.2L ............... 29 Engine Specifications............28 Transmission..............29 2.8L Specification ............ -
Page 34: Fuel Requirements
Mercury diesels are required to use grade 2–D ULSD (ultra‑low sulphur diesel) fuel meeting ASTM Standards D975 (or fuel rated Diesel DIN EN 590), and having a minimum cetane rating of 51. -
Page 35: Engine Oil
Shell Myrina Mopar Texaco Ursa Super TD Engine crankcase Obtain Locally Wintershall Multi‑Rekord Veedol Turbostar Wintershall VIiva 1 These oils are approved by Mercury Marine and Marine Power Europe. For all temperature operation use 15W‑40 oil. 90-8M0133679 JUNE 2017 Page 27... -
Page 36: Engine Specifications
Section 3 - Specifications Engine Specifications 2.8L Specification Description Specifications Engine type In‑line 4‑cylinder diesel Displacement 2.8 L (169 cid) Horsepower Kilowatts Firing order 1‑3‑4‑2 Bore 94 mm (3.700 in.) Stroke 100 mm (3.937 in.) Rated engine RPM 3800 Idle RPM in neutral (engine at normal operating temperature) Oil pressure at idle 2.4 bar (240 kPa [35 psi]) Oil pressure at 3800 RPM... -
Page 37: Transmission
Fluid Type Part Number Engine oil (with filter) 8.9 (9.4) 15W‑40 4‑cycle Diesel Engine Oil 92‑858042K01 Closed cooling system 11 (11.6) Mercury Extended Life Antifreeze 92‑877770K1 4.2L All models Capacity liters (US qt) Fluid Type Part Number Engine oil (with filter) 13.8 (14.6) - Page 38 Section 3 - Specifications Notes: Page 30 90-8M0133679 JUNE 2017...
- Page 39 Section 4 - Maintenance Section 4 - Maintenance Table of Contents Owner and Operator Responsibilities........32 Draining................. 49 Dealer Responsibilities............32 Replacing............... 49 Cleaning Care Recommendation......... 32 Filling................51 Do Not Use Caustic Cleaning Chemicals...... 32 Fuel System................52 Cleaning Gauges............32 Priming................
-
Page 40: Owner And Operator Responsibilities
It is the operator's responsibility to perform all safety checks, to ensure that all lubrication and maintenance instructions are complied with for safe operation, and to return the unit to a Mercury Diesel authorized repair facility for a periodic checkup. -
Page 41: Do-It-Yourself Maintenance Suggestions
IMPORTANT: See Maintenance Schedule for complete listing of all scheduled maintenance to be performed. Some listings can be done by the owner or operator, while others should be performed by an authorized Mercury Diesel repair facility. Before attempting maintenance or repair procedures not covered in this manual, we recommended that you purchase the appropriate Mercury Diesel service manual and read it thoroughly. -
Page 42: Maintenance Schedule
Section 4 - Maintenance Lift and detach the engine cover from the mounts. 24727 24522 Engine cover Engine cover with access panel showing Engine cover Engine cover access panel location Set the engine cover over the mounts and press the cover down in the mount areas to reattach the engine cover. Maintenance Schedule Routine Maintenance NOTE: Perform only the maintenance tasks that apply to your particular power package. -
Page 43: Scheduled Maintenance
Section 4 - Maintenance Scheduled Maintenance After first 50 hours • Clean the transmission oil filter and change the transmission oil. • Touch‑up the power package with paint and spray with Corrosion Guard. Annually • Clean the transmission oil filter and change the transmission oil. •... -
Page 44: Filling
Section 4 - Maintenance Remove the dipstick and observe the oil level. The oil level must be between the marks on the dipstick. If necessary, add oil. Refer to Filling. Typical Oil fill cap Dipstick Maximum mark Minimum mark 37285 Filling IMPORTANT: Do not overfill the engine with oil. - Page 45 Section 4 - Maintenance Install the crankcase oil pump (order separately) onto the threaded fitting of the oil drain hose. Typical Threaded fitting Oil drain hose Crankcase oil pump 23306 Crankcase oil pump 91‑90265A 5 Aids in the removal of engine oil without draining the crankcase. 11591 Pump the oil out of the crankcase into the drain pan.
-
Page 46: Zf Marine Transmission Fluid
Section 4 - Maintenance 13. Push the filter element onto the top piece until it is locked. Listen for a click. 14. Install the top piece with the new filter element into the oil filter housing. IMPORTANT: Overtightening the top piece will cause deformation resulting in oil leakage. 15. -
Page 47: Add Fluid
Section 4 - Maintenance NOTE: If the transmission fluid level was extremely low, see your local Mercury Diesel authorized repair facility. Install the dipstick. Add Fluid If necessary, add the specified automatic transmission fluid through the dipstick threaded hole to bring the level up to the maximum mark on the dipstick. -
Page 48: Technodrive Transmission Fluid
Section 4 - Maintenance Pump the fluid from the housing into a suitable container. Dispose of the fluid properly. Suction pipe Suction pump 13165 Remove and discard the filter element and the O‑rings. Coat the new O‑rings with transmission fluid. Install the new O‑rings and filter element. -
Page 49: Add Fluid
If the fluid level is low, add transmission fluid to bring the level up to the maximum mark on the dipstick. See Add Fluid. NOTE: If the transmission fluid level was extremely low, see your local Mercury Diesel authorized repair facility. -
Page 50: Change Fluid
Section 4 - Maintenance Change Fluid NOTICE Discharge of oil, coolant, or other engine/drive fluids into the environment is restricted by law. Use caution not to spill oil, coolant, or other fluids into the environment when using or servicing your boat. Be aware of the local restrictions governing the disposal or recycling of waste, and contain and dispose of fluids as required. - Page 51 Section 4 - Maintenance Remove the filter element. Filter element 24618 Clean the filter element with a mild cleaning solvent, obtained locally. 10. Lubricate the O‑rings with SAE Engine Oil 30W. Tube Ref No. Description Where Used Part No. SAE Engine Oil 30W Transmission filter element O-ring Obtain Locally 11.
-
Page 52: Engine Coolant
Inspect the gasket in the pressure cap for damage and replace if necessary. The pressure cap maintains pressure on the cooling system and may not be holding pressure properly. To have the cap tested, contact your Mercury Diesel authorized repair facility. Add the specified coolant as necessary. -
Page 53: Filling
Bottom of fill neck 23248 Description Where Used Part Number Mercury Extended Life Antifreeze Closed‑cooling system 877770K1 IMPORTANT: When installing the pressure cap, be sure to tighten it securely to prevent coolant loss. Install the pressure cap. Tighten securely. Changing Change (replace) the engine coolant at the prescribed interval. -
Page 54: Inspection
Section 4 - Maintenance Remove the air filter cartridge from the air filter bracket mounted on the turbocharger inlet. Shown removed from the engine for clarity only Air filter cartridge Air filter bracket 12618 Inspection The air filter cannot be cleaned. Replace the air filter if it is dirty or contaminated. Replace the air filter if the foam element is deteriorated or torn. -
Page 55: Inspection
Section 4 - Maintenance Loosen the clamp and remove the air filter housing from the turbocharger inlet. Oil separator vent hose Air filter housing Turbocharger Clamp 25881 Remove the air filter element from the air filter housing Air filter housing Air filter element 25893 Inspection... -
Page 56: Installation
Section 4 - Maintenance Installation Slide the filter element into the air filter housing. Ensure that the element is seated fully into the air filter housing. Air filter housing Air filter element 25893 NOTE: The warning labels on the air filter housing must be visible after the air filter housing is installed. Install the air filter housing on to the turbocharger inlet. -
Page 57: Draining
Section 4 - Maintenance The engine‑mounted water‑separating fuel filter is equipped with a water‑in‑fuel (WIF) sensor that should alert the operator when water is present in the filter. This fuel filter needs to be replaced at specified intervals or whenever water is detected in the fuel, whichever comes first. - Page 58 Section 4 - Maintenance Remove the water‑separating fuel filter and sealing ring from the mounting bracket. Do not use a filter wrench. Typical Water‑separating fuel filter 23459 NOTE: It may be necessary to keep the existing drain cap and use it on the new filter. Be sure to replace the O‑ring on the drain cap.
-
Page 59: Filling
13. Connect the battery cables. 14. Start and operate the engine. Check the filter connection for fuel leaks. If leaks exist, recheck the filter installation. If leaks continue, stop the engine immediately and contact your Mercury Diesel authorized repair facility. Filling A type of hand pump and primer plunger is located on the fuel filter bracket and is used to •... -
Page 60: Fuel System
Section 4 - Maintenance Loosen the air vent (bleed) screw on the fuel filter bracket. Typical Air vent screw 23469 Move the primer plunger up and down repeatedly. The filter is full when an air‑free stream of fuel flows from the air vent screw. -
Page 61: Fuel Tank Cleaning And Flushing
Section 4 - Maintenance Fuel Tank Cleaning and Flushing IMPORTANT: Diesel fuel should not be left in the tank during winter storage, as an accumulation of rust, sludge, and wax residue will form. Refer to the boat manufacturer's instructions and clean the fuel tank at specified intervals. Unless specified otherwise, flush and clean the diesel fuel tank every 1000 hours or five years, whichever occurs first. - Page 62 Section 4 - Maintenance Remove the drain plug, or fitting (if equipped), from the aft end cover of the engine oil cooler. Typical engine Engine oil cooler Drain plug, or fitting (if equipped) 23295 NOTE: In the following steps, the hoses may require lowering or bending to allow seawater to drain completely. Disconnect the seawater inlet hose from the connector on the seawater pump hose and drain.
-
Page 63: Checking The Seawater Pickups
Section 4 - Maintenance Install the sealing washer and drain plug, if equipped. 37290 Typical seawater strainers After the seawater has completely drained, apply sealant to the threads of the drain plugs or fittings (if equipped). Install and tighten the drain plugs or fittings. Tube Ref No. - Page 64 Section 4 - Maintenance Inspect the cover gasket and replace if damaged. Screws and washers Cover with glass Strainer Housing Drain plug and sealing washer Seal 12863 For plastic seawater strainers: Remove the cover. Remove the strainer. Clean any debris from the strainer housing. Flush both the strainer and housing with clean water.
-
Page 65: Flushing The Seawater System-Inboard Models
Section 4 - Maintenance Tighten the cover screws. Do not overtighten. Screws and washers Cover with glass Strainer Housing Drain plug and sealing washer Seal 12863 For plastic seawater strainers: Insert the plastic strainer basket. Check the cover seal installation. Screw the strainer cover on. -
Page 66: With The Boat In The Water
Section 4 - Maintenance Remove the propeller. Refer to the boat manufacturer's instructions. Disconnect the seawater inlet hose from the seawater pickup pump connection. Using an suitable adapter, connect a flushing hose from a water tap to the seawater inlet hose connected to the seawater pump inlet. -
Page 67: Engine Seawater Pump Inspection
Engine Seawater Pump Inspection IMPORTANT: Mercury strongly recommends that this service be performed by a Mercury Diesel authorized repair facility. Remove and inspect the engine seawater pump at the interval specified in the Maintenance Schedule. See your Mercury Diesel authorized repair facility. -
Page 68: Replacing The Engine Coolant In The Closed-Cooling System
Section 4 - Maintenance Replacing the Engine Coolant in the Closed‑Cooling System Draining the Closed‑Cooling System NOTICE Discharge of oil, coolant, or other engine/drive fluids into the environment is restricted by law. Use caution not to spill oil, coolant, or other fluids into the environment when using or servicing your boat. Be aware of the local restrictions governing the disposal or recycling of waste, and contain and dispose of fluids as required. -
Page 69: Filling The Closed-Cooling System
After the coolant has drained completely, install the intake and exhaust manifold drain plug, the heat exchanger drain plug, and the engine block drain plug. Tighten all drain plugs securely. If required, clean the closed‑cooling system. See your local Mercury Diesel authorized repair facility. Fill the system with the specified coolant. Refer to Filling the Closed‑Cooling System. -
Page 70: Corrosion Protection
To help control the effects of galvanic corrosion, Mercury power packages come with several sacrificial anodes and other corrosion protection devices. For a more comprehensive explanation of corrosion and corrosion protection refer to the Marine Corrosion Protection Guide. -
Page 71: Cleaning And Inspection
Section 4 - Maintenance Remove the anode assembly (anode plug and the sacrificial anode) from the aft end of the fluid cooler. Typical engine Anode assembly Fluid cooler 23710 Cleaning and Inspection Inspection and replacement interval will vary according to the condition of the seawater and the mode of engine operation. NOTE: Using sandpaper, fiber brush, or cleaning pad, remove the deposits from the surface of the anode before trying to determine the amount of erosion. -
Page 72: Antifouling Paint
IMPORTANT: Corrosion damage that results from the improper application of antifouling paint is not covered by the limited warranty. In some areas it may be advisable to paint the bottom of the boat to help prevent marine growth. Contact a Mercury Diesel authorized repair facility for recommendations for your boat. -
Page 73: Lubrication
Section 4 - Maintenance Lubrication Throttle Cable Lubricate the pivot points and guide contact surfaces. Pivot points Guide contact surfaces 23643 Tube Ref No. Description Where Used Part No. SAE Engine Oil 30W Throttle cable pivot points and guide contact surfaces Obtain Locally Shift Cable Lubricate the pivot points and guide contact surfaces. -
Page 74: Serpentine Belt
Section 4 - Maintenance WARNING Inspecting the belts with the engine running may cause serious injury or death. Turn off the engine and remove the ignition key before adjusting tension or inspecting belts. 4.2L inboard shown, 2.8L similar Water circulating pump pulley Alternator pulley Idler Automatic tensioner... -
Page 75: Replacement
Section 4 - Maintenance Release the automatic tensioner and allow it to glide back slowly. The automatic tensioner must return to the initial position and hold tension on the serpentine belt. Replacement IMPORTANT: If a belt is to be reused, it should be installed in the same direction of rotation as when first used. Position a suitable tool in the automatic tensioner release slot. - Page 76 Section 4 - Maintenance Battery Isolators. Isolators can be used to charge an auxiliary battery used for powering accessories in the boat. They should not be used to charge the battery of another engine in the boat unless the type of isolator is specifically designed for this purpose.
-
Page 77: Section 5 - Storage
Section 5 - Storage Section 5 - Storage Table of Contents Cold Weather (Freezing Temperature), Seasonal Storage, Seasonal Storage............71 and Extended Storage............70 Extended Storage Instructions........72 Cold Weather (Freezing Temperature) Storage.... 70 Battery................72 Preparing Your Power Package for Seasonal or Recommissioning.............. -
Page 78: Cold Weather (Freezing Temperature), Seasonal Storage, And Extended Storage
Section 5 - Storage Cold Weather (Freezing Temperature), Seasonal Storage, and Extended Storage IMPORTANT: Mercury Marine strongly recommends that this service be performed by a Mercury Diesel authorized repair facility. Damage caused by freezing is not covered by the Mercury Marine Limited Warranty. -
Page 79: Seasonal Storage
Clean the outside of the engine and repaint any areas required with primer and spray paint. After the paint has dried, coat the engine with the specified corrosion inhibiting oil or equivalent. Description Where Used Part Number Corrosion Guard 92‑802878‑55 Light gray primer Outside of engine 92‑802878‑52 Mercury Diesel White 8M0108939 90-8M0133679 JUNE 2017 Page 71... -
Page 80: Extended Storage Instructions
Read all precautions and perform all procedures found in Seasonal Storage instructions. IMPORTANT: The seawater pump impeller material can be damaged by prolonged exposure to direct sunlight. Remove the seawater pump impeller and store away from direct sunlight. Refer to a Mercury Diesel authorized repair facility for additional information and service. -
Page 81: Section 6 - Troubleshooting
Section 6 - Troubleshooting Section 6 - Troubleshooting Table of Contents Diagnosing Electronically Controlled Fuel System Problems Poor Performance............74 ....................74 Incorrect Engine Temperature........75 Troubleshooting Charts............74 Low Engine Oil Pressure..........75 Starter Motor Will Not Crank Engine, or Cranks Slow... 74 Battery Will Not Charge.......... -
Page 82: Diagnosing Electronically Controlled Fuel System Problems
Diagnosing Electronically Controlled Fuel System Problems A Mercury Diesel authorized repair facility has the proper service tools for diagnosing problems on electronically controlled fuel systems. The engine control module (ECM) on these engines has the ability to detect problems with the system when they occur, and store a trouble code in the ECM's memory. -
Page 83: Incorrect Engine Temperature
Obstruction in the shift or throttle linkages. Remove the obstruction. Check all throttle linkages. If any are loose or missing, see a Mercury Loose or missing shift and throttle linkages. Diesel authorized repair facility immediately. Straighten cable or have a Mercury Diesel authorized repair facility Shift or throttle cable kinked. - Page 84 Section 6 - Troubleshooting Possible Cause Remedy Improper shift cable adjustment. Have adjustment checked by a Mercury Diesel authorized repair facility. Page 76 90-8M0133679 JUNE 2017...
- Page 85 Section 7 - Customer Assistance Information Section 7 - Customer Assistance Information Table of Contents Owner Service Assistance............ 78 Contact Information for Mercury Marine Customer Local Repair Service ............ 78 Service ................. 79 Service Away From Home ..........78 Customer Service Literature..........79 Stolen Power Package ..........
-
Page 86: Owner Service Assistance
If your power package is stolen, immediately inform the local authorities and Mercury Marine of the model and serial numbers and to whom the recovery is to be reported. This information is maintained in a database at Mercury Marine to aid authorities and dealers in recovery of stolen power packages. -
Page 87: Contact Information For Mercury Marine Customer Service
Attn: Publications Department W6250 Pioneer Road P.O. Box 1939 Fond du Lac, WI 54936-1939 Outside the United States and Canada, contact the nearest Mercury Marine or Marine Power International Service Center for further information. When ordering be sure to: •... -
Page 88: Other Languages
Section 7 - Customer Assistance Information Other Languages To obtain an Operation, Maintenance and Warranty Manual in another language, contact the nearest Mercury Marine or Marine Power International Service Center for information. A list of part numbers for other languages is provided with your power package. -
Page 89: Section 8 - Maintenance Log
Section 8 - Maintenance Log Section 8 - Maintenance Log Table of Contents Scheduled Maintenance Log..........82 Vessel Maintenance Notes........... 83 90-8M0133679 JUNE 2017 Page 81... -
Page 90: Scheduled Maintenance Log
Section 8 - Maintenance Log Scheduled Maintenance Log 100 Hours Actual Hours Service Notes Dealer Name Signature Date 200 Hours Actual Hours Service Notes Dealer Name Signature Date 300 Hours Actual Hours Service Notes Dealer Name Signature Date 400 Hours Actual Hours Service Notes Dealer Name... -
Page 91: Vessel Maintenance Notes
Section 8 - Maintenance Log Vessel Maintenance Notes Record all general maintenance performed on your power package here. Save all work orders and receipts. Engine Date Maintenance Completed Servicing Dealer Hours 90-8M0133679 JUNE 2017 Page 83... - Page 93 Parc Industriel de Petit-Rechain 41-71 Bessemer Drive P.O. Box 1939 B-4800 Verviers, Belgium Dandenong South, Victoria 3175 Australia Fond du Lac, WI 54936-1939 USA 90-8M0133679 JUNE 2017 © Mercury Marine. All rights reserved. Printed in U.S.A.
Need help?
Do you have a question about the MerCruiser Diesel Inboard 2.8L and is the answer not in the manual?
Questions and answers