Table of Contents
Advertisement
f i r e - p a r t s . c o m
INSTALLATION & OPERATING INSTRUCTIONS
WARNING: THIS APPLIANCE TO BE USED ONLY AS AN INSERT IN
SOLID FUEL BURNING FIREPLACES.
:
NOTE
THE NATURAL VENT
WARNING: This product must be installed by a licensed plumber or gas fitter when installed in the commonwealth of Massachusetts. Improper installation,
adjustment, alteration, service or maintenance can cause injury or property damage. Refer to this manual. For assistance or additional information consult a
qualified installer, service agency or the gas supplier.
FOR YOUR SAFETY: DO NOT STORE OR USE GASOLINE OR OTHER
FLAMMABLE VAPORS AND LIQUIDS IN THE VICINITY OF THIS OR ANY
OTHER APPLIANCE.
FOR YOUR SAFETY: WHAT TO DO IF YOU SMELL GAS:
1. OPEN WINDOWS.
2. DON'T TOUCH ELECTRICAL SWITCHES.
3. DO NOT USE ANY PHONE IN YOUR BUILDING
4. EXTINGUISH ANY OPEN FLAME
5. IMMEDIATELY CALL YOUR GAS SUPPLIER FROM A NEIGHBOR'S
PHONE.
6. FOLLOW THE GAS SUPPLIERS INSTRUCTIONS.
7. IF GAS SUPPLIER IS UNAVAILABLE, CALL YOUR FIRE DEPARTMENT.
WARNING: IMPROPER INSTALLATION, ADJUSTMENT, ALTERATION,
SERVICE OR MAINTENANCE CAN CAUSE INJURY OR PROPERTY
DAMAGE. REFER TO THIS MANUAL. FOR ASSISTANCE OR
ADDITIONAL INFORMATION, CONSULT A QUALIFIED INSTALLER,
SERVICE AGENCY, OR THE GAS SUPPLIER.
MISE EN GARDE: Installation, réglage, modification, entretien ou depannage non appropriés pourront causer des blessures ou des dommages materiels. Réferéz-vous au manuel du
proprietaire fourni avac cet appariel. Pour assistance ou renseignements complémentaires, veuillez consulter un installateur expérimenté, une agence dé depannage/entreitien ou cotre
compagnie gaziére. Pour utilisation avec les portes en verre certifiée l'appareil suelement. Ne pas opérer avec le verriére enlever, craquelure, brise.
MENDOTA "SEABROOK"
DIRECT VENT
GAS FIREPLACE INSERT
HEARTHGLO COMBUSTION SYSTEM
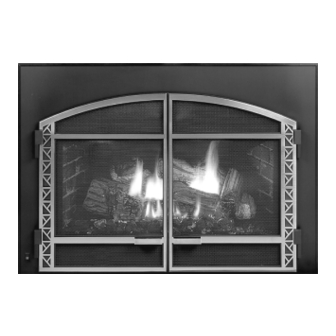
Model D-40 Deep Timber: Flat or Bay
(D40 Flat shown with optional Andover Door and Overlay)
(B-V
)
ENT
SYSTEM CANNOT BE USED TO VENT THIS INSERT MODEL
WITH
NO. DT-0704
AVERTISSEMENT: Cet appareil a etre employe seulment comme un inserer dans
lecarburant solide brulant des cheminees.
POUR VOTRE Sécurité: Ne pas entreposer ni utiliser d'essence ni d'autre vaperures ou liquides
inflammables dans le voisinage de cet appareil ou de tout autre appareil.
POUR VOTRE Sécurité: Que faire si vous sentez une odeur de gaz:
1. Ne pas tenter d'allumer d'appareil
2. Ne touchez à aucun interrupteur. Ne pas vous servir des télé phones se trouvant dans le
batiment ou vous vous trouvez.
3. Evacuez la pièce, le bâtiment ou la zone.
4. Appelez immédiatement votre fournisseur de gaz depuis un voisin. Suivez les instructions du
fournisser.
5. Si vous ne pouvez rejoindre le fournisseur de gas, appelez le service dos incendies.
AVERTISSEMENT: Une installation, un réglage, une modification, un entretien ou une
maintenance incorrects peuvent entrainer des dommages matériels, des lésions corporelles ou la
perte de vies humaines. Consuter le manuel des usagers fourn avec ce generateur d'air chaud.
!
Advertisement
Table of Contents

Related Manuals for Mendota SEABROOK D-40


Summary of Contents for Mendota SEABROOK D-40
-
Page 1: Direct Vent
MENDOTA "SEABROOK" DIRECT VENT GAS FIREPLACE INSERT WITH HEARTHGLO COMBUSTION SYSTEM Model D-40 Deep Timber: Flat or Bay f i r e - p a r t s . c o m (D40 Flat shown with optional Andover Door and Overlay) INSTALLATION &... -
Page 2: Table Of Contents
Gas appliances must be tested and certified by a nationally recognized testing and certification agency to American National Standards Institute - ANSI Gas Appliance Safety Standards. For more information see Pg. 37. The Mendota Gas Fireplace Insert has been tested and certified by Intertek Testing Services. 8431 Murphy Drive, Middleton, WI 53562. -
Page 3: Congratulations
Insert MUST be replaced prior to operating the Insert. The Mendota Gas Insert is a powerful, efficient heating unit. It has been designed as a major source of supplemental heat. It should not take the place of, or be used as, a whole house heating system. -
Page 4: General Information
The D-40 Fireplace Insert must be installed and serviced by a Mendota approved serviceperson. Any adjustments to burner, pilot, logs or coal bed must be made by a Mendota approved service person. Pilot flame must be checked with a voltmeter. Pilot flame must register a minimum of 325 on (DC) millivolt meter. If pilot goes out, always wait five (5) minutes before relighting pilot. -
Page 5: Specifications & Clearances
MENDOTA D-40 GAS DIRECT VENT FIREPLACE INSERT SPECIFICATIONS & CLEARANCES 16 1/4 13 1/4 8 IN. MIN. CLEARANCE MANTEL 12" MIN. FROM TOP TRIM D-40 Surround Dimensions OF GRILL TO MANTEL f i r e - p a r t s . c o m... - Page 6 MENDOTA D-40 GAS DIRECT VENT FIREPLACE INSERT SPECIFICATIONS & CLEARANCES 16 1/4 13 1/4 8 IN. MIN. CLEARANCE MANTEL 12" MIN. D-40 Surround Dimensions FROM TOP TRIM OF GRILL TO MANTEL f i r e - p a r t s . c o m...
-
Page 7: Installation Instructions
CAUTION: Each installation must conform to all local, state and national codes. Refer to the national fuel gas code and local zoning and code authorities for details on installation requirements. The Mendota Inserts must be vented to the outside in accordance with the latest edition of the National Fuel Gas Code. -
Page 8: Flue Venting
FLUE VENTING The D-40 Insert must be vented vertically to the outside and must use the Mendota flexible ducting system. There are two methods for venting Mendota Direct Vent Inserts: 1) Co-Axial and 2) Co-Linear f i r e - p a r t s . c o m FIGURE 3 CO-AXIAL VENT KIT (Typically for factory built ZC fireplaces.) - Page 9 AA-11-377 CO-LINEAR VENT KIT FIGURE 4 NOTE: THE INSERT IS DESIGNED, TESTED & LISTED FOR OPERATION ONLY WITH MENDOTA INSERT VENTING COMPONENTS AS LISTED IN FIGURES 3, 3A, 4 & 4A. (See FIGURE 4A) The vent kits include a trimable flashing. Measure, trim and shape flashing to fit the existing flue liner.
- Page 10 12. Attach a sheet metal strap loop to the flex end of the liner(s) and tie a rope to it. Two installers should proceed to the roof and drop the rope (with weight on the end to make sure it goes all the way down) and insert the liner(s) past the flexible portion, into the existing chimney [See FIGURE 5].
- Page 11 , REFER TO PAGE 7. Use Mendota Co-Linear Vent Kit -- # AA-11-00377 4" exhaust flex pipe extends full length of chimney - from vent boot adapter to vent cap. 4" inlet flex pipe extends from vent boot adapter to existing chimney, above damper area (aprox.4-5 ft.).
- Page 12 Carefully slide the Insert into place in the fireplace opening. At this time, check that Insert is level and plumb with the fireplace opening and positioned in the middle of the opening. If Insert is unsteady or needs leveling, the unit may be leveled by adjusting the four (4) leveling bolts provided within the unit. Leveling bolts are located inside the Gas Valve/Blower compartment.
- Page 13 A. Place u-clamp over threaded rod. Thread clamping nut on threaded rod and tighten firmly. B. Reinstall exhaust baffle by placing rear edge on ledge, swinging front edge upward and reinstalling two (2) sheet metal screws. CAUTION: The exhaust baffle must be reinstalled before operation.
- Page 14 22. The proper Insert surround can now be placed in position. Assemble surround by following instructions supplied with surround kit. Surround kits are available for use with each model Mendota Insert. Select the size of the surround to fill the area between the Insert and existing fireplace opening.
-
Page 15: Raised Hearth Specifications
RAISED HEARTH SPECIFICATIONS f i r e - p a r t s . c o m FIGURE 9 In most installations, a 16" non-combustible protector is required in front of the unit’s glass door surface on the floor or raised hearth. This protection can be any non-combustible material such as 24-gauge sheet metal, tile, brick, concrete board, etc. -
Page 16: Gas Supply Requirements
ADHERE STRICTLY TO LOCAL AND NATIONAL CODES. GAS SUPPLY LINE SIZING The Mendota Gas Insert comes equipped with a 3/8" N.P.T. [1.0 cm] inlet on the main gas valve. Gas supply piping may enter the cabinet from either the left or right side. -
Page 17: Gas Pressure Requirements
Failure to perform this leak test may lead to a house fire and/or an explosion. Mendota is not responsible for any damages due to an Installer’s failure to conduct a leak test and verify that all connections and supply lines are leak proof. -
Page 18: Lighting Check Off List
The following check list must be completed prior to initial lighting of the Fireplace Insert, or manufacturer's warranty and liabilities will be voided: Venting system must be installed by a Mendota approved person according to Figure 3, Pg. 7 with clamps securely in place and all joints leak proof. -
Page 19: Lighting Instructions
LIGHTING INSTRUCTIONS IMPORTANT: Be sure all items on "LIGHTING CHECK OFF LIST" [Pg. 17] have been completed! BE SURE TO CAUTION: If the pilot goes out, be sure to wait a minimum of five minutes before relighting - ALWAYS REMOVE THE GLASS BEFORE RELIGHTING THE PILOT. 1. - Page 20 13. Main burner should now light IMMEDIATELY and flame should not "lift" off burner. If there is any delay in ignition or if flame is "lifting off" burner, turn off burner and carefully check for proper installation of logs/coals, vent system and proper pilot flame impingement on burner and thermopile. Logs or coals must not block pilot flame or main burner flame.
-
Page 21: Deep Timber Log Set Installation Instructions
DEEP TIMBER LOG SET INSTALLATION INSTRUCTIONS With door removed, carefully remove the shipping foam pack, containing the logs, from inside the firebox. Cut the clear tapes and outer plastic wrap using a sharp utility knife or equivalent. Locate the 2 bags of coals and the log pieces. - Page 22 Place Log “A” between Rear Brick Panel and rear-most burner tube – centered left to right in firebox. NOTE: FOR USE WITH NATURAL GAS, SLIDE THIS LOG FORWARD UNTIL FRONT SURFACE TEXTURE OF LOG TOUCHES THE REAR BURNER LEG. FOR USE WITH LP GAS, SLIDE TOWARDS THE REAR OF FIREBOX SO THAT THERE IS A ¼”...
- Page 23 Place right front log “C” behind front burner as shown. Front to Back; place this log so that its rear-most edge is 1/8” away from the center burner tube. Adjustments to this location can be made later during Log “G” installation. f i r e - p a r t s .
- Page 24 6. Place log “E” as shown below – Between Logs “C” and “D” to cover the Pilot Light. Look at the diagram at the bottom of this page to determine the exact position of this log. This log should use the center Log Iron bar for support.
- Page 25 7. Place left front log “F” as shown in the diagram below. Identify Pin on Log “B” and Hole in Log “F”. Place Log “F” so that the hole in log “F” falls over Pin in log “B”, see diagram below. Front right corner of Log “F”...
- Page 26 f i r e - p a r t s . c o m 8. Place right log “G” as shown below – Front right end against right-most log iron bar and the Pin Hole, shown, over pin in LOG “C”. Also see diagram in the next page for exact location of Log “G”.
- Page 27 f i r e - p a r t s . c o m...
- Page 28 9. Carefully place large chunk coals on log “C” and “D” - between front and middle burner - in a loose pattern. Make sure that the coals are not packed too tightly and are only one layer deep. KEEP PASSAGES CLEAR AROUND EACH COAL AS MUCH AS POSSIBLE. This assures flame travel around each coal, and a bright glow.
-
Page 29: Wall Switch, Remote Control Or Thermostat Operation
WALL SWITCH, REMOTE CONTROL OR THERMOSTAT OPERATION The Insert comes with an "ON-OFF" Rocker Switch located in the lower right hand corner of the surround. An optional Wall Switch, remote control or thermostat may be purchased to substitute for the Rocker Switch. A thermostat should be placed in the same room as the fireplace, approx. 4-5 ft. off the floor. -
Page 30: Blower Operation And Wiring
BLOWER OPERATION AND WIRING The Mendota Gas Inserts are equipped with hot air dual blowers. A 120-volt electrical service must be supplied for these blowers at the fireplace at the time of installation. These specially designed Blower Kits are equipped with heavy duty 1,000° wiring. They include an automatic snap switch that automatically turns the blowers "On"... -
Page 31: Blower (S) Removal
BURNER ORIFICE FIGURE 14 f i r e - p a r t s . c o m BLOWER (S) REMOVAL 1. Refer to FIGURE 14. Disconnect power to fireplace and blowers. 2. Remove door assembly, logs and coals. 3. Disconnect gas supply piping/ tubing from gas valve. 4. -
Page 32: Customer Information And Trouble-Shooting
Mendota dealer promptly informed. Mendota products are designed and tested to operate without producing any "sooting" when installed and operated correctly. Mendota dealers will correct "sooting" problems, but Mendota and their dealers are not responsible for damage caused by excessive sooting that has not been immediately brought to their attention. -
Page 33: Trouble Shooting Mendota Gas Fireplace Insert
3. If flame is too "orange" or is causing sooting on viewing glass, pull air shutter knob out (open) in approx. 1/8" increments until sooting stops. IF SOOTING DOES NOT STOP, TURN OFF UNIT AND CALL YOUR MENDOTA SERVICE PERSON. -
Page 34: Maintenance
MAINTENANCE 1. ANNUAL MAINTENANCE OF MENDOTA UNITS IS REQUIRED. The following procedures must be performed each year by a Mendota approved service person. NOTE: Any adjustments to burner, pilot or logs must be done by a qualified Mendota service person. -
Page 35: Replacement Parts List
REPLACEMENT PARTS LIST MENDOTA GAS FIREPLACE INSERT - MODEL D-40 Deep Timber PART NO. DESCRIPTION HA-34-00007 Flat Door Assembly 65-06-00483 Glass Door Pane Flat HA-33-00031 Door Gasket Flat HA-34-00035 Bay Door Assembly 65-06-00582 Glass Door Pane Bay HA-33-00070 Bay Gasket Door... -
Page 36: Natural To Lp Gas Conversion
NATURAL TO LP GAS CONVERSION KIT # HA-34-00178 This conversion must be made by a qualified service technician. A Natural Gas to LPG conversion kit #HA-34-00178 is included with the DXV35 Fireplace. This conversion kit is located within the Ziploc bag containing this Installation and Operating Instructions Manual. - Page 37 Figure 19 f i r e - p a r t s . c o m...
-
Page 38: Label Representation
“LABEL REPRESENTATION" LISTED GAS-FIRED DIRECT VENT ROOM HEATER POÊLE AU GAZ HOMOLOGUE’, A AÉRATION DIRECTE MODEL: _____ CERTIFIED FOR CANADA HOMOLOGUÉ POUR LE CANADA Also for use in mobile (manufactured) homes after first sale of home. Convenant également pour installations dans des maisons mobiles. -
Page 39: Mendota Warranty Qualification & Service Reference Form
As a part of Mendota's on-going program of customer satisfaction, this Form verifies proper installation and operation. It is important as a reference for future service. It insures long life and trouble-free operation of Mendota fireplaces & stoves and qualifies the owner for Mendota's lifetime limited warranty. Owner should sign Form when completed. Optionally, please register at our website at : WWW.JOHNSONGAS.COM/MENDOTA-REGISTRATION.ASP... - Page 40 TAPE SHUT f i r e - p a r t s . c o m ------------------------------------------------------------------------------------------------------------------------------------------------------- POSTAGE NEEDED JOHNSON GAS APPLIANCE COMPANY 520 E AVENUE N.W. CEDAR RAPIDS, IA 52405...
- Page 41 NOTES f i r e - p a r t s . c o m...
- Page 42 NOTES f i r e - p a r t s . c o m...
-
Page 43: Mendota Extended Lifetime Protection And Limited Warranty
Mendota dealer. Mendota is not responsible for any damage to or malfunction of the Insert unless caused by a defect in material or workmanship from normal home use. Damage caused by abuse, improper installation or operation, installation by unqualified personnel or breach of the conditions of this limited warranty will excuse Mendota from performance of any part of the limited warranty. - Page 44 f i r e - p a r t s . c o m Johnson Gas Appliance Company 520 E Avenue N.W. - Cedar Rapids, IA 52405 Website: www.johnsongas.com www.mendotahearth.com DT-0704 Part #85-03-00685...
Need help?
Do you have a question about the SEABROOK D-40 and is the answer not in the manual?
Questions and answers