Christie D13HD-HS User Manual
Hide thumbs
Also See for D13HD-HS:
- Service manual (112 pages) ,
- User manual (15 pages) ,
- User manual (13 pages)
Table of Contents
Advertisement
Advertisement
Table of Contents

Related Manuals for Christie D13HD-HS


Summary of Contents for Christie D13HD-HS
- Page 1 U s e r M a n u a l 020-000883-03 HS Series D13HD-HS/D13WU-HS...
- Page 2 The CD included with this printed manual contains an electronic copy in English. Please read all instructions before using or servicing this product. 手册中包含的光盘,带有着中文的电子副本,使用或维修本产品前,请仔细查阅所有的指示。 Le DC fourni avec ce manuel imprimé contient une copie électronique en français. S'il vous plaît lire toutes les instructions avant d'utiliser ou de réparer ce produit.
- Page 3 Performance specifications are based on information available at the time of printing. Christie makes no warranty of any kind with regard to this material, including, but not limited to, implied warranties of fitness for a particular purpose.
- Page 4 Preventative maintenance is an important part of the continued and proper operation of your product. Please see the Maintenance section for specific maintenance items as they relate to your product. Failure to perform maintenance as required, and in accordance with the maintenance schedule specified by Christie, will void the warranty.
-
Page 5: Table Of Contents
Content Safety ............8 Laser safety warnings . - Page 6 Configuring Christie Presenter ........67...
- Page 7 Federal Communications Commission (FCC) warning ..... . . 86 Christie Laser Projection System Installation Checklist ..... . 87 On-screen display tree .
-
Page 8: Safety
• Do not open or disassemble the projector as this may cause electric shock. • All installation and maintenance procedures must be performed by a Christie qualified technician. • Keep all combustible material away from the concentrated light beam of the projector. -
Page 9: Laser Safety Warnings
Safety Laser safety warnings This product is classified as CLASS 1 LASER PRODUCT - RISK GROUP 3 according to IEC 60825-1:2014 and IEC 62471:2006. IEC 60825-1:2014 CLASS 1 LASER PRODUCT RISK GROUP 3. Warning Possibly hazardous optical radiation emitted from this product. Do not look at operating beam. -
Page 10: Laser Label
• The instructions for the assembly, operation, and maintenance include clear warnings concerning precautions to avoid possible exposure to hazardous laser radiation. • Installing or replacing a lens must be done by a Christie qualified service technician to avoid exposure to dangerous emission levels. -
Page 11: Light Intensity Hazard Distance
Safety Light intensity hazard distance This projector has been classified as Risk Group 3 per the IEC62471:2006 standard due to possible hazardous optical and thermal radiation being emitted. Warning! Failure to comply with the following could result in serious injury. •... -
Page 12: Introduction
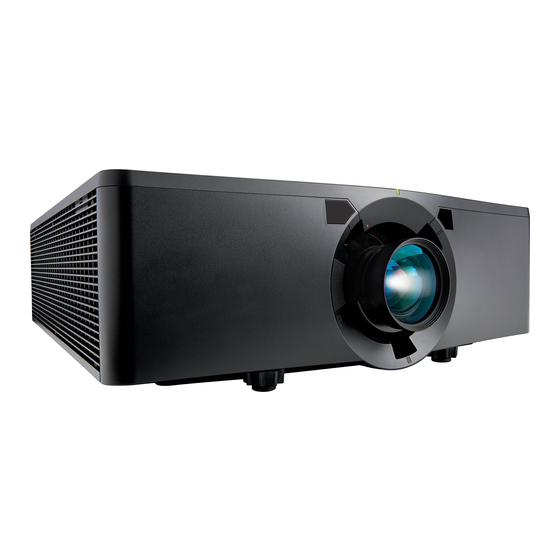
Introduction The HS Series is a high brightness, high-resolution video graphics one-chip laser-based projector. ® The projector is available in HD and WUXGA resolutions and uses Digital Light Processing (DLP technology from Texas Instruments. It is primarily designed for fixed installation and secondary applications including rental-staging and LBE (Location Based Entertainment). -
Page 13: Rear View
Introduction Rear view Identify the main components on the rear of the projector. Part name Description Rear IR sensor Receives signals from the IR remote keypad. Keep the signal path unobstructed for uninterrupted communication with the projector. Input/Output (I/O) panel Connects the projector to external devices. -
Page 14: Left View
Introduction Left view Identify the main components on the left side of the projector. FUSE T15A/250V~ FUSE T20A/250V~ 100V-120V~ FUSE T15A/250V~ 200V-240V~ FUSE T20A/250V~ FUSE T20A/250V~ 100V-120V~ FUSE T15A/250V~ 200V-240V~ Part Name Description Built-in keypad Controls the projector. AC input Connects to the supplied power adapter (200 to 240V~). -
Page 15: Right View
Introduction Right view Identify the main component on the right side of the projector. Part Name Description Cooling air vents (intake) Provides cooling to the projector. Keep these vents unobstructed to prevent the projector from overheating. Built-in keypad The built-in keypad controls the projector. Part Name Description Auto... -
Page 16: Input/Output (I/O) Panel
Introduction Part Name Description Zoom Adjusts the zoom. Back Returns to the previous level or exits the menus if at top level. Input/Output (I/O) panel Identify the components of the Input/Output (I/O) panel. Rear view Bottom view Connector name Connector name 3G-SDI IN DC JACK 3G-SDI OUT... -
Page 17: Ir Remote Keypad
Introduction IR remote keypad The IR remote keypad communicates with the projector by way of wireless communications. Use a cable length of 20 m or less. If the length of cable exceeds 20 m, the IR remote keypad may not work correctly. SHUTTER HDMI1 HDMI2... - Page 18 Introduction Part Name Description Size Adjusts the PIP/PBP size. Number Keys Enter a number, such as a channel, value, and so on. The on-screen display indicates if a function is not supported. Help Displays the instructions for source connection. Menu Displays the menus.
-
Page 19: Led Status Indicators
Introduction LED status indicators LEDs are defined below. Status LED Identify the LED state colors and meaning. LED Status Projector State AC power is off (without AC plugged in). Green (flashing) Projector is in startup or cool down mode. Green (solid) System is operating normally. -
Page 20: Installation
The area shall be cleared of all non-essential personnel during installation, setup and alignment of the projector. Verify safe installation of the projector by completing the Christie Laser Projection System Installation Checklist on page 87 and by following the Setup, alignment and test procedures on page 33. -
Page 21: Connecting To A Computer
Installation Connecting to a computer Learn what cables/connectors that may be used to connect to various devices. Desktop Laptop Monitor FUSE T20A/250V~ 100V-120V~ FUSE T15A/250V~ 200V-240V~ Connector name Connector name Connector name Power Cord (100-120V). USB type A cable DVI-D in cable Power cord (100-120V) rated for North America and Japan. -
Page 22: Connecting To Video Equipment
Installation Connecting to video equipment Learn what cable/connectors may be used to connect to various devices. Component video output equipment DVD player Video cassette recorder Ind. Connector name Ind. Connector name DVI-D IN Cable VGA IN Cable VGA to Component HDMI Cable •... -
Page 23: Turning The Projector On
2. Ensure the lens has been installed in the projector by a Christie qualified service technician. Warning! Failure to comply with the following could result in death or serious injury. • Installing or replacing a lens must be done by a Christie qualified service technician to avoid exposure to dangerous emission levels. -
Page 24: Turning The Projector Off
Installation The status LED is green with a long blink. 5. To select an input source and turn it on, on the IR remote keypad select Input Key. Available input sources are VGA, HDMI1, HDMI2, DVI, 3G-SDI, and HD-BaseT. The projector detects the source you selected and displays the image. Power on SHUTTER HDMI1... -
Page 25: Adjusting The Projector Position
Installation Adjusting the projector position When you select a position for the projector, consider the size and shape of your screen, the location of your power outlets, and the distance between the projector and the rest of your equipment. Follow these general guidelines: •... -
Page 26: Portrait Mode Orientation
Installation Portrait mode orientation When installing the projector in portrait orientation, it is recommended that the built in keypad and power inputs face upwards. This allows access to the built in keypad and power connections during operation. Calculating the lens offset Adjust the offset to align the image on the screen with full image size. -
Page 27: Wuxga Projectors
Installation WUXGA projectors The following show vertical image offsets for the WUXGA projectors: • Vertical image offset: 0% Lens center FUSE T20A/250V~ 100V-120V~ FUSE T15A/250V~ 200V-240V~ • Vertical image offset: +60% Lens center FUSE T20A/250V~ 100V-120V~ FUSE T15A/250V~ 200V-240V~ HS Series User Manual 020-000883-03 Rev. -
Page 28: Hd Projectors
Installation • Vertical image offset: -60% Lens center FUSE T20A/250V~ 100V-120V~ FUSE T15A/250V~ 200V-240V~ HD Projectors: The following show vertical and horizontal image offset for HD projectors: • Vertical image offset: +70% Lens center FUSE T20A/250V~ 100V-120V~ FUSE T15A/250V~ 200V-240V~ HS Series User Manual 020-000883-03 Rev. -
Page 29: Removing And Installing The Lens
Removing and installing the lens Warning! Failure to comply with the following could result in death or serious injury. • Installing or replacing a lens must be done by a Christie qualified service technician to avoid exposure to dangerous emission levels. -
Page 30: Installing The Fuse
Installation Installing the fuse A fuse must be installed in the projector for it to power on. 1. Turn the projector off. 2. Choose the 20A or 15A fuse by sliding the AC cover to the right or to the left. 3. -
Page 31: Cleaning Or Replacing The Filter
Installation Cleaning or replacing the filter Regularly clean or replace the filters in the projector to ensure dust and other foreign materials are kept out of the projector. 1. Turn off the projector. 2. Remove the screws on the filter cover using a 3 mm hex key. Left side filter Right side filter 3. -
Page 32: Installing The Ceiling Mount
Installation Installing the ceiling mount Mount the projector with a Christie-approved mount (such as the Christie One Mount Plus, P/N: 140-117100-XX), using the four mounting points on the underside of the projector. Warning! Failure to comply with the following could result in death or serious injury. -
Page 33: Setup, Alignment And Test Procedures
Installation Setup, alignment and test procedures Follow the steps for the initial setup, alignment and test procedures. 1. Ensure all appropriate agencies have been notified. 2. Ensure that all required documentation is present at show site. 3. Hang appropriate laser area warning signage (if applicable). 4. -
Page 34: Operation
Operation Warning! PERMANENT/TEMPORARY BLINDNESS HAZARD! No direct exposure to the beam must be permitted. RG3 IEC 62471:2006. Operators shall be familiar with all aspects of the function and operation of the laser projector. The projector has multilingual on-screen display (OSD) menus so you can make image adjustments and change a variety of settings. -
Page 35: Size And Position Menu
Operation Size and Position menu The Size and Position menu determines the size and position of the image on the screen. Size & Position 1. Size Presets Auto 2. Overscan 3. Pixel Track 4. Pixel Phase 5. Horz Position 6. Vert Position 7. - Page 36 Operation Menu item Description Options Pixel Track Steady flickering or several soft vertical stripes or bands across the entire image indicates poor pixel tracking. Proper pixel tracking ensures that the image quality is consistent across the screen, the aspect ratio is maintained, and that the pixel phase can be optimized.
-
Page 37: Geometry Correction
Operation Geometry correction Geometry correction provides two ways for warping control: • PC Mode off—User can do simple horizontal and vertical keystone, pincushion, and 4-corner control by using the on-screen display. • PC Mode on—User can do arbitrary warping or blending control by using the PC APP provided separately. - Page 38 Operation Horz Pincushion Adjust the pincushion horizontally and make the image more square. Ind. 1080P WUXGA 5.17% 5.39% 5.17% 4.24% Vert Pincushion Adjust the pincushion vertically and make the image more square. Ind. 1080P WUXGA 9.67% 7.44% 9.83% 7.58% 4-Corner Allow the image to be squeezed to fit an area defined by moving each of the four corners' x and y position.
-
Page 39: Image Settings Menu
Operation Image Settings menu The Image Settings menu sets the brightness, contrast, and other settings for images. Image Settings 1. Brightness 2. Contrast 3. Color Space Auto 4. Detail Normal 5. 3D Display 6. Video Options 7. Input Levels 8. Picture Settings Video 9. -
Page 40: Menu Item Description
Operation Menu item Description Options Video Options Applies only to video sources. • Color—Adjusts a video image from black and white to fully saturated color. (Video sources only.) • Tint—Adjusts the red-green color balance in the image of NTSC video images. (NTSC video sources only.) •... - Page 41 Operation Menu item Description Options Save to User Saves the user settings. — Adjust the image settings and Select Save to User as a picture setting. To recall these settings in the future, select the User in the Picture Settings menu. You can save the following settings: •...
-
Page 42: Configuration Menu
Operation Configuration Menu The Configuration menu sets the language, projection orientation, power usage, and other preferences for the projector. Configuration 1. Language English 2. Lens Settings 3. Ceiling Mount Auto 4. Rear Projection 5. Menu Preferences 6. Power Management 7. High Altitude 8. - Page 43 Operation Menu item Description Options Ceiling Mount Turns the image upside down — for ceiling-mounted projection. Rear Projection Reverse the image so you can — project from behind a translucent screen. Menu Sets the on-screen display • Menu Horz Offset—Changes the horizontal position of the on- Preferences menu preferences, and the screen display.
- Page 44 Operation Menu item Description Options 12V Trigger Sets the 12V trigger on or off. — The 12V trigger is used for electrical projector screens. The projector screen is automatically lowered or raised when the projector is switched on or off. Communications Determines the Network—Allow you to setup network settings.
- Page 45 Operation Menu item Description Options Color Matching Enables the selected method • Manual Adjustment—Manually defines the precise hue of (Manual Adjustment or HSG) each primary color component. to define the precise hue of • HSG Adjustment—Adjusts the hue, saturation, and gain each primary color (HSG) of the projected image.
-
Page 46: Color Matching
Operation Color matching You may require a unique color gamut (range) for a single projector or application, or you may need to precisely match colors across multiple adjacent displays. Use color matching by Manual Adjustment or HSG to define the precise hue of each primary color component (red, green, blue and white). - Page 47 Operation Saturation Note the following about adjusting saturation: • The saturation can be adjust independently for each color (R,G,B,C,M, and Y). • A saturation level of 0 removes all color from that region. • A saturation level of 254 sets the color region to have maximum color. •...
-
Page 48: Light Source Menu
Operation Light Source menu The Light Source menu sets the light source mode and power preferences. Light Source 1. Light Source Mode Constant Power 2. Constant Power 3. Constant Intensity 4. Light Source Info 5. Light Sensor Menu item Description Options Light Source Sets the light source mode. -
Page 49: Status Menu
Status menu The read-only Status menu lists a variety of details about the standard and optional components currently detected in the projector. For DHD models Status Model Name D13HD-HS Serial Number Native Resolution Firmware Main Input Main Signal Format Main Pixel Clock... -
Page 50: For Dwu Models
Operation For DWU models Status Model Name D13WU-HS Serial Number Native Resolution Firmware Main Input Main Signal Format Main Pixel Clock Main Sync Type Sync On Green Main Horz Refresh Main Vert Refresh PIP/PBP Input PIP/PBP Signal Format PIP/PBP Pixel Clock PIP/PBP Sync Type PIP/PBP Horz Refresh PIP/PBP Vert Refresh... -
Page 51: Input Switching & Pip Menu
Operation Input Switching & PIP menu The Input Switching & PIP menu determines how the main and PIP/PBP inputs are handled. Input Switching & PIP 1. Main Input 2. PIP/PBP Input HDMI1 3. PIP/PBP Enable 4. Swap Medium 5. Size 6. -
Page 52: Pip/Pbp Layout And Size
Operation Menu item Description Options Blank On Signal Blanks the screen before timing is stable when • Enabled—Blanks the screen before timing is Switch changing the source. stable when charging source. • Disabled—Disables blanking the screen. PIP/PBP layout and size A P indicates the primary source region (lighter color) and an asterisk (*) indicates both regions are the same size. -
Page 53: Language Menu
Operation Language menu Select an available language for the on-screen display. Language Test Pattern menu Choose the required internal test pattern to display, or select Off to turn off a test pattern. Test Pattern 1. Off 2. Grid 3. White 4. -
Page 54: Logging On To The Web User Interface
Operation Logging on to the web user interface Log onto the web user interface by following the steps below. 1. Open a web browser and type the IP address (in the address bar) assigned to your projector. 2. From the Access type list, select the log in level. 3. -
Page 55: Main Tab-General
Operation Main tab–General Displays information about the projector, its power status, and what is selected for the main and PIP/PBP input sources. Panel Description Control Selects main source/PIP source, enables or disables PIP/PBP, changes the layout or PIP size, swap, and change the test pattern. Projector Check the projector information for power status, Pic mute status, on-screen display status, IP Information... -
Page 56: Main Tab-Lens
Operation Main tab–Lens Controls the focus, lens shift, and zoom adjustments for the lens. HS Series User Manual 020-000883-03 Rev. 1 (07-2016) -
Page 57: Network
Operation Network If you change a setting, the network subsystem of the projector may restart, and you may be logged off. Panel Description Restart Execute a network restart. This does not change any of the network settings. Network HS Series User Manual 020-000883-03 Rev. - Page 58 Description Network Execute a network factory reset. Network settings may be reset to the following default values. Factory Reset Projector Name = Christie@ + Serial Number Show Network Messages = ON LAN settings: • Manual • IP Address = 192.168.0.100 •...
- Page 59 Operation Panel Description SNMP Panel Provides network administrators with a common way to manage their network devices from a single remote location. Administrators can use the Simple Network Management Protocol (SNMP) interface to query a number of devices to see their current status or configuration. Operators can change configuration values and configure trap notifications to be sent when certain events occur (for example, loss of signal, power state change, and so on).
-
Page 60: Tools
Operation Tools Use the Tools pages to control size and position, image settings, configuration, light source, input switching, PIP, and test patterns. Administrator Page Add or delete a user or change password. About Page The About page provides version and license information about HS Series. Description Version Views the main firmware version, network firmware version, projector model name, and... -
Page 61: Christie Presenter
Operation Christie Presenter The Christie Presenter application allows a remote desktop from a host PC to be displayed on the network display through Ethernet or wireless transports. It can adapt to different network settings (DHCP, fixed IP, and direct link by Ethernet cable). -
Page 62: Installing The Christie Presenter Software
Installing the Christie Presenter software Install and configure the Christie Presenter software. 1. In a web browser, connect to the projector's network address. The default address is 192.168.1.100. 2. Download and install the Christie Presenter software. HS Series User Manual 020-000883-03 Rev. 1 (07-2016) - Page 63 Operation 3. Configure the Christie Presenter software. The name entered identifies all computers connected to the projector by the Christie Presenter software—either wired or wireless connections. The Network Display Management > Device Management tab shows all current connections. HS Series User Manual...
-
Page 64: Using The Christie Presenter
Operation Using the Christie Presenter 1. To pause or play the USB display, in the system tray, press Autorun. After starting the Christie Presenter application, the main window appears. Icon Description Connects and searches the network display. Stops or starts displaying desktop contents to the connected network display. -
Page 65: Connecting And Searching The Network Display
Operation Connecting and searching the network display 1. To enter into the connection menu section, click 2. If the IP address of the projector is known, type the IP address and click Connect. 3. If the IP address is not known: a. -
Page 66: Selecting The Display Region
Operation 5. In the Select display port window, select the display port. Selecting the display region When the connection is set up, you must select the display region. 1. To select the size of the projection region, click and select an option: FullScreen, FixedSize, or Alterable. -
Page 67: Configuring Christie Presenter
Operation Configuring Christie Presenter Set the language for Christie Presenter, the region size of fixed size capture mode, if a notification message dialog is allowed, the quality of JPEG images, YUV sample formats, and the network port setting. 1. To configure Christie Presenter for basic and advanced settings, click... -
Page 68: Managing All Connected Network Displays
Operation Managing all connected network displays You can manage all connected network displays and users at the same time. 1. To control all users connected to the same projector, click Icon Description Indicates the administrator is logged in. Indicates a normal user logged in. Indicates the device is connected. -
Page 69: Operating The Card Reader
In this mode, the Card Reader application detects any USB flash devices hot-plug events and displays the flash device icon. When the flash device is removed from USB, the icon disappears. Christie recommends removing the USB flash devices only when the Card Reader is changed to the USB Flash Devices Detection Screen state. - Page 70 Operation Button Description Next Moves the selected item right or goes to next page when this is the right most item. Display Displays the selected image or folder. Thumbnail Enter the Thumbnail Display mode. SlideShow Enter the Slide Show mode. NameOrder Sorts files and folders by name.
- Page 71 Operation Image Slide Show mode 1. In the Thumbnail Display mode, to enter the Slide Show mode, press SlideShow. 2. In the Slide Show mode, to enter the Image Display Mode, press ENTER. 3. To display an image in the Slide Show mode use the operation UI. The following operations are supported in the Slide Show Mode operation UI.
-
Page 72: Troubleshooting
Troubleshooting If you cannot resolve an issue using the information provided in this section, contact your reseller or service center. No image appears on screen The image does not appear on the screen. Resolution • Make sure all the cables and power connections are correctly and securely connected. Installation on page 20 for more details. -
Page 73: Presentation Is Not Displayed
Troubleshooting d. Click Show all devices. e. Under the SP box, select Standard monitor types. f. Under the Models box, select the appropriate resolution mode. g. Verify that the resolution setting of the monitor display is lower than or equal to WUXGA (1920 ×... -
Page 74: Unstable Or Flickering Images
Troubleshooting Unstable or flickering images The image is unstable or is flickering when projected. Resolution • To correct the pixels, use Pixel Track and Pixel Phase. • Change the monitor color setting on your computer. Vertical flickering bar The image has a vertical, flickering bar when projected. Resolution •... -
Page 75: Image Is Not The Correct Size
Troubleshooting Resolution • If you play 4:3 format DVD titles, change the format to 4:3 in the projector on-screen display. • If the image is still stretched, adjust the aspect ratio by setting the display format as 16:9 (wide) aspect ratio type on your DVD player. For more details, see Size and Position menu page 35. -
Page 76: Specifications
Specifications Learn about the product specifications. Due to continuing research, specifications are subject to change without notice. HS Series User Manual 020-000883-03 Rev. 1 (07-2016) -
Page 77: Inputs
Specifications Inputs The following table details the inputs for HS Series. RB in the Resolution column indicates reduced blanking. Signal Type Resolution Frame rate (Hz) HDMI 3G-SDI HDBaseT 640x480 ● ● ● ● 640x480 ● ● ● ● 640x480 ● ●... - Page 78 Specifications Signal Type Resolution Frame rate (Hz) HDMI 3G-SDI HDBaseT 1152x720 ● ● ● 1152x864 ● ● ● ● 1152x864 ● ● ● ● 1152x864 ● ● ● ● 1152x864 ● ● ● ● 1152x870 ● ● ● 1280x720 ● ●...
- Page 79 Specifications Signal Type Resolution Frame rate (Hz) HDMI 3G-SDI HDBaseT 1440x900 ● ● ● ● 1440x900 ● ● ● 1600x900 ● ● ● 1600x1200 ● ● ● ● 1680x1050 ● ● ● ● 1920X1080 ● ● ● 1920X1080 ● ● ●...
- Page 80 Specifications Signal Type Resolution Frame rate (Hz) HDMI 3G-SDI HDBaseT Mandatory 3D Frame Packing ● ● 1080p Frame Packing ● ● 720p Frame Packing ● ● 720p Side by Side ● ● 1080i Side by Side ● ● 1080i Top and Bottom ●...
-
Page 81: Pip/Pbp Compatibility
Specifications Signal Type Resolution Frame rate (Hz) HDMI 3G-SDI HDBaseT 3GA-SDI 1080p ● YCbCr422 10bit 59.94 ● ● 3GB-SDI 1080p YCbCr422 10bit 59.94 ● With 352M Payload ID ● PIP/PBP compatibility The following table details the PIP/PBP compatibility. PIP/PBP 3G-SDI HDMI1 HDMI2 HDBaseT... -
Page 82: List Of Components
Specifications Measurements comply with industry standards where offset is calculated as a ratio of the number of pixels shifted up or down to full image size. • 360 degree orientation • 3D blending and auto warping • Supports fog filter as an optional accessory •... -
Page 83: Physical Specifications
4.0-7.2:1 zoom lens (P/N: 140-116109-XX). Warning! Failure to comply with the following could result in death or serious injury. • Installing or replacing a lens must be done by a Christie qualified service technician to avoid exposure to dangerous emission levels. -
Page 84: Physical Operating Environment
Specifications Physical operating environment Provides specifications for the operating environment. • Operating: 0°C to 40°C • 0 to 40 degrees C (0 to 2500 ft) • 0 to 35 degrees C (2500 to 5000 ft) • 0 to 30 degrees C (5000 to 10000 ft) •... -
Page 85: Regulatory
Specifications The following table provides information about the power input behavior. Condition Input Projector Behavior (Light Source Mode) AC Socket Input Voltage Normal 110V 110V Full (100% power) Abnormal 110V 220V ECO 2 (50% power); displays warning message Normal 220V 220V Full (100% power) Abnormal... -
Page 86: Laser Safety
Specifications Laser safety • IEC 60825-1 • IEC 62471 • FDA CDRH CFR 1040.10 • FDA CDRH CFR 1040.11 Approvals • This product is designed and built to comply with all relevant directives, standards, safety, health and environmental rules and regulations required for the product to be sold in: USA/ Canada, EU, Australia/New Zealand, Kuwait, China, Korea, Japan, Mexico, Ukraine, Russia, India, South Africa, Saudi Arabia, and Argentina. -
Page 87: Christie Laser Projection System Installation Checklist
Specifications Christie Laser Projection System Installation Checklist Use this checklist to ensure the Christie Laser Projection System installation meets local, municipal, and federal requirements. Installation Location Name: Address: Phone: Technician responsible for installing the product: Installation Date: Name: Phone: Site meets the FDA variance requirements (USA only):... - Page 88 PROJECTOR SITE CLEARANCE DISTANCES CONFIRMED Hazard Distance (HD) is confirmed to be____meters from the projector. Describe how the HD was confirmed or calculated (if the Christie HD was not used): (Note: The hazard distances for each lens are defined in the user manual) Beam is 3 meters above floor where the audience is permitted to stand and/or 1.0 meters below...
-
Page 89: On-Screen Display Tree
Specifications On-screen display tree The following table provides the on-screen display menu tree. Level 1 Level 2 Level 3 Level 4 Level 5 Level 6 Default (Or List) (Or List) (Or List) (Or List) Size & Size Presets Auto Auto Position Native Letterbox... - Page 90 Specifications Level 1 Level 2 Level 3 Level 4 Level 5 Level 6 Default (Or List) (Or List) (Or List) (Or List) Size & Geometry Warp Keystone Horz 0 to 40 Position Correction Keystone Vert 0 to 40 Keystone Pincushion Horz 0 to 100 Pincushion...
- Page 91 Specifications Level 1 Level 2 Level 3 Level 4 Level 5 Level 6 Default (Or List) (Or List) (Or List) (Or List) Image Detail Maximum By source set settings High Normal Minimum 3D Display 3D Enable Auto Auto Frame Packing Side by Side Top and Bottom...
- Page 92 Specifications Level 1 Level 2 Level 3 Level 4 Level 5 Level 6 Default (Or List) (Or List) (Or List) (Or List) Image Picture Settings Presentation By source set settings Video Bright REC709 Real DICOM SIM 2D High Speed Blending User Save to User command...
- Page 93 Specifications Level 1 Level 2 Level 3 Level 4 Level 5 Level 6 Default (Or List) (Or List) (Or List) (Or List) Configuration Language SPEC define English Lens Settings Focus Command Zoom Command Lens Shift Command Lens Shift Apply Position 1 to 5 Memory Save Current...
- Page 94 Specifications Level 1 Level 2 Level 3 Level 4 Level 5 Level 6 Default (Or List) (Or List) (Or List) (Or List) Configuration Power Standby Mode 0.5W Mode Communication Management Mode Communication Mode AC Power On Auto Shutdown Never Never 5 Mins 10 Mins 15 Mins...
- Page 95 Specifications Level 1 Level 2 Level 3 Level 4 Level 5 Level 6 Default (Or List) (Or List) (Or List) (Or List) Configuration Communications WLAN Enable By set Start IP End IP Subnet Mask Default Gateway MAC Address SSID Network Projector Name By set Show Network...
- Page 96 Specifications Level 1 Level 2 Level 3 Level 4 Level 5 Level 6 Default (Or List) (Or List) (Or List) (Or List) Configuration Backlight Keypad Timeout 5 Secs Timeout 5 Secs Preferences Backlight Timeout 10 Secs Timeout 20 Secs Timeout 30 Secs Always On Always Off...
- Page 97 Specifications Level 1 Level 2 Level 3 Level 4 Level 5 Level 6 Default (Or List) (Or List) (Or List) (Or List) Configuration Color Matching Manual Reset to Adjustment Default HSG Adjustment HSG Enable Auto Test Pattern 0 to 254 Saturation 0 to 254 Gain...
- Page 98 Specifications Level 1 Level 2 Level 3 Level 4 Level 5 Level 6 Default (Or List) (Or List) (Or List) (Or List) Configuration Hot Key Settings Blank Screen Aspect Ratio Freeze Screen Projector Info Overscan Service Projector Info Model Name Serial Number Native Resolution...
- Page 99 Specifications Level 1 Level 2 Level 3 Level 4 Level 5 Level 6 Default (Or List) (Or List) (Or List) (Or List) Configuration Service Test Pattern Grid White Black Checkerboard Color Bars Green Blue Yellow Magenta Cyan Boresight Wheel Index Phosphor 0 to 719 (2X)
- Page 100 Specifications Level 1 Level 2 Level 3 Level 4 Level 5 Level 6 Default (Or List) (Or List) (Or List) (Or List) Configuration Service Laser Diode Info Voltage/ Current/ Temperature Voltage/ Current/ Temperature Voltage/ Current/ Temperature Voltage/ Current/ Temperature LD10 Voltage/ Current/ Temperature...
- Page 101 Specifications Level 1 Level 2 Level 3 Level 4 Level 5 Level 6 Default (Or List) (Or List) (Or List) (Or List) Status Model Name Serial Number Native Resolution Firmware Vxx, Ayy, Bzz Main Input Main Signal Format Main Pixel Clock Main Sync Type Main Horz Refresh...
- Page 102 Specifications Level 1 Level 2 Level 3 Level 4 Level 5 Level 6 Default (Or List) (Or List) (Or List) (Or List) Input SPEC define Main Input Switching & SPEC define PIP/PBP Input PIP/PBP Enable Swap Size (Small/Medium/ Large) Main Layout (PBP, Main Left/ PBP, Main Top/ PBP, Main Right/...
- Page 103 Specifications Level 1 Level 2 Level 3 Level 4 Level 5 Level 6 Default (Or List) (Or List) (Or List) (Or List) Test pattern Grid White Black Checkerboard Color Bars HS Series User Manual 020-000883-03 Rev. 1 (07-2016)
Need help?
Do you have a question about the D13HD-HS and is the answer not in the manual?
Questions and answers