XYZ Printing da Vinci Jr. 1.0 User Manual
Hide thumbs
Also See for da Vinci Jr. 1.0:
- User manual (25 pages) ,
- Quick manual (15 pages) ,
- Instructions (3 pages)
Table of Contents
Advertisement
Quick Links
Download this manual
See also:
Quick Manual
Advertisement
Table of Contents

Subscribe to Our Youtube Channel
Related Manuals for XYZ Printing da Vinci Jr. 1.0


Summary of Contents for XYZ Printing da Vinci Jr. 1.0
- Page 1 da Vinci April 2016 Ver.1 da Vinci Junior 1.0 3-in-1 3D Printer da Vinci Jr. 1.0 3in1 User Manual...
-
Page 2: Important Notice
da Vinci April 2016 Ver.1 The purpose of this user manual is to help users understand and use the da Vinci Junior 1.0w 3D printer correctly. It contains the operating instructions, maintenance information and application skills of the da Vinci Junior 1.0w 3D print- er. -
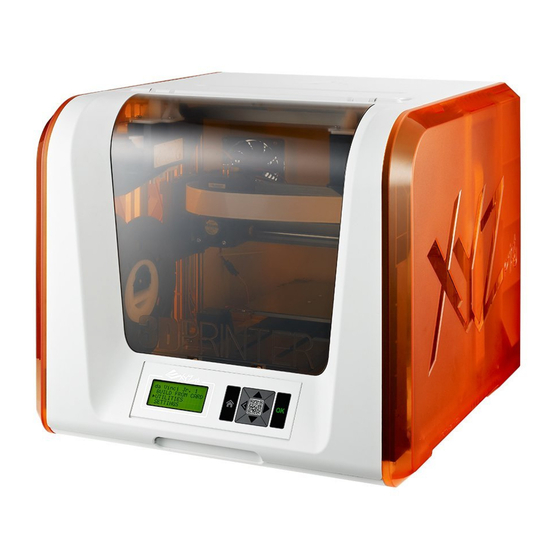
Page 3: Product Overview
da Vinci April 2016 Ver.1 Product Overview A: Filament movement area B: Feed module C: Detector D: Extruder E: Filament F: Print bed G: SD card port (Storage format: FAT32) H: Control and display panel I: Front cover USB Port Power Connector Power Switch Accessory Checklist... -
Page 4: Unpacking The Product
da Vinci April 2016 Ver.1 For better scanning result,when placing the printer, avoid exposing the scanning modules Open the box and remove the Remove the plastic bag and to direct sunlight or lighting apparatus. accessories and cushions. the tapes. Raise the paper cardboard Raise the paper cardboard slightly Remove 2 foams at the back of upwards so that the paper cardboard... -
Page 5: Installing The Accessories
da Vinci April 2016 Ver.1 Note: Please follow these steps and ensure that the guide tube is properly installed before starting the "LOAD FILAMENT" function. Failure to install the guide tube may disrupt filament feed. Install the filament guide tube Run the guide tube through Ensure that the guide tube has been tightly Remove the extruder... -
Page 6: Load Filament
da Vinci April 2016 Ver.1 CHANGE SPOOL First retrieve filament spool to install the filament Take out and separate the filament spool spool axle ring. axle ring into its two components. Install the sensor chip. Please pay special attention to Insert the filament spool axle ring components the position of the installation holes on the chip. -
Page 7: Unload Filament
da Vinci April 2016 Ver.1 LOAD FILAMENT Then load filament using the control panel on the printer… DA VINCI Jr. 1w UTILITIES CHANGE SPOOL UTILITIES CHANGE SPOOL LOAD FILAMENT SETTINGS HOME AXES UNLOAD FILAMENT INFO JOG MODE Select "UTILITIES" > "CHANGE SPOOL" > "LOAD FILAMENT". CHECK FILAMENT LOAD FILAMENT LOADING... - Page 8 da Vinci April 2016 Ver.1 About the da Vinci junior series 3D printer The da Vinci junior series 3D printer (da Vinci Jr.) is a brand new product from XYZprinting that is dedicated to the 3D printer market. Its intricate and colorful exterior as well as its high resolution printing specifications are set to make it the new favorite for families and home hobbyists.
- Page 9 da Vinci April 2016 Ver.1 Button instructions After switching on the printer's power, the user may use the display panel at the front of the printer to understand its status and usage data. The functional buttons on the right allow the user to perform the relevant operations. Button Functions Direction Up...
- Page 10 da Vinci April 2016 Ver.1 Home Menu Top Menu Sub Menu Page CHANGE SPOOL LOAD FILAMENT UNLOAD FILAMENT HOME AXES JOG MODE UTILITIES BUILD FROM CARD CALIBRATE CLEAN NOZZLE Z OFFSET BUZZER LANGUAGE ENERGY SAVE SETTINGS AUTO LEVEL RESTORE DEFAULT STATISTICS SYSTEM VERSION INFO...
- Page 11 da Vinci April 2016 Ver.1 HOME AXES “HOME AXES” moves the extruder to the lower left corner. To home axes: home axes are you sure Select “YES” to proceed. JOG MODE “JOG MODE” is used to manually move the extruder and the print bed. To move the extruder: jog mode x-axis ok...
- Page 12 da Vinci April 2016 Ver.1 CALIBRATE To ensure printing quality, please update printer firmware to the latest version. With latest printer firmware, you may calibrate the print bed in case of low quality printing. 1. Active print bed calibration by selecting “UTILITIES”>”CALIBRATE”>”YES” on the screen. 2.
- Page 13 da Vinci April 2016 Ver.1 CLEAN NOZZLE Over time, carbon deposits or filament dust buildup in the nozzle may decrease its performance. It is advised to clean the nozzle after every 25 hours of printing. Also, if the print bed calibration shows “ERR” or if there is any residue on your prints, you may try to clean the nozzle. To clean the nozzle: CLEAN NOZZLE CLEAN NOZZLE...
- Page 14 da Vinci April 2016 Ver.1 BUZZER When the buzzer is turned on, the printer will output an audible signal when a button is pressed, print job is finished, or issue is detected. Buzzer is turned on by default. To switch off the buzzer: buzzer Select “OFF”...
- Page 15 da Vinci April 2016 Ver.1 STATISTICS In “STATISTICS”, you can check the accumulated print time and last print time. statistics lifetime 00006h last time 00h34m to return SYSTEM VERSION Firmware version is shown here. For stable printing performance, it is advised to keep the firmware up to date. To check for firmware updates, please go to XYZscan/XYZware.
- Page 16 da Vinci April 2016 Ver.1 Scanning takes around 5 minutes. During scanning, the object on the turntable revolves in a clockwise direction. Throughout the process, the laser modules projects linear beam at the object while the camera on the module films a complete image sequence of the rotating object.
- Page 17 da Vinci April 2016 Ver.1 Viewpoints Model information The quality of a model is defined by the number of facet. Generally more facet could result in better quality. Delete model Scanning view Basic workflow Select a scan mode based on the Press “Scan”.
- Page 18 da Vinci April 2016 Ver.1 Install Scan Bed and Devices Calibration Original model Scanning result Scanning result before calibration after calibration When you find inaccurate scan results, please follow the steps for scanning devices calibration: Push the print bed to proper position then install the Scan Bed. In XYZscan,select Note: Please always press the button of Scan Bed before attach or remove it.
- Page 19 da Vinci April 2016 Ver.1 Laser engraver module must be purchased separately.Please read through this manual and all safety reminders carefully before using, operating, dismantling,replacing, or removing this product. Please also comply with relevant safety reminders and instructions. Product Overview ●...
- Page 20 da Vinci April 2016 Ver.1 Function Description : ● Select “Import” on the device to select the graphic file you wish to engrave. Once basic editing has been completed, select this "Engrave" icon. Alternatively, select this "Advanced Engraving Settings" icon to complete advanced settings before engraving.
- Page 21 da Vinci April 2016 Ver.1 Note: The machine can be turned off only when the cooling fan of the print head stops running after the print is com- pleted. Turning off the power directly may clog the print head. References: Please refer to CLEAN NOZZLE to remove the blocks out of the print head.
- Page 22 da Vinci April 2016 Ver.1 Note: Turn off the 3D printer only after the print job is complete and the print head cooling fan stops running. Don't turn off the power directly. Otherwise, the print head may be clogged. References: Please refer to the description of CLEAN NOZZLE function for removing the clogging of the print head.
- Page 23 da Vinci April 2016 Ver.1 3. Please enter the printer name and then press “SCAN” to scroll down the menu for obtaining the exact Wireless Access Point related information. The description sample will use XYZprinting as the name of Wireless Access Point. After obtaining the desired information, enter the Public Key password and then press “Use Wi-Fi”...
-
Page 24: Print From A Mobile Application
da Vinci April 2016 Ver.1 1.The mobile device needs to support wireless printing. 2.Install XYZprinting App from Android or iOS system. User Category Information Gallery My Upload Printer About Main screen Upload the To remote Printer item and control information printable file printer and copyright... - Page 25 da Vinci April 2016 Ver.1 O p e n t h e P l a y S t o r e f r o m y o u r A n d r o i d Please register an account at XYZprinting official browser or App store of iOS system to search website before logging in.
-
Page 26: Specifications
Vinci April 2016 Ver.1 da Vinci Jr. 1.0 3-in-1 3D Printer Model Name da Vinci Jr. 1.0 3-in-1 3D Printer Dimensions 16.54 x 16.93 x 14.96 inches ( 420 x 430 x 380 mm ) Weight 26.46 lbs (12kg) Display 2.6”... -
Page 27: Support Details
da Vinci April 2016 Ver.1 The troubleshooting instruction may guide you to fix the problem. If any error persists, please contact customer service. When an error occurs, please refer to the service code shown on the printer and/or in the software, and check the suggestions below for troubleshooting. -
Page 28: Term Of Service
1. This product is guaranteed for specific period from the purchase date against any breakdown within the scope of proper and reasonable usage of their product as defined by XYZ printing. Presentation of warranty card with the product will ensure free service and repair of inherent faults in the product within the warranty period. - Page 29 da Vinci April 2016 Ver.1 Warning ● Do not let children operate this device without adult supervision. Electric shock hazard. Moving pars can cause serious injury. ● Do not place the printer on an unbalanced or unstable surface. Printer may fall or tumble causing harm and/or injury. Printer may fall or tumble causing harm and/or injury.
Need help?
Do you have a question about the da Vinci Jr. 1.0 and is the answer not in the manual?
Questions and answers