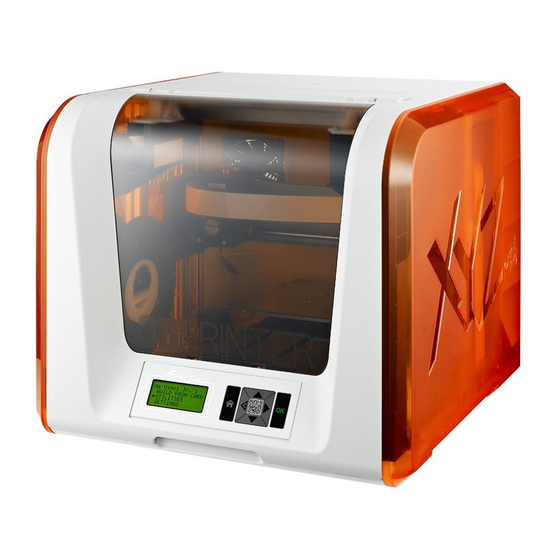
XYZ Printing da Vinci Jr. 1.0 Instructions
3in1 laser engraving module
Hide thumbs
Also See for da Vinci Jr. 1.0:
- User manual (25 pages) ,
- User manual (30 pages) ,
- Quick manual (15 pages)
Advertisement
Table of Contents
- 1 Instructions for the Laser Engraving Module
- 2 Introducing the Installation / Detachment of the Laser Engraving Module
- 3 Recommended Laser Engraving Material
- 4 Reminders before Laser Engraving
- 5 Using the Laser Engraving Function
- 6 Safety Precautions
- 7 Guidelines for Laser Safety
- 8 Emergency Instructions
- Download this manual
Instructions for the laser engraving module
Please visit the official website of XYZprinting in order to obtain additional details on operational reminders,
application techniques, and maintenance information: http://www.xyzprinting.com
Compatible Model : da Vinci Jr. 1.0 3in1
◆ Do not open the front door when the machine is running to prevent interrupting the laser engraving process,
as this would impact the integrity of the sculpted image.
◆ Do not look directly at the laser engraving process to prevent eye discomfort.
◆ Mild odors may be generated during the engraving process. We recommend working in a well-ventilated and
open area to ensure operational comfort.
◆ Please turn off the electric power when dismantling / replacing the laser engraving module.
◆ Defect reparation must be carried out according to the contents of this instruction manual. Where the defect
cannot be repaired, please contact your printer dealer or the customer service center.
Introducing the installation / detachment of the laser engraving module
If the printer has filament inside,please "unload the Filament" first. Select [CHANGE SPOOL].
UTILITIES
CALIBRATE
BUILD SAMPLE
CHANGE NOZZLE
After removing the spool,
please select [CHANGE NOZZLE].
●
To release the extruder:
Press the white button at the
back of the extruder to release it.
●
Installing the laser engraving module:
◆ Connect the flat cable to the laser en-
graver. (Remind the flat cable direction.)
●
Detachment of the laser engraving module
◆ Please select [CHANGE NOZZLE],then switch off the printer power.
◆ Press the white button at the back of the laser engraver to release it.
◆ Detach the connected cables.
◆ Complete dismantling and provide proper safekeeping of the laser engraver module.
P 1
TURN OFF POWER
AND THEN CHANGE
NOZZLE MODULE
The Nozzle will back to the home position and
then turn off the power.
Lightly press the spring around the feed hole and remove the
filament guide tube. Press on the harness chips and disconnect
the cable.
◆ Align the laser engraver with the bracket
and press it to fix the holder.
HD23F1JS067
Advertisement
Table of Contents

Related Manuals for XYZ Printing da Vinci Jr. 1.0


Summary of Contents for XYZ Printing da Vinci Jr. 1.0
- Page 1 Please visit the official website of XYZprinting in order to obtain additional details on operational reminders, application techniques, and maintenance information: http://www.xyzprinting.com Compatible Model : da Vinci Jr. 1.0 3in1 ◆ Do not open the front door when the machine is running to prevent interrupting the laser engraving process, as this would impact the integrity of the sculpted image.
- Page 2 ● Recommended laser engraving material: ◆ Paper ◆ Leather ◆ Plastic ◆ Cardboard ◆ Wood Note: Avoid using materials that are light colored, white, or have glossy surfaces for laser engraving. Achieve the best engraving results with gray colored or dark colored materials. Reminders before laser engraving 1.
- Page 3 Safety Precautions 安全注意事項 PART NUMBER: RS1AWXY100A 產品料號 : RS1AWXY100A LASER CLASSIFICATION: CLASS 3B 雷射功率等級 : CLASS 3B ◆ 雷射安全指引 GUIDELINES FOR LASER SAFETY ◆ ◆ 使用雷射雕刻時請戴上安全護目鏡。 Laser safety eyewear is needed. 嚴禁 ■ 於雷射雕刻過程中眼睛直視雕刻過程以免造成 DO NOT look directly at the laser engraving ■...
Need help?
Do you have a question about the da Vinci Jr. 1.0 and is the answer not in the manual?
Questions and answers