
Related Manuals for XYZ Printing da Vinci Jr 1.0 Pro


Summary of Contents for XYZ Printing da Vinci Jr 1.0 Pro
- Page 1 da Vinci Jr.1.0 Pro May 2016 da Vinci Junior 1.0 Pro 3D Printer da Vinci Jr.1.0 Pro Quick Guide HD23F1JP0E8...
- Page 2 da Vinci Jr.1.0 Pro May 2016 The purpose of this user manual is to help users understand and use the da Vinci Jr. 1.0 Pro 3D printer correctly. It contains the operating instructions, maintenance information and application skills of the da Vinci Jr. 1.0 Pro 3D printer. To learn more about the latest news of the da Vinci Jr.
-
Page 3: Accessory Checklist
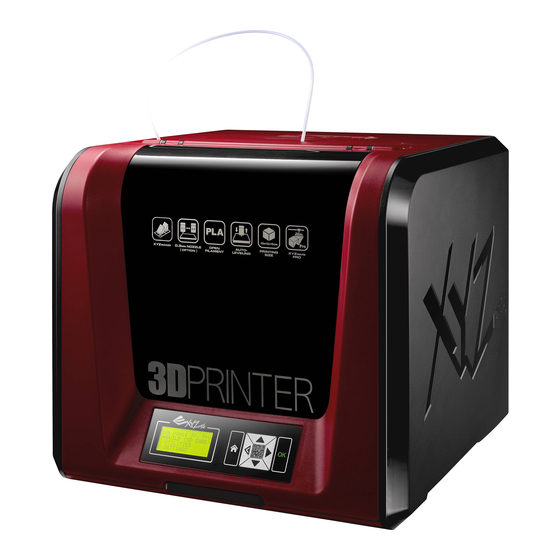
da Vinci Jr.1.0 Pro May 2016 Product Overview A: Filament movement area B: Feed module C: Detector D: Extruder E: Filament F: Print bed G: SD card port (Storage format: FAT32) H: Control and display panel I: Front cover USB Port Power Connector Power Switch Accessory Checklist... -
Page 4: Unpacking The Product
da Vinci Jr.1.0 Pro May 2016 Open the box and remove the Remove the plastic bag and accessories and cushions. the tapes. Remove the securing styrofoam Remove all fixing tapes and the Be sure to remove the fixing and fixing tapes on the print bed. cushion between print bed and cushion from the axis. -
Page 5: Installing The Accessories
da Vinci Jr.1.0 Pro May 2016 Note: Please follow these steps and ensure that the guide tube is properly installed before starting the "LOAD FILAMENT" function. Failure to install the guide tube may disrupt filament feed. Install the filament guide tube Remove the extruder Direct the guide tube from the Ensure that the guide tube has been tightly... -
Page 6: Load Filament
da Vinci Jr.1.0 Pro May 2016 CHANGE SPOOL First retrieve filament spool to install the filament Take out and separate the filament spool axle spool axle ring. ring into its two components. Install the sensor chip. Please pay special attention to Insert the filament spool axle ring components the position of the installation holes on the chip. -
Page 7: Unload Filament
da Vinci Jr.1.0 Pro May 2016 LOAD FILAMENT Then load filament using the control panel on the printer… USE XYZPRINTING DA VINCI Jr. Pro UTILITIES CHANGE SPOOL SPOOL? UTILITIES CHANGE SPOOL LOAD FILAMENT SETTINGS HOME AXES UNLOAD FILAMENT INFO JOG MODE Select "UTILITIES"... - Page 8 da Vinci Jr.1.0 Pro May 2016 CALIBRATE Calibration is enabled for this new extruder module. Please update printer firmware via XYZware before using the new extruder. 1. Active print bed calibration by selecting “UTILITIES”>”CALIBRATE”>”YES” on the screen. 2. Press the detection head on the right side of the print head according to the instruction of screen message, followed by pressing OK.
- Page 9 da Vinci Jr.1.0 Pro May 2016 HOME AXES “HOME AXES” moves the extruder to the lower left corner. To home axes: home axes are you sure Select “YES” to proceed. JOG MODE “JOG MODE” is used to manually move the extruder and the print bed. To move the extruder: jog mode x-axis ok...
- Page 10 da Vinci Jr.1.0 Pro May 2016 Note: The machine can be turned off only when the cooling fan of the print head stops running after the print is completed. Turning off the power directly may clog the print head. References: Please refer to UTILITIES>CLEAN NOZZLE to remove the blocks out of the print head.
- Page 11 da Vinci Jr.1.0 Pro May 2016 CLEAN NOZZLE A.Feeding Path Cleaning Pin B.Cleaner Wire Over time, carbon deposits or filament dust buildup in the nozzle may decrease its performance. It is advised to clean the nozzle after every 25 hours of printing. Also, if the print bed calibration shows “ERR”...
- Page 12 da Vinci Jr.1.0 Pro May 2016 Install Compatible filament In the printer, insert the filament into the Load the filament from the back If you’re using third party filaments, feed port. Open the release arm so that of the printer. please secure the filament using the front tip of the filament can be the holder.
-
Page 13: Specifications
da Vinci Jr.1.0 Pro May 2016 da Vinci Junior 1.0P 3D Printer Model Name da Vinci Junior 1.0P 3D Printer Dimensions 16.54 x 16.93 x 14.96 inches ( 420 x 430 x 380 mm ) Weight 26.46 lbs (12kg) Display 2.6”...
Need help?
Do you have a question about the da Vinci Jr 1.0 Pro and is the answer not in the manual?
Questions and answers