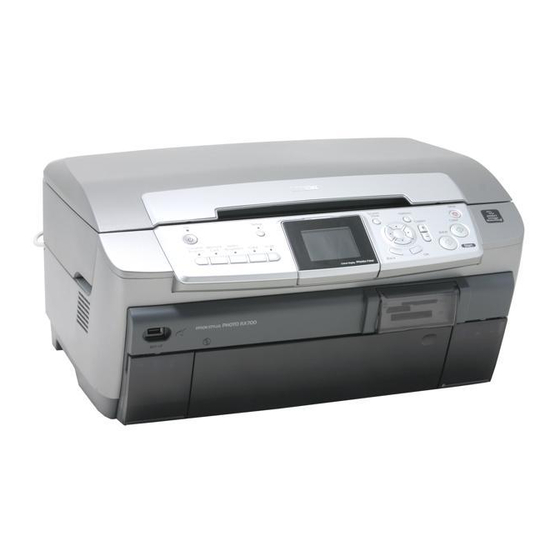
Epson Stylus Photo RX700 Service Manual
Hide thumbs
Also See for Stylus Photo RX700:
- Basics manual (98 pages) ,
- Basic operation manual (52 pages) ,
- Product information (17 pages)
Table of Contents
Advertisement
Quick Links
Advertisement
Table of Contents
Troubleshooting

Related Manuals for Epson Stylus Photo RX700


Summary of Contents for Epson Stylus Photo RX700
- Page 1 SERVICE MANUAL "ECOS" Scanner•Printer•Copier EPSON Stylus Photo RX700 SEMF05001...
- Page 2 SEIKO EPSON CORPORATION. All efforts have been made to ensure the accuracy of the contents of this manual. However, should any errors be detected, SEIKO EPSON would greatly appreciate being informed of them.
- Page 3 REPAIRS ON EPSON PRODUCT SHOULD BE PERFORMED ONLY BY AN EPSON CERTIFIED REPAIR TECHNICIAN. MAKE CERTAIN THAT THE SOURCE VOLTAGES IS THE SAME AS THE RATED VOLTAGE, LISTED ON THE SERIAL NUMBER/RATING PLATE. IF THE EPSON PRODUCT HAS A PRIMARY AC RATING DIFFERENT FROM AVAILABLE POWER SOURCE, DO NOT CONNECT IT TO THE POWER SOURCE.
-
Page 4: About This Manual
C H E C K P O I N T condition that is necessary to accomplish a task efficiently. It may Epson-approved lubricants and adhesives required for servicing also provide additional information that is related to a specific the product. - Page 5 Revision Status Revision Date of Issue Description May 9, 2005 First Release June16, 2005 Revised the following. "Ink Cartridges" on page -15: Changed the description of print capacity and checkpoint. "Adjustment Items" on page -134: The remained Japanese has been translated.
-
Page 6: Table Of Contents
EPSON Stylus Photo RX700 Revision A CONTENTS Chapter 1 Product Description 2.2.3.3 APG Driving Transmission ............... 24 2.2.3.4 Driving Specifications ............... 25 1.1 Overview ......................10 2.2.4 Paper Feed Mechanism ................26 1.1.1 Printer and PC Printing ................10 2.2.4.1 PF Motor Specifications ..............26 1.1.2 Scanner and Scanning Functions .............. - Page 7 EPSON Stylus Photo RX700 Revision A 2.3.2 Features ..................... 43 4.2 Removal of Exterior Parts ................80 2.3.3 Main Board ....................44 4.2.1 Panel Assy ....................80 2.3.3.1 Outline of the Main Board ..............44 4.2.1.1 LCD Assy ..................81 2.3.3.2 Environmental Conditions ..............
- Page 8 EPSON Stylus Photo RX700 Revision A 4.4.18 Idle Roller Shaft Assy ................124 6.2 Cleaning ......................150 4.4.19 PF Motor ....................125 6.3 Lubrication ...................... 151 4.4.20 PF Roller Assy & PF Encoder Assy ............. 126 6.3.1 Designated Lubricant ................151 4.4.21 CD-R Guide Assy .................
-
Page 9: Chapter 1 Product Description
C H A P T E R PRODUCT DESCRIPTION... -
Page 10: Overview
EPSON Stylus Photo RX700 Revision B 1.1 Overview 1.1.1 Printer and PC Printing Basic specifications Stylus Photo RX700, incorporating a color inkjet printer, image scanner and memory Table 1-1. Printer Basic Specifications card slot, is provided with the following functions. Items Specifications... -
Page 11: Scanner And Scanning Functions
EPSON Stylus Photo RX700 Revision B 1.1.2 Scanner and Scanning Functions PC scanner Items Specifications Basic specifications Interface USB 2.0 High Speed Items Specifications Command level FS-D (TBD) Type Flat bed Scanning resolution 50 ~ 6400 dpi (selectable in 1-dpi steps), 9600dpi,... -
Page 12: Copy Functions
EPSON Stylus Photo RX700 Revision B 1.1.3 Copy Functions Functions available Table 1-4. Functions Available Supported papers Copy Function Summary Table 1-3. Supported Papers for Copy Function Standard copy General purpose copy mode with 3 mm margins BorderFree copy BorderFree copying suited for making a copy of photo. -
Page 13: Interfaces
EPSON Stylus Photo RX700 Revision B 1.1.4 Interfaces Back Up function Table 1-7. Backup Function Specifications PC Interface: USB 2.0 High Speed Items Specifications Outside Interface: USB 1.1 Host Function Storing image data from memory card to storage drive through the USB... -
Page 14: Common Specifications
EPSON Stylus Photo RX700 Revision B 1.2 Common Specifications 1.2.2 Environmental Resistance Table 1-11. Environment Resistance Specifications 1.2.1 Electrical Specifications Item Operation Mode Non-operation Mode Primary power input Temperature 10 ~ 35°C * -20 ~ 60°C * 1 month when at 40°C Table 1-10. -
Page 15: Durability
EPSON Stylus Photo RX700 Revision B 1.2.3 Durability 1.2.6 Ink Cartridges Total print life : 25,000 pages (black only, A4), Type : Each-color separate ink cartridge or 10,000 color pages (A4) Print capacity (in pages) or 5 years (whichever comes first) Black:600pages/A4 (360dpi, 3.5% duty) -
Page 16: Special Operations
EPSON Stylus Photo RX700 Revision B 1.3 Special Operations With Stylus Photo RX700, the special operation modes described below are available by turning the power on with the specified buttons held down. C H E C K The functions described below, intended for use by service P O I N T personnel, must not be opened to users. -
Page 17: Chapter 2 Operating Principles
C H A P T E R OPERATING PRINCIPLES... -
Page 18: Overview
This Chapter describes the operating principles of the mechanism and electric circuits APG Assy of Stylus Photo RX700. Paper Eject Roller 2.1.1 Mechanical Components PF Motor The printer of Stylus Photo RX700 consists of the following major mechanisms: E/J Assy Printhead (p.21) Encoder Scale Carriage Mechanism (p.22) APG Mechanism (p.23) Rear Paper Paper Feed Mechanism (p.26) -
Page 19: Motors And Sensors
EPSON Stylus Photo RX700 Revision A 2.1.2 Motors and Sensors Printer Name Type Voltage Fig.No A CR Motor DC motor 42VDC±5% Figure 2-2 B APG Motor DC motor 42VDC±5% Figure 2-3 C PF Motor DC motor 42VDC±5% Figure 2-3 4-phase 48-pole PM type D ASF Motor 42VDC±5%... - Page 20 EPSON Stylus Photo RX700 Revision A Figure 2-4. Motors and Sensors (Printer Housing) Scanner Unit Name Type Voltage Fig.No 4-phase 200-pole HB stepping Scanner CR Motor 42VDC±5% Figure 2-5 motor Transmissive-type photo- Carriage Unit Assy Scanner Home Detector 3.3VDC±5% Figure 2-5 interrupter Figure 2-5.
-
Page 21: Mechanism Operating Principles
2.2 Mechanism Operating Principles This section describes the operating principles of the mechanism of Stylus Photo RX700. 2.2.1 Printhead The printhead of Stylus Photo RX700 is equipped with six rows of nozzles for six Row A Row C Row E colors. -
Page 22: Carriage Mechanism
EPSON Stylus Photo RX700 Revision A 2.2.2 Carriage Mechanism Driven Pulley Assy The Carriage Mechanism consists of the CR Motor, CR Belt, Driven Pulley Assy, CR Guide Shafts (x2), Carriage Assy, CR Scale Mounting Plate Assy, Parallelism Adjust Bushes (x4), APG Assy, etc. -
Page 23: Apg Mechanism
EPSON Stylus Photo RX700 Revision A 2.2.3 APG Mechanism APG Assy 2.2.3.1 APG Motor Specifications APG Motor CR Guide Shaft (Main) Item Specifications Type DC brush motor Voltage 42V (DC voltage) ± 5% (voltage applied to the driver) Armature resistance 64.7Ω... -
Page 24: Apg Driving Transmission
EPSON Stylus Photo RX700 Revision A 2.2.3.3 APG Driving Transmission Shown below is the transmission path of driving force from the APG Motor. Composite Gear 30, 35.2, Release Gear Release Assy PG Sensor Flag Upper Paper Guide APG Motor APG Assy Composite Gear 8, 22.986... -
Page 25: Driving Specifications
EPSON Stylus Photo RX700 Revision A 2.2.3.4 Driving Specifications Figure 2-13 below shows the relationship between the PG positions and the outputs of the sensor 1 as well as major applications of the PG positions. Basic control operation The PG setting in several stages for the Carriage is achieved by moving the CR Guide Shafts up and down with the DC motor while monitoring with the position sensors. -
Page 26: Paper Feed Mechanism
EPSON Stylus Photo RX700 Revision A 2.2.4 Paper Feed Mechanism The paper feed mechanism, consisting primarily of the PF Motor, PF Roller Assy and Paper Eject Rollers (x2), transports the paper from the paper loading mechanism and PE Sensor CD-R Sensor 1 ejects it to the front. -
Page 27: Pe Detector
EPSON Stylus Photo RX700 Revision A 2.2.4.3 PE Detector Function : • Detection for paper positioning control PF Roller Assy Idle Roller Shaft Assy • Detection of the paper tail end (Transports the front- Composite Gear 12, 10 loaded paper) -
Page 28: Cd-R Mechanism
CD-R Tray Signal Before printing in the CDR mode and other times, the CD-R Guide position is Stylus Photo RX700 supports printing on CD-R/DVDs. It executes printing on the judged. media placed on the CD-R tray, which is supplied as a standard accessory. -
Page 29: Cd-R Mechanism Explanation
EPSON Stylus Photo RX700 Revision A 2.2.5.3 CD-R Mechanism Explanation The CD-R Mechanism is as follows: When the CD-R Guide Assy is drawn out toward the front, its position is detected by the CD-R Sensor 2 (Front). Then the APG Assy widens the platen gap to the PG++ position so that the CD-R Tray can be loaded. -
Page 30: Paper Loading Mechanism
EPSON Stylus Photo RX700 Revision A 2.2.6 Paper Loading Mechanism Stylus Photo RX700 is provided with two-way paper loading system, permitting paper loading from the front and rear. The paper loading system consists of two paper loading mechanisms and the ASF Drive Assy. - Page 31 EPSON Stylus Photo RX700 Revision A 2.2.6.3 Transmission Path of Driving Force for the Paper Loading Mechanism Pick Up Gear The ASF Motor switches the paper source between the two feeders by changing the direction of rotation. This section describes the transmission path of driving force from the ASF Motor and each paper loading mechanism.
- Page 32 EPSON Stylus Photo RX700 Revision A Composite Spur Gear 29.6 ASF Motor Gear Composite Gear 27.5, 15.2 Composite Gear 14.7 Composite Gear Composite Gear 27.5, 15.2 17.5, 15.2 Trigger Gear 48 See Flowchart PF Motor 2-1.(p.31) Composite Gear Composite Gear See Flowchart 27.2, 15.2...
- Page 33 EPSON Stylus Photo RX700 Revision A Outlined below is the operation of each paper loading mechanism. During CCW rotation, the Paper Reversing During CW rotation, the PF Rear Clutch Clutch is locked to transmit the driving Outline of the Rear Paper Loading Mechanism...
-
Page 34: Transmission Path Of Driving Force For The Paper Loading Mechanism
Revision A 2.2.7 Outline of Paper Path Stylus Photo RX700 is provided with two paper paths for front paper loading and rear paper loading. The paper paths consist of the respective paper loading mechanisms. CD-R printing is also supported using the supplied CD-R Tray. This section outlines the paper paths. - Page 35 EPSON Stylus Photo RX700 Revision A The CD-R Sensor 1 CD-R Sensor 1 detects PG++ (presence/ absence of the tray), and the PW Sensor on the carriage detects the center of the CD. CD-R Sensor 2 When the CD-R Tray has...
-
Page 36: Ink Supply System
EPSON Stylus Photo RX700 Revision A 2.2.8 Ink Supply System The printer is of an off carriage type in which the ink cartridges are contained in the right and left I/C Holder Assy. Valve Assy (including Ink Tube Assy) By the Pressure Pump Assy, compressed air is sent through the Pressure Sensor Assy to the Left Ink Duct Assy. -
Page 37: Self-Closing Valve
The capacity of each Ink Storage Chamber is equivalent to C H E C K P O I N T printing of 36 pages of graphics. Stylus Photo RX700 uses six colors, thus two chambers are left out of use. Valve Lever Filter... -
Page 38: Pressure Pump Mechanism
EPSON Stylus Photo RX700 Revision A 2.2.9 Pressure Pump Mechanism 2.2.9.1 Pressure Pump Motor Pressure Sensor Pressure Pump Motor Item Specifications Type DC brush motor Pressure Pump Voltage 42 V (DC voltage) ±5% (voltage applied to the driver) Relief Valve Armature resistance 64.7Ω... -
Page 39: Pump Hp Sensor
EPSON Stylus Photo RX700 Revision A 2.2.9.3 Pump HP Sensor Figure below shows the relationship between the pressure and the outputs of the Pump HP Sensor (position detection: Sensor 1) and Pressure Sensor (Sensor 2) during the Function : Detection of pump home position operation of the Pressure Pump. -
Page 40: Ink System
EPSON Stylus Photo RX700 Revision A 2.2.10 Ink System 2.2.10.1 Pump Motor During CW rotation, the pin of the Cap Assy moves Directions of Item Specifications to raise the Cap Assy and rotation of Type 4-phase 48-pole PM type stepping motor the Carriage Lock Lever. -
Page 41: Scanner Unit
EPSON Stylus Photo RX700 Revision A 2.2.11 Scanner Unit The Scanner Unit consists primarily of the following components: CCD Unit (Carriage Unit) Consists of the CCD Board, mirrors and lens, lamp, and Inverter Board, and moves on the CR Shaft. -
Page 42: Cr Motor
EPSON Stylus Photo RX700 Revision A 2.2.11.1 CR Motor ø1Home position correction position chart marking Item Specifications 2-phase 200-pole HB stepping motor Type (Shinano Kenshi: SHP-35D1010) Voltage 42 V ± 5% Winding resistance 6.3Ω ± 10%(25°C/phase) Basic characteristics Inductance 5.6mH ± 20%(1kHzÅA1VrmsÅA25°C) Step angle 1.8°... -
Page 43: Operating Principles Of Electric Circuitry
2.3.1 Overview • Stopping the head drive circuit • Turning off the CCD scanner power supply and stopping the excitation of the The major circuit boards of Stylus Photo RX700 are as follows: scanner motor • Main Board: C583MAIN Turning off the preview monitor... -
Page 44: Main Board
EPSON Stylus Photo RX700 Revision A 2.3.3 Main Board 2.3.3.2 Environmental Conditions Operating temperature: 0 ~ 70°C inside the case 2.3.3.1 Outline of the Main Board Operating humidity: 30 ~ 70%RH inside the case (no condensation) C583Main consists primarily of the three following sections. -
Page 45: Main Board Circuit Configuration (Printer And Common Section)
EPSON Stylus Photo RX700 Revision A 2.3.3.4 Main Board Circuit Configuration (Printer and Common Location Functions Section) RTC circuit RTC9824: by Seiko Epson Composite IC for reset function, RTC and EEPROM Location Functions CR/PF/Pump Sleep mode is entered for power-saving. -
Page 46: Main Board Circuit Configuration (Card Section)
EPSON Stylus Photo RX700 Revision A 2.3.3.5 Main Board Circuit Configuration (Card Section) Location Functions USB IF circuit (IC12) Specification: Universal Serial Bus Specification Revision 2.0 Location Functions (USB 2.0) Receive mode: High/Full speed mode ASIC for card IC10 Receiving system: Bulk transfer / control transfer... -
Page 47: Main Board Circuit Configuration (Scanner Section)
LED circuit Data transfer method: AFE is mounted on the ISN Board Light source: White cold-cathode fluorescent lamp (42 V) <AFE specifications> Switch Functions AFE Type : S1R77012F00A000 (by Epson) Functional Operation Type: Embossed sheet Number of bits: 16 switches... -
Page 48: Power Supply Board
EPSON Stylus Photo RX700 Revision A 2.3.5 Power Supply Board 2.3.5.2 Input and Output Specifications Input Specifications 2.3.5.1 Circuit Constitution Item 100-120 V Specifications 220-240 V Specifications C583PSB/C583PSE Power Supply Unit C583 PSB C583 PSE Fuse for LPS Rated input voltage... - Page 49 EPSON Stylus Photo RX700 Revision A Output specifications Outputs of the C583 MAIN Board Item Output 4 Output 5 Output 6 Outputs of the Power Supply Unit Item Input voltage +15V +42V +42V Output 1 Output 2 Output 3 Input voltage range...
-
Page 50: General Specifications
EPSON Stylus Photo RX700 Revision A 2.3.5.3 General Specifications Item 100-120 V Specifications 220-240 V Specifications Protection against Power supply for Class I equipment electric shocks Safety standard Safety application model EPS-95 EPS-95E standards UL1950 Applicable standards EN60950 CSA22.2No.950 Between primary side and secondary side: 3000V, for 1 minute... - Page 51 C H A P T E R TROUBLESHOOTING...
-
Page 52: Overview
3.1.2 Preliminary Checks Before starting troubleshooting, be sure to verify that the following conditions are all With Stylus Photo RX700, almost all troubles can be coped with by following the met: instructions given on “EPSON Status Monitor 3” (when connected to the PC) or on the The power supply voltage must be within the specification limits. -
Page 53: Procedure For Troubleshooting
EPSON Stylus Photo RX700 Revision A 3.1.3 Procedure for Troubleshooting START Perform troubleshooting according to the flowchart shown at right. In addition, this printer is provided with a mode dedicated for use in various adjustments in the manufacturing process. This mode can be used for fault finding of Does the same the components described below. -
Page 54: Error List
EPSON Stylus Photo RX700 Revision A 3.1.4 Error List Table 3-1. Error List Error Name Occurrence Condition Displayed Message Release Condition No ink cartridge. Open the ink cover and set the ink cartridge. ←Left Right→ Black (T5591) Magenta (T5593) Cyan (T5592) Light Magenta (T5596) Ink related message (1) The ink cover was closed without the ink cartridge being set. - Page 55 EPSON Stylus Photo RX700 Revision A Table 3-1. Error List (continued) Error Name Occurrence Condition Displayed Message Release Condition Combo print error 1 (Euro) There is no Template sheet or it is not placed correctly. Please check it and try A recognition mark could not be found on the template sheet.
- Page 56 EPSON Stylus Photo RX700 Revision A Table 3-1. Error List (continued) Error Name Occurrence Condition Displayed Message Release Condition Displayed for a specified time Scan to memory error (card removed) The memory card or disk was removed. Operation canceled. (approx. 3 seconds).
-
Page 57: Warning List
EPSON Stylus Photo RX700 Revision A 3.1.5 Warning List Table 3-2. Warning List Causes Details Displayed Message (TBD) Release Conditions Displayed when the guide was open when printing started. The guide has been stored. Or, a CDR/DVD guide open The guide for CD/DVD print is opened. Close the guide. - Page 58 EPSON Stylus Photo RX700 Revision A Table 3-2. Warning List (continued) Causes Details Displayed Message (TBD) Release Conditions Displayed for a specified time CD/DVD copy More than one CD or DVD was attempted to be set for CD/DVD copy. Cannot set multiple copies (approx.
-
Page 59: Fatal Error
EPSON Stylus Photo RX700 Revision A 3.1.6 FATAL Error C H E C K The EEPROM (Address: 3CH) stores the error code of the latest P O I N T fatal error. The latest fatal error can be identified using the adjustment program. - Page 60 EPSON Stylus Photo RX700 Revision A Table 3-3. Fatal Errors (continued) Category Error Code Error Cause Remedy PF acceleration lock error Checking the PF mechanism by visual inspection: PF speed over error Check the PF mechanism for paper jam or adhesion of foreign matters by visual inspection.
- Page 61 EPSON Stylus Photo RX700 Revision A Table 3-3. Fatal Errors (continued) Category Error Code Error Cause Remedy Pressure leakage error Checking the tube route (Pressure Motor ~ Pressure Sensor ~IC Holder Pressure release error ~ Printhead) by visual inspection Unit detection error Checking the Pressure Motor / Sensors and related parts ♦...
- Page 62 EPSON Stylus Photo RX700 Revision A Table 3-3. Fatal Errors (continued) Category Error Code Error Cause Remedy Home seek error Checking the operation of the Carriage Assy: CR unlocking error Move the Carriage Assy by hand, and check to see if it moves smoothly.
- Page 63 EPSON Stylus Photo RX700 Revision A Flags that are not stored in memory at power OFF • Paper set flag • CR locking flag • PF drive blocking flag Flowchart 3-1. Printer Power ON Troubleshooting Overview...
- Page 64 EPSON Stylus Photo RX700 Revision A Flowchart 3-2. Printing Processing Troubleshooting Overview...
-
Page 65: Troubleshooting For Printer
EPSON Stylus Photo RX700 Revision A 3.2 Troubleshooting for Printer This section describes repair/service of the Printer Mechanism. Listed below are various problems which may occur, observations of such problems, check point and remedies. Faulty paper loading Table 3-4. Diagnostics when feeder is abnormal... - Page 66 EPSON Stylus Photo RX700 Revision A Faulty paper ejection Table 3-5. Diagnostics when paper ejection is abnormal Condition Cause Check Point Remedy Turn the PF Roller, and check to see if the paper is Faulty PF-related operation Engage the PF-related gears properly.
- Page 67 EPSON Stylus Photo RX700 Revision A Printer stops during initialization Table 3-7. Diagnostics when printer stops during format Condition Cause Check Point Remedy Paper Eject Frame not installed Check to see if the hook securing the Paper Eject Frame has not been Install the Paper Eject Frame properly.
- Page 68 EPSON Stylus Photo RX700 Revision A Faulty print Table 3-8. Diagnostics when printing is abnormal Condition Cause Check Point Remedy Printhead surface is dirty (dots missing) Alternate cleaning and test printing several times. Clean the Printhead surface with a cotton swab.
-
Page 69: Power Supply Related Troubleshooting
EPSON Stylus Photo RX700 Revision A 3.3 Power Supply Related Troubleshooting If the printer does not operate at all (LED does not light up) even with the power turned ON, refer to the following table and perform troubleshooting. Table 3-9. Power Supply Related Troubleshooting... -
Page 70: Ink Supply Related Troubleshooting
EPSON Stylus Photo RX700 Revision A 3.4 Ink Supply Related Troubleshooting Printer stops during initialization or printing. Table 3-10. Troubleshooting for Printer Stop During Initialization or Printing Condition Cause Check Point Remedy Ink End error is Ink is out. Check to see if ink is remaining in all the ink cartridges. Replace the ink cartridge. - Page 71 EPSON Stylus Photo RX700 Revision A Ink is not supplied or waste ink is not discharged properly Table 3-12. Troubleshooting for Faulty Ink Supply or Faulty Waste Ink Discharge Condition Cause Check Point Remedy Pump tube collapsed Visually check tube.
-
Page 72: I/F Related Troubleshooting
EPSON Stylus Photo RX700 Revision A 3.5 I/F Related Troubleshooting Troubleshooting for Memory Card Slot Table 3-14. Troubleshooting for Memory Card This section describes the troubleshooting for the USB I/F and Memory Card Slot. Cause Check Point Remedy Check to see if a memory card is... -
Page 73: Troubleshooting For Scanner
EPSON Stylus Photo RX700 Revision A 3.6 Troubleshooting for Scanner Observation of Trouble and Reference for Remedy Table 3-16. Observation of Trouble and Reference for Remedy This section describes repair/service for the Scanner mechanism. In troubleshooting, Reference for first identify the trouble at the unit level based on the observation. - Page 74 EPSON Stylus Photo RX700 Revision A Carriage unit does not operate Fluorescent lamp does not turn on Table 3-18. Carriage unit does not operate Table 3-20. Fluorescent lamp does not turn on Cause Check Point Yes/No Remedy Cause Check Point...
-
Page 75: Troubleshooting For Motors And Sensors
EPSON Stylus Photo RX700 Revision A 3.7 Troubleshooting for Motors and Sensors Sensor (mechanical contact type) Table 3-23. Sensor Check Sensor Name Location Signal Level Sensor Status C H E C K Refer to 2.1.2 Motors and Sensors (p.19) for the locations of the... - Page 76 C H A P T E R DISASSEMBLY AND ASSEMBLY...
-
Page 77: Overview
W A R N I N G Remove the batteries and plug off the AC adapter before This section describes procedures for disassembling the main components of the disassembling the Stylus Photo RX700. product. Always wear gloves for disassembly and reassembly to avoid Unless otherwise specified, disassembled units or components can be reassembled by injury from sharp metal edges. -
Page 78: Tools
Make the following preparations before disassembling the Stylus Photo RX700: Take due care not to hurt your hand with the edge. Make sure that no memory card has been inserted in the Stylus Photo RX700. Unplug the power cable from the wall outlet. -
Page 79: Disassembly And Reassembly Procedure
Revision A 4.1.4 Disassembly and Reassembly Procedure The flowchart below shows step-by-step disassembly procedure for Stylus Photo RX700. When disassembling each component, refer to the page number indicated for the relevant component. Stylus Photo RX700 does not have any mechanism that permits... -
Page 80: Removal Of Exterior Parts
EPSON Stylus Photo RX900 Revision A 4.2 Removal of Exterior Parts Panel Cover C.B.P-Tite 3x8 F/ZN-3C (x4) ⋅ 4.2.1 Panel Assy Torque: 0.6 ± 0.1N C A U T I O N Take care not to damage any cables with any screw that is projecting from the Shield of the Main Board. -
Page 81: Lcd Assy
EPSON Stylus Photo RX900 Revision A 4.2.1.1 LCD Assy LCD Shaft A C.B.P-Tite 3x8 F/ZN-3C (x2) ⋅ Torque: 0.6 ± 0.1N Coil Spring Clutch C A U T I O N Take care not to bend the Panel Ground Plate on the back side... -
Page 82: Disassembly Of Panel Assy
EPSON Stylus Photo RX900 Revision A 4.2.1.3 Disassembly of Panel Assy C.B.P-Tite 3x8 F/ZN-3C (x2) ⋅ Torque: 0.6 ± 0.1N C A U T I O N Take care not to scratch the surface of the LCD Panel when performing disassembly and assembly with the LCD Assy installed. -
Page 83: Scanner Unit
EPSON Stylus Photo RX900 Revision A 4.2.2 Scanner Unit Chassis Assy (LCD Assy) When removing the Scanner Unit, take care not to break the C A U T I O N ground cable, which is connected to the printer. With the FFC disconnected, take care not to break the ferrite cores by hitting them against each other. - Page 84 EPSON Stylus Photo RX900 Revision A Locate the FFCs (x2) of the Scanner Unit as shown at right in the Middle Housing so that the Scanner Unit can be opened smoothly without folding the FFCs. Install the ferrite cores (x2) and the FFC Clamp at the locations...
-
Page 85: Pressure Pump Assy
EPSON Stylus Photo RX900 Revision A 4.2.3 Pressure Pump Assy ⋅ Torque: 0.6 ± 0.1N C.B.P-Tite 3x8 F/ZN-3C (x2) Before removing or installing the screws shown at right for the C A U T I O N ⋅ Take care not to Torque: 0.8 ±... -
Page 86: Main Board Unit
EPSON Stylus Photo RX900 Revision A 4.2.4 Main Board Unit C.B.P-Tite 3x6 F/ZN-3C A D J U S T M E N T When the Main Board is to be replaced, refer to the following C.B.S-Tite 3x10 F/ZN-3C (x5) R E Q U I R E D section and back up the data in EEPROM before starting ⋅... - Page 87 EPSON Stylus Photo RX900 Revision A Stick the FFC of the Right I/C Holder Assy as shown at right, and make sure that the contact is located at the connector on Fold the Main Board. For the assignment of connectors, see Table 4-2 below and Figure 4-11 at right.
-
Page 88: Middle Housing
EPSON Stylus Photo RX900 Revision A 4.2.5 Middle Housing Hinge Unit (x2) C.B.S-Tite 3x6 F/ZN-3C (x2) ⋅ Torque: 0.8 ± 0.1N When removing or installing the Middle Housing, take care not C A U T I O N C.B.P-Tite 3x10 F/NI (x2) to tilt the printer more than 90 degrees. - Page 89 EPSON Stylus Photo RX900 Revision A Before installing the Middle Housing, check the following conditions for properness: Push the Relay Connectors adequately • Connection of each Waste Ink Tube (x2) (See Figure 4-14) so that they will not rise. •...
- Page 90 EPSON Stylus Photo RX900 Revision A When installing the Middle Housing, lead out the connectors and FFCs through the respective areas shown below in the Middle Housing. FFCx4 (Head FFC) FFC (CR Encoder Board) Black (CD-R Sensor 1 Connector) White (Relay Connector)
-
Page 91: Linear Scale
Turn by 90 degrees and remove C H E C K Stylus Photo RX700 does not have any mechanism that permits the P O I N T operator to unlock the carriage. Therefore, turn the power ON and turn it OFF timely after seeing the movement of the carriage to locate it at a position other than the home position. -
Page 92: Printhead
⋅ Torque: 0.4 ± 0.05N C H E C K Stylus Photo RX700 does not have any mechanism that permits the P O I N T operator to unlock the carriage. Therefore, turn the power ON and unplug the power cable from the wall outlet timely after seeing the movement of the carriage to locate it at a position other than the home position. - Page 93 EPSON Stylus Photo RX900 Revision A Take care not to confuse the orientation of the terminal side of the FFC when connecting the FFC to the Printhead. After installing the CR Weight, form the FFC of the CR Encoder Board as shown at right. (See Figure 4-21)
-
Page 94: Valve Assy (Including Ink Tube Assy)
EPSON Stylus Photo RX900 Revision A 4.2.8 Valve Assy (Including Ink Tube Assy) Tube Stopper ~Rear Side~ Take due care not to stain any surrounding objects with ink. C A U T I O N The ink tubes are very delicate. Take due care not to bend or whiten them by applying undue force. - Page 95 EPSON Stylus Photo RX900 Revision A CONNECTION OF VALVE ASSY AND I/C HOLDER ASSY Joint Clamp After connecting the In this process, there is a possibility of ink leakage. Take great C A U T I O N tubes, insert the Tube care not to stain any surrounding objects with ink.
-
Page 96: Disassembly Of Scanner Unit
EPSON Stylus Photo RX900 Revision A 4.3 Disassembly of Scanner Unit 4.3.1 Disassembly Procedure for Scanner Unit Once the Scanner Housing is removed, there is a possibility that C A U T I O N Scanner Unit Disassembly of TPU Assy dust and dirt may enter the inside of the scanner body. -
Page 97: Scanner Housing
EPSON Stylus Photo RX900 Revision A 4.3.2 Scanner Housing A D J U S T M E N T When the Scanner Housing is removed, make the following R E Q U I R E D adjustment after reinstallation. Once the Scanner Housing is removed, there is a possibility that C A U T I O N 5.4 Scanner Home Position Adjustment (p.142) -
Page 98: Hp Board
EPSON Stylus Photo RX900 Revision A 4.3.3 HP Board 3x5 B Torque: ⋅ Remove the Scanner Housing. (p.97) 0.34 ± 0.05N Move the CCD Unit from the home position. (See Figure 4-29) Disconnect the FFC and the connector of the CR Motor. -
Page 99: Cr Motor Unit
EPSON Stylus Photo RX900 Revision A 4.3.5 CR Motor Unit Remove the Scanner Housing. (p.97) Disconnect the connector of the CR Motor from the HP Board. (See Figure 4-29) Push the Driven Pulley Holder inward and remove the Timing Belt. -
Page 100: Ccd Unit (Carriage Unit Assy)
EPSON Stylus Photo RX900 Revision A 4.3.6 CCD Unit (Carriage Unit Assy) Belt Clamp Ground Remove the Scanner Housing. (p.97) cable CCD Unit Remove the CR Motor Unit. (p.99) (There is no need to remove the Timing Belt) CR Shaft Remove the screw securing the FFC Ground Plate, and disconnect the ground cable. -
Page 101: Disassembly Of Tpu Assy
EPSON Stylus Photo RX900 Revision A 4.3.7 Disassembly of TPU Assy Disconnect the TPU Harness at the rear of the printer. TPU Housing Upper Remove the TPU Assy from the Scanner Unit. Hinge Guide Remove the screw (x7), and remove the TPU Housing Upper. -
Page 102: Disassembly And Assembly Of Major Parts Of Printer
EPSON Stylus Photo RX900 Revision A 4.4 Disassembly and Assembly of Major Parts of Printer The flowchart below shows step-by-step disassembly procedure for the printer. When disassembling each component, refer to the page shown in the chart below. Removal of Exterior Parts (p.80) -
Page 103: Asf Rear Assy
EPSON Stylus Photo RX900 Revision A 4.4.1 ASF Rear Assy Remove the Middle Housing. (p.88) Remove the screw, and remove the LD Roller Guide and spacer. Remove the Paper Block Levers (x2) upward. Remove all the connectors connected to the Relay Connectors. - Page 104 EPSON Stylus Photo RX900 Revision A ASSEMBLY OF ASF REAR ASSY Place the wider cable on the side closer to you Lubrication is necessary. Refer to the following section and lubricate the specified points: Lubrication of ASF Rear Assy (p.152) Engage the hooks (x2) on the front side of the ASF Rear Assy, and install the ASF Rear Assy on the printer.
-
Page 105: I/C Holder Assy
EPSON Stylus Photo RX900 Revision A 4.4.2 I/C Holder Assy Tube Spacer Spacer In this process, there is a possibility of ink leakage. Take great Joint Clamp C A U T I O N care not to stain any surrounding objects with ink. -
Page 106: Waste Ink Pads (I/C Holder Assy)
EPSON Stylus Photo RX900 Revision A 4.4.3 Waste Ink Pads (I/C Holder Assy) C A U T I O N Take due care not to stain any surrounding objects with waste ink. Remove the Middle Housing. (p.88) Remove the I/C Holder Assy. (p.105) Remove the right and left Waste Ink Pads. -
Page 107: Printer Mechanism
EPSON Stylus Photo RX900 Revision A 4.4.4 Printer Mechanism Remove the Middle Housing. (p.88) C.B.P-Tite 3x8 F/ZN-3C (x5) ⋅ Remove the ASF Rear Assy. (p.103) Torque: 0.6 ± 0.1N Printer Mechanism Remove the I/C Holder Assy. (p.105) At the rear of the printer, remove the screws (x2) (one of them secures the Power Supply Assy Shield Plate together). - Page 108 EPSON Stylus Photo RX900 Revision A Before installing the Printer Mechanism, check the following conditions on the Lower Case Assy for properness: • Routing of the harness between the Power Supply Board ~ Main Board • Insulation of the Harness Clamp Make sure that the Waste Ink Tubes (x2) are connected to the Tube Holder properly.
-
Page 109: Power Supply Board
EPSON Stylus Photo RX900 Revision A 4.4.5 Power Supply Board C.B.S-Tite 3x6 F/ZN-3C ⋅ Torque: 0.5 ± 0.1N Remove the Printer Mechanism. (p.107) TPU Connector Cover Disconnect the connector (CN2) from the Power Supply Board, and remove the Power Supply Unit from the Lower Case. -
Page 110: Waste Ink Pads (Lower Case)
EPSON Stylus Photo RX900 Revision A 4.4.6 Waste Ink Pads (Lower Case) Waste Ink Cover C A U T I O N Take due care not to stain any surrounding objects with waste ink. Remove the Printer Mechanism. (p.107) Waste Ink Pads (Lower Case) Remove the Power Supply Board. -
Page 111: Apg Assy
EPSON Stylus Photo RX900 Revision A 4.4.7 APG Assy Remove the Printer Mechanism. (p.107) At the rear of the printer, remove the screws (x3) securing the APG Assy. Remove the APG Assy from the printer frame. Install the APG Assy by the following procedure. -
Page 112: Ink System Assy
For easy work, you are advised to move the carriage from the ⋅ P O I N T Torque: 0.6 ± 0.1N home position before disassembling the Stylus Photo RX700. (Move the carriage by turning power ON and then turning it OFF timely.) Ink System Assy Remove the Printer Mechanism. -
Page 113: Asf Drive Assy
EPSON Stylus Photo RX900 Revision A 4.4.9 ASF Drive Assy Remove the Printer Mechanism. (p.107) Remove the Ink System Assy. (p.112) Remove the screws (x2) at the right side of the printer, and remove the ASF Motor. Remove the screws (x3), and remove the Paper Path Switching Assy. -
Page 114: Rear Paper Guide Assy
EPSON Stylus Photo RX900 Revision A 4.4.10 Rear Paper Guide Assy Remove the Printer Mechanism. (p.107) Remove the screws (x2) securing the Paper Feed Lower Cover at the bottom of the Rear Paper Guide Assy printer. (See Figure 4-50) Disengage the hooks (x2) on the PF Motor side, and remove the Paper Feed Lower Hook Cover from the printer frame. -
Page 115: Cr Motor
EPSON Stylus Photo RX900 Revision A 4.4.11 CR Motor Remove the Printer Mechanism. (p.107) Remove the tension spring of the Driven Pulley Assy at the rear of the printer. Remove the two screws, and remove the CR Motor from the printer frame. -
Page 116: Carriage Assy
EPSON Stylus Photo RX900 Revision A 4.4.12 Carriage Assy CR Left Scale Plate C A U T I O N When pulling out the CR Guide Shafts, take care not to lose the gear at the left side of the printer frame and the washers at the right side. -
Page 117: Assembly Of Carriage Assy
EPSON Stylus Photo RX900 Revision A 4.4.12.1 Assembly of Carriage Assy Washer (x2) Lubrication is necessary. Refer to the following section and lubricate the specified points: • Lubrication of Driven Pulley Assy (p.154) • Lubrication of Carriage Assy (p.156) Coned disc spring (x2) See Figure 4-54 for the orientation of the coned disc spring. -
Page 118: Disassembly Of Carriage Assy
EPSON Stylus Photo RX900 Revision A 4.4.12.2 Disassembly of Carriage Assy Belt Holder Fixing Plate REMOVING THE CR TIMING BELT Toothed Flat Timing Belt Remove the Carriage Assy. (p.116) Timing Belt Holder Turn the Belt Holder Fixing Plate while lifting its hook and remove it from the Timing Belt Holder. -
Page 119: Paper Guide Front Assy (Platen)
EPSON Stylus Photo RX900 Revision A 4.4.13 Paper Guide Front Assy (Platen) Remove the Linear Scale. (p.91) Remove the Printer Mechanism. (p.107) ~ Rear ~ Remove the Carriage Assy. (p.116) Left EJ Frame Release Guide Disengage the hooks (x2), and remove the Left EJ Frame Release Guide. -
Page 120: Waste Ink Pads (Platen Area)
EPSON Stylus Photo RX900 Revision A 4.4.14 Waste Ink Pads (Platen Area) Left Waste Ink Pad C A U T I O N Take due care not to stain any surrounding objects with waste ink. Right Waste Ink Pad Remove the Linear Scale. (p.91) Remove the Printer Mechanism. -
Page 121: Release Assy
EPSON Stylus Photo RX900 Revision A 4.4.15 Release Assy Remove the Printer Mechanism. (p.107) Remove the APG Assy. (p.111) From the direction of the rear of the printer, remove the screws (x3). Press the projection at the front left side to disengage the hooks (x3) of the Release Assy. -
Page 122: Pe Sensor Assy
EPSON Stylus Photo RX900 Revision A 4.4.16 PE Sensor Assy ~ Rear ~ Remove the Printer Mechanism. (p.107) Disengage the hook, and slide the PE Sensor Assy upward and remove it. ~ Front ~ After installing the PE Sensor Assy, route the lead wires as shown... -
Page 123: Upper Paper Guides
EPSON Stylus Photo RX900 Revision A 4.4.17 Upper Paper Guides ~ Rear ~ Remove the Printer Mechanism. (p.107) Remove the Release Assy. (p.121) ~ Rear ~ ~ Rear ~ Remove the PE Sensor Assy. (p.122) Upper Paper From the direction of the rear of the printer, release the springs (x4) of the Upper Paper... -
Page 124: Idle Roller Shaft Assy
EPSON Stylus Photo RX900 Revision A 4.4.18 Idle Roller Shaft Assy C A U T I O N Do not touch any of the rubber rollers of the Idle Roller Shaft Assy ~ Rear ~ with your bare hand. The rubber rollers must be free from dust and dirt. -
Page 125: Pf Motor
EPSON Stylus Photo RX900 Revision A 4.4.19 PF Motor 1. Remove the Printer Mechanism. (p.107) ~ Rear ~ Remove the two screws, and remove the PF Timing Belt and then the PF Motor. Secure the PF Motor by the following procedure: Tighten the upper screw loosely. -
Page 126: Pf Roller Assy & Pf Encoder Assy
EPSON Stylus Photo RX900 Revision A 4.4.20 PF Roller Assy & PF Encoder Assy Take care during work not to scratch or soil the encoder scale C A U T I O N area of the PF Roller Assy. Do not touch the coated surface of the PF Roller Shaft with your bare hand and do not scratch it. -
Page 127: Cd-R Guide Assy
EPSON Stylus Photo RX900 Revision A 4.4.21 CD-R Guide Assy Remove the Linear Scale. (p.91) E-type retaining ring (x3) Remove the Printer Mechanism. (p.107) Remove the Carriage Assy. (p.116) CD-R Gear 17.6 (x2) Remove the torsion springs at the right and left sides. -
Page 128: Assembly Of Cd-R Guide Assy
EPSON Stylus Photo RX900 Revision A 4.4.21.1 Assembly of CD-R Guide Assy ~ Bottom ~ Left EJ Link Left Rack Right EJ Link Lubrication is necessary. Refer to the following section and Right Rack lubricate the specified points: Lubrication of CD-R Guide Assy (p.159) Apply grease to the specified points. -
Page 129: Checking Of Cd-R Guide Assy
EPSON Stylus Photo RX900 Revision A 4.4.21.2 Checking of CD-R Guide Assy ~ Left side ~ ~ Right side ~ EJ Link EJ Frame Assy After installing the CD-R Guide Assy, operate the CD-R Guide Assy several times and CD-R Guide Assy check that it is locked properly and it operates smoothly. -
Page 130: Ej Frame Assy
EPSON Stylus Photo RX900 Revision A 4.4.22 EJ Frame Assy C A U T I O N When installing or removing the EJ frame torsion springs, take care not to bend the spring catches of the printer frame. EJ frame hold spring (x2) -
Page 131: Assembly Of Ej Frame Assy
EPSON Stylus Photo RX900 Revision A 4.4.22.1 Assembly of EJ Frame Assy C A U T I O N When installing the EJ frame torsion springs, take care not to bend the spring catches of the printer frame. Turn over the right... -
Page 132: Asf Pick Up Shaft Assy
EPSON Stylus Photo RX900 Revision A 4.4.23 ASF Pick Up Shaft Assy Remove the Printer Mechanism. (p.107) 2. Remove the Paper Feed Lower Cover. (p.114) Gear 14.4 Remove the pick up compression spring at the bottom of the printer. Remove the two screws for the ASF Pick Up Shaft Assy. - Page 133 C H A P T E R ADJUSTMENT...
-
Page 134: Overview
Revision B EPSON Stylus Photo RX700 Revision B 5.1 Overview This section describes all adjustment procedures for Stylus Photo RX700. 5.1.1 Adjustment Items Described below are adjustment items of Stylus Photo RX700. C H E C K If the disassembly process includes the removal of any... -
Page 135: Mechanical Adjustment
Lower Housing. (Install the Linear Scale after adjustment.) Refer to “4.4.4 Printer Mechanism (p.107)” With Stylus Photo RX700, four stages of PG setting are available by means of the APG Mechanism. However, make this adjustment with the mechanism in the minimum PG position (PG-: 1.2 mm). - Page 136 Set the gauge at the right end, and move the carriage C H E C K Stylus Photo RX700 does not have any mechanism that over the gauge. P O I N T permits unlocking the carriage. Therefore, if the carriage is in...
- Page 137 Revision B EPSON Stylus Photo RX700 Revision B Place the gauge on the Paper Guide Front Assy at its left end. (See Figure 5-7) Move the Carriage Assy over the gauge. Turn each of the Adjustment Bushes to a position where the Printhead comes in contact with the gauge.
-
Page 138: Pf Belt Tension Adjustment
Revision B EPSON Stylus Photo RX700 Revision B 5.2.2 PF Belt Tension Adjustment C H E C K If plucking the belt is not reflected on the LCD at all, try P O I N T plucking the belt again after waiting 2 ~ 3 seconds. -
Page 139: Fd Belt Tension Adjustment
Revision B EPSON Stylus Photo RX700 Revision B 5.2.3 FD Belt Tension Adjustment C H E C K If plucking the belt is not reflected on the LCD at all, try P O I N T plucking the belt again after waiting 2 ~ 3 seconds. -
Page 140: Adjustments By Adjustment Program
Revision B EPSON Stylus Photo RX700 Revision B 5.3 Adjustments by Adjustment Program Preparations for use of the program: Copy the supplied folder containing the adjustment program onto the HDD of a 5.3.1 Overview C H E C K Connect the printer to the PC with the USB cable before running... -
Page 141: Starting The Adjustment Program
Revision B EPSON Stylus Photo RX700 Revision B 5.3.2 Starting the Adjustment Program Start the adjustment program for Stylus Photo RX700 Usually click [OK] as “Auto select” is chosen. Usually click [OK] as “Auto select” is chosen. Particular Adjustment Mode Sequential Adjustment Mode On the screen, select “Replaced”... -
Page 142: Scanner Home Position Adjustment
EPSON 1401646 register the program Note : “ ”: available on the market, “EPSON”: available from EPSON in the start menu Note “*”: With Win2000, the USB driver must be reinstalled after several times of USB connection. Therefore, use of a PC with Win2000 is not recommend. -
Page 143: Home Position Adjustment Procedure
EPSON Stylus Photo RX700 Revision B 5.4.3 Home Position Adjustment Procedure Connect the Stylus Photo RX700 to the PC with the USB cable, turn the power on, and set the home position adjustment tool. (Selection from here is also possible) -
Page 144: Home Position Confirmation Procedure
Revision B EPSON Stylus Photo RX700 Revision B Confirm that the home position adjustment result is “TEST OK”. (See Figure 5-17) C H E C K After adjustment, perform “Home Position Confirmation” and P O I N T make certain that the adjustment values have been written in TEST OK EEPROM. -
Page 145: Uploading Firmware
Then the firmware will automatically be uploaded. Stylus Photo RX700 has two types of firmware. Update the two types of firmware in [Fun] + [B&W] + [Color] + [Power] succession from a memory card. -
Page 146: Chapter 6 Maintenance
C H A P T E R MAINTENANCE... -
Page 147: Overview
EPSON Stylus Photo RX700 Revision A 6.1 Overview Table 6-1. Parts to be Replaced at Maintenance Error Parts Name (Reference Page for Disassembly/Assembly) End * This section describes maintenance work to maintain the functions and performance of 0th column side 11,000 points Waste Ink Pads (Lower Case) (p.110) -
Page 148: Maintenance Counters
EPSON Stylus Photo RX700 Revision A 6.1.1.1 Maintenance counters C H E C K Do not open or close any of the I/C Covers unnecessarily. P O I N T Flushing waste ink counters Af, Bf: If you take out any ink cartridge immediately after opening the I/C... -
Page 149: Waste Ink Absorption Capacity
EPSON Stylus Photo RX700 Revision A 6.1.1.2 Waste Ink Absorption Capacity 6.1.2 Consumables and Regular Replacement Parts Lower Case There are no Regularly Replaced Parts. Waste ink resulting from cleaning or flushing is absorbed by the waste ink pads in Only the ink cartridges listed below are consumables. -
Page 150: Cleaning
EPSON Stylus Photo RX700 Revision A 6.2 Cleaning Do not use such a solvent as thinner. C A U T I O N Take care that the surface of the removed LCD is kept free from scratches or dust and dirt. -
Page 151: Lubrication
EPSON Stylus Photo RX700 Revision A 6.3 Lubrication Lubrication locations are as follows: Table 6-7. Lubrication Locations 6.3.1 Designated Lubricant Unit / Component (Reference Page for Disassembly/Assembly) Refer to ASF Rear Assy p.152 Table 6-6. Designated Lubricant Printer Mechanism Paper Guide Front Assy (Platen) (p.119) p.152... - Page 152 EPSON Stylus Photo RX700 Revision A Lubrication of ASF Rear Assy Table 6-8. Lubrication of ASF Rear Assy Assy to be Lubricated Precautions Lubrication Points/Amount of Application Type (Reference Page) (Fig No.) Lubrication Points: LD Roller shaft support surface G-74...
- Page 153 EPSON Stylus Photo RX700 Revision A Lubrication of Release Assy Sensor Lever Table 6-10. Lubrication of Release Assy contact area Assy to be Lubricated Precautions Lubrication Points/Amount of Application Type (Reference Page) (Fig No.) Lubrication Points: Shaft sliding surface (x7) G-26 Amount of Application: ø1x2mm (Use an injector)
- Page 154 EPSON Stylus Photo RX700 Revision A Lubrication of Driven Pulley Assy Table 6-11. Lubrication of Driven Pulley Assy ~Front~ ~Rear~ Assy to be Lubricated Precautions Lubrication Points/Amount of Application Type (Reference Page) (Fig No.) Lubrication Points: Printer frame sliding surface...
- Page 155 EPSON Stylus Photo RX700 Revision A Lubrication of Rear Paper Guide Assy Table 6-12. Lubrication of Rear Paper Guide Assy Assy to be Lubricated Precautions Lubrication Points/Amount of Application Type (Reference Page) (Fig No.) Lubrication Points: Idle Roller shaft support...
- Page 156 EPSON Stylus Photo RX700 Revision A Lubrication of Carriage Assy Table 6-13. Lubrication of Carriage Assy Assy to be Precautions Lubricated Lubrication Points/Amount of Application Type (Fig No.) (Reference Page) Lubrication Points: Periphery (x4) G-26 PG Cam Bush Amount of Application: ø1x1mm (Use an injector) (p.116)
- Page 157 EPSON Stylus Photo RX700 Revision A Lubrication of Idle Roller Shaft Assy Bush (left side) Printer Frame Bush (right side) Table 6-14. Lubrication of Idle Roller Shaft Assy Assy to be Lubricated Precautions Lubrication Points/Amount of Application Type (Reference Page) (Fig No.)
-
Page 158: (P.116) Figure
EPSON Stylus Photo RX700 Revision A Lubrication of PF Roller Assy Table 6-16. Lubrication of PF Roller Assy Assy to be Lubricated Precautions Lubrication Points/Amount of Application Type (Reference Page) (Fig No.) Lubrication Points: PF Roller Support Lever Printer Frame (p.126) -
Page 159: Amount Of Application: (Apply With A Brush)
EPSON Stylus Photo RX700 Revision A Lubrication of CD-R Guide Assy Table 6-17. Lubrication of CD-R Guide Assy Assy to be Lubricated Precautions Lubrication Points/Amount of Application Type (Reference Page) (Fig No.) CD-R Guide Assy Lubrication Points: Right and left shanks G-26 Figure 6-17 (p.127) - Page 160 EPSON Stylus Photo RX700 Revision A Lubrication of EJ Frame Assy Left Rack Right Rack Table 6-18. Lubrication of EJ Frame Assy Assy to be Lubricated Precautions Lubrication Points/Amount of Application Type (Reference Page) (Fig No.) Lubrication Points: Left Link Lever sliding surface...
- Page 161 EPSON Stylus Photo RX700 Revision A Lubrication of ASF Pick Up Shaft Assy Table 6-19. Lubrication of ASF Pick Up Shaft Assy Assy to be Lubricated Precautions Shaft Lubrication Points/Amount of Application Type (Reference Page) (Fig No.) surface Lubrication Points: Shaft rotating surface (x4)
- Page 162 EPSON Stylus Photo RX700 Revision A Lubrication of CR Motor Unit Table 6-20. Lubrication of CR Motor Unit (Scanner Unit) Assy to be Lubricated Precautions Lubrication Points/Amount of Application Type Bottom face side (Reference Page) (Fig No.) Lubrication Points: Shafts (x2) G-26 Amount of Application: 0.01~0.03g...
- Page 163 C H A P T E R APPENDIX...
-
Page 164: Connectors
EPSON Stylus Photo RX700 Revision A 7.1 Connectors 7.1.1 Connector Assignments Table 7-1. Connectors on the Main Board CN No. Color Pins Connected to – (USB interface connector) – (USB interface connector) (FFC) CR, PW Sensor (FFC) PF Encoder White... -
Page 165: Pin Assignment
EPSON Stylus Photo RX700 Revision A 7.1.2 Pin Assignment CN1 (Main Board side: CN6, 7 ) Print Head Pin No.* Assign Pin No. * Assign (CN18 : NC) COMA VBSA 17 (1) 19 (17) VBSA COMA COMC VBSC VBSC COMC... - Page 166 EPSON Stylus Photo RX700 Revision A Relay Connector (CN4) USB2.0 (CN1) Table 7-2. Relay Connector Pin Assignment Table 7-4. USB 2.0 Pin Assignment Main Board side Motor side Assign Assign CN No. Pin No. Pin No. Motor Name VBUS_IN APG A...
- Page 167 EPSON Stylus Photo RX700 Revision A I/C SW1 (CN5) CD-R Sensor 2 (CN14) Table 7-8. I/C SW 1 Pin Assignment Table 7-12. CD-R Sensor 2 Pin Assignment Assign Assign I/C SW1 CDR2 I/C SW2 (CN10) CD-R Sensor 1 (CN15) Table 7-9. I/C SW 2 Pin Assignment Table 7-13.
- Page 168 EPSON Stylus Photo RX700 Revision A PE Sensor (CN30) Table 7-18. CCD Unit Pin Assignment (continued) Assign Connected to Function Table 7-17. PE Sensor Pin Assignment – +5V power Assign – +12V: ON/OFF is controlled by +12V power PZ2 (E01A56B*) PE_VCC –...
- Page 169 EPSON Stylus Photo RX700 Revision A LCD Connector (CN25) Table 7-22. CF Slot Pin Assignment (continued) Assign Function Table 7-21. LCD Connector Pin Assignment /WAIT Bus cycle extension Assign Connected to Function BVD2/SPKR Battery voltage detection / audio Reserve –...
- Page 170 EPSON Stylus Photo RX700 Revision A Table 7-25. Smart Media Pin Assignment Table 7-24. SD Pin Assignment Assign Function FRDY Ready Assign Function FOEB Output enable CD/DAT3 Card Detect /Data Line [Bit 3] FCEB Chip enable Command/Response Supply voltage ground...
- Page 171 EPSON Stylus Photo RX700 Revision A Modification Factor List Table 7-27. Modification Factor List Mark Meaning Modified by factory setting command Modified by mechanical operation Modified by print operation Modified by standalone-print operation that is chosen from mode-buttons Modified by user-interface setting operation...
-
Page 172: Component Layout
EPSON Stylus Photo RX700 Revision A 7.2 Component Layout This section shows the component layout drawings for various circuit boards. Figure 7-4. C583PNL-B Figure 7-3. C583PNL Appendix Component Layout... - Page 173 EPSON Stylus Photo RX700 Revision A C583PSB (Front) C583PSB (Back) Figure 7-5. C583PSB Component Layout Appendix Component Layout...
-
Page 174: Electric Circuit Diagrams
EPSON Stylus Photo RX700 Revision A 7.3 Electric Circuit Diagrams This section shows electric circuit diagrams of Stylus Photo RX700. C583Main C583PNL C583PSB/PSE CCD Unit Board (Scanner Unit) Appendix Electric Circuit Diagrams... - Page 175 Model : PM-A900/ Stylus PHOTO RX700 Board : C583Main Sheet : 1/3...
- Page 176 Model : PM-A900/ Stylus PHOTO RX700 Board : C583Main Sheet : 2/3...
- Page 177 Model : PM-A900/ Stylus PHOTO RX700 Board : C583Main Sheet : 3/3...
- Page 178 Model : PM-A900/ Stylus PHOTO RX700 Board : C583 PNL & PNL-B Sheet : 1/1...
- Page 179 Model : PM-A900/ Stylus PHOTO RX700 Board : C583PSB Sheet : 1/1...
- Page 180 Model : PM-A900/ Stylus PHOTO RX700 Board : C583PSE Sheet : 1/1...
- Page 181 NONE R24 100 PH1L PH3L SNCK1A SNCK1B TPS60400 R27 100 D_5V D_5V D_5V SNCK1C 0.1uF SNCK1D 2.2uF 4.7uF 4.7uF 0.1uF 0.1uF 74HCT4053PW AC244 AC244 Model : PM-A900 / Stylus PHOTO RX700 Board : Scanner board Sheet : 1/3 : 0.1...
- Page 182 For Primax Setting: Off ON Off 120pF 120pF For J Setting: ON Off ON HEADER 28 NONE D_5V approach to AC244 0.1uF B6 0 VDD5 approach to ASIC 100uF/16V Model : PM-A900 / Stylus PHOTO RX700 Board : Scanner board Sheet : 2/3 : 0.1...
- Page 183 120pF 120pF GL1000 ADDT5 0.1uF 5.6K 120pF 120pF R75 1M GL1000 ADDT6 6MHz 120pF 120pF GL1000 ADDT7 Model : PM-A900 / Stylus PHOTO RX700 120pF 120pF Board : Scanner Board NONE B8-B15 0 ohm--> GL1000 Sheet : 3/3 : 0.1...
-
Page 184: Exploded Diagrams
EPSON Stylus Photo RX700 Revision A 7.4 Exploded Diagrams This section shows exploded diagrams of Stylus Photo RX700. The exploded diagrams consist of the following components: Table 7-29. Exploded Diagrams Component Page Accessory-related Diagram (No.1) page 185 Exterior Part-related Diagram (No.2) page 186 Main Board-related Diagram (No.3) - Page 185 For 220V,240V PM-A900 / EPSON STYLUS RX700 NO.1 Rev.01 C583-ACCE-001_Overseas...
- Page 186 115 103 PM-A900 / EPSON STYLUS RX700 NO.2 Rev.03 C583-CASE-0012...
- Page 187 PM-A900 / EPSON STYLUS RX700 NO.3 Rev.01 C583-ELEC-001...
- Page 188 EPSON STYLUS PHOTO RX700 NO.5 Rev.01 C583-MECH-001P-1_Overseas...
- Page 189 508 515 PM-A900 / EPSON STYLUS RX700 NO.6 Rev.01 C583-MECH-001P-2...
- Page 190 PM-A900 / EPSON STYLUS RX700 NO.7 Rev.03 C583-MECH-001P-32...
- Page 191 PM-A900 / EPSON STYLUS RX700 No.8 Rev.02 C583-MECH-001P-41...
- Page 192 PM-A900 / EPSON STYLUS RX700 NO.9 Rev.01 C583-MECH-001P-5...
- Page 193 EPSON STYLUS RX700 NO.10 Rev.01 C583-MECH-001P-6_Overseas...
- Page 194 Rev.01 C583-MECH-001P-7 PM-A900 / EPSON STYLUS RX700 NO.11...
- Page 195 PM-A900 / EPSON STYLUS RX700 NO.12 Rev.02 C583-MECH-001P-81...
- Page 196 PM-A900 / EPSON STYLUS RX700 NO.13 Rev.01 C583-MECH-001P-9...
- Page 197 PM-A900 / EPSON STYLUS RX700 NO.4 Rev.01 C583-MECH-001S...
-
Page 198: Asp Reference List
EPSON Stylus Photo RX700 Revision A 7.5 ASP Reference List Table 7-30. ASP Reference List Ref. No. Parts name This section shows the ASP list of Stylus Photo RX700. "BUTTON,RIGHT" "BUTTON,LEFT" "HOUSING,PANEL;EBM" Table 7-30. ASP Reference List "COVER,LCD" Ref. No. - Page 199 EPSON Stylus Photo RX700 Revision A Table 7-30. ASP Reference List Table 7-30. ASP Reference List Ref. No. Parts name Ref. No. Parts name "PANEL LCD ASSY.,ASP" "BUSHING,CAM,PG" "LABEL,CAUTION,TRAY;D" "BUSHING,PARALLEL ADJUST,LEFT,FRONT" "C.B.SCREW,3X6,F/ZN-3C" "TORSION SPRING,PRESS,MAIN SHAFT" "C.B.S-TITE SCREW,3X6,F/ZN-3C" "TORSION SPRING,PRESS,SUB SHAFT"...
- Page 200 EPSON Stylus Photo RX700 Revision A Table 7-30. ASP Reference List Table 7-30. ASP Reference List Ref. No. Parts name Ref. No. Parts name "BUSHING,8,RIGHT" "SPUR GEAR,12,TRANSMISSION" "PAPER GIUDE,REAR" "HOLDER,PLANET" "PAPER GUIDE,U-SHAPE ASSY.;B,ASP" "COMPRESSION SPRING,PLANET" "SHAFT,ROLLER,IDLE ASSY.,ASP" "SPUR GEAR,12,PLANET" "MOTOR ASSY.,CR"...
- Page 201 EPSON Stylus Photo RX700 Revision A Table 7-30. ASP Reference List Table 7-30. ASP Reference List Ref. No. Parts name Ref. No. Parts name "POROUS PAD,INK EJECT;F" "JOINT,DUCT" "POROUS PAD,INK EJECT;E" "WEIGHT,CR" "POROUS PAD,INK EJECT;C" "POROUS PAD,MOUNTING PLATE FILTER,UPPER" "POROUS PAD,INK EJECT;B"...
- Page 202 EPSON Stylus Photo RX700 Revision A Table 7-30. ASP Reference List Ref. No. Parts name HP BOARD(ASP) "HINGE UNIT,SCANNER" "COVER,BOARD ASSY.LNVERTOR,TPU(ASP)" INVERTER TPU(ASP) "HARNESS,TPU(ASP)" HOLDER HINGE(ASP) "GUIDE,HINGE(ASP)" C.B.P-TITE SCREW.4X12 F/NI-3C(ASP) "HOUSING TOP,TPU(ASP)" "LOGO PLATE,7.36X29;B" "HOUSING UPPER,TPU(ASP)" CARRIAGE COVER ASSY(ASP) "FFC,SENSOR 9PIN(ASP)"...
Need help?
Do you have a question about the Stylus Photo RX700 and is the answer not in the manual?
Questions and answers