Quantum scalar i40 Quick Start Manual
Hide thumbs
Also See for scalar i40:
- Maintenance manual (474 pages) ,
- User manual (404 pages) ,
- Quick start manual (44 pages)
Table of Contents
Advertisement
Quick Links
Scalar
This quick start guide provides basic installation and configuration
instructions for the Scalar® i40 and Scalar i80 libraries. For more
Quantum Scalar i40 and Scalar i80 User's Guide
information, see the
located on the documentation CD provided with your library.
This instruction uses the following conventions:
Caution: Cautions indicate potential hazards to equipment and are
included to prevent damage to equipment.
WARNING: Warnings indicate potential hazards to personal safety and
are included to prevent injury.
i
40 and Scalar
Quick Start Guide
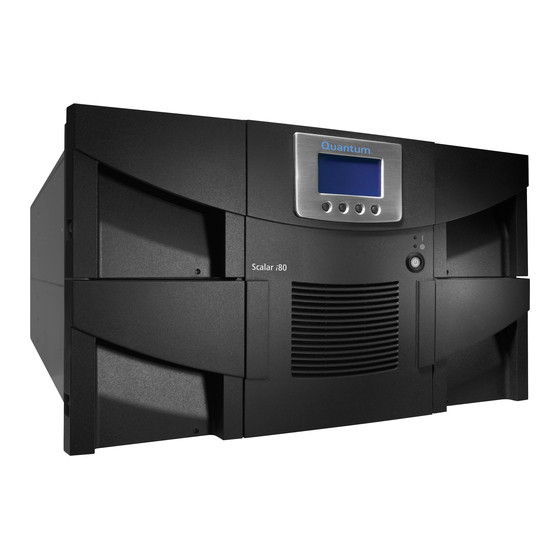
Scalar i80
Scalar i40 and Scalar i80
Contents
Required Tools and Equipment .............. 2
Environmental Requirements ................ 2
Taking ESD Precautions .......................... 2
Unpacking the Library............................ 3
Accessory Kit Contents .......................... 5
i
80
Desktop Kit............................................. 5
Installing the Tape Drives ....................... 5
Connecting the Cables ........................... 7
Network Settings ................................... 8
Client .................................................... 13
Configuring Partitions.......................... 14
Test ....................................................... 14
Importing Tape Cartridges ................... 15
Saving the Library Configuration ........ 17
Configuring the Host Software............ 17
Registering the Library......................... 17
Scalar i40
www.quantum.com
Advertisement
Table of Contents

Related Manuals for Quantum scalar i40


Summary of Contents for Quantum scalar i40
-
Page 1: Table Of Contents
This quick start guide provides basic installation and configuration instructions for the Scalar® i40 and Scalar i80 libraries. For more Running the Installation and Verification Quantum Scalar i40 and Scalar i80 User’s Guide information, see the Test ............14 located on the documentation CD provided with your library. -
Page 2: Required Tools And Equipment
• Temperature: 50°F – 95°F (10°C – 35°C) • Altitude: –500 to 10,000 feet (–152 to 3048 meters) These environmental conditions apply when the Scalar i40 and Scalar i80 libraries are in Quantum Scalar i40 and Scalar i80 operation. For additional specifications, refer to the User’s Guide... -
Page 3: Unpacking The Library
Note: Unpack the library as close to the installation location as possible. 1 Inspect the outer library packaging for damage. If there is any damage evident on the library packaging, do not continue with the installation and contact Quantum customer support. - Page 4 Scalar i40 and Scalar i80 Quick Start Guide 3 Remove the top foam. 4 Scalar i80 only: Remove the shipping carton by lifting it straight up out of the bottom tray. 5 With the help of a second person, lift the library chassis out of the bottom foam and place it on a table approximately waist high.
-
Page 5: Accessory Kit Contents
Slots are numbered starting from the bottom and moving up. • Scalar i40: Half-height tape drives can be installed in slots 1 and 2. • Scalar i80: Half-height tape drives can be installed in slots 1, 2, 3, 4, and 5. -
Page 6: Installation Instructions
Scalar i40 and Scalar i80 Quick Start Guide Figure 3 Acceptable Installation Locations for Tape Drive Slot 5 Half-Height Tape Drives Tape Drive Slot 4 Tape Drive Slot 3 Tape Drive Slot 2 Tape Drive Slot 2 Tape Drive Slot 1... -
Page 7: Connecting The Cables
Scalar i40 and Scalar i80 4 Tighten the tape drive’s captive thumbscrews finger tight to secure the tape drive to the library chassis. 5 Install a filler plate over any open tape drive slot. If you need more filler plates, contact Quantum. -
Page 8: Turning The Library On And Configuring Network Settings
Scalar i40 and Scalar i80 Quick Start Guide Figure 5 Reinstalled Power supply cord Components Filler plate Ethernet Service port – cable in LEFT do not use SCB port Turning the Library ON and Configuring Network Settings Caution: Before turning the library on, make sure you removed the shipping restraint (4 thumbscrews, mylar sheet, metal clip) from the top of the library! Otherwise, the library will not initialize. - Page 9 Scalar i40 and Scalar i80 Figure 6 Turning on the Library Power LED Power button When initialization completes, the Setup Wizard screen appears on the operator panel (see Figure 7). The operator panel screen contains a menu bar with operations that correspond to the four physical buttons below it.
- Page 10 Scalar i40 and Scalar i80 Quick Start Guide The Setup Date/Time screen appears (see Figure Figure 8 Setup Wizard – Date/Time Screen 4 Do one of the following: • To accept the date and time, press the Accept button. • To change the date or time, press the Change button. The Date field becomes available to edit and the menu bar button designations change.
- Page 11 You may have received, separately, License Key Certificates containing instructions on how to retrieve your desired license key from the Quantum Web site. 6 Once you have retrieved your license key, you may add it now or any time later. (If you did not receive your License Key Certificate, contact the place of purchase.)
- Page 12 • I/E Station Slots — You can create a maximum of five I/E station slots on a Scalar i40 and a maximum of ten on a Scalar i80. The minimum is zero. Be aware that if you configure zero I/E station slots, you will not be able to import and export tape cartridges.
-
Page 13: Accessing The Library Via The Web Client
It is recommended that you use the Web client to perform most library functions. The Web client is easier to use than the operator panel, and it presents more information Scalar i40 and Scalar i80 User’s and options than the operator panel does. Refer to the Guide or Web client online help for detailed instructions on how to use the Web client. -
Page 14: Configuring Partitions
2 Check your library’s installed firmware version by selecting Reports > About Library from the operator panel or Reports > About > Scalar i40/i80 from the Web client. 3 If the firmware installed on your library is not at the current level, download the current firmware. -
Page 15: Importing Tape Cartridges
Locations of the I/E stations: • Scalar i40 — The I/E station is located in the first column of the right magazine. • Scalar i80 — If you have five I/E station slots configured, the I/E station is located in the first column of upper right magazine. - Page 16 Scalar i40 and Scalar i80 Quick Start Guide To import tape cartridges: 1 Unlock the I/E station. a From the operator panel, press the Actions button, then press the Down button to select I/E, then press Select. b Select Unlock I/E Station and press the Select button.
-
Page 17: Saving The Library Configuration
Before you can use the library for backup, you need to configure your host application. Refer to your host software documentation for instructions on configuring your host. Scalar i40 and Scalar i80 User’s Guide Refer to the for instructions on how to obtain information from the library, such as host name, WWPN, and so on. - Page 18 ©2010 Quantum Corporation. All rights reserved. Quantum, the Quantum logo, and all resellers, OEMs and other suppliers to meet customers’ evolving other logos are registered trademarks of Quantum Corporation or of their respective owners. data protection needs. Protected by Pending and Issued U.S. and Foreign Patents, including U.S. Patent No. 5,990,810.
Need help?
Do you have a question about the scalar i40 and is the answer not in the manual?
Questions and answers