Quantum Scalar i40 Maintenance Manual
Hide thumbs
Also See for Scalar i40:
- User manual (404 pages) ,
- Quick start manual (44 pages) ,
- Replacement manual (8 pages)
Table of Contents
Advertisement
Quick Links
Advertisement
Table of Contents
Troubleshooting

Related Manuals for Quantum Scalar i40


Summary of Contents for Quantum Scalar i40
- Page 1 Maintenance Guide Quantum Scalar 40 and Scalar 80 6-66548-07 Rev A...
- Page 2 Preserving the World’s Most Important Data. Yours., StorageCare, and Vision are trademarks of Quantum. LTO and Ultrium are trademarks of HP, IBM, and Quantum in the U.S.A. and other countries. All other trademarks are the property of their respective companies.
-
Page 3: Table Of Contents
Contents Preface Scalar i40 Supported Versions ..... . . xxv Chapter 1 Common Service Procedures Receiving Customer Library E-mail......2 Connecting to the Service Port . - Page 4 ......57 Quantum Scalar i40 and i80 Maintenance Guide...
- Page 5 Removing and Installing a Filler Plate ......119 Removing and Installing a Tape Drive Filler Plate ..119 Quantum Scalar i40 and i80 Maintenance Guide...
- Page 6 Replacing a Power Supply in a Single-Power-Supply System (Scalar i40 and Scalar i80)......127 Adding or Replacing a Redundant Power Supply on the ...
- Page 7 Front Panel LEDs ........206 System Control Board LEDs ......207 Quantum Scalar i40 and i80 Maintenance Guide...
- Page 8 DT017 ......... . 241 viii Quantum Scalar i40 and i80 Maintenance Guide...
- Page 9 DT096 ......... . 284 Quantum Scalar i40 and i80 Maintenance Guide...
- Page 10 DT182 ......... . 327 Quantum Scalar i40 and i80 Maintenance Guide...
- Page 11 Diagnostic Resolutions ........340 DR000 - Contact Quantum Service ....340 DR001 - PS Power Loss .
- Page 12 DR123 - Drive Tape Alert 23 ......402 DR130 - Drive Tape Alert 30 ......404 Quantum Scalar i40 and i80 Maintenance Guide...
- Page 13 DR 196 - Media Security Warning ..... 432 Appendix A Tape Alert Flag Descriptions Quantum Scalar i40 and i80 Maintenance Guide xiii...
- Page 14 Contents Index Quantum Scalar i40 and i80 Maintenance Guide...
- Page 15 Setup - Drive Settings Screen ..... . 39 Figure 17 Setup - Control Path Screen ..... . . 40 Quantum Scalar i40 and Scalar i80 Maintenance Guide...
- Page 16 Magazine Release Latch Access Holes ....91 Figure 43 Securing the Scalar i40 and Scalar i80 in the Rack ..92 Quantum Scalar i40 and Scalar i80 Maintenance Guide...
- Page 17 Restraining the Y-tray ......146 Figure 66 Scalar i40 Packaging ......147 Figure 67 Scalar i80 Packaging .
- Page 18 Power Supply LED......210 Figure 91 Enabling Automatic EKM Path Diagnostics... 223 xviii Quantum Scalar i40 and Scalar i80 Maintenance Guide...
-
Page 19: Preface
• Chapter 5, Getting Information About the Library describes all of the reporting features on the library. Quantum Scalar i40 and Scalar i80 Maintenance Guide... - Page 20 • Right side of the system — Refers to the right side as you face the component being described. • Left side of the system — Refers to the left side as you face the component being described. Quantum Scalar i40 and Scalar i80 Maintenance Guide...
- Page 21 Preface Product Safety Quantum will not be held liable for damage arising from unauthorized Statements use of the product. The user assumes all risk in this aspect. This unit is engineered and manufactured to meet all safety and regulatory requirements. Be aware that improper use may result in bodily injury, damage to the equipment, or interference with other equipment.
- Page 22 Preface Related Documents The following Quantum documents are also available for Scalar i40 and Scalar i80 systems: Document Document Title Scalar i40 and Scalar i80 User’s Guide 6-66545-xx Scalar i40 and Scalar i80 Quick Start Guide 6-66546-xx Scalar i40 and Scalar i80 Release Notes...
- Page 23 Englewood, CO 80112 (800) 854-7179 or (303) 397-2740 Contacts Quantum company contacts are listed below. Quantum Corporate Headquarters To order documentation on the Scalar i40 or Scalar i80 or other products, contact: (Corporate Headquarters) Quantum Corporation 1650 Technology Drive, Suite 700...
- Page 24 • eSupport - Submit online service requests, update contact information, add attachments, and receive status updates via e-mail. Online Service accounts are free from Quantum. That account can also be used to access Quantum’s Knowledge Base, a comprehensive repository of product support information. Sign up today at: http://www.quantum.com/osr...
-
Page 25: Scalar I40 Supported Versions
Quantum provides support for the current release and the two previous Versions major releases. For example, since i4 is the latest release, Quantum supports releases i4, i3 and i2. Releases earlier than i2 are not supported. Quantum Scalar i40 and Scalar i80 Maintenance Guide... - Page 26 Preface xxvi Quantum Scalar i40 and Scalar i80 Maintenance Guide...
-
Page 27: Common Service Procedures
Taking a Partition Online or Offline • Taking a Tape Drive Online or Offline • Unlocking the I/E Station • Releasing Magazines • Configuring the Service Port • Saving and Restoring the Library Configuration Quantum Scalar i40 and Scalar i80 Maintenance Guide... -
Page 28: Receiving Customer Library E-Mail
Note: The e-mail account techsup@quantum.com is disabled by default and cannot be deleted, although you can modify the priority level. From the Web client, click Setup > Notification > Setup. Quantum Scalar i40 and Scalar i80 Maintenance Guide... -
Page 29: Connecting To The Service Port
Note: If the login page does NOT appear, the customer may have changed the service port subnet because it conflicted with the customer port network subnet. To view the service port IP address, select Tools > Service Network on the operator panel. Quantum Scalar i40 and Scalar i80 Maintenance Guide... -
Page 30: Figure 1 Service Port
192.168.177.1. If the customer changed the subnet (third octet), the final octet will still be 1, even though it displays as 000. 4 Log in to the library. Figure 1 Service Port Service port Customer port Quantum Scalar i40 and Scalar i80 Maintenance Guide... -
Page 31: Logging In With Service Privileges
See Select Exit twice to return to the default home screen. on page 11 for more information. Quantum Scalar i40 and Scalar i80 Maintenance Guide... -
Page 32: Service Menu Trees
Service Menu Trees Service Menu Trees Figure 2 on page 7 shows the operator panel service menu with service items highlighted. Figure 5 on page 16 shows the Web client service menu. Quantum Scalar i40 and Scalar i80 Maintenance Guide... -
Page 33: Figure 2 Operator Panel Service Menu
Admin Privileges Only SMI-S * Only Available if LUI Power Save Passwords are enabled Alternate Home Auto DT Close Security Services Network IF SSH Services ICMP Web client Service User SNMP V1/V2 Quantum Scalar i40 and Scalar i80 Maintenance Guide... -
Page 34: Figure 3 Web Client Service Menu
Reset Factory Defaults Registrations User Management User Accounts Drives Robotics Remote Authentication Reset Operator Panel Drive Tests Robotics Get/Put Test Passwords Encryption Drive Reset System Configuration Partition Configuration Date & Time Register Library Quantum Scalar i40 and Scalar i80 Maintenance Guide... -
Page 35: Changing Operator Panel Home Screen View
I/E unlock access, displays the number of I/E slots and the number of I/E slots that are full. Changes to the home screen can be made only from the operator panel. Quantum Scalar i40 and Scalar i80 Maintenance Guide... -
Page 36: Figure 4 Alternate Home Screen
I /E slots Number of configured I /E slots Unlock I/E Station Scalar i80 Number of occupied I /E slots Number of configured I/E slots Unlock top Unlock bottom I/E Station I/E Station Quantum Scalar i40 and Scalar i80 Maintenance Guide... -
Page 37: Changing To Alternate Home Screen
Ethernet port or the library service port. If a customer disabled remote service login, you may need to enable it during your session. Remember to disable it again when you are finished. Quantum Scalar i40 and Scalar i80 Maintenance Guide... -
Page 38: Logging Out
Web client closes the browser window but does not log you out. Operator Panel Note: If you are viewing the alternate home screen, select Menu to return to default home screen. 1 Select Actions > Logout. 2 Press Yes to confirm. Quantum Scalar i40 and Scalar i80 Maintenance Guide... -
Page 39: Resetting The Admin Password
1 Using the Web client, log in as a Service user using the default Service login and password (see Logging In With Service Privileges on page 5). Quantum Scalar i40 and Scalar i80 Maintenance Guide... -
Page 40: Shutting Down, Restarting, Turning Off, And Removing Power
The steps for shutting down, turning off, and completely removing library power are: 1 Make sure the connected host applications are not sending commands to the library and that all library operations have stopped. Quantum Scalar i40 and Scalar i80 Maintenance Guide... -
Page 41: Shutting Down The Library
Note: If you are viewing the alternate home screen, select Menu to return to default home screen. 2 Press Actions > Shutdown > Shutdown Library. 3 Press Yes to confirm. A “shutdown in progress” message appears on the operator panel (see Figure Quantum Scalar i40 and Scalar i80 Maintenance Guide... -
Page 42: Figure 5 Shutdown In Progress Message
2 Select Shutdown and click Apply. 3 Click OK to confirm. 4 Wait until the “ready to power down” message appears on the operator panel (see Figure Figure 7 Ready to Power Down Message Quantum Scalar i40 and Scalar i80 Maintenance Guide... -
Page 43: Restarting The Library
4 Several messages appear on the screen, in the order shown in Figure 8. Do not do anything in response to these messages. The library will restart and initialize on its own. Quantum Scalar i40 and Scalar i80 Maintenance Guide... -
Page 44: Figure 8 Series Of Restart Messages
5 Several messages appear on the operator panel, in the order shown Figure 8 on page 18. Do not do anything in response to these messages. The library will restart and initialize on its own. Quantum Scalar i40 and Scalar i80 Maintenance Guide... -
Page 45: Turning Off The Library
It can take up to 12 seconds for the power to completely turn off. Note: Turning off the library does not completely remove library power (see Completely Removing Library Power on page 20). Quantum Scalar i40 and Scalar i80 Maintenance Guide... -
Page 46: Completely Removing Library Power
• Disconnect the power cord from each power supply on the back of the library. It may take 1 to 2 seconds for motion to completely stop. Quantum Scalar i40 and Scalar i80 Maintenance Guide... -
Page 47: Taking The Library Offline
• Online — SCSI hosts control the partition. In this mode, all host application SCSI commands are processed. • Offline — SCSI hosts cannot control the partition. In this mode, library operations can be performed via the local or remote user interface. Quantum Scalar i40 and Scalar i80 Maintenance Guide... - Page 48 The partitions are displayed, along with their online/offline status. 2 Use the Up and Down buttons to select a partition. 3 Press Modify. 4 Uses the Up and Down buttons to change the mode. 5 Press Apply. Quantum Scalar i40 and Scalar i80 Maintenance Guide...
-
Page 49: Taking A Tape Drive Online Or Offline
A drive taken offline will remain offline until you bring it back online, or until the library is rebooted. Quantum Scalar i40 and Scalar i80 Maintenance Guide... - Page 50 2 Use the Up and Down buttons to select a tape drive. 3 Press Modify. 4 Use the Up and Down buttons to select Online or Offline. 5 Press Apply. The new mode is displayed. 6 Press Exit. Quantum Scalar i40 and Scalar i80 Maintenance Guide...
-
Page 51: Unlocking The I/E Station
I/E station is exposed. Note: Because the I/E station is part of the magazine, all storage slots contained in that magazine are unavailable to applications during the time that the I/E station is open. Quantum Scalar i40 and Scalar i80 Maintenance Guide... -
Page 52: Figure 9 I/E Station Unlocked Message
4 Within 30 seconds, open the I/E station by pulling outward on the magazine bezel handle until the magazine stops moving. If you do not open the magazine within 30 seconds, it locks and you receive the following failure message. Quantum Scalar i40 and Scalar i80 Maintenance Guide... -
Page 53: Figure 10 I/E Station Locked Message
4 Within 30 seconds, pull outward on the magazine bezel handle to open the I/E station. If you do not open the magazine within 30 seconds, it locks. 5 When finished, push the magazine in completely. The I/E station is now locked. Quantum Scalar i40 and Scalar i80 Maintenance Guide... -
Page 54: Releasing Magazines
(see Chapter 7, Diagnostic Tickets and Resolutions). Additionally, the library makes sure nothing is physically blocking the magazine that could cause damage to library components before allowing you to release it. Quantum Scalar i40 and Scalar i80 Maintenance Guide... -
Page 55: Releasing Magazines Via The User Interface
If you do not open the magazine within 30 seconds, it locks and you receive the following failure message. Figure 12 Magazine Locked Timer Message Quantum Scalar i40 and Scalar i80 Maintenance Guide... -
Page 56: Releasing Magazines Manually
(see Figure 13). 2 Use the tool to depress the release latch while gently pulling the magazine bezel handle to slide the magazine out. Quantum Scalar i40 and Scalar i80 Maintenance Guide... -
Page 57: Configuring The Service Port
3 If the magazine is on the right side, it will only slide out as far as the I/E station. To release the magazine fully: • On the Scalar i40 and the bottom right magazine of the Scalar i80, reach under the open magazine and insert the tool directly into the access hole in the library chassis to depress the release latch, while pulling out on the magazine bezel handle. -
Page 58: Saving And Restoring The Library Configuration
In the event of a hardware failure or firmware upgrade, the save and restore operations can be used to restore the library's configurable items to a previous state. The save/restore operation also saves and restores library firmware and license keys installed on the library. Quantum Scalar i40 and Scalar i80 Maintenance Guide... -
Page 59: Saving The Library Configuration
Configuration a saved configuration file. If you updated the library firmware since last saving the configuration, the library automatically restores the library firmware to the version that was saved with the configuration. Quantum Scalar i40 and Scalar i80 Maintenance Guide... - Page 60 4 Use the next screens to browse to the saved configuration file and upload it to the library. This operation saves your current library configuration and library firmware. 5 Verify the drive firmware level, and if necessary, manually upgrade to desired firmware level. Quantum Scalar i40 and Scalar i80 Maintenance Guide...
-
Page 61: Removing The Y-Tray Restraint And Releasing The Y-Tray At Initial
2 GA Libraries Only: Using your fingers, carefully push down on two diagonally positioned thumbscrews. Push them down as far as they will go. This ensures that the Y-tray can initialize freely. See Figure Quantum Scalar i40 and Scalar i80 Maintenance Guide... -
Page 62: Figure 14 Pushing Down On Thumbscrews To Release Y-Tray
4 Remove the plastic sheet and metal clip and discard. You will not need to use them again. 5 IMPORTANT: Remove the orange shipping restraint tab and discard. You will not need to use it again. Quantum Scalar i40 and Scalar i80 Maintenance Guide... -
Page 63: Install
4 thumbscrews. If the customer does not have the thumbscrews and library packaging left over from the initial unpack, they will need to order a packaging CRU from Quantum. The packaging and Y-tray restraint procedure is described in detail in... -
Page 64: Using Advanced Reporting Control Path Failover And Forced Cpf
• The control path and failover tape drives must have their topology configured as Point to Point. • The control path and failover tape drives must be connected to an NPIV-enabled switch on the same fabric. Quantum Scalar i40 and Scalar i80 Maintenance Guide... -
Page 65: Configuring Cpf
Point to Point. For more information on configuring tape drive parameters, refer to the user’s guide. a Select Setup > Drive Settings. The Setup - Drive Settings screen displays. Figure 16 Setup - Drive Settings Screen Quantum Scalar i40 and Scalar i80 Maintenance Guide... -
Page 66: Figure 17 Setup - Control Path Screen
Figure 17 Setup - Control Path Screen 3 Select the Failover drive by clicking the Failover option. 4 Click Apply. You can also manually force a failover (see Forcing CPF on page 41). Quantum Scalar i40 and Scalar i80 Maintenance Guide... -
Page 67: Forcing Cpf
Standby columns. For each partition, the following information is listed: Column Indicates Active Drive Location of the current control path tape drive. Active Status Ready status of the current control path tape drive. Quantum Scalar i40 and Scalar i80 Maintenance Guide... -
Page 68: Figure 19 Force Cpf Screen
The new active tape drive location displays in the Active Drive column. The new standby tape drive location displays in the Standby Drive column. Note: If the new tape drive locations do not display, refresh the browser. Quantum Scalar i40 and Scalar i80 Maintenance Guide... -
Page 69: Lodged Tape Removal Instructions
You must first send the customer a copy of this procedure, which they can follow with you on the phone helping them. The procedure is released in Agile as a standalone document named Scalar i40 and Scalar i80 Lodged Tape Removal Instructions (p/n 6-66780-xx). -
Page 70: Notes For Service Before Beginning
Therefore, if you experience a lot of resistance when pulling out the tape drive, you should stop and instead remove the library top cover. What is “a lot” of resistance? Quantum Scalar i40 and Scalar i80 Maintenance Guide... -
Page 71: Rotating The Picker Fingers
1 Rotate the picker arms down by turning one of the picker finger drive gears upward. The picker finger drive gears are located on both sides of the picker (see Figure 20 Figure 21). Quantum Scalar i40 and Scalar i80 Maintenance Guide... -
Page 72: Figure 20 Picker Fingers Horizontal, Grasping Cartridge
Chapter 2: Lodged Tape Removal Instructions Notes for Service Before Beginning Figure 20 Picker Fingers Horizontal, Grasping Cartridge Picker finger drive gear Quantum Scalar i40 and Scalar i80 Maintenance Guide... -
Page 73: Figure 21 Picker Fingers Vertical, Releasing Cartridge
2 Once the picker arms are pointing down, you can try to push the cartridge back into the slot, or move the picker away and then removing the cartridge. Quantum Scalar i40 and Scalar i80 Maintenance Guide... -
Page 74: Required Tools And Equipment
2 Power cycle the library (from the operator panel, select Actions > Shutdown > Restart Library). When the library comes ready, check to see if the problem is resolved. If not resolved, continue to next step. Quantum Scalar i40 and Scalar i80 Maintenance Guide... -
Page 75: Recovering A Cartridge By Removing The Tape Drive
Using the drive sled handle, pull the tape drive out of the library and place it on a flat, stable surface. 3 Take one of the following actions, according to the scenarios in the table below. Quantum Scalar i40 and Scalar i80 Maintenance Guide... - Page 76 Top Cover of the Library on page 55. 3 Dislodge the tape using the drive’s Eject button. Refer to Dislodging Tape Using Drive Eject Button (cartridge completely stuck in drive) on page 57. Quantum Scalar i40 and Scalar i80 Maintenance Guide...
-
Page 77: Figure 22 Lto Tape Cartridge Inspection
Continue through the next few screens to run the tape drive test on the replaced tape drive. 7 Re-import the tape cartridge back into the library, if desired. For Scalar i40 and Scalar i80 User’s Guide instructions, see the Quantum Scalar i40 and Scalar i80 Maintenance Guide... -
Page 78: Recovering A Cartridge By Removing Top Cover Of Library
Attached to Picker) on page 63 • Swiveling the Picker (Theta Axis) on page 65 4 When you have successfully removed the cartridge, perform Reinstalling the Top Cover and Final Steps on page 73. Quantum Scalar i40 and Scalar i80 Maintenance Guide... -
Page 79: Removing The Library From A Rack
4 Disconnect all cords and cables from the back of the library (power supplies, SCB, and tape drives). If you have multiple tape drives, label the cables so you can re-connect them properly later. Quantum Scalar i40 and Scalar i80 Maintenance Guide... -
Page 80: Figure 23 "Plug" In Magazine Bezel To Allow Access To
Figure 23 “Plug” in Magazine Bezel to Allow Access to Thumbscrews 7 Use a large, flat-head screwdriver to loosen the captive thumbscrews on the front of the library that secure the library to the rack. Quantum Scalar i40 and Scalar i80 Maintenance Guide... -
Page 81: Removing The Lid Of The Desktop Kit
1 Using a small Phillips screwdriver, remove the 24 screws that secure Cover of the Library the top cover to the library (10 on top and 7 on left and right sides; Figure 24). Set the screws aside. Quantum Scalar i40 and Scalar i80 Maintenance Guide... -
Page 82: Figure 24 Top Cover Screw Locations
Recovering a Cartridge by Removing Top Cover of Library Figure 24 Top Cover Screw Locations Ten screws on top Seven screws on each side 2 Lift the top cover off of the library. Quantum Scalar i40 and Scalar i80 Maintenance Guide... -
Page 83: Dislodging Tape Using Drive Eject Button (Cartridge Completely Stuck In Drive)
This takes about 15 minutes. If initialization is not completed successfully, you will receive a diagnostic ticket which will need to be resolved before continuing. 4 Visually determine which drive has a stuck tape. Quantum Scalar i40 and Scalar i80 Maintenance Guide... -
Page 84: Figure 25 Hp Lto-4 Eject Button
Button HP LTO-4 Eject button 6 If tape ejects successfully, you are done. If it does not eject, shut down the library and refer to Manually Unloading the Tape Drive page 68. Quantum Scalar i40 and Scalar i80 Maintenance Guide... - Page 85 Y-tray by placing your hand beneath the Y-tray. 3 If the tape ejects successfully, you are done. If it does not eject, shut down the library and refer to Manually Unloading the Tape Drive page 68. Quantum Scalar i40 and Scalar i80 Maintenance Guide...
-
Page 86: Moving The Picker Carriage Along The Robot's Z-Axis
To make them horizontal, rotate the picker finger drive gear downward. Figure 26 Picker Fingers Horizontal, Grasping Cartridge Picker finger drive gear Quantum Scalar i40 and Scalar i80 Maintenance Guide... -
Page 87: Figure 27 Carriage Release Button In Normal Operating Position
Press down until the Carriage Release Button clicks and stays depressed (locked). Figure 27 Carriage Release Button in Normal Operating Position (Flush With Top of Card) Quantum Scalar i40 and Scalar i80 Maintenance Guide... -
Page 88: Figure 28 Depressing The Carriage Release Button
Carriage Release Button should be flush with the top of the picker. If it stops part way up, you can wiggle the picker to cause the button to pop all the way up. Quantum Scalar i40 and Scalar i80 Maintenance Guide... -
Page 89: Sliding The Picker Along The X-Axis
• Push or pull on the metal base of the picker. Stay close to the center of the picker to avoid torquing the picker. Caution: Do not pull on the belt. Do not push or pull on the picker card. Quantum Scalar i40 and Scalar i80 Maintenance Guide... -
Page 90: Figure 29 Acceptable Locations For Sliding The Picker Along The X-Axis
Chapter 2: Lodged Tape Removal Instructions Recovering a Cartridge by Removing Top Cover of Library Figure 29 Acceptable Locations for Sliding the Picker Along the X-axis Quantum Scalar i40 and Scalar i80 Maintenance Guide... -
Page 91: Swiveling The Picker (Theta Axis)
(otherwise you will torque the picker). Holding the Theta Release Gear up and the screw down, swivel the picker. The picker should swivel easily and without resistance. If it does not, then stop. See Figure 30 Figure Quantum Scalar i40 and Scalar i80 Maintenance Guide... -
Page 92: Figure 30 Normal Position Of Theta Gear
Chapter 2: Lodged Tape Removal Instructions Recovering a Cartridge by Removing Top Cover of Library Figure 30 Normal Position of Theta Gear Stabilizing screw (press and hold down) Theta Release Gear (lift up) Quantum Scalar i40 and Scalar i80 Maintenance Guide... -
Page 93: Figure 31 Raising The Gear To Swivel The Picker
Figure 31 Raising the Gear to Swivel the Picker Stabilize by pressing down on this screw Raise this gear up Hold gear and screw in this position as you swivel the picker Quantum Scalar i40 and Scalar i80 Maintenance Guide... -
Page 94: Manually Unloading The Tape Drive
Caution: The load motor should turn very easily. To avoid damage, do not use excessive force. 4 You can now unthread the tape. Read this entire step first before beginning. Quantum Scalar i40 and Scalar i80 Maintenance Guide... - Page 95 There will be some resistance as the cartridge comes free of the magnet. This resistance must be overcome to fully eject the cartridge. 6 Remove the cartridge by hand. Quantum Scalar i40 and Scalar i80 Maintenance Guide...
-
Page 96: Manually Unloading The Hp Lto-4 Full-Height Tape Drive
(there is no hard stop, but the wheel will begin to spring back). This positions the grabber into the parking position. Note that the grabber may already be positioned in the parking position. Quantum Scalar i40 and Scalar i80 Maintenance Guide... - Page 97 6 Remove the cartridge by hand. 7 Inspect the tape cartridge per Figure 22 on page 51. If the tape cartridge passes the inspection, you can re-import into the library later. Quantum Scalar i40 and Scalar i80 Maintenance Guide...
-
Page 98: Figure 33 Manual Unload - Hp Lto-4 Full-Height Tape Drive
Recovering a Cartridge by Removing Top Cover of Library Figure 33 Manual Unload - HP LTO-4 Full-Height Tape Drive RD Thumbwheel access Back of Front of tape tape drive drive Front reel motor access; use T10 Torx driver Quantum Scalar i40 and Scalar i80 Maintenance Guide... -
Page 99: Reinstalling The Top Cover And Final Steps
7 Inspect the recovered tape cartridge per Figure 22 on page 51. If the tape cartridge passes the inspection, you can re-import into the Scalar i40 and Scalar i80 User’s library. For instructions, see the Guide Quantum Scalar i40 and Scalar i80 Maintenance Guide... - Page 100 Chapter 2: Lodged Tape Removal Instructions Recovering a Cartridge by Removing Top Cover of Library Quantum Scalar i40 and Scalar i80 Maintenance Guide...
-
Page 101: Installing, Removing, And Replacing Crus
Installing the Library in a Desktop Kit • Removing the Library from a Desktop Kit • Removing and Replacing the Front Bezel • Replacing the Chassis • Removing and Installing a Filler Plate Quantum Scalar i40 and Scalar i80 Maintenance Guide... -
Page 102: Taking Esd Precautions
• Packaging the Library for Moving or Shipping Taking ESD Precautions Some components within the Scalar i40 and Scalar i80 libraries contain static-sensitive parts. To avoid damaging these parts while performing installation procedures, always observe the following precautions: • Use an antistatic wrist strap. If you do not have one, touch the outside of the library on the sheet metal before touching any components to discharge static from your body. -
Page 103: Connecting Library Cables
Ethernet cable into a live Ethernet jack connected to your network. 3 Connect the power supply cord into the power supply connector. Plug the other end of the cord into a grounded AC outlet. Quantum Scalar i40 and Scalar i80 Maintenance Guide... -
Page 104: Figure 34 Connection Locations
LEFT SCB port Full-height tape drives Filler plate Power supply cord Filler plate Service port Fibre Channel cables in LEFT Ethernet cable port of full-height tape drives in LEFT SCB port Quantum Scalar i40 and Scalar i80 Maintenance Guide... -
Page 105: Installing The Rack Mount Kit (Rail Kit)
If the library is not level in the rack, it will not work properly. Supported Rack Types The Scalar i40 and Scalar i80 libraries are designed to fit in most standard 19-inch equipment cabinets, including: • Dell, 08P157 (US-08P157910-3AU-0900),square, 2.48 - 2.72 mm thick •... -
Page 106: Space Requirements
The following items are included in the rack mount kit: Contents Figure Description Shelf Shelf Extender Phillips head screw, countersunk (M5 x 10) – for shelf assembly T- nut (M5) – for shelf assembly Quantum Scalar i40 and Scalar i80 Maintenance Guide... -
Page 107: Installing The Rack Mount Shelves
The holes used to attach the two halves of the rack mount shelves differ depending on the depth of the rack (see Figure 35 on page 82). It is recommended that you use the ones that are exposed and have the widest spacing. Quantum Scalar i40 and Scalar i80 Maintenance Guide... -
Page 108: Figure 35 Rack Mount Shelf Depth Requirements
27 in (68.5 cm) to 36 in (91.4 cm) b Loosely attach the rack mount shelves to the extenders with 4 M5 x 10 screws and T-nuts (see Figure 36). Quantum Scalar i40 and Scalar i80 Maintenance Guide... -
Page 109: Figure 36 Assembling The Left And Right Rack Mount Shelves
M5 x 10 screws T-nuts must be oriented as shown to properly fit in the shelf The metal adjustment slot fold must be toward outside of the shelf as shown T-nuts M5 x 10 screws Quantum Scalar i40 and Scalar i80 Maintenance Guide... -
Page 110: Figure 37 Rail Adapter Types
Use the rail adapters with small circle pegs on rails with threaded circle hole patterns (M6 on one side and M5 on the other side) Quantum Scalar i40 and Scalar i80 Maintenance Guide... -
Page 111: Figure 38 Assembling The Left-Hand Rack Mount Shelf
Hand Rack Mount Shelf Rail adapter Arrow must point up M5 x 10 screws Rail adapter M5 x 10 Arrow must screws point up Rail adapters M5 x 10 screws M5 x 10 screws Quantum Scalar i40 and Scalar i80 Maintenance Guide... - Page 112 (see Figure 39 on page 87): • 2 washers • 2 M4 x 12 screws Note: The rack mount shelves must be installed on the inside rack rails. Quantum Scalar i40 and Scalar i80 Maintenance Guide...
-
Page 113: Figure 39 Installing The Rack Mount Shelves
Chapter 3: Installing, Removing, and Replacing CRUs Installing the Rack Mount Kit (Rail Kit) Figure 39 Installing the Rack Mount Shelves Washers M4 x 12 screws Left shelf Right shelf Quantum Scalar i40 and Scalar i80 Maintenance Guide... -
Page 114: Figure 40 Tightening The Rack Mount Shelves
3 Once the rack mount shelves are secured to the rack, tighten the screws securing the adjustable shelves (right and left) together (see Figure 40). Figure 40 Tightening the Rack Mount Shelves Tighten screws to secure both rack mounting rails Quantum Scalar i40 and Scalar i80 Maintenance Guide... - Page 115 Clip nut Round, unthreaded holes require clip nuts to accept mounting hardware. Clip nut Threaded holes require neither cage or clip nuts to accept mounting hardware. Quantum Scalar i40 and Scalar i80 Maintenance Guide...
-
Page 116: Installing The Library In A Rack
To remove tape drives, unscrew the captive thumbscrews securing them to the back of the library and slide them out of the library. Set them down gently on a stable surface. Quantum Scalar i40 and Scalar i80 Maintenance Guide... -
Page 117: Figure 42 Magazine Release Latch Access Holes
Right-side magazines will only slide out as far as the I/E station (one column of slots). To release the right-side magazines fully: • On the Scalar i40 and the bottom right magazine of the Scalar i80, reach under the open magazine and insert the tool directly into the access hole in the library chassis to depress the release latch, while pulling out on the magazine bezel handle. -
Page 118: Removing The Library From A Rack
3 Disconnect the power supply cord, the Ethernet cable, and all tape drive cables from the back of the library. If you have multiple tape drives, label the cables so you can reconnect them to the correct tape drives later. Quantum Scalar i40 and Scalar i80 Maintenance Guide... -
Page 119: Installing The Library In A Desktop Kit
Installing the Library in a Desktop Kit The instructions for installing the Scalar i40 and the Scalar i80 in a desktop are the same. The only difference is that the Scalar i40 has two side panels, and the Scalar i80 has four. -
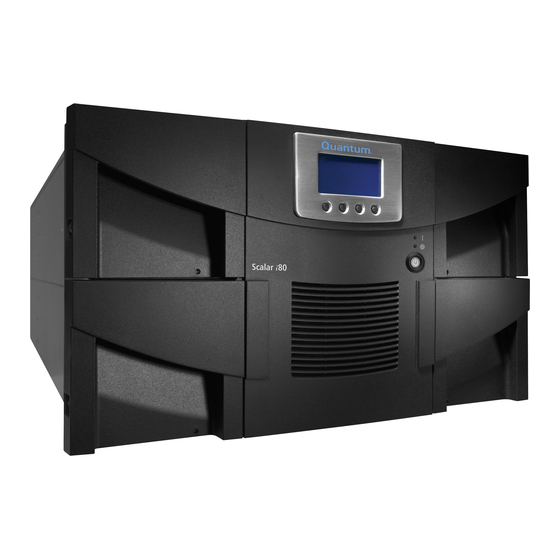
Page 120: Figure 44 Desktop Kit, Scalar I40 And Scalar I80
Chapter 3: Installing, Removing, and Replacing CRUs Installing the Library in a Desktop Kit Figure 44 Desktop Kit, Scalar i40 and Scalar i80 Scalar i40 Scalar i80 Quantum Scalar i40 and Scalar i80 Maintenance Guide... -
Page 121: Kit Contents
Rubber feet Tools Required • Phillips screwdriver • Magazine lock override tool — an opened paperclip, small screwdriver, or other object (3.5 mm or less in diameter that will not break off) Quantum Scalar i40 and Scalar i80 Maintenance Guide... -
Page 122: Space Requirements
I/E station. To release the magazine fully: • On the Scalar i40 and the bottom right magazine of the Scalar i80, reach under the open magazine and insert the... - Page 123 See Figure 46 on page 98. c Carefully turn the library back to an upright position so that it is resting on its rubber feet. Quantum Scalar i40 and Scalar i80 Maintenance Guide...
-
Page 124: Figure 46 Location Of Rubber Feet On Bottom Of Library
Line up the screw hole in the bottom front of the side panel with the captive thumbscrew behind the magazine on the library chassis. b Press the side panel against the wall so that the posts go into the holes. Quantum Scalar i40 and Scalar i80 Maintenance Guide... - Page 125 The side panel should be flush with the side of the library chassis. d Tighten the thumbscrew at the front of the library to secure the side panel to the library. Quantum Scalar i40 and Scalar i80 Maintenance Guide...
-
Page 126: Figure 47 Installing The Side Panels
Installing the Library in a Desktop Kit Figure 47 Installing the side panels Holes for side panel posts Magazine release Captive Hole for captive access holes thumbscrew thumbscrew Inset showing captive thumbscrew behind open magazine Quantum Scalar i40 and Scalar i80 Maintenance Guide... -
Page 127: Removing The Library From A Desktop Kit
77). Removing the Library from a Desktop Kit To remove the library from a desktop kit, reverse the steps in Installing the Library in a Desktop Kit on page 93. Quantum Scalar i40 and Scalar i80 Maintenance Guide... -
Page 128: Removing And Replacing The Front Bezel
The procedure is similar for the Scalar i40 and the Scalar i80. Pictures of the Scalar i40 also apply to the Scalar i80. You may perform this procedure with library power ON. If you do, be careful not to accidentally press the power button and turn the library off when installing the bezel. - Page 129 Follow these steps... Installed in a rack high enough Unscrew all the thumbscrews that secure the library to to access to the bottom bezel the rack (the Scalar i40 has two thumbscrews; the screws Scalar i80 has four). See Figure 50 on page 105.
-
Page 130: Figure 49 Bezel Screw Locations On Bottom Of Library
7 Remove and set aside the two screws securing the bezel to the top of the chassis (see Figure 50 on page 105). Figure 49 Bezel Screw Locations on Bottom of Library Bottom bezel screws Quantum Scalar i40 and Scalar i80 Maintenance Guide... -
Page 131: Figure 50 Bezel Screws
8 Remove the bezel as follows: • Scalar i40: Grasp the bezel gently at the top and bottom and pull the bezel straight out and off of the library. Do not tip or twist the bezel as you pull it off. -
Page 132: Figure 51 Scalar I80 Pull/Push Locations
13 If you turned the library off to perform this procedure, turn it ON now by pressing the power button on the front panel. Wait until the library initializes before resuming library operations. Quantum Scalar i40 and Scalar i80 Maintenance Guide... -
Page 133: Replacing The Chassis
Required Tools • Phillips #1 screwdriver • Magazine lock override tool — an opened paperclip, small screwdriver, or other object (3.5 mm or less in diameter that will not break off) Quantum Scalar i40 and Scalar i80 Maintenance Guide... -
Page 134: Procedure
3 If you had license keys installed on your library, you will need to install new ones on the replacement library. Contact Quantum Support to request new license keys. 4 If the library you are replacing is still turned on and operational, shut down the library by selecting Actions >... - Page 135 I/E station. To release the magazine fully: • On the Scalar i40 and the bottom right magazine of the Scalar i80, reach under the open magazine and insert the tool directly into the access hole in the library chassis to depress the release latch, while pulling out on the magazine bezel handle.
-
Page 136: Figure 52 Components To Remove
Place the library on a flat, stable surface. WARNING: Two people are required to safely lift the library out of a rack. Quantum Scalar i40 and Scalar i80 Maintenance Guide... - Page 137 Remove the plastic sheet and metal clip and discard. You will not need to use them again. c IMPORTANT: Remove the orange shipping restraint tab and discard. You will not need to use it again. Quantum Scalar i40 and Scalar i80 Maintenance Guide...
-
Page 138: Figure 53 Removing The Y-Tray Restraints
Make sure the front end of the library (the “rack ear”) overhangs the edge of the table so that the library lies flat. Caution: Do not turn the library upside down. Do not turn the library more than 90 degrees from upright. Quantum Scalar i40 and Scalar i80 Maintenance Guide... -
Page 139: Figure 54 Restraining The Y-Tray
Caution: If you place the library upright with the Y-tray restraint thumbscrews installed, you could damage the chassis or the Y-tray. Figure 54 Restraining the Y- tray Rack “ear” overhangs Four Y-tray restraint edge of desk or table thumbscrews Quantum Scalar i40 and Scalar i80 Maintenance Guide... - Page 140 SCB to “snap” it into place. 3 Tighten the two thumbscrews finger tight. 4 Connect the Ethernet cable to the LEFT Ethernet port (as viewed from the back of the library; see Figure 55 on page 117). Quantum Scalar i40 and Scalar i80 Maintenance Guide...
- Page 141 2 Tighten the two thumbscrews finger tight. 3 Connect the power cord to the power supply. 4 Plug the power cord into a grounded AC outlet. Quantum Scalar i40 and Scalar i80 Maintenance Guide...
- Page 142 Make sure every empty power supply slot and tape drive slot is covered with a filler plate. 1 Slide the filler plate into the slot. 2 Tighten the thumbscrews. Magazine Slide each magazine into its slot and push it in all the way until it stops. Quantum Scalar i40 and Scalar i80 Maintenance Guide...
-
Page 143: Figure 55 Reinstalled Components
LEFT SCB port Full-height tape drives Filler plate Power supply cord Filler plate Service port Ethernet cable in Fibre Channel cables in LEFT LEFT SCB port port of full-height tape drives Quantum Scalar i40 and Scalar i80 Maintenance Guide... - Page 144 Package the removed chassis using the packaging that contained the replacement chassis. Use the enclosed RMA information to send the chassis back to Quantum. 22 If your library is running SKM, you must you run a special script on the SKM server after you replace the chassis.
-
Page 145: Removing And Installing A Filler Plate
1 Unscrew the two captive thumbscrews. 2 Pull out on the thumbscrews so the filler plate is at a slight angle and the bottom of the filler plate is still attached in the slot. Quantum Scalar i40 and Scalar i80 Maintenance Guide... -
Page 146: Figure 56 Filler Plates Installed
3 Pivot the filler plate up to fit securely in the hole. 4 Tighten the thumbscrews. Figure 56 Filler Plates Installed Tape drive filler plate Single power supply installed in top slot Power supply filler plate Quantum Scalar i40 and Scalar i80 Maintenance Guide... -
Page 147: Removing And Replacing A Magazine
1 On the Web client, select Reports > Library Configuration. 2 Click the Show Barcodes button. The screen displays a map of the library showing the location of each cartridge, by barcode. Quantum Scalar i40 and Scalar i80 Maintenance Guide... -
Page 148: Removing The Magazine From The Library
Right-side magazines will only slide out as far as the I/E station. To release right-side magazines fully: – On the Scalar i40 and the bottom right magazine of the Scalar i80, reach under the open magazine and insert the tool directly into the access hole in the library chassis to depress the release latch, while pulling out on the magazine bezel handle. -
Page 149: Installing The Magazine
Make sure they look the same from all angles. • The storage slots face inward. • On the outer wall of the magazine, the silver rollers sit below the springs (see Figure 58). Quantum Scalar i40 and Scalar i80 Maintenance Guide... -
Page 150: Figure 58 Proper Orientation (Right-Side Magazine)
6 Turn the magazine over and install the two washers and two M3 screws securing the bottom of the bezel to the magazine. Install them in the outer hole in each tab (see Figure 59). Quantum Scalar i40 and Scalar i80 Maintenance Guide... -
Page 151: Figure 59 Removing/Installing The Magazine Bezel
10 Run the magazine diagnostics test on the replaced magazine to be sure it is functioning correctly. a Place a scratch tape in the top I/E station slot. b If manual cartridge assignment is enabled, assign the scratch tape to the System partition. Quantum Scalar i40 and Scalar i80 Maintenance Guide... -
Page 152: Removing And Installing A Power Supply
Adding or Replacing a Redundant Power Supply on the Scalar i80 Figure 60 Single Power Supply Scalar i40, single power System supply Scalar i80, single power supply installed in top slot Filler plate covers empty power supply slot Quantum Scalar i40 and Scalar i80 Maintenance Guide... -
Page 153: Replacing A Power Supply In A Single-Power-Supply System (Scalar I40 And Scalar I80)
The power supply only goes in one way, and should slide in easily. If you cannot slide it in, you may be trying to install it upside down. 7 Tighten the two thumbscrews finger tight. Quantum Scalar i40 and Scalar i80 Maintenance Guide... -
Page 154: Adding Or Replacing A Redundant Power Supply On The Scalar I80
You may need to press firmly on the power supply sheet metal at the very end to plug in the power supply to the connector on the library. You will feel it snap into place. Quantum Scalar i40 and Scalar i80 Maintenance Guide... -
Page 155: Removing And Replacing The System Control Board
Replacing the System Caution: You must completely remove the power cord from the Control Board library before removing and replacing the system control board. Simply shutting down the library is not enough. Quantum Scalar i40 and Scalar i80 Maintenance Guide... - Page 156 Wait for all the LEDs on the SCB to turn off. 6 Disconnect the power cords from the power supplies on the back of the library. The Scalar i40 has one power supply. The Scalar i80 may have one or two power supplies. Make sure you disconnect all power cords from the power supplies.
-
Page 157: Installing Library Firmware
The green power LED on the library front panel above the power button illuminates, and the operator panel screen turns on. The library goes through a connection and initialization sequence that takes up to 60 seconds. Quantum Scalar i40 and Scalar i80 Maintenance Guide... - Page 158 Click Tools > Update Library Firmware. b Read the EULA agreement. c Click Update library firmware with the version from the Quantum Support Web site check box. d Click Apply. Quantum Scalar i40 and Scalar i80 Maintenance Guide...
-
Page 159: Restoring The Library Configuration
1 On the operator panel, press Cancel to exit the Setup Wizard. 2 Take note of the library’s IP address (on the operator panel, select Reports > Network Settings). Quantum Scalar i40 and Scalar i80 Maintenance Guide... - Page 160 9 Package the old SCB in the packaging that shipped with the new SCB and send the old SCB back to Quantum using the included return shipping label. Quantum Scalar i40 and Scalar i80 Maintenance Guide...
-
Page 161: Manually Reconfiguring The Library
Upload the tape drive firmware you want to use. From the Web client, select Tools > Drive Operations > Upload/remove tape drive firmware for autoleveling. b Unload all tape cartridges from the tape drives on which you want to autolevel firmware. Quantum Scalar i40 and Scalar i80 Maintenance Guide... - Page 162 IVT. If any problems are detected, the library issues a diagnostic ticket. 12 Package the old SCB in the packaging that shipped with the new SCB and send the old SCB back to Quantum using the included return shipping label. Quantum Scalar i40 and Scalar i80 Maintenance Guide...
-
Page 163: Removing And Replacing A Tape Drive
Type of Installation Instructions Adding a new tape drive No special instructions. Replacing a tape drive that is No special instructions. not assigned to a partition Quantum Scalar i40 and Scalar i80 Maintenance Guide... -
Page 164: Removing A Tape Drive From The Library
Actions > Tape Drive > Change Mode. Select the tape drive and press Modify. Press the Down button to select Offline, then press Apply. 3 Disconnect the cable from the back of the tape drive. Quantum Scalar i40 and Scalar i80 Maintenance Guide... -
Page 165: Installing A Tape Drive
63. Slots are numbered starting from the bottom and moving up. • Scalar i40: Half-height tape drives can be installed in slots 1 and 2. A full-height tape drive can be installed in slot 1. • Scalar i80: Half-height tape drives can be installed in slots 1, 2, 3, 4, and 5. -
Page 166: Figure 63 Acceptable Installation Locations For Full-Height Tape
At the very end of the slide, you will feel a slight “click” as the tape drive sled connector connects into its mating connector in the library chassis. Quantum Scalar i40 and Scalar i80 Maintenance Guide... -
Page 167: Figure 64 Installing A Tape Drive
Autoleveling takes about 7 minutes. A message appears on the operator panel indicating autoleveling is taking place. If autoleveling is not required, the tape drive takes about 2 minutes to come ready. Quantum Scalar i40 and Scalar i80 Maintenance Guide... - Page 168 Running the IVT Diagnostic Subtests Individually – Robotics, Tape Drive, and Magazine Tests on page 213 for more information. 12 Save the library configuration (see Saving the Library Configuration on page 33). Quantum Scalar i40 and Scalar i80 Maintenance Guide...
-
Page 169: Packaging The Library For Moving Or Shipping
3 Click the “print” icon in the upper right corner to print the report. Alternatively, take a screen capture of the report and save or print it, or copy the map by hand. Quantum Scalar i40 and Scalar i80 Maintenance Guide... -
Page 170: Procedure
Remove all the tape drives from the library. Label tape drives so you know what order to reinstall them later. They must be reinstalled in the same slots as they were previously. Quantum Scalar i40 and Scalar i80 Maintenance Guide... - Page 171 Install four thumbscrews into the floor of the library in the locations shown in Figure 65 on page 146. They will screw through the Y-tray and hold it in place on the floor of the library. Quantum Scalar i40 and Scalar i80 Maintenance Guide...
-
Page 172: Figure 65 Restraining The Y-Tray
Y-tray. 13 Wrap the library in the anti-static wrapping provided in the packaging kit. WARNING: Two people are required to safely lift the library. Quantum Scalar i40 and Scalar i80 Maintenance Guide... -
Page 173: Figure 66 Scalar I40 Packaging
Packaging the Library for Moving or Shipping 14 Place the library in the packaging as shown in Figure 66 Figure Figure 66 Scalar i40 Packaging Top foam Library (anti-static wrap not shown for clarity) Bottom foam Shipping carton Quantum Scalar i40 and Scalar i80 Maintenance Guide... -
Page 174: Unpacking The Library In Its New Location
Y-tray. When placing the library on its side, do not set it on the “rack ear” or the magazine handle, or you could damage them. Quantum Scalar i40 and Scalar i80 Maintenance Guide... -
Page 175: Installing, Removing, And Replacing Frus
The only FRU on the Scalars i40 and Scalar i80 is the Y-tray. Replacing the Y-tray with Robot The procedure is the same for the Scalar i40 and the Scalar i80. The pictures show just the Scalar i40. Caution: Only qualified service technicians should perform this procedure. -
Page 176: Tools Required
Y-tray FRU Kit Contents • (1) Y-tray • (1) 3U Y-axis flex cable (for the Scalar i40) • (1) 6U Y-axis flex cable (for the Scalar i80) • (2) White strain relief clips for library bulkhead Taking ESD Precautions... - Page 177 Replacing the Y-tray with Robot 2 Turn OFF the library by pressing the power button on the front panel. Wait for the LED on the SCB to turn off. 3 Do one of the following: Quantum Scalar i40 and Scalar i80 Maintenance Guide...
- Page 178 I/E station. To release the magazine fully: • On the Scalar i40 and the bottom right magazine of the Scalar i80, reach under the open magazine and insert the tool directly into the access hole in the library chassis to depress the release latch, while pulling out on the magazine bezel handle.
- Page 179 There are 10 screws on the top of the library, and 7 screws on both the left and right sides of the top cover (see Figure 68). Quantum Scalar i40 and Scalar i80 Maintenance Guide...
-
Page 180: Figure 68 Top Cover Screw Locations
7 This step contains an explanation of the proper position, followed Figure 69, which shows the proper position and orientation of the Y-tray in its packaging. If you need to move the picker, follow the instructions in the sections indicated below. Quantum Scalar i40 and Scalar i80 Maintenance Guide... -
Page 181: Figure 69 Y-Tray In Packaging
178. • The picker fingers may point down or inward, it does not matter. Figure 69 Y-tray in Packaging Two foam squares on underside of top foam cradle the picker carriage Quantum Scalar i40 and Scalar i80 Maintenance Guide... - Page 182 The strain relief clip is attached to the cable and will hang loosely from the cable once you detach it. See Figure 70. The Scalar i40 has one strain relief clip; the Scalar i80 has two. Quantum Scalar i40 and Scalar i80 Maintenance Guide...
-
Page 183: Figure 70 Bulkhead Inside Library, Y-Axis Flex Cable
Top hole in bulkhead Library, Y-axis Flex Cable through which cable is threaded Scalar i40 Strain relief clip Y-axis flex cable Scalar i80 Top hole in bulkhead through which cable is threaded Strain relief clip Quantum Scalar i40 and Scalar i80 Maintenance Guide... -
Page 184: Figure 71 Y-Axis Flex Cable Connection On Library Back Plane
11 Thread the Y-axis flex cable through the top hole in the bulkhead (see Figure 70 Figure 71). Quantum Scalar i40 and Scalar i80 Maintenance Guide... -
Page 185: Figure 72 Flex Cable On Robot
Chapter 4: Installing, Removing, and Replacing FRUs Replacing the Y-tray with Robot 12 Gently lay the flex cable on top of the robot (see Figure 72). Figure 72 Flex Cable on Robot Quantum Scalar i40 and Scalar i80 Maintenance Guide... - Page 186 Caution: Lift the Y-tray only by the two designated lift tabs. Lift up at both locations simultaneously and keep the Y- tray level as you lift. Do not tilt or twist the Y-tray. Quantum Scalar i40 and Scalar i80 Maintenance Guide...
-
Page 187: Figure 73 Y-Tray Lift Tabs
Chapter 4: Installing, Removing, and Replacing FRUs Replacing the Y-tray with Robot Figure 73 Y-tray Lift Tabs Front lift tab Rear lift tab Front of library Quantum Scalar i40 and Scalar i80 Maintenance Guide... -
Page 188: Installing The Y-Tray
5 Remove the two Y-axis flex cables from the box and select the one that is appropriate for your library. For a Scalar i40, choose the cable marked “3U.” For a Scalar i80, choose the cable marked “6U.”... - Page 189 If this happens, the cable may start to smoke. If you see smoke, shut off the library and order a new Y-tray FRU. You will need to replace the entire Y-tray assembly. Quantum Scalar i40 and Scalar i80 Maintenance Guide...
-
Page 190: Figure 75 Y-Tray Adapter Board
ZIF connector - push up to unlock; push down to lock Figure 76 Connecting the Flex Cable Blue stiffener straight - CORRECT Blue stiffener angled - WRONG Quantum Scalar i40 and Scalar i80 Maintenance Guide... -
Page 191: Figure 77 Strain Relief On Y-Tray Adapter Board
Caution: Use the new white strain relief clip provided in the kit. Do not reuse the old clip as it may be defective. Figure 77 Strain Relief on Y- tray Adapter Board Strain relief clip Quantum Scalar i40 and Scalar i80 Maintenance Guide... -
Page 192: Figure 78 Strain Relief On Y-Tray Adapter Board
Note: The Y-climber gear must be in the proper position or the Y- tray will not lower into the library correctly. This is a “keying” feature that makes sure the Y-tray is aligned properly as it moves up and down. Quantum Scalar i40 and Scalar i80 Maintenance Guide... -
Page 193: Figure 79 Y-Climber Gear In Proper Position
The partial circle in the center is round at the bottom and horizontal at its top. Figure 79 Y-climber Gear in Proper Position Flat sides vertical “Smiley face” Tab boss in 5 o’clock or 7 o’clock position (depends on the gear) Quantum Scalar i40 and Scalar i80 Maintenance Guide... -
Page 194: Figure 80 Y-Climber Gear In Proper Position And Y-Axis Transmission
Y-axis transmission gears Y-climber gear Y-climber gear - flat Y-climber gear - flat side side is vertical is vertical Tab boss points in a downward “Smiley face” direction, 5 o-clock or 7 o-clock Quantum Scalar i40 and Scalar i80 Maintenance Guide... - Page 195 12 Thread the Y-axis flex cable through the top hole in the bulkhead (see Figure 82). Caution: Do not pull the cable over the top of the bulkhead. The cable must be threaded through the hole as shown. Quantum Scalar i40 and Scalar i80 Maintenance Guide...
-
Page 196: Figure 81 Y-Axis Flex Cable Connection On Library Back Plane
Figure 82 page 171. The strain relief goes through the two holes in the clear plastic attached to the Y-axis flex cable. The Scalar i40 uses one strain relief; the Scalar i80 uses two. Quantum Scalar i40 and Scalar i80 Maintenance Guide... -
Page 197: Figure 82 Y-Axis Flex Cable And Strain Relief Installed On Bulkhead
Strain Relief Installed on through which cable is Bulkhead threaded Scalar i40 Strain relief clip Y-axis flex cable Scalar i80 Top hole in bulkhead through which cable is threaded Strain relief clip Quantum Scalar i40 and Scalar i80 Maintenance Guide... - Page 198 Y-tray adapter board. Note: If the robot starts initializing, it will recognize that tape drives and magazines are missing, and the library will generate diagnostic tickets. If this happens, close the tickets later. Quantum Scalar i40 and Scalar i80 Maintenance Guide...
-
Page 199: Figure 83 X-Axis Encoder On Robot - Front Inside Of Library And Robot Directional Movement
18 Reinstall tape drives and magazines into their correct slots. 19 Reconnect the power cord(s), Ethernet cable, and tape drive cables to their original positions on the rear of the library. Quantum Scalar i40 and Scalar i80 Maintenance Guide... -
Page 200: Packing And Shipping The Removed Y-Tray
Moving the Picker Into Proper Position For Shipping on page 174 for instructions. 5 Send the removed Y-tray back to Quantum using the RMA material enclosed in the packaging. Moving the Picker Into This section contains instructions on how to move the picker on the Y- Proper Position For tray to get it in proper position for shipping in the shipping carton. -
Page 201: Swiveling The Picker (Theta Axis)
Holding the Theta Release Gear up and the screw down, swivel the picker. The picker should swivel easily and without resistance. If it does not, then stop. See Figure 84 Figure Quantum Scalar i40 and Scalar i80 Maintenance Guide... -
Page 202: Figure 84 Normal Position Of Theta Gear
Chapter 4: Installing, Removing, and Replacing FRUs Replacing the Y-tray with Robot Figure 84 Normal Position of Theta Gear Stabilizing screw (press and hold down) Theta Release Gear (lift up) Quantum Scalar i40 and Scalar i80 Maintenance Guide... -
Page 203: Figure 85 Raising The Gear To Swivel The Picker
Figure 85 Raising the Gear to Swivel the Picker Stabilize by pressing down on this screw Raise this gear up Hold gear and screw in this position as you swivel the picker Quantum Scalar i40 and Scalar i80 Maintenance Guide... -
Page 204: Moving The Picker Along The Robot X-Axis
• Push or pull on the metal base of the picker. Stay close to the center of the picker to avoid torquing the picker. Caution: Do not pull on the belt. Do not push or pull on the picker card. Quantum Scalar i40 and Scalar i80 Maintenance Guide... -
Page 205: Figure 86 Acceptable Locations For Sliding The Picker Along The X-Axis
Chapter 4: Installing, Removing, and Replacing FRUs Replacing the Y-tray with Robot Figure 86 Acceptable Locations for Sliding the Picker Along the X-axis Quantum Scalar i40 and Scalar i80 Maintenance Guide... - Page 206 Chapter 4: Installing, Removing, and Replacing FRUs Replacing the Y-tray with Robot Quantum Scalar i40 and Scalar i80 Maintenance Guide...
-
Page 207: Getting Information About The Library
• Viewing the Logged in Users Report • Viewing the All Slots Report • Viewing, Saving, and E-mailing Library Logs • Viewing Library Information on the Operator Panel • Using Advanced Reporting Quantum Scalar i40 and Scalar i80 Maintenance Guide... -
Page 208: Viewing Library Information
Viewing Library Information Viewing Library Information The About screen gives you a quick glance at the following library settings: • Library type (Scalar i40 or Scalar i80) • Library serial number • Copyright date • Library firmware version Web Client Select Reports >... -
Page 209: Viewing The Location Of The Robot
You can set the operator panel to view the robot position as library operations are performed. This view is helpful in diagnosing any library problems because you can see where the robot is, whether it contains a tape, and the finger position. Quantum Scalar i40 and Scalar i80 Maintenance Guide... - Page 210 1 Select Tools > Robotic View. The left graphical section depicts the top-down current location of the robot on the X axis. • The numbers indicate the storage column. • The 'D' designates the tape drive column. Quantum Scalar i40 and Scalar i80 Maintenance Guide...
- Page 211 “Robot: At [0,1,4] - [0,1,5]”. If it is directly in front of a slot, it would then read, for example “At [0,4,4]”. • Picker - Extended or Retracted. Quantum Scalar i40 and Scalar i80 Maintenance Guide...
-
Page 212: Viewing The Library Configuration Report
• In the library map, click a specific tape drive to view information about the tape drive. • In the library map, click the chassis number (0) below the tape drives to view information about the chassis. Quantum Scalar i40 and Scalar i80 Maintenance Guide... - Page 213 If the slot is a cleaning slot, the cleaning status (usable/ expired) and cleaning count (the number of times the cartridge was used to clean a tape drive) are also displayed. Quantum Scalar i40 and Scalar i80 Maintenance Guide...
-
Page 214: Saving And E-Mailing The Library Configuration Record
World Wide (WWN), loop ID, topology, actual topology, speed, and actual speed Quantum Scalar i40 and Scalar i80 Maintenance Guide... -
Page 215: Saving The Configuration Record
2 Save the file to a known location on your computer. E-mailing the Administrators can use the screen on Tools - E-mail Configuration Record Configuration Record the Web client to e-mail the library configuration record. Quantum Scalar i40 and Scalar i80 Maintenance Guide... -
Page 216: Viewing The Network Settings Report
• SSL — SSL, port, and cipher • SMI-S — Access (enabled/disabled) and state (enabled/disabled) • SNMP — Enabled/disabled status for Access, V1, V2, V3, and encryption; algorithm; and port • SNMP-Traps — IP addresses and ports Quantum Scalar i40 and Scalar i80 Maintenance Guide... -
Page 217: Viewing The Logged In Users Report
• User Interface — User interface used to access the system (Web Client or Operator Panel) Web Client Select Reports > Logged in Users. The report displays in a new window. Quantum Scalar i40 and Scalar i80 Maintenance Guide... -
Page 218: Viewing The All Slots Report
• Put Retries — The number of times the picker had to perform a recovery operation to place a tape into the slot. Web Client Select Reports > All Slots. Quantum Scalar i40 and Scalar i80 Maintenance Guide... -
Page 219: Viewing, Saving, And E-Mailing Library Logs
1 Select Reports > Log Viewer. 2 Select Cleaning Log and press Next. 3 The report displays in a new window for viewing. 4 You can save or e-mail the report following the on-screen instructions. Quantum Scalar i40 and Scalar i80 Maintenance Guide... -
Page 220: Diagnostic Tickets Log
SKM Encryption Key Lists keys that failed the most recent data key import operation. This log Import Warning Log is only available if you are running Scalar Key Manager (SKM). Quantum Scalar i40 and Scalar i80 Maintenance Guide... -
Page 221: Tape Drive Log
3 If your library contains multiple tape drive interface types, select the interface type of the tape drive from which you want to retrieve logs and click Next. 4 The Retrieve Drive Log screen displays. This screen lists the available tape drives. Quantum Scalar i40 and Scalar i80 Maintenance Guide... - Page 222 If so, a note will appear stating, “A complete tape drive log could not be retrieved, but a partial log is available and may be saved for further analysis once the progress window is closed.” Quantum Scalar i40 and Scalar i80 Maintenance Guide...
-
Page 223: Viewing Library Information On The Operator Panel
• Partition to which the tape drive is assigned • Whether the tape drive is the control path for the partition • State (ready/active/mounted) • WWNN (if Fibre Channel) or SAS address (if SAS) Quantum Scalar i40 and Scalar i80 Maintenance Guide... -
Page 224: Viewing Network Settings
The operator panel displays a list of all the licenses currently installed on the library: number of COD slots licensed, number of unlicensed slots, and whether Advanced Reporting is licensed. Operator Panel Select Reports > Licenses. Quantum Scalar i40 and Scalar i80 Maintenance Guide... -
Page 225: Using Advanced Reporting
Media Usage Log and read and write errors for media ever mounted in a drive. For complete information and instructions on using Advanced Reporting, see the user’s guide or the Web client online help. Quantum Scalar i40 and Scalar i80 Maintenance Guide... - Page 226 Chapter 5: Getting Information About the Library Using Advanced Reporting Quantum Scalar i40 and Scalar i80 Maintenance Guide...
-
Page 227: Troubleshooting And Diagnostics
Running the IVT Diagnostic Subtests Individually – Robotics, Tape Drive, and Magazine Tests • Running the Random Move Test • Performing Library Diagnostics Tests • Resetting Factory Defaults • EKM Path Diagnostics • Troubleshooting Diagnostic Ticket Display Issue Quantum Scalar i40 and Scalar i80 Maintenance Guide... -
Page 228: Capturing Snapshots Of Library Information
You can only capture a snapshot via the Web client. Web Client 1 Select Tools > Capture Snapshot 2 Select whether to download the file or e-mail it to a recipient, and click Apply. Quantum Scalar i40 and Scalar i80 Maintenance Guide... -
Page 229: Troubleshooting Library "Not Ready" Messages
“not ready” state. The diagnostic ticket may provide information that can help you troubleshoot the problem. For more information, see Chapter 7, Diagnostic Tickets and Resolutions. Quantum Scalar i40 and Scalar i80 Maintenance Guide... - Page 230 Note: You may not see the “not ready” message in the Web client until the browser refreshes. Similarly, even if the problem has been resolved, the “not ready” message will not disappear from the Web client until the browser refreshes. Quantum Scalar i40 and Scalar i80 Maintenance Guide...
-
Page 231: Retrieving Tape Drive Logs
1 Select Tools > Drive Operations. 2 Select Retrieve Tape Drive Log. 3 Click Apply. 4 When the Success message appears, complete the next screens to save the log file to your computer. Quantum Scalar i40 and Scalar i80 Maintenance Guide... -
Page 232: Interpreting Leds
Ticket indicator Amber The LED is illuminated when at least LED. (farthest from one open or unopened diagnostic power button) ticket exists. Figure 87 Front Panel LEDs Ticket indicator LED Power-on LED Quantum Scalar i40 and Scalar i80 Maintenance Guide... -
Page 233: System Control Board Leds
Ethernet device. Figure 88 System Control Board LEDs Customer Ethernet Service Ethernet Health status LED port LEDs port LEDs Quantum Scalar i40 and Scalar i80 Maintenance Guide... -
Page 234: Tape Drive/Sled Leds
Failure. Replacement required. Link Green On solid — Fibre Channel link is present Flashing — Fibre Channel link is present and communications are in process No Fibre Channel link is currently present. Quantum Scalar i40 and Scalar i80 Maintenance Guide... -
Page 235: Figure 89 Fibre Channel Tape Drive Leds
Chapter 6: Troubleshooting and Diagnostics Interpreting LEDs Figure 89 Fibre Channel Tape Status LED Link LED Drive LEDs Half-height FC tape drive Full-height FC tape drive Status LED Link LED Quantum Scalar i40 and Scalar i80 Maintenance Guide... -
Page 236: Power Supply Led
AC power is present but the library front panel switch is turned OFF. Power supply failure. No power. Ensure the power supply is correctly plugged into a wall outlet. Figure 90 Power Supply LED Power supply LED Quantum Scalar i40 and Scalar i80 Maintenance Guide... -
Page 237: Running The Installation And Verification Test (Ivt)
• The operator panel displays progress of all three subtests. Before a test begins, its progress is “Scheduled.” When a test begins, its progress changes to “Running.” Once a test completes, its progress changes to either “Passed” or “Failed.” Quantum Scalar i40 and Scalar i80 Maintenance Guide... - Page 238 • All diagnostic tickets must be closed. • I/E station slots must be allocated (minimum of five). • All magazines must be installed in the library (two in the Scalar i40; four in the Scalar i80). • At least one tape drive must be installed in the library.
-
Page 239: Running The Ivt Diagnostic Subtests Individually - Robotics, Tape Drive, And Magazine Tests
The magazine diagnostic tests all the slots in the selected magazine(s). • You can only perform the subtests from the operator panel. Quantum Scalar i40 and Scalar i80 Maintenance Guide... - Page 240 • All diagnostic tickets must be closed. • I/E station slots must be allocated (minimum of five). • All magazines must be installed in the library (two in the Scalar i40; four in the Scalar i80). • A scratch tape must be in the top I/E station slot. The scratch tape must be assigned to the System partition.
-
Page 241: Running The Random Move Test
5 Press Yes to set partitions offline, log users off the Web client, and continue with the test. 6 When you are ready to stop the test, press Stop. 7 When the operator panel displays the message that the test has stopped, press OK. Quantum Scalar i40 and Scalar i80 Maintenance Guide... -
Page 242: Performing Library Diagnostics Tests
Users will be unable to log in to the Web client and will get an error message stating that Diagnostics is in progress. • You can only enter Diagnostics from the Web client. Quantum Scalar i40 and Scalar i80 Maintenance Guide... -
Page 243: Resetting A Tape Drive
Web client. If you use the Web client, Service users can perform this test directly from the service menu. Admin users must enter Diagnostics, which logs out all users of the same or lower privilege level (see Performing Library Diagnostics Tests on page 216). Quantum Scalar i40 and Scalar i80 Maintenance Guide... -
Page 244: Robotics Get/Put Test
Service users can perform this test directly from the service menu. Admin users can only perform this test from the Web client, by entering Diagnostics (see Performing Library Diagnostics Tests on page 216). Quantum Scalar i40 and Scalar i80 Maintenance Guide... -
Page 245: Resetting Factory Defaults
If you downgrade from your library’s firmware version to an earlier released version, library configuration settings will be reset to the factory defaults for the newly installed firmware. If you upgrade firmware, your library configuration settings remain as you have set them. Quantum Scalar i40 and Scalar i80 Maintenance Guide... -
Page 246: Ekm Path Diagnostics
2 Press Yes to continue. EKM Path Diagnostics The EKM Path Diagnostics consists of a series of short tests to validate whether the key servers are running, connected, and able to serve keys as required. Quantum Scalar i40 and Scalar i80 Maintenance Guide... -
Page 247: Description
Check to see if there is a network configuration issue, such as a firewall, preventing communication with the server. • — A database inconsistency has been Config Test Failure detected. Contact Quantum Support. Quantum Scalar i40 and Scalar i80 Maintenance Guide... -
Page 248: Running Manual Ekm Path Diagnostics
1 From the Web client, select Setup > Encryption > System Configuration (see Figure 91). 2 Select the Automatic EKM Path Diagnostics check box. 3 Select a test interval from the Interval drop-down list. Quantum Scalar i40 and Scalar i80 Maintenance Guide... -
Page 249: Troubleshooting Diagnostic Ticket Display Issue
For example, a line of text may have a line break in the middle of the page. To change screen resolution, show the desktop, right click to display the Properties window, and click Settings > Advanced. Quantum Scalar i40 and Scalar i80 Maintenance Guide... - Page 250 Chapter 6: Troubleshooting and Diagnostics Troubleshooting Diagnostic Ticket Display Issue Quantum Scalar i40 and Scalar i80 Maintenance Guide...
-
Page 251: Diagnostic Tickets And Resolutions
Customers can frequently resolve a simple problem themselves, but if the problem is complex or involves a field replaceable unit (FRU), the customer must contact Quantum Support. Diagnostic tickets can be e-mailed to Quantum Support for diagnosis, as can the library snapshot. For details about the snapshot, see Capturing Snapshots of Library Information on page 202. -
Page 252: Ticket Priority Levels
206). • The operator panel displays a health status icon (see the user’s guide for description). • The Web client displays a subsystem status icon (see the user’s guide for description). Quantum Scalar i40 and Scalar i80 Maintenance Guide... -
Page 253: Viewing, Closing, And Resolving Diagnostic Tickets
This cancelled state does not indicate that a problem has been corrected. The system would re-open the ticket if the issue is encountered again. Quantum Scalar i40 and Scalar i80 Maintenance Guide... -
Page 254: Viewing Diagnostic Tickets
Page 1 of x 3 To view more details about the ticket, including the location coordinates of resources that may be involved, click the Details button. Quantum Scalar i40 and Scalar i80 Maintenance Guide... -
Page 255: Closing Diagnostic Tickets Automatically
Automatic ticket closure will not occur if the library shuts down unexpectedly or if the power cord is unplugged. Quantum Scalar i40 and Scalar i80 Maintenance Guide... -
Page 256: Diagnostic Ticket Error Codes
The Web client provides a full description of the problem and suggestions for resolving it. The following tables provide details on each diagnostic ticket error code. Quantum Scalar i40 and Scalar i80 Maintenance Guide... -
Page 257: Dt000
• Library firmware detected an unmanaged, unexpected code path. Root Causes • Code bug or unexpected result. Service Resolution Perform DR000 - Contact Quantum Service on page 340. Steps Possible CRUs/FRUs None Quantum Scalar i40 and Scalar i80 Maintenance Guide... -
Page 258: Dt001
Dispatch the first part listed below for replacement. If this does not solve the problem, dispatch the second part, and so on, in order. Dispatch only one part (or set of parts) at a time. 1 Power Supply Quantum Scalar i40 and Scalar i80 Maintenance Guide... -
Page 259: Dt002
Dispatch the first part listed below for replacement. If this does not solve the problem, dispatch the second part, and so on, in order. Dispatch only one part (or set of parts) at a time. 1 Power Supply Quantum Scalar i40 and Scalar i80 Maintenance Guide... -
Page 260: Dt010
• The RCS firmware image required for RCS auto-leveling is missing. • The RCS firmware image required for RCS auto-leveling is corrupted. Service Resolution Perform DR010 - RCS Firmware Image Error on page 342. Steps Possible CRUs/FRUs None Quantum Scalar i40 and Scalar i80 Maintenance Guide... -
Page 261: Dt011
Dispatch the first part listed below for replacement. If this does not solve the problem, dispatch the second part, and so on, in order. Dispatch only one part (or set of parts) at a time. 1 Y-TRAY W/ ROBOT (RCS) Quantum Scalar i40 and Scalar i80 Maintenance Guide... -
Page 262: Dt012
Dispatch the first part listed below for replacement. If this does not solve the problem, dispatch the second part, and so on, in order. Dispatch only one part (or set of parts) at a time. 1 Y-TRAY W/ ROBOT (RCS) 2 Library Chassis Quantum Scalar i40 and Scalar i80 Maintenance Guide... -
Page 263: Dt013
Dispatch only one part (or set of parts) at a time. 1 Magazine 2 Y-TRAY W/ ROBOT (RCS) 3 Library Chassis Quantum Scalar i40 and Scalar i80 Maintenance Guide... -
Page 264: Dt014
Dispatch only one part (or set of parts) at a time. 1 Y-TRAY W/ ROBOT (RCS) 2 System Control Board (SCB) 3 Library Chassis Quantum Scalar i40 and Scalar i80 Maintenance Guide... -
Page 265: Dt015
Dispatch the first part listed below for replacement. If this does not solve the problem, dispatch the second part, and so on, in order. Dispatch only one part (or set of parts) at a time. 1 Y-TRAY W/ ROBOT (RCS) Quantum Scalar i40 and Scalar i80 Maintenance Guide... -
Page 266: Dt016
Dispatch the first part listed below for replacement. If this does not solve the problem, dispatch the second part, and so on, in order. Dispatch only one part (or set of parts) at a time. 1 Y-TRAY W/ ROBOT (RCS) Quantum Scalar i40 and Scalar i80 Maintenance Guide... -
Page 267: Dt017
Dispatch the first part listed below for replacement. If this does not solve the problem, dispatch the second part, and so on, in order. Dispatch only one part (or set of parts) at a time. 1 Y-TRAY W/ ROBOT (RCS) Quantum Scalar i40 and Scalar i80 Maintenance Guide... -
Page 268: Dt018
Dispatch the first part listed below for replacement. If this does not solve the problem, dispatch the second part, and so on, in order. Dispatch only one part (or set of parts) at a time. 1 Y-TRAY W/ ROBOT (RCS) Quantum Scalar i40 and Scalar i80 Maintenance Guide... -
Page 269: Dt019
Dispatch only one part (or set of parts) at a time. 1 Y-TRAY W/ ROBOT (RCS) 2 Magazine (if put is to magazine) Drive Sled (if put is to tape drive) Quantum Scalar i40 and Scalar i80 Maintenance Guide... -
Page 270: Dt020
Dispatch the first part listed below for replacement. If this does not solve the problem, dispatch the second part, and so on, in order. Dispatch only one part (or set of parts) at a time. 1 Y-TRAY W/ ROBOT (RCS) Quantum Scalar i40 and Scalar i80 Maintenance Guide... -
Page 271: Dt021
Dispatch only one part (or set of parts) at a time. or 1 Magazine (if destination is a magazine) Drive Sled (if destination is a tape drive) Quantum Scalar i40 and Scalar i80 Maintenance Guide... -
Page 272: Dt022
Dispatch only one part (or set of parts) at a time. 1 Magazine (if source location is a magazine) 2 Y-TRAY W/ ROBOT (RCS) (if source location is a tape drive) Quantum Scalar i40 and Scalar i80 Maintenance Guide... -
Page 273: Dt023
Dispatch the first part listed below for replacement. If this does not solve the problem, dispatch the second part, and so on, in order. Dispatch only one part (or set of parts) at a time. 1 Y-TRAY W/ ROBOT (RCS) Quantum Scalar i40 and Scalar i80 Maintenance Guide... -
Page 274: Dt024
Dispatch the first part listed below for replacement. If this does not solve the problem, dispatch the second part, and so on, in order. Dispatch only one part (or set of parts) at a time. 1 Y-TRAY W/ ROBOT (RCS) Quantum Scalar i40 and Scalar i80 Maintenance Guide... -
Page 275: Dt030
Dispatch the first part listed below for replacement. If this does not solve the problem, dispatch the second part, and so on, in order. Dispatch only one part (or set of parts) at a time. 1 Y-TRAY W/ ROBOT (RCS) 2 Library Chassis Quantum Scalar i40 and Scalar i80 Maintenance Guide... -
Page 276: Dt040
Dispatch the first part listed below for replacement. If this does not solve the problem, dispatch the second part, and so on, in order. Dispatch only one part (or set of parts) at a time. 1 Library Chassis Quantum Scalar i40 and Scalar i80 Maintenance Guide... -
Page 277: Dt041
Dispatch the first part listed below for replacement. If this does not solve the problem, dispatch the second part, and so on, in order. Dispatch only one part (or set of parts) at a time. 1 Library Chassis Quantum Scalar i40 and Scalar i80 Maintenance Guide... -
Page 278: Dt042
• Library Chassis was replaced and the existing SCB from the previous library chassis was re-installed. • An SCB was incorrectly installed from a different library. Service Resolution Perform DR042 - VPD Information Changed on page 360. Steps Possible CRUs/FRUs None Quantum Scalar i40 and Scalar i80 Maintenance Guide... -
Page 279: Dt045
Dispatch the first part listed below for replacement. If this does not solve the problem, dispatch the second part, and so on, in order. Dispatch only one part (or set of parts) at a time. 1 Library Chassis Quantum Scalar i40 and Scalar i80 Maintenance Guide... -
Page 280: Dt046
• User initiated a manual magazine unlock operation. • Hardware/sensor failure indicating a missing or extended magazine. Service Resolution Perform DR046 - Chassis Magazine Unlocked on page 362. Steps Possible CRUs/FRUs None Quantum Scalar i40 and Scalar i80 Maintenance Guide... -
Page 281: Dt050
Dispatch the first part listed below for replacement. If this does not solve the problem, dispatch the second part, and so on, in order. Dispatch only one part (or set of parts) at a time. 1 System Control Board (SCB) Quantum Scalar i40 and Scalar i80 Maintenance Guide... -
Page 282: Dt051
Dispatch the first part listed below for replacement. If this does not solve the problem, dispatch the second part, and so on, in order. Dispatch only one part (or set of parts) at a time. 1 System Control Board (SCB) Quantum Scalar i40 and Scalar i80 Maintenance Guide... -
Page 283: Dt052
GUI Description: The library detected that newer library control firmware is available for a library control firmware update. Explanation: The library is configured to check the Quantum.com Web site to determine if new library control firmware is available. If a newer... -
Page 284: Dt055
• Network cable is damaged. • E-mail server is down. • Configuration error on the customer's network. Service Resolution Perform DR055 - E-Mail Notification Error on page 365. Steps Possible CRUs/FRUs None Quantum Scalar i40 and Scalar i80 Maintenance Guide... -
Page 285: Dt057
Dispatch the first part listed below for replacement. If this does not solve the problem, dispatch the second part, and so on, in order. Dispatch only one part (or set of parts) at a time. 1 Y-TRAY W/ ROBOT (RCS)) 2 Magazine Quantum Scalar i40 and Scalar i80 Maintenance Guide... -
Page 286: Dt058
• The logical library partition does not have enough empty storage slots available to accept all tape cartridges for an import operation. Service Resolution Perform DR058 - Insert Assignment Warning on page 367. Steps Possible CRUs/FRUs None Quantum Scalar i40 and Scalar i80 Maintenance Guide... -
Page 287: Dt059
Dispatch the first part listed below for replacement. If this does not solve the problem, dispatch the second part, and so on, in order. Dispatch only one part (or set of parts) at a time. 1 Drive Sled Quantum Scalar i40 and Scalar i80 Maintenance Guide... -
Page 288: Dt060
(or set of parts) at a time. 1 Y-TRAY W/ ROBOT (RCS) or 2 Drive Sled (if source location is a tape drive) Magazine (if source location is a magazine slot) Quantum Scalar i40 and Scalar i80 Maintenance Guide... -
Page 289: Dt065
Dispatch the first part listed below for replacement. If this does not solve the problem, dispatch the second part, and so on, in order. Dispatch only one part (or set of parts) at a time. 1 Magazine 2 Library Chassis Quantum Scalar i40 and Scalar i80 Maintenance Guide... -
Page 290: Dt067
Dispatch the first part listed below for replacement. If this does not solve the problem, dispatch the second part, and so on, in order. Dispatch only one part (or set of parts) at a time. 1 Y-TRAY W/ ROBOT (RCS) 2 Library Chassis Quantum Scalar i40 and Scalar i80 Maintenance Guide... -
Page 291: Dt068
Root Causes • User did not remove magazine. • Magazine presence sensors do not indicate magazine removal. Service Resolution Perform DR068 - Magazine Unlock Warning on page 371. Steps Possible CRUs/FRUs None Quantum Scalar i40 and Scalar i80 Maintenance Guide... -
Page 292: Dt070
• Any scenario where a properly imported system cleaning tape which has not yet been properly exported is detected to be missing based on library inventory operations. Service Resolution Perform DR070 - Missing Cleaning Media on page 372. Steps Possible CRUs/FRUs None Quantum Scalar i40 and Scalar i80 Maintenance Guide... -
Page 293: Dt071
• A user manually inserted a cartridge into a magazine instead of importing it with the respective UI functionality. Service Resolution Perform DR071 - Unknown Cleaning Media on page 372. Steps Possible CRUs/FRUs None Quantum Scalar i40 and Scalar i80 Maintenance Guide... -
Page 294: Dt072
• Inventory or application issue results in data tape cartridge being loaded when the drive expects a cleaning tape. Service Resolution Perform DR072 - Invalid Cleaning Media on page 373. Steps Possible CRUs/FRUs None Quantum Scalar i40 and Scalar i80 Maintenance Guide... -
Page 295: Dt073
• Cartridge was manually placed into an unassigned storage slot. • A partition was deleted that contained one or more tape cartridges. Service Resolution Perform DR073 - Unassigned Tape Cartridge on page 374. Steps Possible CRUs/FRUs None Quantum Scalar i40 and Scalar i80 Maintenance Guide... -
Page 296: Dt074
• A tape cartridge does not have a barcode label attached, or the barcode label is damaged and unreadable. Service Resolution Perform DR074 - Unlabeled Tape Cartridge on page 375. Steps Possible CRUs/FRUs Cartridge Quantum Scalar i40 and Scalar i80 Maintenance Guide... -
Page 297: Dt080
Dispatch the first part listed below for replacement. If this does not solve the problem, dispatch the second part, and so on, in order. Dispatch only one part (or set of parts) at a time. 1 Drive Sled Quantum Scalar i40 and Scalar i80 Maintenance Guide... -
Page 298: Dt082
• Corrupt tape drive firmware image. • Tape drive rejecting the firmware image as being incorrect or corrupt. Service Resolution Perform DR082 - Tape Drive FW Invalid on page 376. Steps Possible CRUs/FRUs None Quantum Scalar i40 and Scalar i80 Maintenance Guide... -
Page 299: Dt085
Dispatch the first part listed below for replacement. If this does not solve the problem, dispatch the second part, and so on, in order. Dispatch only one part (or set of parts) at a time. 1 Drive Sled Quantum Scalar i40 and Scalar i80 Maintenance Guide... -
Page 300: Dt086
Dispatch only one part (or set of parts) at a time. 1 Drive Sled 2 System Control Board (SCB) 3 Library Chassis Quantum Scalar i40 and Scalar i80 Maintenance Guide... -
Page 301: Dt087
Dispatch only one part (or set of parts) at a time. 1 Drive Sled 2 System Control Board (SCB) 3 Library Chassis Quantum Scalar i40 and Scalar i80 Maintenance Guide... -
Page 302: Dt088
The drive will successfully update the same firmware image if media is not present, or the media is less than gen 4 types.) Service Resolution Perform DR088 - Drive FW Update Failure on page 380. Steps Possible CRUs/FRUs None Quantum Scalar i40 and Scalar i80 Maintenance Guide... -
Page 303: Dt089
Dispatch the first part listed below for replacement. If this does not solve the problem, dispatch the second part, and so on, in order. Dispatch only one part (or set of parts) at a time. 1 Drive Sled Quantum Scalar i40 and Scalar i80 Maintenance Guide... -
Page 304: Dt090
Dispatch the first part listed below for replacement. If this does not solve the problem, dispatch the second part, and so on, in order. Dispatch only one part (or set of parts) at a time. 1 Drive Sled Quantum Scalar i40 and Scalar i80 Maintenance Guide... -
Page 305: Dt091
Dispatch the first part listed below for replacement. If this does not solve the problem, dispatch the second part, and so on, in order. Dispatch only one part (or set of parts) at a time. 1 Drive Sled Quantum Scalar i40 and Scalar i80 Maintenance Guide... -
Page 306: Dt092
• A host has issued a Prevent/Allow Medium Removal SCSI command, then reset or restarted which may have orphaned the Prevent Media Removal on the drive. Service Resolution Perform DR092 - Drive Unload Prevented on page 384. Steps Possible CRUs/FRUs None Quantum Scalar i40 and Scalar i80 Maintenance Guide... -
Page 307: Dt093
• Drive firmware issue. • Incorrect tape drive firmware version, not supporting encryption. • Mounted tape drive, preventing encryption control. Service Resolution Perform DR093 - Drive Control Failure on page 385. Steps Possible CRUs/FRUs None Quantum Scalar i40 and Scalar i80 Maintenance Guide... -
Page 308: Dt094
ESR, but not have the proper encryption key request details available upon drive sled controller request. Service Resolution Perform DR094 - Drive Encryption Warning on page 386. Steps Possible CRUs/FRUs None Quantum Scalar i40 and Scalar i80 Maintenance Guide... -
Page 309: Dt095
Dispatch the first part listed below for replacement. If this does not solve the problem, dispatch the second part, and so on, in order. Dispatch only one part (or set of parts) at a time. 1 SKM Server Quantum Scalar i40 and Scalar i80 Maintenance Guide... -
Page 310: Dt096
Dispatch the first part listed below for replacement. If this does not solve the problem, dispatch the second part, and so on, in order. Dispatch only one part (or set of parts) at a time. 1 Drive Sled Quantum Scalar i40 and Scalar i80 Maintenance Guide... -
Page 311: Dt097
• The tape drive was instructed to unload the tape cartridge but did not complete the request within the allotted time frame. Service Resolution Perform DR097 - Drive Unload Timeout on page 388. Steps Possible CRUs/FRUs None Quantum Scalar i40 and Scalar i80 Maintenance Guide... -
Page 312: Dt101
Dispatch the first part listed below for replacement. If this does not solve the problem, dispatch the second part, and so on, in order. Dispatch only one part (or set of parts) at a time. 1 Drive Sled Quantum Scalar i40 and Scalar i80 Maintenance Guide... -
Page 313: Dt103
Dispatch the first part listed below for replacement. If this does not solve the problem, dispatch the second part, and so on, in order. Dispatch only one part (or set of parts) at a time. 1 Drive Sled Quantum Scalar i40 and Scalar i80 Maintenance Guide... -
Page 314: Dt104
• The tape drive has determined and reported a problem per its internal error analysis algorithms. Service Resolution Perform DR104 - Drive Tape Alert 4 on page 391. Steps Possible CRUs/FRUs None Quantum Scalar i40 and Scalar i80 Maintenance Guide... -
Page 315: Dt105
Dispatch the first part listed below for replacement. If this does not solve the problem, dispatch the second part, and so on, in order. Dispatch only one part (or set of parts) at a time. 1 Drive Sled Quantum Scalar i40 and Scalar i80 Maintenance Guide... -
Page 316: Dt106
Dispatch the first part listed below for replacement. If this does not solve the problem, dispatch the second part, and so on, in order. Dispatch only one part (or set of parts) at a time. 1 Drive Sled Quantum Scalar i40 and Scalar i80 Maintenance Guide... -
Page 317: Dt109
• The tape drive has determined and reported a problem per its internal error analysis algorithms. Service Resolution Perform DR109 - Drive Tape Alert 9 on page 394. Steps Possible CRUs/FRUs None Quantum Scalar i40 and Scalar i80 Maintenance Guide... -
Page 318: Dt112
• The tape drive has determined and reported a problem per its internal error analysis algorithms. Service Resolution Perform DR112 - Drive Tape Alert 12 on page 395. Steps Possible CRUs/FRUs None Quantum Scalar i40 and Scalar i80 Maintenance Guide... -
Page 319: Dt113
• The tape drive has determined and reported a problem per its internal error analysis algorithms. Service Resolution Perform DR113 - Drive Tape Alert 13 on page 396. Steps Possible CRUs/FRUs None Quantum Scalar i40 and Scalar i80 Maintenance Guide... -
Page 320: Dt115
• The tape drive has determined and reported a problem per its internal error analysis algorithms. Service Resolution Perform DR115 - Drive Tape Alert 15 on page 397. Steps Possible CRUs/FRUs None Quantum Scalar i40 and Scalar i80 Maintenance Guide... -
Page 321: Dt116
• The tape drive has determined and reported a problem per its internal error analysis algorithms. Service Resolution Perform DR116 - Drive Tape Alert 16 on page 397. Steps Possible CRUs/FRUs None Quantum Scalar i40 and Scalar i80 Maintenance Guide... -
Page 322: Dt118
• The tape drive has determined and reported a problem per its internal error analysis algorithms. Service Resolution Perform DR118 - Drive Tape Alert 18 on page 398. Steps Possible CRUs/FRUs None Quantum Scalar i40 and Scalar i80 Maintenance Guide... -
Page 323: Dt119
• The tape drive has determined and reported a problem per its internal error analysis algorithms. Service Resolution Perform DR119 - Drive Tape Alert 19 on page 399. Steps Possible CRUs/FRUs None Quantum Scalar i40 and Scalar i80 Maintenance Guide... -
Page 324: Dt120
• The tape drive has determined and reported a problem per its internal error analysis algorithms Service Resolution Perform DR120 - Drive Tape Alert 20 on page 399. Steps Possible CRUs/FRUs None Quantum Scalar i40 and Scalar i80 Maintenance Guide... -
Page 325: Dt121
• The tape drive has determined and reported a problem per its internal error analysis algorithms Service Resolution Perform DR121 - Drive Tape Alert 21 on page 400. Steps Possible CRUs/FRUs None Quantum Scalar i40 and Scalar i80 Maintenance Guide... -
Page 326: Dt122
• The tape drive has determined and reported a problem per its internal error analysis algorithm. Service Resolution Perform DR122 - Drive Tape Alert 22 on page 402. Steps Possible CRUs/FRUs None Quantum Scalar i40 and Scalar i80 Maintenance Guide... -
Page 327: Dt123
• Inventory or application issue results in data tape being loaded when drive expects cleaning tape. Service Resolution Perform DR123 - Drive Tape Alert 23 on page 402. Steps Possible CRUs/FRUs None Quantum Scalar i40 and Scalar i80 Maintenance Guide... -
Page 328: Dt130
Dispatch the first part listed below for replacement. If this does not solve the problem, dispatch the second part, and so on, in order. Dispatch only one part (or set of parts) at a time. 1 Drive Sled Quantum Scalar i40 and Scalar i80 Maintenance Guide... -
Page 329: Dt131
Dispatch the first part listed below for replacement. If this does not solve the problem, dispatch the second part, and so on, in order. Dispatch only one part (or set of parts) at a time. 1 Drive Sled Quantum Scalar i40 and Scalar i80 Maintenance Guide... -
Page 330: Dt133
Dispatch the first part listed below for replacement. If this does not solve the problem, dispatch the second part, and so on, in order. Dispatch only one part (or set of parts) at a time. 1 Drive Sled Quantum Scalar i40 and Scalar i80 Maintenance Guide... -
Page 331: Dt136
Dispatch the first part listed below for replacement. If this does not solve the problem, dispatch the second part, and so on, in order. Dispatch only one part (or set of parts) at a time. 1 Drive Sled Quantum Scalar i40 and Scalar i80 Maintenance Guide... -
Page 332: Dt151
• The tape drive has determined and reported a problem per its internal error analysis algorithms. Service Resolution Perform DR151 - Drive Tape Alert 51 on page 407. Steps Possible CRUs/FRUs None Quantum Scalar i40 and Scalar i80 Maintenance Guide... -
Page 333: Dt153
• The tape drive has determined and reported a problem per its internal error analysis algorithms. Service Resolution Perform DR153 - Drive Tape Alert 53 on page 408. Steps Possible CRUs/FRUs None Quantum Scalar i40 and Scalar i80 Maintenance Guide... -
Page 334: Dt155
Dispatch the first part listed below for replacement. If this does not solve the problem, dispatch the second part, and so on, in order. Dispatch only one part (or set of parts) at a time. 1 Drive Sled Quantum Scalar i40 and Scalar i80 Maintenance Guide... -
Page 335: Dt156
Dispatch the first part listed below for replacement. If this does not solve the problem, dispatch the second part, and so on, in order. Dispatch only one part (or set of parts) at a time. 1 Drive Sled Quantum Scalar i40 and Scalar i80 Maintenance Guide... -
Page 336: Dt158
• The tape drive has determined and reported a problem per its internal error analysis algorithms. Service Resolution Perform DR158 - Drive Tape Alert 58 on page 410. Steps Possible CRUs/FRUs None. Quantum Scalar i40 and Scalar i80 Maintenance Guide... -
Page 337: Dt159
• The tape drive has determined and reported a problem per its internal error analysis algorithms. Service Resolution Perform DR159 - Drive Tape Alert 59 on page 410. Steps Possible CRUs/FRUs None Quantum Scalar i40 and Scalar i80 Maintenance Guide... -
Page 338: Dt165
• Unrecoverable drive sled communication problem between the library controller and drive sled controller or tape drive. Service Resolution Perform DR165 - Library Control Path Failover on page 411. Steps Possible CRUs/FRUs None Quantum Scalar i40 and Scalar i80 Maintenance Guide... -
Page 339: Dt166
• The FC or SAS communication cable is disconnected. • A FC switch or SAS repeater is powered off. Service Resolution Perform DR166 - Library Control Path Warning on page 412. Steps Possible CRUs/FRUs None Quantum Scalar i40 and Scalar i80 Maintenance Guide... -
Page 340: Dt167
• The FC communication cables to both drives or switch are disconnected. • The connected FC switch is powered off. Service Resolution Perform DT167 on page 314. Steps Possible CRUs/FRUs None Quantum Scalar i40 and Scalar i80 Maintenance Guide... -
Page 341: Dt170
Detection Scenarios • TBD Root Causes • The customer installed temporary license is nearing its expiration date. Service Resolution Perform DR170 - EKM License Expiring on page 414. Steps Possible CRUs/FRUs None Quantum Scalar i40 and Scalar i80 Maintenance Guide... -
Page 342: Dt171
LME capabilities in all LME partitions have been disabled. Detection Scenarios • TBD Root Causes • The temporary encryption license expired. Service Resolution Perform DR171 - EKM License Expired on page 415. Steps Possible CRUs/FRUs None Quantum Scalar i40 and Scalar i80 Maintenance Guide... -
Page 343: Dt172
Dispatch the first part listed below for replacement. If this does not solve the problem, dispatch the second part, and so on, in order. Dispatch only one part (or set of parts) at a time. 1 EKM Server Quantum Scalar i40 and Scalar i80 Maintenance Guide... -
Page 344: Dt173
Dispatch the first part listed below for replacement. If this does not solve the problem, dispatch the second part, and so on, in order. Dispatch only one part (or set of parts) at a time. 1 EKM Server Quantum Scalar i40 and Scalar i80 Maintenance Guide... -
Page 345: Dt174
Dispatch the first part listed below for replacement. If this does not solve the problem, dispatch the second part, and so on, in order. Dispatch only one part (or set of parts) at a time. 1 EKM Server Quantum Scalar i40 and Scalar i80 Maintenance Guide... -
Page 346: Dt175
Dispatch the first part listed below for replacement. If this does not solve the problem, dispatch the second part, and so on, in order. Dispatch only one part (or set of parts) at a time. 1 EKM Server Quantum Scalar i40 and Scalar i80 Maintenance Guide... -
Page 347: Dt176
Dispatch the first part listed below for replacement. If this does not solve the problem, dispatch the second part, and so on, in order. Dispatch only one part (or set of parts) at a time. 1 EKM Server Quantum Scalar i40 and Scalar i80 Maintenance Guide... -
Page 348: Dt177
Dispatch the first part listed below for replacement. If this does not solve the problem, dispatch the second part, and so on, in order. Dispatch only one part (or set of parts) at a time. 1 EKM Server Quantum Scalar i40 and Scalar i80 Maintenance Guide... -
Page 349: Dt178
Service Resolution Perform DR178 - EKM Key Unknown on page 421. Steps Possible CRUs/FRUs None Quantum Scalar i40 and Scalar i80 Maintenance Guide... -
Page 350: Dt179
SKM server. Root Causes • Usage of encryption keys exceeds 80% of the pre-generated encryption key set. Service Resolution Perform DR179 - EKM Key Set Depleted on page 422. Steps Possible CRUs/FRUs None Quantum Scalar i40 and Scalar i80 Maintenance Guide... -
Page 351: Dt180
• An SKM server software update was installed only on one of the redundant SKM servers. Service Resolution Perform DR180 - EKM Software Mismatch on page 423. Steps Possible CRUs/FRUs None Quantum Scalar i40 and Scalar i80 Maintenance Guide... -
Page 352: Dt181
CRC check validation in the import file. Root Causes • Export operation file corruption. • Import operation file corruption. Service Resolution Perform DR181 - EKM Key Corrupted on page 423. Steps Possible CRUs/FRUs None Quantum Scalar i40 and Scalar i80 Maintenance Guide... -
Page 353: Dt182
Root Causes • Usage of encryption keys reached 100% of the pre-generated encryption key set. Service Resolution Perform DR182 - EKM Key Set Exhausted on page 424. Steps Possible CRUs/FRUs None Quantum Scalar i40 and Scalar i80 Maintenance Guide... -
Page 354: Dt183
• An EKM server was replaced but the key store was not restored with backup data from the previously configured EKM server. Service Resolution Perform DR183 - EKM Key Set Missing on page 425. Steps Possible CRUs/FRUs None Quantum Scalar i40 and Scalar i80 Maintenance Guide... -
Page 355: Dt184
• An EKM server was replaced or restored without following the required procedure on the library to synchronize the encryption key (template) pointers. Service Resolution Perform DR184 - EKM Key Server Sync Warning on page 426. Steps Possible CRUs/FRUs None Quantum Scalar i40 and Scalar i80 Maintenance Guide... -
Page 356: Dt185
• An Ethernet switch is blocking access to the SKM server’s HTTP port, preventing the library from accessing required information. Service Resolution Perform DR185 - EKM Server HTTP Access on page 427. Steps Possible CRUs/FRUs None Quantum Scalar i40 and Scalar i80 Maintenance Guide... -
Page 357: Dt186
Root Causes • Usage of encryption keys exceeds 80% of the last pre-generated encryption key set. Service Resolution Perform DR186- Resolve EKM Server Key Generation on page 428 Steps Possible CRUs/FRUs None Quantum Scalar i40 and Scalar i80 Maintenance Guide... -
Page 358: Dt187
Root Causes • The EKM server communication certificate will expire within 30 days. Service Resolution Perform DR187 - EKM Server Certificate Expiring on page 428. Steps Possible CRUs/FRUs None Quantum Scalar i40 and Scalar i80 Maintenance Guide... -
Page 359: Dt188
Root Causes • The library’s EKM server communication certificate will expire within 30 days. Service Resolution Perform DR188 - Library Certificate Expiring on page 429. Steps Possible CRUs/FRUs None Quantum Scalar i40 and Scalar i80 Maintenance Guide... -
Page 360: Dt189
EKM server shows an expiration date that indicates the certificate expired. Root Causes • The library’s EKM server communication certificate expired. Service Resolution Perform DR189 - Library Certificate Expired on page 430. Steps Possible CRUs/FRUs None Quantum Scalar i40 and Scalar i80 Maintenance Guide... -
Page 361: Dt190
(30 or less) left before it expires. Root Causes • The temporary license will expire within 30 days. Service Resolution Perform DR 190 - Expiring AR License on page 430. Steps Possible CRUs/FRUs None Quantum Scalar i40 and Scalar i80 Maintenance Guide... -
Page 362: Dt191
Reporting for customer selection expired on or before the current date/ time. Root Causes • The temporary license expired. Service Resolution Perform DR 191 - Expired AR License on page 431. Steps Possible CRUs/FRUs None Quantum Scalar i40 and Scalar i80 Maintenance Guide... -
Page 363: Dt192
• An installation of the “Hitachi” license has been detected. Root Causes • The “Hitachi” license has been applied. Service Resolution Perform DR 192 - Hitachi License Activation on page 431. Steps Possible CRUs/FRUs None Quantum Scalar i40 and Scalar i80 Maintenance Guide... -
Page 364: Dt195
Root Causes • An exported tape cartridge has been removed from the library. Service Resolution Perform DR 195 - Media Removal Notification on page 432 Steps Possible CRUs/FRUs None Quantum Scalar i40 and Scalar i80 Maintenance Guide... -
Page 365: Dt196
• A tape cartridge has been removed from the library without having been properly exported by the robot. Service Resolution Perform DR 196 - Media Security Warning on page 432 Steps Possible CRUs/FRUs None Quantum Scalar i40 and Scalar i80 Maintenance Guide... -
Page 366: Diagnostic Resolutions
Quantum Service • DT000 on page 231 Problem: This Diagnostic Ticket requires technical assistance. Please contact the QUANTUM Technical Assistance Center (ATAC) online via our Customer Service Center (CSC) website at www.Quantum.com/ to open a Service Request. By telephone, in the USA: 800-872-3822, in Europe: 00800-9999-3822. -
Page 367: Dr002 - Ps Failure
4 If the issue could not be corrected, contact Service for a Power Supply replacement. Once the new Power Supply has been received: a Disconnect the AC Power Cord and remove the defective Power Supply. Quantum Scalar i40 and Scalar i80 Maintenance Guide... -
Page 368: Dr010 - Rcs Firmware Image Error
2 Wait for the library to complete its initialization sequence. 3 If this ticket reoccurs again following the library firmware upgrade operation, contact Service for assistance with resolving this issue. Quantum Scalar i40 and Scalar i80 Maintenance Guide... -
Page 369: Dr011 - Rcs Auto-Level Failure
• Select Exit to skip issue resolution and leave the Diagnostic Ticket open for future diagnostic and troubleshooting reference. • Select Close to indicate issue resolution and close the Diagnostic Ticket now. Quantum Scalar i40 and Scalar i80 Maintenance Guide... -
Page 370: Dr012 - Rcs Initialization Error
If the library initializes, import any removed tape cartridge into the partition that owns the drive from which the tape cartridge was removed. 4 If this Diagnostic Ticket reoccurs after the library attempts to reinitialize, contact Service for further assistance. Quantum Scalar i40 and Scalar i80 Maintenance Guide... -
Page 371: Dr013 - Rcs Calibration Failure
6 Re-insert the storage magazines and power on the library. Quantum Scalar i40 and Scalar i80 Maintenance Guide... -
Page 372: Dr014 - Rcs Communication Error
3 Once the library initializes, monitor this issue for reoccurrence. 4 If the library does not initialize, follow the resolution instructions for the reported initialization failure Diagnostic Ticket. 5 If the issue cannot be resolved, contact Service for assistance. Quantum Scalar i40 and Scalar i80 Maintenance Guide... -
Page 373: Dr015 - Rcs Move Failure
6 If a tape cartridge is extending from a tape drive, consult the user documentation to remove the drive sled and remove the tape cartridge from the drive; then re-insert and secure the drive sled. Quantum Scalar i40 and Scalar i80 Maintenance Guide... -
Page 374: Dr016 - Rcs Motion Failure
2 Power off the library and consult the user documentation to manually unlock and remove a storage magazine and manually control picker motion. Quantum Scalar i40 and Scalar i80 Maintenance Guide... - Page 375 • Select Exit to skip issue resolution and leave the Diagnostic Ticket open for future diagnostic and troubleshooting reference. • Select Close to indicate issue resolution and close the Diagnostic Ticket now. Quantum Scalar i40 and Scalar i80 Maintenance Guide...
-
Page 376: Dr017 - Rcs Imager Error
• Select Exit to skip issue resolution and leave the Diagnostic Ticket open for future diagnostic and troubleshooting reference. • Select Close to indicate issue resolution and close the Diagnostic Ticket now. Quantum Scalar i40 and Scalar i80 Maintenance Guide... -
Page 377: Dr019 - Rcs Put Failure
• Select Exit to skip issue resolution and leave the Diagnostic Ticket open for future diagnostic and troubleshooting reference. • Select Close to indicate issue resolution and close the Diagnostic Ticket now. Quantum Scalar i40 and Scalar i80 Maintenance Guide... -
Page 378: Dr020 - Rcs Get Failure
6 Restart host operations and monitor for reoccurrence of this Diagnostic Ticket. 7 Contact Service if the issue could not be resolved or the issue repeats. Quantum Scalar i40 and Scalar i80 Maintenance Guide... -
Page 379: Dr021 - Rcs Put Problem
7 If the obstruction was corrected or no issue was found, re-insert the removed storage magazine. Wait for the library to complete initialization. Quantum Scalar i40 and Scalar i80 Maintenance Guide... -
Page 380: Dr022 - Rcs Get Problem
5 If a move from a cartridge magazine slot failed, unlock and remove the magazine containing the source element and inspect the actual source slot location within the magazine as determined in step 2. Quantum Scalar i40 and Scalar i80 Maintenance Guide... -
Page 381: Dr023 - Rcs Cartridge Presence
2 Manually unlock and carefully pull and remove a storage magazine to gain viewing access to the picker mechanism. 3 Visually inspect the picker mechanism through the magazine opening to determine cartridge presence. Quantum Scalar i40 and Scalar i80 Maintenance Guide... -
Page 382: Dr024 - Rcs Cartridge Loss
If a tape cartridge is extending from the tape drive, remove it and note the drive that contained the tape cartridge. Re-insert and secure the removed drive sleds. Quantum Scalar i40 and Scalar i80 Maintenance Guide... -
Page 383: Dr030 - I/E Unlock Failure
Close this Diagnostic Ticket and repeat the I/E area magazine unlock request again. 4 If the issue cannot be resolved, contact Service for assistance in troubleshooting magazine lock issues. Quantum Scalar i40 and Scalar i80 Maintenance Guide... -
Page 384: Dr031 - I/E Unlock Warning
• Select Exit to skip issue resolution and leave the Diagnostic Ticket open for future diagnostic and troubleshooting reference. • Select Close to indicate issue resolution and close the Diagnostic Ticket now. Quantum Scalar i40 and Scalar i80 Maintenance Guide... -
Page 385: Dr040 - Vpd Information Missing
System Controller Board (SCB), however, due to the missing VPD information in the library chassis, the library will not be able to initialize in the future, in the unlikely event that the SCB needs to be replaced. Quantum Scalar i40 and Scalar i80 Maintenance Guide... -
Page 386: Dr042 - Vpd Information Changed
If the library configuration has not been saved before, the library needs to be re-configured again as the SCB stored configuration information does not apply. Quantum Scalar i40 and Scalar i80 Maintenance Guide... -
Page 387: Dr045 - Chassis Component Failure
• Select Exit to skip issue resolution and leave the Diagnostic Ticket open for future diagnostic and troubleshooting reference. • Select Close to indicate issue resolution and close the Diagnostic Ticket now. Quantum Scalar i40 and Scalar i80 Maintenance Guide... -
Page 388: Dr046 - Chassis Magazine Unlocked
If Diagnostic Ticket DT065 has not been reported, monitor this issue for further occurrence. Contact Service for further assistance if this Ticket is reported again and all magazines have been fully inserted and locked Quantum Scalar i40 and Scalar i80 Maintenance Guide... -
Page 389: Dr050 - Scb Hardware Failure
• Select Exit to skip issue resolution and leave the Diagnostic Ticket open for future diagnostic and troubleshooting reference. • Select Close to indicate issue resolution and close the Diagnostic Ticket now. Quantum Scalar i40 and Scalar i80 Maintenance Guide... -
Page 390: Dr051 - Scb Clock Failure
• Select Exit to skip issue resolution and leave the Diagnostic Ticket open for future diagnostic and troubleshooting reference. • Select Close to indicate issue resolution and close the Diagnostic Ticket now. Quantum Scalar i40 and Scalar i80 Maintenance Guide... -
Page 391: Dr052 - New Library Control Firmware Available
Problem: The library detected that a newer library control firmware version is available for a library control firmware update. 1 Visit www.quantum.com and navigate to the library product firmware download screen to download the latest available library control firmware version. -
Page 392: Dr057 - Cartridge Inventory Error
• Select Exit to skip issue resolution and leave the Diagnostic Ticket open for future diagnostic and troubleshooting reference. • Select Close to indicate issue resolution and close the Diagnostic Ticket now. Quantum Scalar i40 and Scalar i80 Maintenance Guide... -
Page 393: Dr058 - Insert Assignment Warning
2 If no other related Diagnostic Ticket exists, access the remote user Interface and select Reports > Library Configuration to locate and view the configured cleaning slots. 3 Verify that at least one cleaning cartridge is configured and not expired. Quantum Scalar i40 and Scalar i80 Maintenance Guide... -
Page 394: Dr060 - Cartridge Return Failure
3 From the remote user interface, select Reports > Library Configuration to determine the current logical library partition that owns the element where the tape cartridge is currently located. Quantum Scalar i40 and Scalar i80 Maintenance Guide... -
Page 395: Dr065 - Missing Magazine
1 If a magazine is truly missing, re-install the magazine and continue operation. Quantum Scalar i40 and Scalar i80 Maintenance Guide... -
Page 396: Dr067 - Magazine Unlock Failure
Close this Diagnostic Ticket and repeat the storage magazine unlock request again. 4 If the issue cannot be resolved, contact Service for assistance with troubleshooting any storage magazine unlock issues. Quantum Scalar i40 and Scalar i80 Maintenance Guide... -
Page 397: Dr068 - Magazine Unlock Warning
• Select Exit to skip issue resolution and leave the Diagnostic Ticket open for future diagnostic and troubleshooting reference. • Select Close to indicate issue resolution and close the Diagnostic Ticket now. Quantum Scalar i40 and Scalar i80 Maintenance Guide... -
Page 398: Dr070 - Missing Cleaning Media
In order for a cartridge to be a valid cleaning cartridge, it must be imported as a cleaning cartridge via the library operator interface. 1 Note the tape cartridge's barcode information listed in the Diagnostic Ticket details. Quantum Scalar i40 and Scalar i80 Maintenance Guide... -
Page 399: Dr072 - Invalid Cleaning Media
5 If a manual drive cleaning operation was performed, replace the tape cartridge with a valid cleaning cartridge and repeat the drive cleaning operation. Quantum Scalar i40 and Scalar i80 Maintenance Guide... -
Page 400: Dr073 - Unassigned Tape Cartridge
6 Repeat steps 3) and 4) for all storage magazines that contained unassigned cartridges. 7 If desired, import the removed cartridge(s) back into the logical library partition that should own such tape cartridge(s). Quantum Scalar i40 and Scalar i80 Maintenance Guide... -
Page 401: Dr074 - Unlabeled Tape Cartridge
• Select Exit to skip issue resolution and leave the Diagnostic Ticket open for future diagnostic and troubleshooting reference. • Select Close to indicate issue resolution and close the Diagnostic Ticket now. Quantum Scalar i40 and Scalar i80 Maintenance Guide... -
Page 402: Dr080 - Tape Drive Type Changed
2 Close this ticket and perform the firmware update procedure outlined in the User's Guide. 3 Reboot the library so that the automatic tape drive update process is performed again upon initialization. Quantum Scalar i40 and Scalar i80 Maintenance Guide... -
Page 403: Dr085 - Drive Removal Unexpected
Check that the rear drive LED is lit. If lit, power is applied and once the tape drive reinitialized, verify that this Diagnostic Ticket is not displayed again. If the issue is resolved, take the tape drive online. Quantum Scalar i40 and Scalar i80 Maintenance Guide... -
Page 404: Dr086 - Drive Power Loss
From the rear of the library, loosen the drive sled thumb screws of the tape drive and then pull the drive sled backwards to disconnect from the power connection without disconnecting any host interface cables. Quantum Scalar i40 and Scalar i80 Maintenance Guide... -
Page 405: Dr087 - Drive Communication Error
2 If the drive sled has not been reseated, close this ticket and then verify that the drive sled is properly seated and connected: a Consult the user documentation to take the drive offline. Quantum Scalar i40 and Scalar i80 Maintenance Guide... -
Page 406: Dr088 - Drive Fw Update Failure
Problem: A manual or automatic attempt to update tape drive firmware was not successful. The drive did not accept and validate the new firmware version. 1 Note the Diagnostic Ticket details to determine the cause of the failure. Quantum Scalar i40 and Scalar i80 Maintenance Guide... -
Page 407: Dr089 - Drive Sled Fan Failure
3 If no obstruction is found, close this Diagnostic Ticket and reseat the drive sled to determine if the drive sled needs to be replaced: a Consult the user documentation to take the tape drive offline. Quantum Scalar i40 and Scalar i80 Maintenance Guide... -
Page 408: Dr090 - Drive Load Failure
Diagnostic Ticket and monitor the issue for reoccurrence. 3 If the tape cartridge does not load successfully, move the cartridge back to the storage slot location and select a different cartridge for a tape drive load operation. Quantum Scalar i40 and Scalar i80 Maintenance Guide... -
Page 409: Dr091 - Drive Unload Failure
Repeat the drive unload or move operation. d If the tape cartridge still does not unload, contact Service for assistance in manually removing the tape cartridge from the drive. Quantum Scalar i40 and Scalar i80 Maintenance Guide... -
Page 410: Dr092 - Drive Unload Prevented
• Select Exit to skip issue resolution and leave the Diagnostic Ticket open for future diagnostic and troubleshooting reference. • Select Close to indicate issue resolution and close the Diagnostic Ticket now. Quantum Scalar i40 and Scalar i80 Maintenance Guide... -
Page 411: Dr093 - Drive Control Failure
>Library Configuration menu and clicking on the respective tape drive coordinate to verify that the tape drive encryption method setting is correctly reported. 8 Contact Service for assistance if an issue remains. Quantum Scalar i40 and Scalar i80 Maintenance Guide... -
Page 412: Dr094 - Drive Encryption Warning
• Select Exit to skip issue resolution and leave the Diagnostic Ticket open for future diagnostic and troubleshooting reference. • Select Close to indicate issue resolution and close the Diagnostic Ticket now. Quantum Scalar i40 and Scalar i80 Maintenance Guide... -
Page 413: Dr095 - Drive Encryption Failure
Media Changer commands can no longer be received by the configured logical library partition; however, the drive may still be operational for host access. Quantum Scalar i40 and Scalar i80 Maintenance Guide... -
Page 414: Dr097 - Drive Unload Timeout
5 minutes until the unload operation is timed out and a failure gets reported. 1 Note the Diagnostic Ticket details to determine which drive did not complete the unload/eject operation. Quantum Scalar i40 and Scalar i80 Maintenance Guide... -
Page 415: Dr101 - Drive Tape Alert 1
Problem: The tape drive detected and reported severe read performance issues. No data has been lost but read performance is degraded. Data may be at risk based on the condition of the media. Quantum Scalar i40 and Scalar i80 Maintenance Guide... - Page 416 • Select Exit to skip issue resolution and leave the Diagnostic Ticket open for future diagnostic and troubleshooting reference. • Select Close to indicate issue resolution and close the Diagnostic Ticket now. Quantum Scalar i40 and Scalar i80 Maintenance Guide...
-
Page 417: Dr103 - Tape Drive Alert 3
2 Copy all required data from this tape cartridge to another tape cartridge. 3 Discontinue use of the faulty tape cartridge. 4 Restart the current operation with the new tape cartridge. Quantum Scalar i40 and Scalar i80 Maintenance Guide... -
Page 418: Dr105 - Drive Tape Alert 5
4 If DT103 has not been reported, a Consult the user documentation to retrieve and save the tape drive log for vendor analysis. Quantum Scalar i40 and Scalar i80 Maintenance Guide... -
Page 419: Dr106 - Drive Tape Alert 6
2 Make sure the tape cartridge is not write-protected. If the tape cartridge is write-protected, correct the tape cartridge write-protect switch setting and close this Diagnostic Ticket. Quantum Scalar i40 and Scalar i80 Maintenance Guide... -
Page 420: Dr109 - Drive Tape Alert 9
3 If the tape cartridge should not be write-protected, then export the tape cartridge from the library and correct the problem by manually changing the write-protect switch setting on the tape cartridge. Quantum Scalar i40 and Scalar i80 Maintenance Guide... -
Page 421: Dr112 - Drive Tape Alert 12
2 Export the tape cartridge from the library and validate that an improper tape cartridge was loaded into the tape drive. 3 Import a proper tape cartridge type with supported format and continue with the desired operation. Quantum Scalar i40 and Scalar i80 Maintenance Guide... -
Page 422: Dr113 - Drive Tape Alert 13
• Select Exit to skip issue resolution and leave the Diagnostic Ticket open for future diagnostic and troubleshooting reference. • Select Close to indicate issue resolution and close the Diagnostic Ticket now. Quantum Scalar i40 and Scalar i80 Maintenance Guide... -
Page 423: Dr115 - Drive Tape Alert 15
1 Note the Diagnostic Ticket details to determine the specific tape cartridge and tape drive involved in the problem. 2 Re-load the tape cartridge back into the tape drive. Quantum Scalar i40 and Scalar i80 Maintenance Guide... -
Page 424: Dr118 - Drive Tape Alert 18
• Select Exit to skip issue resolution and leave the Diagnostic Ticket open for future diagnostic and troubleshooting reference. • Select Close to indicate issue resolution and close the Diagnostic Ticket now. Quantum Scalar i40 and Scalar i80 Maintenance Guide... -
Page 425: Dr119 - Drive Tape Alert 19
Check for any other cleaning related Diagnostic Tickets and verify that cleaning tapes are properly configured and not expired. Quantum Scalar i40 and Scalar i80 Maintenance Guide... -
Page 426: Dr121 - Drive Tape Alert 21
The resolution of this issue depends on how the library or partition is configured to perform drive cleaning operations. Note the Diagnostic Ticket details to determine which tape drive reported the issue. Quantum Scalar i40 and Scalar i80 Maintenance Guide... - Page 427 • Select Exit to skip issue resolution and leave the Diagnostic Ticket open for future diagnostic and troubleshooting reference. • Select Close to indicate issue resolution and close the Diagnostic Ticket now. Quantum Scalar i40 and Scalar i80 Maintenance Guide...
-
Page 428: Dr122 - Drive Tape Alert 22
This Diagnostic Ticket is displayed when the drive expects a cleaning cartridge but the loaded cartridge is not a cleaning cartridge. The resolution of this issue depends on how the library or partition is configured to perform drive cleaning operations. Quantum Scalar i40 and Scalar i80 Maintenance Guide... - Page 429 Unload the currently mounted tape cartridge and perform a manual drive cleaning operation with a valid cleaning tape. b Once the tape drive has been cleaned, reload the previously dismounted tape cartridge and restart the host application. Quantum Scalar i40 and Scalar i80 Maintenance Guide...
-
Page 430: Dr130 - Drive Tape Alert 30
• Select Exit to skip issue resolution and leave the Diagnostic Ticket open for future diagnostic and troubleshooting reference. • Select Close to indicate issue resolution and close the Diagnostic Ticket now. Quantum Scalar i40 and Scalar i80 Maintenance Guide... -
Page 431: Dr131 - Drive Tape Alert 31
1 Note the Diagnostic Ticket details to determine the specific tape cartridge and tape drive involved in the problem. 2 Unload the tape cartridge from the tape drive; then export the tape cartridge from the library. Quantum Scalar i40 and Scalar i80 Maintenance Guide... -
Page 432: Dr136 - Drive Tape Alert 36
4 Verify that the drive sled's fan is spinning and airflow through the drive sled is not blocked. 5 If no issue is found, contact Service for further assistance. Quantum Scalar i40 and Scalar i80 Maintenance Guide... -
Page 433: Dr151 - Drive Tape Alert 51
• Select Exit to skip issue resolution and leave the Diagnostic Ticket open for future diagnostic and troubleshooting reference. • Select Close to indicate issue resolution and close the Diagnostic Ticket now. Quantum Scalar i40 and Scalar i80 Maintenance Guide... -
Page 434: Dr153 - Drive Tape Alert 53
If damage is found, contact Service to determine how data can be copied to a replacement tape cartridge so the defective tape cartridge can be retired. Quantum Scalar i40 and Scalar i80 Maintenance Guide... -
Page 435: Dr156 - Drive Tape Alert 56
• Select Exit to skip issue resolution and leave the Diagnostic Ticket open for future diagnostic and troubleshooting reference. • Select Close to indicate issue resolution and close the Diagnostic Ticket now. Quantum Scalar i40 and Scalar i80 Maintenance Guide... -
Page 436: Dr158 - Drive Tape Alert 58
2 Copy the data from the WORM tape cartridge to another tape cartridge. 3 Discard the faulty WORM tape cartridge. 4 Monitor this issue for reoccurrence. Quantum Scalar i40 and Scalar i80 Maintenance Guide... -
Page 437: Dr165 - Library Control Path Failover
Tools > Drive Operations menu selection to validate library control path functionality for configured drives, and perform such tests at an opportune and convenient time. Quantum Scalar i40 and Scalar i80 Maintenance Guide... -
Page 438: Dr166 - Library Control Path Warning
If the drive initializes and no ticket is generated for the drive, the fibre channel link has been re-established and the data path to the drive is operational. Quantum Scalar i40 and Scalar i80 Maintenance Guide... -
Page 439: Dr167 - Library Control Path Failure
5 Verify that the fibre channel cables between the host, switch and drives are properly connected. 6 Disconnect each fibre cable connection end point and inspect for defects such as breaks or cuts; reconnect or replace any fibre cable if defects are found. Quantum Scalar i40 and Scalar i80 Maintenance Guide... -
Page 440: Dr170 - Ekm License Expiring
1 To prevent or correct disabling of LME capabilities, reconfigure partitions to allow LME configurations that are in line with the installed encryption license. 2 Alternatively, contact Service to purchase and install an encryption license which meets your current usage. Quantum Scalar i40 and Scalar i80 Maintenance Guide... -
Page 441: Dr171 - Ekm License Expired
• Select Exit to skip issue resolution and leave the Diagnostic Ticket open for future diagnostic and troubleshooting reference. • Select Close to indicate issue resolution and close the Diagnostic Ticket now. Quantum Scalar i40 and Scalar i80 Maintenance Guide... -
Page 442: Dr172 - Ekm Primary Failover
EKM server configuration, setup or functionality issue. 1 Note the Diagnostic Ticket details to determine whether the issue is EKM server communication or configuration related. Quantum Scalar i40 and Scalar i80 Maintenance Guide... - Page 443 • Select Exit to skip issue resolution and leave the Diagnostic Ticket open for future diagnostic and troubleshooting reference. • Select Close to indicate issue resolution and close the Diagnostic Ticket now. Quantum Scalar i40 and Scalar i80 Maintenance Guide...
-
Page 444: Dr174 - Ekm Secondary Failover
1 Ensure that the library is properly connected to the network, and that the network cable is not damaged. 2 Verify that the Key Server is powered on, operational, and properly connected to the network. Quantum Scalar i40 and Scalar i80 Maintenance Guide... -
Page 445: Dr176 - Ekm Mirror Warning
Key Server and that the servers reference each other. 4 If no problems are found with any of these items, then there is a configuration problem with your network. Contact your network administrator for assistance with troubleshooting this issue. Quantum Scalar i40 and Scalar i80 Maintenance Guide... -
Page 446: Dr177 - Ekm Server Fault
5 For all other failures, contact Service for a possible EKM server replacement. Once a new server has been received, consult your user documentation for the proper server and disk replacement and restore procedure. Quantum Scalar i40 and Scalar i80 Maintenance Guide... -
Page 447: Dr178 - Ekm Key Unknown
• Select Exit to skip issue resolution and leave the Diagnostic Ticket open for future diagnostic and troubleshooting reference. • Select Close to indicate issue resolution and close the Diagnostic Ticket now. Quantum Scalar i40 and Scalar i80 Maintenance Guide... -
Page 448: Dr179 - Ekm Key Set Depleted
• Select Exit to skip issue resolution and leave the Diagnostic Ticket open for future diagnostic and troubleshooting reference. • Select Close to indicate issue resolution and close the Diagnostic Ticket now. Quantum Scalar i40 and Scalar i80 Maintenance Guide... -
Page 449: Dr180 - Ekm Software Mismatch
4 If any of the identified corrupted encryption keys are needed, repeat an encryption key export operation on the library from which the encryption keys were exported; then import such encryption keys as needed. Quantum Scalar i40 and Scalar i80 Maintenance Guide... -
Page 450: Dr182 - Ekm Key Set Exhausted
EKM server backup operations on both EKM servers so that all encryption keys can be saved for safe-keeping and restored in the event of a catastrophic EKM server failure. Quantum Scalar i40 and Scalar i80 Maintenance Guide... -
Page 451: Dr183 - Ekm Key Set Missing
6 If the EKM Path Diagnostic test succeeds, close the Diagnostic Ticket and restart host application and library operations. 7 ) If the Diagnostic Ticket re-occurs, or the EKM Path Diagnostic test fails, contact Service for further assistance. Quantum Scalar i40 and Scalar i80 Maintenance Guide... -
Page 452: Dr184 - Ekm Key Server Sync Warning
4 Re-enable library managed encryption on the partition that was just disabled. 5 Close the Diagnostic Ticket and restart host application and library operations. 6 If the Diagnostic Ticket re-occurs contact Service for further assistance. Quantum Scalar i40 and Scalar i80 Maintenance Guide... -
Page 453: Dr185 - Ekm Server Http Access
• Select Exit to skip issue resolution and leave the Diagnostic Ticket open for future diagnostic and troubleshooting reference. • Select Close to indicate issue resolution and close the Diagnostic Ticket now. Quantum Scalar i40 and Scalar i80 Maintenance Guide... -
Page 454: Dr186- Resolve Ekm Server Key Generation
2 Consult the respective EKM server user guide for information as to how to apply new EKM server communication certificates. 3 Apply new EKM server communication certificates before the existing certificate(s) will expire to allow uninterrupted and continued EKM server communication. Quantum Scalar i40 and Scalar i80 Maintenance Guide... -
Page 455: Dr188 - Library Certificate Expiring
• Select Exit to skip issue resolution and leave the Diagnostic Ticket open for future diagnostic and troubleshooting reference. • Select Close to indicate issue resolution and close the Diagnostic Ticket now. Quantum Scalar i40 and Scalar i80 Maintenance Guide... -
Page 456: Dr189 - Library Certificate Expired
• Select Exit to skip issue resolution and leave the Diagnostic Ticket open for future diagnostic and troubleshooting reference. • Select Close to indicate issue resolution and close the Diagnostic Ticket now. Quantum Scalar i40 and Scalar i80 Maintenance Guide... -
Page 457: Dr 191 - Expired Ar License
• Select Exit to skip issue resolution and leave the Diagnostic Ticket open for future diagnostic and troubleshooting reference. • Select Close to indicate issue resolution and close the Diagnostic Ticket now. Quantum Scalar i40 and Scalar i80 Maintenance Guide... -
Page 458: Dr 195 - Media Removal Notification
2 To view which tape cartridges have been removed, select the Media Security Log from the Reports > Log Viewer menu selection. Quantum Scalar i40 and Scalar i80 Maintenance Guide... - Page 459 • Select Exit to skip issue resolution and leave the Diagnostic Ticket open for future diagnostic and troubleshooting reference. • Select Close to indicate issue resolution and close the Diagnostic Ticket now. Quantum Scalar i40 and Scalar i80 Maintenance Guide...
- Page 460 Chapter 7: Diagnostic Tickets and Resolutions Diagnostic Resolutions Quantum Scalar i40 and Scalar i80 Maintenance Guide...
-
Page 461: Appendix A Tape Alert Flag Descriptions
Continued operation without corrective action may cause a failure or raise critical Tape Alert flags. Critical — Either a failure has already occurred or a failure is imminent. Corrective action is required. Quantum Scalar i40 and Scalar i80 Maintenance Guide... - Page 462 The drive can no tape drive is faulty: longer write data to the tape. 1 Use a good tape to test the drive. 2 If the problem persists, call the tape drive supplier help line. Quantum Scalar i40 and Scalar i80 Maintenance Guide...
- Page 463 1 Discard the old tape. medium can be 2 Restart the operation with a different demounted. tape. Quantum Scalar i40 and Scalar i80 Maintenance Guide...
- Page 464 1 Use another tape cartridge for your next backup. 2 Store this tape cartridge in a safe place in case you need to restore data from it. Quantum Scalar i40 and Scalar i80 Maintenance Guide...
- Page 465 1 Do not use this cleaning cartridge in this drive. 2 Wait for the current operation to finish. 3 Then use a valid cleaning cartridge. Quantum Scalar i40 and Scalar i80 Maintenance Guide...
- Page 466 The tape drive has a hardware fault: The drive has a hardware fault that 1 Eject the tape or magazine. requires reset to 2 Reset the drive. recover. 3 Restart the operation. Quantum Scalar i40 and Scalar i80 Maintenance Guide...
- Page 467 The voltage supply to the tape drive is Drive voltage limits outside the specified range. exceeded. Predictive A hardware failure of the tape drive is Predictive failure of failure predicted. Call the tape drive supplier drive hardware. help line. Quantum Scalar i40 and Scalar i80 Maintenance Guide...
- Page 468 Tape system The tape system area could not be read Read errors while area read successfully at load time: reading the system failure area on load. 1 Copy data to another tape cartridge. Quantum Scalar i40 and Scalar i80 Maintenance Guide...
- Page 469 The tape drive has detected an WORM Someone has inconsistency during the WORM medium — tampered with the medium integrity checks. Someone may integrity check WORM medium. have tampered with the cartridge. failed Quantum Scalar i40 and Scalar i80 Maintenance Guide...
- Page 470 The MRS stripes are read to determine if the media is of data-grade. Data-grade media should be used in SCSI streaming devices since it is of the required quality and consistency to be used to store data (i.e., audio/video grade media should not be used). Quantum Scalar i40 and Scalar i80 Maintenance Guide...
- Page 471 EKM path 220 resetting a tape drive 217 carriage release button 61 robotics get/put 218 chassis, removing and replacing downgrading library firmware 34 get/put test 218 cleaning log 193 configuration record 188 report 186 Quantum Scalar i40 and Scalar i80 Maintenance Guide...
- Page 472 65 releasing 28 releasing at install 37 picker fingers, rotating 45 removing and replacing 121 replacement 149 plug, library thumbscrew 54 test 213 restraint unlocking 28 installing 37 power supply, removing and Quantum Scalar i40 and Scalar i80 Maintenance Guide...
- Page 473 43 stuck 43 tape cartridges map, creating 121 tape drives log 195 online/offline 23 pulling out 44 removing 44 removing and replacing 137 removing with lodged cartridge 44 reports 197 Quantum Scalar i40 and Scalar i80 Maintenance Guide...
- Page 474 Index Quantum Scalar i40 and Scalar i80 Maintenance Guide...
Need help?
Do you have a question about the Scalar i40 and is the answer not in the manual?
Questions and answers