Table of Contents
Advertisement
Advertisement
Table of Contents

Related Manuals for moon ACE NEO SERIES


Summary of Contents for moon ACE NEO SERIES
- Page 1 Series All-in-One Owner’s Manual...
- Page 2 ACE Nēo Series...
-
Page 3: Important Safety Instructions
WARNING: TO REDUCE THE RISK OF FIRE OR ELECTRIC SHOCK, DO NOT EXPOSE THIS APPLIANCE TO RAIN OR MOISTURE. FCC information for MOON ACE ALL-in-One equipped with the Qualcomm® aptX audio for Bluetooth module and MiND Music Streamer module: This unit contains Transmitter Module FCC ID : SSSBC127-X and Transmitter Module FCC ID : ZUCSEDMP3. This device complies with part 15 of the FCC Rules. - Page 4 ACE, immediately disconnect it from the AC component. To completely disconnect this mains and take it to your MOON dealer for a apparatus from the AC mains, disconnect the complete check-up. power supply cord plug from the AC receptacle.
-
Page 5: Table Of Contents
Owner’s Manual Table of Contents Introduction Unpacking Installation & Placement Front Panel Controls Phono Input Digital Inputs Software Setup Rear Panel Connections SimLink™ Operating the Nēo ACE Remote Control Operation Troubleshooting Specifications Quick Reference: Setup Menus Appendix www.simaudio.com Simaudio Ltd., 1345 Newton Road Boucherville, Québec J4B 5H2 CANADA Date Code: 20160426... -
Page 6: Introduction
Series Introduction “MiND” (MOON intelligent Network Device) module for Thank you for selecting the MOON Nēo ACE All-in-One streaming; Includes TIDAL and vTuner Music Services. as a part of your music/cinema system. This component has been designed to offer state-of-the-art high-end 3 line-level inputs including a front-mounted 1/8”... -
Page 7: Unpacking
Owner’s Manual Unpacking The Nēo ACE should be removed from its box with care. The following accessories should be included inside the box with your All-in-One: AC power cable ‘CRM-3’ remote control with two ‘CR-2032’ batteries ‘SimLink™’ cable Wi-Fi antenna 1 spare fast-blow fuse This owner’s manual Quick reference guide... -
Page 8: Front Panel Controls
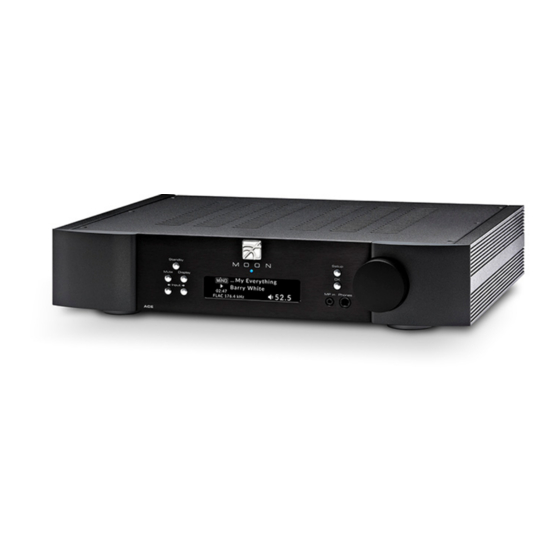
ACE Nēo Series Front Panel Controls Figure 1: Nēo ACE Front panel The front panel will look similar to Figure 1 (above). The “Standby” button places the unit into Standby mode; You can configure this to your own preferences– refer to the “Power Settings” section of the “Software Setup”. When switching from “Standby”... -
Page 9: Phono Input
Owner’s Manual The two (2) ANALOG inputs, “MP in” and “PHONO” inputs will only display their input name and volume level when active: Phono Input The Nēo ACE is equipped with one analog “PHONO” input for use with turntables equipped with a moving magnet (MM) cartridge ONLY. - Page 10 ACE Nēo Series The main body of the display shows the track name When the ACE cannot lock onto selected digital input’s “The Natives Are Restless” on the first line and the artist signal, “NO SIGNAL” will appear in the display instead of name “Horace Silver”...
- Page 11 Owner’s Manual The following chart summarizes which sample rates (from decoded PCM files & DSD files) will work on each digital input: INPUT OPTICAL 1 SPDIF 1 MiND via MiND via BLUETOOTH OPTICAL 2 SPDIF 2 Ethernet WiFi SAMPLE RATE PCM 44.1kHz PCM 48kHz PCM 88.2kHz...
-
Page 12: Software Setup
ACE to automatically switch to that input when your abort whatever you are doing, simply press the press the play button on a MOON CD player or transport “Setup” button to exit from wherever your are. (ii) connected to the ACE. -
Page 13: Input Settings
Owner’s Manual Input Settings: To enter the Setup mode, begin by pressing the “Setup” button; “SETUP” will briefly appear on the display window: Then rotate the volume control clockwise until “INPUTS” is highlighted on the display; then press “OK to enter the Setup “INPUTS”... - Page 14 ACE Nēo Series Note: The “USB”, “MiND” “BLUETOOTH”, “PHONO” and “MP IN” inputs do not provide the facility to assign a preset name (ie. DVD, CD, BLU-RAY, etc.) to the input label. To assign a custom label to an input, rotate the volume knob until “CUSTOM” is highlighted (#8 in the LABEL option list) then press the “OK”...
- Page 15 Owner’s Manual Note: “MiND” is the only input that cannot be disabled: The fourth configurable option is the volume bypass feature for use with home-theater processors and source components that have their own volume control. When activated, the volume control of the ACE is bypassed and the volume is adjusted from the component connected to the input.
- Page 16 ACE Nēo Series Network and MiND settings: This group of SETUP options allows you to easily configure the MiND module found in the ACE. Enter the Setup mode by pressing the “Setup” button; Rotate the volume knob until “NETWORK” is highlighted on the display.
- Page 17 Owner’s Manual “CONNECT” will automatically ask the MiND module to search for available WiFi networks; “Searching for networks” will appear on the display. In most cases within ten (10) seconds, but after up to sixty (60) seconds, one or more network names will be listed on the display.
- Page 18 ACE Nēo Series The next setup option in the “CONFIG” section is “NET PARAMETERS”. Similarly to “WiFi PARAMETERS”, there is an “AUTOMATIC” option (default setting) and a “MANUAL” option: Note: The “AUTOMATIC” option for “NET PARAMETERS” (DHCP) will cover 99% of all scenarios. Alternatively, you can perform this process manually.
- Page 19 Note: The Bluetooth feature of your smart device must be enabled for pairing to work: “MOON ACE” will appear in the Bluetooth device list of your smart device and you must select it. At the same time, the ACE's display window will show "PAIRING COMPLETE" for several seconds and then return to the "BLUETOOTH"...
- Page 20 Then press “OK”.: The default input for “MOON CD” is “SPDIF 1”. To change this input, rotate the volume control to highlight “SPDIF 2”, “ANALOG 1” or “ANALOG 2”. In this example we have chosen “ANALOG 1”. Press “OK” and the check-mark symbol will appear to the right of “ANALOG 1”...
- Page 21 Owner’s Manual Rotate the volume control to highlight either “LAST” or “SPECIFIC VALUE”. The “LAST” option (default setting) will use the exact same volume level from the last time you used the ACE. To accept this option, press “OK” The “SPECIFIC” options allows you to specify an exact volume level at power up. The default setting is 30.0dB. This adjustment occurs in 0.5dB increments and the range is from 0dB to 60dB;...
- Page 22 “MODE” option to the “LOOK” option; The “MOON LOGO” option (default setting) will have our MOON logo randomly floating on the display window and “DISPLAY OFF” will result in the screen being turned off. Use the volume control to highlight your choice of “LOOK” and then press “OK”. The check-mark symbol will appear to the right of the option you selected and flash briefly.
- Page 23 Owner’s Manual Power settings: This set of options allows you to control how much AC power the ACE consumes under certain situations. Enter the Setup mode by pressing the “Setup” button. Rotate the volume control until “POWER SETTINGS” is highlighted on the display and then press “OK”: There are three (3) available options: “NORMAL”...
- Page 24 ACE Nēo Series Displaying firmware versions: This option is for informational purposes ONLY and displays the firmware versions for both the ACE and MiND. This can be a major convenience in situations where troubleshooting a problem may arise. Begin by pressing the “Setup” button and then rotating the volume control until “FIRMWARE” is highlighted on the display and then press “OK”.
-
Page 25: Rear Panel Connections
Owner’s Manual Rear Panel Connections Figure 2: Nēo ACE Rear panel The rear panel will look similar to Figure 2 (above). On the far left side is a screw labelled “GND” for use with a turntable’s grounding wire followed by three pairs of “Analog Inputs” on RCA connectors, labelled “L” for Left (white) on the top row and “R”... -
Page 26: Simlink
When powering up the ACE via the rear panel main rocker switch, you must allow the MiND streaming If you are using a MOON CD Transport or CD Player such module to go through its initialization process, which as the Nēo 260D with your ACE you should make a requires up to sixty (60) seconds, before you can begin SimLink™... -
Page 27: Remote Control Operation
The Nēo ACE uses the ‘CRM-3’ full-function remote control (figure 3). It operates on the Philips RC-5 communication protocol and can be used with other MOON components. The ‘CRM-3’ remote uses two CR-2032 batteries (included). To install them, simply slide the removeable lower section of the back plate downwards while applying slight pressure to the top of this removeable plate. - Page 28 1/8” mini-jack cable) When you turn on the ACE via remote control or by pressing & holding its Standby button, the ACE turn on automatically. The same rule applies when you put the 260D into Standby mode. SimLink™ also allows for the aforementioned “MOON CD” feature in the SETUP software.
-
Page 29: Troubleshooting
MOON support team. Error messages are shown for a “DC Detected on Output Unit will Shutdown” is related duration of ten (10) seconds; The blue LED will blink at to DC (direct current) coming from the source the same time. -
Page 30: Specifications
ACE Nēo Series Specifications Configuration Stereo Power Supply Transformer 250VA Power Supply Capacitance 20,000μF Class Of Operation – Amplifier Class A/B Single-ended inputs 2 (RCA) pairs Mini-jack input 1 (1/8”) Input Sensitivity 370mV – 3.0V RMS Input Impedance 22,100Ω Preamplifier / Subwoofer output 1 (RCA) pair Headphone output 1 ( 1/4”... -
Page 31: Www.simaudio.com
Owner’s Manual Specifications (cont’d) Moving Magnet Phono Section: Input Impedance 47K ohms Input Capacitance 100pF Gain 40dB Input overload @ 40dB 58mV RMS Signal-to-noise ratio (full scale @ 40dB) 104dBr Frequency Response 20Hz - 20kHz (±0.5dB) Crosstalk @ 1kHz -95dB 0.01% THD (20Hz - 20kHz) 0.001%...
Need help?
Do you have a question about the ACE NEO SERIES and is the answer not in the manual?
Questions and answers