moon 350P Owner's Manual
Neo series
Hide thumbs
Also See for 350P:
- Owner's manual (16 pages) ,
- Owner's manual (20 pages) ,
- Owner's manual (20 pages)
Table of Contents
Advertisement
Quick Links
Download this manual
See also:
Owner's Manual
Advertisement
Table of Contents

Subscribe to Our Youtube Channel
Related Manuals for moon 350P


Summary of Contents for moon 350P
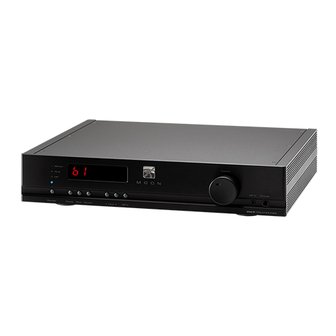
- Page 1 Owner’s Manual Series 350P Preamplifier...
-
Page 2: Important Safety Instructions
350P Preamplifier Important Safety Instructions Read these instructions. Keep these instructions. Heed all warnings. Follow all instructions. Do not use this apparatus near water. Clean only with a dry cloth. Do not block ventilation openings. Install in accordance with the manufacturer’s instructions. - Page 3 To prevent shock hazard, all three connections must ALWAYS be used. Connect the MOON 350P only to an AC source of the proper voltage; Both the shipping box and rear panel serial number label will indicate the correct voltage. Use of any other voltage will likely damage the unit and void the warranty AC extension cords are NOT recommended for use with this product.
-
Page 4: Table Of Contents
Optional Digital Inputs ........7 Optional Phono Section ........9 Rear Panel Connections ........11 Balanced Operation ........12 SimLink™ ............. 12 Operating the 350P ........13 Remote Operation .......... 13 Specifications ..........15 www.simaudio.com Simaudio Ltd., 1345 Newton Road... -
Page 5: Introduction
MOON Preamplifiers are so musically satisfying. The performance of your 350P will continue to improve during the first 300 hours of listening. This is the result of a “break- in” period required for the numerous high quality electronic parts used throughout this preamplifier. -
Page 6: Unpacking
(USA and Canada only) Once the Nēo 350P is unpacked, inspect it thoroughly and report any damage to your dealer immediately. We suggest that you keep all of the original packaging, storing it in a safe, dry place in case you’re required to transport this product. The customized packaging is specially designed to protect the 350P from any potential damage during transit. -
Page 7: Front Panel Controls
“Optional Digital Inputs” on page 8 for further details. The “Standby” button disengages the input section from the rest of the 350P’s circuitry. When in “Standby” mode all audio circuitry remains powered up to help maintain optimal performance. When switching back from “Standby” to the “on” mode, the blue LED directly above the display window will illuminate, As well, the current ‘input’... -
Page 8: Optional Digital Inputs
The “Phones” jack is used for connecting a pair of stereo headphones to the Nēo 350P. The input connector is a standard ¼” stereo jack. When a pair of headphones are used with the 350P, the output signal will continue to be sent to the amplifier(s) connected to the 350P. -
Page 9: Optional Phono Section
Dealer or at the Simaudio factory. This phono card is a very high quality design, providing adjustments for both capacitance and resisitance loading, as well as gain level. This flexibility allows you to optimize the 350P for a wide variety of MC and MM cartridges. -
Page 10: Internal Settings
2 banks of jumpers – one each for the left and right channels. This is the result of the phono section’s genuine mirror-image circuit design which yields exceptional stereo separation. Always disconnect all audio connections and the AC power cord of your Nēo 350P Preamplifier prior to changing any of the following input settings. -
Page 11: Rear Panel Connections
For Nēo 350P’s equipped with the digital input option, you will find 4 digital inputs labeled D1, D2, D3 and D4. The D1 input is on an optical Toslink connector; both the D2 and D3 inputs are on a S/PDIF connector; the D4 input is on a USB type B connector. -
Page 12: Balanced Operation
DAC’s analog outputs; When you press the (play) button on the “MiND” App, the 350P will automatically switch to the input labeled ‘A1’. If your 350P includes the “DAC” option, then the default input for the MiND is the ‘D2” input; When you press the (play) button on the “MiND”... -
Page 13: Operating The 350P
Prior to turning the preamplifier on for the first time, make sure that every cable is properly connected to avoid any problems. Flick the main rocker switch, located on the rear panel, labeled “POWER” to the ‘1’ (on) position to place your 350P in to standby mode. - Page 14 The MUTE button turns off the output volume. Pressing the “Mute” button a second time will reinstate the output volume level back to its current setting. NOTE: The 2 buttons labelled ◄ BAL ► don’t affect the operation of the 350P. Figure 7: CRM-2 Remote Control...
-
Page 15: Specifications
350P Preamplifier Specifications Configuration ............Fully balanced Power Supply Transformers ........1 x 10VA (for audio); 1 x 10VA (controller circuitry) Power Supply Capacitance ........26,400µF Balanced inputs (XLR) ........... 2 pairs Single-ended inputs (RCA) ........4 pairs Mini-jack input ............1 (1/8”) Monitor Loop (RCA) .......... - Page 16 Jack......... 3.5mm microphone jack Input Impedance....1kΩ Current Consumption..12mA NOTE: If you require the RS-232 codes for your Nēo 350P, please contact Simaudio Ltd. directly by either email (service@simaudio.com) or by toll-free telephone (877-980-2400). Fuse Replacement: For the 120V version use a 0.2A fast blow (5 x 20mm size).
Need help?
Do you have a question about the 350P and is the answer not in the manual?
Questions and answers