
Related Manuals for Canon BJ-W3000


Summary of Contents for Canon BJ-W3000
- Page 1 REVISION 0 QY8-1366-000 JAN. 2000 COPYRIGHT © 2000 CANON INC. CANON BJ-W3000/3050 0100 GR 0.40-0 PRINTED IN JAPAN (IMPRIME AU JAPON)
- Page 2 0000 GR 0.40-0...
- Page 4 This manual may include technical inaccuracies or typographical errors due to improvements or changes in the products. When amendments are made to the content of this manual, Canon will issue technical information as the need arises. In the event of major alterations to the content of this manual over a long or short period, Canon will publish a revised version of the manual.
- Page 5 PREFACE This Service Manual describes fundamental field service for the BJ-W3000/BJ-W3050 large format printer. This Manual is composed of the following chapters: Chapter 1 General Description: Features, specifications and operating procedures Chapter 2 Basic Operation: Operation of mechanical and electric functions...
- Page 6 PREFACE Descriptions in this manual are based on the following conventions. 1. In the Basic Operation section, the roles of each function, relationships between electrical and mechanical systems, and the timing for each part are summarized. The mark indicates mechanical drive transmission. The mark accompanying a signal name indicates the flow of electrical signals.
- Page 7 PREFACE • In order to remedy a problem, check the Steps in order. Answer the first "Check item" question. If your answer matches that given in the "Result", follow the corresponding proce- dure in the "Remedy" column. If your answer is not the same, go on to the next step and repeat the same procedure.
-
Page 8: Table Of Contents
PREFACE CONTENTS CHAPTER 1 GENERAL DESCRIPTION I. SPECIFICATIONS ..........1-1 E. Paper Thickness Adjustment Lever ... 1-31 1. Type ............. 1-1 IV. CARTRIDGE REPLACEMENT ....... 1-32 2. Exterior ............1-1 A. Replacing the BJ Print head ....... 1-32 3. Mechanism ..........1-2 B. - Page 9 PREFACE 3. Maintenance jet ........2-53 F. Remaining Ink Detection ......2-35 4. Suction ..........2-54 1. Outline ..........2-35 D. Waste Ink Absorber Unit ......2-56 2. Method of detecting remaining ink ..2-36 1. Waste ink absorber unit ....... 2-56 G.
- Page 10 PREFACE CHAPTER 4 MAINTENANCE AND SERVICING I. PERIODIC PARTS REPLACEMENT ....4-1 IV. MAINTENANCE AND INSPECTION ....4-2 II. STANDARD SERVICE LIFE OF A. Cleaning/Inspection Points ......4-2 CONSUMABLES ..........4-1 B. Lubrication Points ........4-3 III. PERIODIC SERVICE ........4-1 CHAPTER 5 TROUBLESHOOTING I.
- Page 11 PREFACE 19. 065xx (PJL command system) ..... 5-39 1. Non-ejection of ink ....... 5-44 20. 067xx (TIFF command system) ... 5-39 2. Vertical misalignment 1 ......5-45 21. 097xx (Direct error code from the image 3. Vertical misalignment 2 ......5-46 controller) ..........
- Page 12 PREFACE...
- Page 13 CHAPTER 1 GENERAL DESCRIPTION I. SPECIFICATIONS ..........1-1 V. SIMM REPLACEMENT ........1-36 II. NAMES OF COMPONENTS ......1-7 A. About SIMM ..........1-36 A. External View ..........1-7 B. SIMM Installation ........1-36 B. Carriage ............1-8 C. SIMM Removal .......... 1-37 C.
-
Page 14: Chapter 1 General Description
CHAPTER 1. GENERAL DESCRIPTION I. SPECIFICATIONS 1. Type Type: Bubble jet printer Purge system: Suction with tube pump Paper feeding method: Cut sheet media; Manually set to the front. Roll media; Automatic feeding (When manually set to the rear.) Sheet feeder capacity: Cut sheet media;... -
Page 15: Mechanism
CHAPTER 1. GENERAL DESCRIPTION 3. Mechanism Print mode/Resolution (No.) Mode Pass * Resolution Drive frequency Dot size * Monochrome draft 1 pass/Bi 180dpi x 360dpi 14.4kHz Monochrome normal 1 pass/Uni 360dpi x 360dpi 7.2kHz Monochrome enhanced 2 pass/Uni 360dpi x 360dpi 7.2kHz Monochrome high enhanced 4 pass/Uni 360dpi x 360dpi 7.2kHz... - Page 16 CHAPTER 1. GENERAL DESCRIPTION Cartridge construction Head/Ink tank separation type 1 row of 160 nozzles (144 nozzles used) x 4 colors Ink type Black: Pigment, Cyan/Magenta/Yellow: dye Ink tank capacity Black: Approx. 23g, Cyan/Magenta/Yellow: Approx. 20g BJ print head service life A0 size: Approx.
-
Page 17: Media
CHAPTER 1. GENERAL DESCRIPTION Ink tank detection Provided Remaining ink detection Provided Waste-ink full detection Provided Media out detection Provided Remaining roll media detection Not provided Roll media end detection Provided Media size detection Cut sheet media: Automatic vertical/horizontal detection Roll media: Vertical;... - Page 18 CHAPTER 1. GENERAL DESCRIPTION Printable papers Paper standard A1 model A0 model inch Vertical Horizontal Vertical Horizontal ISO A 841.0 × 33.1 × 1189.0 46.8 594.0 × 23.4 × 841.0 33.1 420.0 × 16.5 × 594.0 23.4 297.0 × 11.7 × 420.0 16.5 210.0 ×...
-
Page 19: Others
CHAPTER 1. GENERAL DESCRIPTION 5. Others Power source AC: 100 ~ 240 V (-15%, +10%) Frequency 50/60Hz Power consumption Max.: 120W or less At stand-by: 22W or less Noise Sound pressure level (Complies with ISO 9296.) When operating: Approx. 52dB (A) or less At stand-by: Approx. -
Page 20: Names Of Components
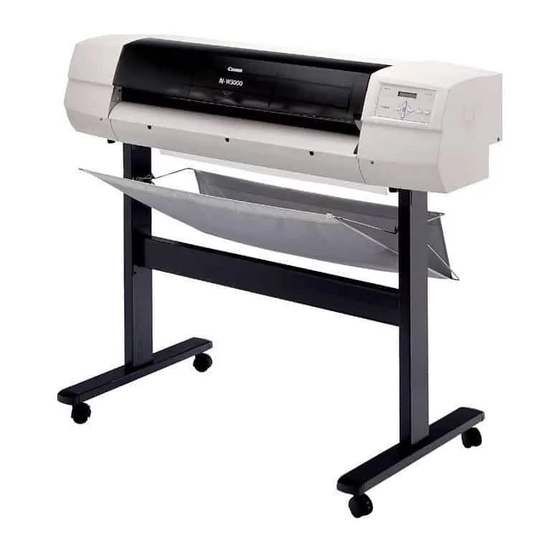
CHAPTER 1. GENERAL DESCRIPTION II. NAMES OF COMPONENTS A. External View [1] Front cover [5] Wiper (Cleaner blade) [2] Carriage [6] Cutter unit [3] Operation panel [7] Platen [4] Paper release lever [8] Pinch roller Figure 1-201 1–7... -
Page 21: Carriage
CHAPTER 1. GENERAL DESCRIPTION B. Carriage [1] Ink tank [4] BJ Cartridge [2] BJ print head release hook [5] Ink tank release hook [3] Paper thickness adjustment lever [6] Cutter unit Figure 1-202 C. Cable Connections [1] Parallel interface connector [4] Earth wire terminal [2] Serial interface connector [5] Power switch... -
Page 22: Rear Side Of Main Unit
CHAPTER 1. GENERAL DESCRIPTION D. Rear Side of Main Unit [1] Roll media stopper [4] Parallel interface connector [2] Spindle [5] AC inlet [3] Serial interface connector [6] Power switch Figure 1-204 E. Printing Direction Paper feed backward direction Paper feed forward direction Figure 1-205 1–9... -
Page 23: Operation
CHAPTER 1. GENERAL DESCRIPTION III. OPERATION A. Operation Panel DATA POWER ONLINE ENTER Figure 1-301 Name Function Data reception lamp Green when receiving data. Blinks if data is transmitted when the printer cannot receive it. Message display Menus, parameters, error messages and other conditions are displayed. -
Page 24: Printer States
CHAPTER 1. GENERAL DESCRIPTION B. Printer States Printer states and key operation are shown below. Data received Printing Online After printing on roll media Menu setup screen Menu setup screen Sleep Pause Offline (Black arrows) : Change of printer states when the Online key is pressed. *1. - Page 25 CHAPTER 1. GENERAL DESCRIPTION State Printer state Online ¥ This machine can receive, analyze and print data. When printing is started, "Printing" appears on the message display. ¥ While online, only the online key is functional. To use the other keys, this machine should be offline or in the menu state.
-
Page 26: User Mode Menu
C. User Mode Menu Menu guide The following diagram shows the menu hierarchy of this printer. Normal menu Printing Menu : Indicates the menu (Select the item using the up and down arrow keys.) Emulation Line Type Interface Setup Main Menu (The shaded items are indicated only in the roll media mode.) Main menu *1: Can be set as a printer driver property, This fares priority... -
Page 27: Menu And Parameter Setup
CHAPTER 1. GENERAL DESCRIPTION . Menu and parameter setup Menus and parameters are selected as described below. 1) By pressing the online key in the offline or pause state, the printer enters the menu state. 2) Select a menu item by pressing the right and left arrow keys. 3) After selecting a menu, move to the parameter menu by pressing the down arrow key. - Page 28 CHAPTER 1. GENERAL DESCRIPTION [2] Head Cleaning [5] Print Mode Used to clean the cartridge heads. a. Print Quality • All [Default: Normal] All heads are cleaned. The print quality can be selected for the • Black type of data or paper. Only the black head is cleaned.
- Page 29 CHAPTER 1. GENERAL DESCRIPTION [6] Media Setup [7] Auto Cut Used to change paper settings. a. Cut Type a. Roll/Cut Sheet [Default: Cut] [Default: Previous setting preserved] Select the type of cut for roll media after completion of printing. Select roll media or cut sheet. •...
- Page 30 CHAPTER 1. GENERAL DESCRIPTION CAUTION • HP RTL In the draft mode, the ink may not Should only be used when printing dry, depending on the environment. raster data. After the raster data is Set the drying time as required. received and 1 band is analyzed, print- ing is started.
- Page 31 CHAPTER 1. GENERAL DESCRIPTION [10] Line Type b. Modify Table The pen setup (pen table) stored in the a. Line Intersect printer can be changed. [Default: Overlay] • Pen Table (1 to 3) Color processing method for overlapping • Pen lines or figures can be set.
- Page 32 CHAPTER 1. GENERAL DESCRIPTION Default values of pen table 1 to 3 at the time of Factory settings. No. of dots Approximate thickness (mm/inch) Pen No. Width(* Color Joint 0.07/0.003 0.14/0.005 0.21/0.008 0.28/0.011 0.35/0.014 0.49/0.019 0.63/0.025 0.78/0.031 0.92/0.036 1.06/0.042 1.20/0.047 1.34/0.052 1.48/0.058 1.62/0.063...
- Page 33 CHAPTER 1. GENERAL DESCRIPTION • Media Save [11] Plot layout Automatic paper saving layout. Con- Printed data layout can be set. tinuous data is rotated clockwise so that paper feeding rate is minimized. The a. Auto Layout (roll media only) image data is printed to the left end of [Default: Off] the paper.
- Page 34 CHAPTER 1. GENERAL DESCRIPTION A=5mm Nesting Best Media Save A=5mm A=5mm Figure 1-304 1–21...
- Page 35 CHAPTER 1. GENERAL DESCRIPTION c. Rotation e. Layout Size (roll media only) [Default: 0°] [Default: ISO A] Data can be rotated on the paper when Paper size can be set. • ISO A printed. • ISO B • Auto (cut paper only) •...
- Page 36 CHAPTER 1. GENERAL DESCRIPTION [12] Interface Setup [13] System Setup a. RS-232C Configuration of the system setting menu Used to set up the RS-232C interface. as follows: • Baud Rate [default: 9600] a. Language Sets the data transfer speed. 2400bps, 4800bps, 9600bps, [Default: previos setting preserved] 19200pbs, 38400bps Language to be indicated on the message...
- Page 37 CHAPTER 1. GENERAL DESCRIPTION c. Feed Priority [14] Self-test Print A self-test pattern can be printed to check [Default: Print Length] the printer operation. Select between paper feeding accuracy • Demonstration over distance, or feeding with less band A built-in demonstration pattern is variation.
-
Page 38: Using The Setup List
CHAPTER 1. GENERAL DESCRIPTION 4. Using the setup list The setup list is used when the printer is not working correctly, to determine whether the problem is attributable to the printer or the computer. The current menu settings, service mode values and a history of the last 4 errors which occurred are printed in the setup list, and can be filed for reference or faxed to the service depart- ment. - Page 39 CHAPTER 1. GENERAL DESCRIPTION Description Description User-defined size setting I/C: Image controller PCB version Length setting E/C: Engine controller PCB version Width setting I/Boot: Image controller PCB ROM Nesting timer setting version Line intersecton setting E/Boot: Engine controller PCB ROM Line shading setting version Baud rate setting...
-
Page 40: Dump Mode
CHAPTER 1. GENERAL DESCRIPTION 5. Dump mode This machine is provided with a dump test function to print the input data in hexadecimal and ASCII code as an online test. Select "Dump mode" on the system setting menu, and then set the printer online. When data is transferred from the computer in this state, the data is first printed normally. - Page 41 Relation between data size recognition and image processing The printer recognizes the size of the data received and lays it out as listed below. When printing using the Canon printer driver, PS (Plot Size) commands are always provided. Data size...
-
Page 42: Basic Operation
CHAPTER 1. GENERAL DESCRIPTION D. Basic Operation • When the paper inserted below the pinch roller unit is detected by the PE 1) Turn the power switch ON. sensor, the suction fan runs and the • The power lamp is lit and the initializa- paper is sucked to the platen. - Page 43 CHAPTER 1. GENERAL DESCRIPTION CAUTION CAUTION • If the roll media is forcibly aligned to After printing, take care not to touch the the paper matching line on the platen, ink with wet hands. skewed feeding may result. When the printer is not to be used for a •...
-
Page 44: Printing
CHAPTER 1. GENERAL DESCRIPTION E. Paper Thickness Adjustment Lever When printing, depending on the print media used or its thickness, the paper may become wavy, causing it to rub the head. To prevent this, the distance between the head and platen can be adjusted in 3 stages Paper thickness using the paper thickness adjustment lever. -
Page 45: Cartridge Replacement
CHAPTER 1. GENERAL DESCRIPTION IV. CARTRIDGE REPLACEMENT The printer is provided with a mechanism Electrode to detect the ink remaining in the ink tank. When the tank becomes empty, the ink head Head state indication on the message display Figure 1-401 becomes “... - Page 46 CHAPTER 1. GENERAL DESCRIPTION 8) Pressing as shown in figure1-405, install 6) Remove the protection cap and protection seal. the BJ print head in the carriage. Protective cap Protective seal Figure 1-403 CAUTION Figure 1-405 Take care not to touch the BJ print head and carriage electrodes.
-
Page 47: Replacing The Ink Tank
CHAPTER 1. GENERAL DESCRIPTION B. Replacing the Ink Tank 5) Twist the protective cap of the ink tank in the direction of the arrow mark and re- CAUTION move it. Replace the ink tank only at the cartridge replacement position. 1) Press the right and left keys in the offline or pause state to move the carriage to the cartridge replacement position. - Page 48 CHAPTER 1. GENERAL DESCRIPTION 6) Install the ink tank. Figure 1-411 CAUTION • Push the ink tank in until it clicks. 7) Close the front cover. • The carriage returns to the home position and head cleaning is carried out. 1–35...
-
Page 49: Simm Replacement
CHAPTER 1. GENERAL DESCRIPTION CAUTION V. SIMM • When handling SIMMs, be careful REPLACEMENT to avoid static electricity discharge. • Before installing the SIMM, be A. About SIMM sure to turn off the printer power. The printer's memory can be increased. If •... -
Page 50: Simm Removal
CHAPTER 1. GENERAL DESCRIPTION C. SIMM Removal 3) With the edge of the SIMM in the slot, roll the SIMM to the left until the hooks 1) Using the installation tools supplied with [3] at both ends of the slot click into the the printer, remove the 4 screws [1] and holes at both ends of the SIMM. -
Page 51: Cartridges
CHAPTER 1. GENERAL DESCRIPTION VI. CAUTIONS ON HANDLING When handling the printer, pay attention Electrodes to the following points. A. Cartridges Head 1. Cautions on handling the BJ print Figure 1-601 head 2. Cautions on handling ink tanks • Do not touch the head surface, or wipe with cloth or paper. -
Page 52: Paper
CHAPTER 1. GENERAL DESCRIPTION D. After Printing B. Paper Storage Environment • Since the ink may still be wet, do not • Store the paper in wrapping paper, in a touch it immediatly after printing. If the place free from high humidity and direct ink is not completely dry, ink may be sun light. -
Page 53: User Maintenance
CHAPTER 1. GENERAL DESCRIPTION 1) Pinch roller/Paper feed roller VII. USER Load plain paper of the maximum width MAINTENANCE which can be printed by your printer (A1 size A. Head Cleaning or A0 size) and feed the paper manually several times to remove any ink. The printer has a head cleaning function to maintain image quality. -
Page 54: Installation Environment
CHAPTER 1. GENERAL DESCRIPTION • Locations where there might be alcohol, VIII. INSTALLATION thinner, etc. nearby. ENVIRONMENT • Places where temperature or humidity Avoid the following when choosing a fluctuates often. location for the printer. • Air from an air conditioning system or •... -
Page 55: Package Configuration
CHAPTER 1. GENERAL DESCRIPTION IX. PACKAGE CON- FIGURATION The package configuration of the printer when shipped from the factory is shown in the figure below. [1] Printer [2] Spindle/Roll media stopper [3] BJ print heads (black, cyan, magenta, yellow) [4] Accessory box Figure 1-901 1–42... -
Page 56: Transporting The Printer
CHAPTER 1. GENERAL DESCRIPTION X. TRANSPORTING Clip Linear scale THE PRINTER Carriage belt When transporting the printer by truck etc., or moving the printer, follow the procedures below. CAUTION • Pack the printer in the original box. If the original box is not avaiable, pack the machine with sufficient shock absorbing material. - Page 57 CHAPTER 2 BASIC OPERATION I. BASIC OPERATION ......... 2-1 A. BJ Cartridge ..........2-39 A. Functional Configuration ......2-1 B. BJ Print head Drive ........2-43 B. Interface Input/Output ........2-2 IV. PURGE UNIT ..........2-46 C. Image Controller .......... 2-7 A.
-
Page 58: Basic Operation
CHAPTER 2. BASIC OPERATION I. Basic operation A. Functional Configuration The printer functional diagram is composed of 5 blocks; image processing/control system, carriage, BJ cartridge unit, purge unit and feeder unit. Image processing/control system Carriage External Engine Image interface controller controller BJ cartridge unit... -
Page 59: Interface Input/Output
CHAPTER 2. BASIC OPERATION B. Interface Input/Output 1. Parallel interface The parallel interface conforms to IEEE1284-B and is applicable to the compatible mode and nibble mode (2-way interface). a. Input/output signal and pin assignment Signal Signal direction Signal Signal direction No. - Page 60 CHAPTER 2. BASIC OPERATION b. Compatible mode The compatible mode is applicable to cases as shown below. The compatible mode can be switched by changing the BUSY and ACKNLG timing in the Centro timing setting mode. • A - B(Defaut) [Ack-in-Busy] DATA1-8 STROBE BUSY...
- Page 61 CHAPTER 2. BASIC OPERATION Data is transferred 8 bits at a time in the compatible mode. The data is transferred by hand- shaking the STROBE, ACKNLG, and BUSY signals. The computer sets 8 bits of data and outputs the STROBE signal to the printer. The printer receives the data with the STROBE signal and responds by setting the BUSY signal to "H".
- Page 62 CHAPTER 2. BASIC OPERATION c. Nibble mode In the nibble mode, 8-bit data is transmitted from the printer to the computer in two pieces, 4 bits at a time. When data transmission is possible, the printer sets the DataAvail signal to "L" and the com- puter sets the HostBusy signal to "L"...
- Page 63 CHAPTER 2. BASIC OPERATION 2. Serial interface The serial interface conforms to RS-232C. The printer side is set up as the DCE (Data Circuit Terminating Equipment) and the computer side as DTE (Data Terminal Equipment). The serial interface connector is a D-Sub 9-pin female. Table 2-102 shows the connector pin assignment and input/output signals.
-
Page 64: Image Controller
CHAPTER 2. BASIC OPERATION C. Image Controller Figure 2-104 is a block diagram of the image controller. Image controller External parallel interface FIFO External serial DRAM (U622) SRAM interface Serial (U602,606, (U628) U611,U616) controller (U632) Y601 Timer 14.7MHz (U610) Communication Serial Gate array controller... - Page 65 CHAPTER 2. BASIC OPERATION [5] Timer (U610) Major functions of the ICs on the image Uses the by external clock of 14.7MHz controller are as follows. divided by 2. Functions as a baud rate clock for the [1] Serial controller (U632) Uses the external clock of 14.7MHz serial controllers.
- Page 66 CHAPTER 2. BASIC OPERATION [8] FLASH ROM (XU601) [14]Timer (U609) 1 Mbyte boot ROM used to initialize the Uses the external clock of 14.7MHz CPU at power ON. Stores the divided by 2. downloaded program. Functions as a timer for : •...
-
Page 67: Chapter 2 Basic Operation
CHAPTER 2. BASIC OPERATION D. Engine Controller Figure 2-105 is a block diagram of the engine controller. The printer is controlled mainly by the CPU (U221), which is run by the 16MHz external clock. Engine controller Y202 16MHz (U221) Command Reset IC communic- (U227) - Page 68 CHAPTER 2. BASIC OPERATION [7] Gate array (U208) Major functions of the ICs on the engine Provided with an 8-bit parallel input port controller are as follows. for the image data from the image controller. Processes the image data [1] CPU (U221) Connected to the DRAM (U216), before sending it to the gate array (U212).
-
Page 69: Engine Controller Input/Output
CHAPTER 2. BASIC OPERATION E. Engine controller Input/Output 1. Engine controller input/output (1/3) Engine controller J211 Front cover When the front cover DOOR_IN switch is opened, "1". J212 +26V Wiper solenoid When "0", SOL_CONT* SL1 turns on. Pump position When the guide roller is sensor PURHP_IN at home position, "1". - Page 70 CHAPTER 2. BASIC OPERATION 2. Engine controller input/output (2/3) Engine controller +26V J203 See the section on the "Paper feed Motor" Paper feed motor (P. 2-58). J201 +26V See the section on the "Carriage Motor" Carriage motor (P. 2-24). J202 PG_OUT1 PG_OUT2 Rotation control signal...
- Page 71 CHAPTER 2. BASIC OPERATION 3. Engine controller input/output (3/3) Engine controller Carriage controller J503 BJ cartridge (Bk) J504 BJ cartridge (C) J208 J501 J207 J502 J505 BJ cartridge (M) J506 BJ cartridge (Y) J509 J502 J207 Rectanguler wave with phase Linear sensor difference of 90˚...
-
Page 72: Summary Of Operation
CHAPTER 2. BASIC OPERATION F. Summary of Operation 1. When the power switch is turned ON AC connection Power switch (SW1) • CPU initialization Software initial check • ROM/RAM check • EEPROM check Error indication Normal? •E011xx •E012xx •E051xx BJ print head presence •... - Page 73 CHAPTER 2. BASIC OPERATION • Linear encoder check • Home position detection • Pump position detection Initial operation • Ink tank presence detection • Remaining ink detection • BJ print head reference position detection Error indication Normal? •E003xx •E005xx •E007xx •...
- Page 74 CHAPTER 2. BASIC OPERATION 2. When media is loaded Set media Media presence detection Message indication Present? Set media. Suction fan (FM1) • Always detect while the fan is rotating. Cooling fan (FM2) • Rotates for 60 sec. after detection of media. Rotation Error indication Normal?
- Page 75 CHAPTER 2. BASIC OPERATION 3. Printing Data reception Check communication condition Error indication Normal? •E052xx •E053xx Front cover open/close detection Message indication Closed? Close the front cover. Media presence detection Present? Message indication Set media. Load the media • See page 2-30 for details. Error indication Normal? •E001xx...
- Page 76 CHAPTER 2. BASIC OPERATION Checking the time having been left Less than 72 hours from the Purge action • See page 2-48, 49, 50 for details. previous purging? Error indication Normal? •E005xx Suction fan (FM1) • Always detected when rotating Cooling fan (FM2) Rotation Normal?
- Page 77 CHAPTER 2. BASIC OPERATION Printing started • Always detected while printing Check print head Normal? Error indication •E004xx •W004xx End of printing Cutting operation • See page 2-38 for details. Cut sheet media? Error indication Normal? •E008xx Feed the media to the printing end position. Move the carriage to the home position Suction fan (FM1) and cooling fan (FM2) stopped.
- Page 78 CHAPTER 2. BASIC OPERATION 2–21...
-
Page 79: Outline
CHAPTER 2. BASIC OPERATION II. CARRIAGE UNIT A. Outline Figure 2-201 shows the composition of the carriage and its driving components. The driving force from the carriage motor (M2) is transmitted to the carriage through the carriage belt , causing the carriage to move back and forth over the paper. The distance it moves is controlled by counting the number of pulses of the signal transmitted from the engine control- ler to the carriage motor. - Page 80 CHAPTER 2. BASIC OPERATION Name Function Linear scale Reference of printing position and print timing. Carriage motor (M2) Moves the carriage back and forth. Home position sensor (PS2) * Detects the home position. Remaining ink sensor (PS3) * Detects the ink level remaining in the ink tank. Ink tank sensor (PS4) * Detects presence of ink tank.
-
Page 81: Operation
CHAPTER 2. BASIC OPERATION B. Carriage Motor Control 1. Outline The carriage motor (M2) of this machine is a 2-phase stepping motor. It controls the back and forth movement of the carriage. The carriage motor (M2) is controlled by the engine controller, the main functions of which are shown below. -
Page 82: Detection Of Front Cover Open/Closed
CHAPTER 2. BASIC OPERATION b. Direction control The output timing of the motor drive pulses (YMA, YMAN, YMB, YMBN) from the carriage motor driver is changed by the carriage motor driver control signals (MTP12-15) output from the CPU, to control the direction of the carriage motor (M2). c. -
Page 83: Linear Encoder
CHAPTER 2. BASIC OPERATION C. Linear Encoder 1. Outline A linear encoder is installed on the printer to allow checking the carriage operation and ad- justing the dot placement position on the paper. When the carriage is returning, after the home position sensor (PS2) turns ON and the carriage has travelled an additional 12mm, that position is considered the home position. -
Page 84: Control
CHAPTER 2. BASIC OPERATION Carriage controller Engine controller Linear sensor Light sensing unit Light emitting unit J502 Photo Comparator J214 diode Gate array Lens Linear scale Position Position When carriage is advancing When carriage is retracting Figure 2-204 4. Control b. -
Page 85: Media Sensor
CHAPTER 2. BASIC OPERATION D. Media Sensor 1. Outline The printer is provided with a media sensor to detect the width and skew of the paper, the internal temperature, and to enable automatic head adjustment. The media sensor is located on the carriage unit and composed of a red and a blue LED and one reflective photo sensor. -
Page 86: Skew Detection
CHAPTER 2. BASIC OPERATION 3. Skew detection By comparing the detected right edge position of the paper after a certain volume of paper has been fed, with the position of the right edge detected during the paper width detection operation, paper skew can be detected. - Page 87 CHAPTER 2. BASIC OPERATION If the skew value is more than the specified amount, the paper is determined to be skewed. The skew value here is the divergence between the paper's right edge at the time of paper width detection and the right edge at the time of skew detection. When paper skew is detected, the printer returns the carriage to the home position and stops operation.
-
Page 88: Light Compensation
CHAPTER 2. BASIC OPERATION 4. Light compensation The media sensor brightness is automatically compensated for at the time of paper width detection and automatic print position adjustment. The carriage is advanced for approx. 200mm, the light quantity on the paper is compensated for in the order of blue and red, and then the light quantity on the platen is compensated for in the order of blue and red. -
Page 89: Automatic Print Position Adjustment
CHAPTER 2. BASIC OPERATION 6. Automatic print position adjustment When cartridges are installed on the carriage, the nozzle positions of the cartridges may be displaced, causing displacement of dots of different colors on the paper. The automatic print position adjustment compensates for this displacement. The head is automatically adjusted vertically (paper feeding) and horizontally (carriage move- ment) as follows. - Page 90 CHAPTER 2. BASIC OPERATION CAUTION Whenever a BJ print head is removed and reinstalled, or the head-to-paper gap is adjusted, the automatic print position adjustment must be conducted. Vertical adjustment Backforwad printing : Black Forward printing : Cyan : Magenta : Yellow Forward Forward...
-
Page 91: Detection Of The Ink Tank
CHAPTER 2. BASIC OPERATION E. Detection of the Ink Tank 1. Outline The printer has an ink tank detection function. When an ink tank is not installed, an error message appears on the message display and the ink and head condition is indicated by a blink- ing hyphen ("–"). -
Page 92: Remaining Ink Detection
CHAPTER 2. BASIC OPERATION F. Remaining Ink Detection 1. Outline The printer has a remaining ink detection function. The remaining ink is detected at 2 levels. When the ink in the ink tank chamber is used up, the ink condition on the message display is shown in lower case letters. -
Page 93: Method Of Detecting Remaining Ink
CHAPTER 2. BASIC OPERATION 2. Method of detecting remaining ink The ink remaining in the ink chamber is detected by the remaining ink sensor (PS3) installed on the purge unit, in the order of yellow, magenta, cyan, and black when the carriage returns to the home position. - Page 94 CHAPTER 2. BASIC OPERATION Ink tank detection Is there an Error Message indication ink tank? Remaining ink detection Ink tank's ink chamber empty? • State indication is displayed in lower-case letters. Dot counting started Dot count (gate array) Counted dot values added (CPU) •...
-
Page 95: Cutter Unit
CHAPTER 2. BASIC OPERATION G. Cutter Unit 2. Cutting operation When roll media is cut, the carriage 1. Outline advances to the left side of the platen and the The Cutter unit is installed on the carriage. cutter hook is released by the cutter guide at As the carriage moves, the cutter lowers, the left edge of the guide rail. -
Page 96: Bj Cartridge
CHAPTER 2. BASIC OPERATION III. BJ CARTRIDGE A. BJ Cartridge 1. Overview Four colors of BJ cartridges are used in this printer: black (Bk), cyan (C), magenta (M), and yellow (Y). The BJ print head and ink tank are separable for each color. 2. - Page 97 CHAPTER 2. BASIC OPERATION Name Function Tank packing Seals between the ink tank and ink pipe to prevent leakage. Ink filter Filters the ink to prevent foreign matter from entering the ink passage. Cartridge body A case accommodating and connecting the head unit and ink tank.
-
Page 98: Bj Print Head
CHAPTER 2. BASIC OPERATION 3. BJ print head Ink from the ink sponge is filtered through the mesh-like ink filter and fed to the head unit through the ink pipe of the cartridge body. The ink is then sent to the nozzle through the joint pipe. When head drive current flows to the heater plate in the nozzle, the ink boils in multiple bubbles, which soon become one bubble. -
Page 99: Nozzle Arrangement
CHAPTER 2. BASIC OPERATION 4. Nozzle arrangement 160 nozzles are arranged vertically in one line at a spacing of 1/360 in. Nozzle arrangement on the BJ print head is shown below. Nozzle 1 Nozzle 160 Figure 2-303 In the monochrome mode, 1 band is printed at a maximum width of 160 nozzles (approxi- mately 11.3mm) . -
Page 100: Bj Print Head Drive
CHAPTER 2. BASIC OPERATION B. BJ Print head Drive 1. Construction of electric head unit The figure below is a block diagram of the BJ print head drive control circuit. Rank resistance RANK GNDH SUBH Sub-heater X2 EVEN Heater 1A ODATA Heater 1B Heater 2A... - Page 101 CHAPTER 2. BASIC OPERATION • 160-bit shift register • Sub-heater The serial ODATA signal from the engine Head temperature adjusting heater for controller is converted to parallel image data stable ink efection. using the DCLK signal timing. The engine controller drives the sub- heater according to the temperature detected •...
-
Page 102: Print Signal
CHAPTER 2. BASIC OPERATION 2. Print signal The BJ print head is controlled as follows. Approx. 70µs (14.4kHz)/ Approx. 130µs (7.7kHz) LTCLK ODATA Data transfer to shift register DCLK EVEN 1(0) 0(1) 1(0) 0(1) 1(0) 0(1) 1(0) 0(1) BENB 0 Drive of head divided into 8 1(0) 0(1) -
Page 103: Purge Unit
CHAPTER 2. BASIC OPERATION IV. PURGE UNIT A. Outline The purge unit provides both a capping function to prevent the head from drying out, and to prevent dust and other foreign substances from attaching, as well as a head cleaning function to maintain the print head's condition. - Page 104 CHAPTER 2. BASIC OPERATION The purge unit is composed of the units below. Name Function Wiper Lifts up when the carriage returns and wipes ink off the head surfaces (C, M, Y, Bk). Remaining ink sensor (PS3) Detects ink remaining in the ink tank. Ink tank sensor (PS4) Detects presence of ink tank.
- Page 105 CHAPTER 2. BASIC OPERATION Purge operation is carried out in the following steps. b. Purge sequence when user cleaning a. Purge sequence when powered is executed (Ink consumed: approx. 0.16g) (Ink consumed: approx. 0.5g) Power switch (SW1) User cleaning Suction Is carriage at home position? Uncapping...
- Page 106 CHAPTER 2. BASIC OPERATION c. Purge sequence when printing (Ink consumed: approx. 0.16g) Data reception 72 hours elapsed after the last discharge Printing started Wiping Suction Wiping Uncapping Maintenance jet Maintenance jet Suction Capping Printing ended Stand by for 2 sec. Wiping Wipe twice Maintenance jet...
- Page 107 CHAPTER 2. BASIC OPERATION d. Purge sequence at the time of head re- placement/ink tank replacement (Ink consumed : approx, 0.65g) Replace the head or ink tank Suction of appropriate head Wiping Maintenance jet Uncapping Suction Suction Capping Capping Stand-by Stand by for about 2 sec.
-
Page 108: Capping Function
CHAPTER 2. BASIC OPERATION B. Capping Function 1. Outline The carriage of this machine stands by at the home position. Duming this time, the caps of the purge unit are pressed against the BJ print heads to prevent the nozzles from drying out and to keep out dust. -
Page 109: Head Cleaning
CHAPTER 2. BASIC OPERATION C. Head Cleaning b. Operation 1. Outline 1) Before starting the printing process, the Head cleaning consists of wiping ink and carriage is moved to the specified position dust from the head face plate, maintenance on the left side of the wiper. The wiper jet to adjust the head conditions, and sucking solenoid (SL1) is turned ON and the wiper up the ink and air bubbles in the nozzles. -
Page 110: Maintenance Jet
CHAPTER 2. BASIC OPERATION 3) The carriage continues moving in c. Timing backward direction, wiping the Y head, M Wiping is conducted under the following head, C head and Bk head. conditions. [1] Before printing 4) After wiping the Bk head, the wiper Before the printing process is started, the solenoid is turned OFF and the wiper is wiping is carried out once. -
Page 111: Outline
CHAPTER 2. BASIC OPERATION b. Timing 4. Suction a. Outline Ink is ejected into the caps in the order of the heads (Bk, C, M and Y) under the follow- The cap is pressed against the head and ing conditions. the thickened ink and air bubbles in the [1] When printing is to be started nozzles are removed by suction. - Page 112 CHAPTER 2. BASIC OPERATION After the guide roller has rotated 160 de- c. Timing grees, it is stopped for about 2 seconds. The [1] User cleaning 1 waste ink carriage tube which was squeezed The user can perform the cleaning recovers during this period, and suction is operation for all heads.
-
Page 113: Waste Ink Absorber Unit
CHAPTER 2. BASIC OPERATION D. Waste Ink Absorber Unit [6] Suction by timer If 72 hours elapse with no suction 1. Waste ink absorber unit operations, head cleaning will be car- Waste ink is removed from the head ried out in the next standby mode. nozzles by the suction operation, sent to the •... -
Page 114: Outline
CHAPTER 2. BASIC OPERATION V. FEEDER UNIT A. Outline The paper feed motor (M1) drives the paper feed roller to feed the paper. The existence of paper is detected by the PE sensor (PS6). A diagram of the feeder unit is shown below. [1] Paper feed roller [2] Pinch roller unit [3] PE sensor (PS6) -
Page 115: Paper Feed Motor Control
CHAPTER 2. BASIC OPERATION B. Paper Feed Motor Control 1. Outline The paper feed motor (M1) is a 2-phase stepping motor. It controls the rotation of the paper feed roller. The paper feed motor is controlled by the engine controller. Its major functions are shown below. - Page 116 CHAPTER 2. BASIC OPERATION b. Control of rotation direction The output timing of the motor drive pulses (XMA, XMAN, XMB, XMBN) from the paper feed motor driver is controlled by the paper feed motor driver control signals (MTP 4 to 7) output by the CPU to the paper feed motor driver, in order to control the rotation direction of the paper feed motor (M1).
-
Page 117: Feeding Operation
CHAPTER 2. BASIC OPERATION C. Feeding Operation 3) The carriage is returned to the home position and the paper width is detected. 1. Outline 4) The carriage is advanced to a position Paper feeding is classified into three about 200mm to the left of the home modes as follows : position, the paper is fed backward, and •... -
Page 118: Paper Feeding During Printing
CHAPTER 2. BASIC OPERATION b. Roll media REFERENCE 1) When the paper is set and the media • Paper length detection is not con- trailing edge sensor detects the paper, the ducted for roll media. suction fan operates to suck the paper on •... -
Page 119: Feeding Operation
CHAPTER 2. BASIC OPERATION 4. Feeding operation For cut sheets, the paper is fed until the paper rear edge reaches a position 3mm behind the pinch roller, after printing is completed. When roll media is cut, the paper is fed to the position to be cut. -
Page 120: Fan
CHAPTER 2. BASIC OPERATION VI. FAN The two fans shown in the figure below function as shown in Table 2-601. Figure 2-601 Symbol Name Fan direction Function Suction fan Suction Pulls the paper onto the platen to prevent it from floating up. Cooling fan Suction Discharges the heat generated by the DC power... - Page 121 CHAPTER 2. BASIC OPERATION • Suction fan (FM1) When the PE sensor detects the paper, the fan drive signal (FAN_CONT) changes to "1" and the suction fan (FM1) runs. The suction fan continues to run constantly while the paper is being transported during the printing operation, to prevent the paper from floating away from the platen.
-
Page 122: Power Supply
CHAPTER 2. BASIC OPERATION VII. POWER SUPPLY A. Power Supply Outline Figure 2-701 is a block diagram which shows the power supply system for the printer. Power switch AC100 to 240 V Switch +26V Paper Feed motor +26V Carriage motor +26V Purge motor +26V... -
Page 123: Power Circuit
CHAPTER 2. BASIC OPERATION B. Power Circuit C. Power Circuit Protection 1. AC power supply On the DC power supply, fuse F1 is By plugging in the power cord and turning provided on the primary side as a safety measure. On the secondary side, overcurrent the power switch (SW1) ON, AC power is protection and overvoltage protection circuits supplied to the DC power supply PCB. - Page 124 CHAPTER 2. BASIC OPERATION 2–67...
- Page 125 CHAPTER 3 MECHANICAL SYSTEM DISASSEMBLY AND ASSEMBLY ......3-1 B. Operation Panel ........... 3-9 1. List of Main Parts ......... 3-2 C. Fan ............. 3-10 2. Outline of disassembly and assembly of II. CARRIAGE UNIT ..........3-13 main parts ............ 3-3 III.
-
Page 126: Disassembly And Assembly
CHAPTER 3. MECHANICAL SYSTEM DISASSEMBLY AND ASSEMBLY The disassembly and assembly list for the main parts and the related outlines are shown here. The outlines give the procedures for removing the main parts from the main unit. However, the directions for removing the connectors and the disassembly procedures for other parts are omitted. -
Page 127: List Of Main Parts
CHAPTER 3. MECHANICAL SYSTEM 1. List of Main Parts Disassembly and assembly of : • operation panel • right cover • lower cover • upper cover • front cover • front cover switch • purge unit • waste-ink absorber unit •... -
Page 128: Outline Of Disassembly And Assembly Of Main Parts
CHAPTER 3. MECHANICAL SYSTEM 2. Outline of disassembly and assembly of main parts Main Unit Operation panel Cover plate (4) Left cover (3) Right cover (3) Image controller (12) Engine controller (5) Right cover stay plate (4) Mount plate (5) Purge unit (3) Cooling fan (2) Front cover switch... - Page 129 CHAPTER 3. MECHANICAL SYSTEM 3–4...
-
Page 130: Precautions For Disassembly And Reassembly
CHAPTER 3. MECHANICAL SYSTEM PRECAUTIONS FOR DISASSEMBLY AND REASSEMBLY 1. Do not loosen or remove screws which are not included in the disassembling procedures in this manual. In particular, never disassemble the points fixed with red screws as shown below. Readjustment is prohibited since they have been adjusted to the optimum position at the factory. - Page 131 CHAPTER 3. MECHANICAL SYSTEM 4. When lifting this machine, be sure that 2 people hold it as shown in Figure 3-003. Electrode Head Figure 3-002 Figure 3-003 5. Before carrying out disassembly or reassembly, be sure to turn OFF the power switch and disconnect the power cord and interface cable.
-
Page 132: Chapter 3 Mechanical System
CHAPTER 3. MECHANICAL SYSTEM 1. Removing the right cover I. EXTERNALS 1) Remove the operation panel (See page 3- A. External Cover 2) Remove 3 screws [1] and take off the right cover [2]. Figure 3-101 Figure 3-102 [1] Front cover 2. - Page 133 CHAPTER 3. MECHANICAL SYSTEM 3) Remove 2 screws [3]. 3. Removing the lower cover 1) Remove the right cover and left cover (See page 3-7). 2) Open the front cover and lower the paper release lever. 3) Remove 6 set screws [1] and take off the lower cover [2].
-
Page 134: Operation Panel
CHAPTER 3. MECHANICAL SYSTEM B. Operation Panel 4. Removing the front cover switch 1) Remove the right cover (See page 3-7). 1. Removing the operation panel 2) Open the front cover. 1) Open the front cover, and holding the 3) Remove 4 screws [1] and take off the green part, move the carriage to the right cover stay plate [2]. -
Page 135: Fan
CHAPTER 3. MECHANICAL SYSTEM C. Fan 3) Remove 3 connectors [3] (CN701, CN702, CN704) from the operation panel 1. Removing the cooling fan and take off the operation panel [2]. 1) Remove the image controller (See page 3- 32). 2) Remove the engine controller (See page 3-33). - Page 136 CHAPTER 3. MECHANICAL SYSTEM 6) Remove 5 set screws [3] and take off the 8) Remove 2 screws [6] and take off the mount plate [4]. cooling fan [7]. Figure 3-114 Figure 3-112 CAUTION 7) Disconnect the connector [5] • To prevent the heads from drying out, return the carriage promptly to the capping position upon completion of the work and close the front cover.
- Page 137 CHAPTER 3. MECHANICAL SYSTEM 2. Removing the suction fan 1) Remove the PE sensor (See page 3-27). 2) Remove 2 screws [1] and remove the suction fan cover [2]. Figure 3-115 3) Disconnect the connector [3] and remove the suction fan [4]. Figure 3-116 3–12...
-
Page 138: Carriage Unit
CHAPTER 3. MECHANICAL SYSTEM 3) Remove the front cover and upper cover II. CARRIAGE UNIT (See pate 3-7). 4) Holding the green part, move the carriage CAUTION to the center, and remove the BJ Before disassembling or reassembling cartridges. the carriage unit, remove the BJ car- 5) Disconnect 2 connectors [3] (J501, J502) tridge and cutter unit. - Page 139 CHAPTER 3. MECHANICAL SYSTEM 6) Remove the idler roller holder tension 8) Remove 7 screws [9] and take off the left spring [4] and remove the idler roller [5] frame plate [10]. and idler roller holder [6]. [10] Figure 3-205 9) Remove the carriage unit [11] from the Figure 3-203 left side of the printer.
- Page 140 CHAPTER 3. MECHANICAL SYSTEM CAUTION 2. Removing the carriage belt When installing the carriage unit, check 1) Remove the carriage unit (See page 3-13). that the linear scale passes through the 2) Remove 2 belt stoppers [1] at the back linear scale sensor.
- Page 141 CHAPTER 3. MECHANICAL SYSTEM 3. Installing the carriage belt 1) Matching the belt stopper [1] and carriage belt [2], insert the belt stopper into the CAUTION hole at the back side of the carriage. Install the carriage belt so that the belt 2) Pull the carriage belt in the direction stopper and the carriage belt joint shown in the figure below and check that...
- Page 142 CHAPTER 3. MECHANICAL SYSTEM 4. Removing the linear scale 3) Unlatch the hook [2] and remove the 1) Remove the carriage unit (See page 3-13). linear scale [3]. 2) Remove the tension spring [1] of the linear scale. Figure 3-211 Figure 3-210 CAUTION When removing the linear scale, be...
-
Page 143: Replacing The Flexible Cable
CHAPTER 3. MECHANICAL SYSTEM 5. Replacing the flexible cable 6) Holding the green part, move the carriage 1) Remove the image controller (See page 3- to the center and remove 2 connectors [3] 32). (J501, J502) of the flexible cable on the carriage controller. - Page 144 CHAPTER 3. MECHANICAL SYSTEM 7) Peel off the fixing sheet [4] of the ferrite 9) Remove 5 screws [9] from the noise core and remove the ferrite core [5]. protection sheet [8]. Figure 3-214 Figure 3-216 10) Peel off the flexible cable [10] from the 8) Remove 4 screws [6] and take off the flexible cable cover [7].
- Page 145 CHAPTER 3. MECHANICAL SYSTEM 11) Fold the new flexible cable as shown in the figure below, and attach double-faced tape to positions [A]. Figure 3-218 12) Stick double-faced tape over the flexible guide and attach the new flexible cable, aligning the mark [B] with the flexible guide edge [12].
-
Page 146: Purge Unit
CHAPTER 3. MECHANICAL SYSTEM 4) Cap the pipe [2] and the end of the waste III. PURGE UNIT ink tube [2] using the waste ink tube caps [3]. CAUTION • Do not touch the wiper or caps. • Since waste ink accumulates on the bottom of the purge unit, hold the sides of the purge unit when removing •... - Page 147 CHAPTER 3. MECHANICAL SYSTEM 5) Disconnect 4 connectors [4] and remove 6) Remove 3 screws [5] and take off the the wiring harness from the wiring harness purge unit [6]. guide. Figure 3-304 Figure 3-303 3–22...
-
Page 148: Removing The Waste Ink Absorber Unit
CHAPTER 3. MECHANICAL SYSTEM 2. Removing the waste ink absorber 5) Remove 2 screws [4]. unit 1) Remove the right cover (See page 3-7). 2) Remove the lower cover (See page 3-8). 3) Remove the tube clamp [1] and discon- nect the waste ink tube from the pipe [2]. -
Page 149: Feeder Unit
CHAPTER 3. MECHANICAL SYSTEM CAUTION IV. FEEDER UNIT • When installing the pinch roller shaft, be careful about the position. 1. Removing the pinch roller unit • Install the pinch roller unit with the 1) Remove the lower cover (See page 3-8). -
Page 150: Removing The Platen
CHAPTER 3. MECHANICAL SYSTEM 2. Removing the platen 1) Remove the pinch roller unit (See page 3- 24). 2) Remove the front cover and upper cover (See page 3-7). 3) Remove 2 screw [1] and remove the left stay [2]. Figure 3-403 Figure 3-405 4) Remove screws [3] (A0 size model: 16,... -
Page 151: Installing The Platen
CHAPTER 3. MECHANICAL SYSTEM < A0 size model > 3. Installing the platen Top view of platen 1) Tighten screw [11] ([7] on the A1 size model) temporarily. 2) Adjust the platen position so that the screw hole [1] is aligned with the platen [2] [16] [14] [12]... -
Page 152: Removing The Paper Feed Roller
CHAPTER 3. MECHANICAL SYSTEM 5. Removing the PE sensor 4. Removing the paper feed roller 1) Remove the platen (See page 3-25). 1) Remove the platen (See page 3-25). 2) Remove the screw [1] and disconnect the 2) Remove the lower cover (See page 3-8). -
Page 153: Driving Unit
CHAPTER 3. MECHANICAL SYSTEM V. DRIVING UNIT 3) Remove the PCB box (See page 3-34). 4) Remove 4 screws [4] and remove the carriage motor [5]. 1. Removing the carriage motor 1) Remove the right cover and left cover (See page 3-7). -
Page 154: Removing The Paper Feed Motor
CHAPTER 3. MECHANICAL SYSTEM 2. Removing the paper feed motor 5) Remove 3 screws [2] and remove the 1) Remove the purge unit (See page 3-21). motor holder [3] from the bearing. 2) Remove the platen (See page 3-25). 6) Disconnect the connector [4], rotate the 3) Remove the lower cover (See page 3-8). -
Page 155: Installing The Paper Feed Motor
CHAPTER 3. MECHANICAL SYSTEM 3. Installing the paper feed motor 4. Fastening the paper feed roller set screws 1) Install the paper feed motor on the motor a. When the marks are aligned between side board, pushing down the front of the paper feed motor in the direction shown in the set screw positions Figure 3-506, and tighten 3 screws [1]. - Page 156 CHAPTER 3. MECHANICAL SYSTEM b. When the marks coincide with the set screw position 1) Match the marks on the paper feed motor side and paper feed roller side. 2) Tighten set screw [1] at the mark slightly. 3) Tighten set screws [2] and [3] slightly. 4) Loosen set screw [1].
-
Page 157: Electrical Part
CHAPTER 3. MECHANICAL SYSTEM 2) Remove the connector [3] (CN602) and VI. ELECTRICAL PART remove 12 screws [4]. 3) Remove the image controller [5]. 1. Removing the image controller CAUTION When replacing the image controller, see "Chapter 5 II. C. 3. Replacing the image controller and engine controller"... -
Page 158: Removing The Engine Controller
CHAPTER 3. MECHANICAL SYSTEM 2. Removing the engine controller CAUTION When replacing the engine controller, see "Chapter 5 II. C. 3. Replacing the image controller and engine controller" (P. 5-11).) 1) Remove the image controller (See page 3- 32). 2) Remove 12 connectors [1] (J201, J202, J203, J204, J206, J207, J208, J210, J211, J212, J213, J214) and remove 3 screws [2]. -
Page 159: Removing The Pcb Box
CHAPTER 3. MECHANICAL SYSTEM 3. Removing the PCB box 5) Remove 7 screws [5]. 1) Remove the right cover (See page 3-7). 2) Remove the engine controller (See page 3-33). 3) Remove the screw [1] and remove the noise protection sheet [2]. Figure 3-606 6) Remove the harness [6] and remove the PCB box [7]. -
Page 160: Removing The Power Switch
CHAPTER 3. MECHANICAL SYSTEM 4. Removing the power switch 5. Removing the DC power supply 1) Remove the PCB box (See page 3-34). 1) Remove the power switch. 2) Remove the screw with a crown washer 2) Disconnect the connector and the DC [1] and the 2 screws [2]. -
Page 161: I. Periodic Parts Replacement
CHAPTER 4 MAINTENANCE AND SERVICING I. PERIODIC PARTS REPLACEMENT ....4-1 IV. MAINTENANCE AND INSPECTION ....4-2 II. STANDARD SERVICE LIFE OF A. Cleaning/Inspection Points ......4-2 CONSUMABLES ..........4-1 B. Lubrication Points ........4-3 III. PERIODIC SERVICE ........4-1... -
Page 162: Chapter 4 Maintenance And Servicing
CHAPTER 4. MAINTENANCE AND SERVICING I. Periodic parts replacement The printer contains no parts which require periodic replacement. II. Standard service life of consumables The printer contains no parts which require replacement. III. Periodic service The printer contains no parts which require periodic service. 4–1... -
Page 163: Iv. Maintenance And Inspection
CHAPTER 4. MAINTENANCE AND SERVICING IV. MAINTENANCE AND INSPECTION A. Cleaning/Inspection Points Figure 4-401 Parts Cleaning Tool Service/caution Pinch roller Plain paper (A1 or A0) Feed the paper until the stains are removed from it. Platen Moistened cloth Clean Check or replace Waste ink absorber unit —... -
Page 164: B. Lubrication Points
CHAPTER 4. MAINTENANCE AND SERVICING B. Lubrication Points Figure 4-402 Position Lubricant Remarks Paper feed motor gear Permalub G2 Apply approx. 500mg of grease uniformaly to the tooth surfaces. Grit roller bearing Permalub G2 Apply approx. 40mg of grease to each bearing surface. Table 4-402 4–3... - Page 165 CHAPTER 5 TROUBLESHOOTING I. SERVICE MODE ..........5-1 IV. CORRECTION OF OPERATION DEFECTS .. 5-32 A. Outline ............5-1 V. CORRECTION OF IMAGE DEFECTS .... 5-43 B. Service Mode Operation ......5-1 A. Initial Inspection ......... 5-43 C. Service Mode Map ........5-2 B.
-
Page 166: Chapter 5 Troubleshooting
CHAPTER 5. TROUBLESHOOTING B. Service Mode Operation I. SERVICE MODE 1. How to enter the service mode A. Outline 1) While pressing the up and down arrow For the purpose of adjustment in the field, keys, turn ON the power switch. 5 service modes are provided as shown 2) Confirm the "Initializing"... -
Page 167: Service Mode Map
CHAPTER 5. TROUBLESHOOTING C. Service Mode Map The hierarchy of service mode items is as shown below. Refer to "D. Service Mode" for details on each item. The service mode items are displayed in English regardless of which language is selected. Main Menu ∆... -
Page 168: Service Mode
CHAPTER 5. TROUBLESHOOTING D. Service Mode 1. Control display mode • Display items: Left or right arrow key • Select an item: Down arrow key • Execute an item: Enter key • Reset the mode: Up arrow key D I S P L A Y ∆... - Page 169 CHAPTER 5. TROUBLESHOOTING < "System" details > Name of item Contents Remarks TYPE A0/A1 size model Indicates the engine controller SW201 setting. Units: °C Internal temperature Units: °C H-TMP K1 Compensated temperature of the head temperature sensor (Bk) (Proper value: 0±80°C) H-TMP K2 Unused H-TMP C...
-
Page 170: Adjusting Mode
CHAPTER 5. TROUBLESHOOTING 2. Adjusting mode • Display items and change values: Left or right arrow key • Select an item: Down arrow key • Registration of values and execution of actions: Enter key • Reset mode or item: Up arrow key A D J U S T ∆... -
Page 171: Operation/Inspection Mode
CHAPTER 5. TROUBLESHOOTING 3. Operation/inspection mode • Display an item: Left or right arrow key • Execute an item: Enter key • Reset mode or item: Up arrow key F U N C T I O N P A N E L L E D / L C D Name of item Contents... -
Page 172: Counter Mode
CHAPTER 5. TROUBLESHOOTING 4. Counter mode • Indication of items: Left or right arrow key • Reset the mode: Up arrow key C O U N T E R W - I N K : 0 0 0 0 0 0 Name of item Contents Remarks... -
Page 173: Initialization Mode
CHAPTER 5. TROUBLESHOOTING 5. Initialization mode • Display items: Left or right arrow key • Initialization of counter: Down arrow key + Enter key • Reset the mode: Up arrow key I N I T I A L I Z E W - I N K : 0 0 0 0 0 0 Name of item... -
Page 174: Adjustments And Settings
CHAPTER 5. TROUBLESHOOTING II. ADJUSTMENTS AND SETTINGS A. About Adjustments and Settings The message display language (Factory setting: English) can be changed using the operation panel keys, corresponding to each sales territory. There are no parts that require mechanical adjustment when assembling them as described in the service manual. -
Page 175: Adjustment And Setting Procedures
CHAPTER 5. TROUBLESHOOTING C. Adjustment and Setting Procedures Some of the adjustments and settings must be carried out after the machine has been booted up in the specific methods described below. Mode Operating procedure Service mode Turn on the power while pressing both the Up arrow and Down arrow keys. -
Page 176: Automatic Printing Position Adjustment And Automatic Band Adjustment (User-Settable)
CHAPTER 5. TROUBLESHOOTING 1. Automatic printing position adjustment and automatic band adjustment (User- settable) Select and execute the "Auto Adjust" or "Auto Band-adj." from the "Adjustment" menu within the Main menu. (See P. 1-15.) 2. Waste ink counter reset (for exclusive use in service mode) Select and execute "W-INK"... - Page 177 CHAPTER 5. TROUBLESHOOTING 3.3 Replacing the engine controller Before replacing the engine controller, the data such as the waste ink amount, carriage driving time, and paper feed accuracy compensation value stored in the EEPROM of the engine controller must be copied into the EEPROM of the image controller, and then be automatically updated through internal communication.
-
Page 178: Paper Feed Accuracy Compensation Value Adjustment
CHAPTER 5. TROUBLESHOOTING 4. Paper feed accuracy compensation 5) Measure the length of the printed scale value adjustment adjustment pattern in the paper feed direction. Media feed accuracy can be adjusted as • Specified value: 380±0.5mm follows. 1) Set up the service mode and select the "ADJUST"... - Page 179 CHAPTER 5. TROUBLESHOOTING CAUTION When changing the paper feed accuracy compensation value ("X-SCALE" value), be sure to write the new value in the "H/W X" item on the label attached to the left frame (under the left cover). At the factory, each printer is adjusted and the value is written on this label. Figure 5-202 shows the label on the left panel of the printer.
-
Page 180: Changing The Parallel Interface Communication Mode
CHAPTER 5. TROUBLESHOOTING 4) Press the ENTER key to confirm the . Changing the parallel interface displayed mode. communication mode • When a "*" mark is displayed after the With some types of computers which com- name of communication mode, execute municate in the compatible mode, the timing of the initial operation and return to the the Busy and Ack signals may need to be... -
Page 181: Image Controller/Engine Controller Upgrade Procedure
CHAPTER 5. TROUBLESHOOTING 6. Image controller/engine controller 7) Type the following from the command upgrade procedure prompt (when the computer output port Upgrade the image controller and/or LPT1 has been selected). engine controller by downloading the COPY/B file name LPT1: firmware following the procedure below. - Page 182 CHAPTER 5. TROUBLESHOOTING • Upon completion of data reception, one of the following messages is displayed. Download Mode a: For both the image controller and Erasing.. engine controller : Download Mode I:XX.XX E:XX.XX Writing.. [Press Online Ke [Press Online Key to Write File on Flash] Download Mode b: For only the image controller : Verifying..
-
Page 183: Error/Warning Codes
CHAPTER 5. TROUBLESHOOTING B. List of Error and Warning III. ERROR/WARNING Codes CODES A. Outline • Error/warning code configuration This machine has a self-diagnostic Numeric Alphabetic function by means of the engine controller and image controller. Diagnosis is carried digit 2 digit 1 digit digit 4... -
Page 184: Media/Feeding System
CHAPTER 5. TROUBLESHOOTING • Errors and warning codes The errors and warning codes are shown below. Detailed information on the codes (meaning, detecting timing, major causes) are described in the following pages. Codes * Diagnostic part 001xx Media/feeding system 003xx Drive system 004xx BJ Print head system... -
Page 185: Xx (Media/Feeding System)
CHAPTER 5. TROUBLESHOOTING 1. 001xx (Media/feeding system) Refer to "CORRECTION OF OPERATION DEFECTS" (P. 5-32) for remedies. Code Meaning Detection timing Major cause (W00111) • PE sensor (PS6) detected • While loading (roll media • No roll media the roll media trailing mode) •... - Page 186 CHAPTER 5. TROUBLESHOOTING Code Meaning Detection timing Major cause (W00161) • Media sensor (PS9) • When skewed feeding is • Improper loading of media detected skewed feed of detected. • Defective media roll media exceeding the • Defective media sensor (PS9) specified value.
-
Page 187: Drive System)
CHAPTER 5. TROUBLESHOOTING 2. 003xx (Drive system) Code Meaning Detection timing Major cause E00311 • Carriage does not oper- • During initial operation • Improper installation of carriage ate. • During purging operation belt • When the carriage is • Defective carriage home position moving backward for a sensor (PS2) reason other than above... -
Page 188: Bj Print Head System)
CHAPTER 5. TROUBLESHOOTING 3. 004xx (BJ Print head system) Code * Meaning Detection timing Major cause (E00401) * • No BJ print head • During initial operation • There is no BJ print head. • Improper installation of BJ print (W00402) * head •... -
Page 189: Ink Tank System)
CHAPTER 5. TROUBLESHOOTING 4. 005xx (Ink tank system) Code * Meaning Detection timing Major cause (E00501) • The ink tank sensor (PS4) • At the time of the home • No ink tank cannot detect the ink tank position detection •... -
Page 190: Cutter System)
CHAPTER 5. TROUBLESHOOTING 6. 008xx (Cutter system) Code Meaning Detection timing Major cause E00801 • Media could not be cut. • While detecting the • No cutter media leading edge after • Improper installation of cutter being cut. • Defective cutter •... -
Page 191: Internal Communication System)
CHAPTER 5. TROUBLESHOOTING 8. 012xx (Internal communication system) Code Meaning Detection timing Major cause E01219 • Abnormal communica- • Constant • Defective engine controller tion between engine • Defective image controller controller and image controller 9. 015xx (Power supply related) Code Meaning Detection timing... -
Page 192: Image Controller)
CHAPTER 5. TROUBLESHOOTING 11. 051xx (Image controller) Code Meaning Detection timing Major cause E05102 • No EEPROM • Constant • Defective DRAM • Error writing to • Defective added memory EEPROM • Defective image controller E05105 • No on board DRAM •... -
Page 193: Internal Data Processing System)
CHAPTER 5. TROUBLESHOOTING 14. 060xx (Internal data processing system) Code Meaning Detection timing Major cause W06011 • Data missing due to • While data is being • Insufficient memory insufficient memory analyzed • Defective setting of parallel interface communication mode W06012 •... -
Page 194: Gl Command System)
CHAPTER 5. TROUBLESHOOTING 15. 061xx (GL command system) Code Meaning Detection timing Major cause W06100 • Unsupported command • While data is being • Incorrect data from computer analyzed • Defective image controller W06111 • Incorrect number of parameters W06120 •... -
Page 195: Esc Command System)
CHAPTER 5. TROUBLESHOOTING 18. 064xx (ESC command system) Code Meaning Detection timing Major cause W06400 • Unsupported command • While data is being • Improper communication data analyzed. from computer W06411 Incorrect number of • Defective image controller parameters W06420 •... -
Page 196: Direct Error Code From The Image Controller)
CHAPTER 5. TROUBLESHOOTING 21. 097xx (Direct error code from the image controller) Code Meaning Detection timing Major cause E097xx* • Undefined error on image • Constant • Defective image controller controller * The last 2 digits of the code are hexadecimal. 22. -
Page 197: Correction Of Operation Defects
CHAPTER 5. TROUBLESHOOTING IV. CORRECTION OF OPERATION DEFECTS 1. 001xx (Media/feeding system) Problem/Unit Step Check item Result Remedy Media jam Has media jam occurred? Remove media jam. Incorrect media Is the media loaded properly? Instruct the user to load the media setting correctly according to the specified media loading procedure. -
Page 198: Drive System)
CHAPTER 5. TROUBLESHOOTING 2. 003xx (Drive system) Problem/Unit Step Check item Result Remedy Foreign substance on Can the carriage be moved Check for foreign substance, or rail smoothly by hand? some part in contact with the rail surface. Carriage belt Is the carriage belt correctly installed? Reinstall correctly. -
Page 199: Bj Print Head System)
CHAPTER 5. TROUBLESHOOTING 3. 004xx (BJ Print head system) Problem/Unit Step Check item Result Remedy BJ print head instal- Is the BJ print head properly Install the BJ print head correctly. lation problem installed? BJ print head Is the trouble corrected by replac- Completed. -
Page 200: Purge Unit)
CHAPTER 5. TROUBLESHOOTING 5. 007xx (Purge unit) a. E00701 Problem/Unit Step Check item Result Remedy Pump home position Does the purge motor (M3) rotate Check the wiring from the sensor to sensor (PS1) when the power switch is turned the engine controller and the wiring from the purge motor to the engine controller. -
Page 201: Cutter System)
CHAPTER 5. TROUBLESHOOTING 6. 008xx (Cutter system) a. E00801 Problem/Unit Step Check item Result Remedy Is the code "001xx (Media/feeder Refer to step 7 onwards of Table 1. system)" displayed when new 001xx (Media/feeder system) media is loaded? (P.5-32). Foreign substance in Are there any foreign substances in Clean the groove. -
Page 202: Internal Communication System)
CHAPTER 5. TROUBLESHOOTING 8. 012xx (Internal communication system) Problem/Unit Step Check item Result Remedy Malfunction Is the trouble corrected by turning Completed. the power switch OFF and ON? Engine controller Is the trouble corrected by replac- Completed. ing the engine controller? Image controller Replace the image controller. -
Page 203: Serial Interface Communication System)
CHAPTER 5. TROUBLESHOOTING 12. 052xx (Serial interface communication system) 13. 053xx (Parallel interface communication system) Problem/Unit Step Check item Result Remedy Improper printer- Is the printer-computer communi- Set the communication mode computer communi- cation setting proper? properly. cation setting Image controller Replace the image controller. -
Page 204: Gl Command System)
CHAPTER 5. TROUBLESHOOTING 15. 061xx (GL command system) 16. 062xx (GL2 command system) 17. 063xx (RTL command system) 18. 064xx (ESC command system) 19. 065xx (PJL command system) 20. 067xx (TIFF command system) Problem/Unit Step Check item Result Remedy Data transmission Does the same phenomenon occur Explain to the user that the trouble problem... -
Page 205: No Power
CHAPTER 5. TROUBLESHOOTING 24. No power Problem/Unit Step Check item Result Remedy Unplugged power Is the power cord properly con- Connect the power cord correctly to source nected to the receptacle on the the printer and outlet. printer and the outlet? Power source failure Is the proper voltage available at Explain to the customer that the... -
Page 206: Nothing Is Indicated On The Operation Panel
CHAPTER 5. TROUBLESHOOTING 25. Nothing is indicated on the operation panel Problem/Unit Step Check item Result Remedy Disconnected Are the connectors on the operation Connect the connectors properly. connector panel and image controller con- nected correctly? Operation panel Is the trouble corrected by replac- Completed. -
Page 207: Media Is Not Fed
CHAPTER 5. TROUBLESHOOTING 28. Media is not fed Problem/Unit Step Check item Result Remedy Loose set screw Are the set screws fixing the paper Tighten the paper feed roller with feed roller tightened firmly? set screws. Paper feed motor (M1) Turn OFF the power switch and Replace the paper feed motor. -
Page 208: Correction Of Image Defects
CHAPTER 5. TROUBLESHOOTING V. CORRECTION OF IMAGE DEFECTS A. Initial Inspection The causes of poor images can be loosely classified into the following four cases : • Installation environment • Type or condition of media • BJ cartridge • Main unit problem Check the installation environment, media and other conditions in the initial inspection. -
Page 209: Corrective Procedures For Image Defects
CHAPTER 5. TROUBLESHOOTING B. Corrective Procedures for Image Defects 1. Non-ejection of ink Normal Abnormal Problem/Unit Step Check item Result Remedy No ink Is there ink in the ink tank chamber of the Replace the ink tank of that applicable color? color. -
Page 210: Vertical Misalignment 1
CHAPTER 5. TROUBLESHOOTING 2. Vertical misalignment 1 Normal Abnormal Problem/Unit Step Check item Result Remedy BJ print head Is it corrected by reinstalling the BJ print Completed. installation problem head of the applicable color and doing the following? • Load the recommended type of media (plain paper or coated paper) larger than A3 and execute the "Auto Adjust"... -
Page 211: Vertical Misalignment 2
CHAPTER 5. TROUBLESHOOTING 3. Vertical misalignment 2 Normal Abnormal Problem/Unit Step Check item Result Remedy Printing position Is it corrected by loading the recom- Completed. adjustment problem mended type of media (plain paper or coated paper) larger than A3 and execut- ing the "Auto Adjust"... -
Page 212: Low Resolution
CHAPTER 5. TROUBLESHOOTING 4. Low resolution Problem/Unit Step Check item Result Remedy Clogged nozzle, foreign Execute the [Head Cleaning] for the If the problem persists after substance stuck to the applicable color. corrective steps have been Is the nozzle check pattern of that color head attempted 3 times, check the proper when printing the "Nozzle Check"... -
Page 213: Dot Misalignment
CHAPTER 5. TROUBLESHOOTING 6. Dot misalignment Normal Abnormal Problem/Unit Step Remedy Check item Result Foreign substance stuck If the problem persists after Execute [Head Cleaning] for that color. to the head corrective steps have been Is the nozzle check pattern of that color proper when the "Nozzle Check"... -
Page 214: Lines (Carriage Direction)
CHAPTER 5. TROUBLESHOOTING 7. Lines (Carriage direction) Normal Abnormal Normal Abnormal Problem/Unit Step Remedy Check item Result Main menu settings If the problem persists after setting Is the "Band Joint" selected in "Feed Priority" in the [System Setup] menu? "Band Joint", check the following. Clogged nozzles Carry out the [Head Cleaning] for the If the problem persists after... -
Page 215: White Lines (Paper Feed Direction)
CHAPTER 5. TROUBLESHOOTING 8. White lines (Paper feed direction) Normal Abnormal Problem/Unit Check item Result Step Remedy Linear scale Is it corrected by replacing the linear Completed. scale and executing the following? Engine controller • Load the recommended type of media Replace the engine controller. -
Page 216: Bleeding
CHAPTER 5. TROUBLESHOOTING 9. Bleeding DENSITY 1 DENSITY 1 Normal Abnormal Problem/Unit Remedy Step Check item Result Media smudges easily. Use the recommended type of Is the recommended type of media being used? media (coated paper or other smudge resistant paper). Printable side reversed. -
Page 217: Blotting Boundary Between Filled Images
CHAPTER 5. TROUBLESHOOTING 11. Blotting boundary between filled images Normal Abnormal Problem/Unit Check item Result Step Remedy Poor moisture absor- Is the recommended type of media being Explain to the user to use the bency of media used? recommended type of media (media with high absor- bency). -
Page 218: Electrical Components Arrangement/ Functions
CHAPTER 5. TROUBLESHOOTING VI. ELECTRICAL COMPONENTS ARRANGEMENT/ FUNCTIONS A. Sensors and Switches Figure 5-601 Name Symbol Function Photo-interrupter Pump position detection Home position detection Detection of remaining ink in the ink chamber Detection of the ink tank presence Media trailing edge detection Sensor Printing position detection Media leading edge detection, media width detection,... -
Page 219: Motors, Fans, And Solenoids
CHAPTER 5. TROUBLESHOOTING B. Motors, Fans, and Solenoids Figure 5-602 Name Symbol Function Motor Paper feed drive Carriage drive Pump drive Hold paper during printing Heat dispersion Solenoid Wiper (cleaner blade) lifting Table 5-602 5–54... -
Page 220: Logic Boards
CHAPTER 5. TROUBLESHOOTING C. Logic boards Figure 5-603 Name Symbol Function Sequence control/motor control Engine controller Image controller Data communication to host/raster conversion Carriage controller Head drive signal/sensor signal relay DC power supply DC power supply Operation panel controller Operation key, LED and message display control Table 5-603 5–55... -
Page 221: Engine Controller
CHAPTER 5. TROUBLESHOOTING D. Engine Controller J217 SW201 J209 J205 J206 J207 J208 Figure 5-604 Function SW No. Remarks Switching between A1 and A0 size SW201 A0: No jumper models. A1: Jumper installed Table 5-604 5–56... -
Page 222: E. Image Controller
CHAPTER 5. TROUBLESHOOTING E. Image Controller DSW601 CN607 CN604 CN605 CN603 CN606 Figure 5-605 SW No. Function Remarks For factory adjustment DSW601-1 Set to OFF before shipment from factory For factory adjustment DSW601-2 Set to OFF before shipment from factory For factory adjustment DSW601-3 Set to OFF before shipment from factory... - Page 223 CHAPTER 6 CIRDUIT DIAGRAM A. GENERAL CIRCUIT DIAGRAM ......6-1 D. CARRIAGE CONTROLLER ......6-33 B. IMAGE CONTROLLER ........6-4 E. PAPER SENSOR ..........6-41 C. ENGIN CONTROLLER ........6-16 F. OPERATION PANEL CONTROLLER ..... 6-42...
- Page 224 Part 6: Circuit Diagram BJ-W3000 / BJ-W3050 A. GENERAL CIRCUIT DIAGRAM General circuit diagram (1/3) CARRIAGE MOTOR PAPER FEED MOTOR SUCTION FAN COOLING FAN PE SENSOR FRONT COVER SENSOR J201 J203 J206 J214 J204 J211 J202 PPOW_CONL PPOW_CONL PG_OUT4 J202...
- Page 225 Part 6: Circuit Diagram BJ-W3000 / BJ-W3050 General circuit diagram (2/3) LINEAR SCALE/LINEAR SENSOR PAPER SENSOR ENGINE CONTROLLER J208 J207 J510 J509 J501 J502 CARRIAGE CONTROLLER J505 J504 J503 J506 HEAD(3) HEAD(2) HEAD(1) HEAD(0)
- Page 226 Part 6: Circuit Diagram BJ-W3000 / BJ-W3050 General circuit diagram (3/3) CENTRONICS RS-232C J701 CN602 PKEY0 CN701 PVcc PKEY1 CPURSTL CN605 CN604 PKEY2 RSV2 PKEY0 PKEY3 PLED9 R/WN PKEY1 PKEY4 PLED8 PKEY2 PKEY5 PLED7 PKEY3 BUZZER PLED6 PKEY4 RSV1 PLED5...
-
Page 227: Image Controller
Part 6: Circuit Diagram BJ-W3000 / BJ-W3050 B. IMAGE CONTROLLER Image controller (1/12) CA[31..2] CA[31..2] (11/12-F7) CD[31..0] CD[31..0] (11/12-F7) C605 4700p L601 Y602 R879 33MHz(DIP) C664 CA10 CA11 CA12 CD10 CA13 CD11 CA14 CD12 CA15 CD13 R715 CA16 CD14 R713... - Page 228 Part 6: Circuit Diagram BJ-W3000 / BJ-W3050 Image controller (2/12) (5/12-F8) (10/12-F6) (11/12-F2) D[31..0] D[31..0] A[31..2] (11/12-F2) A[31..2] U612 U618 XU601 (11/12-A5) BE1L DQ10 DQ10 DQ10 DQ11 DQ11 DQ11 DQ12 DQ12 DQ12 DQ13 DQ13 DQ13 DQ14 DQ14 DQ14 DQ15 DQ15...
- Page 229 Part 6: Circuit Diagram BJ-W3000 / BJ-W3050 Image controller (3/12) MD[31..0] (12/12-F2) MD[31..0] MA[10..0] (12/12-F2) MA[10..0] U616 U602 U611 I/O0 MD16 U606 I/O0 I/O1 I/O0 MD17 MD16 I/O1 I/O0 I/O2 I/O1 MD18 MD17 I/O2 I/O1 I/O3 I/O2 MD19 MD18 I/O3...
- Page 230 Part 6: Circuit Diagram BJ-W3000 / BJ-W3050 Image controller (4/12) MD[31..0] (12/12-F2) MD[31..0] MA[10..0] (12/12-F2) MA[10..0] SIM601 SIM602 MD16 MD16 CAS0 CAS0 MD17 MD17 CAS2 CAS2 CAS3 CAS3 MD18 MD18 CAS1 CAS1 RAS0 RAS0 MD19 MD19 RAS1 RAS1 MD24 MD24...
- Page 231 Part 6: Circuit Diagram BJ-W3000 / BJ-W3050 Image controller (5/12) D[31..0] 645ID[7..0] D[31..0] 645ID[7..0] (12/12-A7) (2/12-F8) U604 ID[7..0] (6/12-F7) (7/12-F7) (8/12-F8) (9/12-E7) (12/12-D2) (10/12-F6) 645ID0 (11/12-F2) 645ID1 645ID2 645ID3 645ID4 645ID5 645ID6 645ID7 R605 (1/12-C2) DTRL R604 (10/12-D2) IOSELL U627 541IA[2..0]...
- Page 232 Part 6: Circuit Diagram BJ-W3000 / BJ-W3050 Image controller (6/12) (6/12-B1) IVCC D602 R986 R985 R984 R983 R982 R981 R980 R979 ID[7..0] CN604 (5/12-F5)(7/12-F7)(8/12-F8)(9/12-E7)(12/12-D2) ID[7..0] L613 /STB U622 U623 R1031 R1030 L621 4.7K DATA0 R1029 R1028 4.7K L620 DATA1 R1027...
- Page 233 Part 6: Circuit Diagram BJ-W3000 / BJ-W3050 Image controller (7/12) R1037 R1036 R1035 R1034 ID[7..0] CN601 (5/12-F5) (6/12-F7) (8/12-F8) (9/12-E7) (12/12-D2) ID[7..0] SCU2L U614 IO_RDL U615 SCU2L (10/12-C2) IO_WRL IO_RDL (5/12-E6) IO_WRL (5/12-E6) DBCLK R793 (1/12-C6) (7/12-B1) DBCLK ABORTL ABORTL...
- Page 234 Part 6: Circuit Diagram BJ-W3000 / BJ-W3050 Image controller (8/12) 10K 10K 10K 10K 10K 10K 10K 10K ID[7..0] U634 CN602 ID[7..0] TP643 PDAT0 R1063 PKEY0 PKEY0 (5/12-F5) TP654 (6/12-F7) PDAT1 R1062 PKEY1 PKEY1 TP642 (7/12-F7) PDAT2 R1061 PKEY2 PKEY2...
- Page 235 Part 6: Circuit Diagram BJ-W3000 / BJ-W3050 Image controller (9/12) PIX[7..0] XPIX[7..0] (10/12-F2) PIX[7..0] U625 PIX0 XPIX0 R991 R992 PIX1 XPIX1 CN607 JP603 R811 R794 L605 CN603 VENB PIXRDY RSINT PIX2 XPIX2 R993 4.7K (10/12-B3) C698 PIXCLK R994 PIX3 XPIX3...
- Page 236 Part 6: Circuit Diagram BJ-W3000 / BJ-W3050 Image controller (10/12) PIX[7..0] (9/12-E8) PIXCLK PIX[7..0] (9/12-F7) C618 4700p VENB (9/12-E8) L602 A[31..2] GMA[10..0] (11/12-F2) A[31..2] GMA[10..0] (12/12-F7) D[31..0] NFM61R00T101 GMD[31..0] (2/12-F8)(5/12-F8)(11/12-F2) D[31..0] GMD[31..0] (12/12-F7) SRA[14..0] (9/12-B7) SRA[14..0] SRD[7..0] (9/12-B3) SRD[7..0] (1/12-D2)
- Page 237 Part 6: Circuit Diagram BJ-W3000 / BJ-W3050 A[31..2] Image controller (11/12) CD[31..0] (2/12-F8) (1/12-F1) CD[31..0] (5/12-B8) (10/12-F6) CA[31..2] R916 R915 R914 R913 R912 R911 R910 R909 R637 R636 R635 R634 R633 R632 R631 R630 CA[31..2] (1/12-F1) D[31..0] (2/12-F8) (5/12-F8) CA31...
- Page 238 Part 6: Circuit Diagram BJ-W3000 / BJ-W3050 Image controller (12/12) MD[31..0] MD[31..0] (3/12-F8)(4/12-F8) GMA[10..0] MA[10..0] (10/12-F2) GMA[10..0] MA[10..0] (3/12-F8)(4/12-F8) GMD[31..0] (10/12-F2) GMD[31..0] R666 R667 R668 R669 R670 R671 R672 R673 R773 R774 R775 R776 R777 R778 R779 R780 GMD31 R639...
- Page 239 Part 6: Circuit Diagram BJ-W3000 / BJ-W3050 C. ENGIN CONTROLLER Engine controller (1/17) (4/17-C7) CTS0_MC (4/17-C7) RTS0_MC PPCLK (3/17-D7) R405 (10/17-D7) DTR1_IC DMA_CONTN (17/17-E7) (10/17-C5) DSR1_IC (5/17-F3) (12/17-C8) (10/17-C5) RXD1_IC FAN_CONT DOOR_VAL (12/17-E6) (10/17-E7) TXD1_IC FANSTS (12/17-D4) DIPMD1 NF218 (4/17-B6)(10/17-F1)
- Page 240 Part 6: Circuit Diagram BJ-W3000 / BJ-W3050 Engine controller (2/17) DRM_RASN PAD4 (5/17-B8) (5/17-A8) DRM_CASN PAD3 RD209 (1/17-E8) MCNT_INTN DRM_WEN (5/17-B8) DACK[1..0]N (1/17-D2)(1/17-C2) PAD5 (4/17-E7) LPOUT1 BACKN (1/17-C2) (17/17-E7)(17/17-F3) DREQ[1..0]N KILLERN (1/17-D2)(3/17-F7)(4/17-D2)(17/17-E2) (1/17-C2) BREQN (1/17-C2)(3/17-F7)(5/17-D7) WRHN (1/17-C2) (7/17-C8) HD_DT[3..0] TETRA_CSN...
- Page 241 Part 6: Circuit Diagram BJ-W3000 / BJ-W3050 Engine controller (3/17) (1/17-C1)(2/17-F2)(4/17-D2)(17/17-E3) SYSTEM_CLK KILLERN (1/17-D2)(2/17-F2)(4/17-D2)(17/17-E2) (1/17-B2) TOTORO_CSN WRLN (1/17-C2)(2/17-F2)(5/17-C8)(5/17-F7) PAD10 (1/17-C2)(2/17-F2)(5/17-D7) (1/17-B7)(2/17-D1)(5/17-F7) ADR[9..0] RD201 PAD9 PAD8 C228 0.1uF NF202 (1/17-D8)(2/17-C1)(5/17-C2) DB[15..0] C256 0.1uF BLKTYPE MDB0 MDB1 EPRTDIR MDB2 MDB3 E0ECLK0 E0ECLK1...
- Page 242 Part 6: Circuit Diagram BJ-W3000 / BJ-W3050 Engine controller (4/17) R235 (1/17-C2) EC_INTREQ0 D/A1 (16/17-E8) R234 (2/17-C7) EC_INTREQ1 D/A0 (15/17-E8) C221 1000pF INK1 (11/17-D5) INK0 (11/17-E5) (2/17-F8) LPOUT1 (15/17-D8)(15/17-F6) MTP[7..1] MTP1 MTP2 C224 MTP3 0.1uF AGND MTP4 10uF/50V MTP5 C225...
- Page 243 Part 6: Circuit Diagram BJ-W3000 / BJ-W3050 Engine controller (5/17) (1/17-B7)(2/17-D1)(3/17-F7) ADR[19..0] ADR10 ADR11 ADR9 ADR8 WRLN (1/17-C2)(2/17-F2)(3/17-F7) NF213 NF211 ADR17 U219 U218 C302 C303 (1/17-F3) 0.1uF ADR16 ADR12 ADR15 0.1uF ADR7 BYTEN ADR14 ADR6 ADR13 DB15 ADR5 D15/A-1 ADR12...
- Page 244 Part 6: Circuit Diagram BJ-W3000 / BJ-W3050 Engine controller (6/17) DA208A DA208B DA208C DA208D DA209A DA209B DA209C DA209D O_OHTP[3..0] (9/17-D8) C212 0.1uF (3/17-D2) OHTP[3..0] U205 OHTP0 O_OHTP0 OHTP1 O_OHTP1 OHTP2 O_OHTP2 OHTP3 O_OHTP3 EHTP0 O_EHTP0 EHTP1 O_EHTP1 EHTP2 O_EHTP2 EHTP3...
- Page 245 Part 6: Circuit Diagram BJ-W3000 / BJ-W3050 Engine controller (7/17) BENB2[2..0] (9/17-C8) (3/17-B2) BLKNUM2[2..0] BLKNUM20 BENB20 BLKNUM21 BENB21 BLKNUM22 BENB22 BLKNUM30 BENB30 BLKNUM31 BENB31 BLKNUM32 BENB32 (3/17-B2) BLKNUM3[2..0] BENB3[2..0] (9/17-C8) O_HD_DT[3..0] (9/17-C4) (2/17-F8) HD_DT[3..0] HD_DT0 O_HD_DT0 HD_DT1 O_HD_DT1 HD_DT2 O_HD_DT2...
- Page 246 Part 6: Circuit Diagram BJ-W3000 / BJ-W3050 Engine controller (8/17) O_SUBH[3..0] (9/17-B4) C272 (2/17-D8) SUBH[3..0] 0.1uF U211 SUBH0 O_SUBH0 SUBH1 O_SUBH1 SUBH2 O_SUBH2 SUBH3 O_SUBH3 (2/17-A8) HRESET O_HRESET (9/17-C4) DA214 R301 R375 R368 R366 R364 (2/17-A8)(6/17-D8) BUFENBN (17/17-C7) DRSL0 DRSL1...
- Page 247 Part 6: Circuit Diagram BJ-W3000 / BJ-W3050 Engine controller (9/17) XCRCDET (17/17-F3) XCRCDAT (17/17-F3) XCRCCK (17/17-F3) (2/17-A7) COMCLK COM_CLK (9/17-B8) (2/17-B7) COMLT COM_LT (9/17-B8) (2/17-B7) COMDIR COM_DIR (9/17-B8) U203 C226 (2/17-B7) CRCDET 0.1uF (2/17-B7) CRC_DATA (2/17-A7) COMDAT (2/17-B7) CRC_CK R310 47...
- Page 248 Part 6: Circuit Diagram BJ-W3000 / BJ-W3050 Engine controller (10/17) R280 DIPMD1 (1/17-E3)(4/17-B6) SW201A R227 R226 R225 R224 R223 R222 R351 100 (1/17-F8) (10/17-C3) (10/17-C2)(10/17-C3) EXT[5..0] XEXT[5..0] (2/17-C8)(4/17-B6) TXD1_IC R318 100 R304 1K EXT0 XEXT0 (2/17-B1) OSBSY (10/17-C2) R305 1K...
- Page 249 Part 6: Circuit Diagram BJ-W3000 / BJ-W3050 Engine controller (11/17) DA219A R354 (9/17-B4) HABA_IN HABA_VAL (1/17-E3) C310 D206 1000PF DA220A DA206A R217 (12/17-E3) (4/17-F3) INK0_IN INK0 DA217B R328 DA207A C209 4.7K 1000PF R269 (9/17-C4) (2/17-E8) DA218B C258 1000PF DA206B DA217A...
- Page 250 Part 6: Circuit Diagram BJ-W3000 / BJ-W3050 Engine controller (12/17) NF214 DA201 J213 C203 R214 4.7K 0.1uF R215 (12/17-B2) MEDIA_IN MEDIAS_VAL (2/17-C8) 100k C222 R210 1000PF (11/17-D8) INK1_IN R207 DA206C 4.7K R208 R206 100k DA205 2.2k TANK (4/17-B6) DA207C R212...
- Page 251 Part 6: Circuit Diagram BJ-W3000 / BJ-W3050 Engine controller (13/17) C334 C338 0.1uF R409 47 U222 R410 47 0.1uF R411 47 DA222A R415 U223A (2/17-D8) LD_DA (2/17-D8) CLK_DA (2/17-D8) DATA_DA (9/17-B4) LED_CONT_R C336 R416 C313 DA221A R412 1000pF 0.1uF 2.2K...
- Page 252 Part 6: Circuit Diagram BJ-W3000 / BJ-W3050 Engine controller (14/17) Q207 +26V (2/17-C7) PPOW_CONL C365 C366 0.1uF 100uF/50V +26V C326 R439 0.1uF Q214 4.7K R440 U234 Q208 U220A Q209 OUT1 (2/17-C7) ACOM1 R441 OUT2 J202 U220B Q210 (2/17-B1) PGXA R442...
- Page 253 Part 6: Circuit Diagram BJ-W3000 / BJ-W3050 Engine controller (15/17) NF210 +26V C349 C350 0.1uF 10uF/50V C368 0.1uF C367 U233 J203 Vcc2 100uF/50V C340 0.1uF (4/17-E7) MTP4 (4/17-E7) MTP5 (4/17-E7) A*in MTP6 (4/17-E7) B*in MTP7 U231A (4/17-F3) D/A 0 R434 3.3k...
- Page 254 Part 6: Circuit Diagram BJ-W3000 / BJ-W3050 Engine controller (16/17) +26V NF209 C361 C344 C345 C360 0.1uF 0.1uF 10uF/50V 100uF/50V U232 J201 Vcc2 (4/17-E7) MTP12 C347 (4/17-E7) MTP13 0.1uF (4/17-E7) MTP14 A*in (4/17-E7) MTP15 B*in (4/17-F3) D/A 1 R394 3.3k...
- Page 255 Part 6: Circuit Diagram BJ-W3000 / BJ-W3050 Engine controller (17/17) U235 OPPRDY (2/17-B1) (2/17-A8) IPIXRDY OVENB (2/17-B1) (10/17-C3) PIXCLK DREQ1N (2/17-F8) (10/17-C3) (9/17-F5) VENB XCRCCK C372 (1/17-D2) REDREQ1N XCRCDAT (9/17-F5) (1/17-C2) REDREQ0N XCRCDET (9/17-F5) 0.1uF NF205 (1/17-C2)(6/17-B8) HLDT SYSTEM_CLK C279 (1/17-C1) 0.1uF...
- Page 256 Part 6: Circuit Diagram BJ-W3000 / BJ-W3050 D. CARRIAGE CONTROLLER Carriage controller (1/8) D504 26VA IC515 Vout R561 15kF R503 1.2k,2W D503 + C502 C548 R501 C549 100u/50V 0.1u 1.2k,2W 0.1u Q506 R560 ZD504 825F HGND (8/8-E2) H24VCNT D506 IC516...
- Page 257 Part 6: Circuit Diagram BJ-W3000 / BJ-W3050 Carriage controller (2/8) J503 J505 HE1B HE1B HENB0 (3/8-F2) HENB2 (3/8-F3) BE01 (3/8-F2) BE21 (3/8-F3) EVEN EVEN (8/8-E7) EVEN2 (8/8-E7) EVEN0 LCLK LCLK LTCLK0 (3/8-F8) LTCLK2 (3/8-F4) HS2A HS2A HS2A0 (3/8-F7) HS2A2 (3/8-F3)
- Page 258 Part 6: Circuit Diagram BJ-W3000 / BJ-W3050 Carriage controller (3/8) (2/8-F5) HENB0 (4/8-B7) (2/8-F1) HENB2 HENB2 (4/8-D3) HENB0 R514 BE01 (4/8-B7) R511 BE21 BE21 (2/8-F5) BE01 (2/8-F1) (4/8-D3) (2/8-E5) LTCLK0 LTCLK0 (4/8-B7) (2/8-E1) LTCLK2 LTCLK2 (4/8-D3) (2/8-E5) HS2A0 HS2A0 (4/8-B7)
- Page 259 Part 6: Circuit Diagram BJ-W3000 / BJ-W3050 Carriage controller (4/8) COM_DIR (8/8-C5) COM_DAT (8/8-D7) COM_CLK (8/8-C7) COM_LT (8/8-C5) CRC_CLK (8/8-C5) CRC_DAT (8/8-C5) OSUBH1 (5/8-D7) CRC_DET (8/8-D7) XSUBH1 OSUBH4 TRI_ENBN (8/8-C5) SUBH4 Y501 (10.245MHz) IC517 R505 C508 NF503 0.1u NF502 C507...
- Page 260 Part 6: Circuit Diagram BJ-W3000 / BJ-W3050 Carriage controller (5/8) SUB0 (2/8-E6) SUB0 R541 22kF R553 SUBH0 Q505 IC509A (8/8-D4) SUBH0 DIA0 DIA0 (2/8-E6)(6/8-E5) R540 R552 DIK0 DIK0 (2/8-D6) 2.2k C532 R539 10kF 0.1u HGND AGND SUB1 SUB1 (2/8-B6) AGND...
- Page 261 Part 6: Circuit Diagram BJ-W3000 / BJ-W3050 Carriage controller (6/8) 26VA R529 C529 C527 33kF IC508A 0.1u IC508D 0.1u R526 AGND 1.3kF DISNS (8/8-C4) IC506 DIA2 DIA2 (2/8-E3)(5/8-C2) DIA1 C528 R525 DIA1 (2/8-C6)(5/8-D2) DIA0 680p DIA0 (2/8-E6)(5/8-E2) 13kF DIA4 DIA3...
- Page 262 Part 6: Circuit Diagram BJ-W3000 / BJ-W3050 Carriage controller (7/8) IC513A 26VA (8/8-C4) REGOUT R569 J510 C531 LEDB LEDB (7/8-C2) R543 LEDR (7/8-C5) LEDR 33kF REGOUT 0.01u R523 POUT POUT (8/8-C4) R545 THERM THERM (8/8-C4) R585 51kF IC511A IC513C REGSEN...
- Page 263 Part 6: Circuit Diagram BJ-W3000 / BJ-W3050 Carriage controller (8/8) J501 J502 ODD0 + C504 (2/8-E6) ODD0 ODD1 24VGND 100u/50V ODD1 (2/8-C6) ODD2 ODD2 (2/8-E3) ODD3 ODD3 (2/8-C3) HRESET HRESET (2/8-B3)(2/8-B6)(2/8-D3)(2/8-D6) EVEN0 EVEN0 (2/8-F6) (1/8-B7) EVEN1 26VGND EVEN1 (2/8-C6) (1/8-B7)
- Page 264 Part 6: Circuit Diagram BJ-W3000 / BJ-W3050 E. PAPER SENSOR Paper sensor +26V LED2 J510 LEDB LEDR +26V REGOUT LED1 POUT THERM 100p 1.1M IC1B 0.1u IC1A 6-41...
- Page 265 Part 6: Circuit Diagram BJ-W3000 / BJ-W3050 F. OPERATIN PANEL CONTROLLER Operation panel controller CN701 PKEY0 PKEY1 PKEY2 PKEY3 PKEY4 FG701 D701 D701 D704 PKEY5 U701 JP701 BUZZER R727 R728 R729 R701 R702 R703 DIODE SW701 DIODE SW702 DIODE SW703 6.8K...
-
Page 266: Appendix
APPENDIX MENU GUIDE ............A-1... - Page 267 APPENDIX BJ-W3000 / BJ-W3050 MENU GUIDE...
- Page 268 This document is printed on 100% recycled paper. PRINTED IN JAPAN (IMPRIME AU JAPON) CANON INC.
Need help?
Do you have a question about the BJ-W3000 and is the answer not in the manual?
Questions and answers