Table of Contents
Advertisement
Quick Links
Advertisement
Table of Contents

Subscribe to Our Youtube Channel
Related Manuals for Peak Pilates AFINA


Summary of Contents for Peak Pilates AFINA
- Page 1 AFINA™ REFORMER & TOWER ASSEMBLY GUIDE & OWNER’S MANUAL...
-
Page 2: Table Of Contents
The Afina™ Reformer ................3 Recommended Use .................4 What’s Inside ....................7 Installing the Carriage, Gear Bar and Springs ......13 Afina™ 4 Assembly Guide ..............15 Afina™ 5 Assembly Guide ..............16 Tower Assembly Guide .................18 Installing Other Accessories .............22 Maintaining the Afina™ Reformer ..........24 Copyright 2015 Mad Dogg Athletics, Inc. -
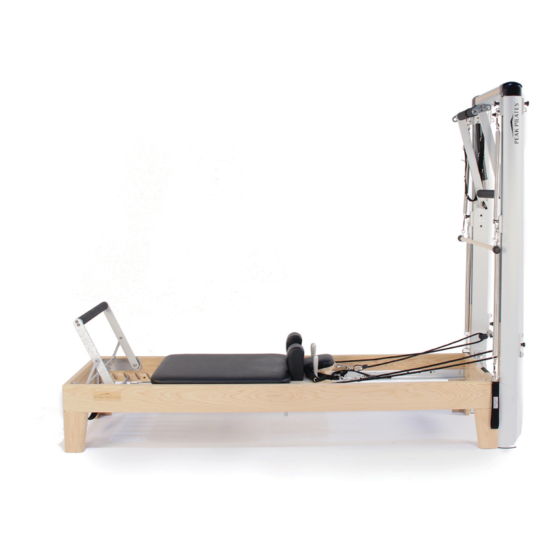
Page 3: The Afina™ Reformer
Pilates enthusiasts with its unique pulley system, gliding carriage and spring tension that simultaneously strengthens and supports the body. We are honored that you have chosen the Afina Reformer by Peak Pilates to continue your path to a happier, healthier life for you and your clients. -
Page 4: Recommended Use
Important: This manual contains safety and usage information. Before beginning exercise, read the entire manual, paying specific attention to all cautions and warnings and obtain qualified instruction on the use of the Afina™ Reformer. Use only for the intended exercise. Do not modify the machine. Modifying the machine in any way will nullify your warranty. - Page 5 8. It is the purchaser’s sole responsibility to instruct end users and supervising personnel on the proper operating procedures of the Afina™ Reformer. We strongly recommend that the end user’s physical condition be evaluated prior to beginning any exercise program.
- Page 6 60 days effective as of the invoice date of the original purchase. This warranty refers to the Afina Reformer model and covers material only. It remains in effect only under the following conditions: 1.
-
Page 7: What's Inside
3. Foot Strap (preinstalled on frame) 4. Carriage Stop All Afina Reformers come with different components depending on your order and desired parts. Other combinations are available with special requests and custom orders. For a complete and comprehensive list on all of the items included in each kit, please see the following pages. - Page 8 The following additional items are included in the Afina™ 4 Reformer kit: COMPONENT QUANTITY 1. Leather Strap Flip Carriage with Resistance Ride Wheels 2. Leather Straps 3. Leather Handles 4. Long Spine Straps 5. Gear Bar with 4 Eyehooks 6. Resistance Ride Springs PEAK PILATES ®...
- Page 9 The following additional items are included in the Afina™ 5 Reformer kit: COMPONENT QUANTITY 1. Nylon Rope Flip Carriage with Ball-bearing Wheels 2. Foot Loops 3. Nylon Ropes 4. Handles 5. Risers with Pulleys and Mounting Hardware 6. Gear Bar with 5 Eyehooks 7.
- Page 10 The following additional items are included in the Tower kit, which can be included with an order of the Afina 4 or Afina 5 kit: PEAK PILATES ®...
- Page 11 16. 45 mm Screws (for Tower Bracket Spacers) 17. M8 Large (24 mm outer diameter) Washers (for Threaded Tower Brackets Blocks only) 18. M8 Small (16 mm outer diameter) Washers 19. Short Wooden Trim Blocks 20. Long Wooden Trim Blocks 21. Tower Caps PEAK PILATES ®...
- Page 12 The following accessories can also be paired with your order of any Afina™ Reformer: COMPONENT QUANTITY 1. Jump Board / Dancer Jump Board 2. Side Split Platform 3. Twin Mats (2 per set) Tools Needed for Assembly 5mm Allen key (provided in kit) PEAK PILATES ®...
-
Page 13: Installing The Carriage, Gear Bar And Springs
INSTALLING THE CARRIAGE, GEAR BAR AND SPRINGS The Reformer Frame The Afina™ Reformer frame comes preassembled, is hand-crafted in either oak or bamboo, and finished with lacquer for a long-lasting shine as well as protection against sweat and water damage. Two or more people should assist with moving and placing the reformer frame in the desired location for use. - Page 14 Position -1 – Carriage stop is removed and placed in the storage hole in the frame Position 1 – Carriage stop in hole position 1 Position 2 – Carriage stop in hole position 2 Position 3 – Carriage stop in hole position 3 PEAK PILATES ®...
-
Page 15: Afina™ 4 Assembly Guide
AFINA™ 4 ASSEMBLY GUIDE For the clients that have chosen leather straps and handles, the head end of the frame will have the pulleys preinstalled for using the leather straps. In addition, the leather handles will have clips attached so they can easily snap on to the end of the leather straps. -
Page 16: Afina™ 5 Assembly Guide
For the clients that have chosen the reformer equipped with ropes and risers, the Afina™ Reformer allows for easy installation of ropes and pulleys to the risers. Your reformer frame will have holes in the head end to accommodate the installation of the risers. - Page 17 Figs. 7 and 8. To shorten the rope, simply pull it further through the hole. To lengthen the rope, lift the cleat to release the tension on the rope (Fig. 9). Fig. 8 Fig. 9 PEAK PILATES ®...
-
Page 18: Tower Assembly Guide
TOWER ASSEMBLY GUIDE If you have ordered the Afina™ Reformer with the tower kit, most components for the tower will arrive in a separate box. It contains additional items (detailed in the “What’s Inside” section). The following pages will detail all of these components and the steps required for installation. - Page 19 (Fig. 17). Note: The preinstalled pulley mounts on the tower must be on the outside of the reformer frame, with the Fig. 17 pulleys pointing inward. PEAK PILATES ®...
- Page 20 Fig. 20. 4. Now tighten all 16 screws attaching the tower to the reformer frame with the Allen key until they are completely tight and secure (Fig. 21). Fig. 19 Fig. 20 Fig. 21 PEAK PILATES ®...
- Page 21 2. Press the circular button at the top of the black handle to release the pins. 3. Insert the pins into the holes until they lock into place. Installing the Wood Trim The Afina Reformer comes with four wood pieces to cosmetically connect the classical wooden frame with the modern metal tower.
-
Page 22: Installing Other Accessories
INSTALLING OTHER ACCESSORIES All Afina™ Reformers come with metal brackets preinstalled on the frame that allow for easy installation of the accessories like a jump board or side split platform. Please find the instructions for installing these two items below: Installing the Jump Board / Dance Jump Board 1. - Page 23 (Fig. 30). 5. Place the mats on top of the reformer frame, with the foot strap set against the foot end of the frame (the head is shown in Fig. 31). Fig. 31 PEAK PILATES ®...
-
Page 24: Maintaining The Afina™ Reformer
MAINTAINING THE AFINA™ REFORMER The Afina™ Reformer is constructed from the finest components and materials. Proper maintenance requires only a small, but very important investment of your time in a regular routine maintenance program. If you are using the equipment in a studio or club environment, we strongly suggest... - Page 25 • Tracking System – The tracks upon which your carriage rides are anodized to inhibit the build-up of unsightly aluminum oxide residue. Clean them on an as- needed basis using a warm, mild soapy water solution and dry thoroughly with a soft cloth. PEAK PILATES ®...
- Page 26 The ropes can be used until the “fraying” affects their function. • Foot Loops, Handles and Safety Clips – These parts wear out over time. Please replace them as needed. PEAK PILATES ®...
- Page 27 Lubricate • Riser Pully Adjustment Knobs – Lubricate threads every six months (or more frequently as needed) with white lithium grease. PEAK PILATES ®...
- Page 28 Mad Dogg Athletics, Inc. Mad Dogg Athletics Europe 2111 Narcissus Court Industrieweg 20 A, Venice, CA 90291 U.S.A 3144 CH Maassluis 310.823.7008 (Worldwide) The Netherlands 800.925.3674 (North America) +31 1059 04508 (Worldwide) customerservice@peakpilates.com international@peakpilates.com...
Need help?
Do you have a question about the AFINA and is the answer not in the manual?
Questions and answers