
Related Manuals for Peak Pilates ARTISTRY SERIES


Summary of Contents for Peak Pilates ARTISTRY SERIES
- Page 1 THE ARTISTRY COLLECTION ASSEMBLY GUIDE AND OWNER’S MANUAL INCLUDES REFORMER & TWS / FWS TOWERS...
-
Page 2: Table Of Contents
Tower Assembly Guide ...24 (Functional Workout System) Installing Optional Accessories ........28 Twin Mat Conversion ............29 Maintaining Artistry Reformers ........30 © 2018 Mad Dogg Athletics, Inc. All rights reserved. Peak Pilates is a registered trademark that is owned by Mad Dogg Athletics, Inc. ®... -
Page 3: Artistry
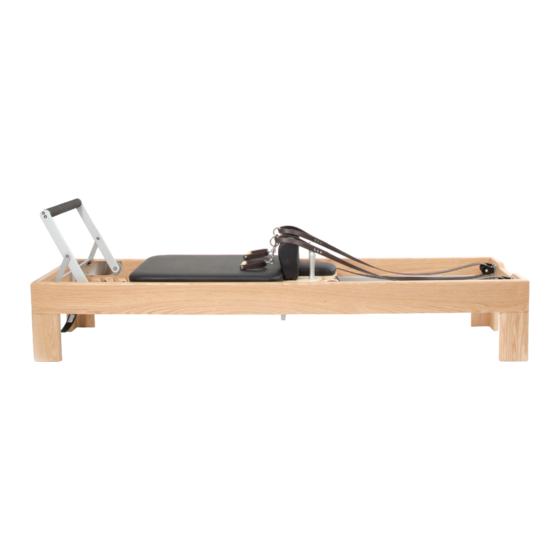
‡ ARTISTRY REFORMERS Created nearly 25 years ago in Boulder, Colorado, Peak Pilates® is world re- nowned for artisan craftsmanship and science-driven ergonomic innovation. Inspired by the designs, principles and movement founded by Joseph Pilates, this collection embodies our continuing aspiration toward balance in mind, body and spirit. -
Page 4: Recommended Use
Unsafe or improper use of this equipment due to failure to read and comply with all requirements and warnings could result in serious injury. Because Peak Pilates® cannot anticipate every situation and condition that can occur while using the apparatus, we make no representation concerning the safety of this equipment. - Page 5 1/16”. 5. Do not tip the equipment during use. 6. Children and/or pets must not be allowed near any Peak Pilates® equipment. Teenagers and/or physically challenged individuals require supervision. 7. Keep hair, clothing, jewelry and other lose items clear of moving parts at all times.
-
Page 6: Warranty
RIGHTS, AND YOU MAY ALSO HAVE OTHER RIGHTS WHICH MAY VARY FROM STATE TO STATE. WARRANTIES OUTSIDE OF THE US MAY VARY. Copyright 2018 Mad Dogg Athletics, Inc. All rights reserved. Peak Pilates® and Total Workout System® are registered trademarks that are owned by Mad Dogg Athletics, Inc. -
Page 7: Tm Reformers
WHAT’S INSIDE? Artistry™ Reformers come with all of the following items included: COMPONENT QUANTITY 1. Reformer Frame 2. Standard Long/Short Box 3. Foot Strap (preinstalled on frame with 2 Safety Links) 4. Removable Gear Block & Carriage Stop 5. Fixed Carriage Stop (preassembled) Artistry™... -
Page 8: Tm Reformers With Vegan
VEGAN STRAPS The following additional items are included in the Artistry™ with Vegan Straps kit: For Assembly instructions please refer to page #17 COMPONENT QUANTITY 1. Vegan friendly Synthetic Strap Flip Carriage 2. Resistance Ride Wheels (preinstalled on carriage) 3. Vegan friendly Synthetic Strap 4. -
Page 9: Tm Reformers With Rope
CO LLEC TI O N OWN E R’ S MANUAL TH E A RTI S TRY ROPES AND RISERS The following additional items are included in the Artistry™ with Ropes kit: For Assembly instructions please refer to pages #18-19 COMPONENT QUANTITY 1. -
Page 10: What's Inside: Tws Tower
TWS TOWER (TOTAL WORKOUT SYSTEM) The following additional items are included in the TWS Tower kit:... - Page 11 CO LLEC TI O N OWN E R’ S MANUAL TH E A RTI S TRY For Assembly instructions please refer to pages #20-21 Tools Needed for Assembly: 3/16 hex key (Provided) COMPONENT QUANTITY 1. Tower 2. Safety Strap 3. Push-Through Bar 4.
-
Page 12: What's Inside: Fws Tower
FWS TOWER (FUNCTIONAL WORKOUT SYSTEM) The following additional items are included in the FWS Tower kit:... - Page 13 CO LLEC TI O N OWN E R’ S MANUAL TH E A RTI S TRY For Assembly instructions please refer to pages #22-25 Tools Needed for Assembly: 5mm hex key (Provided) COMPONENT QUANTITY 1. Tower 2. Push-Through Bar 3. Roll Down Bar 4.
- Page 14 OPTIONAL ACCESSORIES The following accessories are popular choices that can also be included with your order of Artistry™ Reformers: COMPONENT QUANTITY 1. Jump Board 2. Dancer Jump Board 3. Side Split Platform...
-
Page 15: Installing The Springs, Carriage, Gear Bar
CO LLEC TI O N OWN E R’ S MANUAL TH E A RTI S TRY INSTALLATION Artistry™ Reformer frames come preassembled, are hand-crafted in oak and finished with lacquer for a long-lasting shine as well as protection against sweat and water damage. - Page 16 1. Each person should place their hands on the short side of the carriage to ensure that fingers do not get caught between the carriage and the track. (Fig. 2) 2. Lift the carriage and carefully place Fig. 2 one foot inside the frame. Then step over and place the other foot in the frame before lowering the carriage onto the track.
-
Page 17: Artistry Tm With Vegan Assembly Guide
CO LLEC TI O N OWN E R’ S MANUAL TH E A RTI S TRY VEGAN STRAP ASSEMBLY GUIDE For the clients that have chosen synthetic Vegan straps and handles, the head end of the frame will have the pulleys preinstalled for use with the straps. In addition, the handles will have clips attached so they can easily snap on to the end of the synthetic Vegan straps. - Page 18 4. Unscrew the black knobs on the underside of the carriage (on each side of the headrest) to reveal the screw post. Note: If top mounting of the knob is desired, the screw post can be unbolted, flipped and installed in the opposite direction.
-
Page 19: Artistry Tm With Rope Assembly Guide
CO LLEC TI O N OWN E R’ S MANUAL TH E A RTI S TRY ROPE ASSEMBLY GUIDE For the clients that have chosen the reformer equipped with ropes and risers, the head end of the frame will have the retractable risers preinstalled for use with ropes. - Page 20 Installing the Ropes 1. Using the double ended clips, clip the neoprene handles to the ends of the ropes. 2. With the gear bar and carriage stop in position 1, place the handles over the shoulders posts. 3. Thread the loose ends of the ropes Fig.
- Page 21 CO LLEC TI O N OWN E R’ S MANUAL TH E A RTI S TRY 6. To shorten the rope, simply pull it further through the hole. To lengthen the rope, lift the cleat to release the tension on the rope (Fig. 17) Fig.
-
Page 22: Tower Assembly Guide
TWS TOWER ASSEMBLY GUIDE Your pole system comes preassembled with the push-through bar installed. Installing the Poles: 1. Before you assemble the pole system to the head end of the frame, make sure that the set screws in the frame’s fittings are backed completely out of the center holes and that there are no obstructions present. - Page 23 CO LLEC TI O N OWN E R’ S MANUAL TH E A RTI S TRY Installing the Tower Springs: Each tower arm and leg spring has two double ended clips (8 total) to attach to the tower. 1. Use one double ended clip to attach to the Arm springs and tower eye bolt.
-
Page 24: Tower Assembly Guide
FWS TOWER ASSEMBLY GUIDE If you have ordered an Artistry™ Reformer with the FWS Tower kit, most components for the tower will arrive in a separate box. It contains additional items (detailed in the “What’s Inside” section Pg. 12). The following pages will detail all of these components and the steps required for installation. - Page 25 Removing the Push-Through Bar The tower comes with the push-through bar already attached. Because the push through bar swings freely, we recommend removing from the tower before attaching the tower to the reformer frame. To remove the push-through bar from the tower, please follow the instructions below: 1.
- Page 26 Tower Bracket Spacer Installation The final step for attaching the tower to the frame is the installation of tower bracket spacers. Please find the instructions for installing these spacers below: 1. Take the tower bracket spacer and place it inside the rail of the reformer (Fig.
- Page 27 Reinstalling the Push-Through Bar Now that the tower is attached and secure to the reformer frame, you can now reinstall the push-through bar onto the tower. To re-install the push-through bar, please follow the instructions below (Note: these steps require at least two people): 1.
-
Page 28: Installing Optional Accessories
ACCESSORY ASSEMBLY GUIDE Artistry™ Reformers come with metal brackets preinstalled on the frame that allow for easy installation of the optional accessories like a jump board or side split platform. Please find the instructions for installing these two items below: Installing the Jump Board / Dance Jump Board 1. -
Page 29: Twin Mat Conversion
CO LLEC TI O N OWN E R’ S MANUAL TH E A RTI S TRY Installing the Side Split Platform. (continued) 3. Ensure that the bottom of the side split platform is touching the frame. (Fig. 43) Fig. 43 TWIN MAT CONVERSION The carriage can be flipped over to install the twin mats (for exercises with the tower). -
Page 30: Maintaining Artistry Tm Reformers
MAINTAINING ARTISTRY REFORMERS The Artistry™ Reformer is constructed from the finest components and materials. Proper maintenance requires only a small, but very important investment of your time in a regular routine maintenance program. If you are using the equipment in a studio or club environment, we strongly suggest the following maintenance program: Part Daily... - Page 31 CO LLEC TI O N OWN E R’ S MANUAL TH E A RTI S TRY Inspect • Overall machine – We highly recommend that you visually inspect the machine daily and that you thoroughly inspect all the hardware to make sure every nut, bolt and fastener is secure every 2 months.
- Page 32 Clean • Framework – The wooden components on this equipment are finished with a non-toxic, water-based lacquer. Other than an occasional wipe down using a mild soapy solution and drying, no additional cleaning is necessary. The metal framework should be cleaned with a mild soapy solution. •...
- Page 33 TH E A RTI S TRY CO LLEC TI O N OWNE R’ S MANUAL Replace • Springs – We recommend that you replace all of the springs every two years. Any spring that exhibits early signs of fatigue (for example, separation in coils, even if slight) should be replaced immediately.
- Page 34 Venice, CA 90291 The Netherlands Toll-free: 1.800.847.7746 +31 1059 04508 (Worldwide) Dialing outside U.S.: 1.310.823.7008 Fax: 1.310.823.7408 peakpilates.com © 2018 Mad Dogg Athletics, Inc. All rights reserved. Peak Pilates is a registered trademark that is owned by Mad Dogg Athletics, Inc. ®...
Need help?
Do you have a question about the ARTISTRY SERIES and is the answer not in the manual?
Questions and answers