
Related Manuals for Peak Pilates fit REFORMER


Summary of Contents for Peak Pilates fit REFORMER
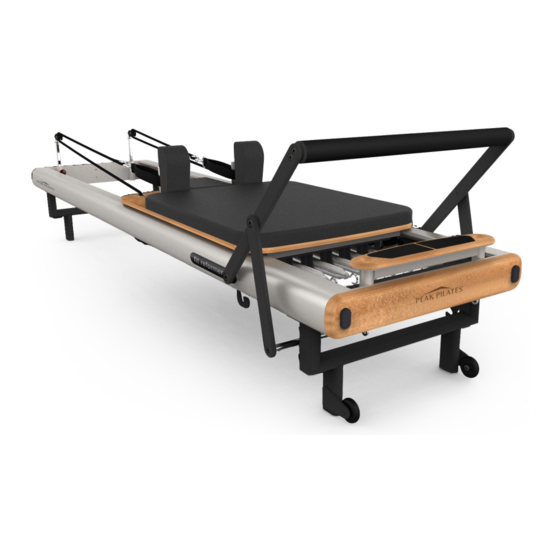
- Page 1 REFORMER ™ ASSEMBLY GUIDE AND OWNER’S MANUAL PeakPilates Fit Owners Manual-2021.indd 1 PeakPilates Fit Owners Manual-2021.indd 1 8/9/21 9:42 AM 8/9/21 9:42 AM...
-
Page 2: Table Of Contents
TABLE OF CONTENTS About the reformer..................® Recommended Use........................Safety Statement.......................... Proper Use........................... Warranty............................Specifications..........................Package Contents.......................... Assembly............................Unpack the carton...................... Assemble the leg......................Attach the springs....................... Assemble the shoulder pads..................Assemble the risers and ropes..................Attach the foot strap....................Attach the reformer straps springs................ -
Page 3: About The
There are a great number of excercises that can be done on the fit reformer where correct form is imperative. ™ We strongly advise that the fit reformer be used only by or under the supervision of a Peak Pilates Certified ™ ®... -
Page 4: Recommended Use
Inspect the machine including all structural and mechanical components, hardware, springs and accessories before use. Do not exercise on the machine if signs of excessive wear, loose hardware, or other defects are evident. Do not attempt to fix a defective machine. Notify Peak Pilates immediately regarding any defects. -
Page 5: Proper Use
™ properly to avoid injury or damage to the unit. Use only components provided by the manufacturer. DO NOT use parts or accessories or modify the machine in any way not approved by Peak Pilates . Keep ® a three-foot area (about one meter) around the equipment clear of obstructions. Make sure the machine is used on a level surface. -
Page 6: Warranty
BE WARRANTIED FOR THE REMAINDER OF THE ORIGINAL WARRANTY PERIOD ONLY. THIS WARRANTY BECOMES EFFECTIVE UPON THE INVOICE DATE OF THE ORIGINAL PURCHASE FROM AN AUTHORIZED PEAK PILATES ® DEALER ONLY. PEAK PILATES ® RETAINS THE RIGHT TO EITHER REPAIR, REPLACE OR REFUND THE PRICE OF ANY DEFECTIVE COMPONENTS UNDER THIS WARRANTY. -
Page 7: Specifications
fit™ REFORMER SPECIFICATIONS Weight: 110 lb / 50 kg Length: 97 in / 246.3 cm Width: 25 in / 63.5 cm Carriage Height: 16 in / 40.6 cm Maximum User Weight: 300 lb / 136 kilo Training Area Length: 121 in / 307 cm Width: 49 in / 124.46 cm 17 18... -
Page 8: Package Contents
REPLACEMENT PARTS PART PART NUMBER 1. fit™ Shoulder Pad Bracket 4610-02-2719 2. fit™ Rail Plate Assembly 4610-02-2737 3. fit™ Side Wheel Spacer 4610-03-1036 4.fit™ Wheel Spacer 4610-03-1037 5. fit™ Adjustable Weldment 4610-04-2289 6. fit™ Shoulder Pad Post 4610-05-0727 7. fit™ Head Pad Hinge 4610-05-0728 8. - Page 9 REPLACEMENT PARTS PART PART NUMBER 9. fit™ Shoulder Bolt Foot End 4610-05-0981 10. fit™ Allen Wrench 4610-05-0983 11. fit™ Gear Change Bar Eyebolt 4610-05-1002 12. fit™ Sleeve Standing Platform 4610-06-0303 13. fit™ Sleeve 4610-06-0846A 14. fit™ Sleeve Head End Assembly 4610-06-0977 15.
- Page 10 17. fit™ Foot End Leg End Cap 4610-06-0985 18. fit™ Foot End Stacking Bum- 4610-06-0986 19. fit™ Long/Short Box 4610-07-0358 20. fit™ Head Rest 4610-07-0362 21. fit™ Carriage Pad 4610-07-0363 22. fit™ Riser Assembly Pull Pin 4610-11-0117C Storage Bracket 23. fit™ Head Rest Support Block 4610-18-0008 24.
- Page 11 25. fit™ Wood Foot End Panel 4610-18-0034 26. fit™ Riser Assembly 4610-20-0434 27. fit™ Rope Cams 4610-20-0435 28. fit™ Shoulder Pad Assembly 4610-20-0436 29. fit™ Foot Bar Assembly 4610-20-0437 30. fit™ Gear Change Bar 4610-20-0438 31. fit™ Shoulder Pad BLK 4610-805-400 4810-805-026-7 (ExtraLight) 4810-805-026-4 (Light)
-
Page 12: Assembly
ASSEMBLY Unpack the Carton Open the box. Carefully remove all parts and verify that all components and accessories are included. Place protective cover on the floor (so the aluminum frame will not be scratched). With one person at each end of the reformer, lift the unit out of the box and place on the floor. WARNING SINCE NO SPRINGS ARE ATTACHED, THE CARRIAGE IS NOT LOCKED IN POSITION AND MAY START TO ROLL, BE EXTRA CAUTIOUS WHEN MOVING THE UNIT. -
Page 13: Attach The Springs
ASSEMBLY Attach the Springs Attach the reformer springs to the anchor bar on the underside of the carriage. The open part of the hook should be facing away from the carriage. Remove the shipping spacers located between the frame of the carriage and the aluminum rails. With two people holding the reformer, turn the unit over onto its legs. -
Page 14: Attach The Foot Strap
ASSEMBLY Feed the free end of each rope through the pulley on the riser assembly. Note that the ropes should only be Feed Free used when the risers are in the raised and engaged End of Rope position. Do not exercise on the reformer when the risers are in the low, stored position. -
Page 15: Attach The Reformer Straps Springs
ASSEMBLY Attaching the Reformer Springs The fit reformer comes with five reformer springs as described below: HEAVY – One heavy spring marked with a red tab. MEDIUM – Two medium springs marked with yellow tabs. LIGHT – Two light springs marked with blue tabs. WARNING AT LEAST ONE SPRING MUST BE ATTACHED TO THE GEAR BAR AT ALL TIMES. -
Page 16: Adjust The Headrest
ASSEMBLY Move gear block that the bar drops into the slot and is fully engaged. Pull out the gear block and place it in the location hole that corresponds to the gear bar position. Make sure that the pin is completely engaged in the hole. Gear bar Gear block ... -
Page 17: Operation
OPERATION Adjusting the Foot Bar The foot bar has four positions – three functional and one for storage. Three Functional Storage Positions Position To disengage and change the position of the foot bar: Lift the rod at the end of the foot bar support bar out of its locating slot while holding the foot bar with your other hand. -
Page 18: Using The Long/Short Box
OPERATION Installing the Jump Board To install the Jump Board perform the following: Lower the Footbar and Support Bar. Slide the Jump Board pegs into the holes located on the Standing Platform with the padded end facing the carriage. Using the Long/Short Box Use the Long/Short box by following the directions below. -
Page 19: Vertically Storing The Fit
OPERATION Pull the pin on each riser and make sure that they drop to their lowest position.. For the upper machine: Hook each double loop strap onto its respective storage post located behind the shoulder pad. For the lower machine: Slide the double loop straps off of the storage posts and drop into the well of the reformer. - Page 20 OPERATION Roll the machine to its desired storage location. WARNING VERIFY THAT THE FLOOR IS FLAT AND THAT THERE ARE NO OBSTRUCTIONS IN THE DESIRED STORAGE AREA. Carefully lift the head end of the machine from the cross member. Continue lifting by “walking” your hands along the left and right side rails until the storage bumpers located on the foot end cross member contact the flooring surface.
- Page 21 OPERATION INSPECT ☑ Overall Machine ☑ Springs ☑ Tracking System ☑ Hardware ☑ Foot Bar and Foot Bar Support Bar Overall Machine: We highly recommend that you visually inspect the machine daily. Springs: Even with extensive pre-testing and rigorous quality inspections, the possibility of spring failure exists. In addition, severe nicks or abrasions may develop as a result of misuse and could lead to springs breaking prematurely.
- Page 22 Please keep pets and small children away from the reformer at all times. The fit ™ reformer should also only be used by persons that have been trained and/or are being trained by Peak Pilates ® Certified Instructors or equivalent.
- Page 23 www.peakpilates.com PeakPilates Fit Owners Manual-2021.indd 21 PeakPilates Fit Owners Manual-2021.indd 21 8/9/21 9:42 AM 8/9/21 9:42 AM...
- Page 24 800.847.7746 (North America) customerserviceEurope@maddogg.com 310.823.7408 (Fax) info@peakpilates.com Copyright ©2021 Mad Dogg Athletics, Inc. All rights reserved. Spin , Spinner , Spinning , the Spinning logo, Peak Pilates ® ® ® ® fit™ reformer #20-036 Resist-A-Ball and are registered trademarks that are owned or used under exclusive license by Mad Dogg Athletics, Inc.
Need help?
Do you have a question about the fit REFORMER and is the answer not in the manual?
Questions and answers