Table of Contents
Advertisement
Advertisement
Table of Contents

Related Manuals for ESI IVX20


Summary of Contents for ESI IVX20
-
Page 1: Installation Manual
Installation Manual 0450-0072 Rev. B... - Page 2 About ESI ESI (Estech Systems, Inc.) is a privately held corporation based in Plano, Texas. Founded in 1987, ESI designs and builds innovative telecommunications products for businesses like yours. Because of their powerful com- bination of value and features, ESI products are consistently recognized by industry publications and leaders.
-
Page 3: Table Of Contents
Table of contents General description......................A.1 Hardware overview/installation.................... B.1 System programming: an introduction.................. C.1 Function 1: System parameters .................... D.1 Function 11: Initialize................................D.1 Functions 12 and 13: Installer and Administrator passwords...................D.1 Function 14: Set time/date..............................D.1 Function 15: System timing parameters..........................D.2 Function 16: Recording alert..............................D.2 Function 17: System speed dial............................D.3 Function 2: CO lines......................E.1... - Page 4 (This page included for pagination purposes only.)
-
Page 5: General Description
® Windows 95/98-based Esi-Access program (on a PC-compatible computer which has either dialed into the system from another location or is physically connected to its RS-232C serial port). Telephone system features IVX 20 expands from its basic four-line, eight-station configuration to a six-line, twelve-station configuration. -
Page 6: Voice Mail Features
General description IVX 20 Voice mail features • Six built-in voice mail ports — These are in addition to the up-to-20 possible call-processing ports; thus, you may build the system to its maximum for call-handling without having to bal- ance voice mail needs versus call-handling needs. •... -
Page 7: Hardware Overview/Installation
IVX 20 Hardware overview/installation Hardware overview/installation IVX 20 hardware components consist of a system cabinet configuration of 4 × 8 that can be ex- panded to a maximum configuration of 6 × 12 × 2. System cabinet ″ ″ ″ The wall-mounted cabinet, measuring 8 ½... -
Page 8: Key Expansion Console
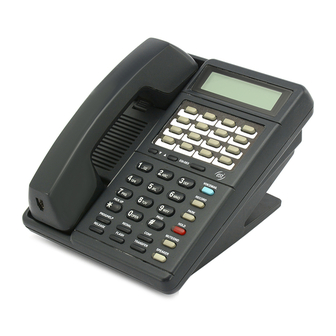
Hardware overview/installation IVX 20 TAPI Phone The TAPI Phone is a special version of the Digital Feature Phone. The TAPI Phone provides a DB9 connector and serial cable to facilitate serial connection to a PC serial port for such standard pack- ®... -
Page 9: Power Supply
IVX 20 Hardware overview/installation Cautions Important: This information complies with the requirements of Underwriters’ Laboratories (UL) and UL Standard 1950. When using this telephone equipment, always exercise basic safety precautions in order to mini- mize the risk of fire, electric shock or injury to persons. Before proceeding, please read the following: •... -
Page 10: Regulatory Information
Hardware overview/installation IVX 20 Regulatory information United States of America Registration The CO line telephone numbers, FCC registration number, and ringer equivalence number (REN) of this equipment must be provided to the telephone company before installation. (See below for FCC registration number and ringer equivalence number.) FCC Part 15 This equipment has been tested and found to comply with the limits for a Class A digital device, pursuant to Part 15 of the... -
Page 11: Hardware Installation
IVX 20 Hardware overview/installation Hardware installation Site location As with most electronic equipment, the environmental considerations for this site need to observe good common sense. Provide a dry, clean, and accessible area. Locate within the telephone equipment room a space which will provide easy connection to the 66 blocks and 110 VAC power. -
Page 12: Mounting The Cabinet
Hardware overview/installation IVX 20 Opening the cabinet The lid on all cabinets is held in place by two tabs that rest in slots in the bottom of the case. A release tab snaps into an opening in the top- center of the cabinet and is secured by a retaining screw. To remove the lid: Remove the retaining screw and depress the release tab at the top of the cabinet. - Page 13 Memory Module Note: The Memory Module is formatted with a proprietary format — do not attempt to install a non- ESI drive. Adding or replacing the Memory Module will require that the system be taken out of service. If the Memory Module must be replaced, all configuration data and customer recordings will be lost.
-
Page 14: External Connections
Hardware overview/installation IVX 20 External connections Grounding instructions IVX grounding (supplemental ground) is as follows: • The conductor wires can be no smaller than the ungrounded branch-circuit supply conductors (usually 16-gauge or higher). • Acceptable wire: bare or covered with green or green and yellow striped jacket. •... -
Page 15: Serial Port
Important: The overhead paging port is designed to handle 30 volts DC @ 1.0 amps. This limit is imposed to avoid high voltages on the 66 block. Therefore, please attach ® only approved devices to this port. ESI has tested the following Viking models of overhead pagers: CPA-7A and PZ-4. -
Page 16: Co Line Connection
Hardware overview/installation IVX 20 CO line connection Local loop IVX’s advanced CO line circuitry provides for open-loop detection and built-in Caller ID interface. Loop start lines are connected via the last six pairs on the 66 block (Lines 5 and 6 require the ex- pansion card). - Page 17 IVX 20 Hardware overview/installation TAPI Phone installation Important: These installation instructions apply only to the IVX 128/IVX 20 TAPI Phone. With the PC turned off, connect the provided serial cable to COM port 1 (or other available COM port) of the PC. Attach the other end of the cable to the nine-pin serial port on the back of the IVX 128/IVX 20 TAPI Phone.
- Page 18 Click Have disk..Insert the TAPI diskette in the A: drive of the PC and click OK. After the disk has loaded, another box will appear with “ESI IVX TAPI telephone” under the model category. Click Next. Select the COM port (as chosen in Step 1) to which the TAPI Phone’s serial cable is connected and click Next.
- Page 19 IVX 20 Hardware overview/installation Important: If you must update the modem driver If Step 2 of the software installation procedure revealed that the PC’s unimodem.vxd file is not at least version 4.10.31, you must update this modem driver file before installing the TAPI Phone software and before the TAPI Phone can operate.
-
Page 20: Power Led
Program the keys on the Expansion Console using the same procedure as with the Digital Fea- ture Phone (press PROG/HELP 2). Label the paper overlay to show how the keys are programmed, either with ESI Installer or manually. Install the labeled paper overlay on the 64-Key Expansion Console. - Page 21 IVX 20 Hardware overview/installation Worksheet Term Wire color Signal RJ11 Main board Expansion card White-Blue Data+ Green Digital Blue-White Data- White-Orange Data+ Green Digital Orange-White Data- White-Green Data+ Green Digital Green-White Data- White-Brown Data+ Green Digital Brown-White Data- White-Slate Data+ Green Digital Slate-White...
- Page 22 Hardware overview/installation IVX 20 (This page included for pagination purposes only.) B.16...
-
Page 23: System Programming: An Introduction
You can program the IVX 20 system either from a Digital Feature Phone or with the Windows 95/98-based Esi-Access package. Both methods follow the same programming steps. This manual focuses on programming from a Digital Feature Phone — the respective documentation for the Windows-based programming details the differences in programming from that environment. -
Page 24: Entering Alphanumeric Characters
System programming: an introduction IVX 20 Entering alphanumeric characters You enter names for extensions and departments by pressing the dial pad key that corresponds to the character to be entered. The key’s possible entries will change each time the key is pressed, and the display will show this. - Page 25 IVX 20 System programming: an introduction Accessing user station programming Should a user forget his password or if an employee leaves the organization, this feature allows the Installer or Administrator to enter a user's station programming and operate within it as if he were the user.
- Page 26 System programming: an introduction IVX 20 System programming overview 1 System parameters 3 Extension programming 11 Initialize 31 Extension definition and routing 12 Installer password 32 Extension feature authorization 13 Administrator password 33 Department groups 14 Set time/date 35 Extension button mapping 15 System timing parameters 4 Auto attendant programming 151 Flash duration...
-
Page 27: Function 1: System Parameters
IVX 20 Function 1: System parameters Function 1: System parameters Function 11: Initialize This function will do one of the following: • Reset — Erases all programmed configuration data but does not delete custom recordings made by the Installer or customer. After performing a reset, the system will match any previous custom recordings to the new configuration data. -
Page 28: Function 15: System Timing Parameters
IN MOST JURISDICTIONS, A CONVERSATION IS PERMITTED TO BE RECORDED IF ONE OF THE TWO PARTIES IS AWARE THAT IT IS BEING RECORDED. HOWEVER, ESI TAKES NO RESPONSIBILITY AS TO ITS LEGALITY IN ALL JURISDICTIONS. IT IS THE RESPONSIBILITY OF THE INSTALLING COMPANY AND THE END USER TO DETERMINE AND FOLLOW THE APPLICABLE STATE AND LOCAL LAWS REGARDING RECORDING OF CONVERSATIONS. -
Page 29: Function 17: System Speed Dial
600–699, for access by any station. A user can initiate a system speed dial by dialing the speed dial location number or by accessing the name through Esi-Dex’s System Dex feature. In Function 32, access to system speed dial can be denied to individual stations (see page F.5). - Page 30 Function 1: System parameters IVX 20 (This page included for pagination purposes only.)
-
Page 31: Function 2: Co Lines
IVX 20 Function 2: CO lines Function 2: CO lines The IVX 20 system can operate on a station-by-station basis as a PBX or as a combined KEY/PBX (default) using standard loop start lines. If a station has line keys programmed, the user accesses the lines by pressing one of these keys or by dialing 9 (or 8 or 7). - Page 32 Function 2: CO lines IVX 20 2. Outbound CO line groups CO lines can be grouped for outbound, pooled access into one of three line groups: 9, 8, or 7. Note: A line can only be in one line group or designated as a private line. Outgoing lines (selected by initially dialing 9 —...
-
Page 33: Function 22: Access Codes/Toll Restriction
IVX 20 Function 2: CO lines Night mode Once you have programmed all desired CO lines for day mode, repeat the programming steps for all desired CO lines for night mode. Default: Answer on ring 1 with ID1 (main greeting) in both day and night modes. Example: To have after hours calls directed to a general delivery mailbox, program the system as follows. -
Page 34: Function 23: Co Line Parameters
Function 2: CO lines IVX 20 You can program an allow exception table and a deny exception table in this function, to be excep- tions to toll restriction. A number listed in the allow exception table (e. g., a branch office or a vendor’s location) will be allowed to all stations, regardless of how they were programmed in Func- tion 32. -
Page 35: Function 24: Caller Id
Esi-Dex and auto callback — This is accomplished by pressing REDIAL (during message playback) or ESI-DEX (after an Esi-Dex search). Caller ID numbers received from the CO are 10 digits long (and include the area codes for local calls). In auto callback, IVX assumes all calls are to be long distance and will automatically add a “1”... - Page 36 Function 2: CO lines IVX 20 (This page included for pagination purposes only.)
-
Page 37: Function 3: Extension Programming
IVX 20 Function 3: Extension programming Function 3: Extension programming This section provides programming for extensions and department groups. Important: Where any gray shading ( ) appears in an example, it represents values either unavailable for programming by the function (e.g., call recording for an analog phone) or unused in the particular example. - Page 38 Function 3: Extension programming IVX 20 4. CO line group Assigns the extension’s ability to access one or more CO line groups (9, 8, and 7). Default: 9. 5. Extension page zone assignment List the page zones (1, 2, 3) that are to include this extension. All stations are in All Page and can- not be edited.
- Page 39 IVX 20 Function 3: Extension programming Here are the steps for programming analog ports: 1. Extension Number Analog port extension numbers must be x112 or x113. 2. Type The two analog ports can be defined as follows: • Phone (PHONE) — Designed to provide for standard 2500-type phones. See the IVX 20 user guide for complete description to the capabilities.
- Page 40 Function 3: Extension programming IVX 20 Example: Here is a portion of a completed programming worksheet (Appendix II) for analog ports. Extension 112 is an analog phone and extension 113 has a fax machine connected. Fax tones detected at the main greeting will be trans- ferred to this station (user may also manually transfer a caller to this extension who wish to send a fax.
-
Page 41: Function 32: Extension Feature Authorization
IVX 20 Function 3: Extension programming Dry contact control The manner in which the dry contact pair is punched down on the 66 block sets the pair as either normally open (sending a page to the port will close the contacts) or normally closed (sending a page to the port will open the contacts). -
Page 42: Function 33: Department Programming
Function 3: Extension programming IVX 20 Function 33: Department programming You can create up to 10 departments (or “hunt groups” ), each with a maximum of 14 extensions. You also can assign an extension to more than one department. Department numbers range 290– 299. -
Page 43: Function 35: Extension Button Mapping
IVX 20 Function 3: Extension programming Example: Here is a portion of a completed Programming Worksheet (Appendix II) for Department programming. Department 290 was created to have calls directed to it to first ring 104, then, if busy/no answer, 111, and then 112. If all are busy or do not answer, the call will forward to the operator if day mode or if during Night Mode to guest mailbox 300 (for pick up in the morn- ing). - Page 44 Function 3: Extension programming IVX 20 Feature key Feature keys, as listed below, cannot be programmed system-wide but must be programmed for each individual station. See “Accessing user station programming” (page C.3) and the User’s Guide for a detailed description of each key. Code Feature User’s Guide...
-
Page 45: Function 4: Auto Attendant Programming
IVX 20 Function 4: Auto attendant programming Function 4: Auto attendant programming You can program the auto attendant, in line programming (Function 2; see pages E E .1–E.5), to an- swer calls immediately, on a delayed-answer basis, or not at all (i.e., for live answer at all times). Day/night mode will change the main greeting announcement and affect rerouting of calls during call processing. -
Page 46: Additional Notes
Function 4: Auto attendant programming IVX 20 Directory branch (ID 18) Branch 18 (selection 8 in the main greeting) is the directory branch which allows the caller to be connected to an employee by selecting his or her name from a list played. The caller selects the person he wishes to reach from the playback of all recorded names. -
Page 47: Function 43: Automatic Day/Night Mode Table
IVX 20 Function 4: Auto attendant programming Function 611, Daytime Main Greeting: “Thank you for calling. If you know your party’s extension, enter it now. For Sales, press 1. For Administration, press 2. For Technical Support, press 3. For a company directory, press 8. Or, to reach the Operator, Main press 0.”... - Page 48 Function 4: Auto attendant programming IVX 20 (This page included for pagination purposes only.)
-
Page 49: Function 5: Voice Mail Programming
IVX 20 Function 5: Voice mail programming Function 5: Voice mail programming To simplify initial installation, all programmed extensions will automatically have a mailbox with the generic personal greeting, “You have reached the mailbox for extension [xxx].” The mailbox user should replace this with a personalized greeting. -
Page 50: Message Length
Function 5: Voice mail programming IVX 20 The sequence of programming is as follows: CO line access — Input the CO line group (9, 8, or 7) that is to be accessed for paging. Dialing pause — Input the pause in seconds that is to occur after the pager numbered has been dialed and before the mailbox number is to be dialed. -
Page 51: Function 61: Recording
IVX 20 Function 6: Recording Function 6: Recording Function 61: Re-record main greeting The main greeting prompts are re-recorded here. Recording a prompt Practice the prompt by recording and re-recording (start and stop by pressing 1). When satisfied with its quality, press # to confirm. Note: Deleting a system prompt by pressing HOLD (instead of #) restores to the default recording. -
Page 52: Function 63: Message-On-Hold (Moh) Programming
Function 6: Recording IVX 20 Function 63: Message-on-hold (MOH) programming MOH can be: • A live feed from an external music source connected to the MOH connector located on the side of the cabinet. • One of three default, generic MOHs pre-recorded by the factory. Function 631: MOH source This selects the source that will be played to callers on hold. -
Page 53: Function 7: Reports
IVX 20 Function 7: Reports Function 7: Reports Serial printer/SMDR capture Connect a standard serial printer or call accounting system to the serial port. SMDR data is output in real time to the port. SMDR data will be stored temporally if a laptop is connected for program- ming (five minutes after you exit programming mode, the buffered SMDR will resume output to the serial port). -
Page 54: Pc Interface
Use an RS-232C cable to connect a computer’s serial port to the serial port of IVX 20. When connected to IVX 20, the computer resets the baud rate for faster communications. Once connected, the installer can: • Program the system using the PC programming package, ESI Installer. • Capture debug information. • Update system software. -
Page 55: Index
Recording, F.6, I.1–I.2 Department programming, F.8–F.9 MOH programming, I.2 Digital Feature Phones. See Phones Recording directory names, I.1 ESI Installer software, J.2 Re-recording main greeting, I.1 Esi-Access software, C.1 Recording tone, D.2 Esi-Dex, D.3, E.5 Regulatory information (U.S. and Canada), B.4 System speed dial, F.6...
Need help?
Do you have a question about the IVX20 and is the answer not in the manual?
Questions and answers