
Subscribe to Our Youtube Channel
Related Manuals for EverFocus PARAGON 264x1


Summary of Contents for EverFocus PARAGON 264x1
- Page 1 User Manual...
-
Page 2: User Manual
All rights reserved. No part of the contents of this manual may be reproduced or transmitted in any form or by any means without written permission of the Everfocus Electronics Corporation. Release Date: Dec. 2011 QuickTime is a registered trademark of the Apple Computer, Inc. -
Page 3: Safety Precautions
SAFETY PRECAUTIONS Ventilation Slots: Do not block the ventilation openings or slots on the cover. Limits for Temperature, Humidity and Power: Do not operate the device beyond its specified temperature, humidity or power source ratings. Do not use the device in environments with very high temperature or humidity. Use it at temperatures between -20~55ºC (-4~131ºF). - Page 4 ATTENTION! This is a class A product which may cause radio interference in a domestic environment; in This is a class A product which may cause radio interference in a domestic environment; in This is a class A product which may cause radio interference in a domestic environment; in this case, the user may be urged to take adequate measures.
-
Page 5: Table Of Contents
TABLE OF CONTENTS PRODUCT OVERVIEW ..........................1 FEATURES ............................... 1 PACKAGE CONTENTS ........................... 2 SPECIFICATIONS ........................... 3 FRONT PANEL ............................4 REAR PANEL ............................6 VIDEO INPUTS/OUTPUTS INSTALLATION ..................7 AUDIO INSTALLATION ........................7 ALARM CONTACTS INSTALLATION ....................7 1.8.1 Alarm Input Contacts ................................ - Page 6 SEQUENCE (DISPLAY SEQUENCE) ....................23 MONITOR............................... 23 ZOOM ..............................24 SEARCH ..............................24 4.9.1 Time Search ..................................24 4.9.2 Event Search ..................................25 4.9.3 Smart Search ..................................25 4.9.4 SNAPSHOT ................................... 27 4.10 COPY ..............................27 4.11 LOGOUT .............................. 27 THE CONFIGURATION SUBMENU .....................
- Page 7 ....................77 EMOTE MART HONE VIA COMPUTER ....................79 EMOTE ..........................80 EMOTE LAYBACK EVERFOCUS DDNS SETUP ........................81 LINKSYS & D-LINK PORT FORWARDING ..................82 TYPICAL L ....................82 INKSYS ORWARDING TYPICAL D-L ....................83 ORWARDING 10 TROUBLESHOOTING ..........................85 APPENDIX A: TIMING OF ALARM MODES ....................
-
Page 8: Product Overview
The Paragon264x1 16-channel DVR permits multiple control options. These include mouse control, front-panel control, IR remote control and control via the EverFocus keyboard (EKB500). These control options employ a simple Graphical User Interface (GUI) that echo standard computer GUIs and therefore make it easy for experienced PC users to intuitively grasp the DVR’s configuration menus. -
Page 9: Package Contents
• 10/100M Ethernet interface for remote network viewing and control • On-screen PTZ control via mouse or front panel • Audio recording capabilities • Supports up to 2 hot-swappable, internal HDDs* • Supports 1 eSATA HDD (external HDD not hot-swappable) •... -
Page 10: Specifications
12VDC – Power Supply Included Dimensions (L x W x H) 353.0 x 354.8 x 70.60 mm / 13.89" x 13.96" x 3.055" Temperature 0°C~40°C / 32°F~104°F (20~80% humidity) Certifications CE, FCC, UL Supported PTZ Protocols EverFocus, Pelco D, Pelco P, Samsung, Transparent... -
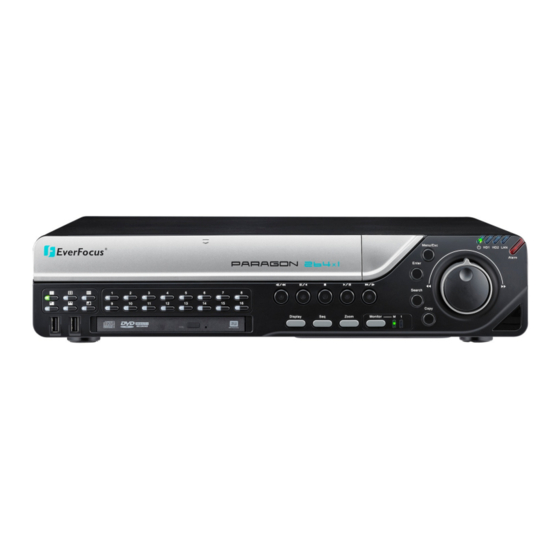
Page 11: Front Panel
1.4 FRONT PANEL Your primary interaction with this DVR will be through the Front Panel buttons and their corresponding buttons on the DVR will be through the Front Panel buttons and their corresponding buttons on the DVR will be through the Front Panel buttons and their corresponding buttons on the included IR Remote Control. - Page 12 11) Fast Reverse: Press this button to play the recorded data in fast reverse. A green LED at the center of the button will turn on if this function is active. This reverse play speed will double every time you click the button until it reaches -32x reverse playing speed.
-
Page 13: Rear Panel
1.5 REAR PANEL During initial setup you will be connecting your DVR to mul During initial setup you will be connecting your DVR to multiple input and output devices. This is done via This is done via the rear panel. 1) Power Plug: Plug the DC 12V power source provided into the power socket. -
Page 14: Video Inputs/Outputs Installation
1.6 VIDEO INPUTS/OUTPUTS INSTALLATION Cameras and CCTV monitors must use copper-core or copper-braid 75 Ohm video cable (e.g. RG-59, RG-6, RG-11) with BNC connectors. To avoid impedance mismatching and undesired loss/reflections, 50 Ohm coax cable (e.g. RG-58), or 75 ohm foil shield antenna cable and other types of coaxial cable should not be used. -
Page 15: Alarm Output Relay
Cable length from box to device („Stubs“) has to be limited to 2m using connector boxes. RS-485 bus serial wiring with connector boxes and connection cable Direct RS-485 bus star wiring is not supported unless using an EverFocus Model EDA997A (see below). INCORRECT RS-485 bus star wiring! -
Page 16: Rs-485 Socket Pin Assignment
Star wiring with RS-485 signal distributor An RS-485 distributor can also be used to increase the maximum number of devices on the bus as well as the total range. Each distributor output provides another RS-485 bus. This allows each output to extend an additional 1200m, and it also enables the additional connection of 31 further devices to each output (the output itself represents one device). -
Page 17: Speed Dome Installation
DVR is connected to a network. Local PTZ/telemetry control can be done via USB mouse or by the optional EKB-500 keyboard. Supported protocols: EverFocus, Pelco-D, Pelco-P, Samsung, Transparent Required DVR settings: 1) Enter the RS-485 receiver address (PTZ ID) in the Camera Setting > Basic Setting submenu of the Configuration menu. -
Page 18: Network Connection Through Patch Cable
1.11.2 Network Connection through Patch Cable The connection to an existing network requires a normal patch cable (straight-through). The illustration shows the connection to a network switch or router. Network Connection through Patch Cable: Pinout of straight patch cable: 1.12 FINAL INSTALLATION PROCESS Once you have completed the basic wiring connections, you can turn on the DVR. -
Page 19: Using The Mouse And Front Panel
Chapter 2 USING THE MOUSE AND FRONT PANEL This DVR supports multiple methods of control. It can be controlled with a mouse, the front panel buttons, an EKB500 keyboard, and the included handheld IR remote control. This chapter will cover doing the basic control functions with the mouse and the front-panel buttons. 2.1 USING THE MOUSE 2.1.1 How to select a Channel and enable its Audio 1. -
Page 20: Using The Configuration Menu's Submenus
2.1.3 Using the Configuration Menu’s Submenus Click on the icon to access the Configuration menu. The Configuration menu screens are divided into 3 main sections. 1. The Top Bar shows the shortcut icons of the ten submenus of the Configuration menu. The blue frame around the Camera icon shows that the Camera submenu has been selected. -
Page 21: Using The Front-Panel Buttons
Button: Click these buttons to activate their functions. Slide bar: Click and drag the bar to the desired value. * Note about the on-screen keyboard: Click on a button to input that character. The buttons on the right and bottom have the following functions: Space Enter a space Caps... -
Page 22: Basic Principles Of Front-Panel Button Navigation
2.2.3 Basic Principles of Front-Panel Button Navigation The basic principle of navigating with the front-panel buttons is to use the control wheel’s outer ring to scroll through the menu items. If the outer ring cannot be used to scroll, it would indicate that the wheel’s inner disk can and should be used to scroll (as is the case with certain submenus). -
Page 23: Field Input Options
3. The Main Body shows all the options for the selected submenu. Use the control wheel’s inner and outer parts to move between items and press “Enter” to make changes to that item. Note: Press the “Menu” button to go back to the previous menu section/level. 2.2.5 Field Input Options Text box: When this type of field is highlighted, press the Enter key and an on-screen keyboard will appear*. -
Page 24: General Dvr Operations
Chapter 3 GENERAL DVR OPERATIONS This chapter introduces the operations of major functions such as playback, layout changes, sequence, triplex operations, copy, and search. 3.1 RECORD By default, the DVR will start to record all channel feeds when it is switched on the first time. This will only change after the following configuration actions: 1. -
Page 25: Select A Camera For Configuration
• To input the password with the front-panel buttons: Use the control wheel to highlight each character and press the “Enter” key on the front panel to input the selected characters. When finished, highlight the Confirm icon ( and press the “Enter” key on the front panel to confirm, save and exit the keyboard. 4. -
Page 26: Main Menu Bar
Chapter 4 MAIN MENU BAR 4.1 PLAYBACK The playback bar is the fastest way to show footage from the exact time in the selected channel’s recorded footage that the user wants to see. The playback bar allows a user to see the timeline of a selected channel and the current playback moment (indicated by the bar’s slider tab and its time indicator below the bar). -
Page 27: Ptz
event recording period; blue indicates a video-loss-event recording period, red indicates an alarm-event recording period. 10. The “+” and “-“ signs are used to decrease or increase the time scale of the time bar. Press “+” or “-“ to select between scale levels L1 ~ L5. -
Page 28: Ptz Express Control
Click the “Auto Pan” button 10. For Pattern (Pattern is the “0” Tour in Everfocus and Pelco PTZ cameras) a. Click the “Pattern” button b. If more than one pattern has been programmed, click the number of the desired pattern c. -
Page 29: Layout
4.3 LAYOUT This DVR offers several display modes, similar to the ones shown below: NOTE: PIP (Picture in Picture) display is not available in Playback mode To change the layout, follow the steps below: With the mouse: Right-click to bring up the menu bar and click , then click on the desired layout choice. -
Page 30: Display
4.5 DISPLAY Press the Display button on the menu by using the mouse or selecting this icon with the front panel keys and pressing ‘Enter’. Pressing/clicking this icon repeatedly will cycle through the four OSD formats: 1. Press once to show camera information. See the table below for the meaning of the camera information icons. Recording Playback Fast forward... -
Page 31: Zoom
4.8 ZOOM 1. Make sure no camera is in playback mode. To make sure, click the Playback icon and then click the square Stop button at the top right of the Playback Bar. 2. Select one camera 3. Right-click to bring up the menu bar and click the button. -
Page 32: Event Search
4.9.2 Event Search From: Select the start date and time of the period that the DVR should search for Event footage. To: Select the end date and time of the period that the DVR should search for Event footage. Camera: Select which cameras’ footage to include in the search. - Page 33 Cancel: Press this button to cancel all changes and return to the Smart Search submenu. How to select a Motion Detection search area with the MOUSE: 1. Click on the editing screen to reveal the grid. 2. Decide what area you want to select and click on the grid block at the upper left corner of the area you want to select.
-
Page 34: Snapshot
4.9.4 SNAPSHOT The Snapshot submenu allows the user to search for a specific recorded incident by viewing a list of video snapshots. These snapshots of recorded video are taken by the DVR and listed in chronological order. The time period of the searched recording and the time interval between each consecutive snapshot depends on the settings configured on this page. -
Page 35: The Configuration Submenu
Chapter 5 THE CONFIGURATION SUBMENU This chapter will walk you through the DVR Menu Settings step by step and show you how to configure the DVR for your specific application. 1. To bring up the Main Menu, press the “Menu” key on the front panel, or right-click with the USB mouse to bring up the OSD Menu bar. - Page 36 Time: This sets the current time of the DVR. Record Mode: Choose from these options … ------------------: Each camera keeps its own, individual recording settings. Normal+Event: All cameras will be set up for Normal recording (continuous recording until recording is switched off by the user) and Event recording.
-
Page 37: Camera Setting
Subnet Mask: This field shows the subnet mask for your network so the DVR will be recognized within the network. If DHCP or PPPoE is selected, this value will be assigned automatically. Gateway: This field shows the gateway for your network so that the DVR will be able to communicate outside the network. If DHCP or PPPoE is selected, this value will be assigned automatically. - Page 38 In these examples, the recording capacity of the DVR is fully allocated to normal recording, with no reserve capacity for increasing image size and/or FPS rate in response to a motion or alarm event (see next item). Since EverFocus DVRs have the capability to change the size of recorded frames and the FPS rate in response to events, it may be advisable to reserve some recording capacity for when an event response is triggered.
-
Page 39: Video Adjust
responding to an event at any given moment. In the example above, with 225 CIF FPS allocated and 255 CIF FPS remaining, it would be possible to increase the FPS rate on the two 4 CIF cameras from 10 FPS to 15 FPS and also increase the resolution and rate of the five 2 CIF cameras to 4 CIF and 15 FPS, with 15 CIF equivalent FPS still available to be assigned to one or more of the nine CIF resolution cameras. - Page 40 feed will be displayed in full screen on the Main monitor. Call Monitor: Call-monitor display reaction options when a motion event occurs. No change: No change on the call-monitor display. Full screen: If this camera experiences a motion event, its feed will be displayed in full screen on the Call monitor. Pre-alarm Record: Check this box to add to the motion-event recording (recorded on the hard disk) footage from 10 seconds before the motion event.
-
Page 41: Video Loss
Set All: Press this button to select the entire area. Clear All: Press this button to clear all the selected grid blocks. Save & Back: Press this button to save the motion grid setting and return to the Motion setting menu. Cancel: Press this button to cancel all changes and return to the Motion setting menu. -
Page 42: Record & Play
Pre-alarm Record: Check this box to add to the motion- event recording (recorded on the hard disk) footage from 5 seconds before the video-loss event. (This Pre-alarm recording’s frame rate will follow the “Normal” frame rate settings.) Buzzer: Check this box to activate the DVR’s buzzer when a video-loss event occurs. -
Page 43: Built-In Cal
The use of record overwrite is strongly recommended. If you do not use this feature, please be sure to make specific arrangements to monitor/be notified when the disk is full. Schedule Record: If this box is checked, the recording schedule set up in the Schedule Setting > Schedule menu page will be active, and all other recording settings will be subject to this setting (i.e. -
Page 44: Play
5.3.3 Play Quick Playback: Check this box to enable the Quick Playback function as described below. Playback From x Seconds ago: If this setting is “x” seconds, and if the user presses the Play front-panel button (or clicks on the Playback icon), the DVR will begin playing back footage from exactly “x”... -
Page 45: Event
N.C.: Normal Closed contact. Active Camera: This field is for associating this alarm device with a specific camera. For example, if you had an external motion detector near camera four, you would select “4” here. This alarm will be associated with this camera for optional full-screen display, event logging, and PTZ preset activation. - Page 46 reactions. These are the event types: Fan Failure: If configured to do so, the DVR will create this event if the fan stops working, or if the fan is not working on start-up. HD Temperature: If configured to do so, the DVR will create this event if the hard drive is starting to overheat. HD Failure: If configured to do so, the DVR will create this event if it fails to detect the HDD on startup.
- Page 47 Network Alarm: Check this box to send out a network alarm to a client PC when this event occurs. (This feature requires PowerCon software on the client PC and proper settings for the Alarm Server in the Network Setup menu; see the Alarm Server section for more information.) Stop Recording: Check this box to let the DVR stop recording when its HD’s temperature goes over the selected limit.
- Page 48 see the Alarm Server section for more information.) Alarm Output: Click on one of the numbers in the dropdown box to let the DVR transmit a signal through the alarm output with the same number, if this event occurs. Selecting “None” would disable this reaction. Output Type: If an Alarm Output has been selected above this setting, this setting will decide how that Output is transmitted when this event occurs.
- Page 49 Power Loss: Log: This box should be permanently checked to log all Power Loss incidents. Email Notify: Check this box to enable email notification of this event when power has been restored. This requires that valid email settings have been entered in the Network Setting >...
-
Page 50: Schedule Setting
5.5 SCHEDULE SETTING On the right is a screenshot of the SCHEDULE SETTING MENU. In this menu you can set periods during which the DVR will record the feeds of selected cameras. These schedules will ONLY be active if the Schedule Record box has been checked in the Record &... -
Page 51: Schedule
Date Type: Select either “Holiday” or “Others”. (These are two different groups, you can assign special days in each group.) Recurrent Type: Choose how often each scheduled day should be applied. Disabled: Ignore this entry (on hold for later activation). One time: This schedule is used only once, on the specified date. - Page 52 1. The default color of each day’s timeline is blue (N+E). Go to Wednesday’s timeline and turn the period from 00:00-06:00 to gray (NoR) by clicking on the “0” (for 00:00) area of the timeline (on the far left). (There are 24 numbered blocks above the timelines, representing the 24 hours of the day).
- Page 53 To set a camera channel’s recording schedule using the Front Panel: In Brief: Use the example above (mouse configuration) to understand the logic of setting the recording modes per camera and per period for the Recording Schedule. Then, apply the logic of the Front-Panel navigation rules (p14-15) to scroll between submenus and setting values.
- Page 54 In these examples, the recording capacity of the DVR is fully allocated to normal recording, with no reserve capacity for increasing image size and/or FPS rate in response to a motion or alarm event (see next item). Since EverFocus DVRs have the capability to change recorded image size and FPS rate in response to events, it may be advisable to reserve some recording capacity for event response.
-
Page 55: Alarm Action
The Apply to Days button: This button can be used to copy schedules to other days. Select which days you wish to copy to. "Select All" selects all days, “Clear All” deselects all days. Click “OK” to copy the settings or "Cancel" to exit without copying. - Page 56 highlighted in blue frame. Initially, the selected block and all following blocks will be gray, which means this gray period has been set to the recording mode corresponding to gray (alarm action recording OFF). 4. Change the section to different mode (with a different color) by clicking on the first block of the section. The color switches from gray >...
-
Page 57: Network Setting
5.6 NETWORK SETTING This menu is for configuring the DVR for a network connection. NOTE: Since every Network Configuration is different, please check with your Network Administrator or ISP to see if your DVR should use specific IP addresses and/or port numbers. -
Page 58: Email
The DNS server IP is required because your DNS server provides critical information necessary for the DVR to communicate with the DDNS server. You can obtain the actual DNS IP from your Internet Service Provider (ISP); or, from a PC located on the same LAN as the DVR, go to http://www.dnsserverlist.org/ to obtain a list of the IP addresses of their recommendation of the best servers to use for your location. -
Page 59: Ddns
Example: http://hostname.everfocusddns.com It is not necessary to append the HTTP port number to the DDNS name. The EverFocus DDNS server not only keeps track of your DVR’s IP address, it keeps track of the ports too! www.dyndns.org... -
Page 60: Alarm Server
Confirm: Re-enter password. Note: For more details on DDNS setup, please see “Chapter 8 - Everfocus DDNS Setup”. 5.6.4 Alarm Server This menu defines the parameters for communicating with a PC that runs PowerCon software. Server IP1~3: IP address of client PC with installed PowerCon Software. -
Page 61: Disk (Information)
5.7 DISK (INFORMATION) On the right is a screenshot of the DISK INFORMATION MENU. This menu is used to review the DVR’s hard drive settings and status. No values in this screen can be changed by the operator. 5.7.1 Disk Record Time (Start): Shows the moment when the first footage that is currently recorded on the DVR, was recorded. -
Page 62: Display Setting
5.8 DISPLAY SETTING Below is a screenshot of the DISPLAY SETTING MENU. This menu gives you the Main Monitor On-Screen Display (OSD) and Main Monitor Sequence setup options. 5.8.1 Monitor OSD Main Monitor These are the display options for the Main Monitor. Camera Title: Check this box to display camera titles. -
Page 63: Call M/T Seq
5.8.3 Call M/T Seq. Use this menu page to configure the dwell times (the number of seconds a specific channel will be displayed) and the order in which the camera channels will be displayed on the Call Monitor. The configured sequence will repeat continuously from steps 1 through 20 until interrupted. -
Page 64: Daylight Saving
5.9.2 Daylight Saving Daylight Saving: Check the box to enable automatic daylight saving time adjustment. Start Date: Set the start date for daylight saving time. Start Time (hh:mm): Set the time when daylight saving time begins. Set To (hh:mm): This is what the time will change to when daylight saving begins. -
Page 65: I/O Control
Sequence Monitor Zoom Search Copy Config. View Covert Cameras Logout Configuration Menu of the DVR User Level and Right RIGHT ADMINISTRATOR MANAGER OPERATOR Express Camera Record/Play Alarm/Event Schedule Network Disk Display System Info *Managers can only access the USER submenu of the System Setting menu. They can only change their own passwords and that of “operator”... -
Page 66: Misc
RS485 PTZ Protocol: Select PTZ protocol, choose from the following protocols: Transparent, Pelco D, Pelco P, Everfocus, or Samsung. (NOTE: all cameras on the bus must use the same protocol) 485 ID: This is the ID used by the EKB500 to send commands to the DVR. On an RS485 connection, every device (PTZ, DVR and controller) must be assigned a unique ID number between 0 and 127. -
Page 67: Information
5.10 INFORMATION Below is a screenshot of the INFORMATION MENU. This menu displays important (read only) system information. 5.10.1 System System Version: Displays the firmware version number. Model: Displays the DVR model number. NTSC/PAL: Displays the current video format (i.e. the format that was auto-detected on the Channel 1 input during boot-up). - Page 68 User: to see log entries related to user access. View Log: Press “View Log” button to view the log. See the image below for more detail. Clear Log: Press “Clear Log” button to clear the log. Export Log to USB: Press “Export’ button to export log data to USB. Log List: Prev Page: Go to the previous page of the log.
-
Page 69: Networking Overview
Chapter 6 NETWORKING OVERVIEW This chapter will give you a basic instruction on how to set up the DVR for network connection. It is highly recommended that you have a working knowledge of what a network is and how it works. This will be helpful in completing the networking process. -
Page 70: Pre-Installation
Internet users always know the address of your location and can easily connect with it. This makes it much simpler to host a website, email server, or other type of server connection. Everfocus suggests using a static IP address. If this is not available, you will need to use a dynamic IP address. This is explained below. -
Page 71: What Is Your Network Setup
IP information can be stored and retrieved. It allows those using a dynamic IP address to be registered centrally so users can connect to it by name. See Chapter 7 for details on using EverFocus DDNS. What type of DVR are you installing? - Page 72 Once you have a cross-over cable, plug one end into the LAN port on the back of the DVR and the other into the network card’s connector (LAN port) on the back of the computer. Log into the EverFocus DVR menu and go to the Network Setting Menu. You must use the Static IP option for this type of connection.
- Page 74 Click on the option that says “Use the following IP address” Assign an IP address of 192.168.1.2, a Subnet Mask of 255.255.255.0, and a Default Gateway of 192.168.1.1, then click OK. Restart both the computer and the DVR. To access the DVR from the computer, simply open Internet Explorer and in the address bar type: http://192.168.1.3...
-
Page 75: Direct High-Speed Modem Connection
Once you have a straight through cable plug one end into the LAN port on the back of the recorder and the other into the high-speed modem. Log into the EverFocus DVR menu and go to the Network Setting Menu. Input the Static IP address, the Subnet Mask, and the Gateway that you obtained from your internet service... -
Page 76: Router Or Lan Connection
Note: If you have a dynamic IP address, you can set the DVR to DHCP to automatically detect the network settings. However, if you want to access the DVR over the Internet (not just over a LAN), it is highly recommended that you use a static IP address. - Page 77 Once you have a straight-through cable, plug one end into the LAN port on the back of the DVR and the other into the router. Using the DVR’s mouse or front-panel buttons, log into the EverFocus DVR go to the Network Setting menu. To let the router automatically assign an address (dynamic IP address): Set the Network Type to DHCP.
- Page 78 Take the computer’s values for Subnet Mask and Default Gateway and input them into the DVR; these values should be exactly the same in both devices. However, you should change the last number of the IP address. For example, if the IP address of the computer is 192.168.2.101, the DVR’s IP address should be 192.168.002.050.
-
Page 79: Remote Operation From Browser
Chapter 7 REMOTE OPERATION FROM BROWSER 7.1 CONNECTING TO THIS DVR To access the DVR from a computer, open an Internet Explorer window and type the IP address in the address bar. Note: The Paragon264x1-16CH DVR supports browsers of Microsoft IE9 or earlier with all 32-bit operating systems ... -
Page 80: Browser Security Setting
7.2 BROWSER SECURITY SETTING 7.2.1 Installing ActiveX controls When you first connect to the DVR’s IP address, you should see a screen like the one below. If you do not see a yellow bar like the one the arrow is pointing at, your security settings may be too high. If so, go to “Section 6.2.2 - Enabling ActiveX Controls.”... - Page 81 Right click on the yellow bar and select “Run Add-on…” Install the MSXML file when prompted to do so. Now, you will able to see the remote live page.
-
Page 82: Enabling Activex Controls
7.2.2 Enabling ActiveX Controls Note: This section is only necessary if you DO NOT see the yellow ActiveX bar at the top of your browser screen when you first connect to the DVR. At the top of the Internet Explorer Window, click on Tools, then select Internet Options. Click the Security tab at the top of the window, then choose Custom Level near the bottom. - Page 83 In the Security Settings window, scroll to “ActiveX controls and plug- ins” Set the controls as follows: “Enable”: Allow previously unused ActiveX controls to run without prompt (Internet Explorer 7 only) Allow scriptlets (IE7 only) Automatic prompting for ActiveX controls Binary and script behaviors Display video and animation on a webpage that does not use external media player (IE7 only)
-
Page 84: Remote Live View Via Smart Phone
7.3 REMOTE LIVE VIEW VIA SMART PHONE You can now get remote access to your EverFocus DVRs and view all their camera feeds remotely from any web-capable smart phone and via any web browser. (These DVRs include EverFocus’ “High Definition”, “Paragon”, “Paragon264”, and “ECOR264” lines of DVRs). - Page 85 In the Site Name field, enter an easy-to-remember name for the DVR installation you want to view. d. Model : Click this field to get a dropdown menu with all the EverFocus model names. Tap the model name of the DVR you want to view.
-
Page 86: Remote Live View Via Computer
7.4 REMOTE LIVE VIEW VIA COMPUTER 1. Click on a camera number on the left side of the display to switch that camera to full screen. Click on “4UP” to display 4 screens, click on “9UP” to display 9 screens or click on “16IP” to display 16 screens. 2. -
Page 87: Remote Playback
Display Setup System Setup Information Setup Video Export Playback Search PTZ Control 5. In the main page, you will see live images in a 16-screen display. 7.5 REMOTE PLAYBACK To playback the video, click the “Search” button. Select from “Time Search”, “Event Search”, or “Motion Search”. -
Page 88: Everfocus Ddns Setup
Step 5. You should now be able to connect by typing the name you created into the address bar. Example: http://hostname.everfocusddns.com It is not necessary to append the HTTP port number to the DDNS name. The EverFocus DDNS server not only keeps track of your DVR’s IP address, it keeps track of the ports too! -
Page 89: Linksys & D-Link Port Forwarding
Chapter 9 LINKSYS & D-LINK PORT FORWARDING 9.1 TYPICAL LINKSYS PORT FORWARDING This section will cover a few simple configurations for the Linksys router. This chapter is only to offer some help to the installer and end user. Please understand we DO NOT support this product and will not give tech support on it. If you need additional technical support on this router you must call Linksys. -
Page 90: Typical D-Link Port Forwarding
IP Address - For each application, enter the IP Address of the PC running the specific application. Enable - Click the Enable checkbox to enable port forwarding for the relevant application. When finished making changes, click the Save Settings button to apply your changes or Cancel Changes to cancel them. - Page 91 local services. Protocol Type - The protocol used for the virtual service. Private Port – The port number that the service uses on the LAN (Local Area Network). Public Port - The port number that the services uses on the WAN (Wide Area Network). Schedule –...
-
Page 92: Troubleshooting
Chapter 10 TROUBLESHOOTING If you have problems with the system, run through the following checklist to see if you can solve the problem. The DVR will not go into record mode. Bring up the DVR’s Menu and check the Camera Setting menu. Verify that all connected cameras are checked as “Installed”... -
Page 93: Appendix A: Timing Of Alarm Modes
Appendix APPENDIX A: TIMING OF ALARM MODES Transparent Mode Input Event Alarm Duration Event = Reaction Duration of alarm input source (motion, contact, system events...) Event Resulting duration for this alarm mode, related to event record, alarm outputs, OSD message, buzzer reaction Timeout + Transparent Mode Input Event... - Page 94 Timeout Mode Input Event Alarm Duration Event Duration = Reaction Duration of alarm input source (motion, contact, system events...) Event Alarm duration for timeout, defined in the event setup menus Duration Resulting duration for this alarm mode, related to event record, alarm outputs, OSD message, buzzer reaction Permanent Mode Alarm Reset...
- Page 95 Timeout Mode: Retrigger of Alarms Duration of alarm input source (motion, contact, system events...) Event Alarm duration for timeout, defined in the event setup menus Duration Resulting duration for this alarm mode, related to event record, alarm outputs, OSD message, buzzer reaction Timeout+Transparent Mode: Retrigger of Alarms Duration of alarm input source (motion, contact, system events...)
-
Page 96: Appendix B: Express Setup Recording Value Selection Rules
Appendix APPENDIX B: EXPRESS SETUP RECORDING VALUE SELECTION RULES Case 1: Record Mode: Normal + Event Record With: Recording days The DVR will automatically adjust the DVR’s image quality and Event frame rate to match the number of Recording days which user selected: According to resolution, event hours and other assumptions above, the DVR will attempt to select one set of suitable quality and event frame rate by checking if set 1 meets the requirements, and proceed in order unit the requirements are met. - Page 97 DVR will apply the settings in the table below to all cameras according to the Preset Settings. Preset Setting Camera Item Apply value Option Quality Superior Best Quality Normal Frame Rate Max recording frame rate of DVR Event Frame Rate Quality Standard Standard Quality...
-
Page 98: Appendix C: Remote Control
Appendix APPENDIX C: REMOTE CONTROL The IR remote control is an accessory to enhance the convenient operation of the DVR. You can perform all the settings and operations from the remote control. The effective distance is up to 33 feet line of sight. The keypad functions are same as the front panel buttons of the DVR. - Page 99 EverFocus USA - California: EverFocus USA - New York: 1801 Highland Avenue, Unit A, Duarte, CA 91010, 415 Oser Avenue, Unit S, Hauppauge, NY 11788, USA TEL: +1 631 436 5070 TEL: +1 626 844 8888...
Need help?
Do you have a question about the PARAGON 264x1 and is the answer not in the manual?
Questions and answers