
Related Manuals for Agilent Technologies Magnis G9710A


Summary of Contents for Agilent Technologies Magnis G9710A
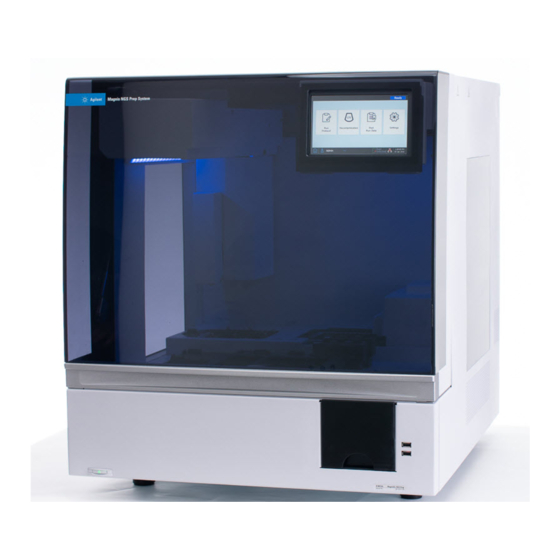
- Page 1 Magnis/MagnisDx NGS Prep System User Guide K1007A MagnisDx NGS Prep system: For In Vitro Diagnostic Use G9710A Magnis NGS Prep system: For Research Use Only. Not for use in diagnostic procedures. Revision C0, May 2022...
- Page 2 Symbol Table European Conformity Caution In Vitro Diagnostic Medical Device CSA mark Manufacturer Consult Instructions for Use Do not discard in domestic household Manufacture date waste Caution, hot surfaces Caution, pinching hazard Environmentally Friendly Use Period Caution, ultra-violet light (EFUP) of 40 years Authorized representative in the Earth ground European Community...
- Page 3 South Korean Class A EMC Declaration This equipment has been evaluated for its suitability for use in a commercial environment. When used in a domestic environment, there is a risk of radio interference. Magnis and MagnisDx NGS Prep System User Guide...
-
Page 4: Table Of Contents
Content Before You Begin Product Description Intended Use 9 Principle of the NGS Prep Procedure 9 Limitations of Use 9 Instrument Specifications Materials Provided Optional USB Disk 11 Cleaning Supplies 11 Product Inspection Safety Precautions 12 Environmental Requirements 14 Installation Requirements 14 Hardware Overview Instrument Components Instrument Status Indicator Lights... - Page 5 Operating the System Running Protocols Prepare the instrument for running a protocol 36 Prepare the reagents and plasticware 36 Set up and initiate the protocol run 37 Collect final library samples and clean up the system 38 Running and Viewing Diagnostic Tests Perform instrument diagnostic tests 39 View reports for diagnostic tests and instrument health checks 40 Decontaminating with UV Light...
- Page 6 Edit User screen 66 System Settings screen 67 Export Files screen 68 Protocols screen 69 Protocol Update screen 70 Connectivity Settings screen 71 Auto Teach screen 72 Hardware Usage Tracking screen 73 Instrument Diagnostic screen 73 System Settings screens Instrument Settings screen 75 Date &...
- Page 7 Magnis system issues 97 Library/sequencing issues 98 Magnis and MagnisDx NGS Prep System User Guide...
-
Page 8: Before You Begin
Magnis/MagnisDx NGS Prep System User Guide Before You Begin Product Description Intended Use Principle of the NGS Prep Procedure Limitations of Use Instrument Specifications Materials Provided Optional USB Disk Cleaning Supplies Product Inspection Safety Precautions Environmental Requirements Installation Requirements This chapter contains information for you to read and understand before you start. -
Page 9: Product Description
Product Description The Magnis NGS Prep System is an automated liquid handling system for next generation sequencing library preparation and/or target enrichment of human nucleic acid samples. Intended Use The MagnisDx NGS Prep System is an automated liquid handling system for next generation sequencing library preparation and/or target enrichment of human nucleic acid samples. -
Page 10: Instrument Specifications
Instrument Specifications Table 1 Technical specifications of the instrument System Component Specification Thermal cycler module Minimum temperature of thermal block 4°C Maximum temperature of thermal block 99°C Heater/Shaker/Magnet module Heater Temperature maximum 75°C Shaker Maximum speed (rpm) 1800 rpm ±5% Chiller module Temperature range 4–12°C... -
Page 11: Materials Provided
Materials Provided Table 2 Materials provided with the Magnis/MagnisDx NGS Prep System Materials Instrument with preloaded touchscreen software Power cord Functional test certificate Optional USB Disk When needed, you can use the USB ports on the front of the instrument to connect a USB disk for transferring files to and from the system. -
Page 12: Product Inspection
Product Inspection Upon receipt of the Magnis/MagnisDx NGS Prep System, carefully inspect the product box for any visible signs of damage. If damage to the product box is detected, contact Agilent Worldwide Technical Support. Allow the shipping container for the Magnis/MagnisDx NGS Prep System to come to room temperature prior to unpacking. - Page 13 • Before disconnecting the power cord, turn off the instrument at both the power button on the front and the power switch on the back. • Unplug the instrument before you clean any major liquid spills and before servicing any of the electrical or internal components.
-
Page 14: Environmental Requirements
Electrostatic Discharge The Magnis/MagnisDx NGS Prep System is static sensitive. Electrostatic discharges greater than 8000 volts may interfere with the normal operation of the USB ports on the instrument. Handling precautions are required when working in high static environments. Wear a grounded wrist strap and take other anti-static precautions prior to making contact with the instrument in high static environments. -
Page 15: Hardware Overview
Magnis/MagnisDx NGS Prep System User Guide Hardware Overview Instrument Components Instrument Status Indicator Lights This chapter provides product information on the hardware elements of the Magnis/MagnisDx NGS Prep System. -
Page 16: Instrument Components
Instrument Components The Magnis/MagnisDx NGS Prep System includes the following instrument components. Front and sides of instrument – Figure 1 • Instrument door • Waste bin drawer containing disposable tip waste bin • LCD touchscreen for display of the firmware software •... - Page 17 Back of instrument – Figure 2 • Power switch • Ethernet port • Power cord inlet • Back vent Back vent Power switch Ethernet port Power cord inlet Figure 2 Instrument back Instrument interior – Figure 3 Figure 4 • Instrument deck consisting of the following modules: •...
- Page 18 LED indicator light Gantry LED indicator light tube Barcode scanner Instrument deck Micropipettor Figure 3 Instrument interior Thermal cycler (loaded) HSM (loaded) Tube holders Tip box platforms (empty) (3 loaded, 1 empty) Tip waste bin opening Beads/Buffer Plate platform Chiller (loaded) (loaded) Figure 4...
-
Page 19: Instrument Status Indicator Lights
Instrument Status Indicator Lights You can quickly and easily check the status of the instrument based on the color of the LED indicator lights that illuminate the entire plate-filling area. Table 4 Colors and descriptions of the LED indicator lights in the plate filling area LED Color Instrument Status Description... -
Page 20: Getting Started
Magnis/MagnisDx NGS Prep System User Guide Getting Started Starting Up the Magnis/MagnisDx NGS Prep System Turn on the instrument Log in to the system Managing User Accounts About user access levels Add new user accounts Edit user accounts Disable user accounts Programming System Settings Set the chiller temperature Set the time and date... -
Page 21: Starting Up The Magnis/Magnisdx Ngs Prep System
Starting Up the Magnis/MagnisDx NGS Prep System Turn on the instrument The power button on the front of the instrument is to toggle the instrument on and off. 1 Press the power button on the front of the instrument. The light on the power button turns green, the instrument turns on, the LED indicator lights inside the instrument illuminate, and the software launches on the touchscreen. - Page 22 System startup events Figure 6 shows the sequence of events for starting up the system. The preparatory activities, which are automatically performed by the system following software login, are described in Table Power ON Instrument turns on Software launches Login screen opens - Enter credentials to continue System performs preparatory activities (Hardware initialization, IHC, teach-point verification)
-
Page 23: Managing User Accounts
Managing User Accounts About user access levels The access level assigned to a user account – Standard or Advanced – determines the user’s access to certain software settings and functions. The table below summarizes the differences in privileges between the two access levels. Table 6 Actions permitted for Standard and Advanced user account Action... - Page 24 Figure 7 User Management screen 3 Press Add. Add New User screen opens. Figure 8 Add New User screen 4 In the User Name field, enter a user name for the new account. User names can contain a combination of letters and numbers, but numbers are only permitted at the end of the user name (e.g., abc123).
-
Page 25: Edit User Accounts
8 Mark the check box labeled Email alert on run complete if you want the system to send an email alert to the user when it completes a protocol that was initiated by that user. 9 Mark the check box labeled Email alert on error occurs if you want the system to send an email alert to the user when it encounters an error during a protocol run that was initiated by that user. -
Page 26: Disable User Accounts
Figure 10 Edit User screen 4 On the Edit User screen, change any of the following attributes for the user account as desired. • Access Level (Standard or Advanced) • Password (requires updating both the Password and Confirm Password fields) •... - Page 27 Figure 11 User Management screen 3 Select the user name for the account that you want to disable and press Disable. A message box opens asking you to confirm that you want to disable the account. 4 Press Yes in the message box to continue. All user permissions for that account are disabled.
-
Page 28: Programming System Settings
Programming System Settings Set the chiller temperature When the system is running a protocol, the temperature of the chiller is dictated by the protocol parameters. During setup of a protocol run, however, the chiller is pre-cooled to the temperature specified on the Chiller Setting screen. The temperature is set to 12°C by default, but temperatures from 4°C to 12°C are permitted. -
Page 29: Assign An Instrument Name
Date & Time Settings screen opens. 4 Set the date, time, and time zone as needed. • To change the date, select the day, month, and year in the fields on the left side of the screen. Press the + and – buttons to adjust the values or type the desired values into the fields. -
Page 30: View The Instrument Serial Number And Software Version
Figure 13 Instrument Settings screen 4 In the Instrument Name field, type a name for the instrument. 5 Press Close to save your changes. View the instrument serial number and software version You may need to provide the serial number of the instrument and the version number of the firmware software when scheduling service for your system. -
Page 31: Set The Instrument Health Check Settings
Figure 14 Connection Settings screen 4 Select between obtaining an IP address automatically and assigning an IP address manually. • When you select Obtain an IP Address Automatically, an IP address is automatically assigned and the fields for network information are unavailable. •... - Page 32 Figure 15 Other Settings screen 4 Mark the check box on the screen to include verification of teach points as part of the first instrument health check (IHC) that the system performs after being powered on. Or, clear the check box to exclude teach-point verification from the instrument health checks. When the check box is marked, each time the instrument is powered on, the first IHC that the system performs includes teach-point verification.
-
Page 33: Setting Up Email Alerts And Protocol Alerts
Setting Up Email Alerts and Protocol Alerts Set up the email settings for outgoing email alerts The system can send automatic email alerts to individual user accounts, as determined by the user account settings (see “Edit user accounts” on page 25). To use these alerts, you must set up the sender information for emails sent by the system. -
Page 34: Set Up Alerts For Notification Of New Protocols
Figure 17 Sender Info expanded • Email address: Enter the email address of the email account to be used as the sender for outgoing email alerts • Username: Enter the user name of the email account • Password: Enter the password of the email account 7 Press Sender Info again to collapse the outgoing email account settings. -
Page 35: Operating The System
Magnis/MagnisDx NGS Prep System User Guide Operating the System Running Protocols Prepare the instrument for running a protocol Prepare the reagents and plasticware Set up and initiate the protocol run Collect final library samples and clean up the system Running and Viewing Diagnostic Tests Perform instrument diagnostic tests View reports for diagnostic tests and instrument health checks Decontaminating with UV Light... -
Page 36: Running Protocols
Running Protocols Prepare the instrument for running a protocol Prepare the Magnis/MagnisDx NGS Prep System so that it is ready to run a protocol. 1 Verify that the instrument deck is cleared of all labware from previous runs. 2 Turn on the instrument and close the instrument door. “Turn on the instrument”... -
Page 37: Set Up And Initiate The Protocol Run
Set up and initiate the protocol run For detailed instructions on running a protocol for your particular sample type, refer to the user manual for your Magnis Target Enrichment Kit. 1 From the Home screen, press Run Protocol. The system locks the instrument door and performs an IHC. At completion of the IHC, the Enter Run Info step opens. -
Page 38: Collect Final Library Samples And Clean Up The System
Collect final library samples and clean up the system At the completion of the run, the system keeps the prepared library solutions in the PCR plate on the thermal cycler module, which is held at 12°C for up to 72 hours. Collect the samples within that 72-hour period. -
Page 39: Running And Viewing Diagnostic Tests
Running and Viewing Diagnostic Tests Perform instrument diagnostic tests Diagnostic tests verify that individual components of the instrument are functioning as intended. 1 Before you start, make sure that the tube holder lids are closed and all tip boxes, strip tubes, and plates have been removed from the deck. -
Page 40: View Reports For Diagnostic Tests And Instrument Health Checks
Figure 21 Diagnostic Test Report screen 7 Review the report. Make note of any test items marked as Failed. If any of the items failed the diagnostic test, you will see an error icon near the bottom of the screen, like the one shown below. Press directly on the icon to view more information about the failed test items. - Page 41 Figure 22 Diagnostic Report Explorer screen 4 On the left side of the screen, select the folder containing the report type of interest. The Diagnostic Report folder contains reports from instrument diagnostic tests. The IHC Report folder contains reports from instrument health checks. The right side of the screen displays the reports in the selected folder.
-
Page 42: Decontaminating With Uv Light
Decontaminating with UV Light Do not look directly at the UV light while decontamination is in progress. WA RNI NG Run a decontamination “quick cycle” The Magnis/MagnisDx NGS Prep System includes a UV tube that can be used to decontaminate the surfaces of the instrument deck. -
Page 43: Run A Uv Decontamination "Extended Cycle
Run a UV decontamination “extended cycle” The Magnis/MagnisDx NGS Prep System includes a UV tube that can be used to decontaminate the surfaces of the instrument deck. The extended cycle is a 2-hour decontamination. Agilent recommends running the extended cycle in the event of a spill or leakage on the instrument deck. The system only permits running the extended cycle once every 7 days to protect the deck surfaces from excessive exposure to UV light. -
Page 44: Running Auto-Teaching And Teach-Point Verification
Running Auto-Teaching and Teach-Point Verification Run auto-teaching Auto-teaching is a process in which the system locates and records the positions of markers (called teach points) printed on the empty deck, ensuring that, during a protocol, the micropipettor is accurately aligned with the tubes or wells at each deck position. At particular points during the auto-teaching process, the system prompts you NOT E to add tips to the micropipettor and to place (and then later remove) a tip box... -
Page 45: Include Teach-Point Verification In The Ihc
7 When prompted on the touchscreen for a tip box and tip, open the instrument door, add a new tip box (with lid off) to the indicated platform, and add a tip to the micropipettor at the indicated barrel position. Close the door, then press Next to continue. 8 When prompted on the touchscreen to remove the tip box, open the instrument door and remove the tip box. -
Page 46: Installing Updates
Installing Updates Install protocol updates When Agilent releases new protocols for the Magnis/MagnisDx NGS Prep System, users with an Advanced user account can install the protocols on the system through a USB disk or through an online connection. Upload a protocol from a USB disk 1 Save the protocol file (*.bjp) to a USB disk. - Page 47 11 Press Close. You are returned to the Protocols screen. The new protocol is now listed. Download a protocol from the Agilent website 1 From the Home screen, press Settings. Settings screen opens. 2 Press Protocol Update. Protocols screen opens 3 Press Update Protocol.
-
Page 48: Install Firmware Updates
Any protocols for which multiple versions are available have a right-pointing arrowhead (>) listed next to their name. 3 Double-press the arrowhead for the protocol of interest. The Select Protocol’s Default Version dialog box opens. 4 Press the version that you want to make the default, then press Select. You are returned to the Protocols screen and the update to the default protocol version has been applied. - Page 49 A message box opens displaying the license agreement. 10 Read the license agreement, then press Accept to accept the terms. The system begins the firmware update process. When the process is complete, the system automatically reboots with the new firmware version running on the touchscreen. Download firmware from the Agilent website 1 From the Home screen, press Settings.
-
Page 50: Performing Maintenance
Magnis/MagnisDx NGS Prep System User Guide Performing Maintenance Annual Preventative Maintenance Cleaning the System Components Precautions to take when cleaning the system components Clean the deck surfaces and instrument exterior Clean the barcode scanner Replacing the UV Tube and Viewing UV Tube Usage Request a UV tube replacement View usage hours for the UV tube Disposing of Instrument Parts... -
Page 51: Annual Preventative Maintenance
Annual Preventative Maintenance The Magnis/MagnisDx NGS Prep System does not require calibration, however, it does require preventive maintenance annually. Preventative maintenance is performed by an Agilent service engineer or Agilent authorized service provider. This service helps ensure the reliable operation of your system. -
Page 52: Cleaning The System Components
Cleaning the System Components Table 3 on page 11 for a list of recommended cleaning supplies. Precautions to take when cleaning the system components Follow these precautions to avoid damaging the system during cleaning. • Do not use solvents, such as acetone, benzene, or phenol-based agents to clean the system, as these could damage the instrument. - Page 53 Use a wiping pattern that will cover all exposed surfaces. Verify that the wipe contains sufficient cleaning agent to wet the surfaces and if not, obtain a fresh wipe or reapply additional cleaning agent to the wipe. If a wipe becomes visibly soiled, change to a clean wipe. a Instrument interior: Open the instrument door and wipe down the areas of the deck that are outlined in yellow in Figure 32...
- Page 54 Figure 33 Exterior surfaces on the front of the instrument to be wiped down c Instrument Exterior - Left and Right: Using a laboratory wipe moistened with 70% isopropyl alcohol, wipe down the left and right sides of the instrument, which are outlined in yellow in Figure 34.
-
Page 55: Clean The Barcode Scanner
Figure 35 Exterior surfaces on the back of the instrument to be wiped down e Instrument Exterior - Top of the instrument: Using a laboratory wipe moistened with 70% isopropyl alcohol, wipe the top surface of the instrument 3 Allow isopropyl alcohol to fully evaporate. 4 From the Touchscreen, initiate a 30-minute UV decontamination procedure. -
Page 56: Replacing The Uv Tube And Viewing Uv Tube Usage
Replacing the UV Tube and Viewing UV Tube Usage Request a UV tube replacement After 630 hours of UV-tube usage, the next time a decontamination cycle is initiated, the system notifies you to replace the UV tube. Replacement of the UV tube must be performed by an Agilent engineer or Agilent authorized service provider. -
Page 57: Disposing Of Instrument Parts
Disposing of Instrument Parts If, at any time, the Magnis/MagnisDx NGS Prep System or any of its parts are no longer of use, you can return the unneeded items to Agilent as part of the Agilent Product Take-Back program. www.agilent.com/environment/product/index.shtml for information on this program. -
Page 58: Software User Interface Reference
Magnis/MagnisDx NGS Prep System User Guide Software User Interface Reference Software User Interface Overview Login screen Home screen Settings screens Settings screen User Management screen Add New User screen Edit User screen System Settings screen Export Files screen Protocols screen Protocol Update screen Connectivity Settings screen Auto Teach screen... -
Page 59: Software User Interface Overview
Software User Interface Overview The touchscreen displays the Magnis firmware software, which you use to operate the Magnis/MagnisDx NGS Prep System. To access the software, you must log in with a valid user name and password (see “Log in to the system” on page 21). - Page 60 Table 7 Descriptions of the top and bottom banner elements (continued) Element Description Door status Indicates the position and lock status of the instrument door (Door Opened, Door Closed, or Door Unlocked). Error icon Indicates the occurrence of a system error or failed diagnostic test. Press to view information on the error(s).
-
Page 61: Login Screen
Login screen Purpose: To log in to the software using your user account credentials. See instructions in “Log in to the system” on page 21. To open: From any screen, press the user name for the currently logged-in user at the bottom of the screen, then press Log Out. -
Page 62: Home Screen
Home screen Purpose: To provide a dashboard for accessing all areas of the software. To open: From any screen, press the Home icon in the bottom left corner. The Home screen is also the first screen that opens after you log in to the software. Figure 39 Home screen Run Protocol Press this button to launch the on-screen protocol wizard for setting up and running a library... -
Page 63: Settings Screens
Settings screens Settings screen Purpose: To access tools for viewing and configuring a variety of settings. To open: From the Home screen, press Settings. Figure 40 Settings screen Each button on the Settings screen accesses a different area of the software. The buttons are described in Table Table 8... -
Page 64: User Management Screen
User Management screen Purpose: To view the list of user accounts and to access tools for adding, editing, and disabling user accounts. See instructions in “Managing User Accounts” on page 23. To open: From the Home screen, press Settings. Then, press User Management. Figure 41 User Management screen User list The center of the screen displays a table of the existing user accounts. -
Page 65: Add New User Screen
Add New User screen Purpose: To create new user accounts and configure the settings for the account. See instructions in “Add new user accounts” on page 23. To open: From the Home screen, press Settings. Press User Management. Then, press Add. Figure 42 Add New User screen User Name In this field, type the user name for the new account. -
Page 66: Edit User Screen
Cancel This button cancels creation of the new user account and returns you to the User Management screen. Edit User screen Purpose: To edit configurations, including resetting the password, for existing user accounts. See instructions in “Edit user accounts” on page 25. To open: From the Home screen, press Settings. -
Page 67: System Settings Screen
Email alert on error occurs Mark this check box to have the system generate an automatic email to the user when the system encounters an error during a protocol run that was set up by that user. The email will be sent to all email addresses entered in the Email address(es) field. -
Page 68: Export Files Screen
Table 9 Settings screen buttons (continued) Button Description Firmware Update Opens the “Firmware Update screen” for installing a new version of the firmware software from a connected USB disk drive or by connecting to the Agilent website. Other Settings Opens the “Other Settings screen”... -
Page 69: Protocols Screen
• PCR Runtime Info Log folder: Contains log files created during PCR cycling. • Diagnostic Report folder: Contains the results of the 10 most recent self diagnostic tests. Browser The panel on the right of the screen is a browser. Use the browser to navigate to the desired folder. -
Page 70: Protocol Update Screen
Update Protocol This button opens the Protocol Update screen (described below), which has tools for uploading new protocol files from a USB disk or from the Agilent website. Close This button returns you to the Home screen. Protocol Update screen Purpose: To upload new protocol files into the software from a connected USB disk drive or from the Agilent website. -
Page 71: Connectivity Settings Screen
USB Disk / Online Download Select the USB Disk option to import a protocol file from a connected USB disk. When the USB Disk option is selected, the screen displays a browser of the folders and files on the connected USB disk. -
Page 72: Auto Teach Screen
Protocol Alert Settings This button opens the Protocol Alert Settings screen, which has tools for settings alerts when Agilent releases a new protocol for the Magnis/MagnisDx NGS Prep System. Close This button returns you to the Settings screen. Auto Teach screen Purpose: To run auto-teaching, a process that locates and records the positions of the teach points that See instructions in... -
Page 73: Hardware Usage Tracking Screen
Hardware Usage Tracking screen Purpose: To track the usage of the system’s UV tube. For Agilent engineers and Agilent authorized service providers, to reset the tracker following replacement of the UV tube. See instructions in “Replacing the UV Tube and Viewing UV Tube Usage” on page 56. - Page 74 Figure 52 Instrument Diagnostic screen Run Diagnostic Test Opens the Diagnostic Test screen, which allows you to select from a list of diagnostic tests. Browse Report Opens the Diagnostic Report Explorer screen, which contains a list of completed diagnostic tests and instrument health checks.
-
Page 75: System Settings Screens
System Settings screens Instrument Settings screen Purpose: To view and/or set the instrument name, serial number, firmware software version, and device version. See instructions in “Assign an instrument name” on page 29. To open: From the Home screen, press Settings. On the Settings screen press System Settings. Then, press Instrument Settings. -
Page 76: Date & Time Settings Screen
Date & Time Settings screen Purpose: To set the date and time on the instrument. See instructions in “Set the time and date” on page 28. To open: From the Home screen, press Settings. On the Settings screen press System Settings. Then, press Date &... -
Page 77: Chiller Setting Screen
Chiller Setting screen Purpose: To set the temperature of the instrument’s chiller module. See instructions in “Set the chiller temperature” on page 28. To open: From the Home screen, press Settings. On the Settings screen press System Settings. Then, press Chiller Setting. Figure 55 Chiller Setting screen Chiller Temperature Type the desired temperature for the chiller (in °C) into the field. -
Page 78: Connection Settings Screen
Figure 57 Firmware Update screen – Online Update selected USB Disk / Online Update Select the USB Disk option to install firmware files from a connected USB disk. When the USB Disk option is selected, the screen displays a browser of the folders and files on the connected USB disk. -
Page 79: Other Settings Screen
Figure 58 Connection Settings screen Obtain an IP Address Automatically When this option is selected, the instrument automatically assigns an IP address. Use Manual Configuration When this option is selected, you need to manually assign an IP address and enter the necessary network information into the following text fields. - Page 80 Figure 59 Other Settings screen Verify teach points during Instrument Health Check When this check box is marked, each time the system is powered on, the first IHC that it performs includes verification of the teach point positions. If the system identifies a mis-alignment with the teach points, it displays an error message instructing you to run auto-teaching.
-
Page 81: Instrument Diagnostic Screens
Instrument Diagnostic screens Diagnostic Test screen Purpose: To run diagnostic tests on the instrument. See instructions in “Perform instrument diagnostic tests” on page 39. To open: From the Home screen, press Settings. On the Settings screen press Self Diagnostic. Then, press Run Diagnostic Test. Figure 60 Diagnostic Test screen –... -
Page 82: Diagnostic Test Report Screen
This button initiates the selected diagnostic tests. During the diagnostic test run, the screen appears as in Figure 61. At completion of the test, the Diagnostic Test Report screen opens. Close This button returns you to the Instrument Diagnostic screen. Diagnostic Test Report screen Purpose: To view the results of instrument diagnostic tests. -
Page 83: Diagnostic Report Explorer Screen
Diagnostic Report Explorer screen Purpose: To view the results of instrument diagnostic tests or an instrument health check. See instructions in “View reports for diagnostic tests and instrument health checks” on page 40. To open: From the Home screen, press Settings. On the Settings screen press Self Diagnostic. Then, press Browse Report. -
Page 84: Decontamination Screen
Decontamination screen Purpose: To perform UV decontamination of the instrument deck. See instructions in “Decontaminating with UV Light” on page 42. To open: From the Home screen, press Decontamination. Figure 64 Decontamination screen Quick cycle / Extended cycle Select between the quick cycle and extended cycle decontamination procedures. The quick cycle takes 30 minutes to complete. -
Page 85: Run Data Explorer Screen
Run Data Explorer screen Purpose: To browse to a completed protocol run and open the Post Run Data screen for that run. To open: From the Home screen, press Post Run Data. Figure 65 Run Data Explorer screen Browser Use the browser to navigate to the folder for the desired protocol run. The panel on the left side of the browser has a folder for each user account. -
Page 86: Post Run Data Screen
Post Run Data screen Purpose: To view information on a protocol run, including the sample names, number of PCR cycles, sample type, labware serial numbers, and audit trail. The screen has four tabs: Run Setup, Run Info, Labware Info, and Audit Trails. To open: From the Home screen, press Post Run Data. -
Page 87: Run Info Tab
Run Info tab Figure 68 Post Run Data – Run Info tab The Run Info tab contains information pertaining to the selected protocol run and the system on which the run was performed. Labware Info tab Figure 69 Post Run Data – Labware Info tab The Labware Info tab lists the serial number and, where available, the part number and lot number of each piece of labware used in the protocol run. -
Page 88: Audit Trails Tab
Audit Trails tab Figure 70 Post Run Data – Audit Trails tab The Audit Trails tab provides a list of user actions that occurred during the setup and execution of the protocol run. For each action the tab shows the date and time of the action, the user name of the user who performed the action, and a description of the action. -
Page 89: Protocol Wizard Screens
Protocol Wizard screens When setting up a protocol run, the protocol setup wizard walks you through a series of screens that provide step-by-step instructions on how to set up and start the run. Press the forward arrow button to advance to the next screen. If necessary, press the back arrow button to return to the previous screen. -
Page 90: Connectivity Settings Screens
Connectivity Settings screens Email Alert Settings screen Purpose: To set up the sender information for email alerts sent by the system. See instructions in “Set up the email settings for outgoing email alerts” on page 33. To open: From the Home screen, press Settings. On the Settings screen press Connectivity Settings. -
Page 91: Protocol Alert Settings Screen
Figure 73 Sender Info expanded Email address: Type the email address of the email account to be used as the sender for outgoing email alerts. Username: Type the user name of the email account. Password: Type the password of the email account. Protocol Alert Settings screen Purpose: To set up notifications to be displayed on the touchscreen whenever Magnis protocol updates are available from Agilent. -
Page 92: Run Screens
Run screens Run screen when run is in-progress Purpose: To monitor the real-time progress of a protocol run. To open: Opens automatically after starting a protocol run. Figure 75 Run screen when protocol run is in-progress When a run is in-progress you cannot use the touchscreen to perform other NOT E functions. -
Page 93: Run Screen When Sample Collection Is In-Progress
Run screen when run is complete Purpose: To initiate sample collection. To open: Opens automatically after the system completes a protocol run. Figure 76 Run screen when protocol run is complete Elapsed Time The time displayed is the total time (hh:mm:ss) that has elapsed since the protocol run started. This button initiates library sample collection. -
Page 94: Run Screen When Libraries Are Ready
Figure 77 Run screen when sample collection is in-progress Run screen when libraries are ready Purpose: Displayed when the prepared library samples are ready to remove from the chiller. To open: Opens automatically after the system completes library sample collection. Figure 78 Run screen when libraries are ready –... - Page 95 Figure 79 Run screen when libraries are ready To close the Run screen, press the X on the tab. Closing the screen may take several seconds. Do not repeatedly press the X NOT E button. Magnis and MagnisDx NGS Prep System User Guide...
-
Page 96: Troubleshooting
Magnis/MagnisDx NGS Prep System User Guide Troubleshooting Troubleshooting Suggestions Magnis system issues Library/sequencing issues This chapter contains troubleshooting suggestions to help you solve potential problems and errors encountered during system operation or downstream library sequencing. -
Page 97: Troubleshooting Suggestions
Troubleshooting Suggestions Magnis system issues Touchscreen presents usability issues or appears unresponsive. ✔ As an alternative to the touchscreen controls, you can use a USB-connected mouse to make selections and enter data. Connect the mouse using either of the two USB ports on the front of the instrument. - Page 98 The system is no longer connected to the network. ✔ Make sure that a functioning ethernet cable is connected to the ethernet port at the back of the instrument, and that the other end of the ethernet cable is connected to a live network port. ✔...
- Page 99 The sequencing reads do not cover the expected genomic regions. ✔ The wrong probe design may have been used in the protocol run for target enrichment. Review the sample and probe tracking that was recorded during the run. Repeat the protocol run with the correct probe design, if necessary.
- Page 100 No part of this manual may be reproduced in any form or by any means (including electronic storage and retrieval or translation into a foreign language) without prior agreement and written consent from Agilent Technologies, Inc. as governed by United States and international copyright laws.