Table of Contents
Advertisement
Quick Links
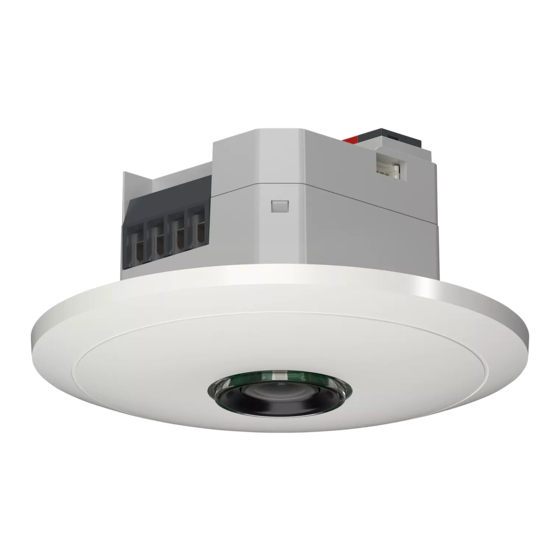
Optical presence detector
EN
thePixa P360 KNX UP WH
thePixa P360 KNX UP BK
–
thePixa P360 KNX UP SF
thePixa P360 24V KNX UP WH –
thePixa P360 24V KNX UP BK –
thePixa P360 24V KNX UP SF –
1. General information
•
Optical presence detector for ceiling installation
•
KNX Data Secure
•
Rectangular detection area with up to 6 detection zones
(Total area 11 x 15.5 m I 171 m
height)
•
Automatic presence and brightness-dependent control
for lighting and HVAC
•
Each detection zone has its own light measurement
•
Integrated temperature sensor
•
6 channels light, Z1 light – Z6 light:
— Switching or constant lighting control with 6 independent
control systems and standby function (orientation light)
— Switching mode with dimmable lighting
— Free switch object with configuration type switching
— Fully or semi-automatic device function
— Brightness switching value configurable in lux by using
parameters and telegram
— Light time delay configurable by using parameters
— Aura effect function
— Manual override by telegram
•
6 channels HVAC, Z1 HVAC – Z6 HVAC:
— Configurable switch-on delay and time delay
— Sending of operating mode
— Separate block telegram
•
6 channels room occupancy, Z1 – Z6 room occupancy:
— Output of number of persons
— Control of a fan with various stages
— 3 configurable thresholds (threshold switch)
•
The thePixa Plug app (for Android, iOS) allows settings
via mobile devices
•
Restriction of the detection area via thePixa Plug
•
Adjustment of brightness measurements via thePixa Plug
•
Test mode for checking function and detection area via
thePixa Plug
•
Optional accessories for surface mounting (9070816,
9070443), for recessed ceiling mounting (9070992) and
the power supply unit 24 V DC (909330)
•
The ETS (Engineering Tool) can be used to select appli-
cation programmes, to assign specific parameters and
addresses, and to transfer them to the device
www.theben.de
•
Please refer to the KNX manual for detailed function
descriptions.
–
2269200
–
2269202
2269203
2269210
2269212
2269213
; at 4.5 m installation
2
2. Safety
307581 03
20.06.2022
Assembly and installation should only be carried
out by a qualified electrician, somebody who has
completed appropriate professional training and
has the knowledge and experience necessary to be
able to recognise and avoid the potential dangers
posed by electricity.
Before installation/disassembly, disconnect the
supply voltage and ensure that the parts are no
longer live.
Prior to commissioning and using the product, read
and observe all the operating instructions.
3. Proper use
•
thePixa is an optical presence detector, which uses pixel-
based technology. It does not resolve sharp images, does
not recognize people and works in compliance with data
protection regulations. thePixa uses image comparisons
to detect differences in the status of monitored rooms.
•
The device is intended for ceiling installation and is used
in offices, conference rooms, corridors, schools, etc.
•
Intended for interior installation only
4. Connection
Bus terminal KNX: Ensure correct polarity.
Programming button and LED for physical
address
!
Do not press the button when mains voltage is
applied.
Positioning of the detector (see TOP)
L Observe zone alignment in the ETS.
Auxiliary voltage
1
Advertisement
Table of Contents

Related Manuals for Theben thePixa P360 24V KNX UP WH


Summary of Contents for Theben thePixa P360 24V KNX UP WH
- Page 1 – thePixa P360 KNX UP SF able to recognise and avoid the potential dangers 2269203 posed by electricity. thePixa P360 24V KNX UP WH – 2269210 thePixa P360 24V KNX UP BK – 2269212 Before installation/disassembly, disconnect the thePixa P360 24V KNX UP SF –...
-
Page 2: Flush-Mounted Installation
5. Installation and detection area Connecting the presence detector There are 3 ways to mount the presence detector at the Connection (230 V AC) ceiling: – Flush mounting – Ceiling installation – Surface mounting L Observe the recommended installation height of 2.5 m –... -
Page 3: Ceiling Installation
Ceiling installation Detection area with a ceiling installation box 9070992 (installation diameter The rectangular detection area of the presence detector 68 mm). covers a large area and can be divided into 6 independent zones. L The 6 zones can be positioned either in the ETS, or via the thePixa Plug app. -
Page 4: Switching Mode
L For each zone, the current brightness has to be taught in is activated. If the artificial light is switched off manually, the lighting remains off as long as people are present. At the end with the smartphone/tablet (see chapter 8.4 Parameters, of the time delay, the lighting will switch automatically again. -
Page 5: Programming Mode
7. Start-up Download thePixa Plug app from the App Store or Google † Play Store. Settings L Basic settings are made via the ETS (see application description in the KNX manual). L The presence detector supports KNX Data Secure. Open thePixa Plug app and press + in the menu bar. †... - Page 6 IMPORTANT: The following must be observed The motion/presence detected by the presence detector is displayed in green (motion) and red (presence). during start-up ... L Various algorithms are stored in the presence detector Create a background image with † for different types of changes. This can lead to a motion/ Add or edit zones.
- Page 7 Place the smartphone or tablet in the corresponding zone. † Select the Apply button. † ▻ Measured lux value (from smartphone/tablet) is entered in the field <set light level value>. Go out of the zone. † Start/cancel recording Finally, press the OK button. †...
-
Page 8: Control Commands
8.5 Control commands 8.6 Zones Create a (new) background image Transfer zone configuration to another detector Edit zones Add exclusion zone Add zone – Add and edit 6 zones, which Teach-in can be labelled. The currently measured brightness value will be accepted as –... -
Page 9: Troubleshooting
- Zone editing L The safety password must consist of 6 characters: A-Z, Theben AG herewith declares that this type of radio installation complies with 0-9. Directive 2014/53/EU. The complete text of the EU Declaration of Conformity is available at the following Internet address: www.theben.de/red-konformitaet... - Page 10 13. Contact Theben AG Hohenbergstr. 32 72401 Haigerloch GERMANY Phone +49 7474 692-0 Fax +49 7474 692-150 Hotline Phone +49 7474 692-369 hotline@theben.de Addresses, telephone numbers, etc. www.theben.de...