Theben thePixa P360 KNX Manual
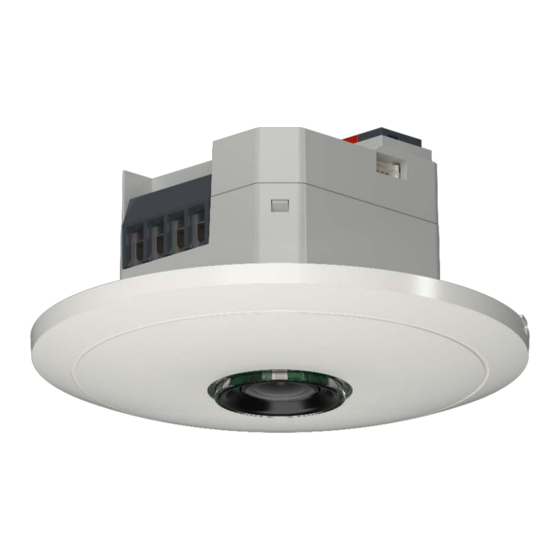
Optical presence detector
Hide thumbs
Also See for thePixa P360 KNX:
- Manual (9 pages) ,
- Instruction manual (7 pages) ,
- Manual (11 pages)
Table of Contents
Advertisement
Quick Links
Advertisement
Table of Contents

Related Manuals for Theben thePixa P360 KNX


Summary of Contents for Theben thePixa P360 KNX
- Page 1 KNX manual Optical presence detector thePixa P360 KNX 2021-05-26...
-
Page 2: Table Of Contents
Contents Function description Optical presence detector thePixa P360 KNX Features Technical data Dimensions Detection area General information about KNX Secure Start-up with "KNX Data Secure" Start-up without "KNX Data Secure" Settings via thePixa Plug app Connecting smartphone/tablet to the presence detector The application programme "thePixa P360 KNX"... - Page 3 1 zone 13.6 Constant lighting control, additional manual override vis push button, 4 zones 13.7 Master/Slave parallel switching 13.8 Master/Master parallel switching 13.9 Aura effect 13.10 Adding the persons counted Optical presence detector thePixa P360 KNX...
-
Page 4: Function Description
Function description 1 Function description Optical presence detector thePixa P360 KNX Light The optical presence detector switches or controls up to 6 lighting groups dependent on the presence of persons and the current brightness. The brightness switching value or setpoint is adjusted by means of parameters or objects (brightness setpoint value only). -
Page 5: Features
• Surface mounting on ceilings possible with surface frame (option) • thePixa Plug app sor settings and evaluations (iOS/Android) • KNX firmware update possible (ETS app) • Sensor firmware update possible (thePixa Plug app) Optical presence detector thePixa P360 KNX... - Page 6 • 6 channels room occupancy, Z1 room occupancy – Z6 room occupancy • Output of number of persons • Control of a fan with up to 3 stages • 3 configurable thresholds (threshold switch) Optical presence detector thePixa P360 KNX...
-
Page 7: Technical Data
IP 20 in accordance with EN 60529 Ambient temperature -5 – +45 °C Protection class II subject to designated installation Pollution degree Rated impulse voltage 4 kV Radio frequency/transmission BLE 2.4 GHz Class 2 (2.5 mW) power Optical presence detector thePixa P360 KNX... -
Page 8: Dimensions
Technical data Software Class A Dimensions Optical presence detector thePixa P360 KNX... -
Page 9: Detection Area
Technical data Detection area The rectangular detection area of presence detector thePixa P360 KNX covers a large detection area and can be divided into up to 6 independent zones. Installation height Detection area walking Detection area sitting 2.5 m 54 m... - Page 10 P360 KNX when installing it. Label ETS database: Label thePixa P360 KNX UP WH: The designation TOP indicates the orientation of the detection area. Also, the area marked with TOP is displayed at the top of the screen on smartphone / tablet.
- Page 11 For the detection of motion and presence to function correctly, the field of view must be clear. It has to be avoided, for example, that suspended lamps or partitions restrict the detection area. Example of a lamp in the detector's field of vision: Optical presence detector thePixa P360 KNX...
-
Page 12: General Information About Knx Secure
As soon as a "KNX-Secure" device is included in the project, the ETS requests a project password. If no password is entered, the device is included with Secure Mode deactivated. However, the password can also be entered or changed later in the project overview. Optical presence detector thePixa P360 KNX... -
Page 13: Start-Up With "Knx Data Secure
To start up the device without KNX Data Secure, select the device in the 'Topology' or 'Devices' section and set the 'Secure start up' option in the 'Properties' area of the 'Settings' tab to 'Disabled'. Optical presence detector thePixa P360 KNX... -
Page 14: Settings Via Thepixa Plug App
Settings via thePixa Plug app 4 Settings via thePixa Plug app If the presence detector thePixa P360 KNX is paired with thePixa Plug app, the following functions are available: • Detection display (grid) The motions (green) or presences (red) the optical presence detector is currently evaluating are displayed. -
Page 15: Connecting Smartphone/Tablet To The Presence Detector
Settings via thePixa Plug app Connecting smartphone/tablet to the presence detector The connection between thePixa P360 KNX and the app is established directly via Bluetooth. Download the app thePixa Plug from the App Store or Google Play Store. Open thePixa Plug and press + in the menu bar. - Page 16 Settings via thePixa Plug app Device list of available thePixa devices appears Select device and confirm with OK. A detailed description of the app can be found in our operating instructions. Optical presence detector thePixa P360 KNX...
-
Page 17: The Application Programme "Thepixa P360 Knx
The application programme "thePixa P360 KNX" 5 The application programme "thePixa P360 KNX" Selection in the product database Manufacturer Theben AG Product family Physical sensors Product type Presence detector Program names thePixa P360 KNX Number of communication objects 170 Number of group addresses Number of associations ... -
Page 18: Overview Of Communication Objects
The application programme "thePixa P360 KNX" Overview of communication objects 5.2.1 General objects No. Object name Function Length U DPT Temperature value Send °C value 2 bytes 9.001 Central command Receive 1 bit U 1.001 5.2.2 Zone related objects Object name... - Page 19 The application programme "thePixa P360 KNX" Object name Function Length Z1 Occupancy density Send value 2 bytes 9.008 Z2 Light output Switching 1 bit 1.001 Z2 Light input Switching external button 1 bit 1.001 External button Z2 Light input 4 bit 3.007...
- Page 20 The application programme "thePixa P360 KNX" Object name Function Length Z3 Brightness setpoint value Receive lux value 2 bytes 9.004 presence Z3 Brightness setpoint value Receive lux value 2 bytes 9.004 standby Z3 Brightness value Send lux value 2 bytes 9.004...
- Page 21 The application programme "thePixa P360 KNX" Object name Function Length Block = 0 1 bit 1.003 Z4 Light Block = 1 1 bit 1.001 Z4 HVAC Switching 1 bit 1.001 Z4 HVAC Send operating mode 1 byte 20.102 Z4 HVAC...
- Page 22 The application programme "thePixa P360 KNX" Object name Function Length Z5 Ventilation Send value 1 byte 5.001 Block = 0 1 bit 1.003 Z5 Room occupancy Block = 1 1 bit 1.001 Z5 Occupancy rate Send value 1 byte 5.001...
-
Page 23: Description Of Communication Objects
The application programme "thePixa P360 KNX" Description of communication objects 5.3.1 General objects Object 2: Temperature value - Send °C value Sends the room temperature in °C, measured with the temperature sensor inside the device, as a 2-byte telegram. The temperature value is adapted to the conditions in the room with the temperature calibration. The adaptation can be done in thePixa Plug app. - Page 24 The application programme "thePixa P360 KNX" 5.3.2 Zone related objects 5.3.2.1 Objects for zone 1 5.3.2.1.1 Light The following objects are available if "yes.." has been selected at <Activate light>. Object 10: Z1 Light output – Switching In "switching" mode, an ON telegram upon detection of motion and insufficient brightness, and an OFF telegram upon the expiration of the time delay (motion/presence) or with sufficient brightness will be sent.
- Page 25 The application programme "thePixa P360 KNX" Object 18: Z1 Brightness setpoint value no motion/presence – Receive lux value This enables changing of the brightness setpoint value during operation. Receives the lux value preset for the following case: In zone 1, neither motion nor presence is detected. Constant lighting control uses the received value as a permanent new preset.
- Page 26 The application programme "thePixa P360 KNX" Object 24: Z1 Parallel switching – Trigger output, or Z1 Aura effect – send motion status The function of the object depends on the parameter <Master operating mode>. Master operating Function mode Parallel switching Allows sending the detection status of zone 1 to another zone.
- Page 27 The application programme "thePixa P360 KNX" Object 25: Z1 Parallel switching – Trigger input, or Z1 Aura effect – Receive motion status The function of the object depends on the parameter <Master operating mode>. Master operating Function mode Parallel switching Allows zone 1 to receive the detection status another zone.
- Page 28 The application programme "thePixa P360 KNX" 5.3.2.1.2 HVAC The following objects are available if "yes.." has been selected at <Activate HVAC>. Object 29: Z1 HVAC – Switching, or Z1 HVAC – Send operating mode, or Z1 HVAC – Send value The function of the object depends on the parameter <Type of telegram>.
- Page 29 The application programme "thePixa P360 KNX" 5.3.2.1.3 Room occupancy The following objects are available if "yes.." has been selected at <Activate room occupancy>. Object 31: Z1 Number of persons – Receive number Receives an 8-bit telegram with the number of dynamic and/or static persons. The received value is added with the number of measured persons in zone 1.
- Page 30 The application programme "thePixa P360 KNX" Object 39: Z1 Occupancy density – Send value Sends the average density of room occupancy within zone 1 during the last hour by means of a 16-bit telegram. Example: If on average half of the area was occupied, the occupancy density is 50%. See chapter 11, page 62.
- Page 31 The application programme "thePixa P360 KNX" 5.3.2.2 Objects for zone 2 Objects 40..69 The objects 40 to 69 are for zone 2, and they are identical in their function to the objects of zone 1 (objects 10 to 39). 5.3.2.3 Objects for zone 3 Objects 70..99...
-
Page 32: Parameter Pages Overview
The application programme "thePixa P360 KNX" Parameter pages overview Parameter page Description General information Basic settings: zone allocation, sensitivity, etc. Zone parameters for zone 1…6 General zone settings Zone name, operating mode, use, etc. Light General settings for lighting control. -
Page 33: General Parameters
The application programme "thePixa P360 KNX" General parameters 5.5.1 Settings Designation Values Description General settings Installation height of detector 2.5 m, 3.0 m, 3.5 m, Selection of installation height of 4.0 m, 4.5 m detector. Sensitivity of sensor 1…3…5 The detector has 5 sensitivity... - Page 34 The application programme "thePixa P360 KNX" Designation Values Description Activate security mode In thePixa Plug app, the available parameters can be changed without a password: - Entering actual temperature - Light level value per zone - Installation height - Detection sensitivity...
- Page 35 The application programme "thePixa P360 KNX" Designation Values Description Send temperature cyclically The parameter is visible if "yes.." has been set at the parameter <Send temperature on bus>. The measured temperature value is not transmitted cyclically. every minute The measured temperature value is...
-
Page 36: Zone Related Parameters
The application programme "thePixa P360 KNX" Zone related parameters The detection area can be divided into up to 6 independent zones. 5.6.1 General zone settings Designation Values Description Zone name (optional) text field For easy distinction of zones, e.g. - Page 37 The application programme "thePixa P360 KNX" Designation Values Description Cycle time parallel switching The parameter is visible if "parallel switching" has been set at the parameter <Master operating mode>. 5 s...25 s, 30 s…5 min The interval between two telegrams can be set to a maximum of 5 minutes.
- Page 38 The application programme "thePixa P360 KNX" 5.6.2 Light Designation Values Description Light general Function light switching light.. The light is switched or dimmed to a defined value depending on motion or presence. It is possible to dim the lighting to a specific value without motion or presence detection.
- Page 39 The application programme "thePixa P360 KNX" Designation Values Description Send brightness value cyclically The parameter is visible if "yes.." has been set at the parameter <Send brightness value on bus>. The measured brightness value is not transmitted cyclically. every minute...
- Page 40 The application programme "thePixa P360 KNX" Designation Values Description Block telegram light Blocking the light output means that the detector in the corresponding zone does not send any light output object telegrams, although motion and brightness continue to be evaluated.
- Page 41 The application programme "thePixa P360 KNX" Designation Values Description Switching light general Brightness switching value Measurement off (not The zone switches or dims on motion dependent on luminance) or presence without taking the ambient brightness into account. 5 lx The brightness switching value...
- Page 42 The application programme "thePixa P360 KNX" 5.6.2.1 Time delays Designation Values Description Delay from motion to presence none When there is a change from motion to presence in the detector (time not adjustable), the status immediately changes to presence. 1 s…5 s…60 min...
- Page 43 The application programme "thePixa P360 KNX" 5.6.2.2 Switching Designation Values Description Switching light Switch object light Response at start of block send 0 An OFF telegram is sent at the start of blocking. send 1 An ON telegram is sent at the start of blocking.
- Page 44 The application programme "thePixa P360 KNX" 5.6.2.3 Dimming Designation Values Description Dimming light Switch-on dimming value at No motion, no presence 0...100% Dimming value as a response to the detected motion status within the Motion 0...50...100% zone. Presence 0...100% Aura 1...10...25 %...
- Page 45 The application programme "thePixa P360 KNX" 5.6.2.4 Control settings Designation Values Description Constant lighting control Brightness setpoint value at No motion, no presence Light off Desired brightness depending on 5…3000 lx motion status within the zone. Motion Light off, 5…100...3000 lx...
- Page 46 The application programme "thePixa P360 KNX" Designation Values Description Response with manual dimming school Manual dimming using a 4-bit object ends the control. The manually set dimming value, e.g. 75%, applies until the end of presence. office Manual dimming using a 4-bit object changes the brightness setpoint value for the control.
- Page 47 The application programme "thePixa P360 KNX" 5.6.3 Heating - ventilation - air conditioning Designation Values Description HVAC Type of telegram switch command 3 telegram types are available for HVAC operating mode selection. value Output value of HVAC object at No motion, no presence...
- Page 48 The application programme "thePixa P360 KNX" Designation Values Description Cyclical transmission HVAC object Value is not sent cyclically. every minute Value is sent cyclically with selected every 2 minutes time. … every 30 minutes 5.6.3.1 Time delays Designation Values Description...
- Page 49 The application programme "thePixa P360 KNX" 5.6.4 Room occupancy The number of persons counted may vary slightly depending on the application and ambient conditions. Designation Values Description Room occupancy general Composition of the persons counted only dynamic Only the persons who move are counted.
- Page 50 The application programme "thePixa P360 KNX" Designation Values Description Send number of persons upon change The parameter is visible if "Yes.." has been set at the parameter <Send number of persons to bus>. The measured number of persons is not sent depending on a change in the number of persons.
- Page 51 The application programme "thePixa P360 KNX" Designation Values Description Number of persons For threshold 1 1 Person Desired number of persons for … threshold 1. 5 Personen … 10 Personen … 50 Personen For threshold 2 1 Person Desired number of persons for …...
- Page 52 The application programme "thePixa P360 KNX" do not send Block No response. 0%...100% Selected value is sent when blocking. Cyclical transmission ventilation object Value is not sent cyclically. every minute Value is sent cyclically with selected every 2 minutes time.
- Page 53 The application programme "thePixa P360 KNX" Designation Values Description Cyclical transmission threshold switch Value is not sent cyclically. object 1 every minute Value is sent cyclically with selected every 2 minutes time. … every 30 minutes Optical presence detector thePixa P360 KNX...
-
Page 54: Manual Operation With Push Buttons
The override is detected via object 11, and the lighting remains on for the duration of the presence. After the room is vacated and the corresponding time delay has expired, the zone is again in normal switching mode. Optical presence detector thePixa P360 KNX... -
Page 55: Manual Operation Via Switching Function With Dimmable Light
The override is detected via object 11, and the lighting remains on for the duration of the presence. After the room is vacated and the corresponding time delay has expired, the zone is again in normal switching mode. Optical presence detector thePixa P360 KNX... -
Page 56: Manual Operation With Constant Lighting Control Function
The override is detected via object 11, and the lighting remains on for the duration of the presence. After the room is vacated and the corresponding time delay has expired, the zone is again in normal standard operating mode. Optical presence detector thePixa P360 KNX... -
Page 57: Parallel Switching
This results in several light outputs with their own light measurement but with joint presence detection. Example of a Master-Master switching with 2 detectors: Optical presence detector thePixa P360 KNX... -
Page 58: Telegram Load When Using Parallel Switching
Please note that the time delay can never be shorter than the interval between two telegrams, in order to prevent unintentional switch off. The parallel switching is compatible with all Theben KNX presence detectors. Optical presence detector thePixa P360 KNX... -
Page 59: Aura Effect Function
An example of the aura effect with the required object links and parameter settings can be found in chapter 13.9 on page 86. Optical presence detector thePixa P360 KNX... -
Page 60: Adding The Persons Counted
By linking inputs and outputs, the result is the total number of persons. An example for adding the persons counted with the necessary object links and parameter settings can be found in chapter 13.10 on page 91. Optical presence detector thePixa P360 KNX... -
Page 61: Occupancy Rate
50% with an 8-bit output object (object 38 for zone 1). The value is transmitted every full hour. The thePixa Plug app also displays the occupancy rate of the last 7 days graphically. Example: If several zones are active, a separate chart is created for each zone. Optical presence detector thePixa P360 KNX... -
Page 62: Occupancy Density
This allows, for example, to determine which rooms are used to capacity and which are not. Example of evaluation for a meeting room: Total detection area (300 grids): Zone 1 includes 144 grids of the total detection area. Optical presence detector thePixa P360 KNX... - Page 63 60 min 6 persons or grids 10 min x 1‘000‘000 = 6‘944.44 ppm 144 grids 60 min 4 persons or grids 20 min x 1‘000‘000 = 9‘259.26 ppm 144 grids 60 min 16‘203.70 ppm Optical presence detector thePixa P360 KNX...
- Page 64 The thePixa Plug app also displays the occupancy density of the last 7 days graphically. Example: If several zones are active, a separate chart is created for each zone. The displayed value in the app is %. Optical presence detector thePixa P360 KNX...
-
Page 65: Update-Tool
Update-Tool 12 Update-Tool An ETS app is available for the KNX firmware update, which can be downloaded free of charge. For more detailed information on the procedure, please refer to the following document: https://www.theben.de/knx-update Optical presence detector thePixa P360 KNX... -
Page 66: Typical Applications
The lighting is automatically switched off if the room is vacated or the amount of daylight increases. 13.1.1 Devices • thePixa P360 KNX (2269200) • RMG 4 U (4930223) 13.1.2 Overview Obj. 10 Obj. 0 Optical presence detector thePixa P360 KNX... - Page 67 Activation of function via Switch object Standard or customer-defined parameter settings apply to unlisted parameters. If desired, zone 1 can be adjusted to suit the specific application in thePixa Plug app. Optical presence detector thePixa P360 KNX...
-
Page 68: Presence And Brightness-Dependent Switching Of Light, Additional Control Of Heating, 1 Zone
EM1 HME 6 T channel H1 / Transmission of actual Send °C value actual value temperature Z1 HVAC / EM1 HME 6 T channel H1 / Adjustment of the operating Send operating mode operating mode preset mode Optical presence detector thePixa P360 KNX... - Page 69 Channel function Heating controller options HME 6 T channel H1: setpoints div. parameters as per customer specification If desired, zone 1 can be adjusted to suit the specific application in thePixa Plug app. Optical presence detector thePixa P360 KNX...
-
Page 70: Presence And Brightness-Dependent Switching Of Light, Additional Manual Override Via Push Button, 4 Zones
Important: With the predefined zone divisions, zone 1 is always the entire detection area. This must be taken into account for lighting control. 13.3.1 Devices • thePixa P360 KNX (2269200) • iON 104 (4969234) • RMG 4 U (4930223) Optical presence detector thePixa P360 KNX... - Page 71 Z4 Light input / object Switching external Button T3.1 / switching button Z5 Light output / Switching RMG 4 U channel C4 / switch Z5 Light input / object Switching external Button T4.1 / switching button Optical presence detector thePixa P360 KNX...
- Page 72 Switching On/Off Activation of function via Switch object Standard or customer-defined parameter settings apply to unlisted parameters. If desired, the zones can be adjusted to suit the specific application in thePixa Plug app. Optical presence detector thePixa P360 KNX...
-
Page 73: Constant Lighting Control, 1 Zone
P360 KNX DALI Gateway KNX plus Comment Object name / function Object name Z1 Light output / Send value Group 1 / set value Z1 Light input / Group 1 / status value Feedback value Optical presence detector thePixa P360 KNX... - Page 74 Min/max values apply to Dimming object Switch-on via dimming Standard or customer-defined parameter settings apply to unlisted parameters. If desired, zone 1 can be adjusted to suit the specific application in thePixa Plug app. Optical presence detector thePixa P360 KNX...
- Page 75 Dimming value for lighting value Z1 Light input / DMG 2 T channel C1 / feedback Feedback value in % DMG 2 T channel C2 / dimming Z1 Ventilation Dimming value for ventilation value Optical presence detector thePixa P360 KNX...
- Page 76 Load selection Fan (soft switching deactivated) response Standard or customer-defined parameter settings apply to unlisted parameters. If desired, zone 1 can be adjusted to suit the specific application in thePixa Plug app. Optical presence detector thePixa P360 KNX...
- Page 77 Important: With the predefined zone divisions, zone 1 is always the entire detection area. This must be taken into account for the lighting control. 13.6.1 Devices • thePixa P360 KNX (2269200) • DALI Gateway KNX plus (9070929) Optical presence detector thePixa P360 KNX...
- Page 78 Obj. 33 Obj. 44 Obj. 34 Obj. 46 Obj. 38 Obj. 116 Obj. 131 Obj. 133 Obj. 117 Obj. 134 Obj. 118 Obj. 136 Obj. 122 Obj. 10 Obj. 11 Obj. 70 Obj. 71 Optical presence detector thePixa P360 KNX...
- Page 79 Z5 Light input / External button G4, dimming / brighter/darker Button T4 / brighter/darker brighter/darker Z5 Light output / G4, set value / value Send value Z5 Light input / G4, status / value Feedback value Optical presence detector thePixa P360 KNX...
- Page 80 Response to long / short One button operation Standard or customer-defined parameter settings apply to unlisted parameters. If desired, the zones can be adjusted to suit the specific application in thePixa Plug app. Optical presence detector thePixa P360 KNX...
- Page 81 The trigger signal acts on the light and on the HVAC channel of the Master. 13.7.1 Devices • thePixa P360 KNX (2269200) • RMG 4 U (4930223) 13.7.2 Overview Obj. 0 Obj. 10 Obj. 25 Master Obj. 24 Slave Obj. 24 Slave Optical presence detector thePixa P360 KNX...
- Page 82 P360 KNX (Master) thePixa P360 KNX (Slaves) Comment Object name / function Object name / function Z1 Parallel switching / Z1 Parallel switching / Connection between Master Trigger input Trigger output and Slaves Optical presence detector thePixa P360 KNX...
- Page 83 Activation of function via Switch object Standard or customer-defined parameter settings apply to unlisted parameters. If desired, the zones can be adjusted to suit the specific application in thePixa Plug app. Optical presence detector thePixa P360 KNX...
- Page 84 Obj. 25 Obj. 24 Obj. 25 Obj. 0 Obj. 10 Instead of 2 different detectors, a Master-Master parallel switching can also be implemented with just one thePixa, by configuring both zones as Master. Optical presence detector thePixa P360 KNX...
- Page 85 Activation of function via Switch object Standard or customer-defined parameter settings apply to unlisted parameters. If desired, the zones can be adjusted to suit the specific application in thePixa Plug app. Optical presence detector thePixa P360 KNX...
- Page 86 Important: With the predefined zone divisions, zone 1 is always the entire detection area. This must be taken into account for the lighting control. 13.9.1 Devices • thePixa P360 KNX (2269200) • DALI Gateway KNX plus (9070929) Optical presence detector thePixa P360 KNX...
- Page 87 Obj. 85 Obj. 76 Obj. 122 Master B Obj. 54 Obj. 44 Obj. 146 Obj. 55 Obj. 46 Obj. 150 Obj. 84 Obj. 74 Obj. 174 Obj. 85 Obj. 178 Master C Obj. 76 Optical presence detector thePixa P360 KNX...
- Page 88 Typical applications 13.9.3 Objects and links Links thePixa P360 KNX / Master A, DALI Gateway KNX plus B, C Comment Object name / function Object name Z2 Light output / Send value 34, 90, 146 Group 1, 3, 5 / set value...
- Page 89 Typical applications Links thePixa P360 KNX / Master B thePixa P360 KNX / Master C Comment Object name / function Object name Z3 Aura effect / Z2 Aura effect / Object link Send motion status Receive motion status Master B – Master C...
- Page 90 Min/max values apply to Dimming object Switch-on via dimming Standard or customer-defined parameter settings apply to unlisted parameters. If desired, the zones can be adjusted to suit the specific application in thePixa Plug app Optical presence detector thePixa P360 KNX...
- Page 91 • RMG 4 U (4930223) 13.10.2 Overview Obj. 32 Obj. 10 Obj. 0 Master A Obj. 31 Obj. 10 Obj. 10 Obj. 32 Master B Obj. 10 Obj. 20 Obj. 31 Obj. 33 Obj. 30 Master C Optical presence detector thePixa P360 KNX...
- Page 92 RMG 4 U channel C3 / switch Switching lighting on and Z1 Light output / Switching object Z1 Threshold switch 1 / RMG 4 U channel C4 / switch Switching warning light on Switching object and off Optical presence detector thePixa P360 KNX...
- Page 93 Typical applications 13.10.4 Important parameter settings thePixa P360 KNX / Master A Parameter page Parameter Setting General Installation height of detector 3.0 m (according to effective installation height) Zone definition 1 zone Zone 2…3 General zone settings Operating mode master...
- Page 94 Typical applications thePixa P360 KNX / Master C Parameter page Parameter Setting General Installation height of detector 3.0 m (according to effective installation height) Zone definition 1 zone Zone 1 General zone settings Operating mode master Master operating mode individual switching Activate light yes..