Table of Contents
Advertisement
Quick Links
Advertisement
Table of Contents

Related Manuals for Pulse Pursuit 240F


Summary of Contents for Pulse Pursuit 240F
-
Page 3: Table Of Contents
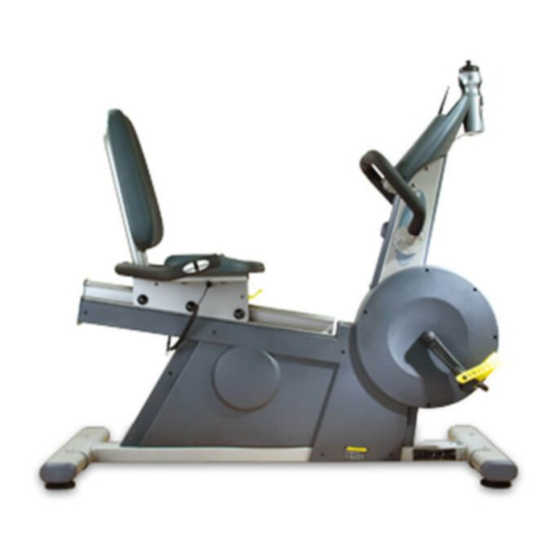
Installation Procedure Language Option MAIN FRAME Welcome Message Operational Information SEAT Preparing to use the Pulse 240F Pursuit Cycle Preparing to use the Pulse 250F Pursuit Cycle The Heart Rate Monitor Correct Exercising Posture The Control Panel Programme Control LCD Screen Graphic Display LED Screen Programme Selection, Control &... -
Page 4: Contents Of 240F Cycle Flat Pack And Assembly
240F Cycle Flat Pack The Pulse 240F Cycle will have to be assembled from the flat pack.The contents of the pack are as follows; This Manual Main Body Console Handle Bars Feet Struts Feet Strut Plates Pedals & Foot Straps Bottle &... - Page 5 Viewed from front Assembly of 240F Cycle Assemble the foot straps onto the pedals. The External Power Box has to be located inside the Front Feet Strut. Firstly attach the Power Box onto the PSU Cover Moulding, using the velcro strip. Carefully slide the Power Box cable from inside the feet strut through the grommet in the base.
- Page 6 Attach the handle bars to the main frame using the handle bar bolts, making sure that the heart rate sensor wire passes through the large hole as shown and appears at the top of the frame. Ensure the bolts are tight and secure. Split the console in halve, by taking out the 2 screws in the bottom halve.Then insert the...
- Page 7 Place the bottom halve of the console onto the frame and secure with the console bolts. NOTE: Fasten Bolts securely. Place the top halve of the console onto the bottom halve. Carefully pull the electrical connectors up from the frame. Ensure that all the electrical connectors attach to the circuit board as shown, (Also see wiring...
-
Page 8: Contents Of 250F Cycle Flat Pack And Assembly
250F Cycle Flat Pack The Pulse 250F Cycle will have to be assembled from the flat pack.The contents of the pack are as follows; This Manual Main Body Console Front Handle Bars Feet Struts Feet Strut Plates Pedals & Foot Straps Bottle &... - Page 9 Assembly of 250F Cycle Assemble the foot straps onto the pedals. The External Power Box has to be located inside the Front Feet Strut. Firstly attach the Power Box onto the PSU Cover Moulding, using the velcro strip. Carefully slide the Power Box cable from inside the feet strut through the grommet in the base.
- Page 10 Attach the handle bars to the main frame using the handle bar bolts, making sure that the heart rate sensor wire passes through the large hole as shown and appears at the top of the frame. Ensure the bolts are tight and secure. NOTE: Fasten Bolts securely.
- Page 11 Attach the rear handle bars using 3 rear handle bar bolts and washers. NOTE: Make sure that the “Male” connector block in the Handle Bars is connected to the “Female” connector block in the Seat. Attach the seat (lower) using the 4 lower seat bolts.
- Page 12 (11) Place the bottom halve of the console onto the frame and secure with the console bolts. NOTE: Fasten Bolts securely. (12) Place the top halve of the console onto the bottom halve. Carefully pull the electrical connectors up from the frame. Ensure that all the electrical connectors attach to the circuit board as shown, (Also see wiring...
- Page 13 GENERAL SAFETY PRECAUTIONS The successful and safe operation of the Pulse Pursuit & Perform Cycles is dependent upon its proper handling, installation operation and maintenance. The following safety precautions are for your safety and guidance. Please read them carefully before proceeding to install and/or operate the Pulse Pursuit &...
-
Page 14: Introduction
Ergonomically-designed rider position. • Low maintenance requirements. • Hand pulse sensor as standard, with a Polar receiver integrated into the console.A Polar transmitter belt can be supplied as an optional extra. • Data can be displayed in either imperial or metric units. -
Page 15: Technical Data
Humidity: Up to 95% relative humidity, non-condensing Displays: LED: 30 x 14 tricolour matrix (w x h) LCD: 128 x 64 negative-image STN (w x h) LED backlit NOTE: The Pulse cycles both use a speed independent electronic braking system. -
Page 16: Installation
Installation The Pursuit / Perform Cycle Package Before commencing installation, check that all parts and accessories have been supplied.The complete Pursuit / Perform Cycle package should include the following: Pursuit / Perform Cycle. Separate IEC mains cable with moulded 13 A plug fitted and External power supply box with cable. 4 &... -
Page 17: Installation Procedure
WARNING Installation Procedure When installing or adjusting any piece of Pulse Fitness Once the Pursuit / Perform Cycle has been sited you must ensure that equipment, DO NOT leave any adjustment devices it is stable. If necessary, adjust the height of the feet to compensate for projecting which could cause injury to any third party. -
Page 18: Language Option
Language Option, Maximum Time & Contrast Parameters CAUTION To alter these options you have to enter Test Mode, it is CAUTION: Seek professional advice prior to use. Fitlinxx Do not continue if you feel faint, dizzy or exhausted. START absolutely critical that when in Test Mode you only alter STOP the settings for these options, adjusting any other settings could result in terminal failure of the cycle. -
Page 19: Welcome Message
Smart Card is to be inserted with the information chip facing upwards. Welcome Message CAUTION To alter this option you have to enter Test Mode, it is absolutely critical that when in Test Mode you only alter the setting for this option, adjusting any other settings could result in terminal failure of the cycle. -
Page 20: Operational Information
The Heart Rate Monitor There are two types of heart rate monitor available for the Pursuit / Perform Cycle.The first is the hand pulse monitor which is standard on all cycles. The second is a cordless Polar chest strap monitor, which is an optional extra. - Page 21 To fit the heart rate monitor, proceed as follows: Attach one end of the elasticated strap to one end of the sensor strip as shown.Turn the end of the elasticated strap 90° and insert lug through the rear of the hole in the end of the monitor strip. Elasticated Strap Monitor Strip Then turn back through 90°...
-
Page 22: Correct Exercising Posture
Correct Exercising Posture Programme Control & Graphic Display Information, Help When using the Pulse Cycles, to ensure that you obtain the most from Information LCD Screen LED Screen & Options Button your workout, it is essential that you have the correct posture on the Cardio Theater machines as follows;... - Page 23 Information is therefore only displayed once an exercise programme has been selected and started. Examples of information displayed on this screen are as follows; (1) Time In all modes except Pace mode, the LEDs will illuminate progressively from left to right as the elapsed time of the exercise increases. i.e.When all LEDs are illuminated from left to right, the exercise time you have set has been completed (see Note on page 23).
-
Page 24: Programme Selection, Control & Data Entry Buttons
Programme Selection, Control and Data Entry Buttons The programme selection, control and data entry buttons provide the means of selecting, starting and stopping exercise programmes, and entering operational parameters such as duration, difficulty (effort), target heart rate, etc. In general, the buttons perform the following functions: Buttons for general selection and entering numerical data when requested. -
Page 25: Exercise Modes
Checked/adjusted the pedal straps. • Fitted the heart rate monitor chest strap or be holding the Hand pulse sensors and checked that the Console is receiving the signal (see Figure G for a general explanation of a Data Summary screen). -
Page 26: Manual Mode
Manual Mode Function: Enables you to exercise at a steady rate and time that you feel is suitable. Select Manual Mode. Enter Session time. Press ' + ' to increase or ' - ' to decrease the effort required to Effort turn the pedals during exercise. -
Page 27: Profile Mode
Profile Mode Function: Enables you to exercise at a pre-programmed variable rate for a time that you feel is suitable, with a choice of 5 profiles. Select Profile Mode. Effort level Enter Session time. Time Select profile. Exercise time Press ' + ' to increase or ' - ' to remaining decrease the effort required to turn the pedals during... -
Page 28: Pace Mode
Pace Mode Function: Enables you to compete against a computer-controlled ‘pace bike’ that travels at a constant speed (set by you) over a distance that you feel is suitable. Select Pace Mode. Enter Pacer speed. Direction Pacer position, of travel orange dot Enter Circuit distance. -
Page 29: Heart Rate Control Mode
Heart Rate Monitor sensor target rate* as beats per minute - No signal (bpm) from your data and - Hand Pulse Sensor detected automatically adjusts the effort to - Chest transmitter detected turn the pedals in order to achieve Your calculated Your current and maintain the target rate. - Page 30 Typical LED Display. Finished screen with options. Current position indicated by flashing orange row Time Computer raises or lowers Exercise time effort level automatically to remaining achieve & maintain Target Heart Rate.
-
Page 31: Fitness Level
Fitness Level Function: A seven minute test that enables your fitness trainer to measure improvements in your level of fitness following a prescribed programme of exercise. The objective of the test is to cycle at a constant 60 rpm under an increasing workload over the period of the test. - Page 32 Results. Once the test has finished you will be given a Fitness Level Mark out of five. The chart in Figure J shows how you rate between Excellent and Poor. Male Age Groups Female Age Groups 15-19 20-29 30-39 40-49 15-19 20-29 30-39...
-
Page 33: Maintenance
Switch off and disconnect the Cycle from the mains supply before carrying out any maintenance procedures. NEVER switch on the cycle while the side panels are removed. ALWAYS replace faulty/damaged parts with new genuine Pulse Fitness parts and never use the Pursuit / Perform Cycle until the machine has been fully repaired. -
Page 34: Corrective Maintenance
CAUTION The PCB contains components that are sensitive to static charges. Do not touch any of the components on the PCB or the PCB itself when removing or refitting the connectors. Corrective Maintenance Corrective maintenance is limited to replacing the control panel.To do this, proceed as follows: Read through all the following instructions before commencing work. -
Page 35: Warranty
If a defect involves a components part or accessory that is already in service and can reasonably be replaced or serviced by the purchaser, Pulse Fitness will be responsible only for providing, at no charge, a suitable replacement and instructions for the purchaser. -
Page 36: Target Heart Rate Zone Chart
Target Heart Rate Zone Chart Select your age band and appropriate training zone according to your fitness level (if in doubt, consult your health professional). The chart has been designed to enable the user to easily select their desired training zone, whether it be fat burning or cardiovascular training. -
Page 37: Troubleshooting
Troubleshooting Fault Probable cause Cure Control display remains blank. Not plugged in. Plug into mains socket. Not switched on. Switch machine on. Blown fuse on cycle or mains plug. Replace fuse. Control panel failed. Display screen is not clear, flickers or areas Poor contrast Adjust contrast.(Refer to Section 4.4 on Page 18) appear faint. -
Page 38: Declaration Of Conformity
Declaration of Conformity EC Declaration of Conformity Standards Route to Compliance 240F PULSE PURSUIT and 250F PULSE PERFORM CYCLES Directive Test Name Standard Year Low Voltage Directive Safety requirements for EN60065 1998 73/23/EEC mains operated electronic and related apparatus for... -
Page 39: Engineers Service History
Engineers Service History Date Description of fault/ Signed Date Description of fault/ Signed maintenance carried out maintenance carried out... -
Page 40: User's Notes
User’s Notes... - Page 44 Pulse Fitness GMBH Rombacher Hütte 10, D-44709, Bochum, Germany Tel: (49) 234 43623 Fax: (49) 234 9431330 email: pulsefitness@t-online.de Pulse Fitness Scandinavia AB Box 70, 25054 Helsingborg, Sweden Tel: +46 (0) 42 164075 135-100-9 Fax: +46 (0) 42 164076...