
Related Manuals for Meritor MM-96147


Summary of Contents for Meritor MM-96147
- Page 1 MAINTENANCE MANUAL MM-96147 DRIVELINE MAINTENANCE MANUAL (16579) MM-96147 / Revised 03-21 Printed in USA Copyright Meritor, Inc., 2021 Page 1...
- Page 2 If Tools and Supplies are Specifi ed in This Manual Contact Meritor’s Commercial Vehicle Aftermarket at 888-725-9355. For assistance with parts, you may also contact the Meritor Parts Center in Florence, KY at 859-525-3500 or CustCareCntr.Florence@Meritor.com. MM-96147 / Revised 03-21...
-
Page 3: Table Of Contents
Lubrication ............... 59 Universal Joints ..............12 Section 10: Center Bearing Removal and Installation ..60 Center Bearings ..............13 Center Bearings on Meritor Drivelines ......... 60 Slip Yoke ................14 Removal ................61 Permalube™ Drivelines ............ 15 Disassembly ..............61 Section 5: RPL Series Permalube ........ - Page 4 MM-96147 / Revised 03-21 (16579) Page 4 Copyright Meritor, Inc., 2021 Printed in USA...
-
Page 5: Section 1: Safety Information
CAUTION Indicates a hazardous situation or unsafe practice which, if not avoided, could result in injury or damage to components. (16579) MM-96147 / Revised 03-21 Printed in USA Copyright Meritor, Inc., 2021 Page 5... -
Page 6: Section 2: Driveline
END YOKE OUTPUT WELD TUBING BEARING CENTER SPLINED YOKE STUB BEARING YOKE SLIP SEAL SPLINE TUBING WELD YOKE WITH PLUG YOKE SHROUD WELCH PLUG 4003529a Fig. 2.1 MM-96147 / Revised 03-21 (16579) Page 6 Copyright Meritor, Inc., 2021 Printed in USA... -
Page 7: Two- And Three-Piece Driveline
END YOKE OUTPUT CENTER SPLINED BEARING YOKE WELD BEARING TUBING YOKE STUB SEAL SLIP SPLINE TUBING WELD WITH YOKE PLUG YOKE SHROUD WELCH PLUG 4004043a Fig. 2.2 (16579) MM-96147 / Revised 03-21 Printed in USA Copyright Meritor, Inc., 2021 Page 7... - Page 8 END YOKE END YOKE OUTPUT OUTPUT OUTPUT REAR FRONT AXLE SLIP SHAFT SEAL AXLE YOKE YOKE UNIVERSAL JOINT COMPONENTS BEARING CUPS TRUNNION BEARING CROSS 4003528a Fig. 2.3 MM-96147 / Revised 03-21 (16579) Page 8 Copyright Meritor, Inc., 2021 Printed in USA...
-
Page 9: Section 3: Introduction
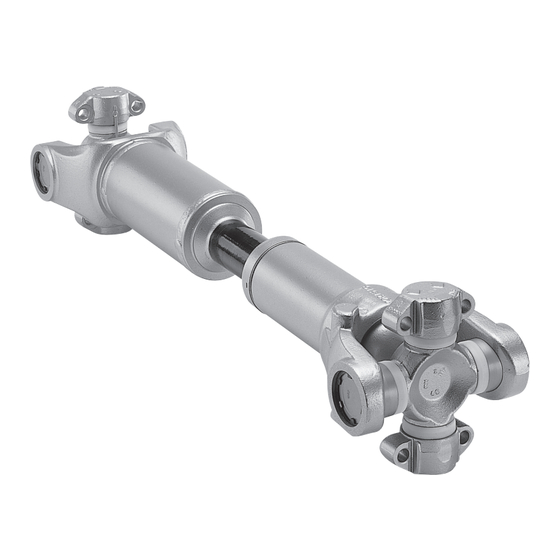
Introduction Description RPL Series Permalube™ (Non-Greaseable) The Meritor RPL Series Permalube non-greaseable driveline is permanently lubricated and sealed at the factory and does not require lubricant. RPL10 and RPL14 series drivelines are similar to the 155R series driveline except they do not require lubrication. - Page 10 Introduction EASY SERVICE (1/2 ROUND) 4001789a Fig. 3.6 WING-STYLE 4003527a Fig. 3.7 155R SERIES 4001789b Fig. 3.8 MM-96147 / Revised 03-21 (16579) Page 10 Copyright Meritor, Inc., 2021 Printed in USA...
-
Page 11: Section 4: Inspection
• If the output and input end yokes or fl anges are loose: Disconnect the driveline. Tighten the retaining nut to the correct specifi cation. Refer to the axle or transmission manufacturer’s service instructions. (16579) MM-96147 / Revised 03-21 Printed in USA Copyright Meritor, Inc., 2021 Page 11... -
Page 12: Universal Joints
fi ne-tooth fi le or emery cloth. Figure 4.3. • If bolt hole threads are damaged: Replace the yoke or fl ange. 4001794a Fig. 4.4 Yoke-Style Driveline MM-96147 / Revised 03-21 (16579) Page 12 Copyright Meritor, Inc., 2021 Printed in USA... -
Page 13: Center Bearings
Verify that the rubber cushion is correctly seated in the metal bracket. 4001797a • If any of these conditions are evident: Replace the center bearing assembly. Fig. 4.7 Yoke-Style Driveline (16579) MM-96147 / Revised 03-21 Printed in USA Copyright Meritor, Inc., 2021 Page 13... -
Page 14: Slip Yoke
Inspect for excessive wear on the rubber lip of the seal. If there is excessive movement and vibration of the slip yoke assembly, refer to Section 14 for the troubleshooting procedures. MM-96147 / Revised 03-21 (16579) Page 14 Copyright Meritor, Inc., 2021... -
Page 15: Permalube™ Drivelines
0.017-inch (0.432 mm). • If the radial movement exceeds 0.017-inch (0.432 mm): Replace the slip yoke and the tube shaft. (16579) MM-96147 / Revised 03-21 Printed in USA Copyright Meritor, Inc., 2021 Page 15... - Page 16 • Wing-Style Permalube drivelines: Install new capscrews with Dri-Loc patches and secure the capscrews with lock washers. Meritor recommends that you inspect RPL Series Permalube bearing cup capscrews and wing-style capscrews and lock washers at initial inspection, or no more than 2,000 miles (3200 km).
- Page 17 Inspection 4011832a Fig. 4.15 Flange-Style Driveline 4001806a Fig. 4.16 Yoke-Style Driveline 4011832b Fig. 4.17 Flange-Style Driveline (16579) MM-96147 / Revised 03-21 Printed in USA Copyright Meritor, Inc., 2021 Page 17...
-
Page 18: Section 5: Rpl Series Permalube
If necessary, use a brass drift and lightly tap the center of the driveline to separate from the vehicle. Serious personal injury bushing to assist in snap ring removal. Figure 5.2. and damage to components can result. MM-96147 / Revised 03-21 (16579) Page 18 Copyright Meritor, Inc., 2021... -
Page 19: Disassembly
Figure 5.6. 4001812c Fig. 5.3 Press DOWN until the fi rst round bushing loosens. Figure 5.3. Remove the round bushing. Figure 5.4. Fig. 5.6 (16579) MM-96147 / Revised 03-21 Printed in USA Copyright Meritor, Inc., 2021 Page 19... -
Page 20: Assembly
4001824a Use the grease packet supplied with the slip yoke to apply the Fig. 5.12 entire amount of grease into the slip yoke. Figure 5.10. MM-96147 / Revised 03-21 (16579) Page 20 Copyright Meritor, Inc., 2021 Printed in USA... -
Page 21: Installation
Position the fi rst bushing onto the trunnion by threading the cross trunnion through the yoke bore. Figure 5.18. 4001831b Fig. 5.15 Snap the shroud over the seal. Figure 5.16. (16579) MM-96147 / Revised 03-21 Printed in USA Copyright Meritor, Inc., 2021 Page 21... - Page 22 Use snap ring pliers to install the snap ring into the snap ring groove. Figure 5.20. Fully seat the snap ring. Fig. 5.22 MM-96147 / Revised 03-21 (16579) Page 22 Copyright Meritor, Inc., 2021 Printed in USA...
-
Page 23: Rpl20, Rpl25 And Rpl25Sd Series Permalube Procedures
Use a torque wrench to alternately tighten the capscrews to procedures. NEVER hit steel parts with a steel hammer. Pieces Meritor’s driveline torque specifi cation. Figure 5.24. of a part can break off. Serious personal injury and damage to components can result. -
Page 24: Removal
NOTE: Support the driveline when you remove it from the end yoke. If necessary, use an appropriate tool to tap the wing bushing from the end yoke. Figure 5.27. MM-96147 / Revised 03-21 (16579) Page 24 Copyright Meritor, Inc., 2021... - Page 25 Figure 5.30. Refer to the Service Notes page on the front inside cover of this manual for information to obtain these tools. 4001814c Fig. 5.32 Remove the universal joint from the yoke. (16579) MM-96147 / Revised 03-21 Printed in USA Copyright Meritor, Inc., 2021 Page 25...
-
Page 26: Disassembly
Pull the slip yoke and slip shaft sections apart. Figure 5.38. Turn over the universal joint. Repeat the procedure for the opposite side of the universal joint. MM-96147 / Revised 03-21 (16579) Page 26 Copyright Meritor, Inc., 2021... -
Page 27: Assembly
Install the new seal onto the spline shaft neck. Ensure that the entire amount of grease into the slip yoke. Figure 5.41. small diameter side fi ts onto the splines fi rst. Figure 5.44. (16579) MM-96147 / Revised 03-21 Printed in USA Copyright Meritor, Inc., 2021 Page 27... -
Page 28: Installation
You must install the 4001831a interference bosses away from the yoke. Figure 5.49. Fig. 5.46 Snap the shroud over the seal. Figure 5.47. MM-96147 / Revised 03-21 (16579) Page 28 Copyright Meritor, Inc., 2021 Printed in USA... - Page 29 As a result, it was possible to insert the wing bushing into the yoke and install the pieces incorrectly. Figure 5.50. INCORRECT BUSHING INSTALLATION CORRECT BUSHING INSTALLATION 4003387c Fig. 5.50 (16579) MM-96147 / Revised 03-21 Printed in USA Copyright Meritor, Inc., 2021 Page 29...
- Page 30 Fig. 5.51 Install the universal joint into the yoke so that the wing bearing weld straps face INBOARD and the arrows point toward the end or coupling yokes. Figure 5.52. MM-96147 / Revised 03-21 (16579) Page 30 Copyright Meritor, Inc., 2021...
- Page 31 Figure 5.56 and Figure 5.57. 4001884b Fig. 5.53 Position the fi rst round bushing onto the trunnion by threading the cross trunnion through the yoke bore. Figure 5.54. (16579) MM-96147 / Revised 03-21 Printed in USA Copyright Meritor, Inc., 2021 Page 31...
- Page 32 Figure 5.60. Use snap ring pliers to install the snap ring into the snap ring groove. Figure 5.58. Fully seat the snap ring. MM-96147 / Revised 03-21 (16579) Page 32 Copyright Meritor, Inc., 2021...
- Page 33 115-135 lb-ft (155-183 Nm). Figure 5.64. bushing point TOWARD the end yoke, and the universal joint weld strap faces the driveline and AWAY from the yoke. (16579) MM-96147 / Revised 03-21 Printed in USA Copyright Meritor, Inc., 2021 Page 33...
-
Page 34: Rpl35 And Rpl35Sd Series Permalube Procedures
Use a brass or synthetic mallet for assembly and disassembly procedures. NEVER hit steel parts with a steel hammer. Pieces of a part can break off. Serious personal injury and damage to components can result. MM-96147 / Revised 03-21 (16579) Page 34 Copyright Meritor, Inc., 2021... - Page 35 (SPX Kent-Moore tool number J-42368-2) radius of the bottom trunnion as shown. Refer to Section 16 underneath. Figure 5.68. for a tool drawing. Figure 5.71 and Figure 5.72. (16579) MM-96147 / Revised 03-21 Printed in USA Copyright Meritor, Inc., 2021 Page 35...
- Page 36 Install the press bridge tool on the ears of the drive fl ange and use a press to press DOWN. Figure 5.74. RECEIVER 4011754a Fig. 5.76 MM-96147 / Revised 03-21 (16579) Page 36 Copyright Meritor, Inc., 2021 Printed in USA...
- Page 37 Install the press bridge tool and press DOWN until the cross is pressed out. 10. Remove the bushing/bearing assembly and the half-round sleeves. Remove the cross from the drive fl ange. Figure 5.82. TRUNNION 4011755a Fig. 5.79 (16579) MM-96147 / Revised 03-21 Printed in USA Copyright Meritor, Inc., 2021 Page 37...
-
Page 38: Assembly
Figure 5.86. 4011757a Fig. 5.83 CYLINDER Install the cross into the drive fl ange. Figure 5.84. 4011760a Fig. 5.86 MM-96147 / Revised 03-21 (16579) Page 38 Copyright Meritor, Inc., 2021 Printed in USA... - Page 39 Figure 5.92. SNAP RING LESS THAN 0.450" (11.4 MM) 0.450" (11.4 MM) MIN. INCORRECTLY CORRECTLY SEATED SEATED 4011773a Fig. 5.89 4011764a Fig. 5.92 (16579) MM-96147 / Revised 03-21 Printed in USA Copyright Meritor, Inc., 2021 Page 39...
-
Page 40: Installation
Once correctly seated, the snap ring will expand in the groove and the ends of the snap ring will spread further apart. 4011767a Fig. 5.95 MM-96147 / Revised 03-21 (16579) Page 40 Copyright Meritor, Inc., 2021 Printed in USA... - Page 41 12. After assembly, strike the ears of the yoke with a brass mallet to relieve the stress and free up the cross joint. Move it by Fig. 5.102 hand to ensure it moves freely. (16579) MM-96147 / Revised 03-21 Printed in USA Copyright Meritor, Inc., 2021 Page 41...
- Page 42 LOCK WASHER DRIVE YOKE FLANGE FLANGE 4011822a Fig. 5.103 LIMITED CLEARANCE INSTALL M14 M14 NUT BOLT FROM THIS SIDE DRIVE YOKE FLANGE FLANGE 4011823a Fig. 5.104 MM-96147 / Revised 03-21 (16579) Page 42 Copyright Meritor, Inc., 2021 Printed in USA...
-
Page 43: Section 6: Full-Round
Use a screwdriver to pry the seal out of the groove in the slip BUSHING yoke. Figure 6.3. 4001893a Fig. 6.1 Remove the second bearing cup. Figure 6.2. (16579) MM-96147 / Revised 03-21 Printed in USA Copyright Meritor, Inc., 2021 Page 43... -
Page 44: Installation
4001824a Fig. 6.8 Install the new seal onto the spline shaft neck. Ensure that the small diameter side fi ts onto the splines fi rst. Figure 6.9. MM-96147 / Revised 03-21 (16579) Page 44 Copyright Meritor, Inc., 2021 Printed in USA... - Page 45 NEVER hit steel parts with a steel hammer. Pieces of a part can break off. Serious personal injury and damage to Fig. 6.13 components can result. (16579) MM-96147 / Revised 03-21 Printed in USA Copyright Meritor, Inc., 2021 Page 45...
-
Page 46: Lubrication
fi tting until grease fl ows from the bearing cup seals on all four trunnions. Use Meritor grease specifi cation O-634-B, NLGI Repeat Step 2 to Step 5 to install the second bearing cup. - Page 47 NOTE: When you lubricate a slip yoke, the splined shaft can be either fully extended or fully collapsed. After installation, add Meritor specifi cation O-634-B, NLGI Grade 2 with EP additive to the slip yoke grease fi tting. Six to eight pumps or approximately one oz (28 grams) is suffi...
-
Page 48: Section 7: Wing-Style Permalube
Figure 7.2. Refer to Table C. Loosen and remove the four capscrews from the slip yoke end of the driveline. Support the slip yoke end, and separate it from the vehicle. MM-96147 / Revised 03-21 (16579) Page 48 Copyright Meritor, Inc., 2021... -
Page 49: Lubrication
Tap the bearing cups lightly with a brass or copper hammer to Add Meritor specifi cation O-634-B, NLGI Grade 2 with EP additive seat the bearing cups into the end yoke. to the slip yoke grease fi tting. Six to eight pumps or approximately NOTE: Any time a universal joint is disconnected, new capscrews one oz (28 grams) is suffi... -
Page 50: Section 8: Easy Service
Remove the seal and shroud. Figure 8.4 and Figure 8.5. Repeat Step 1 to Step 3 to remove the universal joint cross from the slip yoke. MM-96147 / Revised 03-21 (16579) Page 50 Copyright Meritor, Inc., 2021... -
Page 51: Assembly
Snap the shroud over the seal. Install the new seal onto the spline shaft neck. Ensure that the small diameter side fi ts onto the splines fi rst. Figure 8.7. (16579) MM-96147 / Revised 03-21 Printed in USA Copyright Meritor, Inc., 2021 Page 51... -
Page 52: Installation
Easy Service Installation Use a torque wrench to alternately tighten the capscrews to Meritor’s driveline torque specifi cation. Refer to Table D. Figure 8.10. Universal Joint Repeat Step 1 through Step 3 to attach the weld yoke end of WARNING the driveline to the vehicle. -
Page 53: Lubrication
Use a grease Grade 2 with EP additive, to the slip yoke grease fi tting. Six to eight that meets Meritor specifi cation O-634-B, NLGI Grade 2 with EP pumps or approximately one oz (28 grams) is suffi cient to lube the additive. -
Page 54: Section 9: 155R Series Slip Drive Shaft Assembly
Place the universal joint in a suitable press bridge and bearing cup bushing receiver. Figure 9.3. Use snap ring pliers to remove the snap rings. Figure 9.1. MM-96147 / Revised 03-21 (16579) Page 54 Copyright Meritor, Inc., 2021... -
Page 55: Disassembly
Figure 9.9. Mark the slip yoke and slip shaft sections to ensure that you reassemble them into their original positions. Figure 9.6. (16579) MM-96147 / Revised 03-21 Printed in USA Copyright Meritor, Inc., 2021 Page 55... - Page 56 Install the new seal onto the spline shaft neck. Ensure that the small diameter side fi ts onto the splines fi rst. Figure 9.11. 4001831b Fig. 9.13 Push together the driveline sections. Figure 9.14. MM-96147 / Revised 03-21 (16579) Page 56 Copyright Meritor, Inc., 2021 Printed in USA...
-
Page 57: Installation
Figure 9.18. Observe all warnings and cautions provided by the press manufacturer to avoid damage to components and serious personal injury. (16579) MM-96147 / Revised 03-21 Printed in USA Copyright Meritor, Inc., 2021 Page 57... - Page 58 Hand-tighten the capscrews through the bearing strap into the yoke. Use a torque wrench to alternately tighten the capscrews to Meritor’s driveline torque specifi cation. Figure 9.21. Fig. 9.19 Strike the yoke ear with a brass or copper hammer to ensure Fig.
-
Page 59: Lubrication
Lubricate the universal joints at the grease fi tting until grease fl ows from the bearing cup seals on all four trunnions. Use a grease that meets Meritor specifi cation O-634-B, NLGI Grade 2 with EP additive. Figure 9.22. • If grease does not purge from all four trunnion seals: Follow the steps below. -
Page 60: Section 10: Center Bearing Removal And Installation
Center Bearings on Meritor Drivelines 4003025c The center bearing removal and installation procedures in this section apply to Meritor RPL Permalube, Wing-Style Permalube, Fig. 10.1 Easy Service, Full-Round and 155R drivelines. MM-96147 / Revised 03-21 (16579) Page 60 Copyright Meritor, Inc., 2021... -
Page 61: Removal
Fig. 10.3 Flange-Style Driveline Remove the universal joint from the coupling yoke or fl ange. Discard the universal joint mounting bolts. 4011833a Fig. 10.5 Flange-Style Driveline (16579) MM-96147 / Revised 03-21 Printed in USA Copyright Meritor, Inc., 2021 Page 61... - Page 62 Follow the puller tool manufacturer’s instructions. Figure 10.10 and Figure 10.11. • If the yoke or fl ange is loose enough to remove by hand: Replace the entire coupling shaft. MM-96147 / Revised 03-21 (16579) Page 62 Copyright Meritor, Inc., 2021...
- Page 63 Remove both defl ectors, if equipped. Install a new center bearing, defl ectors, if necessary, and coupling yoke. Fig. 10.12 Remove and discard the rubber cushion. Figure 10.13. (16579) MM-96147 / Revised 03-21 Printed in USA Copyright Meritor, Inc., 2021 Page 63...
-
Page 64: Installation
Use a punch and brass hammer to install the bearing. Install the center bearing bracket bolts. Tighten them to the vehicle manufacturer’s specifi cation. Figure 10.20 and Figure 10.21. MM-96147 / Revised 03-21 (16579) Page 64 Copyright Meritor, Inc., 2021... - Page 65 Center Bearing Removal and Installation 4001800a Fig. 10.20 Yoke-Style Driveline 4011835a Fig. 10.21 Flange-Style Driveline (16579) MM-96147 / Revised 03-21 Printed in USA Copyright Meritor, Inc., 2021 Page 65...
-
Page 66: Section 11: Lubrication
Table E. • Inspect RPL Series Permalube and Wing-Style Permalube non-greaseable drivelines at least every 25,000 miles (40 000 km). MM-96147 / Revised 03-21 (16579) Page 66 Copyright Meritor, Inc., 2021 Printed in USA... - Page 67 (up positions until to 10 stops per an interval can miles). be determined. Grease the assembly as necessary. (16579) MM-96147 / Revised 03-21 Printed in USA Copyright Meritor, Inc., 2021 Page 67...
- Page 68 Lubrication Table F: Approved Lubricants Lubricant Recommendation Universal Joint Grease Must meet Meritor Specifi cation O-634-B (NLGI Grade 2, Lithium 12-Hydroxy Stearate with Molybdenum Disulfi de) Amalie All Purpose Grease with Moly-L1-2M Exxon 5160 Shell Super Duty Special FF Marathon Maralube Molycode 529...
-
Page 69: Section 12: Torque Specifications
Fasteners 3/8-24 45-60 (61-81) WASHER BOLT 1/2-20 115-135 (155-183) RPL10 and RPL14 Series Permalube, and 155R Series Drivelines 16T Series Driveline 17T, 17LT, 18T Series Drivelines (16579) MM-96147 / Revised 03-21 Printed in USA Copyright Meritor, Inc., 2021 Page 69... -
Page 70: Section 13: Troubleshooting
Use the following procedure to check for looseness across the ends 4001802a of the universal joint bearing cup assemblies and trunnions. Fig. 13.4 Check for loose grease fi ttings. Tighten them to 6 lb-ft (8 Nm). MM-96147 / Revised 03-21 (16579) Page 70 Copyright Meritor, Inc., 2021 Printed in USA... - Page 71 4011840a Fig. 13.8 Flange-Style Driveline (16579) MM-96147 / Revised 03-21 Printed in USA Copyright Meritor, Inc., 2021 Page 71...
- Page 72 Rebalance or replace. Worn universal joint Replace the universal joint. Torsional or inertial excitation Reduce the universal joint continuous running angle by adding shims to driveline components. MM-96147 / Revised 03-21 (16579) Page 72 Copyright Meritor, Inc., 2021 Printed in USA...
- Page 73 Excessive torque load for universal Replace with a higher capacity universal joint and driveline. assemblies joint and driveline size TYPICAL SHOCK FAILURE — CROSS DAMAGE 4001862a (16579) MM-96147 / Revised 03-21 Printed in USA Copyright Meritor, Inc., 2021 Page 73...
- Page 74 Driveline too long for operating Install a two-piece driveline with a shaft support bearing. bending speeds Bending fatigue due to secondary Reduce the universal joint continuous running angle. couple loads MM-96147 / Revised 03-21 (16579) Page 74 Copyright Meritor, Inc., 2021 Printed in USA...
- Page 75 New center parts will not fl ex Yoke ears are distorted, causing the Replace the yoke. when you install them into the center parts to bind yoke (16579) MM-96147 / Revised 03-21 Printed in USA Copyright Meritor, Inc., 2021 Page 75...
-
Page 76: Section 14: Meauring And Recording Driveline Angles
• One-piece driveline, single rear axle • One-piece driveline, tandem rear axle • Two-piece driveline, single rear axle • Two-piece driveline, tandem rear axle MM-96147 / Revised 03-21 (16579) Page 76 Copyright Meritor, Inc., 2021 Printed in USA... - Page 77 Usually found on the transmission specification engine specification label If equipped plaque attached to the attached to the tractor's with air ride. tractor instrument panel. engine block. Fig. 14.3 (16579) MM-96147 / Revised 03-21 Printed in USA Copyright Meritor, Inc., 2021 Page 77...
- Page 78 Phasing Type (Refer to the reverse side.) Transmission Angle Maximum Engine RPM Transmission Top Gear Ratio Rear Suspension Ride Height Maximum Engine HP Clutch 4001904a Fig. 14.5 MM-96147 / Revised 03-21 (16579) Page 78 Copyright Meritor, Inc., 2021 Printed in USA...
-
Page 79: Measure
fl at transmission surface, including the countershaft bearing covers or the PTO cover. Figure 14.7 and Figure 14.8. SPACER Fig. 14.8 Fig. 14.7 (16579) MM-96147 / Revised 03-21 Printed in USA Copyright Meritor, Inc., 2021 Page 79... - Page 80 Gathering Worksheet. Figure 14.14. Figure 14.11. Inter-Axle Front Axle Rear Axle Driveline 1st Driveline 2nd Driveline Angle Angle Angle Angle Angle 4001898a Fig. 14.14 4001910a Fig. 14.11 MM-96147 / Revised 03-21 (16579) Page 80 Copyright Meritor, Inc., 2021 Printed in USA...
- Page 81 Gathering Worksheet. Figure 14.17. eline Front Axle Rear Axle Angle Angle Angle Inter-Axle Front Axle Driveline Rear Axle Angle Angle Angle Fig. 14.20 4001900a Fig. 14.17 (16579) MM-96147 / Revised 03-21 Printed in USA Copyright Meritor, Inc., 2021 Page 81...
-
Page 82: Adjustment
11.5 -7.0 Fig. 14.21 Manually Calculating Driveline Angles If a computer and/or the Meritor Driveline Angle Analysis Program are not available, driveline joint angles can be calculated manually. Fig. 14.22 Recommended amboid driveline angles are shown in Figure 14.23. To calculate a joint angle, subtract the measured forward component angle from the measured rear component angle for that joint. -
Page 83: Driveline Angle Analysis Program
• OEM Program: • Model • Two-piece tandem • VIN • Two-piece single • Unit • One-piece single • Year • One-piece tandem • DSM name (16579) MM-96147 / Revised 03-21 Printed in USA Copyright Meritor, Inc., 2021 Page 83... - Page 84 PARALLEL. If the yoke lugs are not aligned (opposite or crossed), the section is CROSSED. Both sections are considered when determining the phasing type. MM-96147 / Revised 03-21 (16579) Page 84 Copyright Meritor, Inc., 2021 Printed in USA...
-
Page 85: Measuring And Recording Driveline Angles: Plan View
Failure to use a jack stand can result in serious personal injury and damage to components. WARNING To prevent eye injury, always wear eye protection when performing vehicle maintenance or service. (16579) MM-96147 / Revised 03-21 Printed in USA Copyright Meritor, Inc., 2021 Page 85... - Page 86 Use a carpenter’s square or other straightedge if needed. Figure 14.28. The universal joint plan view angle can now be calculated by using Formula 1. 4005553a Fig. 14.31 MM-96147 / Revised 03-21 (16579) Page 86 Copyright Meritor, Inc., 2021 Printed in USA...
- Page 87 Fig. 14.33 Calculate the plan view universal joint angles using Formula 1. Figure 14.34. Distance –Distance –1 Axle Trans Plan_Angle= Tan Driveline_Length Formula 1 4005555a Fig. 14.34 (16579) MM-96147 / Revised 03-21 Printed in USA Copyright Meritor, Inc., 2021 Page 87...
-
Page 88: Section 15: Driveline Balance Weight
RECOMMENDED When re-balancing drivelines, proper driveline weights are WELD YOKE SLIP YOKE necessary. Meritor’s recommended practices for welding balance weights are shown in Figure 15.1, Figure 15.2, Figure 15.3, Figure 15.4 and Figure 15.5. 0.25” (6.35 MM) RECOMMENDED WELD YOKE... -
Page 89: Section 16: Special Tools
Fig. 16.1 Refer to the Service Notes page on the front inside cover of this manual for information on how to obtain these tools. *See Tool Drawings. (16579) MM-96147 / Revised 03-21 Printed in USA Copyright Meritor, Inc., 2021 Page 89... - Page 90 0.008" (0.203 MM) 0.081" SEE DETAIL Z (2.057 MM) Ø2.10" Ø1.808± 0.030" (53.34 MM) (45.9232± 0.762 MM) 1.12" (28.448 MM) RPL35/35SD HALF-ROUND SLEEVE 4011820a Fig. 16.2 MM-96147 / Revised 03-21 (16579) Page 90 Copyright Meritor, Inc., 2021 Printed in USA...
- Page 91 2.16" (54.864 MM) R0.06" (1.524 MM) 0.12" SECTION B-B (3.048 MM) 0.06" (1.524 MM) X 45° SECTION A-A RPL35/35SD BEARING CUP BUSHING RECEIVER 4011821a Fig. 16.3 (16579) MM-96147 / Revised 03-21 Printed in USA Copyright Meritor, Inc., 2021 Page 91...
- Page 92 1.00425 2X 35 6.39 2.015 5.985 0.75 1/2-13 UNC-2B 1.01 0.4075 TAP DRILL 1.27 0.75 1.13 7.50 2.2765 0.684 2X R.277 4017045a BRIDGE TOOL Fig. 16.4 MM-96147 / Revised 03-21 (16579) Page 92 Copyright Meritor, Inc., 2021 Printed in USA...
- Page 93 Special Tools Ø2.92 Ø2.38 Ø3.5 0.124 SECTION A-A BEARING CUP BUSHING RECEIVER 4017046a Fig. 16.5 (16579) MM-96147 / Revised 03-21 Printed in USA Copyright Meritor, Inc., 2021 Page 93...
- Page 94 Special Tools 1.00 0.265 Ø2.37 Ø1.762 0.75 YOKE BEARING CUP TOOL 4017047a Fig. 16.6 MM-96147 / Revised 03-21 (16579) Page 94 Copyright Meritor, Inc., 2021 Printed in USA...
-
Page 95: Section 17: Glossary
Permalube Driveline— A driveline incorporating permanently lubricated universal joints with a permanently lubricated and sealed slip section. The entire assembly does not require regular lubrication. (16579) MM-96147 / Revised 03-21 Printed in USA Copyright Meritor, Inc., 2021 Page 95... -
Page 96: Section 18: Appendix
For drivelines outside of the same plane, measure the offsets of each joint to the frame. Measure joint center to joint center lengths of each shaft. Fax this information to OnTrac’s Customer Service Center at 248-435-5580 or call the Center at 866-OnTrac1 (668-7221) for assistance. 2. Drivelines are balanced according to Meritor’s driveline specifications. Fig. 18.1... - Page 97 For drivelines outside of the same plane, measure the offsets of each joint to the frame. Measure joint center to joint center lengths of each shaft. Fax this information to OnTrac’s Customer Service Center at 248-435-5580 or call the Center at 866-OnTrac1 (668-7221) for assistance. 2. Drivelines are balanced according to Meritor’s driveline specifications. Fig. 18.2...
- Page 98 For drivelines outside of the same plane, measure the offsets of each joint to the frame. Measure joint center to joint center lengths of each shaft. Fax this information to OnTrac’s Customer Service Center at 248-435-5580 or call the Center at 866-OnTrac1 (668-7221) for assistance. 2. Drivelines are balanced according to Meritor’s driveline specifications. Fig. 18.3...
- Page 99 For drivelines outside of the same plane, measure the offsets of each joint to the frame. Measure joint center to joint center lengths of each shaft. Fax this information to OnTrac’s Customer Service Center at 248-435-5580 or call the Center at 866-OnTrac1 (668-7221) for assistance. 2. Drivelines are balanced according to Meritor’s driveline specifications. Fig. 18.4...
- Page 100 Information contained in this publication was in effect at the time the publication was approved for printing and is subject to change without notice or liability. 2135 West Maple Road Meritor Heavy Vehicle Systems, LLC, reserves the right to revise the information presented or to discontinue the production of parts described at any time. Troy, MI 48084 USA...