Table of Contents
Advertisement
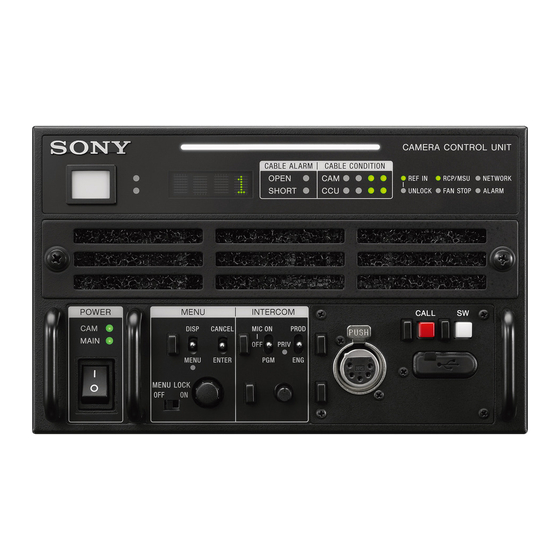
CAMERA CONTROL UNIT
HDCU3500
HDCU5500
UHB TRANSMISSION BOARD KIT
HKCU-FB50
ST 2110 INTERFACE KIT
HKCU-SFP50
利用条件:
① 本情報はソニー製品の販売、設置、設定、使用の目的でのみご利用ください。かかる目的以外での利用を禁止します。
② 著作者の事前の書面による許可なく、本情報の全部または一部の複写、複製、転載、改変、翻訳、送信等を禁止します。
情報改訂:
本情報は、当社の裁量により、予告なく変更されることがあります。ご使用される場合、本情報が最新の情報であることを確認のうえ、
ご使用ください。
Conditions of Use:
(1) Please use this information only for the purpose of sales, installation, configuration, and use of Sony products. Using this information
for any purpose other than the purpose described foregoing is forbidden.
(2) Do not copy, replicate, reproduce, alter, translate, transmit, sell, lease, or distribute this information in whole or in part without the prior
written permission of the author.
Revision of Information:
This information may be changed or updated at any time without any prior notice. Please confirm that this information is up-to-date before
using it.
SERVICE MANUAL
1st Edition (Revised 1)
SINGLE MODE FIBER EXTENSION KIT
HKCU-SM50
RECORDING OPTION
HKCU-REC55
Advertisement
Table of Contents

Related Manuals for Sony HDCU3500


Summary of Contents for Sony HDCU3500
- Page 1 ご使用ください。 Conditions of Use: (1) Please use this information only for the purpose of sales, installation, configuration, and use of Sony products. Using this information for any purpose other than the purpose described foregoing is forbidden. (2) Do not copy, replicate, reproduce, alter, translate, transmit, sell, lease, or distribute this information in whole or in part without the prior written permission of the author.
- Page 2 à moins d’être qualifié pour en effectuer d’autres. Pour toute réparation faire appel à une personne compétente uniquement. Model Name Serial No. HDCU3500/L (SY): LEMO Op- 10001and Higher tical Fiber Connector HDCU3500/T (SY): Tajimi Op-...
- Page 3 CLASS 1 LASER PRODUCT LASER KLASSE 1 PRODUKT LUOKAN 1 LASERLAITE KLASS 1 LASER APPARAT This Baseband Processor Unit is classified as a CLASS 1 LASER PRODUCT. HDCU3500/HDCU5500...
- Page 4 Batterien nur durch den vom Hersteller empfohlenen Kasser batteriet i henhold til gjeldende avfallsregler. oder einen gleichwertigen Typ ersetzen. Wenn Sie die Batterie entsorgen, müssen Sie die Gesetze der jeweiligen Region und des jeweiligen Landes befolgen. HDCU3500/HDCU5500...
-
Page 5: Table Of Contents
Top Chassis/Air Distributor Assembly ..................2-12 HDCU3500/HDCU5500... - Page 6 TX-167B Board (HDCU5500/HKCU-FB50)/TX-167A Board (HDCU3500)........
- Page 7 NET-37 Board (HKCU-SFP50)(2/2)....................7-11 HDCU3500/HDCU5500...
- Page 8 Frame Wiring......................... . . 8-6 Revision History HDCU3500/HDCU5500...
-
Page 9: Service Overview
Section 1 Service Overview 1-1. Location of Printed Wiring Boards TX-167B (HDCU5500) TX-167A (HDCU3500) HIF-76 CN-4055 PS-939 RE-345 SY-467 CN-4054 LE-429 CN-4052 CN-4053 CN-4057 MB-1257 LE-427 VIF-75 LE-425 AT-195 CN-4056 FP-305 TX-167B (HKCU-FB50) ENC-185 (HKCU-REC55) CN-4058 (HKCU-REC55) NET-37 (HKCU-SFP50) MDC-23... -
Page 10: Functions Of Onboard Switches And Led Indicators
Do not change the setting of “Factory use” switch. Ref. No. Function Factory default set- ting S001 Factory use OFF (ALL) 1-2-2. NET-37 Board S0401 D1201 S1101 S0601 NET-37 Board (A Side) Ref. No. Name Color Description Normal State (Power On) D0201 TDIS_A Factory use Inconstant Continued HDCU3500/HDCU5500... - Page 11 This LED goes out when NET1_FPGA (IC001) is normally completed configuration. Switch Note Do not change the setting of “Factory use” switch. Ref. No. Function Factory default set- ting S0401 Factory use S0601 Factory use OFF (ALL) S1101 Factory use OFF (ALL) HDCU3500/HDCU5500...
- Page 12 The LED lights when the output voltage of IC007 is normally. D1500 PLD-DONE This LED lights while configuration of the PLD Switch Note Do not change the setting of “Factory use” switch. Ref. No. Function Factory default set- ting S1200 Factory use OFF (ALL) HDCU3500/HDCU5500...
-
Page 13: Tx-167A Board
(Power On) D101 POWER Lit when the power to the TX-167A board is ab- normal. D2001 TX1_CONFDONE This LED goes out when TX1 PLD is normally completed configuration. 1-2-5. TX-167B Board S1002 TX-167B BOARD (A side) TX-167B BOARD (B side) HDCU3500/HDCU5500... -
Page 14: Board
Lit when the output voltage to the IC3001/IC3002 is abnormal. D1200 Green Lit when the reference input signal from the out- - side is detected. D2100 to DebugLED Green Factory use 2103 D2300 PLD2DONE This LED goes out when PLD2 IC (IC1700) is normally completed configuration. HDCU3500/HDCU5500... -
Page 15: Board
Factory use Inconstant D1703 LED2 Green Factory use Inconstant D1704 LED3 Green Factory use Inconstant Switch Note Do not change the setting of “Factory use” switch. Ref. No. Function Factory default set- ting S812 Factory use S901 Factory use Continued HDCU3500/HDCU5500... - Page 16 Green Factory use Inconstant D804 AG3_LED4 Green Factory use Inconstant D805 AG3_LED5 Green Factory use Inconstant D806 AG3_LED6 Green Factory use Inconstant D807 AG3_LED7 Green Inconstant D500 CON_ERR This LED goes out when ENC2_FPGA (IC401) is normally completed configuration. HDCU3500/HDCU5500...
-
Page 17: Notes On Replacement Of Circuit Board
AT-195 board, VIF-75 board, and RE-345 board store the important information including the model name and serial number. After replacing the AT-195 board, VIF-75 board, and RE-345 board, perform RESTORE on the [04 <SERIAL NUMBER>] page of the SERVICE menu. (Refer to “4-2-2. Description of SERVICE Menu”.) HDCU3500/HDCU5500... -
Page 18: Cautions When Replacing The Lithium Battery
Replace the lithium battery on the SY-467 board. SY-467 board Lithium battery Hooks Lithium battery Battery holder Hooks Note When installing the lithium battery, install it to the orientation shown in the figure. Install the removed parts by reversing the steps of removal. 1-10 HDCU3500/HDCU5500... -
Page 19: Cleaning Of Connector/Cable
Clean the tip of the optical contacts (white) using the optical connector cleaner. Optical contacts (white) Female connector Insert the optical connector cleaner straight. Apply sufficient pressure (approximately 600 g to 700 g) to ensure that the optical contact is a little depressed. 1-11 HDCU3500/HDCU5500... -
Page 20: When The Optical Connector Cleaner (Commercially Available) Is Not Available (Connectors/Cables Of Lemo)
Clean the LEMO connectors and cables using the following procedure. Fixtures • Alignment sleeve remover HC-001 (for female connector) Sony Part No. : J-6480-010-A or DCC.91.312.5LA manufactured by LEMO, or equivalent Note Insert the shorter nose end when removing/installing the alignment sleeve. This fixture contains shock absorber portion. -
Page 21: When The Optical Connector Cleaner (Commercially Available) Is Not Available
The alignment sleeve can be removed/reinstalled with the sleeve itself attached to the tip of the remover. Great care should be taken so as not to lose or damage the alignment sleeve. Alignment sleeve: Sony Part No. : 9-980-074-01 Alignment sleeve Clean the tip of the optical contacts (white) with a cotton swab moistened with alcohol. - Page 22 If there is no screwdriver, use the plate attached to the connector cap. Pull the adapter pin out of the connector in the arrow direction. Remove the adapter from the connector. Adapter Adapter pin Clean the optical contacts (white) with a cotton swab moistened with alcohol. Optical contacts (white) 1-14 HDCU3500/HDCU5500...
-
Page 23: When The Optical Connector Cleaner (Commercially Available) Is Not Available (Connector)
Connector Clean the tip of the white optical contacts with a cotton swab moistened with alcohol. Optical contact (white) 1-15 HDCU3500/HDCU5500... -
Page 24: Service Tools/Measuring Equipment List
1-6-1. Service Fixtures Part No. Name Usage/Note J-6480-010-A Alignment sleeve remover HC-001 For female optical connector (LEMO® DCC. 91.312.5LA or equivalent) — Cotton swab Commercially available, for cleaning optical con- tact block (4 mm or less in diameter) 1-16 HDCU3500/HDCU5500... -
Page 25: Pld
This unit uses the PLD (Programmable Logic Device) that supports USB drive to write and rewrite the internal data. If the part listed below needs to be replaced or to be upgraded, contact your local Sony Sales Office/Service Center. Note The part number of PLD (or ROM for PLD) in which data is not written yet, is shown in “Spare Parts”. - Page 26 Select the PLD to be upgraded and then press the control knob. A message “UPDATE OK?” appears. Select “YES.” The unit restarts automatically and the version update starts. Upon completion of the version update, a message “UPDATE SUCCEEDED” appears. 1-18 HDCU3500/HDCU5500...
-
Page 27: Flexible Flat Cable And Coaxial Cable
Latch Connector Insert the flexible flat cable firmly as far as it will go with the insulating surface facing front. Close the latch of the connector in the direction of arrow B to lock the flexible flat cable. 1-19 HDCU3500/HDCU5500... -
Page 28: Disconnecting/Connecting Fine-Wire Coaxial Cable
Correct Connector Hold the connector to disconnect. Fine-wire coaxial cable Wrong Connector Do not attempt to disconnect by pulling the cable. Hold both sides of the fine-wire coaxial cable connector, and pull the connector straight to disconnect it. 1-20 HDCU3500/HDCU5500... - Page 29 Do not attempt to disconnect by pulling the cable. Raise the pull-bar in the direction of arrow A to unlock it. Hold both sides of the fine-wire coaxial cable connector, and pull the connector straight to disconnect it. 1-21 HDCU3500/HDCU5500...
- Page 30 Lift the tool straight in the arrow direction with the hook hooked to disconnect the connector of the fine-wire coaxial cable. Connector Hook the tool's hook to the connector of Tool the fine-wire coaxial cable. Hook Hook Connector Fine-wire coaxial cable Do not attempt to disconnected by Wrong pulling the cable. 1-22 HDCU3500/HDCU5500...
- Page 31 Connecting Insert the connector of fine-wire coaxial cable in the arrow direction to connect it. Note Insert the connector firmly as far as it will go. Fine-wire coaxial cable Connector 1-23 HDCU3500/HDCU5500...
-
Page 32: Circuit Protective Devices
The fuse is critical parts to safe operation. Replace the components with Sony parts whose part number appear in the manual published by Sony. If the components are replaced by any parts other than the specified ones, this may cause a fire or electric shock. -
Page 33: Lead-Free Solder
• The ordinary soldering iron can be used but the iron tip has to be applied to the solder joint for a slightly longer time. The printed pattern (copper foil) may peel away if the heated tip is applied for too long, so be careful. 1-25 HDCU3500/HDCU5500... -
Page 35: Replacement Of Main Parts
Connector Unlock it before pulling out a locking connector. If not so, this causes damage. Screw A New Truster (P2.6 x 5) screw cannot be reused. Prepare a new screw. HDCU3500/HDCU5500... -
Page 36: Top Cover
B3 x 5 Top cover B3 x 5 B3 x 5 Front side Note When attaching the top cover, tighten the screws (a) to (g) sequentially in alphabetical order. Install the removed parts by reversing the steps of removal. HDCU3500/HDCU5500... -
Page 37: Front Panel
B3 x 5 Front panel assembly Portion B Note When attaching the front panel assembly, insert the portion A of the chassis into the portion B of the front panel assembly. Install the removed parts by reversing the steps of removal. HDCU3500/HDCU5500... -
Page 38: Board
Front panel assembly Front side Flexible flat cable Harness Rotary encoder knob FP-305 board CN003 Harness Cushions CN202 CN001 View on arrow A FP-305 board 3 x 8 Cushions Install the removed parts by reversing the steps of removal. HDCU3500/HDCU5500... -
Page 39: Cn-4056 Board
Remove the two screws, and then remove the CN-4056 board. Disconnect the harness from the connector (CN001) on the CN-4056 board. Front panel assembly Front side P2.6 x 5 CN-4056 board CN001 Harness Install the removed parts by reversing the steps of removal. HDCU3500/HDCU5500... -
Page 40: Board
Disconnect the harness from the connector (CN001) on the LE-425 board. Remove the screw, and then remove the LE-425 board. Front panel assembly Front side Harness CN001 LE-425 board 3 x 8 Install the removed parts by reversing the steps of removal. HDCU3500/HDCU5500... -
Page 41: Board
Disconnect the harness from the connector (CN001) on the LE-429 board. Remove the two screws, and then remove the LE-429 board. Front panel assembly Front side 3 x 8 CN001 LE-429 board Harness Install the removed parts by reversing the steps of removal. HDCU3500/HDCU5500... -
Page 42: Board
Disconnect the three harnesses from the connectors (CN001, CN003 and CN004) on the LE-427 board. Remove the three screws, and then remove the LE-427 board. Front panel assembly Front side LE-427 board CN003 CN004 Harness 3 x 8 CN001 Harnesses Install the removed parts by reversing the steps of removal. HDCU3500/HDCU5500... -
Page 43: Optical Multi Fiber Cable
Note • When attaching the optical cable, be careful not to mistake the connector. • The connection destination of HDCU3500 is different from that of HDCU5500. When connecting them, be careful not to connect to the wrong destination. • When connecting the harness, wind the harness around the cable clamper [A] two times. - Page 44 • When attaching the LEMO connector assembly, install it with the red mark up. • When attaching the LEMO connector assembly, secure the connector assembly temporarily using the four screws, then fully tighten them. Install the removed parts by reversing the steps of removal. 2-10 HDCU3500/HDCU5500...
-
Page 45: Tajimi Connector Assembly
• When attaching the LEMO connector assembly, install it with the red mark up. • When attaching the TAJIMI connector assembly, secure the connector assembly temporarily using the four screws, then fully tighten them. Install the removed parts by reversing the steps of removal. 2-11 HDCU3500/HDCU5500... -
Page 46: Top Chassis/Air Distributor Assembly
Remove the nine screws, and then remove the top chassis. 3 x 8 Top chassis 3 x 8 Holes Front side Portions A Note When attaching the upper chassis, insert two portions A of the straightening plate assembly into the two holes of the upper chassis. 2-12 HDCU3500/HDCU5500... - Page 47 Note When attaching the current plate assembly, insert portion A into the inside of the front panel assembly and insert portion B into the inside of the chassis. Install the removed parts by reversing the steps of removal. 2-13 HDCU3500/HDCU5500...
-
Page 48: Board
When installing the VIF-75 board, tighten the screws in the following sequence: (a), (b). Remove the four screws, then remove the heat sink retainer, four helical compression springs and heat sink UB70H15. Remove the radiation sheet (40 x 40) T1. 2-14 HDCU3500/HDCU5500... - Page 49 • When attaching the heat sink retainer, tighten the screws in the following sequence: (a), (b) and others. • When attaching the VIF-75 board, tighten the screws in the following sequence: (a), (b) and others. Install the removed parts by reversing the steps of removal. 2-15 HDCU3500/HDCU5500...
-
Page 50: Board/At-195 Board
Remove the two screws, and then remove the AT-195 board. Fine-wire coaxial cable CN600 B to B connectors 3 x 8 SY-467 board AT-195 board 3 x 8 B to B connectors Front side B to B connectors 2-16 HDCU3500/HDCU5500... - Page 51 Remove the six screws, then remove the SY-467 board. 3 x 8 SY-467 board Board bracket (SY) Note When attaching the SY-467 board, tighten the screws in the following sequence: (a), (b) and others. Install the removed parts by reversing the steps of removal. 2-17 HDCU3500/HDCU5500...
-
Page 52: Lithium Battery
Remove the lithium battery from the four hooks of the battery holder. SY-467 board Lithium battery Hooks Lithium battery Battery holder Hooks Note When installing the lithium battery, install it to the orientation shown in the figure. Install the removed parts by reversing the steps of removal. 2-18 HDCU3500/HDCU5500... -
Page 53: Dc Fan
3 x 8 3 x 8 Air distributor subassembly Duct intake Harness DC fan subassembly Front side MB-1257 board CN008 Note When attaching the DC fan subassembly, tighten the screws in the following sequence: (a), (b) and others. 2-19 HDCU3500/HDCU5500... - Page 54 • When attaching the DC fan to the fan bracket, tighten the screws in the order of (a), (b), (c). • When attaching the DC fan, pay attention to the position of label and harness. Install the removed parts by reversing the steps of removal. 2-20 HDCU3500/HDCU5500...
-
Page 55: Dc Fan (60 Square)
• When connecting the harness, wind the harness in a ring shape one time as shown in the figure, and then lock the wire saddle. • Check that the harness of the DC fan (60 square) is not located outside of the duct PS. 2-21 HDCU3500/HDCU5500... - Page 56 • When attaching the duct PS, be careful not to catch the harness. • When attaching the DC fan (60 square), pay attention to the position of label and harness. Install the removed parts by reversing the steps of removal. 2-22 HDCU3500/HDCU5500...
-
Page 57: Tx-167B Board (Hdcu5500/Hkcu-Fb50)/Tx-167A Board (Hdcu3500)
2-11. TX-167B Board (HDCU5500/HKCU-FB50)/TX-167A Board (HDCU3500) The TX-167A board is installed in HDCU3500. It can be removed in the same procedure as the TX-167B board. Preparation Remove the top cover. (Refer to “2-2. Top Cover”.) Remove the optical cable. (Refer to step 1 in “2-4-1. - Page 58 (3) Remove the two radiation sheets (35 x 35) T0.5. • TX-167A board: (1) Remove the four screws (PSW3 x 8), then remove the heat sink retainer, four helical compression springs and heat sink UB70H15. (2) Remove the radiation sheet (35 x 35) T0.5. 2-24 HDCU3500/HDCU5500...
- Page 59 • When attaching the heat sink retainer, tighten the screws in the following sequence: (a), (b) and others. • When attaching the TX-167B board or TX-167A board, tighten the screws in the following sequence: (a), (b) and others. Install the removed parts by reversing the steps of removal. 2-25 HDCU3500/HDCU5500...
-
Page 60: Power Block
3 x 8 Duct rear PS-939 board RE-345 board Front side CN5004 CN5006 Harness CN102 Harnesses Note When attaching the duct rear, tighten the screws in the order of (a) and (b) while pushing it against the rear panel. 2-26 HDCU3500/HDCU5500... - Page 61 3 x 8 CN5003 (RE-345 board) Harness Harness CN1006 (PS-939 board) Front side Note When attaching the power assembly, tighten the screws in the following sequence: (a), (b). Install the removed parts by reversing the steps of removal. 2-27 HDCU3500/HDCU5500...
-
Page 62: Board
Remove the optical multi fiber cable. (Refer to “2-4. Optical Multi Fiber Cable”.) Remove the DC fan. (Refer to “2-9. DC Fan”.) Remove the DC fan (60 square). (Refer to “2-10. DC Fan (60 Square)”.) Remove the power assembly. (Refer to “2-12-1. Power Assembly”.) 2-28 HDCU3500/HDCU5500... - Page 63 K3 x 6 3 x 6 Front panel (PS) K3 x 6 Side cover (PS) Note When assembling, attach it with the harness connected to the connector (CN2002) on the RE-345 board brought near the front panel (PS) side. 2-29 HDCU3500/HDCU5500...
- Page 64 Insulating sheet (PS-B) Top case (PS) Marks Note When replacing the radiation sheets (H), attach them on the insulating sheet (PS-B) according to the marks in the top case (PS). Install the removed parts by reversing the steps of removal. 2-30 HDCU3500/HDCU5500...
-
Page 65: Dc Fan (Power)
• When attaching the DC fan (power), pay attention to the position of label and harness. • When attaching the DC fan (power), apply locking compound as shown in the figure. Install the removed parts by reversing the steps of removal. 2-31 HDCU3500/HDCU5500... -
Page 66: Board
Put the harness on the Binding bands insulating sheet (PS-A). Bottom case (PS) Note When installing the PS-939 board, tighten the screws in the following sequence: (a), (b) and others. Install the removed parts by reversing the steps of removal. 2-32 HDCU3500/HDCU5500... -
Page 67: Ac Inlet
• Insert the three harness terminals into the AC inlet terminal with the wire color and convex part's direction shown in the figure. • Insert until the harness terminals are locked. Install the removed parts by reversing the steps of removal. 2-33 HDCU3500/HDCU5500... -
Page 68: Power Switch Harness
• After fitting the excess portion of the power switch harness in the portion (A), tighten the screws of the SW bracket. • When attaching the SW bracket, tighten the screws in the following sequence: (a), (b). Install the removed parts by reversing the steps of removal. 2-34 HDCU3500/HDCU5500... -
Page 69: Rear Panel
Remove the three fine-wire coaxial cables from the locking edge saddle. Open the locking wire saddle [B], and then remove the two harnesses. Harness Clamper CN010 Locking edge saddle Flexible flat cables Locking wire saddle [A] Harnesses MB-1257 board CN005 Fine-wire coaxial cables Locking wire saddle [B] 2-35 HDCU3500/HDCU5500... - Page 70 Rear panel assembly MB-1257 board CN006 CN007 CN004 3 x 8 Note When attaching the rear panel assembly, tighten the screws in the following sequence: (a), (b) and others. Install the removed parts by reversing the steps of removal. 2-36 HDCU3500/HDCU5500...
-
Page 71: Board
Remove the AC inlet. (Refer to “2-13. AC Inlet”.) Remove the rear panel assembly. (Refer to “2-15-1. Rear Panel Assembly”.) Procedure Remove the eight screws, and then remove the HIF-76 board subassembly. P2.6 x 5 HIF-76 board subassembly Rear panel assembly 2-37 HDCU3500/HDCU5500... - Page 72 BNC board bracket Clamper HIF-76 board P2.6 x 5 CN002 Fine-wire coaxial cable Tape AS When replacing the fine-wire coaxial cable, attach the new tape AS to the same position. Install the removed parts by reversing the steps of removal. 2-38 HDCU3500/HDCU5500...
-
Page 73: Cn-4052 Board
HIF-76 board subassembly Fine-wire coaxial cable [A] Fine-wire coaxial cable [B] CN-4052 board Clamper Harness Harness Fine-wire coaxial cables [B] CN001 Clamper CN007 CN-4052 board CN-4052 board 3 x 8 Install the removed parts by reversing the steps of removal. 2-39 HDCU3500/HDCU5500... -
Page 74: Cn-4055 Board
Tape AS CN001 Harness P2.6 x 5 Tape AS Marking-off line CN-4055 board Align the lower end of the tape AS with the marking-off line, then attach it. Install the removed parts by reversing the steps of removal. 2-40 HDCU3500/HDCU5500... -
Page 75: Cn-4054 Board
Remove the two screws, and then remove the CN-4054 board. Disconnect the flexible flat cable from the connector (CN002) on the CN-4054 board. Rear panel assembly CN-4054 board CN002 Flexible flat cable P2.6 x 5 Install the removed parts by reversing the steps of removal. 2-41 HDCU3500/HDCU5500... -
Page 76: Cn-4053 Board
Disconnect the harness from the connector (CN002) on the CN-4053 board. Audio panel assembly Front side 3 x 8 Harness CN002 CN-4053 board P2.6 x 5 Audio panel Install the removed parts by reversing the steps of removal. 2-42 HDCU3500/HDCU5500... -
Page 77: Cn-4057 Board
Locking compound 1401B CN001 (1/2 size of a grain of rice) Hexagonal screws D-sub panel Note When attaching the hexagon screws, apply locking compound as shown in the figure. Install the removed parts by reversing the steps of removal. 2-43 HDCU3500/HDCU5500... -
Page 78: Mb-1257 Board
Board”.) Remove the TX-167B board or TX-167A board. (Refer to “2-11. TX-167B Board (HDCU5500/HKCU-FB50)/ TX-167A Board (HDCU3500)”.) Procedure Disconnect the cables. (1) Disconnect the two harnesses from the connectors (CN001 and CN002) on the MB-1257 board. (2) Disconnect the two flexible flat cables from the connectors (CN005 and CN010) on the MB-1257 board. - Page 79 • When attaching the board holder (SY) and board holder (VIF), tighten the screws in the following sequence: (a), (b). • When attaching the board guide (front) and board guide (rear), tighten the screws in the following sequence: (c), (d). Install the removed parts by reversing the steps of removal. 2-45 HDCU3500/HDCU5500...
-
Page 80: Board (Hkcu-Sfp50)
Clamper Harness (SLOT POWER) CN405 CN0103 Chassis Fine-wire coaxial cable (CA60-155-11) MB-1257 board CN402 CN0101 Fine-wire coaxial cable (CA60-155-11) CN403 CN0102 Note When assembling, insert portions A of the cover sheets (fibers) into the inside of the chassis. 2-46 HDCU3500/HDCU5500... - Page 81 Remove the four screws, and then remove the NET-37 board in the direction of the arrow. 3 x 8 3 x 8 NET-37 board Front side Install the removed parts by reversing the steps of removal. 2-47 HDCU3500/HDCU5500...
-
Page 82: Optical Conversion Adaptor (Hkcu-Sm50)
Optical Conversion Adaptor (HKCU-SM50) Note The removed screws cannot be reused. Use supplied screws. • Screw (M2 x 6): 5 pcs • Screw (P2.6 x 5): 2 pcs Preparation Remove the top cover. (Refer to “2-2. Top Cover”.) 2-48 HDCU3500/HDCU5500... - Page 83 • Route the connected optical fiber cables as shown in the figure. • Check that the connected optical fiber cable is located inside of the cover sheet (fiber). • Insert portion A of the cover sheet (fibers) into the inside of the chassis. 2-49 HDCU3500/HDCU5500...
- Page 84 Notches SC-ST optical conversion adaptor M2 x 6 M2 x 6 P2.6 x 5 SMF panel SMF bracket M2 x 6 SC-ST optical conversion adaptor ST connector cap Install the removed parts by reversing the steps of removal. 2-50 HDCU3500/HDCU5500...
-
Page 85: Hkcu-Rec55
Cover sheet (fiber) (MDC) Front side Optical module (SFP+) Current plate Current plate (MDC) (MDC) Boss Boss LC optical fiber cable Correct Wrong Note Insert the portion A of the cover sheet (fiber) into the inside of the chassis. 2-51 HDCU3500/HDCU5500... - Page 86 (2) Disconnect the optical module (SFP+) from the connector (CN401) on the ENC-185 board. 3 x 8 3 x 8 Contact Top chassis surface Optical module (SFP+) ENC-185 board Front side CN401 ENC assembly When attaching the top chassis, tighten the screws in the order of (a), (b), and other screws. 2-52 HDCU3500/HDCU5500...
- Page 87 Remove the screw, then remove the MDC-23 board. Remove the radiation sheet (L) from the MDC-23 board. Remove the four screws, then remove the heat sink retainer, four helical compression springs and heat sink UB70H20. Remove the six screws, then remove the ENC-185 board. 2-53 HDCU3500/HDCU5500...
- Page 88 • When attaching the heat sink retainer, tighten the screws in the following sequence: (a), (b) and others. • When attaching the ENC-185 board, tighten the screws in the following sequence: (a), (b) and others. 10. Install the removed parts by reversing the steps of removal. 2-54 HDCU3500/HDCU5500...
-
Page 89: If-1371 Board
When attaching the IF-1371 board assembly, tighten the screws in the following sequence: (a), (b). Remove the two screws, then remove the IF-1371 board. B3 x 5 IF-1371 board Board bracket (IF) Install the removed parts by reversing the steps of removal. 2-55 HDCU3500/HDCU5500... -
Page 90: Incom-Rec Panel Assembly
FP-305 board. Note When attaching the INCOM-REC panel assembly, tighten the screws in the following sequence: (a), (b) and others. Install the removed parts by reversing the steps of removal. 2-56 HDCU3500/HDCU5500... -
Page 91: Optical Conversion Adaptor
When attaching the audio panel (REC) assembly, align the two dowels. Front side LC optical fiber cable Dowel hole Optical conversion adaptor Dowel Dowel hole View on arrow A 3 x 8 CN-4058 board Harnesses Dowel Audio panel (REC) assembly CN-4053 board Clamper CN004 CN009 MB-1257 board 2-57 HDCU3500/HDCU5500... - Page 92 Remove the two screws, then remove the optical conversion adaptor from the LC holder (55). Optical conversion adaptor LC holder (55) P2.6 x 5 Audio panel (REC) assembly Install the removed parts by reversing the steps of removal. 2-58 HDCU3500/HDCU5500...
-
Page 93: Cn-4058 Board
(1) Disconnect the harness from the connector (CN101) on the CN-4058 board. (2) Remove the two nuts. (3) Remove the CN-4058 board from the audio panel (REC) assembly. CN101 Harness CN-4058 board Nuts Audio panel (REC) assembly Install the removed parts by reversing the steps of removal. 2-59 HDCU3500/HDCU5500... -
Page 95: Software Update
Copy the camera application update data to the USB drive using the following procedure. Note For how to obtain the data file for update (hdcu5000_app.pkg), contact your local Sony Sales Office/Service Center. Create the following directory in the USB drive. -
Page 96: Upgrading Os
Copy the OS update data to the USB drive using the following procedure. Note For how to obtain the data file for update (hdcu5000_os.pkg), contact your local Sony Sales Office/Service Center. Create the following directory in the USB drive. \MSSONY\PRO\CAMERA\HDCU5000 Copy the data file for update “hdcu5000_os.pkg”... -
Page 97: Forced Version Update
Preparation Copy the PLD update data to the USB drive using the following procedure. Note For how to obtain the data files for update, contact your local Sony Sales Office/Service Center. Create the following directory in the USB drive. \MSSONY\PRO\CAMERA\HDCU5000 Copy the data file for update to be updated to the directory created. - Page 98 Upon completion of the version update, a message “UPDATE SUCCEEDED” appears. The version update progress status is displayed on the monitor. Turn off and on the power of the unit and confirm that the version has been updated on the VERSION1, VERSION2 page of the DIAGNOSIS menu. HDCU3500/HDCU5500...
-
Page 99: Menu Settings
Check that the following screen appears. If it does not appear, repeat steps 1 to 3. <CCU MENU> SYSTEM OPERATION VIDEO/MONITOR AUDIO/INTERCOM MAINTENANCE FILE NETWORK DIAGNOSIS SERVICE Set the cursor to [SERVICE] and press the control knob. The SERVICE menu is displayed. HDCU3500/HDCU5500... -
Page 100: Changing Setting Values
Turn the CANCEL/ENTER lever to the CANCEL side before pressing the control knob. The setting of the selected item is restored. To suspend: Turn the DISP/MENU lever to the MENU. The menu disappears. To restart the setting operation, turn the DISP/MENU lever again to the MENU side. HDCU3500/HDCU5500... -
Page 101: Service Menu
Fine-adjusting PROMPTER input level and 27 MHz VCO flee-run POWER UNIT Displaying power unit status MODE Operation mode setting for connection terminal TEMPERTURE Displaying temperature at each point 4-2-2. Description of SERVICE Menu The display screen appearing in this section shows the indication example. HDCU3500/HDCU5500... - Page 102 Place the cursor on the version to update the version. - TX1 (HIGH) - TX1 (ULTRA) - - NET1 - NET2 - ENC1 (XAVC) - ENC2 (REC55) - • “TX1 (ULTRA)” and “TX2” are displayed only when the HKCU-FB50 is installed. HDCU3500/HDCU5500...
- Page 103 Reset the cumulative power-on time. REGENERATE UUID Regenerate the UUID. - SERIAL NUMBER Screen display <SERIAL NUMBER> ?S04 TOP MODEL NAME : HDCU3500 SERIAL NUMBER: 01234567 ?RESTORE Description Item Setting Value Description MODEL NAME HDCUxxxx Display the model name of the unit.
- Page 104 Display the VIF-75 board power supply status. - Display the TX-167 board power supply status. - Display the NET-37 board power supply status. POWER Display the power unit power supply status. - TEMPERATURE Display the temperature of the power unit. - Continued HDCU3500/HDCU5500...
- Page 105 D-SUB: Only D-SUB connector input is used. IP: Only IP stream input is used. D-SUB&IP and IP are selectable only when the NET board is mounted and IP Intercom stream is received. When the NET board is not mounted, D-SUB is fixed. Continued HDCU3500/HDCU5500...
- Page 106 TX1 FPGA(INTERNAL) : 43.0 TX2 FPGA(INTERNAL) : 45.0 With HKCU-FB50 installed ENC FPGA(INTERNAL) : 84.1 With HKCU-REC55 installed Screen display Item Setting Value Description VIF FRONT - Display the temperature of VIF-75 board. VIF FPGA (ON BOARD) VIF FPGA (INTERNAL Continued HDCU3500/HDCU5500...
- Page 107 Display the temperature of ENC-185 board. • “NET FPGA (INTERNAL)” is displayed only when the HKCU-SFP50 is installed. • “TX2 FPGA (INTERNAL)” is displayed only when the HKCU-FB50 is installed. • “ENC FPGA (INTERNAL)” is displayed only when the HKCU-REC55 is installed. HDCU3500/HDCU5500...
-
Page 109: Web Maintenance Menu
“Create Log File” Download Log File Downloading error log file “Download Log File” License Optional Function License install state display “Optional Function” Others Change Password Change the Web/FTP password “Change Password” All Reset Restore the factory default settings “All Reset” HDCU3500/HDCU5500... -
Page 110: Maintenance Tab
Right-click a file name and save the target file. 5-2-4. License Menu Optional Function This item displays how the licenses are installed in the unit. • Text box The conditions of the licenses installed in the unit are displayed. HDCU3500/HDCU5500... -
Page 111: Others Menu
5-2-5. Others Menu Change Password Change the Web / FTP password for this unit. All Reset Restore the settings of this unit to the factory default settings. HDCU3500/HDCU5500... -
Page 113: Circuit Description
The HIF-76 board contains the SLOT1 OUT 1-4 output connector (BNC type), SDI RET 1-4 input connector (BNC type), SDI I/O 1-4 input/output connector (BNC type), REFARENCE IN/OUT connector (BNC type), and Prompter 1-2 input connector (BNC type) on the rear panel. HDCU3500/HDCU5500... -
Page 114: Board
NET2 PLD. 6-1-15. TX-167A Board The TX-167A board is mounted in HDCU3500. Main-line video signals The image capture data that is transmitted from the camera is input to the VIF-75 board. The image capture data is then sent to the TX-167A board through CN101 and CN103. -
Page 115: Tx-167B Board
The TALK signal of the front INTERCOM that is input from the FP-305 board to the CN400 connector is converted to a digital signal in the A/D and D/A converter IC (IC2513), and then the digital signal is input to the FPGA (IC1200). HDCU3500/HDCU5500... - Page 116 The FPGA IC (IC1200) monitors and controls the power unit through the I2C interface. This IC is connected through the B to B connector (CN301). Power IC interface The FPGA IC (IC1200) monitors and controls the power ICs (IC001, IC002, IC003, IC004, and IC203) through the I2C interface. HDCU3500/HDCU5500...
-
Page 117: Board
The CN-4058 board mounted in the HKCU-REC55 contains a TIME CODE connector on the rear panel side. 6-1-20. IF-1371 Board The IF-1371 board mounted in the HKCU-REC55 contains a USB connector (for external storage devices) on the front panel side. HDCU3500/HDCU5500... -
Page 118: Board
IF-1371 board using the USB Host function (IC001). In the same way, the recording stream signals can be transferred from the 10GbE network connector through the SFP+ module connected to the CN401 connector using the 10GbE network function of the FPGA (IC001). HDCU3500/HDCU5500... -
Page 119: Spare Parts
Therefore, specified parts should be used in the case 指定の部品を使ってください。 of replacement. 2. 部品の共通化 2. Standardization of Parts Some repair parts supplied by Sony differ from those ソニーから供給する補修用部品は,セットに使われ used for the unit. These are because of parts common- ているものと異なることがあります。 ality and improvement. -
Page 120: Exploded Views
2-382-110-01 o LEG 3-725-295-21 s SCREW, (+) (B3) 3-815-708-01 s HANDLE 7-621-592-00 s SCREW +K 2.6X6 7-682-163-01 s SCREW +P 4X12 3-955-834-01 s CLAMP 4-098-033-01 s SADDLE WIRE (C) 4-382-854-01 s SCREW (M3X8), P, SW (+) 4-748-474-01 s BRACKET, LEMO CN HDCU3500/HDCU5500... -
Page 121: Front Panel
7-682-560-09 s SCREW +B 4X6 2-249-353-01 s COVER, LAMP 7-685-103-19 s SCREW +P 2X5 TYPE2 NON-SLIT 3-650-537-01 s WASHER 3-723-762-01 o HANDLE 4-139-232-01 s KNOB, ROTARY ENCODER 4-382-854-01 s SCREW (M3X8), P, SW (+) 4-478-730-02 s CAP, USB 4-486-742-01 s CUSHION HDCU3500/HDCU5500... -
Page 122: Dc Fan And Boards
A-5001-897-A s SY-467 COMPL 4-382-854-01 s SCREW (M3X8), P, SW (+) A-5006-197-A s AT-195D COMPL 4-559-446-02 s SCREW, +P2.6X5 NEW TRUSTER (For HDCU3500/5500L) 1-510-062-11 s OPTICAL MODULE (SFP) 7-682-957-01 s SCREW +PSW 3X40 1-756-134-18 s BATTERY, LITHIUM (SECONDARY) 1-855-126-21 s DC FAN... -
Page 123: Tx-167A Board
TX-167A Board Part No. SP Description A-5001-894-A s TX-167A COMPL(PCD) 4-382-854-01 s SCREW (M3X8), P, SW (+) 4-559-446-02 s SCREW, +P2.6X5 NEW TRUSTER 4-748-583-02 s PANEL, SDI 4-748-822-01 s SHEET, RADIATION (35X35) T0.5 5-004-264-01 s SPRING, COMPRESSION HDCU3500/HDCU5500... -
Page 124: Chassis
1-972-256-11 s HARNESS, SUB (POWER SW) 1-972-575-11 s SUB HARNESS (SLOT POWER) 1-972-576-11 s SUB HARNESS (DM POWER)170 4-077-459-01 s CLAMP, FLAT (30) 4-198-668-01 s SADDLE, LOCKING WIRE 4-382-854-01 s SCREW (M3X8), P, SW (+) 7-682-961-01 s SCREW +PSW 4X8 HDCU3500/HDCU5500... -
Page 125: Rear Panel
2-990-241-02 s HOLDER (A), PLUG 4-382-854-01 s SCREW (M3X8), P, SW (+) 4-431-734-01 s TAPE AS 4-559-446-02 s SCREW, +P2.6X5 NEW TRUSTER 4-748-471-01 s PANEL, AUDIO 4-748-472-01 s PANEL, D-SUB 5-004-742-01 s LABEL UHB 7-682-949-01 s SCREW +PSW 3X10 HDCU3500/HDCU5500... -
Page 126: Power Block
1-972-269-11 s SUB HARNESS PFC 1-972-270-11 s SUB HARNESS PRIMARY SIGNAL 1-972-271-11 s SUB HARNESS SECONDARY R 3-655-653-01 s BAND (TAITON), BINDING 4-382-854-51 s SCREW (M3X6), P, SW (+) 4-427-952-02 s RADIATION SHEET D 4-462-217-02 s SHEET (H), RADIATION HDCU3500/HDCU5500... -
Page 127: Tx-167B Board (Hkcu-Fb50)
A-5001-895-A s TX-167B COMPL 1-510-062-11 s OPTICAL MODULE (SFP) 4-382-854-01 s SCREW (M3X8), P, SW (+) 4-431-734-01 s TAPE AS 4-559-446-02 s SCREW, +P2.6X5 NEW TRUSTER 4-748-583-02 s PANEL, SDI 4-748-822-01 s SHEET, RADIATION (35X35) T0.5 5-004-264-01 s SPRING, COMPRESSION HDCU3500/HDCU5500... -
Page 128: Board (Hkcu-Sfp50)(1/2)
1-912-709-11 s MICRO COAXIAL CABLE (CA60 155 1-972-575-11 s SUB HARNESS (SLOT POWER) 3-531-576-01 s RIVET 4-382-854-01 s SCREW (M3X8), P, SW (+) 4-559-446-02 s SCREW, +P2.6X5 NEW TRUSTER 4-729-417-01 s BRACKET, NET 5-002-721-01 s SHEET (FIBER), COVER 5-004-431-01 s AIR DISTRIBUTOR F (NET) 7-10 HDCU3500/HDCU5500... -
Page 129: Board (Hkcu-Sfp50)(2/2)
NET-37 Board (HKCU-SFP50)(2/2) Part No. SP Description 4-382-854-01 s SCREW (M3X8), P, SW (+) 5-004-102-01 s SHEET, RADIATION(40X40) T1 5-004-264-01 s SPRING, COMPRESSION 7-11 HDCU3500/HDCU5500... -
Page 130: Hkcu-Sm50
1-849-778-11 s SC-LC OPTICAL FIBER CABLE 3-719-381-22 s SCREW (M2X6) 4-382-854-01 s SCREW (M3X8), P, SW (+) 4-559-446-02 s SCREW, +P2.6X5 NEW TRUSTER 4-579-333-01 s CAP, ST CONNECTER 5-002-721-01 s SHEET (FIBER), COVER 5-004-992-01 s PANEL, SMF 5-004-993-01 s BRACKET, SMF 7-12 HDCU3500/HDCU5500... -
Page 131: Enc Assembly (Hkcu-Rec55) (1/2)
1-005-667-11 s OPTICAL FIBER CABLE (LC) 2P A-2229-250-A s MOUNT, IF-1371 A-5017-530-A s ASSY, INCOM PANEL 1-969-481-21 s WIRE, CONNECTOR WITH LEAD (HPR 1-005-666-11 s OPTICAL CONNECTOR (LC ADAPTER) 1-970-388-11 s HARNESS, SUB(HANDLE) 3-725-295-21 s SCREW, (+) (B3) 7-13 HDCU3500/HDCU5500... - Page 132 ENC Assembly (HKCU-REC55) (1/2) Part No. SP Description 4-382-854-01 s SCREW (M3X8), P, SW (+) 4-478-730-02 s CAP, USB 4-559-446-02 s SCREW, +P2.6X5 NEW TRUSTER 5-002-721-01 s SHEET (FIBER), COVER 5-011-474-01 s PANEL, AUDIO (REC) 7-14 HDCU3500/HDCU5500...
-
Page 133: Enc Assembly (Hkcu-Rec55) (2/2)
ENC Assembly (HKCU-REC55) (2/2) Part No. SP Description A-5007-560-A s ENC-185 COMPL A-5007-562-A s MDC-23 COMPL 4-382-854-01 s SCREW (M3X8), P, SW (+) 4-471-145-11 s SHEET, RADIATION (L) 4-748-822-02 s SHEET, RADIATION (35X35) T0.5 5-004-264-01 s SPRING, COMPRESSION 7-15 HDCU3500/HDCU5500... -
Page 134: Supplied Accessories
7-3. Supplied Accessories HDCU3500/5500 Q'ty Part No. SP Description A-8278-054-B s REMOTE INDICATOR ASSY 5-006-303-01 s CD-ROM PACK HKCU-FB50 Q'ty Part No. SP Description 3-704-046-31 s BAG,PREVENTION,ELECTRIFICATION 2pcs 5-004-742-01 s LABEL UHB 5-006-306-01 s OPERATING INSTRUCTIONS 5-006-306-11 s OPERATING INSTRUCTIONS... -
Page 135: Diagrams
OPTICAL MULTI CABLE VERSION_UP_SPI(5) ASSEMBLY CONF_DONE(NET1/NET2/DPR) CCU_SENSE_IN(STBY_INCOM_IN) XRST(3) (CPU_XRST, STBY_INCOM_OUT CPU_XRST_TRI, CPU_XRST_NET) CPU_CLK(3) BUS (25MHz, CIF-BUS)(23) (From/To 3/5) HKCU-REC55 I2C(SDA/SCL)(COMMON)(2) (For HDCU3500) 700P_MAIN_TX/RX(2) I2C_SDA/SCL 700P_SUB_TX/RX(2) CPU BUS SGMII (From/To 3/5) AU_SY2VIF[2:0] VIDEO/AUDIO_CLK MIC6/7_I2C_SDA/SCL (From/To 5/5) AU_VIF2SY[4:0] (For HDCU5500) AU_DATA_NMI(TX/RX)(2) VUP_TX/RX... - Page 136 J002 Copper MST_74MHZ_CLK IC002 NETWORK_TRUNK MST_27MHZ_CLK CN002 CN007 700P_MAIN_TX/RX(2) D001 9093 700P_SUB_TX/RX(2) (From/To 1/5) REAR TALLY (From/To 1/5) AT_RST SGMI_0 NW_TRUNK1_RET_F NW_TRUNK1(TX/RX, 4) NW_TRUNK2(TX/RX, 4) NW_TRUNK2_RET_F HD_Field_Sync(HD_F) HD_Horizontal_Sync(HD_H) FrameGate (From/To 1/5) (From/To 1/5) (From/To 3/5) (From/To 4/5) (From/To 4-/5) HDCU3500/HDCU5500...
-
Page 137: Overall
4Gbit SYNC(F/V/H/FG) DRAM_I/F(118) DDR4 SYNC(F/V/H/F-Gate) (From/To 1/5) S0401, IC405 IC2106 NET_REF(F/V/H) NET_REF(F/V/H) CAMERA SMF NCONF PW_ON_CONF nCONFIG Reset IC IC1203 (For HDCU3500) PLD_RECONFIG PW_ON_CONF NCONF nCONFIG PLD_RECONFIG IC2103, IC2104 HKCU-SM50 IC2105 SPIFlash PWR_GOOD_DPR Buff IC1204 IC0707, IC0108 Config (I/O) PLD_... - Page 138 Overall (4/5) MB-1257 (4/5) (From/To 2/5) (From/To 2/5) For HDCU3500 VIF-75 (2/2) TX-167A IC1700 (2/2) AUDIO 700P_MAIN_TX/RX(2) 700P 700P_SUB_TX/RX(2) NW_TRUNK1_RET_F NW_TRUNK2_RET_F Audio NW_TRUNK1(TX/RX, 4) META/GATE/CAM-CHARA from NET_RET 700P NW_TRUNK2(TX/RX, 4) TX-FPGA(from CAM) NET_MAIN 4K TRUNK META/CAM-CHARA/AUDIO to 4K-POST MAIN for UPCONV...
- Page 139 VUP_RX/TX PCIE X601,IC609 X812 IC1100-1103 IC904 ZQ_MG0_VG0I0-3_P/N 27MHz 32.768kHz IC1200-1203 IC800 VUP_XCS_ZQ (RTC) MG0_ZQ_VG000-3_P/N TEMP X2501 CODEC NAND 27MHz (MARGAUX) FLASH LPDDR4 IC2503 IC007 IC100,102 IC2601,2602 AG3_RESET IC813-815 RESET +1.8V MEM_RESET_X +1.8V RESET SYNQ PROG POP RESET SRESET S811-814 HDCU3500/HDCU5500...
-
Page 140: Frame Wiring
CN002 CAMERA SMF CN-4052 CN-4056 CN002 CN001 CN001 HDCU5500 HDCU3500 (*): OPTICAL TX-167A OPTICAL OPTICAL MODULE FOR HDCU3500 MODULE MODULE FINE-WIRE (HKCU-SM50) TX-167B: SUB HARNESS SUB HARNESS COAXIAL FOR HDCU5500, (HANDLE TALLY) (RM) CABLE HKCU-FB50 (FOR HDCU3300) POWER ASSEMBLY SY-467... -
Page 141: Revision History
1-1. Location of Printed Wiring Boards, 1-7-1. Corresponding PLDs, 1-9-1. Fuse, 1-9-2. Circuit Protection Element, 2-1. Notes on Replacing the Parts, 2-6. VIF-75 Board, 2-7. SY-467 Board/AT-195 Board, TX-167B Board (HDCU5500/HKCU-FB50)/TX-167A Board (HDCU3500), 4-2-2. Description of SERVICE Menu • Additions: 1-2-7. ENC-185 Board, 1-2-8. MDC-23 Board, 2-19. HKCU-REC55, Section 5. - Page 144 HDCU3500 (SY) Printed in Japan Sony Corporation HDCU5500 (SY) J, E 2019. 12 08 9-932-690-02 © 2019...