Alcatel speed touch home Advanced User's Manual
Hide thumbs
Also See for speed touch home:
- User manual (104 pages) ,
- User manual (88 pages) ,
- User manual (86 pages)
Table of Contents
Advertisement
Quick Links
Download this manual
See also:
User Manual
Advertisement
Table of Contents
Troubleshooting

Related Manuals for Alcatel speed touch home


Summary of Contents for Alcatel speed touch home
- Page 1 SPEED TOUCH HOME Advanced User Guide 3EC 17096 AAAA TCZZA Ed. 01...
- Page 2 Status Released Change Note B D Fa a22087 Short Title CD-UG Speed Touch Home All rights reserved. Passing on and copying of this document, use and communication of its contents not permitted without written authorization from Alcatel. 2 / 180...
-
Page 3: Table Of Contents
Speed Touch at a Glance ..... . . 2.2.1 Introducing the Speed Touch Home ..2.2.2 Front Panel . - Page 4 Remote Organization ....7.4.2 Speed Touch Home ....7.4.3 Your Computer .
- Page 5 Bridging and IP Addresses ... 9.2.2 PPP to PPTP Relaying and IP Addresses Your Speed Touch Home and IP Addressing ..9.3.1 Static IP Configuration .
- Page 6 ......14.1.2 ATM and your Speed Touch Home ..14.1.3 ATM &...
- Page 7 Rear panel with Ethernet and ATMF 25 Interface ..Figure 6 Rear View for connecting the Speed Touch Home ..Figure 7 Rear View for connecting the Speed Touch Home .
-
Page 8: Figure 21 'Connect To' Window
Example of a Specific and an any Destination Connection Figure 86 Speed Touch Home Product Code ..... . . 8 / 180... - Page 9 Contents Figure 87 MDI X Internal Crossover ......Figure 88 MDI X to MDI X External Crossover .
- Page 10 ........Table 16 Power Adapters for Speed Touch Home ....
-
Page 11: Welcome To The Speed Touch
This technological breakthrough coincides with an ever increasing demand for better Internet access. This Speed Touch Home Advanced User Manual is an addition to the User Manual delivered with the STHome. It contains some additional information on STHome's features and provides you with technical background on networking capabilities. -
Page 12: Conventions
1 Welcome to the Speed Touch Conventions The following words and symbols mark special messages throughout this document: WARNING: Text written in this manner indicates that failure to directions could cause bodily harm or loss of life. WARNING CAUTION: Text written in this manner indicates that failure to directions could result in damage to equipment or loss of information. -
Page 13: Speed Touch Tour
2 Speed Touch Tour 2 Speed Touch Tour This chapter aims to familiarize you with the Speed Touch Home. The topics described in this chapter are: Delivery Check " STHome at a Glance: " Features Front Panel LED Description Rear Panel System Requirements: "... -
Page 14: Delivery Check
2 Speed Touch Tour Delivery Check Prior to installation, inspect the Speed Touch Home for damage. Make sure the box contains all the components (See figure 1): The Speed Touch Home(*) " Power supply adapter with 2m (6.56ft.) connecting cable "... -
Page 15: Speed Touch At A Glance
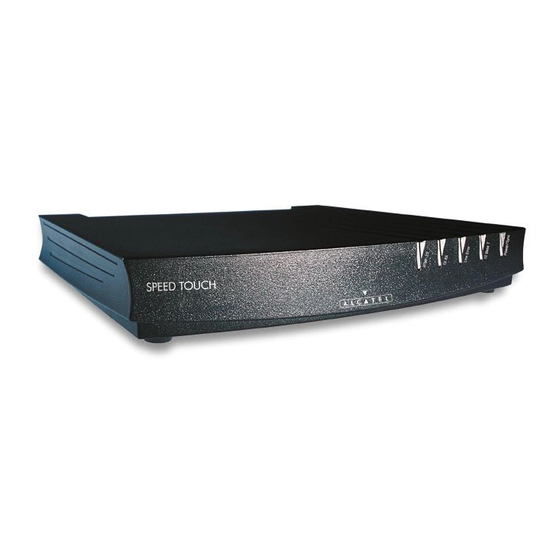
Speed Touch at a Glance 2.2.1 Introducing the Speed Touch Home Your Speed Touch Home is an ADSL modem used for Internet access, or remote Local Area Network (LAN) access at very high speed (up to 8Mbps downstream) via the ADSL Line. -
Page 16: Leds
2 Speed Touch Tour 2.2.4 LEDs As seen in figure 2, the Speed Touch Home is equipped with 5 Light Emitting Diodes (LEDs) on its front panel. Following table explains the functions of the LEDs: Table 1 STHome LED Status Overview... -
Page 17: Ethernet And Atmf 25
2 Speed Touch Tour 2.2.5 Ethernet and ATMF 25 There are two Speed Touch Home versions: Ethernet only and Ethernet + ATMF 25 (See figures 4 and 5). Power Switch Link Integrity Power 10Base T/MDI-X Power Socket Ethernet Interface adsl 0645/ 01... -
Page 18: System Requirements
2 Speed Touch Tour System Requirements The Speed Touch Home requires the following hardware and system configuration: ADSL ADSL service must be enabled on your telephone line. Read Chapter 4 first for instructions. The ADSL modem relies on ATM Technology for its wide area communications. - Page 19 2 Speed Touch Tour ATMF 25 A PC/workstation with an ATMF 25 PC NIC installed; " For advanced networking, a workgroup ATM switch " supporting ATMF 25 interfaces. Operating System When the STHome is used in Bridging mode, it does not put "...
- Page 20 2 Speed Touch Tour 20 / 180 3EC 17096 AAAA TCZZA Ed. 01...
-
Page 21: Connecting The Speed Touch Home
3 Connecting the Speed Touch Home 3 Connecting the Speed Touch Home This chapter describes how to connect your Speed Touch Home. The topics discussed are: Information on Cables and Connectors " The Ethernet Interface on the STHome " The ATMF 25 Interface "... -
Page 22: Cables And Connectors
Defaults Line adsl 0782/ 01 Figure 6 Rear View for connecting the Speed Touch Home Please follow the numbers on the figures 6, 7, 10 and 11 to complete the connection procedure for the STHome. 22 / 180 3EC 17096 AAAA TCZZA Ed. 01... - Page 23 3 Connecting the Speed Touch Home Using other LAN cables You can use LAN cables other than the one provided in the box. However, make sure that it has the correct layout: A straight through cable has to be used for the connection between the STHome and your PC or between the hub and the PCs on your LAN.
-
Page 24: Ethernet Interface
Defaults Line adsl 0782/ 01 Figure 7 Rear View for connecting the Speed Touch Home The Ethernet port is a 10Base T Half Duplex Ethernet interface of type MDI X connecting to either a single PC or a work group hub. -
Page 25: Multiple Pc Configuration
3 Connecting the Speed Touch Home Assuming the Speed Touch Home and PC are properly powered on, the Link Integrity LEDs on both your PC and STHome should be continuously green. This indicates that the link between the STHome and PC is correct. If not, check the cable layout according to Appendix B. -
Page 26: Atmf 25 Interface
10Base T/MDI-X Defaults Line adsl 0782/ 01 Figure 10 Rear View for connecting the Speed Touch Home The (optional) ATMF port on the Speed Touch Home is an ATM Forum 25.6 Mbit/s compliant interface of type ATM Network Equipment. Connect the PC (with an ATMF PC NIC card of type ATM End "... -
Page 27: The Adsl Line
3 Connecting the Speed Touch Home The ADSL Line Please read Chapter 4 prior to connecting your Speed Touch Home to the ADSL line. Enabling ADSL As soon as your ADSL provider enables ADSL service on your telephone line, two "channels" coexist on the single twisted pair: the standard voice channel reserved for your regular "... -
Page 28: Power Supply
Line adsl 0782/ 01 Figure 11 Rear View for connecting the Speed Touch Home The Speed Touch Home is delivered with a modular external power adapter of 120 V /60Hz (US standard) or 230 V /50Hz (European standard) converting to: /1A unregulated output voltage for passive splitter "... -
Page 29: Adsl Connectivity
This chapter contains: A brief Introduction of ADSL Technology " Focuses on In House ADSL Installation " Important Information on connecting the Speed Touch Home " 29 / 180 3EC 17096 AAAA TCZZA Ed. 01... -
Page 30: Adsl Exposed
207kHz 272kHz 1.1MHz adsl 0609/ 01 Figure 12 POTS and ADSL Frequency Spectra As a result, your telephone lifeline service will never be affected by any possible Speed Touch Home failure. 30 / 180 3EC 17096 AAAA TCZZA Ed. 01... -
Page 31: Enabling Adsl
4 ADSL Connectivity Enabling ADSL Prior to using the Speed Touch Home, you MUST contact your ADSL provider. He will inform you whether the ADSL service is already enabled. If not, he will advice you on how to proceed. Your ADSL provider must provide you with: A telephone line which supports ADSL service;... -
Page 32: Central Splitter
In case of a new dedicated cable, ADSL service is only present on those wall sockets attached to this cable. Inside the Speed Touch Home, dedicated filters remove the POTS signals, consequently only the ADSL remains to be processed by the modem. - Page 33 4 ADSL Connectivity Indoor Although indoor splitters come in various configurations, their working principles are identical to those of the outdoor's. Depending on splitter type and your ADSL provider procedures, you are allowed to install the splitter yourself. For more information, check the booklet that is supplied with the indoor splitter.
-
Page 34: Distributed Filters
4 ADSL Connectivity 4.3.2 Distributed Filters In this configuration, the combined POTS/ADSL signals are distributed over the complete in house wiring. POTS + ADSL POTS + ADSL POTS POTS POTS ONLY ONLY ONLY = one distributed filter adsl 0750/ 01 Figure 14 The Distributed Filter If your wall sockets are fully wired you can connect your Speed... -
Page 35: Packet Services
5 Packet Services 5 Packet Services This chapter is about selecting the appropriate packet service for your application. The following topics are highlighted: A brief Description of the supported Packet Services " Selection Criteria for a specific Service " Internet Access vs. Private LAN Interconnection "... -
Page 36: Introduction
5 Packet Services Introduction The Speed Touch Home offers two different packet services. A packet service can be defined as: The actions that need to be performed on every data packet in order to filter or forward packets to the next device in the communication chain."... -
Page 37: Packet Services At A Glance
5 Packet Services Packet Services at a Glance 5.3.1 IEEE 802.1D Transparent Bridging The Speed Touch Home IEEE 802.1D Bridging packet service offers complete protocol transparency and has inherent configuration simplicity. Yet it provides excellent forwarding performance. 5.3.2 PPP to PPTP Relaying In contrast to Bridging, which provides an "Always On"... -
Page 38: Internet And Corporate Access Vs. Lan To Lan Interconnection
Internet, this server will ask you to identify and authenticate yourself. The most appropriate Speed Touch Home configuration is then PPP to PPTP Relaying (See Chapter 7 for more information). In this case, your ISP or corporate network administrator will most likely determine which networking model to use. -
Page 39: Summary
An optimal solution may be discovered through experimentation. You can also try a combination of the presented solutions. Summary All Speed Touch Home's packet services can be summarized in the following table: Table 2 STHome Packet Services... - Page 40 5 Packet Services 40 / 180 3EC 17096 AAAA TCZZA Ed. 01...
-
Page 41: Ieee 802.1D Transparent Bridging
6 IEEE 802.1D Transparent Bridging 6 IEEE 802.1D Transparent Bridging The topics covered in this chapter include: Connect & Go for Bridging " Bridging Features " Default Bridging Settings " Bridging Configuration " Using Bridging " 41 / 180 3EC 17096 AAAA TCZZA Ed. 01... -
Page 42: Connect & Go
6 IEEE 802.1D Transparent Bridging Connect & Go 1. Connect your Speed Touch Home and PC(s) as described in Chapter 3. 2. Configure Public IP addresses on your PC(s) according to the preferred method of your service provider: A Static IP address (See section 9.4.2) A Dynamic IP address (See section 9.4.3) -
Page 43: Bridging Defaults
Default Value ATM Encapsulation Method RFC1483 LLC/SNAP for Bridged PDUs (FCS not preserved) Bridge Port State 1 Port in Forwarding State Ageing Time 5 Minutes Speed Touch Home DHCP Mode No DHCP 43 / 180 3EC 17096 AAAA TCZZA Ed. 01... -
Page 44: Bridging Configuration
VPI/VCI values of the virtual channels on which the " Bridging service is enabled. In the event of default differences (see table 3 for Speed Touch Home's original cross connections), adapt them using the local web pages as described in Chapter 12. -
Page 45: Bridge Ports
6 IEEE 802.1D Transparent Bridging 6.4.2 Bridge Ports The Speed Touch Home comes with one preconfigured Bridge port, i.e. Br1 by default. As this port is put in Forwarding state, frames can be transmitted and received without any configuration action. -
Page 46: Advanced Concepts
Sample Configuration Figure 15 shows a configuration example: One PC is connected to an ISP while another one is connected to a remote LAN. Both connections are made via the Speed Touch Home. Internet IP address obtained via ISP Access Point... -
Page 47: Ppp To Pptp Relaying For Windows 9X
7 PPP to PPTP Relaying for Windows 9x This chapter covers configuring and using the PPP to PPTP Relaying (PPP/PPTP) mode of the Speed Touch Home. The following topics are dealt with: Connect & Go for PPP to PPTP Relaying "... -
Page 48: Connect & Go
7 PPP to PPTP Relaying for Windows 9x Connect & Go Initial Configuration 1. Connect your Speed Touch Home and PC(s) as described in Chapter 3. 2. Determine your PC's OS. If: Windows 98 : Continue with step 5. Windows 95 : Continue with step 3. -
Page 49: Features
7 PPP to PPTP Relaying for Windows 9x Features PPP to PPTP Relaying has the following features: Standard Dial up" behavior " Security through identification, authentication and encryption " Multiprotocol support depending on PPTP implementation, " e.g. for MS Windows: TCP/IP , IPX/SPX and NETBEUI Complete TCP/IP protocol transparency "... -
Page 50: Requirements
Should you want connectivity to multiple remote organizations, additional sets of these parameters need to be supplied. 7.4.2 Speed Touch Home The Speed Touch Home comes with 4 preconfigured PPP/PPTP connections (See table 5). 7.4.3 Your Computer Your PC must support the Point to Point Protocol (PPP) and Point to Point Tunneling Protocol (PPTP). -
Page 51: Configuring Dial Up Networking For Windows 9X
7 PPP to PPTP Relaying for Windows 9x Configuring Dial Up Networking for Windows 9x To configure a new connection on a Windows 9x platform, to an ISP , or your corporate headquarters, proceed as follows: 1. Double click on your desktop. 2. -
Page 52: Figure 17 Vpn Server Window
9. The VPN Server window appears (See figure 17). Enter the DNS hostname or IP address of the Virtual Private Network (VPN) server. In this case the VPN Server is your Speed Touch Home. The default IP address for the STHome is 10.0.0.138. Its default hostname is SpeedTouch". -
Page 53: Figure 18 Successful Creation Of A New Dial Up Networking Connection Window
7 PPP to PPTP Relaying for Windows 9x 10. A window appears announcing that you have successfully installed a new Dial Up Networking connection (See figure 18). Figure 18 Successful Creation of a New Dial Up Networking Connection Window Press the button. -
Page 54: Figure 20 'Corporate' Properties Windows
7 PPP to PPTP Relaying for Windows 9x 11. Click and select 'Properties'. 12. The 'Corporate' properties window appears (See figure 20): Figure 20 'Corporate' Properties Windows Select the 'Server Types' tab. 13. Disable the protocols that you will not use e.g. IPX/SPX, NETBEUI. - Page 55 7 PPP to PPTP Relaying for Windows 9x Creating multiple icons for multiple destinations You can create a unique icon for each of your destinations. This can be accomplished by repeating the steps - starting with step 5. - for each destination. Note Using specific virtual channels to multiple destinations is described in the advanced configurations, section 14.4.4.
-
Page 56: Using Ppp To Pptp Relaying For Windows 9X
7 PPP to PPTP Relaying for Windows 9x Using PPP to PPTP Relaying for Windows 9x 7.6.1 Establishing a PPP/PPTP Connection After configuring the connection, establish the connection as follows: 1. Double click in the Dial Up Networking folder. Double click the shortcut on your desktop. -
Page 57: Releasing A Ppp/Pptp Connection
7 PPP to PPTP Relaying for Windows 9x Saving your password If you want the current Dial Up connection application to remember your User Name and Password, tick the 'Save Password' box (n). The next time you establish this connection, both values are displayed automatically. -
Page 58: Advanced Concepts
7 PPP to PPTP Relaying for Windows 9x 7.6.3 Advanced Concepts In section 14.4 the following advanced features, background information and configuration possibilities are described: Advanced Point to Point Tunneling Information " Tunneling from behind an IP Router " Establishing specific PPP/PPTP Sessions "... -
Page 59: Downloading And Installing Dial Up Networking Upgrade For Windows 95
7 PPP to PPTP Relaying for Windows 9x Downloading and Installing Dial Up Networking Upgrade for Windows 95 This section explains how to download and install the Windows Dial Up Networking 1.3 Performance and Security Upgrade for Windows 95". 7.7.1 System Requirements The Windows 95 workstation must meet the following minimum requirements :... -
Page 60: Figure 24 'Download Center' Web Page
7 PPP to PPTP Relaying for Windows 9x 3. You will be guided to Microsoft's 'Download Center' (See figure 24): Figure 24 'Download Center' Web Page In this web page, select the Operating System. Click 4. In the result list, look for the following title: and select it by clicking. -
Page 61: Figure 25 'Save As
7 PPP to PPTP Relaying for Windows 9x 9. A 'Save As...' window pops up (see figure 25), asking you to specify a location for the MSDUN13.exe file to be downloaded. Figure 25 'Save As...' Window 10. Specify a location for the storage and click execute the download. -
Page 62: Installing Msdun
7 PPP to PPTP Relaying for Windows 9x 7.7.3 Installing MSDUN If the download was successful, proceed with installing the Dial Up Networking Upgrade. Save your work and exit all applications (except your Web browser) before beginning the installation process. Note If you have installed Windows 95 from a CD rom, you will need to have the Windows 95 CD rom ready prior to start the installation... -
Page 63: Figure 28 'End User License Agreement' Window
7 PPP to PPTP Relaying for Windows 9x 4. The 'End User License Agreement' window appears: Figure 28 'End User License Agreement' Window This license agreement must be accepted to start the installation. To do so, click 5. The installation starts: Figure 29 'Copying Files...' Window 63 / 180... -
Page 64: Figure 30 'Restart' Window
7 PPP to PPTP Relaying for Windows 9x During the installation, setup will ask you to restart your computer twice: Figure 30 'Restart' Window Proceed each time by clicking 6. Upon restart, the installer will rebuild your driver twice: once for Dial Up Networking and once to enable Virtual Private Networking. -
Page 65: Configuring And Using Tunnelling On Windows Nt Platforms
7 PPP to PPTP Relaying for Windows 9x Configuring and Using Tunnelling on Windows NT Platforms This section describes how to create and setup a PPTP Dial Up connection over standard telephone lines and Virtual Private Network connections over IP networks such as the Internet on a Windows NT platform. -
Page 66: Figure 31 'Network' Window
7 PPP to PPTP Relaying for Windows 9x Figure 31 'Network' Window Select the 'Protocol' tab and click 5. The 'Select Network Protocol' window appears (See figure 32). Figure 32 'Select Network Protocol' Window Click on the scroll button in the dialog box and select the 'Point to Point Tunneling Protocol' from the list. -
Page 67: Figure 33 'Pptp Configuration' Window
7 PPP to PPTP Relaying for Windows 9x 6. Setup now needs to copy some Windows NT files and prompt you for the proper path to the installation files. Specify the path and click The installation will load all necessary PPTP files. 7. -
Page 68: Figure 35 'Remote Access Setup' Window
7 PPP to PPTP Relaying for Windows 9x 9. The 'Remote Access Setup' window appears (See figure 35) and lists a modem that is already setup in RAS. Figure 35 'Remote Access Setup' Window To add the new VPN ports to 'RAS', click 10. -
Page 69: Figure 37 'Configure Port Usage' Window
7 PPP to PPTP Relaying for Windows 9x 11. At this point, by default the ports are configured for dial in only. To change this select a port and click in the 'Remote Access Setup' window. 12. The 'Configure Port Usage' window appears (See figure 37). Figure 37 'Configure Port Usage' Window Select the 'Dial out only' option and click... -
Page 70: Creating A New Pptp Phonebook Entry
7 PPP to PPTP Relaying for Windows 9x 7.8.2 Creating a New PPTP Phonebook Entry The following procedure tells how you can create a tunnel session for use with the corporate LAN or dial up transport. A tunnel session contains the IP address of a PPTP server and your User Account information on that server. -
Page 71: Figure 39 'New Phonebook Entry Wizard' Window
7 PPP to PPTP Relaying for Windows 9x 4. The 'New Phonebook Entry Wizard' window appears (See figure 39). Figure 39 'New Phonebook Entry Wizard' Window 5. Enter a name for the tunnel you are creating (the tunnel will be saved in the phonebook under this name). Click 6. -
Page 72: Figure 41 'Phone Number' Window
7 PPP to PPTP Relaying for Windows 9x 7. The 'Phone Number' window appears (See figure 41). Figure 41 'Phone Number' Window Enter the 'Phone number' of the dial up server you are calling. Click Note Multiple Phone Numbers You can assign more then one phone number to each entry. This might be useful if you have a pool of phone numbers to connect to. -
Page 73: Logging On To A Vpn Server Through A Tunnel Session
7 PPP to PPTP Relaying for Windows 9x 8. The 'New Phonebook Entry Wizard' window appears (See figure 43). Figure 43 'New Phonebook Entry Wizard' Window This window tells you that the new tunnel creation was successful. Click to save the tunnel definition and to add the Phonebook entries to scroll list. -
Page 74: Figure 44 'Dial Up Networking' Window
7 PPP to PPTP Relaying for Windows 9x Creating a shortcut If you intend to regularly log on to a VPN using a PPTP tunnel, it may be useful to create a shortcut to it on your desktop. 3. The 'Dial Up Networking' window appears (See figure 38). Figure 44 'Dial Up Networking' Window Select the tunnel you want to set up in the phonebook... -
Page 75: Figure 46 'Connecting To' Window
7 PPP to PPTP Relaying for Windows 9x 5. Enter the optional information in the 'Domain' box. This is only required by some Microsoft NT VPN servers. Click 6. The 'Connecting To' window appears (See figure 46): Figure 46 'Connecting To' Window This window informs you of the status of the connection process. -
Page 76: Tearing Down A Tunnel Session
7 PPP to PPTP Relaying for Windows 9x 7.8.4 Tearing down a Tunnel Session To uninstall a tunnel, proceed as follows : 1. Click the appropriate connection icon on your system tray to pop up the 'Dial Up Networking Monitor' window (See figure 47). -
Page 77: Atm Forum 25.6 Interface Configuration
PC applications are captured by the ATMF 25.6 interface and cross connected, or switched to the ADSL line. The Speed Touch Home's ATM Forum 25.6 interface is completely transparent to upper protocol layers. The packet services depend solely on your PC NIC's capabilities. Consult your PC NIC documentation for information on service configuration. - Page 78 8 ATM Forum 25.6 Interface Configuration 78 / 180 3EC 17096 AAAA TCZZA Ed. 01...
-
Page 79: Configuring Ip
From the previous chapters, it is clear that the TCP/IP protocol suite plays a crucial role. Not only for the various networking capabilities of the Speed Touch Home, but also for its internal configuration. Due to the flexibility and the multitude of TCP/IP features, numerous configurations are possible. -
Page 80: General Ip Information
Net Mask 255.255.255.0 " With the prefix method this will be written as : prefix address 10.0.0.138/24 " In the routing table of the Speed Touch Home this notation will be used. 80 / 180 3EC 17096 AAAA TCZZA Ed. 01... -
Page 81: Private Vs. Public Addresses
9 Configuring IP 9.1.2 Private vs. Public Addresses In the examples throughout this document Private IP addresses are used for local IP configurations. Private IP addresses are defined in RFC1918 Address Allocation for Private Internets. This RFC is categorized as "Best Current Practice". Private hosts do not require access to hosts in other enterprises or to the Internet. -
Page 82: Choosing An Ip Address
Private Private IP addresses are to be used for local IP communication. E.g. configuring the Speed Touch Home or dumping files to your local printer. For this purpose it is best to choose addresses from the private ranges declared by the Internet Assigned Number Authority (IANA). -
Page 83: Packet Services And Ip Addressing
Bridging and IP Addresses Basically, Bridging does not require any IP address at all: neither in your PC(s), nor in your Speed Touch Home. However, in case of Internet access or private IP networking, your PC(s) must be configured for TCP/IP . -
Page 84: Ppp To Pptp Relaying And Ip Addresses
Consequently you are free to choose any IP address as long as it is compatible with your local network and is unique in that same network. As the Speed Touch Home has a preconfigured Net10" address (10.0.0.138), you should configure IP addresses like 10.0.0.1, 10.0.0.2, ... on your PCs. -
Page 85: Figure 49 (A) 'Corporate' Server Types Properties Window (B Corporate 'Tcp/Ip Settings' Window
9 Configuring IP (a) 'Corporate' Server types (b) 'Corporate' TCP/IP Settings Figure 49 (a) 'Corporate' Server Types Properties Window (b) Corporate 'TCP/IP Settings' Window Here, select 2. The 'TCP/IP Settings' window appears (See figure 49b), showing you that the PPP/PPTP application for 'Corporate is set for using a In case your ISP or corporate administrator instructs you to use a Static IP address for PPP/PPTP , you tick 'Specify an IP Address' and... -
Page 86: Your Speed Touch Home And Ip Addressing
Single PC Configuration " In the below drawing, a simple configuration is given: one PC attached to the Speed Touch Home. It is most applicable to Bridging and PPP to PPTP Relaying. IP Address : 10.0.0.1 IP Address : 10.0.0.138 (Sub)net Mask : 255.0.0.0... -
Page 87: Automatic Ip Configuration: Dhcp
DHCP Server on the same network which responds with DHCP replies. This task can also be performed by the Speed Touch Home. Depending on the size and complexity of your network, a few DHCP configurations can be envisaged: Simple IP network: no DHCP , i.e. - Page 88 9 Configuring IP Configuring the One of the Speed Touch Home features is that it can automatically revert from DHCP Client to DHCP Server. At boot STHome for Auto DHCP time the STHome probes for 20 seconds to check wether a DHCP Server is available on the network.
-
Page 89: Figure 53 The Sthome As Dhcp Client
9 Configuring IP Configuring the For advanced networks, the role of DHCP Server might be performed by an IP node other than the Speed Touch Home on STHome as DHCP the local LAN. Typically such functions are attributed to home... - Page 90 9 Configuring IP Configuring your IP To setup the Speed Touch Home without DHCP , tick network without DHCP . For more information, refer to section 12.1.9. Note This configuration might be necessary for Bridging configurations. Default STHome DHCP For the STHome, DHCP is by default disabled. This is to avoid conflicts with the DHCP Server of your ISP .
-
Page 91: Your Pc(S) Or Lan And Ip Addressing
9 Configuring IP Your PC(s) or LAN and IP Addressing 9.4.1 Viewing the IP Address Setting of your PC To check the IP settings of your PC(s), proceed as follows: 1. Double click on your desktop. 2. Double click to open the 'Control Panel' folder. 3. -
Page 92: Figure 56 Tcp/Ip Properties Window
9 Configuring IP 5. Select 'TCP/IP Protocol -> <network adapter>' and press button. Note <network adapter> is a placeholder for the name of the type of physical network adapter installed in your PC. 6. The 'TCP/IP Properties' window appears (See figure 56) where you select the 'IP Address' tab. -
Page 93: Configuring A Static Ip Address On Your Pc
9 Configuring IP 9.4.2 Configuring a Static IP Address on your PC Corporate LANs mostly use Static IP Addresses, so consult your LAN administrator to obtain an IP Address and a Subnet Mask. This section describes how you can configure the IP Address of your PC. - Page 94 9 Configuring IP 3. You are now back in the Network window. Click 4. Some configuration files will be copied on your hard disk. A 'Setting Changes' message will ask if you wish to restart your computer. Answer After the PC has finished restarting, it will acquire its own IP address from the DHCP server using BOOTP/DHCP .
-
Page 95: Dns
Domain Name System (DNS). Basically DNS is a hierarchical system of servers resolving computer names to IP addresses. This chapter describes Speed Touch Home's DNS abilities: Some General Information on DNS " Configuring your LAN for DNS "... -
Page 96: Using Dns
When you type www.alcatel.com , into the URL field of the Web browser. Your browser must resolve www.alcatel.com into an Alcatel IP address in order for the HTTP request to end up in the Alcatel WWW server. Most of the time your ISP or corporate network performs this DNS resolving. -
Page 97: Configuring Your Local Network For Dns Automatic Ip Configuration
10 DNS 10.2 Configuring your Local Network for DNS Automatic IP Configuration Speed Touch Home's DNS server is active by default, so nothing has to be configured. In the DNS scenario, it is assumed that the DHCP is used for IP parameter distribution. - Page 98 10 DNS 98 / 180 3EC 17096 AAAA TCZZA Ed. 01...
-
Page 99: Lost Speed Touch
11 Lost Speed Touch 11 Lost Speed Touch Non accessibility to your Speed Touch Home may occur if wrongly configured or simply by forgetting the preconfigured IP address. Due to the flexible nature of the STHome, you may end up in a situation where restoring all of the original defaults is the only solution. -
Page 100: Resetting Speed Touch Home's Ip Address
11 Lost Speed Touch 11.1 Resetting Speed Touch Home's IP Address 11.1.1 Ping of Life The Ping of Life is a method to reset the IP address of the Speed Touch Home without changing other settings. The principle is fairly simple, a special ping packet will deliver an IP address to your STHome. -
Page 101: Figure 57 'Arp -A ' Command
Speed Touch Home. In the subsequent example, 10.0.0.145 will be used. The MAC address: 01–90–D0–80–01–01 is a special MAC group address from Alcatel on which the STHome will react. For the example the command is thus: arp –s 10.0.0.145 01–90–D0–80–01–01 101 / 180 3EC 17096 AAAA TCZZA Ed. -
Page 102: Figure 58 'Arp -A' Command
(See figure 58). Figure 58 'Arp -a' Command 5. Turn off the Speed Touch Home. 6. Turn on again and wait for 30 seconds to allow the selftest to end. 7. Ping the IP address you just entered in the ARP cache within 60 seconds (see figure 59): ping <STHome IP address>... - Page 103 11 Lost Speed Touch 8. If successful, the STHome has configured this IP address and will reply to the ping. 9. You may clear the entry in the ARP cache by issuing the following command: arp –d <STHome IP address> Leaving the entry in the ARP cache does not harm the general operation.
-
Page 104: Reset To Original Defaults
11 Lost Speed Touch 11.2 Reset to Original Defaults The following procedures will reset all of the Speed Touch Home's configurable values back to their original defaults, including the IP address. Reset to Defaults vs. the STHome IP Address A reset to original defaults, also implies the STHome's IP address is reset to 10.0.0.138. -
Page 105: Ping To Defaults
11 Lost Speed Touch 11.2.1 Ping to Defaults The first method to reset all settings to the original defaults is the Ping to Defaults. The technique is identical to that used for the Ping of Life, except that another MAC address is used, i.e. 01–90–D0–80–01–FF. Ping to Defaults vs. -
Page 106: Push Button
–d <IP address within subnet> Note The IP address used to perform a Ping to Defaults is not assimilated by your Speed Touch Home. The STHome will restart with the original defaults, including the default IP address 10.0.0.38. 6. If needed, reconfigure the STHome's IP address. -
Page 107: Speed Touch Home Local Configuration
12 Speed Touch Home Local Configuration 12 Speed Touch Home Local Configuration The Speed Touch Home can be configured in two different ways: Using a Web Browser " Through a Command Line Interface via Telnet " 107 / 180 3EC 17096 AAAA TCZZA Ed. 01... -
Page 108: Web Interface
12 Speed Touch Home Local Configuration 12.1 Web Interface The Speed Touch Home comes with integrated local configuration capabilities. This feature is based on the HTTP Server/Web browser Concept". It allows configuration of your STHome via a Web browser from any local PC via the Ethernet interface. -
Page 109: Speed Touch Home's Web Pages Principles
12 Speed Touch Home Local Configuration 12.1.2 Speed Touch Home's Web Pages Principles To access the Speed Touch Home's web pages proceed as follows: 1. Start the Web browser on your PC or workstation. 2. Contact the STHome by entering its IP address or DNS hostname in the URL field. - Page 110 12 Speed Touch Home Local Configuration Header Frame Buttons The Header frame is present in all of the STHome web pages. Command buttons: To let all changes made take effect. Use the button to make the changes permanent. To save changes in permanent storage.
- Page 111 12 Speed Touch Home Local Configuration Pops up the 'DHCP Configuration' page, allowing you to configure STHome's DHCP server/client mode. (See section 12.1.9) Pops up the 'DNS Configuration' page, allowing you to configure STHome's DNS server. (See section 12.1.10) This button allows you to upgrade the STHome software from the local network.
-
Page 112: Initial Setup Page
12 Speed Touch Home Local Configuration 12.1.3 Initial Setup Page Figure 61 'Initial Setup' Web Page The Speed Touch Home relies heavily on the TCP/IP Protocol for its internal operation. IP requires a minimum set of parameters for its proper operation: IP address "... -
Page 113: Table 8 Ip Address Classes And Default Netmasks
IP Address " In this field you can configure a user defined IP address for the Speed Touch Home. This IP address will show up as Extra" in the STHome Routing Table (See section ). Netmask / Subnet Mask "... -
Page 114: The System Setup Page
12 Speed Touch Home Local Configuration 12.1.4 The System Setup Page The 'System Setup' page allows you to protect your Speed Touch Home settings by configuring a system password. Just type it into the 'Password' field. A User ID is not required. -
Page 115: The Phonebook Page
12 Speed Touch Home Local Configuration 12.1.5 The Phonebook Page Definition The Speed Touch Home Phonebook is like any ordinary phonebook: A repository for names and numbers". In contrast to a standard phonebook though, it contains additional connectivity information. Figure 63... -
Page 116: Table 9 Default Phonebook Entries
The VPI/VCI columns list the VPI/VCI values of the ATM virtual channels that are terminated on the Ethernet port. The Speed Touch Home VPI values can range from 0 up to 15; its VCI values from 32 to 511. Type "... -
Page 117: The Routing Page
12 Speed Touch Home Local Configuration 12.1.6 The Routing Page Click to activate the Speed Touch Home's 'Routing' page: Figure 64 'Routing' Web Page This 'Routing' web page (See figure 64) consists of two tables: IP Address Table This table summarizes all IP addresses configured on any STHome interface . - Page 118 Deleting an IP address automatically removes all related routes in the tables. IP Route Table Although the Speed Touch Home has no real IP Routing functionality, it has the flexibility to access machines in other networks than its own. The IP Route table recalls these specific routes (See figure 64).
-
Page 119: The Pptp Connections Page
12 Speed Touch Home Local Configuration 12.1.7 The PPTP Connections Page Click to recall the Speed Touch Home 'PPTP Connections' table. This table presents relevant PPP/PPTP connection information. Figure 65 'PPTP Connections' Web Page The following fields are part of the 'PPTP Connections' table: Name "... -
Page 120: Figure 66 Ppp Atm Format (Rfc 2364:Ppp Over Aal5)
12 Speed Touch Home Local Configuration High-level Data Link Control (HDLC) Framing " PPP packets arriving via a PPTP tunnel and PPP packets Encapsed on ATM connections differ in format. The PPP format on AAL5 follows RFC 1661 Point to Point Protocol (PPP)", see figure 66, whereas the PPP format within a tunnel follows Point to Point Tunneling Protocol (PPTP)", see figure 67. - Page 121 12 Speed Touch Home Local Configuration State " The Speed Touch Home allows multiple users to connect to different remote organizations simultaneously. However this has a price, as every time somebody browse through the STHome a connection is no longer available for other users.
-
Page 122: The Bridging Page
12 Speed Touch Home Local Configuration 12.1.8 The Bridging Page The Speed Touch Home contains an IEEE 802.1D compliant Transparent Bridge that can be reconfigured via this local web page. In principle for Bridging nothing needs to be configured for proper operation as it is a Plug &... - Page 123 Encapsulation/Decapsulation refers to the Encapsulation/ Decapsulation of Ethernet or IEEE 802.3 frames into/from AAL5/ATM. The Speed Touch Home is compliant with RFC 1483 Multiprotocol Encapsulation over ATM Adaptation Layer 5" and supports both the LLC/Sub-Network Access Protocol (SNAP) method and the VC MUX method for Bridged Ethernet V2.0/IEEE 802.3 PDUs.
-
Page 124: Figure 69 'Bridge Data' Web Page, Part 1
The MAC addresses are spread over 3 tables: Permanent MAC Addresses Table (See figure 69) " The following MAC addresses are resident inside the Bridge: The own MAC address of the Speed Touch Home: e.g. 00-80-9F-05-0B-A0 The MAC broadcast address: FF-FF-FF-FF-FF-FF... -
Page 125: Figure 70 'Bridge Data' Web Page, Part 2
These MAC addresses are learned and aged by the Bridge. All MAC addresses in this list are automatically entered and removed by the Speed Touch Home Bridge entity. The Learning process adds MAC addresses received on any of its ports, while the ageing process removes them, when their ageing time has expired. -
Page 126: The Dhcp Page
12 Speed Touch Home Local Configuration 12.1.9 The DHCP Page This page (See figure 71) allows you to change the Speed Touch Home DHCP server/client settings. Depending on the size and complexity of your network a few DHCP configurations can be envisaged: Simple IP network: no DHCP , i.e. - Page 127 " For small home LANs it might be interesting to configure all your PCs as DHCP clients and the Speed Touch Home as DHCP Server. In this configuration each time a computer boots, it will obtain its IP configuration from the STHome.
-
Page 128: Figure 72 Advanced 'Dhcp Server Configuration' Web
12 Speed Touch Home Local Configuration If the Speed Touch Home is configured for Auto DHCP or DHCP server, additional configuration must be done. Click access the 'DHCP server configuration' web page. Figure 72 Advanced 'DHCP Server Configuration' Web Page... - Page 129 'auto', there will be referenced to the 'DNS Configuration' web page settings. DHCP Spoofing Field " This field has no meaning for the Speed Touch Home and will result in an error message when used. DHCP Lease Table "...
-
Page 130: The Dns Page
Should the devices not reveal their hostname in the DHCP request, or even worse: if they do not support DHCP , static entries can be added to the Speed Touch Home's local DNS database. To do so, add the hostname and corresponding IP address of these devices via the bottom row of the table. -
Page 131: The Software Upgrade Page
12 Speed Touch Home Local Configuration 12.1.11 The Software Upgrade Page The Speed Touch Home supports two software upgrade possibilities: A new version of the software can be downloaded from " the ADSL network to your STHome. This feature is controlled by the ADSL provider. At some point in time he might decide to upgrade the software in your Speed Touch Home. - Page 132 Passive Software Version " Indicates the software version resident in, but not used by the Speed Touch Home. This could be a newer version which is yet to be switched to active, but also a dormant older version. Software Path Input Field "...
-
Page 133: Command Line Interface
12 Speed Touch Home Local Configuration 12.2 Command Line Interface As mentioned in the introductory part, the Speed Touch Home exhibits a Command Line Interface (CLI). The CLI can be accessed only via the Ethernet interface. 12.2.1 Telnet Access Via a PC connected to the Ethernet interface of the STHome you can execute CLI commands. - Page 134 12 Speed Touch Home Local Configuration 4. The opening banner appears: ––––––––––––––––––––––––––––––––––––––––––––––––––––––––––––––––––– ______ ___/_____/\ /\\ ALCATEL ADSL MODEM _____/__ /\_____/___ \ Version 3.2 /\ \ _______//_______/ / _\/______ Copyright 1999. / _\__ \_______\/ * /_/______/___________________/ /________/ /___/ * \ \...
-
Page 135: Software Upgrade
13 Software Upgrade 13 Software Upgrade The Speed Touch Home supports two software upgrade possibilities: A new version of the software can be downloaded from " the ADSL network to your STHome. You can upload new STHome software packages from a PC "... -
Page 136: Software Download From The Network
13 Software Upgrade 13.1 Software Download from the Network This feature is controlled by the ADSL provider. At some point in time he might decide to upgrade the software in your Speed Touch Home. This download will happen almost unnoticed. You will be able to see a change in the software version if you browse to the STHome's 'Software Upgrade' page. -
Page 137: Advanced Networking Concepts
14 Advanced Networking Concepts 14 Advanced Networking Concepts The topics, presented in this chapter are: ATM Connectivity " Direct Connect vs. Dial Up " Advanced Bridging " Advanced Tunneling " 137 / 180 3EC 17096 AAAA TCZZA Ed. 01... -
Page 138: Atm Connectivity
14 Advanced Networking Concepts 14.1 ATM Connectivity 14.1.1 Overview All data arriving at, and departing from, your Speed Touch Home via the ADSL Line is carried in ATM cells. ATM is a connection oriented packet switching technology using fixed size packets, called cells. These cells consist of a header and a payload and are switched through a public or private ATM network depending on the contents of the header. -
Page 139: Atm And Your Speed Touch Home
Practically speaking, a number of virtual channels to one or multiple remote destination(s) can start from/are terminated at the Speed Touch Home. By default, a number of channels are terminated in the STHome for Ethernet; others are cross connected to the ATMF 25.6 interface (if equipped). -
Page 140: Atm & Cpe Interfaces
14 Advanced Networking Concepts 14.1.3 ATM & CPE Interfaces ATM traffic arriving at the Speed Touch Home is switched to either the Ethernet interface or the ATMF 25 interface depending on the VPI/VCI values in the individual cells. ATM virtual channels can transport all forms of protocols. -
Page 141: Direct Connect Vs. Dial Up
14 Advanced Networking Concepts 14.2 Direct Connect vs. Dial up Basically the Speed Touch Home offers two solutions to access remote information infrastructures: "Direct Networking" and "Dial Up Networking". Direct Networking Direct Networking relates to how the network connection is experienced by the user. -
Page 142: Advanced Bridging Concepts
14 Advanced Networking Concepts 14.3 Advanced Bridging Concepts 14.3.1 Introduction Bridging is a LAN technology that transparently relays Ethernet frames between Bridge ports. Depending on the destination MAC addresses of Ethernet frames, the Bridge makes decisions whether to forward or discard frames. Central to the operation of a data bridge is its filtering database. -
Page 143: Bridge Operation
It does not participate in the relaying of frames. Disabled State A port in this state, does not participate in the relaying of frames nor does it update the filtering database. Ports can be enabled/disabled via the Speed Touch Home web pages. 14.3.3 Bridge Operation Learning If the STHome bridge is active, the filtering database is empty. -
Page 144: Multiprotocol
Isolation The Alcatel Multiport Bridge in the Speed Touch Home provides Isolation between remote ports. i.e. Frames (including broadcasts) arriving via ADSL/ATM ports will never be forwarded/flooded to another ADSL/ATM port. -
Page 145: Plug & Play Bridging
14 Advanced Networking Concepts 14.3.6 Plug & Play Bridging The Speed Touch Home Bridge is a 'Plug & Play' device. Via the bridge learning and ageing mechanism, it discovers at which side of the Bridge machines are located. Through this knowledge it is able to keep traffic, submitted to your local printer, from crossing the Bridge. -
Page 146: Advanced Tunneling (Ppp/Pptp) Concepts
IP , ready to be routed over an IP network. At the destination the IPX packets are decapsulated and consequently available in their original format again. Tunneling applied to the Speed Touch Home implies: Tunnels have a local scope. "... -
Page 147: Tunneling From Behind An Ip Router
14 Advanced Networking Concepts 14.4.2 Tunneling from behind an IP Router The Speed Touch Home allows local tunneling from behind a router. This requires a few special settings in both the STHome and your PCs/workstations. 172.16.0.2 IP Router Local PPTP tunnels Ethernet LAN 172.16.0.1... -
Page 148: Ppp To Pptp Relaying
14.4.3 PPP to PPTP Relaying By double clicking dial up icons, PPTP tunnels are established between the Speed Touch Home and PCs on your LAN. Simultaneously, PPP sessions are established with remote destinations. The STHome relays all PPP traffic inside PPTP tunnels to ATM virtual channels. -
Page 149: Establishing Ppp/Pptp Connections
ISP or your corporate headquarters. By default, the Speed Touch Home is configured for four PPP/ATM connections. The STHome is however capable of managing up to 12 PPP/ATM channels simultaneously. This can be achieved by deleting all other packet service entries. -
Page 150: Figure 80 A Single Atm Channel Is Used For Any Destination
Single ATM Channel to any destination " In this scenario, the ISP supplied one ATM channel for connectivity. It is most applicable when a single PC is connected to the Speed Touch Home (See figure 80). ATM Network Internet Local PPTP... - Page 151 14 Advanced Networking Concepts Specific Destination Multiple remote organizations might be connected to your Speed Touch Home, e.g., your private ISP and your corporate headquarters. In this case, the STHome's ATM channels will be split over both locations. For example, 6 ATM channels could be provisioned to your ISP and 6 channels to your corporate.
-
Page 152: Figure 82 Configuring 'Alcatel_Pptp' In Phonebook (A) And Pptp Connections Web Pages (B)
14 Advanced Networking Concepts Example For creating a Dial Up connection to the corporate 'Alcatel', which has to use the virtual channel, named 'Alcatel_pptp', do the following: Configure a PPTP connection entry, named 'Alcatel_pptp', in " Speed Touch Home's Phonebook (Figure 82a) and enable it by adding it to the pptp connections (Figure 82b). -
Page 153: Figure 85 Example Of A Specific And An Any Destination Connection
14 Advanced Networking Concepts Double click the 'Alcatel' Icon to establish the PPP/PPTP " connection. The following Dial Up window will appear: Figure 84 'Connect To' Window As can be seen in the 'VPN Server' field, the virtual channel to be used is specified by its name. - Page 154 14 Advanced Networking Concepts Note Any destination" ATM channels (i.e. connections without specified virtual channels) can be used as Specific destination" channels. This can be done by adding the name of the virtual channel to be used in the VPN Server" field, each time you establish the connection.
-
Page 155: Simultaneous Ppp/Pptp Sessions
Therefore, any user on the local network can initiate tunnels as long as there are idle ATM channels. By default, the Speed Touch Home supports four simultaneous PPP/ATM channels. The STHome is however capable of managing up to 12 simultaneous PPP/ATM channels. This can be done by deleting all other packet service entries in the Phonebook. - Page 156 As soon as the tunnel is terminated, connectivity through the original default gateway is possible again. You can circumvent this problem by manually adding routes to local destinations in the Speed Touch Home's routing table (See section 12.1.6). 156 / 180...
- Page 157 14 Advanced Networking Concepts 157 / 180 3EC 17096 AAAA TCZZA Ed. 01...
-
Page 158: Troubleshooting
15 Troubleshooting 15 Troubleshooting Problem Solution Speed Touch Home modem does not Make sure the STHome modem is plugged in work work Make sure the STHome modem is turned on (no visual indicator on top lights up) ATMF connection does not work... -
Page 159: Troubleshooting
15 Troubleshooting 160 / 180 3EC 17096 AAAA TCZZA Ed. 01... - Page 160 Abbreviations Abbreviations ATM Adaption Layer ADSL Asymmetric Digital Subscriber Line Asynchronic Transfer Mode Command Line Interface DHCP Dynamic Host Configuration Protocol Domain Name System Data Terminal Equipment Frame Check Sequence HDLC High-level Data Link Control HTML HyperText Markup Language HTTP HyperText Transfer Protocol IANA Internet Assigned Number Authority...
-
Page 161: Abbreviations
Abbreviations Remote Access Services Request For Comments Rest Of the World SNAP Sub-Network Access Protocol Switched Virtual Channels Transmission Control Protocol Uniform Resource Locator Virtual Channel Virtual Channels Virtual Channel Identifier Virtual Path Identifier Virtual Private Network Wide Area Network World Wide Web 162 / 180 3EC 17096 AAAA TCZZA Ed. - Page 162 Product Code Tables Appendix A Product Code Tables The exact functionality of the Speed Touch Home modem depends on the model that you have purchased. Each model has a unique eight part product code. The product code is printed on one of the labels that can be found on the underside of the STHome housing.
-
Page 163: Appendix A Product Code Tables
Appendix A Product Code Tables X field The 'X field' reflects the physical specifications of your Speed Touch Home as listed in table 10. Table 10 X Field' Specification AC/DC Plug Type Wire A/B Splitter Power * 110V/9V 220V/12V ROW** 220V/12V UK&Sing 220V/9V... - Page 164 Appendix A Product Code Tables S field The 'S field' specifies the default software package (See table 13). Table 13 S Field" Specification Default Software Package Bridging + PPTP H field The 'H field' specifies the Hardware Platform (See table 14). Table 14 H Field"...
- Page 165 Appendix A Product Code Tables 166 / 180 3EC 17096 AAAA TCZZA Ed. 01...
- Page 166 Appendix B Hardware Reference Appendix B Hardware Reference Connector Pinout Table 15 Connector Pinout Connector Signal Name Function X Field Specification Wire A Subscriber line wire A 3, 4 Wire A Subscriber line wire A Wire B Subscriber line wire B 3, 4 1 2 3 4 5 6 Wire A...
-
Page 167: Appendix B Hardware Reference
Appendix B Hardware Reference Power Supply Adapter The Speed Touch Home is equipped with one of the following portable power supply adapters listed in table 16. Due to the special characteristics of the output class II AC adapter, use only the AULT Incorporated types or equivalents listed in the table. - Page 168 Appendix B Hardware Reference Straight through Cable Layout (LAN Cable) Speed Touch Receive Transmit Twisted Pairs Transmit Receive MDI X port MDI port (Transmit and receive connections reversed) adsl 0527/ 01 Figure 87 MDI X Internal Crossover Crossover Cable Layout Speed Touch Receive Receive...
- Page 169 Appendix B Hardware Reference 170 / 180 3EC 17096 AAAA TCZZA Ed. 01...
- Page 170 Appendix C Speed Touch Default Factory Settings Appendix C Speed Touch Default Factory Settings Global Speed Touch Home Default settings IP Address 10.0.0.138 DNS Name SpeedTouch DNS Domain Name local.net DNS Server Mode STHome set as DNS server DHCP Mode No DHCP IEEE 802.1D Transparent Bridging and related defaults...
-
Page 171: Appendix C Speed Touch Default Factory Settings
Appendix C Speed Touch Default Factory Settings PPP To PPTP Relaying Defaults Phonebook Entries Table 19 Default Relaying Phonebook Entries Name VPI Value VCI Value State RELAY_PPP1 Configured RELAY_PPP2 Configured RELAY_PPP3 Configured RELAY_PPP4 Configured ATM Encapsulation RFC2364 VC MUX for PPP PDUs Global Default VPI/VCI Values ATMF Interface Table 20... - Page 172 Power supply adapter " The Speed Touch Home comes with a portable power supply adapter. Due to the special characteristics of the output of the class II AC adaptor, only use the models or equivalent listed in the power adapter table in Appendix B.
-
Page 173: Appendix D Safety
Appendix D Safety Power sources " The powering of this product must adhere to the power specifications indicated on the marking labels. If you are insure of the type of power supply to your home, consult your product dealer or local power company. The mains socket outlet must be close to the equipment and easily accessible. - Page 174 Appendix D Safety Modem/Telephone use " Avoid using a modem/telephone (other than a cordless type) during an electric storm. There is a slight risk of electric shock caused by lightning. Do not use the telephone to report a gas leak in the vicinity of the leak.
- Page 175 Appendix D Safety Safety Standards The Speed Touch Home complies with the following safety standards: EN 60950, 2 ed. (1992), including amendments 1 (1993), " 2 (1993), 3 (1995) and 4 (1997) IEC 60950, 2 ed. (1991), including amendments 1 (1992), "...
-
Page 176: Radio Frequency Interference Statement
" Consult the dealer or an experienced radio/TV technician for help. Modifications Changes or modifications not expressly approved by Alcatel could invalidate the users authority to operate this equipment. Canadian DOC Class B Notice Notification of Canadian RF Interference Statements... -
Page 177: Appendix E Agency Regulatory Notices
Appendix E Agency Regulatory Notices European Community Declaration of Conformity Alcatel declare , sole responsibility that this product, to which this declaration relates ,is in conformity with the following standard(s) and other common practices: " EN 50081 1: 1992, Electromagnetic Compatibility - Generic emissions standard - Part 1: Residential, commercial and light industry following the provisions of The Electromagnetic Compatibility Directive, 89/336/EEC. - Page 178 Index Index Numbers Connectors, 22 Crossover Cable Layout, 169 10Base-T Interfacing, 24 DHCP , 126 ADSL, 30 DHCP Web Page, 126 Asymmetric, 30 Dial-up, 141 Digital, 30 Line Interface, 22 Direct Connection, 141 Pinning, 34 DNS, 95, 130 Subscriber, 30 Wiring, 34 DNS Web Page, 130 ADSL cable, 22...
-
Page 179: Index
Index Speed Touch Local Webpages, 108 accessing the local pages, 109 Bridge Configuration, 122 MAC Address, 112, 124 Initial Setup, 112 Phonebook, 115 Routing Table, 117 configuring your browser, 108 DHCP , 126 Online Help, 111 DNS, 130 PPTP Connections, 119 Software Upgrade, 131 System Setup, 114 Phonebook Web Page, 115...