Avaya G450 Quick Start For Hardware Installation
Branch gateway
Hide thumbs
Also See for G450:
- Cli reference manual (1334 pages) ,
- Manual (736 pages) ,
- Installing and upgrading (324 pages)

Related Manuals for Avaya G450


Summary of Contents for Avaya G450
- Page 1 Quick Start for Hardware Installation: Avaya G450 Branch Gateway 03-602053 Issue 7 February 2011...
- Page 2 Warranty Be aware that there may be a risk of unauthorized intrusions associated Avaya Inc. provides a limited warranty on this product. Refer to your with your system and/or its networked equipment. Also realize that, if sales agreement to establish the terms of the limited warranty. In such an intrusion should occur, it could result in a variety of losses to addition, Avaya’s standard warranty language as well as information...
- Page 3 • CISPR 24, including all national standards based on CISPR 24. • IEC 61000-3-2 and IEC 61000-3-3. • Consult the dealer or an experienced radio/ Avaya Inc. is not responsible for any radio or television interference TV technician for help. caused by unauthorized modifications of this equipment or the substitution or attachment of connecting cables and equipment other Equipment With Direct Inward Dialing (“DID”):...
- Page 4 RJ11C FCC Part 68 Supplier’s Declarations of Conformity CO trunk 02GS2 0.3A RJ21X, Avaya Inc. in the United States of America hereby certifies that the RJ11C equipment described in this document and bearing a TIA TSB-168 label 02LS2 0.3A RJ21X, identification number complies with the FCC’s Rules and Regulations...
- Page 5 This product meets the applicable Industry Canada technical Downloading Documentation specifications/Le présent materiel est conforme aux specifications For the most current versions of Documentation, see the Avaya techniques applicables d’Industrie Canada. Support Web site: http://support.avaya.com. European Union Declarations of Conformity Avaya Inc.
- Page 6 Quick Start for Hardware Installation: Avaya G450 Branch Gateway February 2011...
-
Page 7: Table Of Contents
Attaching ground wires for purchased ground blocks..................34 Connecting power to the Branch Gateway......................34 Chapter 6: Prepare for configuration..................37 Branch Gateway configuration........................37 Configuring basic Branch Gateway connectivity.....................37 Using the CLI..............................39 Index............................41 Quick Start for Hardware Installation: Avaya G450 Branch Gateway February 2011... - Page 8 Quick Start for Hardware Installation: Avaya G450 Branch Gateway February 2011...
-
Page 9: Chapter 1: Before You Install
Make sure you have the necessary equipment to assist you in the installation before you start working. Related topics: Equipment required for installation on page 10 Equipment required for mounting on page 10 Equipment required for installing an S8300 Server on page 10 Quick Start for Hardware Installation: Avaya G450 Branch Gateway February 2011... - Page 10 LAN line access from the customer site to access the http://rfa.avaya.com website, this task will require a preliminary trip to the customer site. Quick Start for Hardware Installation: Avaya G450 Branch Gateway February 2011...
- Page 11 • Business Partners should point their browsers to the Business Partner portal option sales_market, services-voice, training tools and procedures to select RFA • Associates should point their browsers to the Avaya Associate portal • Contractors should point their browsers to avaya.com •...
- Page 12 Alternatively, if the Branch Gateway will be configured using the CLI, keep the installation script to run as a CLI command at the configuration stage. If the Branch Gateway will be configured using Gateway Installation Wizard (GIW) or Avaya Installation Wizard (AIW), and you have an EPW, enter the ART information contained in the installation script into the EPW.
- Page 13 Before you install Non-Avaya personnel may need to contact their service support or customer care center for IP addresses, depending on entitlements. Related topics: Obtaining the RAS IP address and password on page 13 Obtaining the RAS IP address and password 1.
-
Page 14: Site Requirements
Download any firmware image file upgrades you need from the Avaya Support website, and any Communication Manager service packs that may be required for the upgrade. - Page 15 Gateway must be installed in a Restricted Access Location (RAL). An RAL is defined as an access that can be gained only by trained service personnel or customers who have been Quick Start for Hardware Installation: Avaya G450 Branch Gateway February 2011...
- Page 16 If you have any questions about the safety conditions, contact your project manager. When you have verified that the site is ready for a safe installation, proceed with the installation. Quick Start for Hardware Installation: Avaya G450 Branch Gateway February 2011...
-
Page 17: Chapter 2: Unpack The Device
Result If you have any questions about the equipment order, or if the equipment has been damaged, contact your project manager. Quick Start for Hardware Installation: Avaya G450 Branch Gateway February 2011... -
Page 18: Branch Gateway Package Contents
- One ground screw - Four rubber feet - One jumper for bridging NVRAM init pins • Auto-run CD The Avaya Partner Contact Closure adjunct box, if ordered, is packaged separately. Quick Start for Hardware Installation: Avaya G450 Branch Gateway February 2011... -
Page 19: Chapter 3: Mount The Devices
Connect the strap to an approved ground, such as an unpainted metal surface. Note: Avaya has developed special hardware platforms for customers with harsh environmental conditions. These platforms have been tested to meet stringent physical and environmental requirements (i.e., shock, vibration, EMI, etc.) imposed by the United States Navy for use on their ships. -
Page 20: Branch Gateway Racks
• To the middle of each side panel of the Branch Gateway for fastening the chassis to the rack at the middle Attaching a mounting bracket to the front of the Branch Gateway Quick Start for Hardware Installation: Avaya G450 Branch Gateway February 2011... -
Page 21: Attaching A Mounting Bracket To The Middle Of The Branch Gateway
MM717 or MM716 media module. See Connecting a DCP telephone to an MM712 or MM717 media module. Note: Connecting a DCP telephone to an MM712 or MM717 media module Quick Start for Hardware Installation: Avaya G450 Branch Gateway February 2011... -
Page 22: Attaching A Mounting Bracket With Cable Guides
1. Position a bracket over the desired mounting position. 2. Affix the bracket to the chassis with five of the fifteen 6-32 x 3/8 screws provided. 3. Tighten with a screwdriver. Quick Start for Hardware Installation: Avaya G450 Branch Gateway February 2011... -
Page 23: Before Mounting The Branch Gateway
Ensure that there is adequate ventilation. 4. Insert four rack mounting screws, two on each side. 5. Verify that the Branch Gateway is level and horizontal. 6. Tighten the rack mounting screws. Avoid overtightening. Quick Start for Hardware Installation: Avaya G450 Branch Gateway February 2011... -
Page 24: Mounting The Branch Gateway On A Wall
Only service-trained personnel are to wall-mount the Branch Gateway. Caution: One person may wall mount a G450 if the PSUs are removed. See . A minimum of two installers is required to wall-mount a Branch Gateway with the PSUs installed. - Page 25 3. Position the Branch Gateway so that its front panel is facing up, and secure it to the plywood using a minimum of four screws (pan head at least ¾ in, #10-12 screw). Quick Start for Hardware Installation: Avaya G450 Branch Gateway February 2011...
- Page 26 Mount the devices Quick Start for Hardware Installation: Avaya G450 Branch Gateway February 2011...
-
Page 27: Chapter 4: Install Media Modules
Warning: Do not operate the Branch Gateway with any open slots. Failure to cover empty slots with the supplied blank plates can cause overheating due to inadequate air distribution. Quick Start for Hardware Installation: Avaya G450 Branch Gateway February 2011... -
Page 28: Combination Limitations
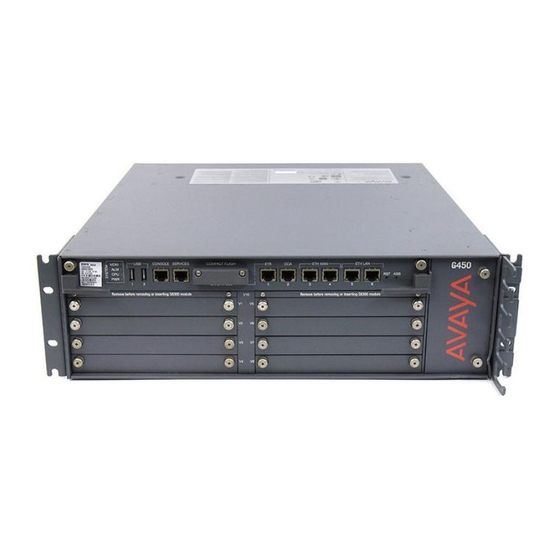
Each media module is restricted to certain slots. Allocate a slot for the media module. Make sure your slot allocations allow a permissible slot for every media module. Figure 2: The G450 Branch Gateway front panel ports and slots Table 1: Figure notes: 1. System LEDs 1. -
Page 29: Inserting The S8300 Server
Provides two ports for connecting ISDN trunks. S8300B/ Server S8300C/S8300D Inserting the S8300 Server You can only install the S8300 in slot V1 on the left side of the Branch Gateway. Quick Start for Hardware Installation: Avaya G450 Branch Gateway February 2011... - Page 30 S8300 module” above slot V1 and tighten the screws on the front of the plate. 7. After you have inserted the S8300 Server module, if applicable, insert the rest of the media modules. Quick Start for Hardware Installation: Avaya G450 Branch Gateway February 2011...
-
Page 31: Inserting Media Modules
Gateway chassis and engage both sides of the module in the interior guides. 2. Slide the module slowly into the chassis, maintaining an even pressure to assure that the module does not become twisted or disengaged from the guides. Quick Start for Hardware Installation: Avaya G450 Branch Gateway February 2011... - Page 32 Warning: After you have connected telephones to the various media modules, be sure to add circuit protection to the lines. Quick Start for Hardware Installation: Avaya G450 Branch Gateway February 2011...
-
Page 33: Chapter 5: Power Up
Branch Gateways can be grounded at the block installed close to the equipment (on a rack) and then a single ground conductor can be routed from the same block to an approved ground. Quick Start for Hardware Installation: Avaya G450 Branch Gateway February 2011... -
Page 34: Attaching Ground Wires For Purchased Ground Blocks
1. Connect the power cable to the power connector on the Branch Gateway back panel. 2. Plug the power cable into an AC outlet. The Branch Gateway is now powered. Quick Start for Hardware Installation: Avaya G450 Branch Gateway February 2011... - Page 35 The PWR LED on the front panel lights. The CPU LED lights up if the firmware is running. At least one LED on each media module, except the S8300, lights up initially and then goes off after about 20 seconds. Quick Start for Hardware Installation: Avaya G450 Branch Gateway February 2011...
- Page 36 Power up Quick Start for Hardware Installation: Avaya G450 Branch Gateway February 2011...
-
Page 37: Chapter 6: Prepare For Configuration
Branch Gateway configuration The Branch Gateway requires software configuration. The Branch Gateway can be configured using the Avaya Branch Gateway Command Line Interface (CLI). The CLI is a comprehensive tool for configuring the gateway and includes all supported configuration tasks. For information about configuration using the CLI, see . - Page 38 • Hostname for the Branch Gateway The settings you configured are displayed, and you are prompted for confirmation. • If you confirm the settings, they are saved and the Branch Gateway reboots. Quick Start for Hardware Installation: Avaya G450 Branch Gateway February 2011...
-
Page 39: Using The Cli
A remote technician can now further configure the Branch Gateway using the CLI. Using the CLI For information about configuring the G450 Branch Gateway with the Command Line Interface: • For instructions on how to connect to the CLI, see Accessing the Avaya G450 Branch Gateway. - Page 40 Prepare for configuration Quick Start for Hardware Installation: Avaya G450 Branch Gateway February 2011...
-
Page 41: Index
..............attaching to Branch Gateway ......Branch Gateway installation chassis Dimensions of plywood board for mounting gateway . rack mounting ......... Documentation, planning ..........tabletop installation ......... Downloading Quick Start for Hardware Installation: Avaya G450 Branch Gateway February 2011... - Page 42 ............verifying ..............gateway in rack ............wires, attaching ............ hardware required ..........Guides for cables ..........options for chassis ..........Mounting bracket front ..............INADS mid ............... Quick Start for Hardware Installation: Avaya G450 Branch Gateway February 2011...
- Page 43 Branch Gateway chassis ....... Verifying environmental conditions before installation ..IP address grounding ............. obtaining ............power ..............Wall mounting brackets ............... the Branch Gateway chassis ....... the gateway chassis ..........Quick Start for Hardware Installation: Avaya G450 Branch Gateway February 2011...