Table of Contents
Advertisement
Advertisement
Table of Contents

Related Manuals for Interlogix xgen


Summary of Contents for Interlogix xgen
-
Page 1: Programming Guide
Installation & Programming Guide P/N 230410 • REV A • ISS 31AUG15... - Page 2 Americas Corporation, Inc., except where specifically permitted under US and international copyright law. Trademarks and Interlogix, xGen name and logo are trademarks of UTC Fire & patents Security Americas Corporation, Inc. IOS is the registered trademark of Cisco Technology, Inc.
-
Page 3: Table Of Contents
Intended Use vi Advisory messages vii Introduction 8 System Capacity 8 xGen Product Codes 9 NXG-001 xGen Plastic Enclosure 10 NXG-003 xGen Metal Enclosure 11 Power Requirements 11 Grounding 12 Shielding 12 ... - Page 4 EN 50131 compliance precautions 29 Programming Methods 30 Method 1 – DLX900 Management Software 30 Method 2 – xGen Web Server 31 Method 3 – UltraConnect App 36 Troubleshooting 42 Recommended Items To Change 43 ...
- Page 5 Programming Instructions for Outputs 114 Combining Actions with Schedules 115 Programming Instructions for Speech Tokens 116 Upgrading Firmware using USBUP 118 Upgrading Firmware using DLX900 119 Index 120 xGen Installation & Programming Guide...
-
Page 6: Important Information
WORK PROPERLY DEPENDS ON A NUMBER OF PRODUCTS AND SERVICES MADE AVAILABLE BY THIRD PARTIES OVER WHICH INTERLOGIX HAS NO CONTROL AND FOR WHICH INTERLOGIX SHALL NOT BE RESPONSIBLE INCLUDING, BUT NOT LIMITED TO, INTERNET, CELLULAR AND LANDLINE CONNECTIVITY; MOBILE DEVICE AND OPERATING SYSTEM COMPATIBILITY;... -
Page 7: Warranty Disclaimers
YOU MAY ALSO HAVE OTHER LEGAL RIGHTS THAT VARY FROM STATE TO STATE. INTERLOGIX DOES NOT MAKE ANY CLAIMS OR WARRANTIES TO YOU OF ANY KIND REGARDING ANY PRODUCT, SOFTWARE OR SERVICE’S POTENTIAL, ABILITY, OR EFFECTIVENESS TO DETECT, MINIMIZE, OR IN ANYWAY PREVENT DEATH, PERSONAL INJURY, PROPERTY DAMAGE, OR LOSS OF ANY KIND WHATSOEVER. -
Page 8: Disclaimer
INTERLOGIX DOES NOT WARRANT THAT ANY PRODUCT (INCLUDING SECURITY PRODUCTS), SOFTWARE OR SERVICE MANUFACTURED, SOLD OR LICENSED BY INTERLOGIX WILL PREVENT, OR IN ALL CASES PROVIDE ADEQUATE WARNING OF OR PROTECTION FROM, BREAK-INS, BURGLARY, ROBBERY, FIRE, OR OTHERWISE. INTERLOGIX DOES NOT WARRANT TO YOU THAT ITS SOFTWARE OR... -
Page 9: Advisory Messages
Note: Note messages advise you of the possible loss of time or effort. They describe how to avoid the loss. Notes are also used to point out important information that you should read. xGen Installation & Programming Guide... -
Page 10: Introduction
With the ability to control up to 512 zones, 96 partitions, and 256 outputs with 256 users, the xGen meets the requirements of the most demanding installation. The xGen can be fully customized - all zones, Partitions, lists, groups, outputs, schedules, permission profiles, and presets can be assigned a text name to make it easy to program and maintain. -
Page 11: Xgen Product Codes
Main description Additional description EN grade NXG-64 64 zone panel no IP xGen 8 to 64 zone panel no IP, plastic housing EN-gr2 xGen 8 to 64 zone panel with IP, plastic NXG-64IP 64 zone panel /w IP EN-gr2 housing... -
Page 12: Nxg-001 Xgen Plastic Enclosure
NXG-001 xGen Plastic Enclosure The xGen enclosure features a DIN rail for mounting xGen modules, a tamper switch, and integrated cable management. The enclosure should be installed in accordance with EN50131-1 Environmental Class II to provide operating conditions within: •... -
Page 13: Nxg-003 Xgen Metal Enclosure
DIN rail. Refer to module installation manual for further details. Power Requirements The xGen intrusion panel family is designed to be used with a 40 VA TD300- E101F transformer (p/n NXG-003-X) which is included in the xGen panel. This transformer includes a 500 mA 250 VAC fast blow replaceable fuse on the terminal block. -
Page 14: Grounding
Termination Links Put a jumper across TERM on the panel and the furthest device to ensure correct RS-485 termination and avoid communication issues with signal reflection, etc. xGen Installation & Programming Guide... -
Page 15: Cable Requirements
Belden 8723, 2 pair twisted, shielded cable is recommended. • 800 m total cable run on system. • Max. 800 m from remote device to xGen control panel. • Max. 32 devices plus panel. • Max. 16 keypads, as part of the 32 device limit. -
Page 16: Xgen Wiring Diagram
D9 Green LED – RS485 Receiving D20 Red LED – Follows Output 5 J5Term D6 D9 OP4- on J10 POS on J10 ZONE 3.3K NXG-1820 Codepad Install supplied ferrite choke on bus cable near codepad before connecting 12V 7A xGen Installation & Programming Guide... -
Page 17: Ferrite Installation
Ferrite Installation Install the supplied ferrite on the Ethernet cable before attaching the cable to the xGen intrusion panel.. This will prevent unwanted RF interference. xGen Installation & Programming Guide... -
Page 18: Xgen Terminal Diagram
J16 – Connect to external speaker, this provides headphone level audio output • J21 – 5-pin connector for USBUP-EUR, used to upgrade firmware • J3 – Terminals for backup battery • J4 – Terminals for xGen RS-485 bus and power connection xGen Installation & Programming Guide... -
Page 19: Xgen Led Indicator Diagram
• During a phone session it will turn on when a DTMF digit is detected • D10 Red LED – follows Output 1 (BELL output), typically used for indoor speaker xGen Installation & Programming Guide... - Page 20 D18 Red LED – Heartbeat, should flash every second LEDs Bottom Row (left to right) • D6 Red LED – RS485 Transmitting • D9 Green LED – RS485 Receiving • D20 Red LED – follows Output 5 (Power) xGen Installation & Programming Guide...
-
Page 21: Xgen Specifications
From 10,000 (4 digits) to 100,000,000 (8 digits) End-of-line resistor 680 Ω, 3.3 kΩ (default), 3.74 kΩ, 6.98 kΩ Onboard zones 8 (default); 16 if zone doubling enabled. Maximum zone number: NXG-64(IP) NXG-256IP NXG-512IP 2 - box tamper Additional inputs xGen Installation & Programming Guide... -
Page 22: Current Consumption
30mA 20mA idle 20mA idle NXG-504 4 relay output expander 70mA 4 relays on 70mA 4 relays on 20mA idle 20mA idle NXG-510 10 relay output expander 160mA 10 relays on 160mA 10 relays on xGen Installation & Programming Guide... -
Page 23: Output Current Rating
1830 g NXG-003 Metal Enclosure 475 x 395 x 130 mm 7150 g NXG-1820-EUR Touchscreen keypad 18 x 82 x 125 mm 150 g NXG-208 8 zone expander 135 x 80 x 55 mm 150 g xGen Installation & Programming Guide... -
Page 24: Fuses
500 mA, fast 20x5 Note: Mains fuse is part of the mains terminal block. Maintenance No regular maintenance needed. System will report servicing when necessary System monitoring The system provides monitoring for the following items. xGen Installation & Programming Guide... -
Page 25: Sia And Cid Reporting Code Descriptions
SIA and CID reporting code descriptions xGen Installation & Programming Guide... - Page 26 Installation & Programming Guide...
- Page 27 Installation & Programming Guide...
- Page 28 Installation & Programming Guide...
- Page 29 Installation & Programming Guide...
-
Page 30: En50131-3 Compliancy
The tamper of the warning device should be connected to a 24 hour zone input. • Overriding is not supported with xGen. In case a zone is faulted, one shall bypass the zone manually before arming or verify the zone and clear the fault. See user instructions •... -
Page 31: Optional Functions
Line fault, enabled per path used • Line fault delay, 0 s • Refer to xGen Reference Manual for additional features, accessible at level 3 It is required to apply the following supervision settings for wireless expanders: • Short supervision: 20 minutes •... -
Page 32: Programming Methods
Connect to xGen using DLX900 on LAN 1. Turn on power to your system 2. Connect an Ethernet cable to the rear of the xGen and wait 10 sec for the local router to assign the xGen an IP address if DHCP is available. -
Page 33: Method 2 - Xgen Web Server
8. Refer to Programming Guide starting on page 55. Method 2 – xGen Web Server xGen has a built in web server which makes it easy and simple to set up your system from a web browser instead of the keypad. This features: •... - Page 34 Connect to xGen Web Server over LAN 1. Turn on power to your system 2. Connect an Ethernet cable to the rear of the xGen and wait 10 sec for the local router to assign the xGen an IP address if DHCP is available.
- Page 35 Check your router settings and try again. • On the xGen Touch Screen keypad press Menu – [PIN] – [ENTER] – Installer – Communicator – IP Configuration – IP Options, this will allow you to modify connection settings including DHCP.
- Page 36 LAN/internet connection available. The 3G modem is pre-configured and does not require any programming. Once plugged onto the xGen panel, the unit will automatically register itself on the mobile network. If not, please refer the manual that comes with the cellular radio for instructions on how to install it.
- Page 37 4. Contact Tech Support for assistance • Check radio module is correctly installed • Check radio antenna is correctly installed or moving antenna to a higher location • Check cable connection of Ethernet cable • Check router settings xGen Installation & Programming Guide...
-
Page 38: Method 3 - Ultraconnect App
Congratulations, your xGen system is now connected to your network and UltraConnect. It is now ready to be programmed. Refer to Programming Guide starting on page 55. Method 3 – UltraConnect App UltraConnect is a smartphone app that allows you to: •... - Page 39 4. Tick “Enable UltraConnect” to enable email reporting via UltraConnect. Features Email Reports UltraConnect App Enable UltraConnect = OFF Web Access Code = 00000000 Enable UltraConnect = OFF Web Access Code = not 00000000 Enable UltraConnect = ON Web Access Code = 00000000 xGen Installation & Programming Guide...
- Page 40 5. Enter a first name and PIN code: Connect to xGen via UltraConnect App UltraConnect is an app that allows you to control and program your xGen from an Apple® iPhone/iPad, or Google Android device. 1. On your smartphone go to the Apple® App Store or Google Play store.
- Page 41 Web Server and go to Users. 7. Click Done button to save the details, then Sites to go back. 8. Click the name of the Site, the app will now connect you to xGen. Using the App The first screen that will appear once you connect is Arm/Disarm.
- Page 42 Touch Cameras to view any cameras connected to the system, this is a live view of the camera. Touch Latest Clip to view the last recorded clip by that camera. You can also access video clips linked to History events by touching Play Video Clip from the History screen. xGen Installation & Programming Guide...
- Page 43 When you login with the installer account you will also have access to additional menus for setting up and programming the xGen. Refer to the xGen Reference Guide for additional help on the Advanced screen. xGen Installation & Programming Guide...
-
Page 44: Troubleshooting
Check that your mobile device has access to the internet (e.g. open a web browser) • Try disabling WiFi on your device once the xGen is configured, and using the 3G/4G data connection of your device with the UltraSync app •... -
Page 45: Recommended Items To Change
UltraConnect, and UltraConnect app. • Enable remote access for DLX900. The default Download Access Passcode of 84800000 allows remote access. Login to the xGen Web Server and go to Settings – Network to change the code: xGen Installation & Programming Guide... - Page 46 Note: To disable DLX900 access change the Download Access Code to 00000000. xGen Installation & Programming Guide...
-
Page 47: System Status Messages
System Status Messages Various messages may appear on the Status screen of xGen Web Server and UltraConnect app. System • AC power fail – The security system has lost its electricity power • Low battery – The security system’s back up battery requires charging •... -
Page 48: App And Web Error Messages
• Low battery – This zone is a wireless device and needs its battery changed App and Web Error Messages Various error messages may appear in the xGen Web Server and UltraConnect app. Advanced/Settings Configuration Menus •... - Page 49 • "PIN digits must be between 0 and 9" • "PIN Must be 4–8 digits from 0–9" • "Data must not contain the following characters []" xGen Installation & Programming Guide...
-
Page 50: Arming And Disarming Your System
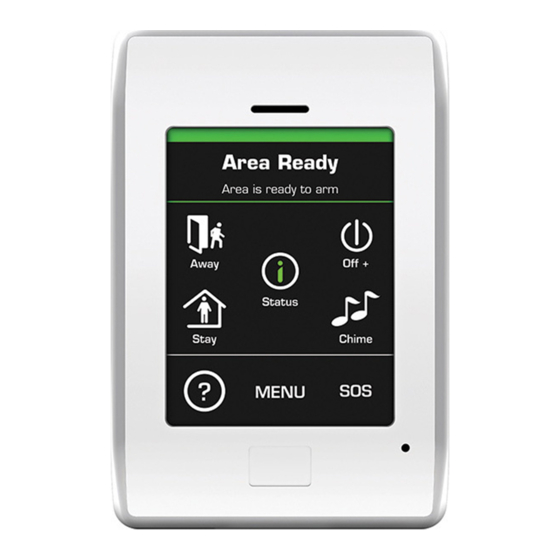
You may arm and disarm partitions from a NXG-1820 keypad. Only users with an authorized user code (Level 2 user) will be allowed to use the xGen alarm system. Users with no valid user code (Level 1 user) do not have access as defined by EN 50131-3. -
Page 51: Disarm One Or More Partitions
If silent alarm is enabled, then the keypad will not display any signs that the panic button was pressed. To cancel a SOS alarm – return to the home screen, touch the Status button and turn the Partition off. xGen Installation & Programming Guide... -
Page 52: Configure Email Reporting
Configure Email Reporting 1. Login to xGen Web Server or UltraConnect app. Use an installer or master user account. 2. Click Settings 3. Click Channels in the drop down menu 4. Click “Select Channel to Configure” where the Format is already set to Email 5. -
Page 53: Xgen Building Blocks
On the following page is the system diagram of xGen showing all the different building blocks that can be used to create an xGen system. You have full flexibility to customise your system. Program each building block in turn to complete your system. -
Page 54: System Diagram
Actions Actions up to Permissions Schedules 256* Schedules Cameras Speech Tokens UltraConnect [*] For the maximum number of zones, partitions and users in the particular xGen panel version, see "xGen Specifications" on page 19. xGen Installation & Programming Guide... -
Page 55: Presets - Just Click And Go
Presets make it quick to program a system without needing to program every detail. Most menus in xGen have presets pre-programmed for your convenience, simply select from the drop-down menu the most suitable option. For example, using the built-in presets you can quickly create a new user and assign them Arm/Disarm permission for Partitions 1-2 during normal office hours and no access during holidays. -
Page 56: Programming With Presets
Menu 8 – Actions Menu 9 – Arm-Disarm Number Menu 10 – Devices xGen is fully customizable for maximum flexibility. Should a preset not be available for your requirements then Menus 11 and higher provide access to more detailed programming settings. -
Page 57: Programming Guide For Xgen
Programming Guide for xGen xGen Installation & Programming Guide... -
Page 58: Quick Start Guide
System, System Clock 23. Test Testing, Walk Test, Siren Test, Communicator Test 24. Train Client/End User Note: If testing reporting, master code does not send open/closing reports by default (see Feature 2). xGen Installation & Programming Guide... -
Page 59: Programming Instructions For System Options
If you want time and date to be automatically updated then check internet time server is enabled under Communicator – IP Config. If you want to allow xGen to send diagnostic emails then check email is set up correctly under Communicator – Email and xGen is connected to a network. - Page 60 4. Go to System and Siren Options 5. Select the settings you want to enable 6. Go to Timers 7. Enter the settings for global timers. Note Entry/Exit times are not here, go to Partitions-Partition Timers. xGen Installation & Programming Guide...
- Page 61 8. Go to Maintenance and Test 9. Enter a Diagnostic email interval. This is the number of days to wait before sending an email at the specified time. This verifies email communication is working. xGen Installation & Programming Guide...
- Page 62 Web Page xGen Installation & Programming Guide...
-
Page 63: Programming Instructions For Permissions
1. User a) Groups a) Main b) Options/Timers b) Advanced 13. Menus 12. Partition Groups 11. Permissions 18. Channel Groups 19. Action Groups 7. Schedules 10. Devices Outputs zone expanders, keypads, transmitters 11. Permissions 7. Schedules xGen Installation & Programming Guide... - Page 64 For example, if this permission is assigned to a user, then that user will have access to Arm each of the Partitions that are selected inside the Partition Group and no others. 5. Click the Options/Timers tab xGen Installation & Programming Guide...
-
Page 65: Programming Instructions For Menus
• Program Users or Devices Programming Instructions for Menus Goal Create a list of menus that a user or device has access to on the xGen system. Pre-conditions None. Notes: The menus that will be available are the ones that the device has permission to display AND the ones that a user has access to, at the specified time and date which is controlled by Schedules. -
Page 66: Programming Instructions For Holidays
Program Permissions • Assign the Permission to a User or a Device Programming Instructions for Holidays Goal Create a list of holidays to provide or prevent access to the xGen system on the specific dates. Pre-conditions None. Notes Ticking Holidays in a Schedule for a permission PREVENTS access. - Page 67 Instructions 1. Open Holidays 2. Select one of the 4 Holidays available 3. Enter a name for the Holidays 4. Enter the start and end date for each holiday you have Next • Program Schedules xGen Installation & Programming Guide...
- Page 68 Easter Monday Monday, 6 April Anzac Day Saturday, 25 April Queen's Birthday Monday, 8 June Labour Day Monday, 5 October Christmas Day Friday, 25 December Boxing Day Saturday, 26 December #Additional Day Monday, 28 December xGen Installation & Programming Guide...
- Page 69 We would open Holidays and program these date ranges: Next, go to Schedules and tick “Holidays 1”: xGen Installation & Programming Guide...
-
Page 70: Programming Instructions For Users
Note: EN 50131 Grade 2 Required settings 5 digits minimum User name must be assigned to give that user access to UltraConnect app or xGen Web Server. A user with no first name will be unable to gain remote access. - Page 71 4. Enter a new PIN code for the user. It must be unique and 4-8 digits long. 5. Select the user type that you want to apply to this user. Descriptions of each type are available in the xGen Reference Guide. 6. The Status option determines if that user can interact with the system, or if their access has expired, or has Lost their card.
- Page 72 9. You can program up to 4 levels of different access using Permissions and Schedules. Permission Profile 1 is the highest level and will override Permission Profile 2 when Schedule 1 becomes active. Refer to xGen Reference Guide for more details.
-
Page 73: Programming Instructions For Zones
Zones can have one or two profiles. The first profile will be active during the selected schedule, it takes priority over the second profile/schedule. The second profile will be active during the selected schedule if the first profile is not active. xGen Installation & Programming Guide... - Page 74 12. Partition Group 18. Channel Groups 7. Schedule 1. User Instructions 1. Go to Zones. 2. Select a zone number you want to program. 3. Enter a name for the zone. 4. Select a zone type preset. xGen Installation & Programming Guide...
- Page 75 Partition. When this zone is activated then it will report as this user number. 9. If you are programming a second zone profile, then go to that now and repeat steps 4-7. Web Page xGen Installation & Programming Guide...
-
Page 76: Programming Instructions For Custom Zones
3. Zones a) Partition Options a) Profile 1 b) Partition Timers b) Profile 2 c) Partition Reporting 15. Zone Type 16. Zone Options 12. Partition Group 7. Schedule 7. Schedule 18. Channel Groups 1. User xGen Installation & Programming Guide... - Page 77 Instructions 1. Go to Zone Type. 2. Go to Zone Options. xGen Installation & Programming Guide...
- Page 78 3. Select the options you want, the SIA/CID event code can be customized. See the xGen Reference Guide for a table of codes. 4. Go to Zones. 5. Select a zone number you want to program. 6. Enter a name for the zone.
-
Page 79: Programming Instructions For Partitions
Group to each zone (step 8). Programming Instructions for Partitions Goal Program Partitions, Entry/Exit Times, Reporting Options, and Partition Groups. Pre-conditions Programmed Communicator, Channels, and Channel Groups. Notes Partition Counting requires an xGen Door Controller module to function. xGen Installation & Programming Guide... -
Page 80: Menu Overview
2. Select a Partition Number 3. Enter a descriptive name 4. Select the Options you want to enable for this Partition. Partition 2 and above have “Use Partition 1 Options” ticked to allow faster programming of your xGen Installation & Programming Guide... - Page 81 Untick this box if you want to customize options for Partition 2 and above. 5. For advanced programming you can assign a Schedule and a Partition Time Disarm function to occur according to the schedule. Refer to the xGen Reference Guide for more details. 6. Go to Partition Timers 7.
- Page 82 10. Assign the Partition an account number and the Channel Group you want this Partition to report to. See Programming Instructions for Zone Reporting for more details on how this works. Next • Customize Partition Groups if needed. xGen Installation & Programming Guide...
-
Page 83: Programming Instructions For Schedules
Webpage Programming Instructions for Schedules Goal Create a schedule to provide or prevent access to the xGen system on the specific dates and times. Pre-conditions Holidays have been programmed if needed. Notes Ticking Holidays in a Schedule PREVENTS access on the holiday dates. - Page 84 (e.g. bakers hours), do not tick the following day of the AM hours. (See Reference Guide for more details) Menu Overview 14. Holidays 7. Schedules 18. Channel Groups 14. Holidays Instructions 1. Go to Menu 7 – Schedules 2.
- Page 85 6. To allow an Action to control when this Schedule is active/inactive, select the Follow Action Number. 7. Now the schedule is ready to be assigned to a User or used by another part of the system. xGen Installation & Programming Guide...
- Page 86 Webpage xGen Installation & Programming Guide...
-
Page 87: Programming Instructions For Arm-Disarm
Use presets for Schedules, Partition Groups and Permissions for faster programming. xGen will sound a warning prior to the Arm-Disarm from arming a Partition. This is set in Partitions – Partition Timers – Partition Type Delay. If a user with Partition Type Override option disarms a Partition with Arm-Disarm, then the Arm-Disarm will no longer function on that Partition. - Page 88 Advanced 7. Schedule 11. Permissions 14. Holidays 18. Channel 7. Schedules Instructions 1. Create a Partition Group and select the Partitions you want to be Armed according to the schedule you will create later. xGen Installation & Programming Guide...
- Page 89 3. Create a Permission and select the corresponding Partition Group for Arm and Disarm. 4. Open Users and create a new user. Suggested you provide a descriptive name such as “Auto Arm-Disarm Office” to make troubleshooting in the future easy. xGen Installation & Programming Guide...
- Page 90 6. Select the Permission you created above. If you want a simple Arm-Disarm then leave the Schedule here Disabled. The Schedule selected here is only for the User. It determines when the User is allowed to perform an Arm- Disarm, not when the Arm-Disarm will occur. xGen Installation & Programming Guide...
- Page 91 55 and report those disarm events (openings) to the communication channels specified. At 5pm each weekday the system would arm Partitions 1, 2, and 3 as if it were user 55 and report those arm events (closings) to the communication channels specified. xGen Installation & Programming Guide...
-
Page 92: Programming Instructions For Communicator
Configure each communication path for delivering event messages. Pre-conditions None. Menu Overview 6. Communicator a) Options b) IP Config c) Ethernet d) Radio e) Dial IP f) Email g) Remote Access h) System Event Reporting 18. Channel Groups Instructions 1. Open Communicator. xGen Installation & Programming Guide... - Page 93 2. Select reporting options. 3. Select when you want xGen to perform an automatic communication test. 4. Click IP Config. xGen Installation & Programming Guide...
- Page 94 5. Edit IP settings for the xGen panel, if DHCP is enabled on the xGen and a DHCP server is available, then this screen will automatically be filled in. • Require SSL – should not be used. • Enable Clock Updates – will keep the time and date correct using the provided Internet Time Server, no manual adjustment will be needed when daylight savings occurs provided the time zone is set correctly in System.
- Page 95 7. Click Radio and enter settings if required, this will depend on the SIM card and operator you are using. xGen Installation & Programming Guide...
- Page 96 8. Click Dial IP and enter settings if required 9. Click Email and enter settings if required, this bypasses the UltraConnect email server. xGen Installation & Programming Guide...
- Page 97 10. Click Remote Access 11. Edit Remote Access settings for the xGen panel. • Download Access Code – gives access to DLX900 to access the xGen panel programming. 12. Click System Event Reporting. xGen Installation & Programming Guide...
-
Page 98: Programming Instructions For Ultraconnect
Pre-conditions 1. At least one user has been given a username and PIN code (see User Programming). 2. xGen is connected to internet and has been allocated an IP address (see Communicator Programming, IP Config). Notes: UltraConnect provides a secure VPN connection to your xGen over the internet. - Page 99 1. Go to Menu 6 – Communicator, 3 - IP Config. 2. Under sub-menu 12 - IP Options, tick the box “Enable UltraConnect”. 3. Go to Menu 22 - UltraConnect. 4. Enter a new 8 digit Web Access Passcode. All zeros disables UltraConnect remote access. xGen Installation & Programming Guide...
-
Page 100: Programming Instructions For Event Lists
5. Enter the required details into your device/software. This will usual be your xGen serial number, Web Access Passcode, and a valid Username and PIN code. The xGen serial number can be found in the Device Info menu. 6. Verify the UltraConnect service is working by using your device/software to connect your xGen system. - Page 101 We open up Event Lists and enter the name “Critical”. We tick Alarms, Alarm Restores, Bypass and Bypass Restore, and AC Fail Reporting. Then we click to Event List 2 and enter the name “Informational”. Tick Opening and Closing, and Autotest Report. xGen Installation & Programming Guide...
-
Page 102: Programming Instructions For Channels
Take note of the Sequence Attempts under Communicator – System Event Reporting (6.11.2). This is the number of times xGen will attempt the sequence of Channels you set up in this section. xGen Installation & Programming Guide... - Page 103 3. Select the Format of the communication channel, this will automatically use the settings programmed for that Format in the Communicator menu 4. Select the reporting device, by default Device 1 is the xGen panel 5. Enter the destination phone number, email address or IP address depending on which Format you selected xGen Installation &...
- Page 104 Messages sent to a Channel Group will be checked against each Channel’s Event List. If it is on the list then xGen will attempt to send it. If not, then xGen will not send it, even if the Channel is in the same group.
- Page 105 This requires setting up 3 channels. These channels are labelled on the diagram. When Channel 1/4/2 receives an alarm message, xGen checks that the channel’s Event List includes alarm messages and then attempts to deliver the message via that channel.
-
Page 106: Programming Instructions For Zone Reporting
Notice that Channel 4 is not selected in the Channel Group. The xGen will still deliver to these destinations if Channel 1 cannot be reached. If Channel 4 were included in the Channel Group then it is likely the control room will receive unwanted duplicate messages. - Page 107 3. Zones 4. Partitions a) Partition Options b) Partition Timers c) Partition Reporting 12. Partition Groups 7. Schedule 18. Channel Instructions 1. Open the lowest Partition number for the Zone 2. Go to Partition Reporting xGen Installation & Programming Guide...
- Page 108 3. Enter an account number 4. Select a valid Channel Group 5. DONE. All zones that are a part of that Partition will now report to the selected Channels within the Channel Group. xGen Installation & Programming Guide...
-
Page 109: Programming Instructions For System Event Reporting
Event List(s). Take note of the Sequence Attempts under Communicator – System Event Reporting (6.11.2). This is the number of times xGen will attempt the sequence of Channels you set up in this section. - Page 110 18. Channel Groups Instructions 1. Go to Communicator, System Event Reporting 2. Select a Channel Group. 3. DONE. Your xGen will now report system events to the Channels selected in the Channel Group you just selected. xGen Installation & Programming Guide...
-
Page 111: Programming Instructions For Actions
Example After failing Channel Attempts on the last back up channel, AC Fail xGen will go back to the first Channel in the chain Sequence Attempts = 2 Menu 6.11.1.1 Menu 5 – Channels Channel 1 Channel 4 System Event... - Page 112 Actions can be used without programming an Action Result. For example, outputs on xGen are controlled by monitoring an Action State, no Action Result needs to be programmed. Menu Overview 8. Actions 19. Action Groups Events to be monitored Instructions 1.
-
Page 113: Programming Instructions For Action Groups
Pre-conditions Program the actions you want to use. Notes See xGen Reference Guide for more details on Actions. Action Groups can allow you to create a convenient menu for a user to trigger specific Actions from a TouchNav. Permissions control what actions a User or Device has access to. - Page 114 11. Permissions 11. Permissions 7. Schedules 7. Schedules Instructions 1. Open Action Groups 2. Select a Action Group Number 3. Enter a descriptive Name 4. Select the Actions you want to include xGen Installation & Programming Guide...
-
Page 115: Programming Instructions For Scenes
The schedule you want the Scene to follow needs to be programmed. If you wish to perform ZWave Device Actions the ZWave device(s) must be learnt Notes User 99 will be reported for alarm system control events. Menu Overview 20. Scenes Schedules ZWave Devices xGen Installation & Programming Guide... -
Page 116: Programming Instructions For Outputs
Turn an output on or off according to an Action Event 1 Event 2 Event 3 Event 4 Action Action Result State Pre-conditions Program the Action and any associated components. Notes See xGen Reference Guide for more details on Actions. xGen Installation & Programming Guide... -
Page 117: Combining Actions With Schedules
Write/Plan out on paper what you want to create. This makes it easier to set up Actions and associated settings. Actions can be used without programming an Action Result. For example, outputs on xGen are controlled by monitoring an Action State, no Action Result needs to be programmed. Menu Overview 7. -
Page 118: Programming Instructions For Speech Tokens
1. We want Zone 1 to be announced as “Front Office Motion Zone”. 2. Look up each of these words in the Speech Token Library in the Appendix. We get 68, 106, 102, 122. 3. Go to the Speech Tokens menu, select Zone Tokens, select Zone 1. xGen Installation & Programming Guide... - Page 119 2. Partition Type Schedule – [Schedule] when the feature is active 3. Permissions – Man Down – [Group] 4. Permissions – Options/Timers – Man Down – [Duration] – how long the timer is per user xGen Installation & Programming Guide...
-
Page 120: Upgrading Firmware Using Usbup
Upgrading Firmware using USBUP Upgrading firmware on your xGen devices is easy using the USBUP-EUR flash tool. 1. Check with your supplier to download the latest firmware file for your device. 2. Create a folder on the USBUP-EUR called “XGEN” or “XPANDER” or “XOUTPUT”... -
Page 121: Upgrading Firmware Using Dlx900
1. Check with your supplier to download the latest firmware file for your device. 2. Open DLX900 and go to Devices – Device Info: 3. Select the device you want to upgrade. If you wish to update the xGen control panel, select the Control Info tab. -
Page 122: Index
UltraConnect app messages, 47 LED indicator diagram, 17 upgrading firmware using DLX900, 120 upgrading firmware with USBUP, 119 N USBUP, 119 NXG-001 xGen Plastic Enclosure, 10 W NXG-003 xGen Metal Enclosure, 11 Web Server messages, 47 O wiring diagram, 14 options affected by EN 50131 regulations, 28 X ... - Page 123 64 zones, 72 outputs, 115 xGen terminal diagram, 16 partitions, 78 xGen upgrade permissions, 62 DLX900, 120 Quick Start Guide, 57 USBUP, 119 scenes, 114 xGen wiring diagram, 14 schedules, 82 speech tokens, 117 xGen Installation & Programming Guide...