Sign In
Upload
Manuals
Brands
Ricoh Manuals
All in One Printer
Pro C7100s
Ricoh Pro C7100s Manuals
Manuals and User Guides for Ricoh Pro C7100s. We have
7
Ricoh Pro C7100s manuals available for free PDF download: Operating Instructions Manual, Technical Bulletin, Starter Manual, Read This First Manual
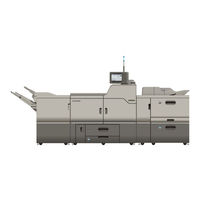
Ricoh Pro C7100s Operating Instructions Manual (276 pages)
Brand:
Ricoh
| Category:
All in One Printer
| Size: 12.52 MB
Table of Contents
Table of Contents
3
1 Easy Search
9
Searching by What You Want to Do
9
I Want to Reduce My Costs
9
I Want to Use Scanned Files on the Computer
10
I Want to Register Destinations
11
I Want to Operate the Machine more Effectively
11
What You Can Do with this Machine
13
You Can Customize the [Home] Screen
13
You Can Make Copies Using Various Functions
14
You Can Print Data Using Various Functions
15
You Can Utilize Stored Documents
16
You Can Use the Scanner in a Network Environment
17
You Can Embed Text Information in Scanned Files
17
You Can Prevent Information Leakage (Security Functions)
18
You Can Centrally Control Scan Conditions and Distribution
19
You Can Monitor and Set the Machine Using a Computer
19
You Can Prevent Unauthorized Copying
20
2 Getting Started
23
Overview of this Machine
23
Names of Major Features
23
Model-Specific Information
23
Functions Requiring Optional Configurations
24
Guide to Names and Functions of Components
28
Guide to Functions of the Attention Light
32
Guide to Functions of the Machine's Options
34
Guide to Functions of the Machine's External Options
34
Guide to Functions of the Machine's Internal Options/Option Controller
39
Guide to the Names and Functions of the Machine's Control Panel
41
Adjusting the Angle of the Control Panel
43
Inserting/Removing a Memory Storage Device
45
Inserting an SD Card
45
Inserting a USB Flash Memory Device
46
Removing an SD Card
47
Removing a USB Flash Memory Device
47
Changing Modes
48
Displaying the [Home] Screen
48
How to Use the [Top] Screen and the [Home] Screen
48
Changing Modes by Pressing the Icons on the [Home] Screen
51
Changing Modes by Pressing the Function Keys
52
System Reset
55
How to Use the Screens on the Control Panel
56
How to Use the [Copier] Screen
56
How to Use the [Document Server] Screen
57
How to Use the [Printer] Screen
62
How to Use the [Scanner] Screen
63
How to Use the [Information] Screen
75
Switching Screen Patterns
76
Changing the Display Language
77
Logging in the Machine
79
When the Authentication Screen Is Displayed
79
User Code Authentication Using the Control Panel
79
User Code Authentication Using a Printer Driver
80
Logging in Using the Control Panel
80
Logging out Using the Control Panel
80
Auto Logout Function
81
Logging in Using a Printer Driver
81
Logging in Using Web Image Monitor
82
Logging out Using Web Image Monitor
82
User Lockout Function
83
Changing the Login Password
83
Turning On/Off the Power
86
Saving Energy
87
Anti-Humidity Heater Switch
89
Entering Text
91
Character Entry Display
91
Available Characters
94
Entering Text
95
Software that You Can Download
98
Device Manager NX
98
Smartdevicemonitor for Client
98
Using the Ring Binder and the High Capacity Stacker
99
Using the Ring Binder
99
Using the High Capacity Stacker
102
3 Information for this Machine
107
Information on Environmental Regulations
107
ENERGY STAR Program
107
Energy Saving Functions
107
User Information on Electrical and Electronic Equipment (Mainly Europe)
109
Europe)
109
Environmental Advice for Users (Mainly Europe)
110
4 Paper Specifications and Adding Paper
113
Placing Originals
113
Recommended Original Sizes and Weights
113
Sizes Detectable with Auto Paper Select
116
Placing Originals on the Exposure Glass
118
Placing Originals in the Auto Document Feeder
120
Loading Paper
122
Precautions for Loading Paper
122
Loading Paper into Tray 1
124
Loading Paper into the A3/11 × 17 Tray Unit
126
Loading Paper into Tray 2
127
Loading Paper into the Multi Bypass Tray (Tray A)
128
Loading Paper into the Three-Tray Wide Large Capacity Tray
131
Loading Paper into the Two-Tray Wide Large Capacity Tray
132
Loading Paper into the Interposer
133
Loading Cover Sheets into the Interposer of the Perfect Binder
134
Loading Orientation-Fixed Paper or Two-Sided Paper
137
Changing the Paper Size
140
Precautions for Changing the Paper Size
140
Changing the Paper Size in Tray 2
140
Changing the Paper Size in the Three-Tray Wide Large Capacity Tray
143
Changing the Paper Size in the Two-Tray Wide Large Capacity Tray
149
Changing to a Size that Is Not Automatically Detected
154
Changing to a Custom Paper Size
155
Recommended Paper
156
Recommended Paper Sizes and Types
156
Unusable Paper
181
Paper Storage
182
5 Convenient Functions
183
Registering Frequently Used Functions
183
Registering Functions in a Program
183
Registering a Shortcut to a Program to the [Home] Screen
188
Deleting a Shortcut to a Program from the [Home] Screen
189
Recalling a Stored Program
190
Changing a Stored Program
191
Deleting a Stored Program
192
Changing the Default Functions of the Initial Screen
194
Customizing the [Home] Screen
196
Types of [Home] Screens and How to Customize Them
196
Adding Icons to the [Home] Screen
197
Changing the Order of Icons on the [Home] Screen
200
Deleting an Icon on the [Home] Screen
202
Displaying an Image on the [Home] Screen
203
Restoring the [Home] Screen Default
205
Checking Machine Status and Settings
206
Managing Jobs
209
Types of Screens to Manage Jobs
209
Checking Jobs in the Job List
213
Changing the Order of Jobs
213
Holding Jobs
214
Deleting Jobs
215
Checking the Job History
216
6 Maintenance and Specifications
217
General Requirements
217
Dos and Don'ts
217
Saving Printouts
219
Backing up Hard Disk Data
219
Replenishing and Replacing Consumables
220
Adding Toner
220
Replacing the Waste Toner Bottle
223
Adding Staples
224
Replacing Ring Combs
225
Filling the Glue Container
227
Where to Put Your Machine
228
Moving the Machine
228
Optimum Environmental Conditions after Moving the Machine
228
Maintaining Your Machine
233
How to Clean the Machine
233
Cleaning the Exposure Glass and Scanning Glass
233
Cleaning the Auto Document Feeder
234
Cleaning the Power Cord Plug
235
Checking the Earth Leakage Breakers
236
Useful Information
239
Counter
239
Inquiry
239
Specifications
242
Specifications for the Main Unit
242
Specifications for the Document Server
246
Specifications for Printer
246
Specifications for Scanner
247
Specifications for Auto Document Feeder
250
Specifications for Finisher SR5050
251
Specifications for Booklet Finisher SR5060
254
Specifications for Punch Unit
259
Specifications for Interposer
260
Specifications for Multi-Folding Unit
260
Specifications for Three-Tray Wide Large Capacity Tray
262
Specifications for Two-Tray Wide Large Capacity Tray
262
Specifications for Multi Bypass Tray (Tray A)
263
Specifications for Decurl Unit
264
Specifications for Trimmer
264
Specifications for Ring Binder
265
Specifications for Perfect Binder
266
Specifications for Buffer Pass Unit
267
Specifications for High Capacity Stacker
268
7 Appendix
271
Trademarks
271
Advertisement
Ricoh Pro C7100s Operating Instructions Manual (256 pages)
Copy/Document Server
Brand:
Ricoh
| Category:
Printer
| Size: 13.88 MB
Table of Contents
Table of Contents
3
1 Specifying the Settings for Originals
9
Specifying Original Sizes
9
Selecting a Regular Size for the Original
9
Specifying a Custom Size for the Original
10
Original Orientation
11
Reverse Orientation
13
Selecting the Original Type
15
Batch Mode
17
SADF Mode
18
Mixed Sizes Mode
19
2 Basic Copying
21
Basic Procedure
21
Function Compatibility
22
Interrupt Copy
22
Auto Start
23
Job Preset
24
Auto Paper Select
28
Rotate Copy
29
Manual Paper Select
30
Copying from the Multi Bypass Tray (Tray A)
31
Copying Onto Regular Size Paper from the Multi Bypass Tray (Tray A)
31
Copying Onto Custom Size Paper from the Multi Bypass Tray (Tray A)
32
Copying Onto Various Types of Paper
35
Copying Onto Tab Stock
36
Copying Onto Transparencies
40
Copying Onto Envelopes
41
Reducing or Enlarging Originals
43
Preset Reduce / Enlarge
43
Zoom
44
Auto Reduce / Enlarge
46
Duplex Copying
48
Specifying the Original and Copy Orientation
50
Combined Copying
52
One-Sided Combine
54
Two-Sided Combine
55
Finishing
58
Sort
58
Stack
62
Staple
63
Punch
67
Fold
70
Ring Binding
81
Perfect Binding
85
Storing Data in the Document Server
95
3 Color Copying
97
Copying in Color
97
Automatically Selecting a Color Mode
97
Copying in Full Color
98
Copying in Black and White
98
Converting Colors
99
Erasing Colors
100
Overlaying Copies with a Color
101
Adjusting Color
104
Color Balance
104
Color Adjustment
107
Registering User Colors
109
Adjusting Colors Based on the Selected Color
109
Creating Colors by Specifying the Density of Primary Colors with Number Keys
110
Changing the User Color Name
112
Deleting User Colors
112
Printing a List of User Colors
113
4 Advanced Copying
115
Adjusting Copy Image Density
115
Auto Image Density
115
Manual Image Density
116
Combined Auto and Manual Image Density
116
Image Adjustment
117
Sharp / Soft
118
Contrast
119
Background Density
120
Adjust U.C.R
120
Text / Photo Sensitivity
121
Advanced Reduce/Enlarge Copying
122
Size Magnification
122
Directional Magnification (%)
123
Directional Size Magnification (MM) (Mainly Europe and Asia)
124
Directional Size Magnification (Inch) (Mainly North America)
126
Create Margin
127
Stamps
128
Preset Stamp
130
User Stamp
131
Date Stamp
135
Page Numbering
137
Stamp Text
142
Advanced Copier Functions
146
Scan Position
146
Margin Adjustment
147
Reverse Ejection
148
Erase Center / Border
149
Erase Inside
154
Erase Outside
156
Image Repeat
157
Double Copies
161
Centering
162
Positive/Negative
163
Mirror Image
164
Edges Full Bleed
165
Series Copies
166
Booklet/Magazine
168
Spread Duplex
171
Creep Adjustment
172
MIX 1 & 2 Sided
173
Covers
175
Designate
178
Chapters
180
Designation Sheet Copy
181
Insert Sheet
183
Slip Sheet
184
5 Document Server
187
Relationship between Document Server and Other Functions
187
Storing Data
188
Changing Stored Document Information
191
Changing the User Name
191
Changing the File Name
191
Changing the Password
192
Checking the Details of a Stored Document
194
Searching for Stored Documents
195
Searching by File Name
195
Searching by User Name
195
Printing Stored Documents
197
Interrupting a Print Job
198
Changing the Number of Print Copies While Printing Is in Progress
199
Sample Print
199
Printing a Specified Page
200
Editing a Stored Document
202
Combining Stored Documents
202
Inserting a Stored Document
203
Deleting Pages
204
Duplicating Stored Documents
204
Deleting Stored Documents
206
Arranging Stored Documents Using Folders
207
Creating a Folder
207
Changing Folder Information
208
Searching for Folders
209
Deleting Folders
211
Displaying Stored Documents with Web Image Monitor
212
Downloading Stored Documents with Web Image Monitor
213
Specifying Access Permission for Stored Documents
214
Assigning Users and Access Permission for Stored Documents
215
Assigning Access Permission in Advance for Specified Users of Stored Documents
216
6 Copier / Document Server Features
219
General Features
219
Reproduction Ratio
223
Edit
225
Stamp
231
Preset Stamp
231
User Stamp
235
Date Stamp
238
Page Numbering
241
Stamp Text
244
Input / Output
248
Adjust Color Image
253
Administrator Tools
254
Ricoh Pro C7100s Operating Instructions Manual (130 pages)
Brand:
Ricoh
| Category:
Printer
| Size: 2.61 MB
Table of Contents
Table of Contents
2
Read this First
4
Introduction
4
How to Read this Manual
4
Symbols
4
Disclaimer
5
Power Switch Symbols
5
Safety During Operation
5
Safety Precautions to be Followed
5
Environments Where the Machine Can be Used
5
Handling Power Cords and Power Plugs
6
Handling the Main Machine
8
Handling the Machine's Interior
10
Handling the Machine's Supplies
11
Where to Place CAUTION Labels
13
Before You Begin
15
What You Need
15
Maintenance Kits
15
General Cautions
17
Names of Components
18
Control Panel
19
Turning Off/On the Power
20
Turning off the Main Power
20
Turning on the Main Power
20
Specifying System Auto-Reset Timer
22
Preparation
23
Resetting the Replaceable Parts Counter
24
Replacing the Paper Feed Rollers
26
Before You Begin
26
Tray Names
26
Position of the Paper Feed Rollers
27
Replaceable Parts
27
Replacing the Rollers in Tray 1
30
Replacing the Rollers in Tray 2
35
Replacing the Rollers in the Wide LCT
40
Replacing the Rollers in the Wide LCT 3
40
Replacing the Rollers in the Wide LCT 4/5
43
Replacing the Rollers in the Bypass Tray
49
Replacing the Rollers in the ADF
53
Development Unit
61
Before You Begin
61
Replaceable Parts
61
Replacing the Charger Unit/Cleaning Unit for Photoconductor Unit/Photoconductor Unit
63
ITB Cleaning Unit
70
Before You Begin
70
Replaceable Parts
70
Replacing the ITB Cleaning Unit
71
Paper Transfer Unit
83
Before You Begin
83
Replaceable Parts
83
Replacing the Paper Transfer Unit
84
Fuser Unit
88
Before You Begin
88
Replaceable Parts
88
Replacing the Fusing Belt Smoothing Roller
90
Replacing the Fuser Cleaning Unit/Fuser Unit
96
Fifth Station
102
Before You Begin
102
What You Need
103
Changing Special Toner Color
106
Toner Bottle
125
Before You Begin
125
Replaceable Parts
127
Replacing the Toner Bottle
128
Advertisement
Ricoh Pro C7100s Operating Instructions Manual (100 pages)
Paper settings
Brand:
Ricoh
| Category:
Printer
| Size: 3.38 MB
Table of Contents
Table of Contents
3
1 Before Making Paper Settings
5
Overview of Paper Settings
5
2 Registering a Custom Paper
9
How to Use the [Edit Custom Paper] Screen
9
How to Use the [Recall from Paper Library] Screen
11
Registering a Custom Paper
13
Selecting the Paper's Name from the Paper Library
13
Registering a Paper Whose Paper Name Is Not Displayed in the Paper Library
14
Registering a New Custom Paper by Modifying an Existing Paper
17
Registering a Custom Paper with the Media Identification Unit
20
Part Names and Functions of the Media Identification Unit
20
Connect the Media Identification Unit
20
How to Register Paper Scanned by the Media Identification Unit as Custom Paper
21
Modifying a Custom Paper
28
Custom Paper Settings
30
Adjusting the Image Position of the Either Side of the Paper
32
Preparations
32
Entering the Value
33
Searching for a Paper by Specifying the Conditions
35
Printing the Parameters of Custom Paper Settings
36
Saving Custom Papers to the Saved Paper Library
37
Deleting a Custom Paper
38
Managing the Paper Library
40
3 Changing Tray Paper Settings
41
Accessing Tray Paper Settings
41
Specifying a Custom Paper
41
Manually Specifying a Paper's Size and Type
42
Names and Positions of Paper Trays (Trays 1 to 8 and Tray A)
43
Tray Paper Settings
44
Paper Tray
44
Cover/Designation/Slip/Separation Sheet
56
4 Adjustment Settings for Operators
63
How to Use the [Adjustment Settings for Operators] Screen
63
Accessing the Adjustment Settings for Operators
64
Features of the Displayed Items and Setting Operations
64
Printing with Adjusted Settings
66
Menu Items and Functions
68
Setting Values
72
Machine: Image Position
72
Machine: Image Quality
73
Machine: Paper Feed/ Output
74
Machine: Maintenance
77
Finishing: Finisher
79
Finishing: Fold
87
Finishing: Perfect Binder
92
Finishing: Stacker
94
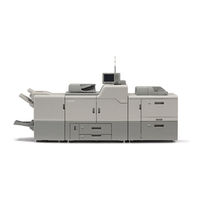
Ricoh Pro C7100s Technical Bulletin (82 pages)
Brand:
Ricoh
| Category:
All in One Printer
| Size: 6.29 MB
Table of Contents
Appendix 1: Available Adjustments
7
Appendix 2: Components
17
Modified Parts
43
Troubleshooting
75
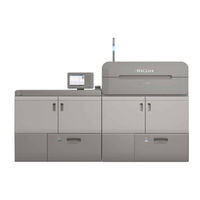
Ricoh Pro C7100s Starter Manual (40 pages)
Brand:
Ricoh
| Category:
All in One Printer
| Size: 2.09 MB
Table of Contents
Read this First
1
Table of Contents
3
How to Read the Manuals
4
Symbols Used in the Manuals
4
Disclaimer
4
Notes
5
Machine Types
5
1 Manuals Provided with this Machine
7
Manuals for this Machine
7
Manuals List
8
How to Use the Operating Instructions
10
Formats of the Operating Instructions
10
Reading the HTML Manuals on the CD-ROM
10
Installing and Opening the HTML Manuals
11
Reading the PDF Manuals on the CD-ROM
11
2 Safety Information for this Machine
13
Safety Information
13
Safety During Operation
13
Safety Precautions to be Followed
13
Handling Power Cords and Power Cord Plugs
14
Handling the Main Machine
16
Safety Labels of this Machine
20
Positions of WARNING and CAUTION Labels
20
Trimmer Unit
26
High Capacity Stacker
30
Power Switch Symbols
30
3 Other Information for this Machine
31
Laws and Regulations
31
Legal Prohibition
31
Laser Safety
31
Overseas Affiliates and Noise Emission Information
33
EMC Directive
33
User Information for RFID in 13.56Mhz for Type 2 and 4
33
User Information on Electrical and Electronic Equipment (for Users in India)
33
4 Appendix
35
Trademarks
35
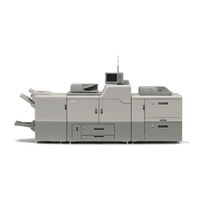
Ricoh Pro C7100s Read This First Manual (40 pages)
Brand:
Ricoh
| Category:
All in One Printer
| Size: 2.05 MB
Table of Contents
Read this First
1
Table of Contents
3
How to Read the Manuals
4
Symbols Used in the Manuals
4
Disclaimer
4
Notes
5
Machine Types
5
1 Manuals Provided with this Machine
7
Manuals for this Machine
7
Manuals List
9
How to Use the Operating Instructions
11
Formats of the Operating Instructions
11
Reading the HTML Manuals on the CD-ROM
11
Installing and Opening the HTML Manuals
12
Reading the PDF Manuals on the CD-ROM
12
2 Safety Information for this Machine
15
Safety Information
15
Safety During Operation
15
Safety Precautions to be Followed
15
Handling Power Cords and Power Cord Plugs
16
Handling the Main Machine
18
Safety Labels of this Machine
22
Positions of WARNING and CAUTION Labels
22
Trimmer Unit
28
Power Switch Symbols
32
3 Other Information for this Machine
33
Laws and Regulations
33
Duplication and Printing Prohibited
33
Laser Safety
33
Notes to USA Users of FCC Requirements
34
Notes to Canadian Users of IC Rules for Type 2 and 4
35
4 Appendix
37
Trademarks
37
Advertisement
Related Products
Ricoh Pro C7100x
Ricoh Pro C7100
Ricoh Pro C7110x
Ricoh Pro C7110
Ricoh Pro C7110s
Ricoh Pro C751 EX
Ricoh PRO C7200
Ricoh PRO C7200X
Ricoh PRO C7210X
Ricoh PRO C7210S
Ricoh Categories
All in One Printer
Printer
Digital Camera
Copier
Printer Accessories
More Ricoh Manuals
Login
Sign In
OR
Sign in with Facebook
Sign in with Google
Upload manual
Upload from disk
Upload from URL