Sign In
Upload
Manuals
Brands
LXE Manuals
Antenna
VX3X
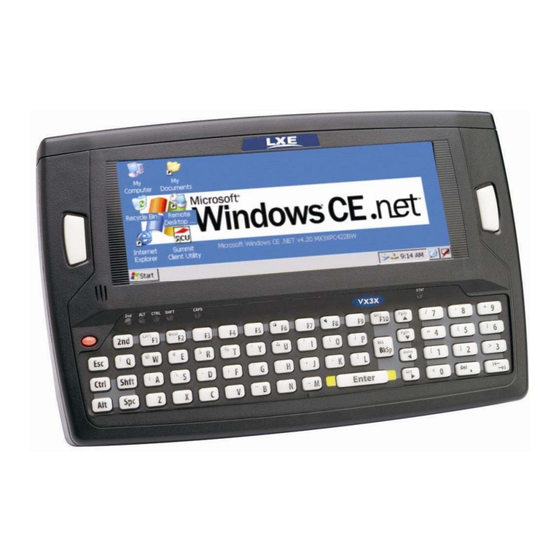
User Manuals: LXE VX3X Antenna Kit
Manuals and User Guides for LXE VX3X Antenna Kit. We have
6
LXE VX3X Antenna Kit manuals available for free PDF download: Reference Manual, User Manual, Installation Instructions Manual
LXE VX3X Reference Manual (402 pages)
Microsoft Windows CE .NET 4.2/CE 5.0 Equipped
Brand:
LXE
| Category:
Handhelds
| Size: 5 MB
Table of Contents
Revision Notice
3
Table of Contents
5
Chapter 1 Introduction
21
Overview
21
Features/Options for the MX3X Family
22
Identifying an MX3 Computer
22
Related Manuals
23
Components
24
Front and Back Views
24
Figure 1-1 Front
24
Figure 1-2 Back
24
Endcap Options
25
Figure 1-3 Endcaps
25
MX3P Module
26
Battery Well Vent Aperture
26
When to Use this Guide
26
Figure 1-4 Side View
26
Figure 1-5 Vent Aperture in Battery Well - Do Not Cover
26
Document Conventions
27
Getting Started
28
Insert Main Battery
29
About Lithium-Ion Batteries
29
Check Battery Status
29
Figure 1-6 Battery Contacts and Main Battery
29
Optional Devices
30
Attach Handstrap (Optional)
30
Attach the Stylus Clip (Optional)
30
Figure 1-7 MX3X with Handstrap Installed
30
Attach to Hip-Flip (Optional)
31
Figure 1-8 Hip-Flip Accessory
31
Connect External Power Supply to MX3X or Cradle (Optional)
32
Figure 1-10 International AC/DC 12V Power Supply
32
Figure 1-11 Connect External Power Supply
32
Figure 1-9 US AC/DC 12V Power Supply and Automotive Power Adapter
32
24/72 Maximum VDC MX3P Power Supply Input/Output Cable Connection
33
Connect External Power Supply to the MX3P
33
Figure 1-12 Connect External Power Supply
33
Figure 1-13 Vehicle Power Supply, 24 - 72 Maximum VDC (Fuse Not Shown)
33
MX3P Specific Power Accessories
33
Figure 1-14 Connecting the Power Supply to the MX3P Endcap Power Jack
34
Figure 1-15 Vehicle Power Supply Footprint
34
12V VDC MX3P Power Cable Connection
35
Figure 1-16 Vehicle Connection Wiring Color Codes
35
Connect MX3X Audio Jack (Optional)
36
Connect Remote Antenna (Optional)
36
Figure 1-17 Connect Audio Jack
36
Power Button
37
Figure 1-18 Power Button
37
Restart Sequence
37
Tapping the Touchscreen with a Stylus
38
Keypad Shortcuts
38
Entering the Multi Applock Activation Key
39
Figure 1-19 End-User Multi Applock Touch Panel
39
Using a Stylus Tap
39
Using the Switch Key Sequence
39
Touchscreen Calibration
40
Figure 1-20 Touchscreen Recalibration
40
Set the Display Contrast
41
Set the Display Backlight Timer
41
Set the Display Brightness
41
Set the Power Schemes Timers
42
AC Power Scheme
42
Battery Power Scheme
42
Set the Audio Speaker Volume
43
Using the Keypad
43
Using the Touchscreen
43
Setup the Client and Network
44
Access the Terminal Emulation Parameters
44
Installing PCMCIA and CF Cards
45
Figure 1-21 PCMCIA and CF Card Location
45
Installation
46
Installing / Removing Cards
46
Preparation
46
Removal
46
Enter Data
47
Keypad Entry
47
Stylus Entry
47
Input Panel
47
Integrated Laser Scanner Data Entry
48
Figure 1-22 Scan Beam
48
Figure 1-23 Scanner LED Location
48
Using a Headset and Voice for Data Entry
49
Adjust Microphone and Secure the Cable
49
Connecting the Audio Cable and a Headset
49
Figure 1-24 Audio Cable and Headset
49
Entering Data
50
Tethered Scanner
50
MX3P and the MX3 Cradles
50
Bluetooth Scanners and Printers
50
Activesync
51
Introduction
51
Initial Setup
52
Network
52
Serial Connection
52
USB Connection
52
Irda Connection
53
Synchronizing from the Mobile Device
53
Connect and Communicate
53
Explore
54
Backup Data Files Using Activesync
54
Connect
54
Disconnect
54
Infrared Port Transfer
54
Prerequisites
54
Serial Port Transfer
54
USB Transfer
54
Activesync with a Cradle
55
Cold Boot and Loss of Host Re-Connection
55
Figure 1-25 Activesync Cable Connected to Serial Port on Cradle
55
Troubleshooting Activesync
56
Lxeconnect
57
Install Lxeconnect
57
Using Lxeconnect
58
Bluetooth
59
Initial Use
59
Figure 1-26 Bluetooth LXEZ Pairing Display
59
Computer Is Connectable
60
Computer Is Discoverable
60
Continuous Search
60
Prompt if Devices Request to Pair
60
Report Failure to Reconnect
60
Report When Connection Lost
60
Report When Reconnected
60
Settings Tab | Bluetooth Options
60
Subsequent Use
61
Bluetooth Devices
62
Bluetooth Mobile Barcode Reader Setup
62
Introduction
62
Figure 1-27 Sample Bluetooth Address Barcode Label
63
Figure 1-28 about Tab and Bluetooth Address
63
MX3X with Label
63
MX3X Without Label
63
Bluetooth Beep and LED Indications
64
Bluetooth Printer Setup
65
Docking Cradles
66
Status LED
66
Desktop Cradle
67
Connectors
67
Vehicle Mount Cradle
67
Activesync with a Cradle
68
Tethered Scanner and a Cradle
68
The Passive Vehicle Cradle
68
Getting Help
68
Manuals
68
Accessories
69
Chapter 2 Physical Description and Layout
73
Hardware Configuration
73
Central Processing Unit
73
System Memory
73
Figure 2-1 Hardware
73
Core Logic
74
Video Subsystem
74
Power Supply
74
Audio Interface
74
PCMCIA Slots
75
Slot 0 - Network or SRAM Cards
75
Slot 1 - Compact Flash Card
75
Bluetooth LXEZ Pairing
75
Power Modes
76
Primary Events Listing
76
Figure 2-2 Power Modes - On, Suspend, Critical Suspend and off
76
On Mode
77
The Display
77
The Mobile Device
77
User Idle Mode
77
System Idle Mode
78
Suspend Mode
78
Critical Suspend Mode
79
Off Mode
79
Physical Controls
80
Power Button
80
Figure 2-3 Location of the Power (PWR) Button
80
Restart Sequence
80
Endcaps and COM Ports
81
Figure 2-4 Endcap and COM Ports
81
Figure 2-5 Serial Ports and Cables
81
COM Port Switching
82
Endcap Combinations
82
Figure 2-6 Endcap Combinations
82
Figure 2-7 RS-232 Port
83
Figure 2-8 9-Pin RS-232 Pinout
83
Integrated Scanner Port
83
Serial Port
83
Figure 2-9 Pinout - Serial Cable for Synchronization
84
LXE Connection Cable Technical Specification
84
RTS/CTS Handshaking and the Serial Port
84
Activesync
85
Figure 2-10 Endcap Ports
85
Figure 2-11 USB Type a to Serial Port Cable Pinout
85
USB Host / Client Port
85
USB Host Cable
85
Figure 2-12 USB Type B to Serial Port Cable Pinout
86
Tethered Scanners
86
USB Client Cable
86
Programmable Scan Buttons
87
Field Exit Key Function (IBM 5250/TN5250 Only)
87
Figure 2-13 Programmable Buttons
87
Scan Buttons and the SCNR LED
87
The Keypad
88
Key Functions
88
Figure 2-14 the QWERTY Keypad
88
Caps Key and Capslock Mode
89
Keypad Shortcuts
89
Keypress Sequences
89
LED Functions
90
Figure 2-15 LED Functions
90
Display
91
Display and Display Backlight Timer
91
Touchscreen
91
Cleaning the Glass Display/Scanner Aperture
92
Applying the Protective Film to the Display
92
Speaker
93
Infrared (IR) Port
93
Figure 2-16 Infrared Port - COM2 Port
93
Power Supply
94
Check Battery Status
94
Handling Batteries Safely
94
Figure 2-17 Main Battery
94
Main Battery
95
Battery Hot-Swapping
95
Low Battery Warning
95
Critical Suspend State
96
Backup Battery
96
Backup Battery Maintenance
96
Battery Chargers
97
MX3 Multi-Charger Plus
97
Figure 2-18 MX3 Multi-Charger Plus
97
Figure 2-19 Insert Main Battery in Charge Pocket
97
Battery Chargers Affected
98
Battery Label Location
98
Important Battery Charger Version Information
98
External Power Supply (Optional)
99
Figure 2-20 US AC/DC 12V Power Supply and Cigarette Lighter Adapter
99
Figure 2-21 International AC/DC 12V Power Supply
99
Chapter 3 System Configuration
101
Introduction
101
Windows Operating System
101
Network Configuration
101
Installed Software
101
Software Load
102
Software Applications
102
Optional
102
Applock (Option)
102
Bluetooth (Option)
103
JAVA (Option)
103
LXE Rfterm (Option)
103
Wavelink Avalanche Enabler (Option)
103
Desktop
104
Folders Copied at Startup
105
My Device Folders
105
Start Menu Program Options
106
Communication
107
Activesync
107
Connect
107
Remote Control
107
Start FTP Server / Stop FTP Server
108
Command Prompt
108
Internet Explorer
108
Figure 3-1 Pocket CMD Prompt Screen
108
Media Player
109
Transcriber
109
Windows Explorer
109
Taskbar
109
Advanced Tab
109
Taskbar Icons
110
Settings | Control Panel Options
111
About
112
Identifying Software Versions
113
Language and Fonts
113
MAC Address
113
Accessibility
113
Administration - for Applock
114
Battery
114
Figure 3-2 Battery
114
Figure 3-3 Control Panel - Bluetooth
115
Bluetooth
115
Bluetooth Devices
116
Figure 3-4 Discover Bluetooth Devices and Query Device Data
116
Figure 3-5 Bluetooth Devices Panel
116
Figure 3-6 Bluetooth Device Pair / Delete / Disconnect Menu
117
Figure 3-7 Bluetooth Device Properties Menu
117
Figure 3-8 Bluetooth Settings Panel
118
Options
118
Settings
118
Turn off Bluetooth Button
118
About
119
Figure 3-9 Bluetooth about Panel
119
Pairing and Auto-Reconnect
120
Certificates
121
Date/Time
122
Figure 3-10 Date/Time Properties
122
Dialing
123
Figure 3-11 Dialing
123
Display
124
Appearance
124
Background
124
Backlight
124
Figure 3-12 Display Properties / Backlight Tab
124
Input Panel
125
Internet Options
125
Keyboard
126
Keypad
127
Figure 3-13 Keymap Panel
128
Keymap Tab
128
Figure 3-14 Launchapp Panel
129
Launchapp Tab
129
Figure 3-15 Runcmd Panel
130
Runcmd Tab
130
Mixer
131
Figure 3-16 Mixer
131
Mouse
132
Network and Dialup Connections
132
Create a Connection Option
132
MX3X-VXC Options
133
Communication
133
Figure 3-17 MX3X-VXC Options - Communication
133
Figure 3-18 MX3X-VXC Options - Misc
134
Misc
134
Owner
135
Figure 3-19 Owner Properties
135
Password
136
Figure 3-20 Password Properties
136
PC Connection
137
Figure 3-21 Communication / PC Connection Tab
137
Pcmcia
138
Power
139
Battery
139
Figure 3-22 Power Properties – Battery Status
139
AC Power Scheme
140
Battery Power Scheme
140
Device Status
140
Figure 3-23 Power Properties - Schemes
140
Schemes
140
Regional Settings
141
Default Settings
141
Remove Programs
141
Scanner
142
Determine Your Scanner Software Version
142
Figure 3-24 Determine Your Scanner Software Version
142
Stylus
143
Calibration
143
Double Tap
143
Figure 3-25 Stylus Properties / Recalibration Start
143
System
144
Figure 3-26 System / General Tab
145
Figure 3-27 System / Memory
145
General
145
Memory
145
Copyrights
146
Device Name
146
Terminal Server Client Licenses
146
Figure 3-28 System / Device Name
146
Volume and Sounds
147
Figure 3-29 Volume and Sounds
147
Good Scan and Bad Scan Sounds
147
Utilities
148
Launch.exe
148
Regedit.exe
150
Regload.exe
150
Warmboot.exe
150
Wavplay.exe
150
Command-Line Utility
150
Coldboot.exe
150
Prtscrn.exe
150
API Calls
151
Wavelink Avalanche Enabler Configuration
152
Briefly
152
Enabler Install Process
152
Enabler Uninstall Process
152
Stop the Enabler Service
153
Update Monitoring Overview
153
Mobile Device Wireless and Network Settings
154
Enabler Configuration
155
Figure 3-30 Avalanche Enabler Opening Screen
155
File Menu Options
156
Avalanche Update Using File | Settings
157
Menu Options
157
Connection Tab
158
Figure 3-31 Connection Options
158
Execution Tab
159
Figure 3-32 Execution Options (Dimmed)
159
Figure 3-33 Server Contact Options
160
Server Contact Tab
160
Figure 3-34 Startup / Shutdown Options
161
Startup/Shutdown Tab
161
Display Tab
162
Figure 3-35 Scan Config Option
162
Figure 3-36 Window Display Options
162
Scan Config Tab
162
Figure 3-37 Application Shortcuts
163
Shortcuts Tab
163
Adapters Tab
164
Figure 3-38 Adapters Options – Network
164
Figure 3-39 Avalanche Network Profile Displayed
165
Figure 3-40 Manual Settings Properties Panels
165
Status Tab
166
Troubleshooting
166
Figure 3-41 Status Display
166
Express Scan
167
Figure 3-42 Express Scan Desktop Icon
167
Figure 3-43 Express Scan Password Input
167
Figure 3-44 Scan Barcode 1
168
Figure 3-45 Scan Remaining Barcodes
168
Figure 3-46 Configuring Settings
169
Reflash the Mobile Device
170
Preparation
170
How to : Reflash Using Keypress Method
170
How To: Reflash Using TAG File Method
171
Clearing Persistent Storage
171
Advertisement
LXE VX3X Reference Manual (316 pages)
LXE VX3X: Reference Guide
Brand:
LXE
| Category:
Automobile Accessories
| Size: 2 MB
Table of Contents
Revision Notice
3
Table of Contents
5
Chapter 1 Introduction
21
Overview
21
Identifying the VX3X Computer
22
When to Use this Guide
23
Document Conventions
24
Quick Start
25
Troubleshooting
25
Entering the Multi Applock Activation Key
26
Hotkey (Activation Hotkey)
26
Touch
26
Components
27
Figure 1-1 VX3X Components, Top View (Endcap)
27
Figure 1-2 VX3X Components, Front View
27
Figure 1-3 VX3X Components, Back View
28
Data Entry
29
Keyboard Data Entry
29
Barcode Data Entry
29
Bluetooth Scanners
29
Tethered Scanners
29
Touchscreen Entry
30
Input Panel (Virtual Keyboard)
30
Right Click
30
Setup the Radio and Network
31
Setup Terminal Emulation Parameters
31
Activesync - Initial Setup
32
USB Connection
32
Serial Connection
32
Connect
32
Radio
32
Bluetooth
33
Initial Use
33
Figure 1-4 Bluetooth Devices Display - before Discovering Devices
33
Computer Is Connectable
34
Computer Is Discoverable
34
Prompt if Devices Request to Pair
34
Report Failure to Reconnect
34
Report When Connection Lost
34
Report When Reconnected
34
Settings Tab | Bluetooth Options
34
Continuous Search
35
Subsequent Use
35
Bluetooth Devices
36
Bluetooth Barcode Reader Setup
37
Figure 1-5 Sample Bluetooth Address Barcode Label
37
Introduction
37
VX3X with Label
38
Figure 1-6 about Tab and Bluetooth Address
39
VX3X Without Label
39
Bluetooth Beep and LED Indications
40
Saving Changes to the Registry
41
Getting Help
42
Manuals and Accessories
42
Manuals
42
Accessories
42
Chapter 2 Physical Description and Layout
47
Hardware Configuration
47
System Hardware
47
Figure 2-1 VX3X Hardware Configuration
47
Central Processing Unit
48
System Memory
48
Core Logic
48
Video Subsystem
48
Power Supply
48
Backup Battery
48
Audio Interface
49
PCMCIA and CF Slots
49
CF - Compact Flash Card
49
PCMCIA - Radio or SRAM Cards
49
Bluetooth LXEZ Pairing
49
Power Modes
50
Physical Controls
51
Power Button
51
Figure 2-2 Location of the Power (PWR) Button
51
Restart Sequence
51
Endcap Ports
52
Figure 2-3 Serial Ports and Cables
52
External Connectors
53
Connector (COM1 or COM3)
54
Figure 2-4 Scanner Serial Connector (COM3)
54
Pinout
54
Figure 2-5 Pinout - Serial Cable
55
RTS/CTS Handshaking and the Serial Port
55
Technical Specifications - Connection Cable
55
USB-C Connector
56
Activesync
56
Figure 2-6 USB Client Cable Pinout
56
USB Client Cable Pinout
56
USB-H Connector
57
Figure 2-7 USB Host Cable Pinouts
58
USB Host Cable Pinouts
58
Audio Connector
59
Figure 2-8 VX3X Audio Jack for External Speaker or Headphones
59
Pinout
59
Power Supply Connector
60
Pinout
60
Antenna Connector (Optional)
60
Figure 2-10 RF Antenna SS Connector
60
Figure 2-9 the Power Connector
60
Vehicle Remote Antenna Mount
60
Programmable Keys
61
Field Exit Key Function (IBM 5250 Only)
61
Figure 2-11 Programmable Keys
61
The QWERTY Keyboard
62
IBM 3270 Overlay
62
IBM 5252 Overlay
62
Figure 2-12 QWERTY Keyboard Standard Overlay
62
Figure 2-13 QWERTY Keyboard with IBM 3270 Overlay
62
Figure 2-14 QWERTY Keyboard with IBM 5250 Overlay
62
Key Functions
63
Caps Key and Capslock Mode
64
Keypad Shortcuts
64
Keypress Sequences
64
Custom Key Maps
64
LED Functions
65
Figure 2-15 LED Functions
65
General Windows CE Keyboard Shortcuts
66
Input Panel (Virtual Keyboard)
67
Figure 2-16 Virtual Keyboard
67
Enabling the Input Panel
68
Figure 2-17 Input Panel Properties
68
Speaker
69
The Display
69
Cleaning the Display
69
Set the Display Contrast
69
Set the Display Backlight Timer
70
Set the Display Brightness
70
Touchscreen
70
Power Supply
71
External Power Supply
71
Figure 2-18 Optional AC Power and Adapter Cable
71
Vehicle 12-80VDC Direct Connection
72
Figure 2-19 Direct Vehicle Power Connection Cable (12 Ft.)
72
Figure 2-20 Connecting the Power Cable to the Vehicle
72
Figure 2-21 Vehicle Connection Wiring Color Codes
72
VX3X Input Power Specifications
73
CMOS Battery
73
Chapter 3 System Configuration
75
Introduction
75
Windows CE 5.0 Operating System
75
Wireless Network Configuration
75
Warmboot
75
Coldboot
75
Installed Software
76
Software Load
76
Software Applications
76
Applock
77
Bluetooth (Optional)
77
Java (Optional)
77
LXE Rfterm (Optional)
77
Wavelink Avalanche Enabler (Optional)
77
Desktop
79
Folders Copies at Startup
80
My Device Folders
80
Start Menu Program Options
81
Communication
82
Activesync
82
Connect
83
Start FTP Server / Stop FTP Server
83
Command Prompt
84
Internet Explorer
84
Media Player
84
Figure 3-1 Pocket CMD Prompt Screen
84
Remote Desktop Connection
85
Transcriber
85
Windows Explorer
85
Taskbar
86
Advanced Tab
86
Figure 3-2 Taskbar Properties
86
Control Panel Options
87
About
88
Figure 3-3 about Properties, Software
89
Language and Fonts
89
Figure 3-4 about Properties, Versions
90
Figure 3-5 about Properties, Network IP
90
Identifying Software Versions
90
Radio MAC Address
90
Accessibility
91
Administrator Control
91
Figure 3-6 Accessibility Properties, Keyboard
91
Bluetooth
92
Discover
93
Figure 3-7 Control Panel – Bluetooth
93
Figure 3-8 Discover Bluetooth Devices
93
Bluetooth Devices
94
Figure 3-9 Bluetooth Devices Panel
94
Bluetooth Device Properties
95
Figure 3-10 Bluetooth Device Disconnect / Delete
95
Figure 3-11 Bluetooth Device Properties Menu
95
Figure 3-12 Bluetooth Device Settings Panel
96
Options
96
Settings
96
Turn off Bluetooth Button
96
About
97
Figure 3-13 Bluetooth about Panel
97
Easy Pairing and Auto-Reconnect
98
Certificates
99
Date/Time
99
Figure 3-14 Date/Time Properties
99
Dialing
100
Figure 3-15 Dialing
100
Display
101
Appearance
101
Background
101
Backlight
101
Figure 3-16 Display Properties / Backlight Tab
101
Input Panel
102
Figure 3-17 Input Panel Properties
102
Internet Options
103
Keyboard
104
Keypad
105
Figure 3-18 Keypad Properties / Keymap Tab
105
Keymap
105
Figure 3-19 Keymap Properties / Launchapp Tab
106
Launchapp
106
Figure 3-20 Keymap Properties / Runcmd Tab
107
How To: Remap a Key Sequence
107
How To: Remap a Single Key
107
How To: Remap an Application Launch
107
Runcmd
107
How To: Remap a Command
108
Mixer
109
Figure 3-21 Mixer
109
Mouse
110
MX3X-VXC Options
110
Allow Remote Desktop Autologon
110
Communication
110
Enable TCP/IP Version 6
110
Figure 3-22 MX3X-VXC Options Properties / Communication Tab
110
Autolaunch Timesync
111
Capslock
111
Figure 3-23 MX3X-VXC Options Properties / Misc Tab
111
Misc
111
Touch Screen Disable
111
Network and Dialup Connections
112
Figure 3-24 Network Connection Properties
112
Owner
113
Figure 3-25 Owner Properties
113
Password
114
Figure 3-26 Password Properties
114
PC Connection
115
Figure 3-27 Communication / PC Connection Tab
115
Pcmcia
116
Figure 3-28 PCMCIA Control Tab
116
Figure 3-29 Intata Control Tab
116
Regional Settings
117
Remove Programs
117
Scanner
117
Stylus
118
Calibration
118
Double Tap
118
Figure 3-30 Stylus Properties / Recalibration Start
118
Figure 3-31 Stylus Properties / Recalibration
118
System
119
Figure 3-32 System / General Tab
119
General
119
Copyrights
120
Device Name
120
Figure 3-33 System / Memory
120
Figure 3-34 System / Device Name
120
Memory
120
Terminal Server Client Licenses
121
Volume and Sounds
121
Wi-Fi
121
Figure 3-35 Volume and Sounds
121
CF Flash Cards, CAB Files and Programs
122
Access Files on the Flash Card
122
Backup VX3X Files Using Activesync
123
Prerequisites
123
Serial Port Transfer
123
VX3X and Activesync Partnership
123
USB Transfer
124
Connect
124
Explore
124
Disconnect
125
Important Information - Cold Boot and Loss of Host Re-Connection
125
Radio Connection
125
Serial Connection
125
USB Connection
125
Troubleshooting
126
Create a Communication Option
127
Figure 3-36 Pinout – Serial Cable for Synchronization
128
Technical Specifications - Connection Cable
128
VX3X Utilities
129
Launch.exe
129
Regedit.exe
131
Regload.exe
131
Regdump.exe
131
Warmboot.exe
131
Wavplay.exe
131
VX3X Command-Line Utilites
131
Coldboot.exe
131
Prtscrn.exe
131
API Calls
132
Reflash the VX3X
133
How To: Reflash Using Keypress Method
133
How To: Reflash Using TAG File Method
134
Clearing Persistent Storage
134
Wavelink Avalanche Enabler Configuration
135
Briefly
135
Enabler Install Process
135
Enabler Uninstall Process
135
Stop the Enabler Service
135
Update Monitoring Overview
135
Mobile Device Wireless and Network Settings
136
Enabler Configuration
137
Figure 3-37 Avalanche Enabler Opening Screen
137
File Menu Options
138
Avalanche Update Settings
139
Menu Options
139
Connection
140
Figure 3-38 Connection Options
140
Execution
141
Figure 3-39 Execution Options (Dimmed)
141
Figure 3-40 Server Contact Options
142
Server Contact
142
Figure 3-41 Startup / Shutdown Options
143
Startup/Shutdown
143
Display
144
Figure 3-42 Scan Config Option
144
Figure 3-43 Window Display Options
144
Scan Config
144
Figure 3-44 Application Shortcuts
145
Shortcuts
145
Adapters
146
Figure 3-45 Adapter Options – Network
146
Figure 3-46 Avalanche Network Profile Displayed
147
Figure 3-47 Manual Settings Properties Panels
148
Figure 3-48 Status Display
149
Status
149
Express Scan
150
Figure 3-49 Express Scan Desktop Icon
150
Figure 3-50 Express Scan Password Input
150
Figure 3-51 Scan Barcode 1
151
Figure 3-52 Scan Remaining Barcodes
151
Figure 3-53 Configuring Settings
152
LXE VX3X User Manual (76 pages)
Microsoft Windows CE .NET 4.2/CE 5.0 Equipped
Brand:
LXE
| Category:
Handhelds
| Size: 1 MB
Table of Contents
Revision Notice
2
Table of Contents
3
Introduction
7
Overview
7
Features/Options for the MX3X Family
8
Identifying an MX3 Computer
8
Related Manuals
9
Document Conventions
10
Environmental Specifications
10
Laser Warnings and Labels
11
Mx3X
11
Figure 1 CDRH / IEC 825 Caution Label Location - MX3X, Back
11
Figure 2 Caution Label - Laser Scanner
11
Battery Well Vent Aperture
12
Figure 3 Vent Aperture in Battery Well - Do Not Cover
12
Components
13
Front and Back Views
13
Figure 4 Front
13
Figure 5 Back
13
Endcap Options
14
MX3P Module
14
Figure 6 Endcaps
14
Figure 7 Side View
14
Quick Start
15
Troubleshooting
15
About Lithium-Ion Batteries
16
Insert Main Battery
17
Check Battery Status
17
Figure 8 Battery Contacts in Battery Compartment
17
Figure 9 Main Battery
17
Optional Devices
18
Attach Handstrap (Optional)
18
Attach the Stylus Clip (Optional)
18
Figure 10 MX3X with Handstrap Installed
18
Attach to Hip-Flip (Optional)
19
Figure 11 Hip-Flip Accessory
19
Connect External Power Supply to MX3X or Cradle (Optional)
20
Figure 12 US AC/DC 12V Power Supply and Automotive Power Adapter
20
Figure 13 International AC/DC 12V Power Supply
20
Figure 14 Connect External Power Supply
20
Connect External Power Supply to the MX3P
21
MX3P Specific Power Accessories
21
Figure 15 Connect External Power Supply
21
24/72 Maximum VDC Power Supply Input/Output Cable Connection
22
Figure 16 Vehicle Power Supply, 24 - 72 Maximum VDC (Fuse Not Shown)
22
Figure 17 Connecting the Power Supply to the MX3P Endcap Power Jack
22
Figure 18 Vehicle Power Supply Footprint
22
Figure 19 Vehicle Connection Wiring Color Codes
23
12V VDC Power Cable Connection
24
Connect MX3X Audio Jack (Optional)
25
Connect Remote Antenna (Optional)
25
Figure 20 Connect Audio Jack
25
Power Button
26
Restart Sequence
26
Figure 21 Power Button
26
Tapping the Touchscreen with a Stylus
27
Keypad Shortcuts
27
Entering the Multi Applock Activation Key
28
Using a Stylus Tap
28
Using the Switch Key Sequence
28
Figure 22 End-User Multi Applock Touch Panel Segment
28
Touchscreen
29
Calibration
29
Figure 23 Touchscreen Recalibration
29
Set the Display Contrast
30
Set the Display Backlight Timer
30
Set the Display Brightness
30
Set the Power Schemes Timers
31
Battery Power Scheme
31
AC Power Scheme
31
Set the Audio Speaker Volume
32
Using the Keypad
32
Using the Touchscreen
32
Enter Data
33
Keypad Entry
33
Stylus Entry
33
Input Panel
33
Integrated Laser Scanner Data Entry
34
Figure 24 Scan Beam
34
Figure 25 Scanner LED Location
34
Using a Headset and Voice for Data Entry
35
Connecting the Audio Cable and a Headset
35
Adjust Microphone and Secure the Cable
35
Figure 26 Audio Cable and Headset
35
Entering Data
36
Tethered Scanner
36
Bluetooth Devices
37
Mobile Bluetooth Accessories
37
Getting Help
38
Manuals
38
Accessories
38
Advertisement
LXE VX3X User Manual (78 pages)
LXE VX3X: User Guide
Brand:
LXE
| Category:
Automobile Accessories
| Size: 2 MB
Table of Contents
Revision Notice
3
Table of Contents
5
The Vx3X Vehicle Mount Computer
9
Introduction
9
Identifying the VX3X Computer
10
Document Conventions
11
Environmental Specifications
11
Quick Start
12
Troubleshooting
13
Components
14
Figure 1 VX3X Components, Top View
14
Figure 2 VX3X Components, Front View
14
Figure 3 VX3X Components, Back View
15
Microsoft Windows CE Control Panel
16
The Half-Screen Display
16
Applock and the VX3X
17
Single Application Applock
17
Multi Application Applock
17
Figure 23 Switchpad Menu
17
Using the Touchscreen
17
Using the Keypad
18
The QWERTY Keyboard
19
IBM 3270 Overlay
19
IBM 5250 Overlay
19
Figure 5 QWERTY Keyboard Standard Overlay
19
Figure 6 QWERTY Keyboard with IBM 3270 Overlay
19
Figure 7 QWERTY Keyboard with IBM 5250 Overlay
19
Key Functions
20
CAPS Key and Capslock Mode
21
Keypad Shortcuts
21
Keypress Sequences
21
Custom Key Maps
21
LED Functions
22
Figure 8 LED Functions
22
General Windows CE Keyboard Shortcuts
23
Input Panel (Virtual Keyboard)
24
Enabling the Input Panel
24
Figure 9 Small and Large Virtual Keyboards
24
Power Supply
25
Backup Battery
25
Getting Help
26
Manuals and Accessories
26
Manuals
26
Accessories
26
Install Mounting Brackets
31
Installation
31
RAM Mount System
32
Components
32
Torque Measurements
32
Procedure
33
Figure 10 RAM Clamp Mount Components
33
Figure 11 Assembled RAM Clamp Mount
33
Step 1 - Mount Vehicle RAM Clamp Mount
33
Figure 12 RAM Clamp Mount - Mounting Dimensions (Not to Scale)
34
Mounting Dimensions
34
Figure 13 Attach RAM Mount to VX3X
35
Step 2 - Attach RAM Mount Ball to the VX3X
35
Step 3 - Attach VX3X Assembly to RAM Mount
36
Completed Assembly
36
Figure 14 RAM Assembly
36
Figure 15 Completed RAM Mount Assembly
36
Strain Relief Cable Clamps
37
Figure 14 Strain Relief Cable Clamps
37
Figure 14 Slide Clamp over Cable
37
Install Stylus Tether and Sleeve (Optional)
38
Install/Remove Touchscreen Protective Film Optional)
38
Connect Serial Barcode Scanner
39
Figure 16 Connect Serial Scanner Cable
39
Figure 17 VX3X with Generic Barcode Scanner Attached
40
Figure 18 Generic Barcode Scanner
40
Connect Serial Printer or PC
41
Figure 19 Connect Serial Cable to COM3
41
USB-C Port
42
Figure 20 Connect USB-C Cable
42
USB-H Port
43
Figure 21 Connect USB-H Cable
43
Connect External Headset
44
LXE Headsets
44
Figure 22 Connect External Headset
44
Figure 23 Headset Adapter Cable Components
44
Other Headsets
45
Figure 24 Headset Quick Disconnect Connector
45
Connect Antenna
46
Connect Power Cable
46
Figure 25 Connect Power Cable to VX3X
46
External Power Supply, Optional
47
Figure 26 Optional Power Configuration
47
Vehicle 12-80VDC Power Connection
48
Figure 27 Vehicle Power Connection Cable (Fuse Not Shown)
48
Figure 28 Connecting the Power Cable to the Vehicle
48
Figure 29 Vehicle Connection Wiring Color Codes
49
LXE VX3X User Manual (33 pages)
Vehicle Mounted Computer
Brand:
LXE
| Category:
Automobile Accessories
| Size: 1 MB
Table of Contents
Table of Contents
3
Set up a New VX3X
5
Hardware Setup
5
Software Setup
5
Components
6
Front
6
Back
7
Endcap
8
Endcap Options
8
Tapping the Touchscreen with a Stylus
9
Backlights and Indicators
10
Connecting Cables to the VX3X
11
Connect Cable- USB Host
11
USB-H Cable Assembly
11
Connect Cable- USB Client
11
USB-C Cable Assembly
11
Connect Cable - Serial
11
Connecting an AC/DC Power Supply
13
Connecting Vehicle Power
14
Vehicle 12-80VDC Power Connection
14
Connect Power Cable
16
Connecting the Headset Cable
17
Adjust Headset / Microphone and Secure Cable
18
Connecting a Tethered Scanner
19
Attach Stylus Tether and Sleeve
19
Set Date and Time Zone
20
Grab Time Utility
20
Autolaunch Time-Sync
20
Using the Input Panel / Virtual Keyboard
21
Adjust Speaker Volume
22
Using the Keypad
22
Using the Control Panel
22
Touchscreen
23
Calibrating the Touchscreen
23
Adjusting the Display Backlight Timer
23
Apply the Touchscreen Protective Film
23
Cleaning the Touchscreen and Scanner Aperture
24
Setup Terminal Emulation Parameters
24
Using the Applock Switchpad
25
Using the Keypad
25
Using the Touchscreen
25
Connecting to Bluetooth Devices
26
Taskbar Connection Indicator
26
Reboot
27
Warm Boot
27
Cold Boot
27
Troubleshooting
27
Regulatory Notices and Safety Information
28
Class a Digital Device
28
RF Notices
29
RF Safety Notice
29
Lithium Battery Safety Statement
30
Vehicle Power Supply Connection Safety Statement
31
Revision History
31
LXE VX3X Installation Instructions Manual (6 pages)
Vehicle Remote Mount Antenna
Brand:
LXE
| Category:
Antenna
| Size: 0 MB
Table of Contents
Table of Contents
1
Vehicle Remote Mount Antennas for Lxe Computers
2
Introduction
2
Components
3
Figure 1 Remote Antenna Components
3
Mounting Instructions
4
Figure 2 Typical Remote Antenna Installation
4
Contacting LXE
5
Revision Notice
5
Advertisement
Related Products
LXE VX5
LXE VX2
LXE VX1
LXE VX6
LXE VX7
LXE VX3Plus
LXE vx8 karv
LXE VX4
LXE Categories
Handhelds
Automobile Accessories
Battery Charger
PDA
Desktop
More LXE Manuals
Login
Sign In
OR
Sign in with Facebook
Sign in with Google
Upload manual
Upload from disk
Upload from URL