Sign In
Upload
Manuals
Brands
HEIDENHAIN Manuals
Controller
GAGE-CHEK 2000
User Manuals: HEIDENHAIN GAGE-CHEK 2000 Electronics
Manuals and User Guides for HEIDENHAIN GAGE-CHEK 2000 Electronics. We have
2
HEIDENHAIN GAGE-CHEK 2000 Electronics manuals available for free PDF download: Operating Instructions Manual
HEIDENHAIN GAGE-CHEK 2000 Operating Instructions Manual (250 pages)
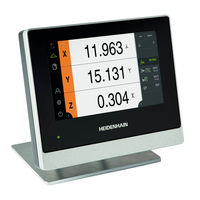
Evaluation Unit
Brand:
HEIDENHAIN
| Category:
Motherboard
| Size: 3 MB
Table of Contents
Section 1
5
Table of Contents
5
Fundamentals
7
Overview
8
Information on the Product
8
Overview of New and Modified Functions
8
Demo Software for the Product
9
Documentation on the Product
9
Validity of the Documentation
9
Notes on Reading the Documentation
10
Target Groups for the Instructions
11
Storage and Distribution of the Documentation
11
Document Category
11
About These Instructions
11
Target Groups According to User Types
12
Notes in this Documentation
12
Symbols and Fonts Used for Marking Text
13
Safety
14
Improper Use
15
Intended Use
15
General Safety Precautions
15
Overview
15
Personnel Qualification
16
Obligations of the Operating Company
16
General Safety Precautions
17
Symbols on the Product
17
Electrical Safety Precautions
18
Basic Operation
19
Gestures and Mouse Actions
20
Using the Touchscreen and Input Devices
20
Touchscreen and Input Devices
20
Overview
20
General Operating Elements and Functions
22
Figure 1: Screen Keyboard
22
GAGE-CHEK 2000 - Switch-On and Switch-Off
24
Switching on the GAGE-CHEK 2000
24
Activating and Deactivating the Energy Saving Mode
24
Switching off the GAGE-CHEK 2000
25
User Login and Logout
25
User Logout
26
User Login
26
User Interface
27
Setting the Language
27
Performing the Reference Mark Search after Startup
27
User Interface after Switch-On
28
Figure 2: the User Interface in the Product's Factory Default Setting
28
Main Menu of the User Interface
29
Figure 3: User Interface
29
Measure Menu
30
Figure 4: Measure Menu
30
File Management Menu
31
Figure 5: File Management Menu
31
Figure 6: User Login Menu
32
User Login Menu
32
Settings Menu
33
Figure 7: Settings Menu
33
Switch-Off Menu
34
Position Display
34
Operating Elements of the Position Display
34
Scrolling the Function Bar
35
Moving Functions on the Function Bar
35
Hiding and Showing the Main Menu
35
Hiding or Displaying the Function Bar
35
Customizing the Workspace
35
Using the Function Bar
36
Operating Elements of the Function Bar
36
Function Elements
36
Adjusting Settings in the Quick Access Menu
39
Messages and Audio Feedback
40
Messages
40
Figure 8: Display of Messages in the Workspace
40
Wizard
41
Figure 9: Display of Messages in the Wizard
41
Audio Feedback
42
Section 2
45
Transport and Storage
48
Items Supplied
49
Items Supplied and Accessories
49
Overview
49
Unpacking
49
Accessories
50
In Case of Damage in Transit
52
Repackaging and Storage
52
Repackaging the Product
53
Storage of the Product
53
Mounting
54
Assembly of the Product
55
Figure 10: Dimensions of Rear Panel of the Product
55
Overview
55
Figure 11: Product Mounted on Single-Pos Stand
56
Figure 12: Cable Routing on Single-Pos Stand
56
Mounting on Single-Pos Stand
56
Figure 13: Product Mounted on Duo-Pos Stand
57
Figure 14: Cable Routing on Duo-Pos Stand
57
Mounting on Duo-Pos Stand
57
Figure 15: Product Mounted on Multi-Pos Stand
58
Figure 16: Cable Routing on Multi-Pos Stand
58
Mounting on Multi-Pos Stand
58
Figure 17: Product Mounted on Multi-Pos Holder
59
Figure 18: Cable Routing on Multi-Pos Holder
59
Mounting on Multi-Pos Holder
59
Installation
60
General Information
61
Overview
61
Device Overview
62
Figure 19: Rear Panel on Devices with ID 1089181-01
63
Figure 20: Rear Panel on Devices with 1089182-XX
63
Connecting Encoders
64
Connecting Touch Probes
65
Wiring Switching Inputs and Outputs
66
Connecting a Network Peripheral
70
Connecting Input Devices
70
Connecting the Line Voltage
71
Commissioning
72
Logging in for Commissioning
73
Overview
73
User Login
73
Performing the Reference Mark Search after Startup
74
Setting the Language
74
Changing the Password
75
Steps for Commissioning
75
Activating Software Options
76
Basic Settings
76
Setting the Date and Time
79
Setting the Units of Measure
79
Configuring a Touch Probe
81
Configuring the Axes
81
Configuring Alias Assignment for Axis Names
82
Overview of Typical Encoders
83
Configuring Axes for Encoders with Endat Interface
86
Configuring the Axes for Encoders with a 1 VPP
87
PP or 11 Μa PP Interface
87
Configuring Axes for Encoders with TTL Interface
92
Performing Error Compensation
96
Coupling Axes
114
Reference Marks
115
OEM Area
116
Adding a Startup Screen
117
Adding Documentation
117
Configuring the Unit for Screenshots
118
Figure 21: the Screenshotclient User Interface
118
Back up Settings
119
Backing up Data
119
Back up User Files
120
Setup
121
Logging in for Setup
122
Overview
122
User Login
122
Performing the Reference Mark Search after Startup
123
Setting the Language
123
Changing the Password
124
Single Steps for Setup
125
Setting the Date and Time
126
Setting the Units of Measure
126
Entering and Configuring Users
127
Adding the Operating Instructions
129
Configuring the Network
130
Configuring the Network Drive
131
Configuring Operation with a Mouse or Touchscreen
132
Configuring the RS-232 Interface
132
Figure 22: Example of a Transfer for the X and y Axes with the Active Minmax Function in the Data Format Standard
135
Figure 23: Example of a Transfer for the X and y Axes with the Active Minmax Function in the Data Format Steinwald
136
Figure 24: Data Format Myformat1.Xml
137
Network Protocols
140
Switching Functions
140
Remote Access
141
Activating the Interface for Data Transfer
146
Back up Settings
148
Back up User Files
149
File Management
150
Figure 25: File Management Menu
151
Overview
151
File Types
152
Managing Folders and Files
152
Figure 26: File Management Menu with Preview Image and File Information
154
Viewing and Opening Files
154
Exporting Files
155
Importing Files
155
Settings
157
Overview
158
Device Information
159
General
159
Display
160
Screen
160
Printers
161
Sounds
161
Copyrights
162
Documentation
162
Function Bar
162
Service Info
162
Sensors
163
Interfaces
164
Usb
164
Oem
165
Setup
165
User
165
Operator
166
Axes
167
Information
168
Service
169
Firmware Information
170
Servicing and Maintenance
172
Cleaning
173
Overview
173
Maintenance Plan
174
Resuming Operation
174
Updating the Firmware
174
Diagnostics for Encoders with 1 V
176
Encoder Diagnostics
176
Interface
176
Diagnostics for Encoders with Endat Interface
178
Figure 27: Example of Functional Reserves of a Length Gauge
178
Restoring Files and Settings
179
Restore OEM-Specific Folders and Files
180
Restore User Files
181
Restoring Settings
182
Reset All Settings
183
Reset to Shipping Conditions
183
Removal and Disposal
184
Disposal
185
Overview
185
Removal
185
Specifications
186
Overview
187
Product Data
187
Figure 28: Housing Dimensions for Devices with ID 1089181-XX
189
Product Dimensions and Mating Dimensions
189
Figure 29: Housing Dimensions for Devices with ID 1089182-XX
190
Figure 30: Dimensions of the Rear Panel for Devices with ID 1089181-XX
190
Figure 31: Housing Dimensions of the Rear Panel for Devices with ID 1089182-XX
191
Figure 32: Product Dimensions with Single-Pos Stand
191
Product Dimensions with Single-Pos Stand
191
Figure 33: Product Dimensions with Duo-Pos Stand
192
Figure 34: Product Dimensions with Multi-Pos Stand
192
Product Dimensions with Duo-Pos Stand
192
Product Dimensions with Multi-Pos Stand
192
Figure 35: Product Dimensions with Multi-Pos Holder
193
Product Dimensions with Multi-Pos Holder
193
Section 3
198
Cleaning the Measured Object and the Measuring Machine
200
Conducting the Reference Mark Search
200
Fixing the Measured Object in Place
200
Preparing a Measurement
200
Reducing Environmental Influences
200
Stabilizing the Temperature of the Measured Object
200
Creating a Preset Table
202
Manually Creating Presets
202
Preset
202
Probing the Preset
203
Activating the Preset
204
Deleting Presets
204
Selecting a Preset
204
Remote Access
205
Setting a Position as a Preset
205
Probing the Preset
206
Figure 36: Measure Menu
207
Lengths and Angles
207
Measuring Lengths and Angles
207
Figure 37: Measure Menu with Touch Probe
208
Measuring with a Touch Probe
208
Touch Probe
208
Configuring Probing Functions
209
Probing Functions
209
Measuring with Probing Functions
210
Figure 38: Function Bar with the Function Elements for Probing Functions
211
Configuring the Minmax Function
212
Minimum, Maximum, and Range
212
Remote Access
213
Acquiring the Minimum, Maximum, and Range
214
Figure 39: Measure Menu with Active Minmax Function
214
Configuring the Diameter/Radius Function
216
Diameter/Radius
216
Displaying the Diameter
217
Figure 40: Measure Menu with Activated D/R Function
217
Configuring the Relative Function
218
Relative Measurement
218
Figure 41: Measure Menu with Activated Relative Function
219
Performing a Relative Measurement
219
Configuring the Mastering Function
220
Mastering
220
Remote Access
221
Figure 42: Measure Menu with Open Mastering Function
222
Mastering
222
Configure the Dial Gage Function
223
Dial Gage
223
Figure 43: Example of an Absolute Measurement
223
Figure 44: Example of a Difference Measurement
223
Activating Axes
224
Adding a Function Element
224
Setting General Parameters
224
Entering Values
225
Figure 45: Example of a Value Input for an Axis
225
Activating the Trigger Signal of an Individual Axis
226
Remote Access
226
Figure 46: Overview
228
Measuring with the Dial Gage
228
Overview
228
Figure 47: Single View of the Dial Gage
229
Single View
229
Configuring the Part Function
230
Figure 48: Example of Active Part Function with Selected Functions
230
Management of Parts
230
Configuring Selected Functions
231
Figure 49: Measure Menu with Activated Part Function
233
Working with Part Management
233
Configuring the Measured Value Output
234
Sending Measured Values to a Computer
234
Adding a Function Element
235
Functions for Measured Value Output
235
Figure 50: Display of Selected Contents for Measured Value Output
236
Remote Access
236
Selecting Contents for the Data Transfer
236
Sending Measured Values to a Computer
237
Starting Remote Access
239
Starting Remote Access Via MQTT
239
Starting Remote Access Via REST
239
Starting Remote Access Via RS-232
239
What to Do if
240
Exporting Logging Files
241
Overview
241
System or Power Failure
241
Malfunctions
242
Restoring Settings
242
Restoring the Firmware
242
Troubleshooting
242
V List of Figures
248
Advertisement
HEIDENHAIN GAGE-CHEK 2000 Operating Instructions Manual (216 pages)
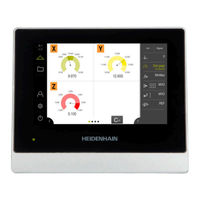
Evaluation Unit
Brand:
HEIDENHAIN
| Category:
Controller
| Size: 3 MB
Table of Contents
Table of Contents
3
1 Fundamentals
11
Overview
12
Information on the Product
12
Demo Software for the Product
12
Documentation on the Product
13
Validity of the Documentation
13
Notes on Reading the Documentation
14
Storage and Distribution of the Documentation
15
About These Instructions
15
Document Category
15
Target Groups for the Instructions
15
Target Groups According to User Types
16
Contents of the Chapters
16
Notes in this Documentation
18
Symbols and Fonts Used for Marking Text
19
2 Safety
21
Overview
22
General Safety Precautions
22
Intended Use
22
Improper Use
23
Personnel Qualification
23
Obligations of the Operating Company
24
General Safety Precautions
24
Symbols on the Product
24
Electrical Safety Precautions
25
3 Transport and Storage
27
Overview
28
Unpacking
28
Items Supplied and Accessories
28
Items Supplied
28
Accessories
29
In Case of Damage in Transit
31
Repackaging and Storage
32
Repackaging the Product
32
Storage of the Product
32
4 Mounting
33
Overview
34
Assembly of the Product
34
Mounting on Multi-Pos Stand
36
Mounting on Multi-Pos Holder
37
5 Installation
39
Overview
40
General Information
40
Product Overview
41
Connecting Encoders
43
Connecting Touch Probes
44
Wiring Switching Inputs and Outputs
45
Connecting a Printer
47
Connecting Input Devices
48
Connecting a Network Peripheral
48
Connecting the Line Voltage
49
6 Basic Operation
51
Overview
52
Using the Touchscreen and Input Devices
52
Touchscreen and Input Devices
52
Gestures and Mouse Actions
52
General Operating Elements and Functions
54
GAGE-CHEK 2000 - Switch-On and Switch-Off
56
Switching on GAGE-CHEK 2000
56
Activating and Deactivating the Energy Saving Mode
56
Switching off GAGE-CHEK 2000
57
User Login and Logout
57
User Login
58
User Logout
58
Setting the Language
59
Performing the Reference Mark Search after Startup
59
User Interface
60
User Interface after Switch-On
60
Main Menu of the User Interface
61
Measure Menu
62
File Management Menu
63
User Login Menu
64
Settings Menu
65
Switch-Off Menu
66
Position Display
66
Operating Elements of the Position Display
66
Working in the Workspace
67
Adjusting the Display of the Workspace
67
Using the Inspector
68
Operating Elements of the Inspector
68
Function Elements
68
Adjusting Settings in the Quick Access Menu
69
Messages and Audio Feedback
70
Messages
70
Wizard
71
Audio Feedback
72
7 Commissioning
73
Overview
74
Logging in for Commissioning
74
User Login
74
Performing the Reference Mark Search after Startup
75
Setting the Language
75
Changing the Password
76
Steps for Commissioning
76
Basic Settings
76
Configuring the Axes
81
Configuring a Touch Probe
100
OEM Area
101
Adding Documentation
101
Adding a Startup Screen
102
Configuring the Unit for Screenshots
103
Back up Settings
104
Back up User Files
104
8 Setup
107
Overview
108
Logging in for Setup
108
User Login
108
Performing the Reference Mark Search after Startup
109
Setting the Language
109
Changing the Password
110
Single Steps for Setup
110
Basic Settings
110
Adding Function Elements
123
Creating a Preset Table
124
Configuring the Minmax Function
126
Configuring the Measured Value Output
127
Back up Settings
135
Back up User Files
136
9 Measuring
137
Overview
138
Conducting a Measurement
138
Preparing a Measurement
138
Selecting a Preset
140
Measuring Lengths and Angles
142
Measuring with a Touch Probe
143
Capturing the Minimum, Maximum, and Range
144
Sending Measured Values to a Computer
145
10 File Management
147
Overview
148
File Types
149
Managing Folders and Files
149
Opening and Viewing Files
152
Exporting Files
153
Importing Files
154
11 Settings
155
Overview
156
Overview of the Settings Menu
157
General
158
Device Information
158
Screen
158
Display
159
Input Devices
159
Sounds
160
Printers
160
Properties
161
Add Printer
161
Remove Printer
162
11.2.10 Date and Time
162
11.2.11 Units
163
Copyrights
164
11.2.13 Service Info
164
11.2.14 Documentation
164
Sensors
165
Touch Probe
165
Interfaces
166
Network
166
Network Drive
167
Usb
168
Rs-232
168
Data Transfer
169
Wireless LAN Hotspot
169
Switching Functions
170
User
171
Oem
171
Setup
172
Operator
173
Adding a User
173
Axes
174
Reference Marks
174
Information
175
Error Compensation
175
Nonlinear Error Compensation (NLEC)
176
Squareness Error Compensation (SEC)
176
Axes X, y
177
Axis Q
177
Encoder
178
Reference Marks (Encoder)
182
11.6.10 Reference Point Displacement
183
Linear Error Compensation (LEC)
183
Segmented Linear Error Compensation (SLEC)
184
11.6.13 Create Table of Supporting Points
184
Service
185
Firmware Information
185
Back up and Restore
186
Firmware Update
187
Reset
187
OEM Area
188
Documentation
188
Software Options
189
12 Service and Maintenance
191
Overview
192
Cleaning
192
Maintenance Plan
193
Resuming Operation
193
Updating the Firmware
194
Restore Settings
196
Restore User Files
197
Reset All Settings
198
Reset to Shipping Conditions
198
13 What to Do if
199
Overview
200
System or Power Failure
200
Restoring the Firmware
200
Restore Settings
201
Malfunctions
201
Troubleshooting
202
14 Removal and Disposal
205
Overview
206
Removal
206
Disposal
206
15 Specifications
207
Overview
208
Product Data
208
Product Dimensions and Mating Dimensions
210
Product Dimensions with Duo-Pos Stand
211
Product Dimensions with Multi-Pos Stand
211
Product Dimensions with Multi-Pos Holder
212
16 Index
213
17 List of Figures
215
Advertisement
Related Products
HEIDENHAIN GAGE-CHEK 2000 Series
HEIDENHAIN GAGE-CHEK 2000 Demo
HEIDENHAIN AK GAP 108
HEIDENHAIN GAP 1001
HEIDENHAIN HR 550FS
HEIDENHAIN MANUALPLUS 620
HEIDENHAIN ND 1200 - V2.17 GUIDE
HEIDENHAIN ND 1200 QUADRA-CHEK
HEIDENHAIN ND 1300 - V2.1.0 GUIDE
HEIDENHAIN ND 1400 - V2.16 GUIDE
HEIDENHAIN Categories
Media Converter
Measuring Instruments
Industrial Equipment
Control Systems
Scanner
More HEIDENHAIN Manuals
Login
Sign In
OR
Sign in with Facebook
Sign in with Google
Upload manual
Upload from disk
Upload from URL