Sign In
Upload
Manuals
Brands
Dell Manuals
Projector
PowerEdge 4220
Dell PowerEdge 4220 Manuals
Manuals and User Guides for Dell PowerEdge 4220. We have
24
Dell PowerEdge 4220 manuals available for free PDF download: Installation Manual, User Manual, Technical Manual, Manual, Quick Setup Manual, Specifications
Dell PowerEdge 4220 Installation Manual (228 pages)
Document
Brand:
Dell
| Category:
Server
| Size: 12.75 MB
Table of Contents
5
English
1
Installation Guide
5
Table of Contents
7
Safety Instructions
7
SAFETY: Rack Mounting of Systems
8
Rack Installation Instructions
8
Rack Specifications
9
Before You Begin
10
Recommended Tools and Supplies
10
Installing Rack Cabinets
11
Opening and Closing the Front Rack Door
11
Removing and Replacing the Rack Doors
15
Removing and Replacing the Side Panels
18
Installing the Brushes
18
Replace the Lower Side Panels. See "Replacing the Lower Side Panels" On
20
Removing and Replacing the Extension Service Cover
22
Removing and Replacing the Extension
23
Reversing the Front Door (Optional)
31
Securing the Rack Leveling Feet
33
Installing the Rack Stabilizer Feet
35
Installation Guide
36
Adjusting the Rear Rack Posts (Optional)
38
Routing Cables
43
Coupling Two Racks
49
Français
51
Consignes De Sécurité
51
SÉCURITÉ : Montage En Rack Des Systèmes
52
Instructions D'installation En Rack
52
Spécifications Du Rack
53
Avant De Commencer
54
Outils Et Fournitures Recommandés
54
Installation Des Armoires Rack
55
Ouverture Et Fermeture De La Porte Avant Du Rack
56
Retrait Et Réinstallation Des Portes Du Rack
60
Retrait Et Réinstallation Des Panneaux Latéraux
63
Installation Des Brosses
65
Retrait Et Remplacement De L'extension Du Capot De Service
67
Retrait Et Remplacement De L'extension
68
Inversion Du Sens D'ouverture De La Porte Avant (Facultatif)
76
Fixation Des Pieds Réglables De L'armoire
78
Installation Des Pieds Stabilisateurs
81
Réglage Des Montants Arrière Du Rack (Facultatif)
83
Acheminement Des Câbles
88
Couplage De Deux Armoires
93
Deutsch
95
Sicherheitshinweise
95
SICHERHEIT: Einbauen Von Systemen IM Rack
96
Anleitung Für Die Rackmontage
96
Rack-Spezifikationen
97
Bevor Sie Beginnen
98
Empfohlene Werkzeuge Und Zubehör
99
Installation Von Rackschränken
99
Öffnen Und Schließen Der Vorderen Racktür
100
Entfernen Und Installieren Der Racktüren
104
Abnehmen Und Wiederanbringen Der Seitenteile
107
Installation Der Bürsten
109
Entfernen Und Wiederanbringen Der Wartungsabdeckung Für Die Erweiterung
111
Entfernen Und Wiederanbringen Der Erweiterung
112
Umgekehrtes Einbauen Der Vorderen Tür (Optional)
121
Einstellen Der Höhenverstellbaren Rackfüße
124
Anbringen Der Stabilisatoren
127
Anpassen Der Hinteren Rackstützen (Optional)
130
Verlegen Der Kabel
135
Verbinden Von Zwei Racks
185
Español
187
Instrucciones De Seguridad
187
SEGURIDAD: Montaje De Sistemas En Rack
188
Instrucciones De Instalación Del Rack
188
Especificaciones Del Rack
189
Antes De Comenzar
190
Herramientas Y Material Recomendados
190
Instalación De Armarios Rack
191
Apertura Y Cierre De La Puerta Frontal Del Rack
191
Extracción Y Colocación De Las Puertas Del Rack
195
Extracción Y Colocación De Los Paneles Laterales
199
Instalación De Las Tiras De Cepillo
201
Extracción Y Colocación De La Cubierta De La Extensión De Servicio
203
Extracción Y Colocación De La Extensión
204
Inversión De La Puerta Frontal (Opcional)
212
Fijación De Los Pies Niveladores Del Rack
214
Instalación De Los Pies Estabilizadores Del Rack
217
Ajuste De Los Postes Posteriores Del Rack (Opcional)
219
Colocación De Los Cables
225
Acoplamiento De Dos Racks
Advertisement
Dell PowerEdge 4220 Installation Manual (190 pages)
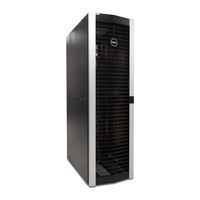
Server Rack Installation Guide
Brand:
Dell
| Category:
Racks & Stands
| Size: 6.07 MB
Table of Contents
5
English
1
Installation Guide
5
Table of Contents
7
Rack Installation Instructions
8
Rack Requirements
8
Before You Begin
9
Installation Tasks
9
Recommended Tools and Supplies
10
Removing and Replacing the Rack Doors
14
Removing and Replacing the Side Panels
17
Reversing the Front Door (Optional)
24
Securing the Rack Leveling Feet
26
Installing the Rack Stabilizer Feet
28
Adjusting the Rack Posts (Optional)
29
Routing Cables
7
Safety Instructions
7
SAFETY: Rack Mounting of Systems
34
Coupling Two Racks
37
Index
41
Français
43
Consignes De Sécurité
43
SÉCURITÉ : Montage En Rack Des Systèmes
44
Instructions D'installation Du Rack
44
Exigences Du Rack
44
Avant De Commencer
45
Tâches D'installation
46
Outils Et Fournitures Recommandés
46
Retrait Et Remise En Place Des Portes Du Rack
50
Retrait Et Remise En Place Des Panneaux Latéraux
53
Inversion Du Sens De L'ouverture De La Porte Avant (Facultatif)
60
Fixation Des Pieds Réglables Du Rack
62
Installation Des Stabilisateurs
64
Réglage Des Montants (Facultatif)
66
Acheminement Des Câbles
71
Couplage De Deux Racks
75
Index
79
Deutsch
81
Sicherheitshinweise
81
SICHERHEIT: Systeme IM Rack Montieren
82
Anleitung Für Die Rackmontage
82
Rackanforderungen
82
Bevor Sie Beginnen
83
Ablauf Der Installation
84
Empfohlene Werkzeuge Und Zubehör
84
Entfernen Und Wiederanbringen Der Racktüren
88
Entfernen Und Wiederanbringen Der Seitenteile
92
Umgekehrtes Einbauen Der Vorderen Tür (Optional)
99
Einstellen Der Höhenverstellbaren Rackfüße
101
Anbringen Der Stabilisatoren
103
Anpassen Der Rackstützen (Optional)
105
Verlegen Der Kabel
110
Verbinden Zweier Racks
113
Stichwortverzeichnis
155
Español
157
Instrucciones De Seguridad
157
SEGURIDAD: Montaje De Sistemas En Rack
158
Instrucciones De Instalación Del Rack
158
Requisitos Del Rack
158
Antes De Comenzar
159
Tareas De Instalación
160
Herramientas Y Material Recomendados
160
Extracción Y Colocación De Las Puertas Del Rack
164
Extracción Y Colocación De Los Paneles Laterales
168
Inversión De La Puerta Frontal (Opcional)
175
Fijación De Los Pies Niveladores Del Rack
177
Instalación De Los Pies Estabilizadores Del Rack
179
Ajuste De Los Postes Del Rack (Opcional)
181
Cableado
186
Acoplamiento De Dos Racks
189
Índice
Dell PowerEdge 4220 Installation Manual (162 pages)
Document
Brand:
Dell
| Category:
Server
| Size: 8.25 MB
Table of Contents
5
English
1
Installation Guide
5
Table of Contents
7
Safety Instructions
7
SAFETY: Rack Mounting of Systems
8
Installation Instructions
8
Rack Requirements
8
Rack Installation
9
Before You Begin
10
Installation Tasks
10
Recommended Tools and Supplies
10
Removing and Replacing the Rack Doors
10
Removing the Front Door
12
Replacing the Front Door
12
Opening and Removing the Back Doors
15
Replacing the Back Doors
15
Removing the Side Panels
16
Replacing the Side Panels
16
Reversing the Front Door (Optional)
21
Securing the Rack Leveling Feet
23
Installing the Rack Stabilizer Feet
26
Routing Cables
28
Removing the Door Panels From the Optional Door Kit
28
Coupling Two Racks
33
Index
37
Français
39
Consignes De Sécurité
39
SÉCURITÉ : Montage En Rack Des Systèmes
40
Consignes D'installation
40
Conditions Requises Pour Le Rack
41
Installation Du Rack
41
Avant De Commencer
42
Étapes D'installation
42
Outils Et Fournitures Recommandés
43
Retrait Et Remise En Place Des Portes Du Rack
43
Retrait De La Porte Avant
45
Remise En Place De La Porte Avant
45
Ouverture Et Retrait Des Portes Arrière
47
Remise En Place Des Portes Arrière
48
Retrait Des Panneaux Latéraux
49
Remise En Place Des Panneaux Latéraux
49
Inversion De La Porte Avant (Optionnel)
54
Fixation Des Cales Du Rack
56
Installation Des Pieds Stabilisateurs Du Rack
59
Acheminement Des Câbles
61
Retrait Des Panneaux De La Porte Du Kit De Porte Optionnel
62
Association De Deux Racks
67
Index
71
Deutsch
73
Sicherheitshinweise
73
SICHERHEIT: Montieren Von Systemen IM Rack
74
Installationsanweisung
74
Rackanforderungen
74
Rackinstallation
75
Vorbereitung
76
Montagearbeiten
76
Empfohlene Werkzeuge Und Zubehörteile
76
Entfernen Und Einsetzen Der Racktüren
76
Entfernen Der Vordertür
78
Einsetzen Der Vordertür
78
Öffnen Und Entfernen Der Hintertüren
80
Einsetzen Der Hintertüren
81
Entfernen Der Seitenwände
82
Austauschen Der Seitenwände
82
Umdrehen Der Vordertür (Optional)
87
Einstellen Der Höhenverstellbaren Füße Des Racks
89
Befestigen Der Rack-Stabilisierungsstandfüße
92
Kabelführung
95
Entfernen Der Türverkleidung Aus Dem Zusätzlichen Türen-Bausatz
95
Verbinden Von Zwei Racks
99
Stichwortverzeichnis
131
Español
133
Instrucciones De Seguridad
133
SEGURIDAD: Montaje De Estantes Para Los Sistemas
134
Instrucciones De Instalación
134
Requisitos Para El Estante
135
Instalación De Estantes
135
Antes De Comenzar
136
Tareas De Instalación
136
Herramientas Y Materiales Recomendados
136
Extracción Y Sustitución De Las Puertas Del Estante
137
Extracción De La Puerta Frontal
138
Sustitución De La Puerta Frontal
138
Abrir Y Extraer Laspuertas Posteriores
140
Sustitución De Las Puertas Posteriores
141
Extraer Los Paneles Laterales
142
Sustitución De Los Paneles Laterales
142
Invertir La Puerta Frontal (Opcional)
147
Asegurar Las Patas Niveladorasdel Estante
149
Instalación De Las Patas Estabilizadoras Del Estante
152
Canalización De Cables
154
Retirar Los Paneles De La Puerta Del Kit De Puerta Opcional
155
Acoplar Dos Estantes
159
Índice
Advertisement
Dell PowerEdge 4220 Installation Manual (186 pages)
Document
Brand:
Dell
| Category:
Server
| Size: 6.95 MB
Table of Contents
5
English
1
Installation Guide
5
Table of Contents
7
Rack Installation Instructions
8
Rack Specifications
8
Before You Begin
9
Installation Tasks
9
Recommended Tools and Supplies
10
Removing and Replacing the Rack Doors
14
Removing and Replacing the Side Panels
18
Reversing the Front Door (Optional)
25
Securing the Rack Leveling Feet
26
Installing the Rack Stabilizer Feet
29
Adjusting the Rack Posts (Optional)
30
Routing Cables
7
Safety Instructions
7
SAFETY: Rack Mounting of Systems
34
Coupling Two Racks
39
Français
41
Consignes De Sécurité
41
SÉCURITÉ : Montage En Rack Des Systèmes
42
Instructions D'installation De L'armoire
42
Spécifications De L'armoire Rack
42
Avant De Commencer
43
Tâches D'installation
44
Outils Et Fournitures Recommandés
44
Retrait Et Réinstallation Des Portes
48
Retrait Et Réinstallation Des Panneaux Latéraux
53
Inversion Du Sens D'ouverture De La Porte Avant (Facultatif)
60
Fixation Des Pieds Réglables De L'armoire
62
Installation Des Stabilisateurs
64
Réglage Des Montants (Facultatif)
66
Cheminement Des Câbles
71
Couplage De Deux Armoires
77
Deutsch
79
Sicherheitshinweise
79
SICHERHEIT: Einbauen Von Systemen IM Rack
80
Anleitung Für Die Rackmontage
80
Rack-Spezifikationen
80
Bevor Sie Beginnen
81
Ablauf Der Installation
82
Empfohlene Werkzeuge Und Zubehör
82
Entfernen Und Installieren Der Racktüren
86
Entfernen Und Installieren Der Seitenteile
91
Umgekehrtes Einbauen Der Vorderen Tür (Optional)
98
Einstellen Der Höhenverstellbaren Rackfüße
100
Anbringen Der Stabilisatoren
103
Anpassen Der Rackstützen (Optional)
104
Verlegen Der Kabel
109
Zwei Racks Verbinden
151
Español
153
Instrucciones De Seguridad
153
SEGURIDAD: Montaje De Sistemas En Rack
154
Instrucciones De Instalación Del Rack
154
Especificaciones Del Rack
154
Antes De Comenzar
155
Tareas De Instalación
156
Herramientas Y Material Recomendados
156
Extracción Y Colocación De Las Puertas Del Rack
160
Extracción Y Colocación De Los Paneles Laterales
165
Inversión De La Puerta Frontal (Opcional)
172
Fijación De Los Pies Niveladores Del Rack
174
Instalación De Los Pies Estabilizadores Del Rack
176
Ajuste De Los Postes Del Rack (Opcional)
178
Colocación De Los Cables
183
Acoplamiento De Dos Racks
Dell PowerEdge 4220 Installation Manual (148 pages)
Rack Server
Brand:
Dell
| Category:
Server
| Size: 4.48 MB
Table of Contents
5
English
1
Installation Guide
5
Table of Contents
7
Installation Instructions
8
Rack Requirements
7
Safety Instructions
7
SAFETY: Rack Mounting of Systems
8
Rack Installation
8
Before You Begin
9
Installation Tasks
9
Recommended Tools and Supplies
10
Removing and Replacing the Rack Doors
13
Removing and Replacing the Side Panels
14
Reversing the Front Door (Optional)
20
Securing the Rack Leveling Feet
22
Installing the Rack Stabilizer Feet
24
Adjusting the Rack Posts (Optional)
25
Routing Cables
29
Index
33
Français
35
Consignes De Sécurité
35
SÉCURITÉ : Montage En Rack Des Systèmes
35
Instructions D'installation
36
Exigences Du Rack
36
Installation En Rack
36
Avant De Commencer
37
Tâches D'installation
38
Outils Et Fournitures Recommandés
38
Retrait Et Remise En Place Des Portes Du Rack
42
Retrait Et Remise En Place Des Panneaux Latéraux
43
Inversion Du Sens De L'ouverture De La Porte Avant (Facultatif)
49
Fixation Des Pieds De Nivellement Du Rack
51
Installation Des Pieds Stabilisateurs Du Rack
53
Ajustement Des Montants Du Rack (Facultatif)
54
Acheminement Des Câbles
59
Index
63
Deutsch
65
Sicherheitshinweise
65
SICHERHEIT: Systeme IM Rack Montieren
66
Installationsanleitung
66
Rackanforderungen
66
Rackinstallation
66
Bevor Sie Beginnen
67
Ablauf Der Installation
68
Empfohlene Werkzeuge Und Zubehör
68
Entfernen Und Wiederanbringen Der Racktüren
72
Entfernen Und Wiederanbringen Der Seitenteile
73
Umgekehrtes Einbauen Der Vorderen Tür (Optional)
79
Einstellen Der Höhenverstellbaren Rackfüße
81
Anbringen Der Stabilisatoren
83
Anpassen Der Rackstützen (Optional)
84
Verlegen Der Kabel
89
Stichwortverzeichnis
121
Español
123
Instrucciones De Seguridad
123
SEGURIDAD: Montaje De Sistemas En Rack
124
Instalación Del Rack
124
Antes De Comenzar
125
Tareas De Instalación
126
Herramientas Y Material Recomendados
126
Extracción Y Colocación De Las Puertas Del Rack
130
Laterales
131
Inversión De La Puerta Frontal (Opcional)
137
Fijación De Los Pies Niveladores Del Rack
139
Instalación De Los Pies Estabilizadores Del Rack
141
Ajuste De Los Postes Del Rack (Opcional)
142
Colocación De Los Cables
124
Instrucciones De Instalación
124
Requisitos Del Rack
147
Índice
Dell PowerEdge 4220 User Manual (121 pages)
Brand:
Dell
| Category:
Projector
| Size: 8.97 MB
Table of Contents
3
Table of Contents
7
1 Your Dell Projector
8
About Your Projector
8
Top/Bottom View
10
2 Connecting Your Projector
11
Installing the Optional Wireless Dongle
12
Connecting to a Computer
12
Connecting a Computer Using a VGA Cable
13
Monitor Loop-Through Connection Using VGA Cables
14
Connecting a Computer Using a RS232 Cable
15
Connecting a Computer By USB Cable
16
Connecting a Computer Using Wireless
17
Connecting a DVD Player
17
Connecting a DVD Player Using an S-Video Cable
18
Connecting a DVD Player Using a Composite Video Cable
19
Connecting a DVD Player Using a Component Video Cable
20
Connecting a DVD Player Using an HDMI Cable
21
Connecting to Local Area Network
21
To Project an Image and Control the Projector That Is Connected to a Network Through a RJ45 Cable
22
Professional Installation Options: Installation for Driving Automatic Screen
23
Connection with Commercial RS232 Control Box
24
3 Using Your Projector
24
Turning Your Projector On
24
Turning Your Projector Off
25
Adjusting the Projected Image
25
Raising the Projector Height
25
Lowering the Projector Height
26
Adjusting the Projector Zoom and Focus
27
Adjusting Projection Image Size
31
Using the Control Panel
33
Using the Remote Control
36
Installing the Remote Control Batteries
37
Operating Range with Remote Control
38
Using the On-Screen Display
38
Input Source
39
Auto Adjust
40
Brightness/Contrast
40
Video Mode
41
Volume
41
Audio Input
41
Advanced Settings
56
Language
56
Help
57
Wireless Networking Installation
58
Enable Wireless On the Projector
60
Install the Wireless Application Software On Your Computer
63
Launch the Wireless Application
67
Presentation to Go (Ptg) Installation
68
Ptg Viewer
68
Photo Viewer
69
Ptg/Photo Function Introduction
69
Ptg Overview
70
Photo Overview
70
Buttons-Introduction
71
Set Up Ptg Converter - Lite
72
Ptg Converter - Lite Application Software
73
Audio Projection Installation
74
Enable Wireless or LAN On the Projector
75
Install the Dell Wireless Application Software On Your Computer
77
Launch the Wireless Application
77
Login
79
Video Stream Installation
79
Video Stream Support Format
80
Enable Wireless or LAN On the Projector
80
Install the Dell Wireless Application Software On Your Computer
80
Launch the Wireless Application
80
Login
81
Managing the Projector From Web Management
81
Configuring the Network Setting
81
Accessing Web Management
84
Managing Properties
100
Make Application Token
101
4 Troubleshooting Your Projector
105
Guiding Signals
106
Changing the Lamp
108
5 Specifications
115
6 Contacting Dell
116
7 Appendix: Glossary
Dell PowerEdge 4220 User Manual (121 pages)
Brand:
Dell
| Category:
Projector
| Size: 9.06 MB
Table of Contents
3
Table of Contents
7
1 Your Dell Projector
8
About Your Projector
8
Top/Bottom View
10
2 Connecting Your Projector
11
Installing the Optional Wireless Dongle
12
Connecting to a Computer
12
Connecting a Computer Using a VGA Cable
13
Monitor Loop-Through Connection Using VGA Cables
14
Connecting a Computer Using a RS232 Cable
15
Connecting a Computer By USB Cable
16
Connecting a Computer Using Wireless
17
Connecting a DVD Player
17
Connecting a DVD Player Using an S-Video Cable
18
Connecting a DVD Player Using a Composite Video Cable
19
Connecting a DVD Player Using a Component Video Cable
20
Connecting a DVD Player Using an HDMI Cable
21
Connecting to Local Area Network
21
To Project an Image and Control the Projector That Is Connected to a Network Through a RJ45 Cable
22
Professional Installation Options: Installation for Driving Automatic Screen
23
Connection with Commercial RS232 Control Box
24
3 Using Your Projector
24
Turning Your Projector On
24
Turning Your Projector Off
25
Adjusting the Projected Image
25
Raising the Projector Height
25
Lowering the Projector Height
26
Adjusting the Projector Zoom and Focus
27
Adjusting Projection Image Size
31
Using the Control Panel
33
Using the Remote Control
36
Installing the Remote Control Batteries
37
Operating Range with Remote Control
38
Using the On-Screen Display
38
Input Source
39
Auto Adjust
40
Brightness/Contrast
40
Video Mode
41
Volume
41
Audio Input
41
Advanced Settings
56
Language
56
Help
57
Wireless Networking Installation
58
Enable Wireless On the Projector
60
Install the Wireless Application Software On Your Computer
63
Launch the Wireless Application
67
Presentation to Go (Ptg) Installation
68
Ptg Viewer
68
Photo Viewer
69
Ptg/Photo Function Introduction
69
Ptg Overview
70
Photo Overview
70
Buttons-Introduction
71
Set Up Ptg Converter - Lite
72
Ptg Converter - Lite Application Software
73
Audio Projection Installation
74
Enable Wireless or LAN On the Projector
75
Install the Dell Wireless Application Software On Your Computer
77
Launch the Wireless Application
77
Login
79
Video Stream Installation
79
Video Stream Support Format
80
Enable Wireless or LAN On the Projector
80
Install the Dell Wireless Application Software On Your Computer
80
Launch the Wireless Application
80
Login
81
Managing the Projector From Web Management
81
Configuring the Network Setting
81
Accessing Web Management
84
Managing Properties
100
Make Application Token
101
4 Troubleshooting Your Projector
105
Guiding Signals
106
Changing the Lamp
108
5 Specifications
115
6 Contacting Dell
116
7 Appendix: Glossary
Dell PowerEdge 4220 User Manual (121 pages)
Dell 4320: User Guide
Brand:
Dell
| Category:
Projector
| Size: 8.51 MB
Table of Contents
3
Table of Contents
7
1 Your Dell Projector
8
About Your Projector
8
Top/Bottom View
10
2 Connecting Your Projector
11
Installing the Optional Wireless Dongle
12
Connecting to a Computer
12
Connecting a Computer Using a VGA Cable
13
Monitor Loop-Through Connection Using VGA Cables
14
Connecting a Computer Using a RS232 Cable
15
Connecting a Computer By USB Cable
16
Connecting a Computer Using Wireless
17
Connecting a DVD Player
17
Connecting a DVD Player Using an S-Video Cable
18
Connecting a DVD Player Using a Composite Video Cable
19
Connecting a DVD Player Using a Component Video Cable
20
Connecting a DVD Player Using an HDMI Cable
21
Connecting to Local Area Network
21
To Project an Image and Control the Projector That Is Connected to a Network Through a RJ45 Cable
22
Professional Installation Options: Installation for Driving Automatic Screen
23
Connection with Commercial RS232 Control Box
24
3 Using Your Projector
24
Turning Your Projector On
24
Turning Your Projector Off
25
Adjusting the Projected Image
25
Raising the Projector Height
25
Lowering the Projector Height
26
Adjusting the Projector Zoom and Focus
27
Adjusting Projection Image Size
31
Using the Control Panel
33
Using the Remote Control
36
Installing the Remote Control Batteries
37
Operating Range with Remote Control
38
Using the On-Screen Display
38
Input Source
39
Auto Adjust
40
Brightness/Contrast
40
Video Mode
41
Volume
41
Audio Input
41
Advanced Settings
56
Language
56
Help
57
Wireless Networking Installation
58
Enable Wireless On the Projector
60
Install the Wireless Application Software On Your Computer
63
Launch the Wireless Application
67
Presentation to Go (Ptg) Installation
68
Ptg Viewer
68
Photo Viewer
69
Ptg/Photo Function Introduction
69
Ptg Overview
70
Photo Overview
70
Buttons-Introduction
71
Set Up Ptg Converter - Lite
72
Ptg Converter - Lite Application Software
73
Audio Projection Installation
74
Enable Wireless or LAN On the Projector
75
Install the Dell Wireless Application Software On Your Computer
77
Launch the Wireless Application
77
Login
79
Video Stream Installation
79
Video Stream Support Format
80
Enable Wireless or LAN On the Projector
80
Install the Dell Wireless Application Software On Your Computer
80
Launch the Wireless Application
80
Login
81
Managing the Projector From Web Management
81
Configuring the Network Setting
81
Accessing Web Management
84
Managing Properties
100
Make Application Token
101
4 Troubleshooting Your Projector
105
Guiding Signals
106
Changing the Lamp
108
5 Specifications
115
6 Contacting Dell
116
7 Appendix: Glossary
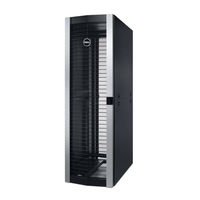
Dell PowerEdge 4220 Technical Manual (37 pages)
Rack Enclosures
Brand:
Dell
| Category:
Racks & Stands
| Size: 1.34 MB
Table of Contents
3
Table of Contents
5
1 System Overview
5
Introduction
5
Benefits
5
Table 1. Benefits
7
2 Rack Enclosure Features
7
Enclosure Specifications
7
Table 2. Basic Rack Specifications
7
Table 3. Rack Features and Specifications
8
Comparison of Poweredge Rack Enclosures
8
Table 4. Comparison of Poweredge Rack Enclosures
9
3 Rack Enclosure Views and Features
9
Poweredge 2420 Rack Enclosures
9
Figure 1. Front, Rear, and Frame Views of the 2420 Rack Enclosure
10
Poweredge 4220 and 4820 Rack Enclosures
10
Figure 2. Top View of the 2420 Rack Enclosure
10
Figure 3. Front View and Features
11
Figure 4. Back View of the 4220 Rack Enclosures
12
Figure 5. Back View of the 4820 Rack Enclosures
12
Figure 6. Side View of the 4220 Rack Enclosures
13
Figure 7. Side View of the 4820 Rack Enclosures
14
Figure 8. Top View of the Rack Enclosures
15
Rack Interior Features
15
Figure 9. Tail Bar Access for Cables
16
Figure 10. Vertical-Mount Power Distribution Unit Trays
16
Figure 11. Casters and Leveling Feet
17
Figure 12. Stabilizer Feet
17
Figure 13. Front, Side, and Rear Latches and Locks
18
4 Thermal and Airflow Considerations
18
Thermal and Airflow Features
19
5 Installing Rack Enclosures
19
Adjustable Mounting Posts
19
Dell Readyrails and Readyrails II
19
Figure 14. Adjustable Vertical Mounting Posts
20
Figure 15. Readyrails II and Readyrails Mounting Kits
21
Cable Management Arm (CMA)
21
Figure 16. Cable Management Arm
22
6 Rack Kit Accessories
22
Thermal Solutions
22
Table 5. Blanking Panel Options
23
Power Solutions
24
Management Solutions
26
Additional Accessories
27
Accessory Compatibility Table
27
Table 6. Rack Accessories for Dell Rack Enclosures
28
7 Rack Packaging Options
28
Table 7. Packaging Options for Dell Rack Enclosures
29
8 Mechanical Drawings
29
Figure 17. External Dimensions - 4820 Rack Enclosure
29
Figure 18. External Dimensions - 4220 Rack Enclosure
30
Figure 19. External Dimensions - 2420 Rack Enclosure
30
Figure 20. Internal Dimensions - 2420, 4220, 4820 (Top and Bottom Views)
31
Figure 21. Internal Dimensions - 2420, 4220, 4820 (Leveling Foot/Minimum Clearance)
31
Figure 22. External Dimensions - 4820D Rack Enclosure
32
Figure 23. External Dimensions - 4220D Rack Enclosure
32
Figure 24. Internal Dimensions - 4220D and 4820D (Top and Bottom Views)
33
Figure 25. Internal Dimensions - 4220D and 4820D (Leveling Foot/Minimum Clearance)
33
Figure 26. External Dimensions - 4820W Rack Enclosure
34
Figure 27. External Dimensions - 4220W Rack Enclosure
34
Figure 28. Internal Dimensions - 4220W and 4820W (Top and Bottom Views)
35
Figure 29. Internal Dimensions - 4220W and 4820W (Leveling Foot/Minimum Clearance)
36
Appendix A. Regulatory Certifications
37
Appendix B. Documentation and Resources
37
Table 8. Additional Resources
Dell PowerEdge 4220 Manual (12 pages)
Cable Routing Procedures
Brand:
Dell
| Category:
Server
| Size: 1.31 MB
Table of Contents
3
Table of Contents
4
Introduction
4
Section 1: Cabling a Dell™ Poweredge™ R310 or R410 with a Cable Management Arm (CMA)
4
Connecting the CMA Cables to the System
4
Figure 1: System with Cables Installed
5
Installing the Inner CMA Attachment Bracket
5
Routing the Power Cables Through the Strain Reliefs
5
Routing the Cables Through the CMA
5
Figure 2: Attaching the Inner CMA Attachment Bracket
5
Figure 3: Routing Power Cables Through the Strain Reliefs
6
Left-Side Mounting Instructions
6
Figure 4: Routing the Cables Through the CMA
7
Figure 5: Attaching the KVM Dongle to the CMA Basket
8
Right-Side Mounting Instructions
8
Figure 6: Left-Side Mounted CMA Installation
8
Figure 7: Right-Side Mounted CMA Installation
9
Section 2: Cabling a Dell™ Poweredge™ R310 or R410 System Without a CMA
9
Routing the Cables
9
Removing the CMA Brackets for Shallow Racks
9
Figure 8: Cable Routing Without a CMA
10
Figure 9: Removing the CMA Brackets for Shallow Racks
10
Section 3: Replacing a Power Supply On a Poweredge™ R310 or R410 System with a CMA
11
Figure 10: Disconnecting the Inner CMA Attachment Bracket
11
Figure 11: Replacing the Outer Power Supply
11
Section 4: Cabling a Poweredge™ R310 or R410 System Installed in Static Rails
12
Figure 12: Cabling a System Installed in Static Rails
Dell PowerEdge 4220 Manual (11 pages)
Cabling PowerEdge R515
Brand:
Dell
| Category:
Server
| Size: 1.35 MB
Table of Contents
3
Table of Contents
4
Introduction
4
Section 1: Cabling a Dell™ Poweredge™ R515 with a Cable Management Arm (CMA)
4
Connecting the CMA Cables to the System
4
Figure 1: System with Cables Installed
5
Installing the Inner CMA Attachment Bracket
5
Routing the Power Cables Through the Strain Reliefs
5
Routing the Cables Through the CMA
5
Figure 2: Attaching the Inner CMA Attachment Bracket
5
Figure 3: Routing Power Cables Through the Strain Reliefs
6
Left-Side Mounting Instructions
6
Figure 4: Routing the Cables Through the CMA
7
Right-Side Mounting Instructions
7
Figure 5: Left-Side Mounted CMA Installation (Preferred)
8
Section 2: Cabling a Dell™ Poweredge™ R515 System Without a CMA
8
Routing the Cables
8
Figure 6: Right-Side Mounted CMA Installation
9
Removing the CMA Brackets for Shallow Racks
9
Figure 7: Cable Routing Without a CMA
9
Figure 8: Removing the CMA Brackets for Shallow Racks
10
Section 3: Replacing a Power Supply On a Poweredge™ R515 System with a CMA
10
Replacing a Power Supply with a Left-Side Mounted CMA
10
Replacing a Power Supply with a Right-Side Mounted CMA
10
Figure 9: Disconnecting the Inner CMA Attachment Bracket
11
Figure 10: Replacing the Outer Power Supply
11
Figure 11: Cabling a System Installed in Static Rails
11
Section 4: Cabling a Poweredge™ R515 System Installed in Static Rails
Dell PowerEdge 4220 Manual (12 pages)
Cabling PowerEdge R415
Brand:
Dell
| Category:
Server
| Size: 2.15 MB
Table of Contents
3
Table of Contents
4
Introduction
4
Section 1: Cabling a Dell™ Poweredge™ R415 with a Cable Management Arm (CMA)
4
Connecting the CMA Cables to the System
4
Figure 1: System with Cables Installed
5
Installing the Inner CMA Attachment Bracket
5
Routing the Power Cables Through the Strain Reliefs
5
Routing the Cables Through the CMA
5
Figure 2: Attaching the Inner CMA Attachment Bracket
5
Figure 3: Routing Power Cables Through the Strain Reliefs
6
Left-Side Mounting Instructions
6
Figure 4: Routing the Cables Through the CMA
7
Figure 5: Attaching the KVM Dongle to the CMA Basket
8
Right-Side Mounting Instructions
8
Figure 6: Left-Side Mounted CMA Installation (Preferred)
8
Figure 7: Right-Side Mounted CMA Installation
9
Section 2: Cabling a Dell™ Poweredge™ R415 System Without a CMA
9
Routing the Cables
9
Removing the CMA Brackets for Shallow Racks
9
Figure 8: Cable Routing Without a CMA
10
Figure 9: Removing the CMA Brackets for Shallow Racks
10
Section 3: Replacing a Power Supply On a Poweredge™ R415 System with a CMA
11
Figure 10: Disconnecting the Inner CMA Attachment Bracket
11
Figure 11: Replacing the Outer Power Supply
11
Section 4: Cabling a Poweredge™ R415 System Installed in Static Rails
12
Figure 12: Cabling a System Installed in Static Rails
Dell PowerEdge 4220 Manual (17 pages)
Best Practices Guide for Rack Enclosures
Brand:
Dell
| Category:
Server
| Size: 1.33 MB
Table of Contents
3
Table of Contents
4
Executive Summary
4
Key Attributes
4
Size
5
Strength
6
Cooling
7
Rack Installation
7
Removal From Pallet
8
Moving Into Place
10
Coupling Racks
11
Power Distribution Unit (PDU) Installation
11
Rear Mount Pdus
12
Zero U Mount Pdus
14
Cabling
14
Internal Cable Management
Dell PowerEdge 4220 Manual (9 pages)
Cabling PowerEdge R715
Brand:
Dell
| Category:
Server
| Size: 0.61 MB
Table of Contents
3
Table of Contents
4
Introduction
4
Section 1: Cabling a Dell™ Poweredge™ R715 with a Cable Management Arm (CMA)
4
Connecting the CMA Cables to the System
4
Figure 1: System with Cables Installed
5
Routing the Power Cables Through the Strain Reliefs
5
Routing the Cables Through the CMA
5
Left-Side Mounting Instructions
5
Figure 2: Routing Power Cables Through the Strain Reliefs
6
Figure 3: Routing the Cables Through the CMA
6
Figure 4: Left-Side Mounted CMA Installation
7
Right-Side Mounting Instructions
7
Figure 5: Right-Side Mounted CMA Installation
8
Section 2: Cabling a Dell™ Poweredge™ R715 System Without a CMA
8
Routing the Cables
8
Removing the CMA Brackets for Shallow Racks
8
Figure 6: Cable Routing Without a CMA
8
Figure 7: Removing the CMA Brackets for Shallow Racks
9
Section 3: Replacing a Power Supply On a Poweredge™ R715 System with a CMA
9
Replacing a Power Supply with a Left-Side Mounted CMA
9
Replacing a Power Supply with a Right-Side Mounted CMA
9
Figure 8: Replacing the Power Supply
Dell PowerEdge 4220 Manual (20 pages)
Installing rack stabilizer feet
Brand:
Dell
| Category:
Server
| Size: 0.92 MB
Table of Contents
1
Installing the Rack Stabilizer Feet
1
Recommended Tools and Supplies
5
À Propos Des Avertissements
5
Installation Des Stabilisateurs
5
Outils Et Fournitures Recommandés
9
Anbringen Der Stabilisatoren
9
Empfohlene Werkzeuge Und Zubehör
17
Acerca De Las Advertencias
17
Instalación De Los Pies Estabilizadores Del Rack
17
Herramientas Y Material Recomendados
Dell PowerEdge 4220 Manual (8 pages)
Cabling PowerEdge T610
Brand:
Dell
| Category:
Server
| Size: 0.88 MB
Table of Contents
3
Table of Contents
4
Introduction
4
Section 1: Cabling a Dell™ Poweredge™ T610 with a Cable Management Arm (CMA)
4
Connecting the CMA Cables to the System
4
Figure 1: System with Cables Installed
5
Routing the Power Cables Through the Strain Reliefs
5
Installation of the CMA
5
Figure 2: Routing Power Cables Through the Strain Reliefs
6
Figure 3: Routing the Cables Through the CMA
6
Figure 4: Right-Side Mounted CMA Installation
7
Section 2: Cabling a Dell™ Poweredge™ T610 System Without a CMA
7
Routing the Cables
7
Figure 5: Left-Side Mounted CMA Installation
7
Figure 6: Cable Routing Without a CMA
8
Figure 7: Replacing the Power Supply
8
Section 3: Replacing a Power Supply On a Poweredge™ T610 System with a CMA
Dell PowerEdge 4220 Manual (20 pages)
Coupling Two Dell Racks
Brand:
Dell
| Category:
Server
| Size: 1.01 MB
Table of Contents
1
Coupling Two Racks
5
Couplage De Deux Racks
17
Acerca De Las Advertencias
17
Acoplamiento De Dos Racks
Dell PowerEdge 4220 Manual (10 pages)
Cabling PowerEdge R610
Brand:
Dell
| Category:
Server
| Size: 1.35 MB
Table of Contents
3
Table of Contents
4
Introduction
4
Cabling a Poweredge R610 with CMA
4
Installing the Cables to the System
5
Route the Power Cables Through the Strain Reliefs
5
Routing the Cables Through the CMA
8
Cabling a Poweredge R610 Without a CMA
8
Routing the Cables
8
Removing the CMA Brackets for Shallow Racks
9
Replacing a Power Supply On a Poweredge R610 with CMA
10
Cabling a Poweredge R610 Installed in Static Rails
Dell PowerEdge 4220 Manual (9 pages)
Cabling PowerEdge R710
Brand:
Dell
| Category:
Server
| Size: 1.09 MB
Table of Contents
3
Table of Contents
4
Introduction
4
Cabling a Poweredge R710 with CMA
4
Installing the Cables to the System
5
Route the Power Cables Through the Strain Reliefs
5
Routing the Cables Through the CMA
7
Cabling a Poweredge R710 Without a CMA
7
Routing the Cables
8
Replacing a Power Supply On a Poweredge R710 with CMA
9
Cabling a Poweredge R710 Installed in Static Rails
Dell PowerEdge 4220 Manual (12 pages)
Placing the Service Tag (Service Label) on Your Rack
Brand:
Dell
| Category:
Server
| Size: 0.99 MB
Dell PowerEdge 4220 Manual (10 pages)
Rack Mounting equipment shelf
Brand:
Dell
| Category:
Server
| Size: 2.96 MB
Dell PowerEdge 4220 Manual (10 pages)
Installing the Optional Fan Kit in a Dell PowerEdge 4210 Rack
Brand:
Dell
| Category:
Server
| Size: 0.92 MB
Dell PowerEdge 4220 Quick Setup Manual (2 pages)
Brand:
Dell
| Category:
Projector
| Size: 0.83 MB
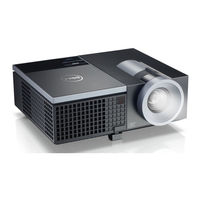
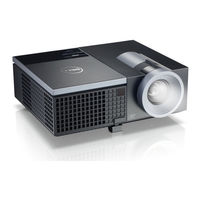
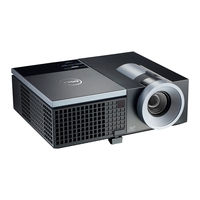
Dell PowerEdge 4220 Specifications (2 pages)
Projectors
Brand:
Dell
| Category:
Projector
| Size: 0.89 MB
Share and save
Advertisement
Related Products
Dell 4210X - XGA DLP Projector
Dell 4610X - XGA DLP Projector
Dell 4310WX - DLP Multimedia Projector
Dell 4320
Dell 4100MP
Dell 4610X WIRELESS PLUS
Dell PowerEdge RAID Controller S300
Dell Vostro 420
Dell PowerEdge 4210
Dell 4200W
Dell Categories
Laptop
Desktop
Server
Monitor
Storage
More Dell Manuals
Login
Sign In
OR
Sign in with Facebook
Sign in with Google
Upload manual
Upload from disk
Upload from URL