Table of Contents
Advertisement
Quick Links
Advertisement
Table of Contents

Subscribe to Our Youtube Channel
Summary of Contents for LifeGear 16065
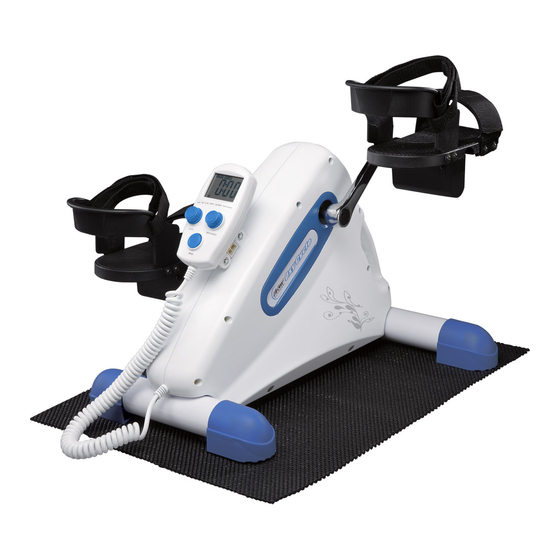
- Page 1 Motorized/ Manual Oxy Cycle ITEM#: 16065 Owner’s Manual IMPORTANT: Read all instructions carefully before using this product. Retain this owner’s manual for future reference. The specifications of this product may vary from this photo, subject to change without notice. 2013, Aug.
-
Page 2: Table Of Contents
EXERCISES --------------------------------------------------------------- 10 ONE YEAR LIMITED WARRANTY LifeGear Inc. warrants to the original purchaser that this product is free from defects in material and workmanship when used for the purpose intended, under the conditions that it has been installed and operated in accordance with LifeGear's Owner's Manual. -
Page 3: Safety Precautions
SAFETY PRECAUTIONS Read all instructions carefully before operating this product. Retain this owner’s manual and keep all original transaction receipt for future reference. Consult your physician before beginning this or any other exercise program. If you experience any irregular physical conditions such as dizziness, severe muscle or joint pain, pain in the chest, stop exercising and consult with your physician immediately. -
Page 4: Electrical Safety
ELECTRICAL SAFETY When using an electrical appliance, basic precautions should always be followed, including the following: Read all instructions before using this unit. DANGER - To reduce the risk of electric shock: WARNING - To reduce the risk of burns, fire, electric shock, or injury to persons: An appliance should never be left unattended when plugged in. -
Page 5: Overview Drawing
OVERVIEW DRAWING PARTS LIST Description Qty No. Description Main Frame 400x320x279 1 014 Plastic Cap Power Control Board 1 015 Bolt M8x20mm Motor 1 016 Bolt M8x15mm End Cap 4 017 Bolt M6x12mm Controller 1 018 Bolt M6x40mm Controller Bracket A 1 019 Nut M6 Controller Bracket B... -
Page 6: Hardware Packing List & Tools
HARDWARE PACKING LIST & TOOLS (16) Bolt M8x15mm (25) Washer Ø18xØ8x1.5T 6 PCS 6 PCS Wrench Allen Wrench 1 PC 1 PC ASSEMBLY INSTRUCTIONS Slide the Controller (5) onto the Controller Bracket A (6). Hold the unit in an upright position. The Controller (5) side facing up and the AC Power Cable (8) side is on the bottom. - Page 7 Attach the Front Stabilizer (11) to the Main Frame (1) with three M8x15mm Bolts (16) and Ø18xØ8x1.5T Washers (25). Insert the Rear Stabilizer (12) into the Main Frame (1). Attach the Rear Stabilizer (12) to the Main Frame (1) with three M8x15mm Bolts (16) and Ø18xØ8x1.5T Washers (25).
- Page 8 Connect the Left Pedal (22L) to the Left Crank (13L) assembly where would position your left foot when exercising. Thread it into the crank assembly in the counter-clockwise direction by the tool provided. ( See figures 6 and 7). Connect the Right Pedal (22R) to the Right Crank (13R) assembly by threading it in the clockwise direction.
-
Page 9: How To Use
CONTROLLER SPEED control knob RESISTANCE control knob Turn knob clockwise to Turn knob clockwise to increase speed. increase resistance. Make sure the speed Make sure the resistance control knob is set to off control knob is set to off position before turning the (0 level) position before resistance control knob. -
Page 10: Workout Principal
before turning the speed control knob. When setting exercise time counts down to 0:05, controller will alarm for 5 seconds and then the pedals will stop to revolve automatically. The STOP sign will appear and flash on the screen of the controller. Turn the speed control knob counterclockwise to the off position, the STOP sign will stop flash, and then you can turn the speed control knob clockwise to start pedaling again. -
Page 11: Exercises
The Overload Principal In order for you to strengthen your body, you must develop a series of exercise workouts each day. When you work out on a regular basis, your body specifically your muscles, adjust to the new level of workout. It’s called increasing local metabolic efficiency. - Page 12 Routine People vary in how they adapt to repetitive exercise. In developing an exercise routine pay attention to how you feel especially after an exercise is completed. You may feel tired but you should not feel exhausted. When you first start exercising, the principal muscles you use will ache slightly, especially the next day.
- Page 13 Arm Exercise When using the device for upper body exercise- it should be placed directly in front of the user on a table top, and the user should be seated in a comfortable chair such that they can easily reach the pedals without hyper extending (over straightening) the elbow joint.


Need help?
Do you have a question about the 16065 and is the answer not in the manual?
Questions and answers