Table of Contents
Advertisement
Advertisement
Table of Contents

Related Manuals for LifeGear multi/GYM 76500


Summary of Contents for LifeGear multi/GYM 76500
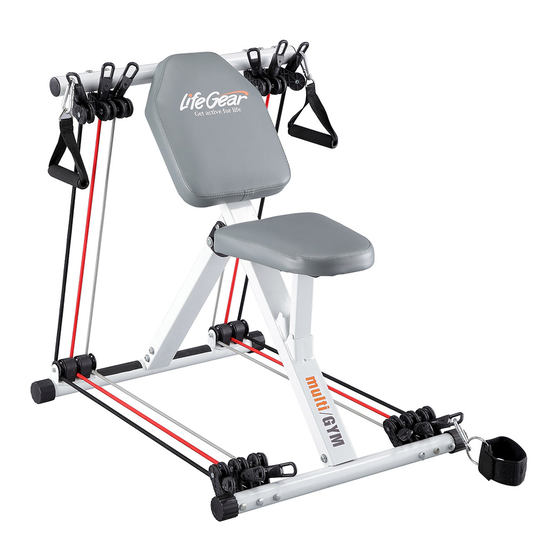
- Page 1 multi/GYM ITEM NO: 76500 OWNER’S MANUAL IMPORTANT: Read all instructions carefully before using this product. Retain this owner’s manual for future reference. The specifications of this product may vary from this photo and are subject to change without prior notice. 2017, March...
-
Page 2: Table Of Contents
TABLE OF CONTENTS WARRANTY ------------------------------------------------------------------------------- 2 IMPORTANT SAFETY INSTRUCTIONS ------------------------------------------- 3 PARTS LIST ------------------------------------------------------------------------------- 4 HARDWARE LIST ----------------------------------------------------------------------- 5 TOOLS -------------------------------------------------------------------------------------- 5 EXPLODED VIEW ------------------------------------------------------------------------ 6 ASSEMBLY INSTRUCTIONS --------------------------------------------------------- 7 FOLDING STORAGE -------------------------------------------------------------------- 12 ADJUSTMENTS -------------------------------------------------------------------------- 13 USING THE MULTI STRENGTH TRAINER --------------------------------------- 14 MAINTENANCE --------------------------------------------------------------------------- 18 WARM UP AND COOL DOWN ROUTINE ----------------------------------------- 19... -
Page 3: Warranty
ONE YEAR LIMITED WARRANTY LifeGear Inc. warrants to the original purchaser that this product is free from defects in material and workmanship when used for the purpose intended, under the conditions that it has been installed and operated in accordance with LifeGear's Owner's Manual. -
Page 4: Important Safety Instructions
IMPORTANT SAFETY INSTRUCTIONS Basic precautions, including the following important safety instructions should always be followed when using this equipment. Read all instructions before using this equipment. Before exercise, in order to avoid injuring the muscle, warm-up exercises are recommended. Do not allow children to use or play on the multi stregth trainer. Keep children and pets away from the multi stregth trainer while in use. -
Page 5: Parts List
PARTS LIST Description Qty No. Description 001 Ankle Strap 1 022 Pulley Set Tube 002 Front Foot Cap Ø38 2 023 Round End Cap Ø38 Front Main Frame 003 Fixed Pin Ø10x80 12 024 30x60x875mm 004 Plastic Washer Ø10.3xØ22x2.0T 2 025 Rear Tube Ø38x1.5Tx580mm 005 C Clip Ø17xØ9x1.0T 16 026 Pulley Ø38x15 006 Axle Ø10x75mm... -
Page 6: Hardware List
HARDWARE LIST (16) Washer (21) Hexagon Socket Pan Head Cap Bolt 12 PCS 12 PCS TOOLS Allen Wrench with Phillips Screwdriver Multi Hex Tool 1 PC 1 PC... -
Page 7: Exploded View
EXPLODED VIEW 43 42... -
Page 8: Assembly Instructions
ASSEMBLY INSTRUCTIONS BACKWARD 16 21 Round End Cap (23) FORWARD Front Foot Cap (2) Step 1 Attach the Rear Main Frame (33) onto the Rear Tube (25) with four Washers (16) and four Hexagon Socket Pand Head Cap Bolts (21). Tighten bolts with the Allen Wrench with Phillips Screwdriver provided. - Page 9 Front Foot Cap (2) Step 2 Attach the Front Main Frame (24) onto the Pulley Set Tube (22) with four Washers (16) and four Hexagon Socket Pand Head Cap Bolts (21). Tighten bolts with the Allen Wrench with Phillips Screwdriver provided. Hardware: (16) Washer (21) Hexagon Socket Pan Head Cap Bolt...
- Page 10 Step 3 Attach the Pulley Set Tube (22) into the Front Main Frame (24) with four Washers (16) and four Hexagon Socket Pand Head Cap Bolts (21). Tighten bolts with the Allen Wrench with Phillips Screwdriver provided. Hardware: (16) Washer (21) Hexagon Socket Pan Head Cap Bolt 4 PCS 4 PCS...
- Page 11 16 17 Step 5 Attach the Seat Frame (11) to the Left/Right Seat Cushion Support Plates (10L, 10R) with one Hexagon Socket Pan Head Cap Bolt (15), one Washer (16), and one Nylon Nut (17) that were removed. Tighten bolt and nylon nut with the Allen Wrench with Phillips Screwdriver and Multi Hex Tool provided.
- Page 12 (34) Black Resistance Band (Heavy Resistance) (35) Red Resistance Band (Medium Resistance) (36) Grey Resistance Band (Light Resistance) Step 7 Please follow the illustrations A and B to attach two Handles (37) to two Grey Resistance Bands (36) with two Snap Hooks (38). Please follow the illustrations C and D to attach the Ankle Strap (1) to the Grey Resistance Band (36) with the Snap Hooks (38).
-
Page 13: Folding Storage
FOLDING STORAGE Seat Cushion Seat Frame Rear Main Frame Front Main Frame Remove the Seat Frame from the selected adjustment bracket on the Front Main Frame. Fold the Front and Rear Main Frames for easy storage. -
Page 14: Adjustments
ADJUSTMENTS Rear Level Adjuster Adjusting the Rear Level Adjuster Turn the Rear Level Adjuster on the rear tube as needed to level the trainer. Seat Cushion Seat Frame Front Main Frame Adjusting the Seat Cushion The Seat Cushion can be set to two different positions: a level position and an incline position. -
Page 15: Using The Multi Strength Trainer
USING THE MULTI STRENGTH TRAINER Rear Main Frame Front Main Frame NOTE: Open the Front Main Frame and Rear Main Frame fully before using the trainer. WARNING: Do not overexert yourself or work to exhaustion. STRENGTH EXERCISES BENCH PRESS MusclesTargeted: Chest Sit on the seat cushion and hold the handles next to chest, palms facing downwards. - Page 16 SHOULDER PRESS MusclesTargeted: Shoulders Sit on the seat cushion and hold the handles above shoulders keeping feet flat on floor. Push up to arms length over head keeping chest high and back straight and return. OBLIQUE TWIST MusclesTargeted: Obliques Sit on the seat cushion and hold the handles above shoulders, palms facing inwards.
- Page 17 PULL OVER MusclesTargeted: Chest Sit on the floor with back against seat cushion; hold the handles above head with arms slightly bent, palms facing forward. Pull the handles overhead past front of chest towards ab region and return. GOLF STROKE MusclesTargeted: Back, Rear Shoulders and Obliques Stand erect with one foot against the pulley...
- Page 18 LEG EXTENSION MusclesTargeted: Front of Thighs Sit on the seat cushion with ankle strap around the ankle, knees flexed holding onto seat cushion. Extend leg without locking knee and return. LEG CURL MusclesTargeted: Hamstrings Stand with one foot on the floor and ankle strap around the ankle, hold onto pulley set tube.
-
Page 19: Maintenance
SIT-UP MusclesTargeted: Abdominals Lie on the floor with feet up on the seat cushion, cross arms over chest. Roll upwards by contracting at your navel until you have lifted your shoulder blades and head off the floor and return. Never arch your back. -
Page 20: Warm Up And Cool Down Routine
WARM UP AND COOL DOWN ROUTINE The WARM-UP is an important part of any workout. The purpose of warming up is to prepare your body for exercise and to minimize injuries. Warm up for two to five minutes before aerobic exercising. It should begin every session to prepare your body for more strenuous exercise by heating up and stretching your muscles, increasing your circulation and pulse rate, and delivering more oxygen to your muscles. - Page 21 QUADRICEPS STRETCH With one hand against a wall for balance, reach behind you and pull your right foot up. Bring your heel as close to your buttocks as possible. Hold for 15 counts and repeat with left foot. INNER THIGH STRETCH Sit with the soles of your feet together and your knees pointing outward.
Need help?
Do you have a question about the multi/GYM 76500 and is the answer not in the manual?
Questions and answers