Table of Contents
Advertisement
Quick Links
Advertisement
Table of Contents

Related Manuals for LifeGear 13100


Summary of Contents for LifeGear 13100
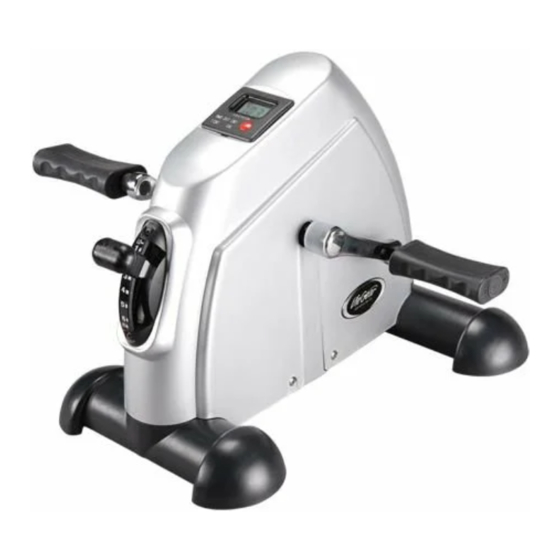
- Page 1 Magnetic Mini Bike Item No.: 13100 Owner’s Manual IMPORTANT: Read all instructions carefully before using this product. Retain this owner’s manual for future reference. The specifications of this product may vary from this photo, subject to change without notice. 2010, May...
-
Page 2: Table Of Contents
EXERCISES ------------------------------------------------------------------------------- 7 ONE YEAR LIMITED WARRANTY LifeGear Inc. warrants to the original purchaser that this product is free from defects in material and workmanship when used for the purpose intended, under the conditions that it has been installed and operated in accordance with LifeGear's Owner's Manual. LifeGear's obligation under this warranty is limited to replacing or repairing, free of charge, any parts which may prove to be defective under normal home use. -
Page 3: Safety Instructions
SAFETY PRECAUTIONS Read all instructions carefully before operating this product. Retain this owner’s manual and keep all original purchase receipt for future reference. Do not operate the magnetic mini bike in a wet or moist environment. Do not operate under blanket or pillow. Excessive heating can occur and cause fire or injury to persons. -
Page 4: Digital Display Computer Operation
DIGITAL DISPLAY COMPUTER OPERATION COMPUTER BUTTON FUNCTION: RED BUTTON: Push the red button to turn on the display. Push the red button to select each function. Push the red button for 3 seconds to clear all functions to zero except the T.CNT function. COMPUTER DISPLAY FUNCTIONS &... -
Page 5: Parts List
PARTS LIST Description Qty No. Description 001 Tension Control Handle L=350 1 020 Clip Ø17x1.0 002 Pan Head Phillips Self Drilling 4 021 Bearing 6000-ZZ Screw ST4.2x40 003 Cover Support 2 022 Bearing Bracket 004 Cover 1 023 Belt Pulley with Crank Ø128 J3 005 Digital Display Computer 1 024 Bolt M6x16 HR-1257... -
Page 6: Overview Drawing
OVERVIEW DRAWING... -
Page 7: Operating The Tension Control Handle
OPERATING THE TENSION CONTROL HANDLE 6-LEVEL TENSION CONTROL HANDLE The resistance can be adjusted by pulling the tension control handle in a downward or upward direction. To increase the resistance, pull the TENSION CONTROL HANDLE in a downward direction. To decrease the resistance, pull the TENSION CONTROL HANDLE in an upward direction. -
Page 8: Exercises
EXERCISES This device can be used for upper and lower body. As a lower body device, it works with passive motion to increase tone of the quadriceps muscles (muscles in the thigh) and circulate blood flow to the entire lower leg and foot. For upper body use, it perform as a resistance device allowing the user to use the pedals as hand grips to exercise the muscles of the arm (biceps, triceps, deltoids and the smaller muscles of the forearms).
Need help?
Do you have a question about the 13100 and is the answer not in the manual?
Questions and answers