Advertisement
Quick Links
Advertisement

Related Manuals for LifeGear 93810


Summary of Contents for LifeGear 93810
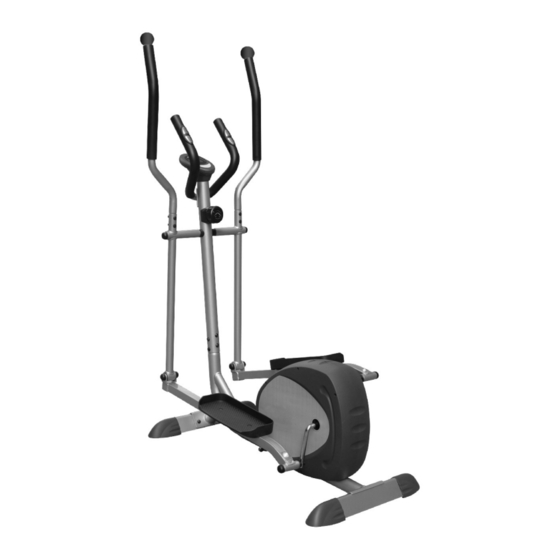
- Page 1 Magnet Power, Elliptical Transorbit OWNER’S MANUAL Model# 93810...
-
Page 2: Table Of Contents
Table of Contents ■ Warranty ■ Precautions ■ Operation Instruction ■ Parts List ■ Overview Drawing Hardware Packing List ■ Assembly Instructions ■ Adjustment ■ Maintenance and Treatment ■ Warm Up Exercises ■ The equipment conforms to EN957-1 and EN957-9 Class HC requirements. - Page 3 One Year Limited Warranty LifeGear Inc. warrants to the original purchaser that this product is free from defects in material and workmanship when used for the purpose intended, under the conditions that it has been installed and operated in accordance with LifeGear’s Owner’s Manual. LifeGear’s obligation under this warranty is limited to replacing or repairing, free of charge, any parts which may prove to be defective under normal home use.
- Page 4 1. Precautions 1) Read all the instructions in this manual and do warm up exercises before using this equipment. 2) This elliptical bike is a home stationary fitness equipment, and also an aerobic training equipment that can help you to develop your cardio-vascular function. 3) Please make sure all parts are not damaged and fixed well before use.
-
Page 5: Operation Instruction
2. Operating Instruction FUNCTIONS AND OPERATIONS: AUTO ON/OFF: When you start to exercise or press the button on the computer, the monitor will turn on. If you leave the equipment for 5 minutes, the power will turn off automatically. SCAN: Press the button until SCAN appears at SCAN position, monitor will scan the following functions: time, speed, distance, calories and pulse every 4 seconds. -
Page 6: Parts List
3. Parts List Description Description Main frame Ф8 Spring washer Rear stabilizer Ф5 Flat washer Base foot Ф8 Plastic flat washer Pedal support tube Ф10 Plastic flat washer Pedal Crosshead self lock bolt ST4.2x16 6L,R Handlebar support (left & right) M6x50 Bolt Nut cap M5x50 Bolt... - Page 7 Description Description 35 M10×20 Bolt Wheel axis 36 M8×16 Bolt Wheel 37 M8×50 Bolt U-shape bracket 38 M8×20 Bolt Pulse sensor 39 M5x35 Screw Round plug 40 M8 Cap nut F35 Square tube plug 41 M10 Lock nut Front connecting tube 42 M8 Lock nut Crosshead self bolt ST4x25 43 1/2”...
-
Page 8: Overview Drawing
Overview Drawing... -
Page 9: Hardware Packing List
Hardware Packing List... -
Page 10: Assembly Instructions
6. Assembly Instructions Attention: Please follow these assembly instructions step by step to assemble this elliptical. 1. Attach the Front Connecting Tube Insert the Tension control wire (12) and Sensor wire I (25) into the bottom tube hole of Front connecting tube (91) and then pull them out from the upper hole of Front connecting tube (91). - Page 11 4. Attach the Front Upright Frame Put the cable end of the resistance cable for the Tension control (21) into the spring hook of Tension control wire (12) as shown on drawing A of figure 4. Pull the resistance cable for the Tension control (21) up and force it into the gap of metal bracket of Tension control wire (12) as shown on drawing B of figure 4.
- Page 12 7. Attach the Handlebar Support (Right & Left) Attach one Arc spacer (9) and Wave washer (96) to the right end of horizontal axle of Front upright frame (14). Insert right Handlebar support (6R) to the right end of horizontal axle of Front upright frame (14) and secure it with one Plastic flat washer (53), Big washer (49), Spring washer (51), Special washer (16), and Bolt (36).
- Page 13 11. Attach the Pedal Attach the left Pedal (5) to the left Pedal support tube (4) with two Bolts (37), Flat washers (50), and Lock nuts (42). Do the above same steps to assemble the right Pedal (5) to the right Pedal support tube (4).
-
Page 14: Adjustment
7. Adjustment Resistance can be adjusted by tension control to increase or decrease the exercise intensity. After long term use, If you believe the turning parts are loose, please tighten the bolts or screws. 8. Maintenance and Treatment Verify that all the bolts and nuts are locked properly and the turning parts should be turned freely without damaged parts. -
Page 15: Warm Up Exercises
9. Warm Up Exercises A successful exercise program consists of a warm-up, aerobic exercise, and a cool-down. Do the entire program at least two or preferably three times a week, resting for a day between workouts. After several months, you can increase your workouts to four or five times per week. Warming up is an important part of your workout, and should begin every session. - Page 16 Calf-Achilles Stretch Lean against a wall with your left leg in front of the right and your arms forward. Keep your right leg straight and the left foot on the floor; then bend the left leg and lean forward by moving your hips toward the wall. Hold, then repeat on the other side for 15 counts.
Need help?
Do you have a question about the 93810 and is the answer not in the manual?
Questions and answers